Wednesday, January 28, 2015

Download and Transfer Files from One GAFE Domain to Another

Google Drive is my “Go-To” place for all documents. I live in my Drive. With all the great uses and advantages Drive has over MS Office, there is one drawback. You can not transfer ownership from one domain in GAFE to another. This normally might not be an issue, but we recently went through a domain migration so this was an issue for us. Even after using a 3rd party product to migrate files over, things did not go too smoothly. Below are directions on how to bulk download and transfer files from one GAFE domain to another.


Download and Transfer Files from One GAFE Domain to Another

Download Old Account Files:
  1. Sign in to the old GAFE account (gl.k12.mi.us for Gull Lake Staff).
  2. Go to your Drive.
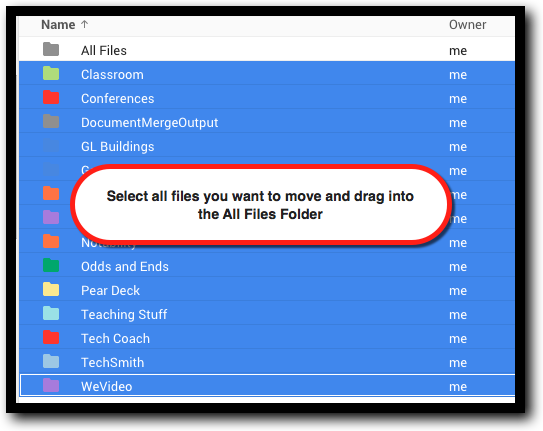
  3. Click on “New” and create a folder and name it “All Files”.


  1. Drag all your files/folders in your Drive into this folder. If you are only missing a few files or folders, only drag those into this new folder.


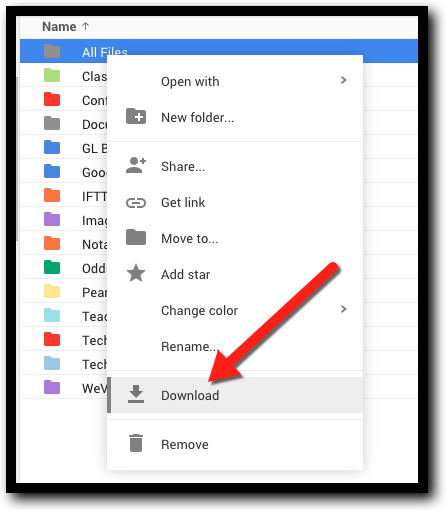
  1. Right click on this folder and click “Download”.


  1. Find the location of this file on your computer. You will need to unzip this folder. It is usually done by just double clicking on it and it will open a new folder.
  2. Sign out of your old GAFE account.


Upload Files Into New Account:
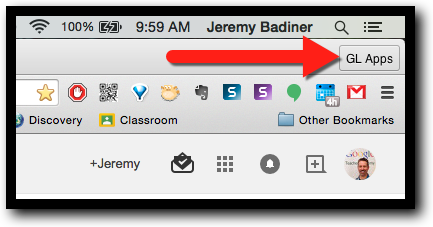
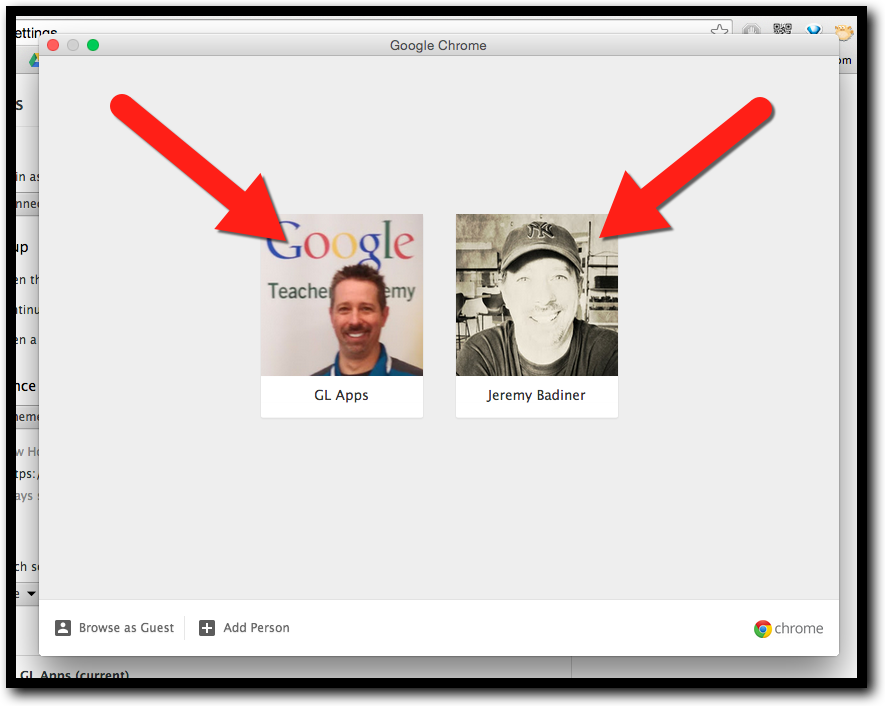
  1. Log into your new GAFE domain account (gulllakecs.org for Gull Lake Staff).
  2. Go to your Drive.
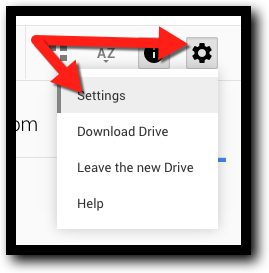
  3. Click on the gear in the top right and click “Settings”.


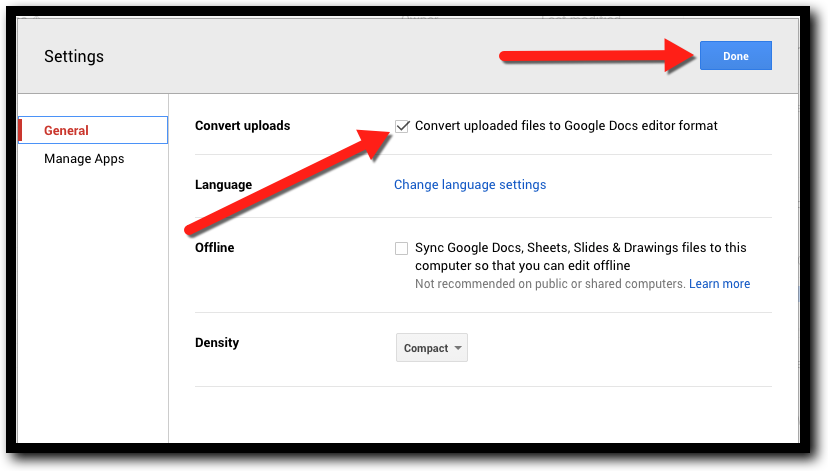
  1. Make sure the checkbox next to “Convert uploaded files to Google Docs editor format” is checked. Click “Done”.


  1. Locate your unzipped folder from your computer and drag it into your Drive folder. It will upload and convert keeping the folder organizational system you had.
  2. Now you can relocate all these files/folders to where you want them in your new Drive.


I would suggest that after you are done uploading and organizing files to delete the All Files folder so you are off and running with a clean Drive.


If you want these directions in a Document Click Here!


Sunday, January 25, 2015

Waukegan Google n' More Conference


I just got back from a great Google Conference. It was held in Waukegan, Illinois. I have always had a special spot for any Google conferences (it must be all that GAFE Kool-aid I drink). This conference was no different...well...maybe a little. It was attended by 10 "DEN Family" members from this year's DENSI 2014 from all over the country (Texas, Wisconsin, Illinois, and Michigan). It is always fantastic to connect with these amazing educators in person (we always connect online between DENSI events). Below are my 2 presentations if you missed them or just want to check them out. Dig around on the linked sites and grab my resources. Happy Googling!


How much fun was Waukegan Google n' More? Here is my DEN Family hanging out after presenting all day. Laughing, hugging, and smiling! Fun had by all!


My Presentations: 
  • Feel free to look around, dig through my resources, and use what you want!
  • Collaboration with Google Sheets: 
    • Google Sheets can be used for more than just collecting and working with data. Google Sheets can be a fantastic and easy to use collaborative tool. This hands-on session will focus on some great real classroom uses for collaboration with Google Sheets such as Parent-Teacher Conference sign-up, student created vocabulary definitions, student generated book critiques, classroom party supply sign-up, student data collection/analysis, and other easy to setup and use collaborative Google Sheets. Come ready to see how Google Sheets can make your teaching life much easier!

  • Snagit and Share-It!: 
    • There are many tools for creating screen captures. Perhaps the easiest is TechSmith's Snagit for Chrome. After installing the extension and App in your Chrome browser the world of image and screen capture is open...all for FREE! In this session we will look at how to use Snagit to annotate images, create video screen captures, create animated GIFs, and how this integrates beautifully into Google Drive for sharing. This is perfect for the flipped classroom, image/GIF creation, or for sharing screen capture images or “How-To” videos.


Check out all the other presentations at Waukegan Google n' More Here!

Friday, January 23, 2015

Edit Images in Google Slides and Documents

Google Slides and Documents are awesome. With all the updates Google is always doing with these products they just keep getting better. One of these improvements is the ability to edit images. There are many options now that were not available before. Below are some easy steps to help you start editing your images in both Documents and Slides.


Edit Images in Google Slides & Documents


Insert an Image:
  1. Click “Insert”.


  1. Find where the image is located.


Edit an Image: (Make sure to click on the image first to bring up these tools.)
   
Crop:
  1. Click the “Crop tool”.


  1. You can crop the image using the corners or sides to keep it a rectangle...or…


  1. Choose the shape you want to use. There are lots to pick from. Make sure the image fits in the outlines of the shape.


Border:
  1. Line Color: Click to add a border to you image.


  1. Line Weight: Click this tool and choose how thick you want the border.


  1. Line Style (style): Click this tool and choose style of line used in the border.


Reset Image:
  1. We all makes mistakes. If you click the Reset button your image will go back to it’s original format and you can start over. The ultimate in “undo”. Little 1 step errors can still be undone with the “Undo” arrow


Inserting and editing images in Documents and Sheets will add more appeal and effectiveness to your documents. Open a document or Slide and give these steps a try!


If you want these directions in a Document Click Here!


Monday, January 19, 2015

Create a Contact Group in Gmail


Gmail is a great tool. It is easy to use, stores conversations in ways that make sense, and is intuitive at finding contacts’ addresses. If you have sent, received, or created a contact it can show up by merely typing part of a recipient’s name in the “To” line while composing an email. Even better, creating email groups is easy. Below are the simple steps to do just this.


Create a Contact Group in Gmail

  1. Login to your Google account and go to your email.
  2. On any screen in Gmail click the word “Mail” in the top left corner.


  1. Click on “Contacts”.


  1. This is a list of all your contacts. If you are in a GAFE domain, you will also have access to every address in the domain. We will be using this to set up our groups.
  2. Look at the very bottom right. You may have to click “More”. Find “New Group…


  1. Click on “New Group...” and Name this new group (ex: Teachers, Students, or Parents). Click “Done”.


  1. Now find the group that you want to add contacts to on the left and click on it.
  2. Click on the image of the person with a + sign towards the center of the screen at the near the top.


  1. Start typing the name of your contact you want to add to this group. When you see the correct contact click on it. You can continue to add as many contacts as you need at this point to complete this group.


  1. Click “Add”.


  1. From here on out you can type the name of the group in the “To” line of an email (or in the share button in and Google Drive file) and the contacts in the group will receive the email.


If you want these directions in a Document Click Here!


Wednesday, January 14, 2015

Set Up Another Google Account on Your Android Device

I am connected all the time. My personal and work email, calendar events, and Drive access is available on every device and computer I own. Below is all you have to do to add a Google account to your Android device. This will allow Calendar, Drive, Email, and any Google tool to work on your Android device. You can choose what to sync and what not to sync as well:


Set Up Another Google Account on Your 
Android Device


  1. Go to your "Settings" (every manufacturer has a little different way to do this).
  2. Find Accounts (some devices have “skins” installed so it might look different).
  3. Under "Accounts" will be the “Google” accounts. Tap that.


  1. Add an existing account (not create new unless you are creating a brand new Google account).
  2. Fill in all the information needed.
  1. The last screen will look something like mine. Put checkboxes on everything you want synced. I would recommend NOT syncing contacts if this is a school account. You probably don't want all the school contacts in your phone contact list. Here are the ones I checked.


All your synced data can be edited by using the appropriate app (Gmail, Calendar, Drive, Google+, etc…). Just go into the settings on the app and edit how you want your device to handle the account.


If you want these directions in a Document Click Here!

Tuesday, January 13, 2015

New Multiple Chrome Sign In

In the spirit of all things Google, change is always happening. Google did it again; this time the changes occurred in Chrome. I have always loved the ability to use multiple users (sign-ins in Chrome) to work easily with multiple accounts. Now Google has made some changes. Here is a quick look at how Chrome is a little different.


New Multiple Chrome Sign In & Guest Mode

Account Naming:
The icon showing your current “User” is different. The image is no longer in the corner. It is replaced with the name you called that account.


Image Selection:
An added feature is that you can now use your Google+ image instead of the select list of icons! This is great!
  1. Click on the name of your account.
  2. Click on the image in the center.


  1. Select the image you want (your Google+ image will be the first one). You can rename the account here as well.


  1. Click “Save”.


Switching Between Accounts:
This is a little different, and uses another screen, but easy to do.
  1. Click your account name in the top corner.


  1. Click “Switch User”.


  1. Click the account you want.


Guest Mode:
You can use Guest Mode to allow others to use your Chrome! No more need for incognito mode!
  1. Click your account name in the top corner.


  1. Click “Switch person”.


  1. Click “Browse as a guest”.


  1. Now you can allow someone else to use your computer and they can log in without messing with your sign-in. Life is good! Especially if Incognito mode is disabled.


Google is always changing to improve tools. Change is good!
You will need to be updated to the newest version of Chrome to use these new features.

If you want these directions in a Document Click Here!