Showing posts with label GAFE. Show all posts

Saturday, July 30, 2016

Training for Google Apps

We all know how awesome Google Apps for Education really is: collaboration, free, web tools, free, syncing across multiple devices, free, accessible anywhere, free, unlimited storage, and did I mention FREE? Now that so many of us have tasted and enjoy the Google Kool-Aid we find ourselves wanting to learn more about the tools. We are all looking for tips and tricks, hidden features, better ways to use tools, and the most current updates to our favorite Google tools. If only there was a place to go to have videos, online tutorials, and interactive training. Wait...there is! Google has just acquired Synergyse, a training platform that is being integrated right into your already favorite Google tools. The best part is you do not have to go looking for helpful resources, they are attached to the Google tool you already have open! Install the Training for Google Apps Chrome Extension now and start learning to use Google tools to their fullest!


Training for Google Apps Chrome Extension

  1. Install the Chrome Extension from the Chrome Web Store (click here).


  1. Allow the required permissions and refresh your Google Tools to have the icon placed in the top right corner.


  1. This icon will appear in Google Gmail, Calendar, Drive, Documents, Sheets, Slides, Sites, Google+, and more! (Full list below)



  1. When in one of these Google tools, just click the icon in the top corner and a list of available resources will come up.
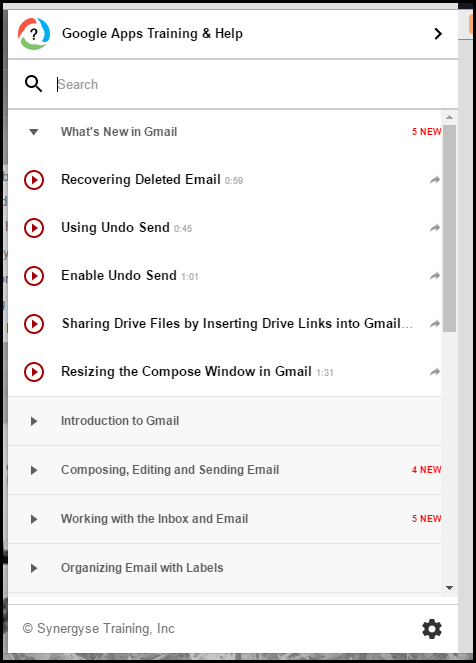


  1. Search for or click on the topic you wish to learn more about and a video will pop up and play.


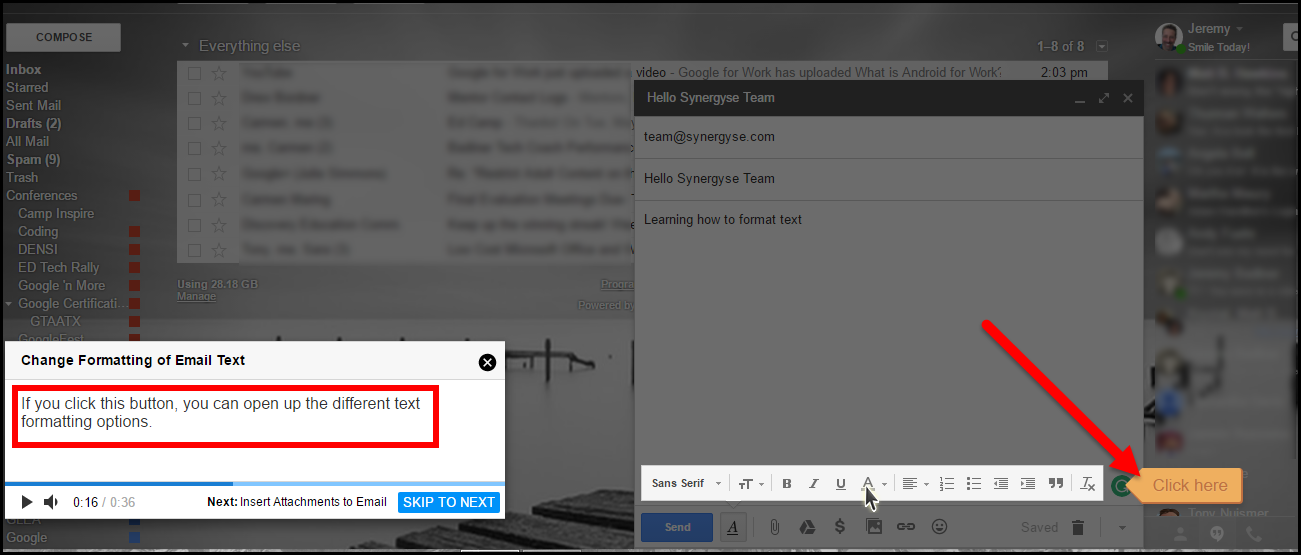
  1. Many tutorials also have helpful “step by step” interactive tools that walk you through just what you want to do. They shade out areas, place call outs, and require you to click to continue. Also, the spoken text is also written in the box on the left.


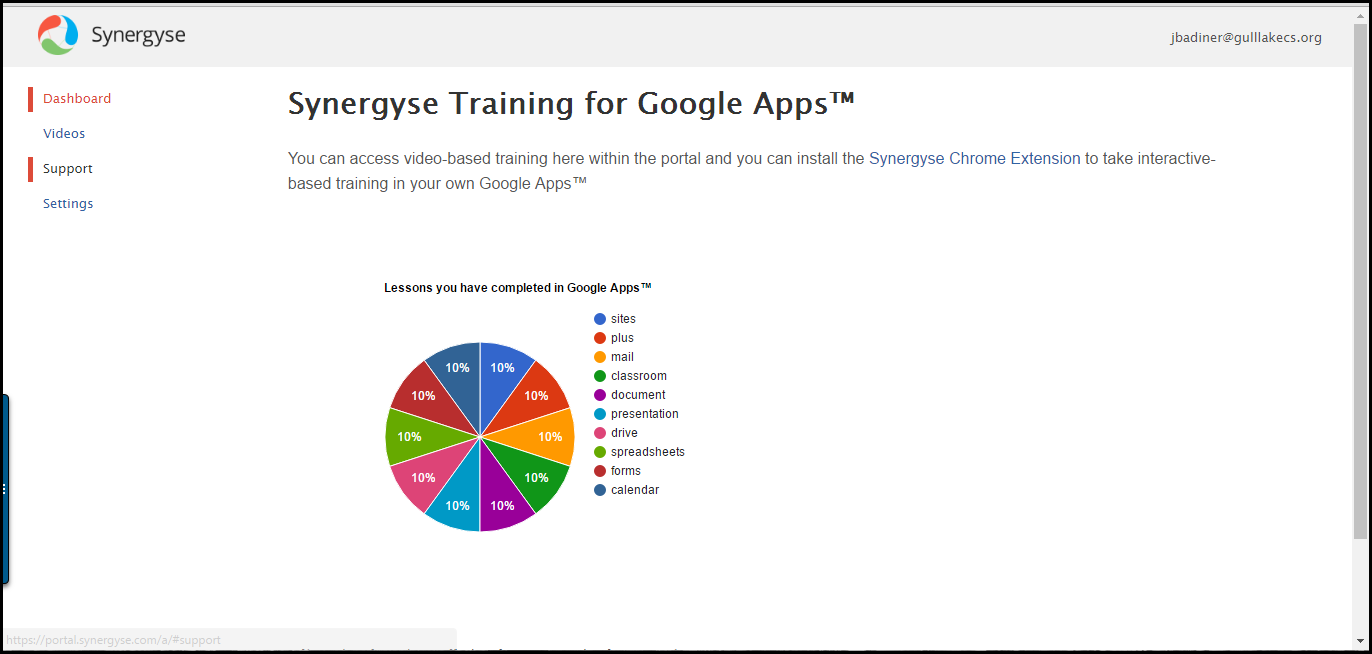
  1. All your progress is saved and recorded so you know what you have worked on. There is a dashboard that you can visit to see what tools have been used as well.


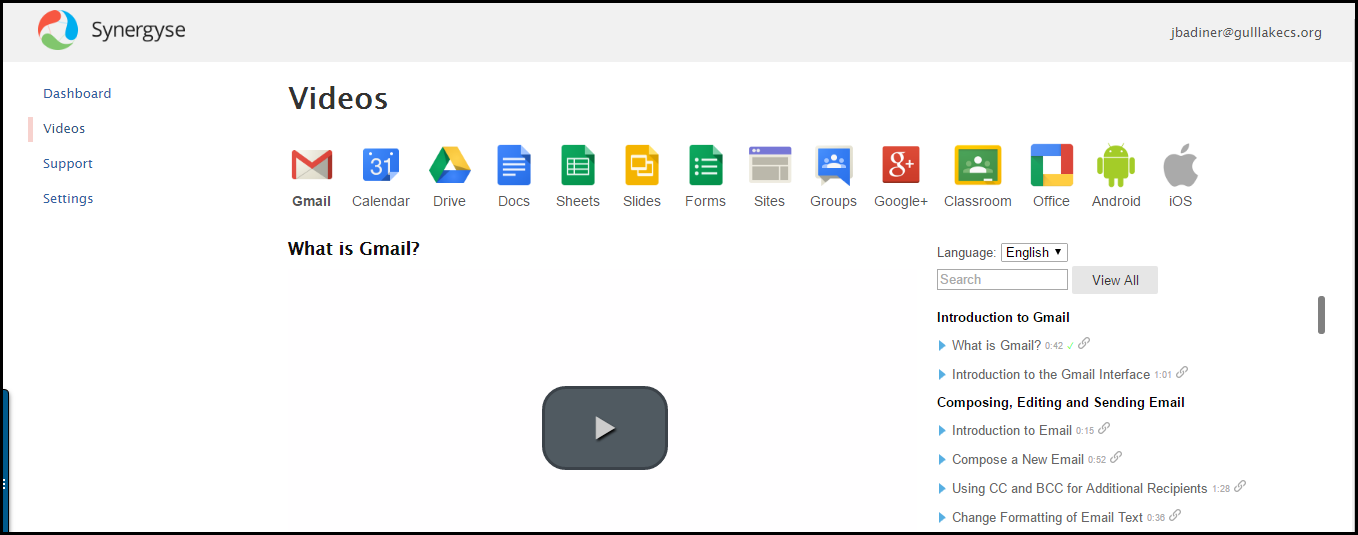
  1. You can also search for helpful videos without being in the actual tool by visiting https://portal.synergyse.com/a/#videos/en/mail.


Give it a try!


For these directions in a document, click Here!


Wednesday, January 28, 2015

Download and Transfer Files from One GAFE Domain to Another

Google Drive is my “Go-To” place for all documents. I live in my Drive. With all the great uses and advantages Drive has over MS Office, there is one drawback. You can not transfer ownership from one domain in GAFE to another. This normally might not be an issue, but we recently went through a domain migration so this was an issue for us. Even after using a 3rd party product to migrate files over, things did not go too smoothly. Below are directions on how to bulk download and transfer files from one GAFE domain to another.


Download and Transfer Files from One GAFE Domain to Another

Download Old Account Files:
  1. Sign in to the old GAFE account (gl.k12.mi.us for Gull Lake Staff).
  2. Go to your Drive.
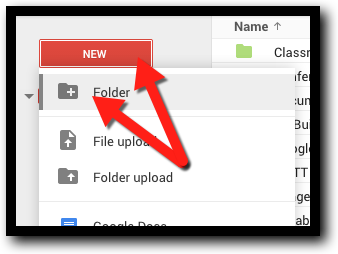
  3. Click on “New” and create a folder and name it “All Files”.


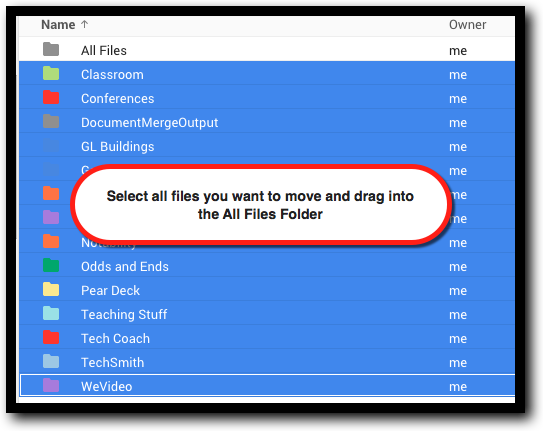
  1. Drag all your files/folders in your Drive into this folder. If you are only missing a few files or folders, only drag those into this new folder.


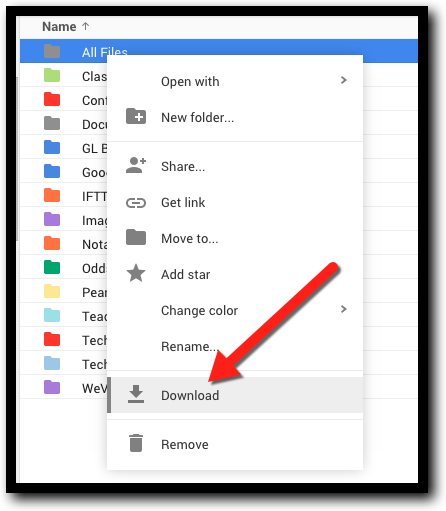
  1. Right click on this folder and click “Download”.


  1. Find the location of this file on your computer. You will need to unzip this folder. It is usually done by just double clicking on it and it will open a new folder.
  2. Sign out of your old GAFE account.


Upload Files Into New Account:
  1. Log into your new GAFE domain account (gulllakecs.org for Gull Lake Staff).
  2. Go to your Drive.
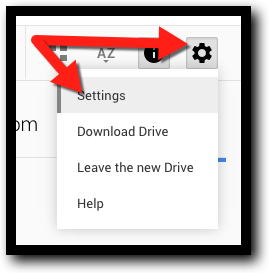
  3. Click on the gear in the top right and click “Settings”.


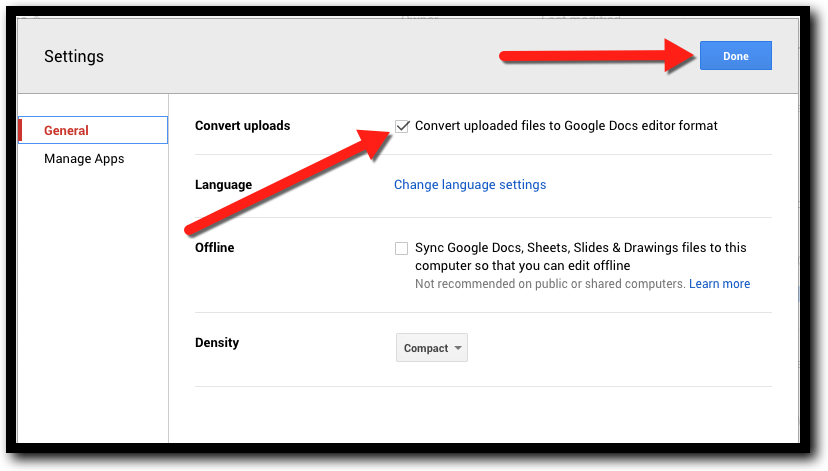
  1. Make sure the checkbox next to “Convert uploaded files to Google Docs editor format” is checked. Click “Done”.


  1. Locate your unzipped folder from your computer and drag it into your Drive folder. It will upload and convert keeping the folder organizational system you had.
  2. Now you can relocate all these files/folders to where you want them in your new Drive.


I would suggest that after you are done uploading and organizing files to delete the All Files folder so you are off and running with a clean Drive.


If you want these directions in a Document Click Here!


Saturday, December 27, 2014

Create a Calendar and Import Events


We are undergoing a change in our district right now. We have been a GAFE district for a number of years, but we are changing our domain. This sounds simple enough, the email address just changes at the end...right? Well...there is a lot more that goes into it. What about all those files in your Drive? You do realize that you can not just share and transfer ownership outside your GAFE domain. Sharing, yes. Transfer ownership...not so much. Also, all those calendars that you can not make others owners of. The list goes on. We have been migrating our @gl.k12.mi.us account to @gulllakecs.org for a few weeks now. Things are slowly showing up, sharing, and reorganizing. Slow and steady wins the race. I will be sharing some Tips and Tricks on this migration for the next couple weeks. This tip will be to show how to export events from your old (gl.k12.mi.us) account, create a new calendar, and import these events.


Create a Calendar and Import Events


Here are the steps to export calendar events from one Google Account and import them to another. You will need access to both accounts to do this.


How to export a calendar:

  1. Open the Calendar in the account you want to export from in your browser.
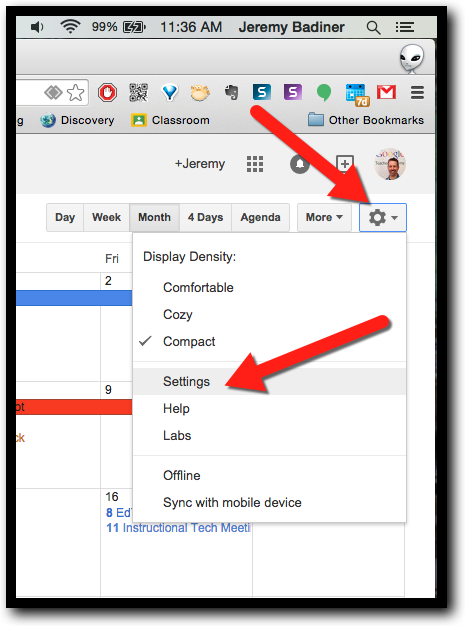
  2. Click on the gear and then “Settings”.

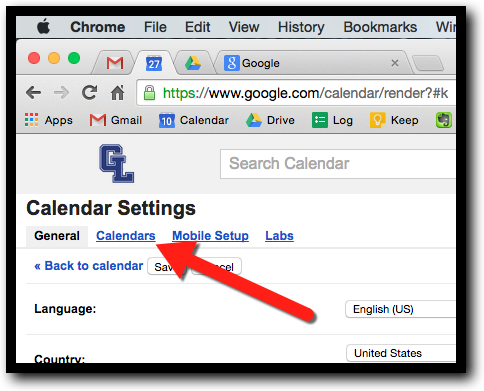
  1. Click on “Calendars”.

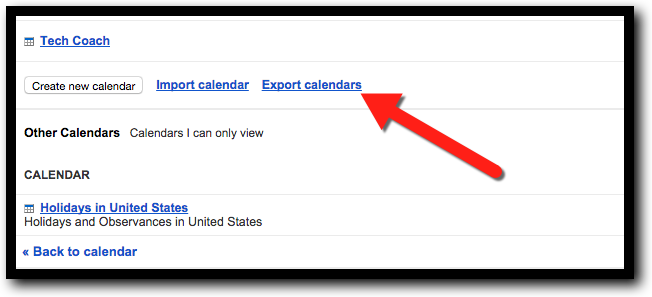
  1. Scroll down and click on “Export Calendar”.

  1. Your exported file will now be on your computer. Remember its location.


How to create a new calendar:

  1. Open the Calendar in the account you want to create a new calendar in with your browser.
  2. Click on the gear and then “Settings”.


  1. Click on “Calendars”.

  1. Scroll down and click on “Create New Calendar”.

  1. Name your calendar and click “Create Calendar”.


How to import the exported events into your new calendar:

  1. Open the Calendar in your account you want the events added in your browser.
  2. Click on the gear and then “Settings”.

  1. Click on “Calendars”.


  1. Scroll down and click on “Import Calendar”.

  1. Choose the exported file from your computer and choose the calendar to import these events into.


  1. Click “Import”.


If you want all these steps in a Document Click Here.