Showing posts with label Google. Show all posts

Monday, October 30, 2017

Fun with Google

Need some fun Google Games and Tools? Check these fun Google Tricks out!

Flip A Coin

What do you do when you have to make a tough decision to make between two options? You flip a coin! What if you don’t have a coin? Well, no worries...Google to the rescue. Type 'Flip A Coin' and click on 'Google Search' and just like that Google will tell you your fate (or at least heads or tails)!


Roll A Die

Playing a game and need to roll a die? Google has you covered! Just type 'Roll a die' and Google will help you play games easily.
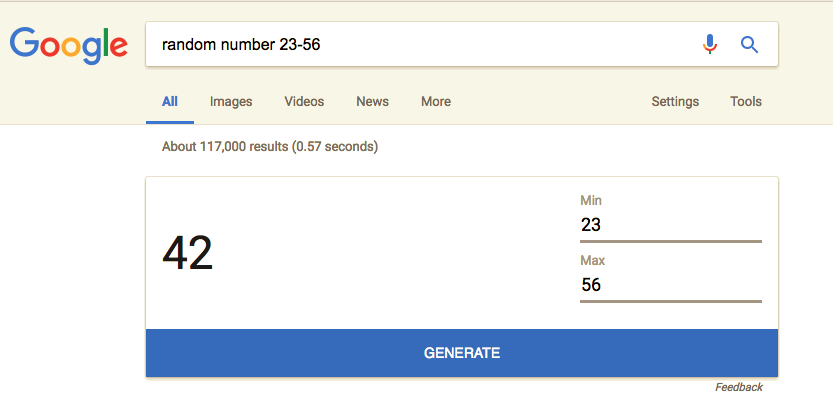

Pick a Number

What do you do when you have to pick a random number? Let Google do it for you! Type “Pick a number from x-x” into the search bar and press enter. You can make the first and last numbers anything you want.


Zerg Rush

If you type 'Zerg Rush' into the search bar and click “Google Search” a playable game with small O characters will appear and start destroying all your search results if they are not clicked with the mouse pointer. Get clicking and save your search!

Atari Breakout

Type 'Atari Breakout' into Google Images and you'll get the classic Atari arcade game to play. Be careful, you may be stuck playing for a while and forget what you came to Google fo in the first place!.
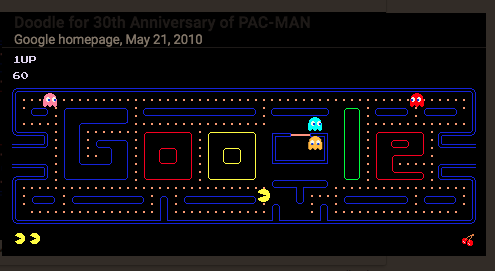

Google Pacman

Google also lets you play the 1980s arcade game Pac-Man. Just type 'Google Pacman' in the search box and get ready to chop some pellets. Watch out for those pesky multi-colored ghosts around the Google logo.

Offline Dinosaur Game

If you lose your internet connection you won’t get bored. Google gives you an awesome endless Dinosaur Game on Chrome to play until network is back!
Hidden Google Secrets


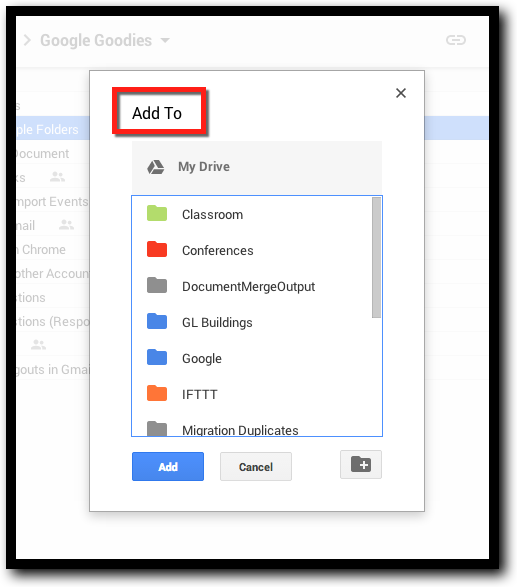
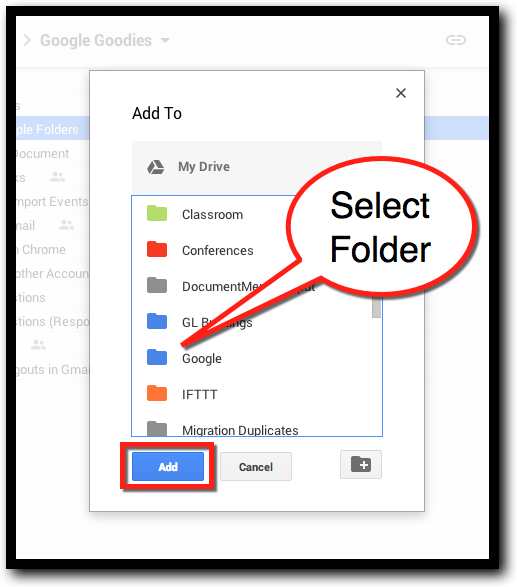
For this in a Document, click Here!

Thursday, February 5, 2015

Pin Tabs in Google Chrome

Hi...my name is Jeremy, and I’m a tabaholic! I live in Google Chrome and at any given moment I have at least 10 tabs running at the same time. There...I feel better. Thanks! The good news, this is not a problem for me. How can I tell what each tab is? Simple...I pin the important ones. What is pinning tabs, you ask? It makes the tab small (only showing the site icon), and “locked” in place to allow more real estate for other tabs in my browser. Follow these steps and begin pinning!


Pin Tabs in Google Chrome

  1. Start Google Chrome.
  2. Open all the tabs you want to pin.
  3. Right click on a tab.
  4. Click on “Pin Tab”.


  1. Repeat and reorder so all your tabs that you use every day are auto started each time you start Chrome and in the correct location. You can reorder these at any time. I pin Mail, Calendar, and Drive. Pinned tabs look like the ones in the box below (only icon).


Notes:
  • If you are on one of these pinned tabs and change the address (go to another site) the last site is what will open when Chrome is restarted.
  • The pinned tabs are always going to be on the left side (you can reorder them at any time but the will always be the first tabs).
  • If you close a tab it will not return the next time you restart Chrome. Only tabs currently used will return.
  • Warning: The more tabs you have pinned, the slower Google Chrome will start up. Each tab will need to be loaded.


Get busy pinning and save time opening!


If you want these directions in a document Click Here!

Friday, January 2, 2015

Create and Share a Google Calendar


Let’s face it, if you use Google tools, one of the best features is Google Calendar. You can create as many calendars as you wish for yourself or to share with others. They can even be public and embedded on websites for others to see and follow. You can give others access to view or edit, or just keep them to yourself. And the best, if you are like me, color code them for your own organizational purposes. Here are the easy steps to creating and sharing a Google Calendar.


Create and Share a Calendar

How to Create a New Calendar:
  1. Open the Calendar in the account you want to create a new calendar in with your browser.
  2. Click on the gear and then “Settings”.


  1. Click on “Calendars”.


  1. Scroll down and click on “Create New Calendar”.


  1. Name your calendar and click “Create Calendar”.


How to Share a Calendar:
  1. Hover over the calendar on the left side that you want to share.
  2. Click the little dropdown arrow to the right of the calendar name.


  1. Click “Calendar Settings”.


  1. Click “Share this calendar” at the top left.


  1. If you want to make this a public calendar (anyone in the world can see), click the checkbox for “Share this calendar with others” and “Make this calendar public”.


  1. If you want to share with just a select group of people go down to “Share with specific people”. (If you are only sharing with specific people, do not do the previous step if it is not shared publicly as well.)


  1. After entering in the email address of the select people you want to see/edit calendar, choose from the drop down what rights you want to give them (above).
  2. Click “Save”.
  3. You are all set!


If you want these steps in a Document Click Here!

Add a Drive File to Multiple Folders


One of the gems of Google Drive is how things can be organized. I often find myself wanting a file in multiple locations. In Dropbox, System Documents, or other file organizations this would mean making a copy and putting them in separate folders. That is if until you edit one and have to go back and do the same to the other. With Drive, that is is not needed. The file is only 1 file, just “linked” to 2 folders. Beautiful, really! Here are the easy steps to put your files into multiple folders so you have them grouped in ways that make sense to you.


Add a Drive File to Multiple Folders


  1. Go to the folder in Drive that contains the file you want in multiple locations.
  1. Select the file by clicking on it.
  1. Click “Shift+Z” (hold down the shift key and tap the Z key”.


  1. You now see the option to “Add to” instead of “Move”.


  1. Click on the folder you want it added to and click “Add” at the bottom of the popup.


  1. This will keep the file in its original location (the one you first located it in) as well as link it to the selected folder.
  2. You can add the file to more folders by repeating these steps.


If you want these steps in a Document Click Here!

Thursday, January 1, 2015

A Reflection on 2014


Some EDTech Reflections of 

Wow! What a year! As my 3rd year as an Instructional Technology Coach at Gull Lake COmmunity Schools there were many "firsts" for me this year. 2014 was stressful, busy, and yet amazing. Here are some of my highlights from the past 365 days!


New Tech Team:
I can not say enough what a pleasure it is to work with such great individuals. We have contracted through KRESA this year for our tech support and the team is amazing. From Tony, to Micah, to Dylan and the rest of the KRESA support, it has been a great year of growth and improvement. We have an amazing open communication and collaboration with the Instructional Tech team I work daily with. Speaking of Instructional Tech, I do believe that we have the most cohesive, collaborative, and solid Ed Tech Team at Gull Lake. Drew, Karen, Lisa, and I could not be a more perfect match. I may be a little bias, but you can't top GL EdTech! I am fortunate!


MACUL 2014:
Actually, kind of 3 highlights. I was fortunate to work with an amazing and talented group of #michED Tech Gurus and help put on the first EdTech Rally. Over 70 EdTech Specialists joined together for a half day session of collaboration, networking, and fun. It was amazing to say the least. We also organized another meeting this fall and hosted over 120 EdTech Specialists. The momentum is rolling and gaining force! I also did my first 2 hour Hands On session at MACUL. It was energetic and exciting. I will be submitting proposals every year now (already lined up for MACUL 2015)!


Mobile Learning Conference:
A local favorite, the MACUL Mobile Learning Conference at KRSEA. I did another great couple of presentations and learned for Michigan's best! This is another local conference that is gaining momentum in the state. I am looking forward to presenting this year as well!


DENSI 2014:
What can one say, but be blessed with the opportunity to experience Discovery Education Network Summer Institute even one time in a life, but this summer I attended my second. Thi syear it was held in Nashville with 125 of my closest (and most distant in milage) DEN Family members. If you are not a DEN STAR and applying for DENSI 2016, you are truely missing out!


Windows 8:
Ugh...Really, that is putting it nicely. Our district launched all new computer systems (grades 3-12) and left Windows XP in the dust, only to struggle with the district learning curve of experiencing Windows 8. Need I say more? Things have improved, and the learning curve is flattening out for many. We have settled into the new system and life is...of course good!


Chromebooks:
YES! We finally launched our first 4 carts district wide. I am looking forward to the success and ease of these for ou 3-8 students! Whoot! Google On!


Leave GroupWise:
OH MAN! The world is right again! Finally, after what seemed like forever, we have left the 1990s and cut the GroupWise email/Novell tether. We are now 100% Google Apps for Education! Celebrate Google!


Google Migration:
With the leaving of GroupWise, we experienced a "migration" from our old GAFE accounts (@gl.k12.mi.us) to  our new district domain (@gulllakecs.org). Sounds easy...Well, not so much. The migration is still in process. Over two weeks into it and things are looking better. It is hard to get others excited about change when it isn't smooth, but it will sort itself out! Excitement is just around the corner!


Google Teacher Academy:
Yep...That is my highlight of all highlights! After 2 previous attempts, I was selected to be 1 of 50 to attend the Austin, Texas Google Teacher Academy (#GTAATX) in December. Wow! How amazing is that?! I am now a Google Certified Teacher! Oh, the joy! Oh, the excitement! Oh, the Googliness! The connections, networking, and resources gained will be a great benefit for both my district & me!


Google Education Trainer:
To add to my Google credits, I was also selected to be a Authorized Google Education Trainer! Whoa! What a December indead! Now I can help (in official capacity) our district and others with all things Google! Time to take myself on the road! I see an interesting future ahead for me! I Heart Google!


Overall...this was an AMAZING year! There were so many other things that could have been included, but I had to try to narrow things down. I am looking forward to what 2015 brings! I am wishing you all the best of the new year! Happy EDTeching!


Wednesday, December 31, 2014

Add Fonts to a Google Document


Fonts! What would the world be without them? This coming from a self proclaimed "Fontophile". I LOVE fonts. The more the better. When I left MS Office as my main tool, I was disappointed in Google Documents and the lack of fonts to choose from. All that has changed. There are now over 450 fonts to choose from. Life is good again. Below are easy to follow directions on how to add fonts to your Google Documents.


Add Fonts to a Google Document


I will admit that I am addicted to Google. I use Drive for everything (sorry MS Office...you are not in my tool box any more). I did have one complaint moving to Drive: the lack of Fonts! I am a self proclaimed “Fontophile”. I am addicted to fonts. In MS Office I had over 527 fonts on my computer (I know...it was a sickness). Moving to Drive was a little disappointing a few years ago. Now, that is not an issue. There are over 450 fonts to choose from! As I am saying this, I know some of you are saying that you can not see them. All you need to do is pick the ones you want and install them. Installing is very easy and all done through an open document. Here are the easy steps.


  1. Open a Google Document.
  2. Click on the fonts button.


  1. Look at the list of fonts you have and click on the bottom “More Fonts”.


  1. Scroll on the left side. Click any font you want. When you are ready click “OK” at the bottom and they will appear in the column to the right. This is your new font list.


  1. That is all. One tip of advice (from a recovering Fontophile). Don't go overboard. Just choose the ones you actually will use. Otherwise you will spend more time playing with font selection than actually producing a document (all this from an “in therapy” Fontophile)!


Add Fonts to Google a Document.gif


If you would like these directions in a Document Click Here!

How to Add a Signature to Your Gmail


Gmail is an awesome tool. There are lots of ways to make your Gmail stand out. Some are a little more overwhelming (changing background patterns or colors, text size, and others. The best way to pass on important information is to have a good email signature. There are lots of things that could go in there. I include my 2 building phone numbers, my Google Voice number, and all my important links (Twitter, Blog, Google+, Flickr, YouTube Channel, and Calendly links). The best part of a complete signature is that all your important contact information is available to anyone you email. Below is how to easily setup your Gmail signature.


How to Add a Signature to Your Gmail
Adding a signature makes your school mail complete. It can include any important information you wish to always have available to parents and others. I include my 2 building phone numbers, my Google Voice number, and all my important sites (Twitter, Blog, Google+, Flickr, YouTube, and Calendly links). Keep in mind, you don’t want your signature to be too overwhelming, and it is redundant to have your email address in it as that is already send through the email you created. Here are the steps to creating your signature.

  1. Open up Gmail.

  1. Click the gear in the top right corner and click on “Settings”.


  1. Scroll down to “Signature”.


  1. Click in the box and create your signature. I actually write this in a Google Document so I can edit it easily later. Also, images are easier to work with in a document as you can resize them easier. Just a tip. In mine I made the images links by highlighting the image and clicking the link icon and adding a web link. This takes up less room and adds some color to your signature.

  1. Click the button under “No Signature” to include signature. I also check the “Insert this signature before quoted text in replies and remove the "--" line that precedes it.


  1. Scroll to the very bottom and click “Save Changes”.


  1. I always send an email to myself to make sure the signature look like I want it to before I call it all done.


If you want these directions in a Google Document Click Here!