Tuesday, September 28, 2021

Install the IPEVO Visualizer App


If you are missing the IPEVO Visualizer app to use with your IPEVO Document Camera follow the steps below.


Check to see if you have the IPEVO Visualizer:

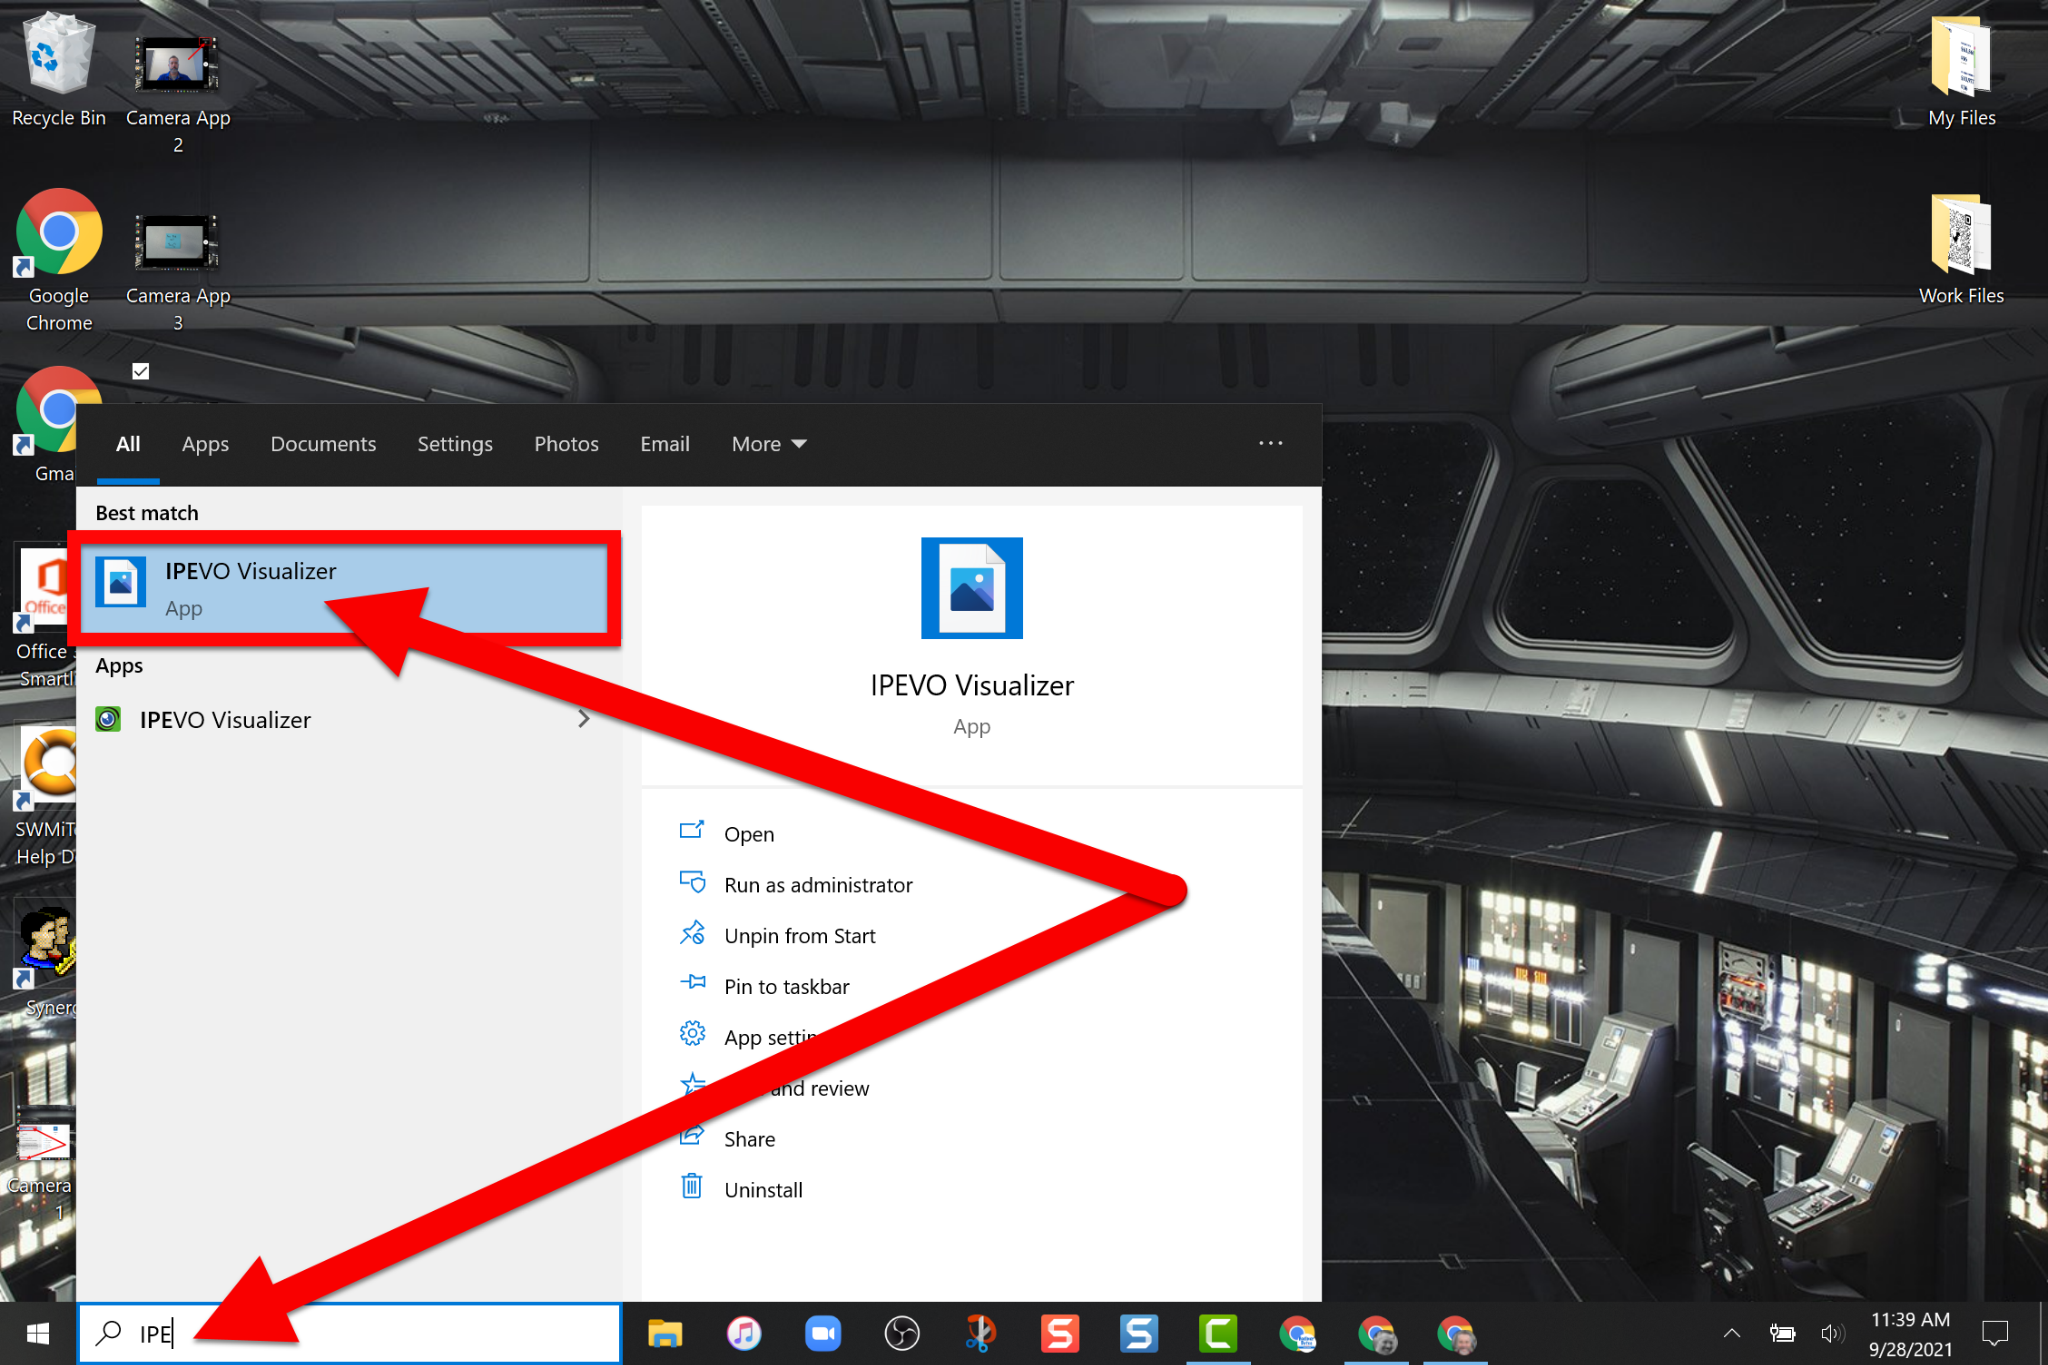
  1. Click in the search bar at the bottom left corner of your Windows device and type “IPEVO”.  If you see the app listed at the top you already have this installed!


Install the IPEVO Visualizer:

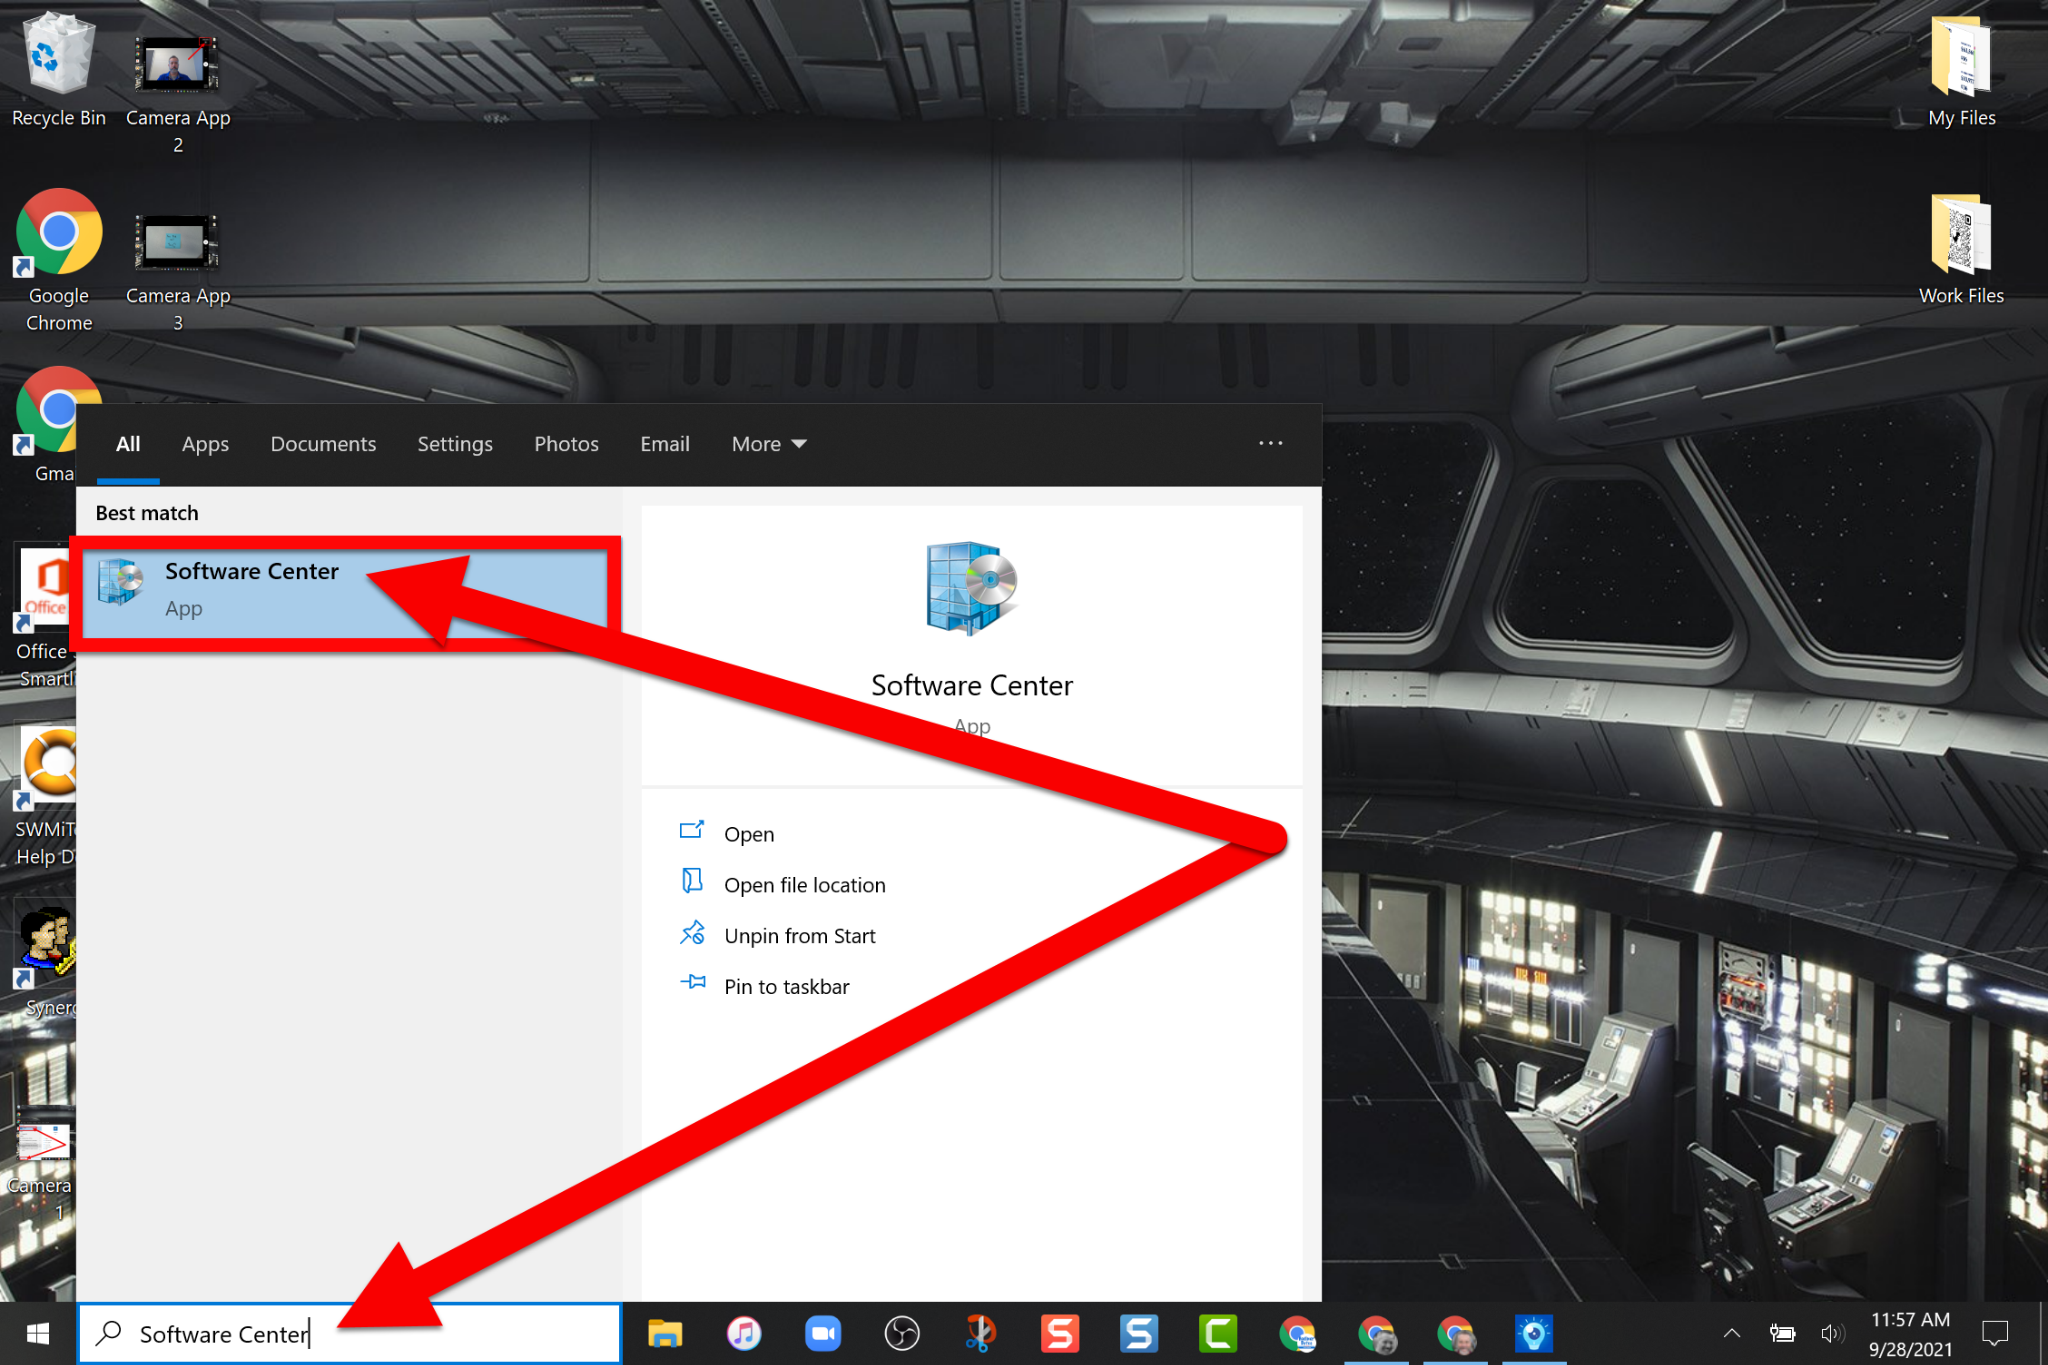
  1. Click in the search bar at the bottom left corner of your Windows device and type “Software Center” and click on the app at the top.


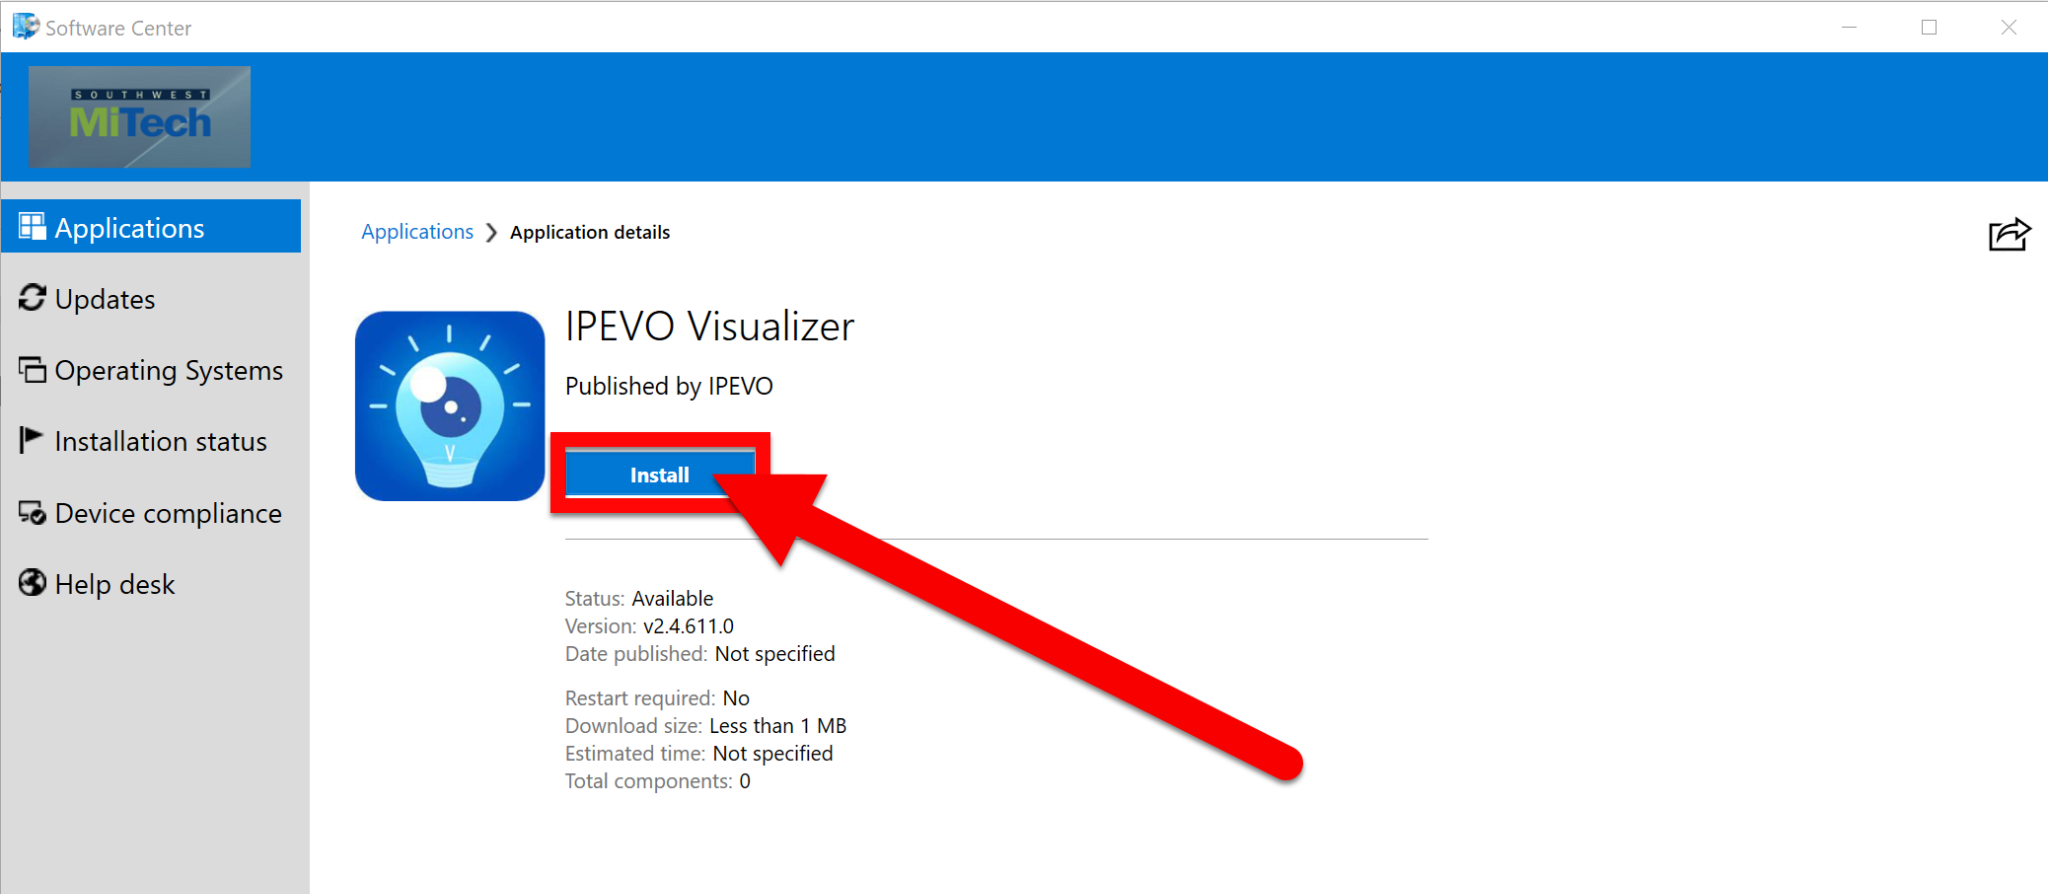
  1. On the left make sure to be in the Application tab and scroll to find “IPEVO Visualizer”. Click on it.


  1. Click the “Install” button to start the install.


  1. Once installed you will find it in your program list (Windows button on the bottom left). Once you open the program I suggest you Pin it to the Taskbar (right-click the icon and choose “Pin to Taskbar) This keeps it on the taskbar when you close for easy access later.


If you want these directions in a Document click HERE!


Camera App & Doc Camera

Most of us use the IPEVO Visualizer app to share our Document Camera to the projector, but if you have a substitute teacher for the day they will not have that program installed. The easiest way to have them use the Document Camera is to use the built-in Camera App on every Windows computer. 


There are more options available when using the IPEVO Visualizer app, but Subs may not have access to this program. For instructions on how to install it (if you do not have it already installed) are HERE.


Start the Camera:

  1. In the search bar at the bottom left type in the word “Camera” and click on the Camera app.


  1. Once the camera starts up click on the “Change Camer” icon on the top right.


  1. As long as the Document Camera is plugged in it will be displayed.


If you want these directions in a Document click HERE!


Monday, September 27, 2021

Creating Comics with Pixton

Comics are fun to read and a great way to hook students into telling a story (or explaining curricular concepts). There is a great tool (and free at a basic level) to do this. Pixton is an easy-to-use comic maker that is worth exploring!


Getting Started:

  1. Head over to pixton.com and create a free Education account. Click on “Sign Up”.


  1. Choose “Educator” from the options and sign in with Google.


  1. Choose what to do first:

  • Make a Class Photo: Create your avatar and have students’ avatars auto-added to the “class photo.

  • Have Students Make Comics: create your class and invite students.

  • Try the Comic Maker: Jump right in and create a comic


Creating a Comic:


  1. In your dashboard click on the “My Comics” tab.

  2. Click on “New Comic”.

  3. Explore the items you can add (items with the lock symbol are for the paid version):

  • Background

  • Characters

  • Focus

  • Words

  1. These video links will help you get going.

  2. For more help explore the Comic School.


Setting Up a Classroom:

  1. Head to the My Classrooms” tab and click “New Classroom”.


  1. Name this classroom and click “Next”.


  1. Choose the Grade Level of this class and click “Continue” (6th grade and up will also enter the subject).


  1. Add any special options for this class and click “Continue”.


  1. Choose “Using their Google IDs” for sign in.


  1. Copy the link and send this to your students so they can join. (Make sure to not share this outside your class so others do not join your classroom.)


Viewing Your Classroom and Student Work:

  1. Head to the My Classrooms tab and click “View Class” under your created classroom.

  2. You will see your students who have joined here.


  1. By clicking on a student you will see all the comics they have created.


Student Account Setup:

  1. Have your students use the class share link you created to join. This is always found on the bottom of the Class Tile.


  1. When they click it they will “Sign in with Google”.


  1. They will then click “Make My Avatar”. Follow the steps to make their avatar look as they wish.


  1. When they are done their Avatar will be added to the class photo. Click “Continue”.


  1. Anytime they are in the “My Dashboard” they can click “Go to this Class” and they will view the class. 


  1. They will then be able to create a comic by clicking “New Comic”.


  1. This will be shared in the teacher’s Classroom Tab.


If you want these directions in a Document click HERE!


Sunday, September 12, 2021

Archive Previous Google Classrooms

Just a reminder for you to make sure you have Archived Last Year's Google Classrooms. This helps clean up the Classroom list on the student side as well as your Classroom list. 


Archive Classrooms:

  1. Make sure you have returned all turned in work (a habit you should do every time you "grade" or look at completed assignments. Otherwise, you own the students' work and they do not.

  2. Go to your Classroom list screen.

  3. Find last year's Classroom(s) and click the 3 dots in the top right of the Classroom Tile.


  1. Choose "Archive"


  1. Choose "Archive" on the next screen.


  1. Done!


 If you want these directions in a Document click HERE!


Tuesday, September 7, 2021

Google Sheets Templates

I will be the first to say that I LOVE spreadsheets. You can just do so much with them, and I just love graphs and charts (I know, kind of geeky). Google just made it even easier to use charts and set colors. Check out below and start exploring the style templates in Google Sheets.


Style Templates:

  1. Open a Google Spreadsheet.

  2. Enter in some data for a chart or graph.

  3. Click “Format”.


  1. Click “Template”.


  1. On the right side, you will see a list of default templates. You can choose one of these. 


  1. You can also click “Customize”. 


  1. You can set font, chart background, and data range colors. Click “Done” to save this template.


Here is a Video Walkthrough of these steps as well.


If you want these directions in a Document, Click HERE!