Gmail is the “go-to” tool for sending emails, but did you know that you can send an email directly from a Google Document? It is easy and a great way to keep a copy of all those emails in your Drive if you have the need. All you need is a blank Document and something to say. Check out the steps below to get started.
Send Email from a Google Doc:
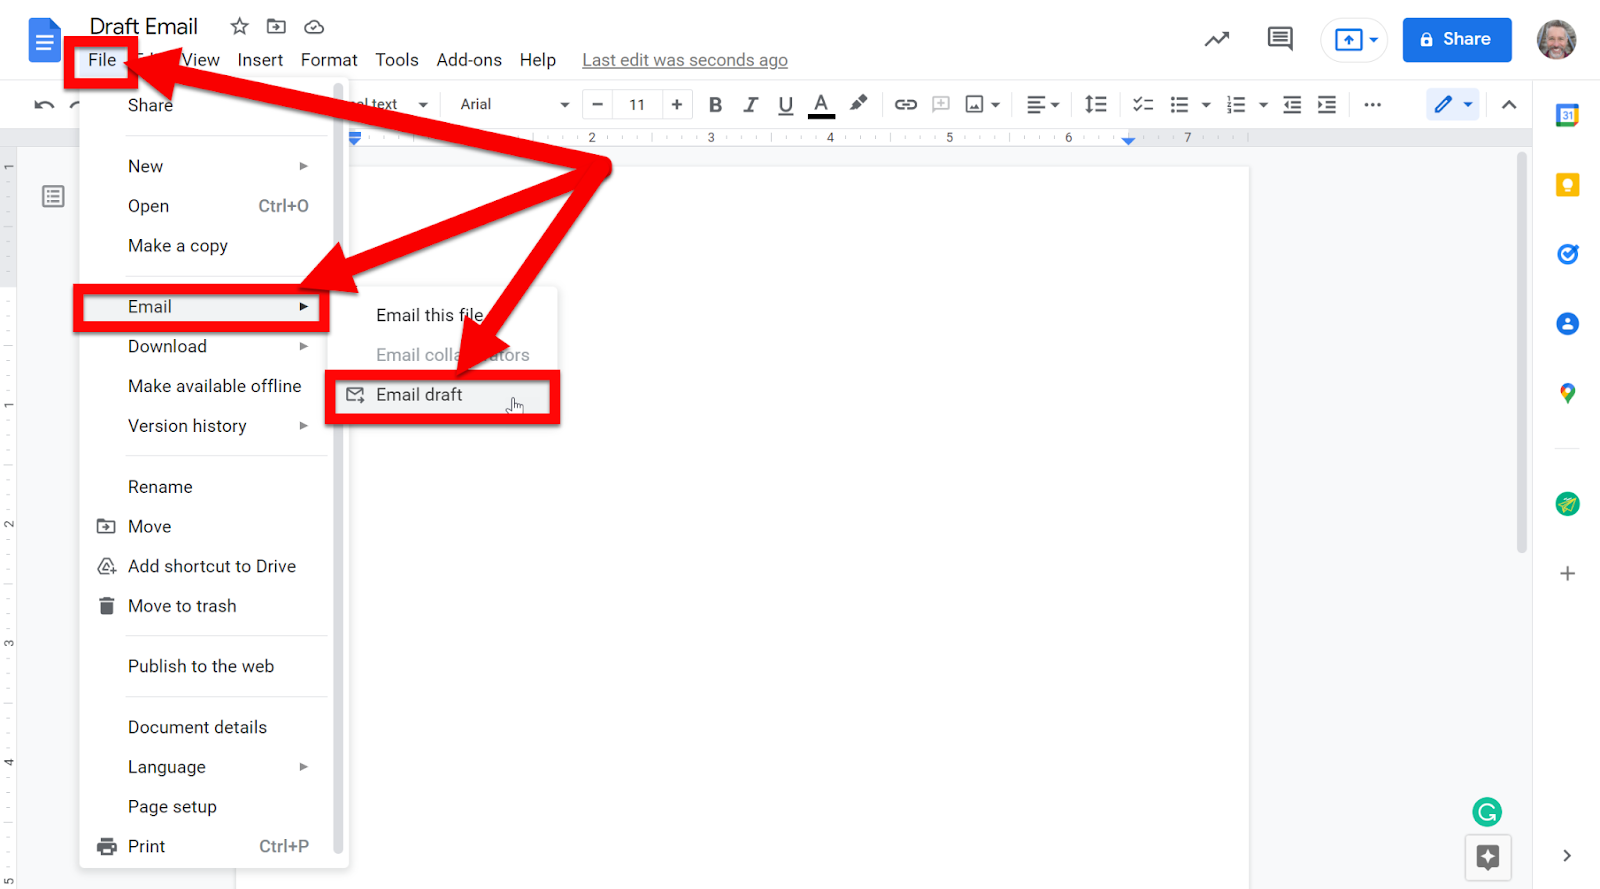
Open a new Document.
Click “File”, then “Email”, and then “Email draft”.
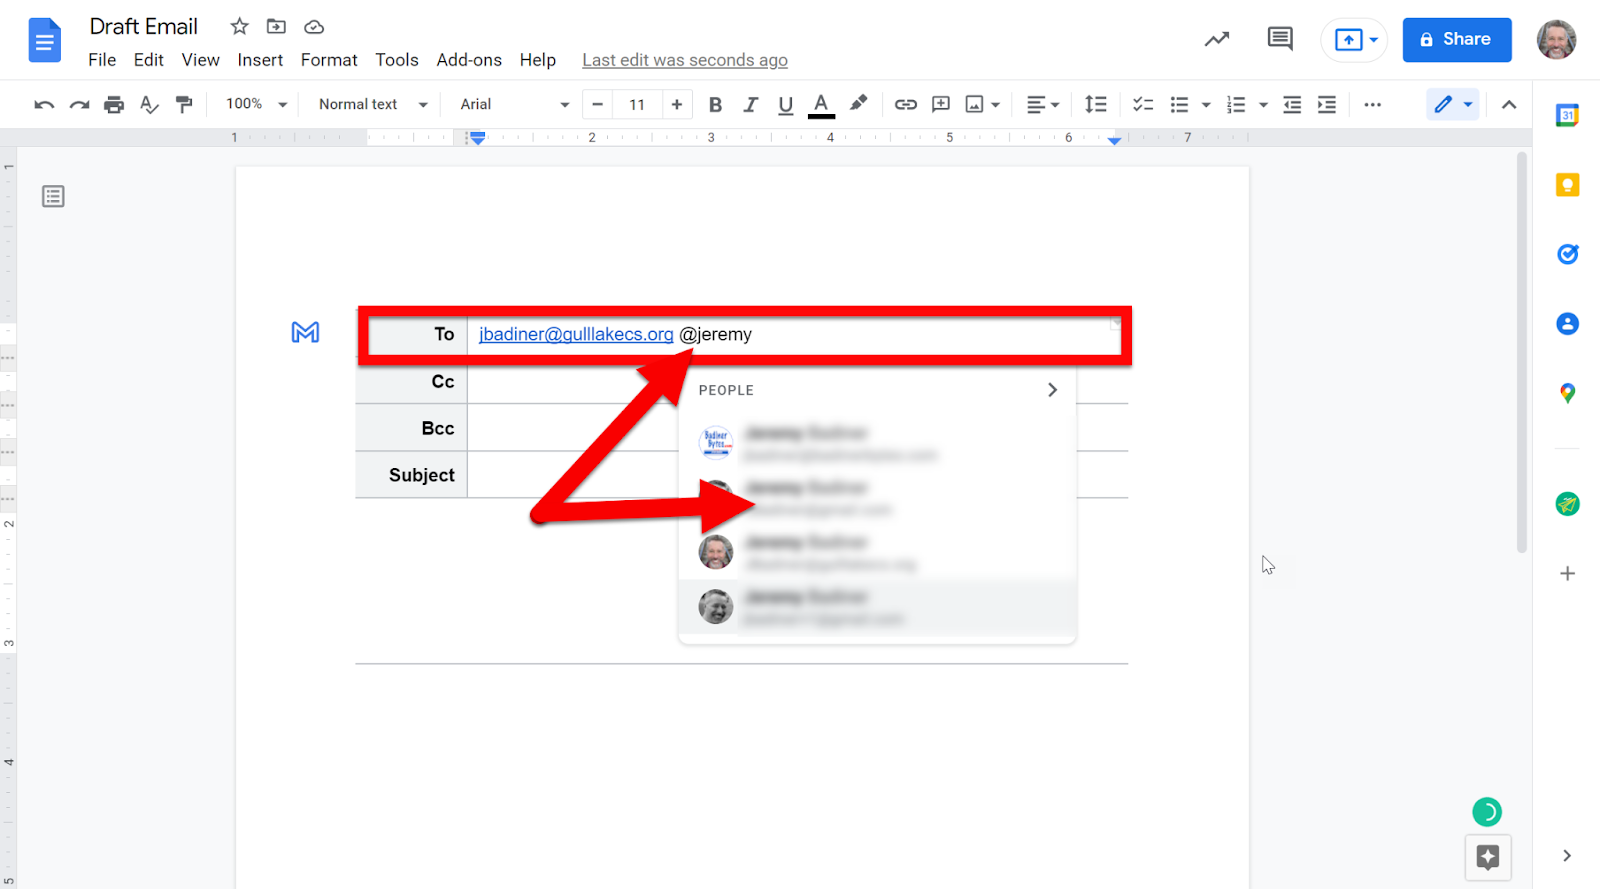
In the “To” box enter the email you are sending the email to. You can also type “@” and Docs will search your Domain or personal Contacts.
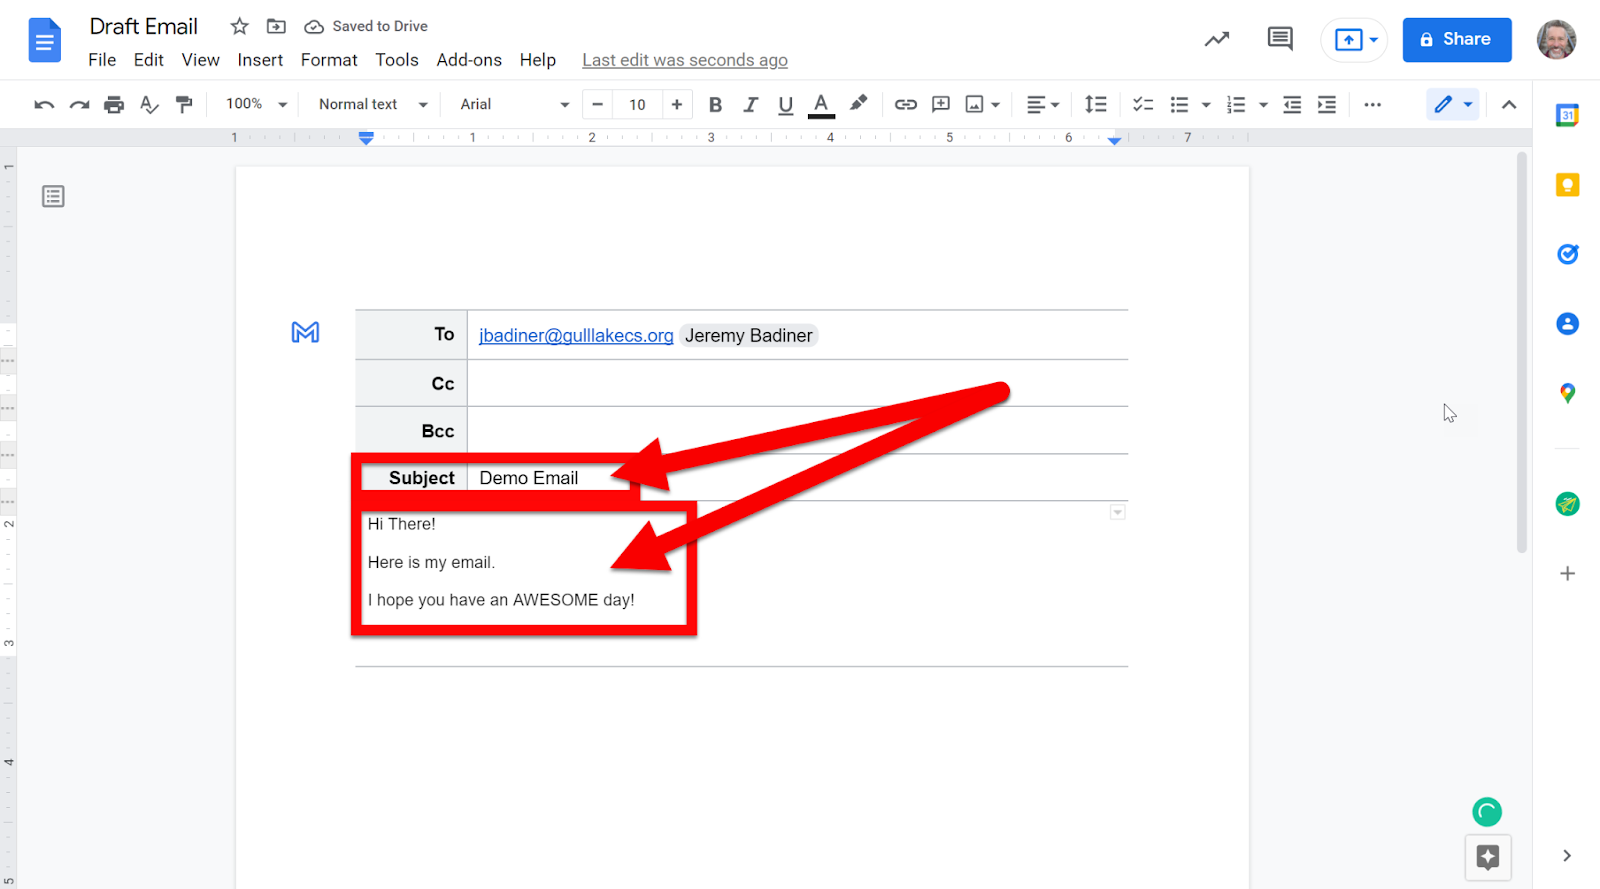
Fill in the Subject line and compose your email. If you have an email set up in Gmail leave your signature off. If you do not have it set up in Gmail type it in below your message.
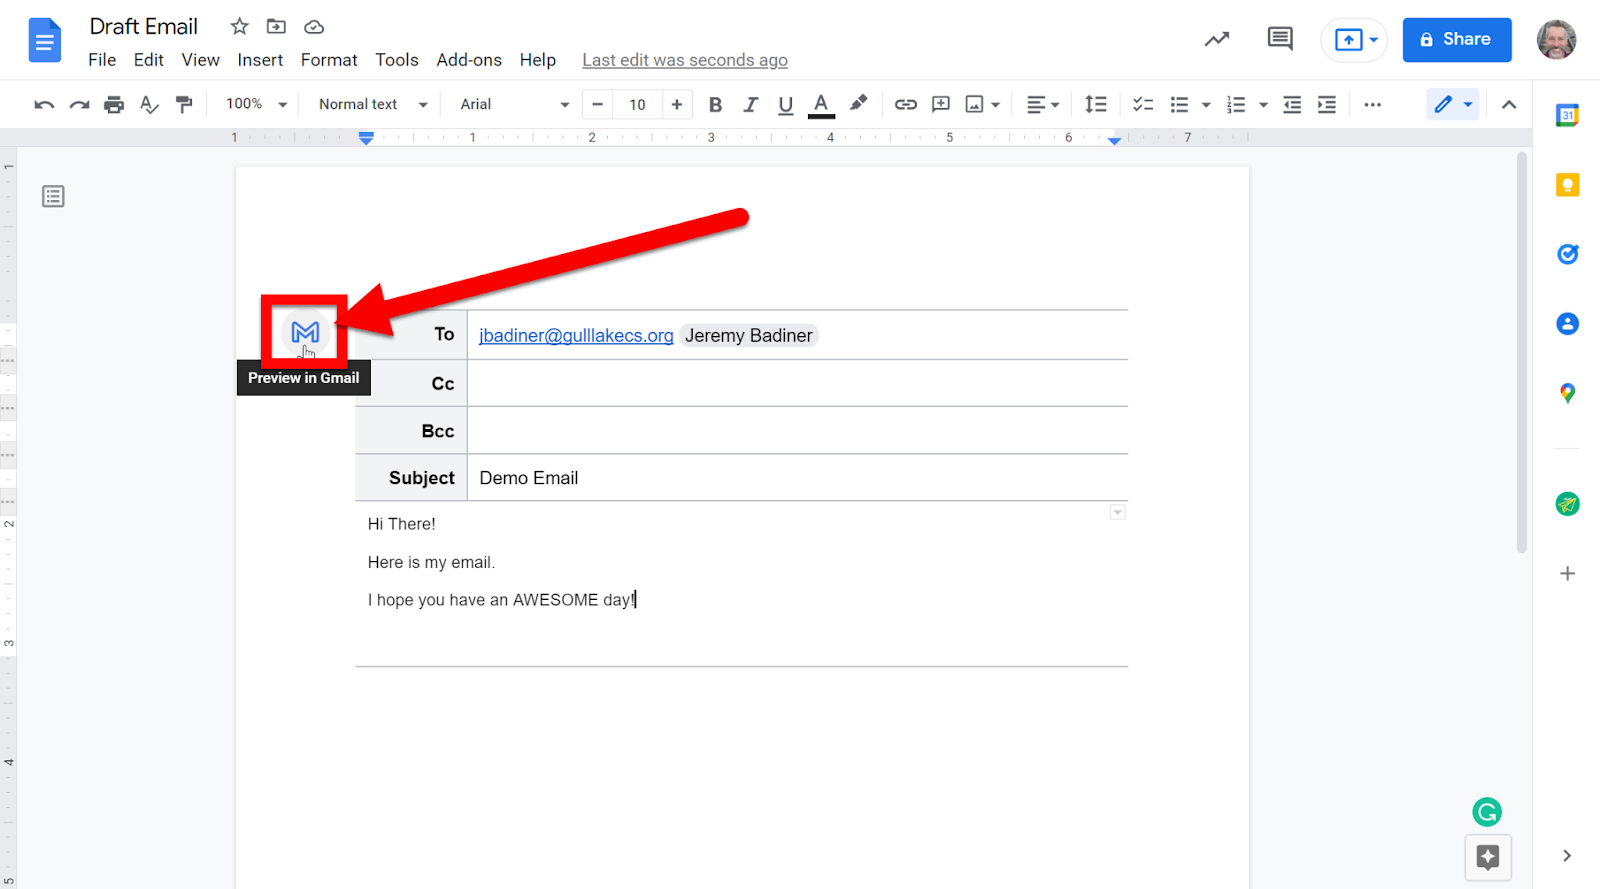
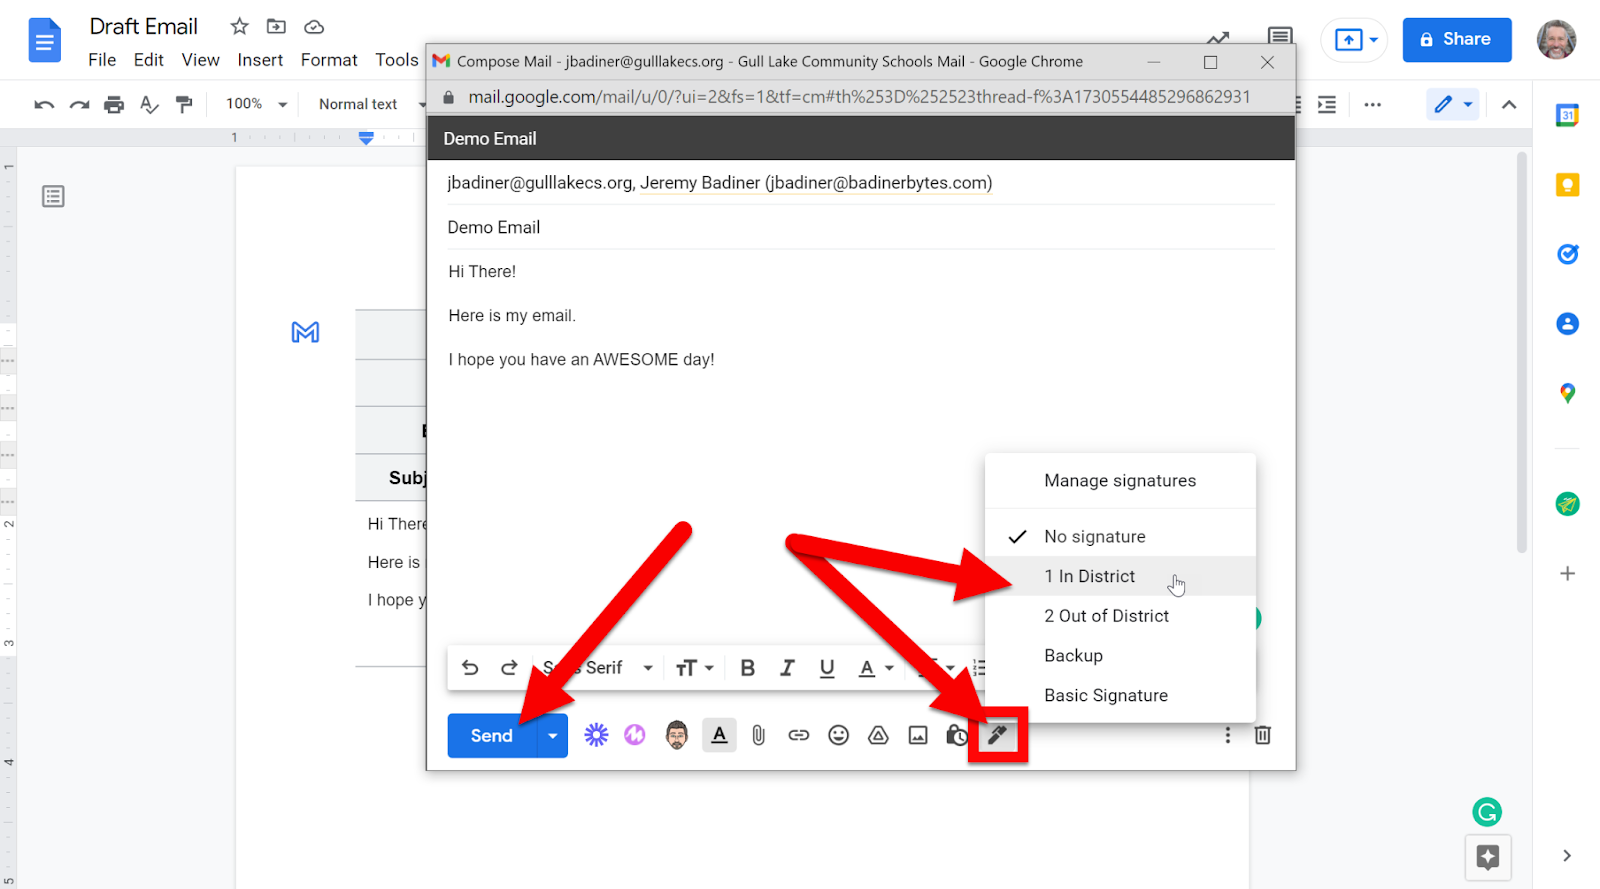
Click the blue Gmail logo to the left.
A Gmail pop-up will open with your composed email. If you have a set signature click the pen icon at the bottom right to select which signature you want to use (Doc on how to set up Multiple Gmail Signatures). If you do not have a Gmail signature set up just type it in your message like normal. Click “Send”.
That is it! Your message is sent.
To see all these steps in a video walk-through click HERE!
If you want these directions in a Document click HERE!
Google is at it again. They have updated the Gmail layout. If you are not seeing this update, it might be because (like me) you had your “Chat” position set to “Right side of the inbox”. Follow the steps below to see the new layout. You can (for now) always go back to the old layout. I am not sure when Google will force the new layout as default.
Enable New Layout:
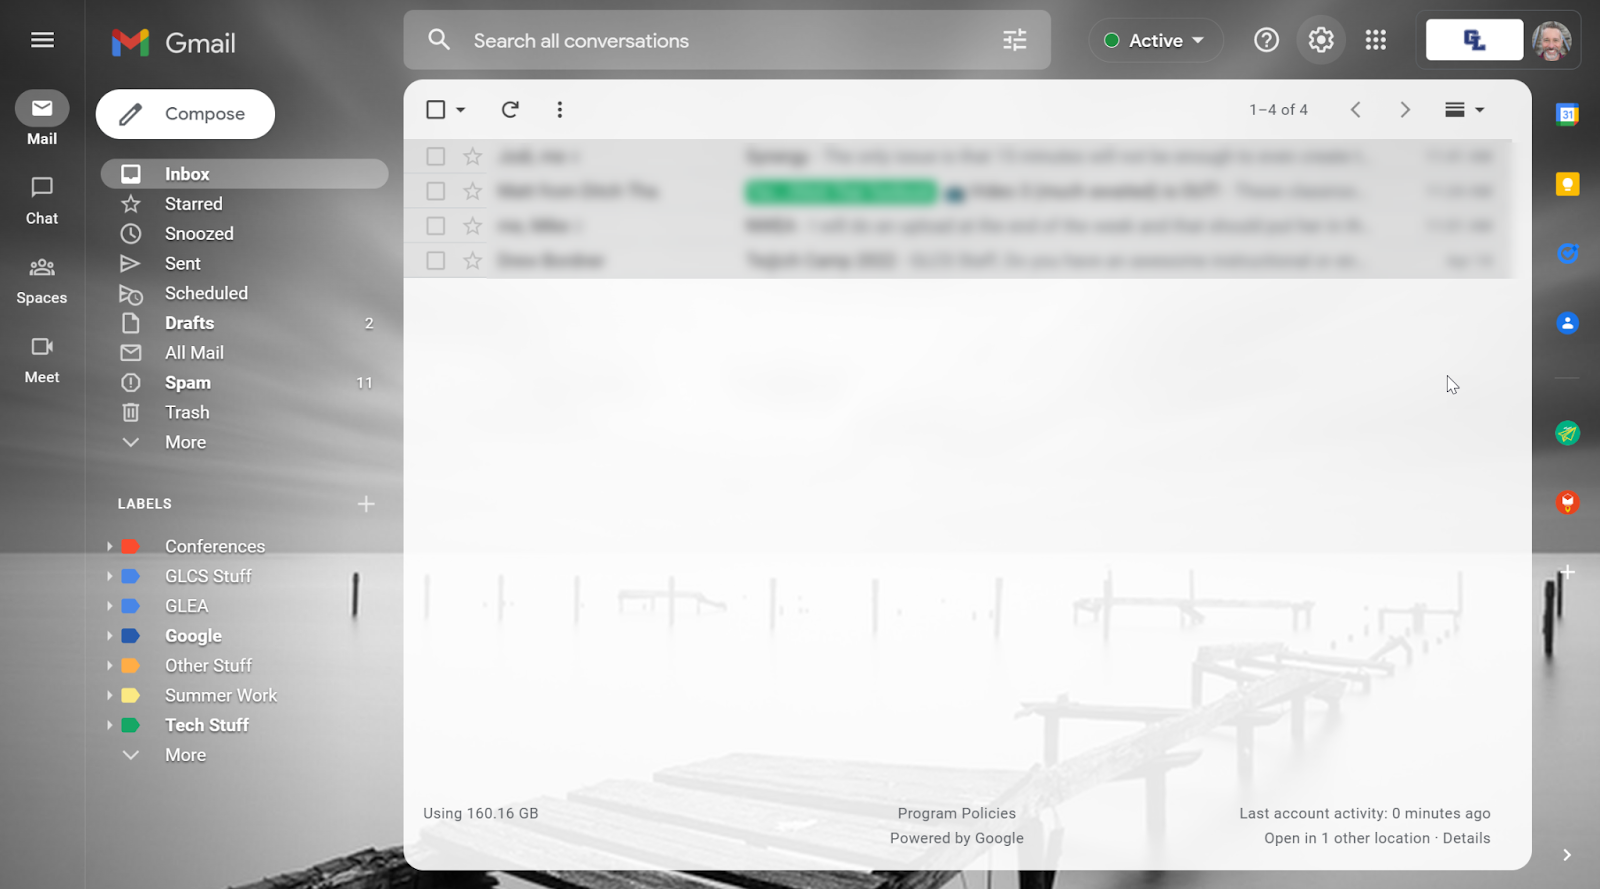
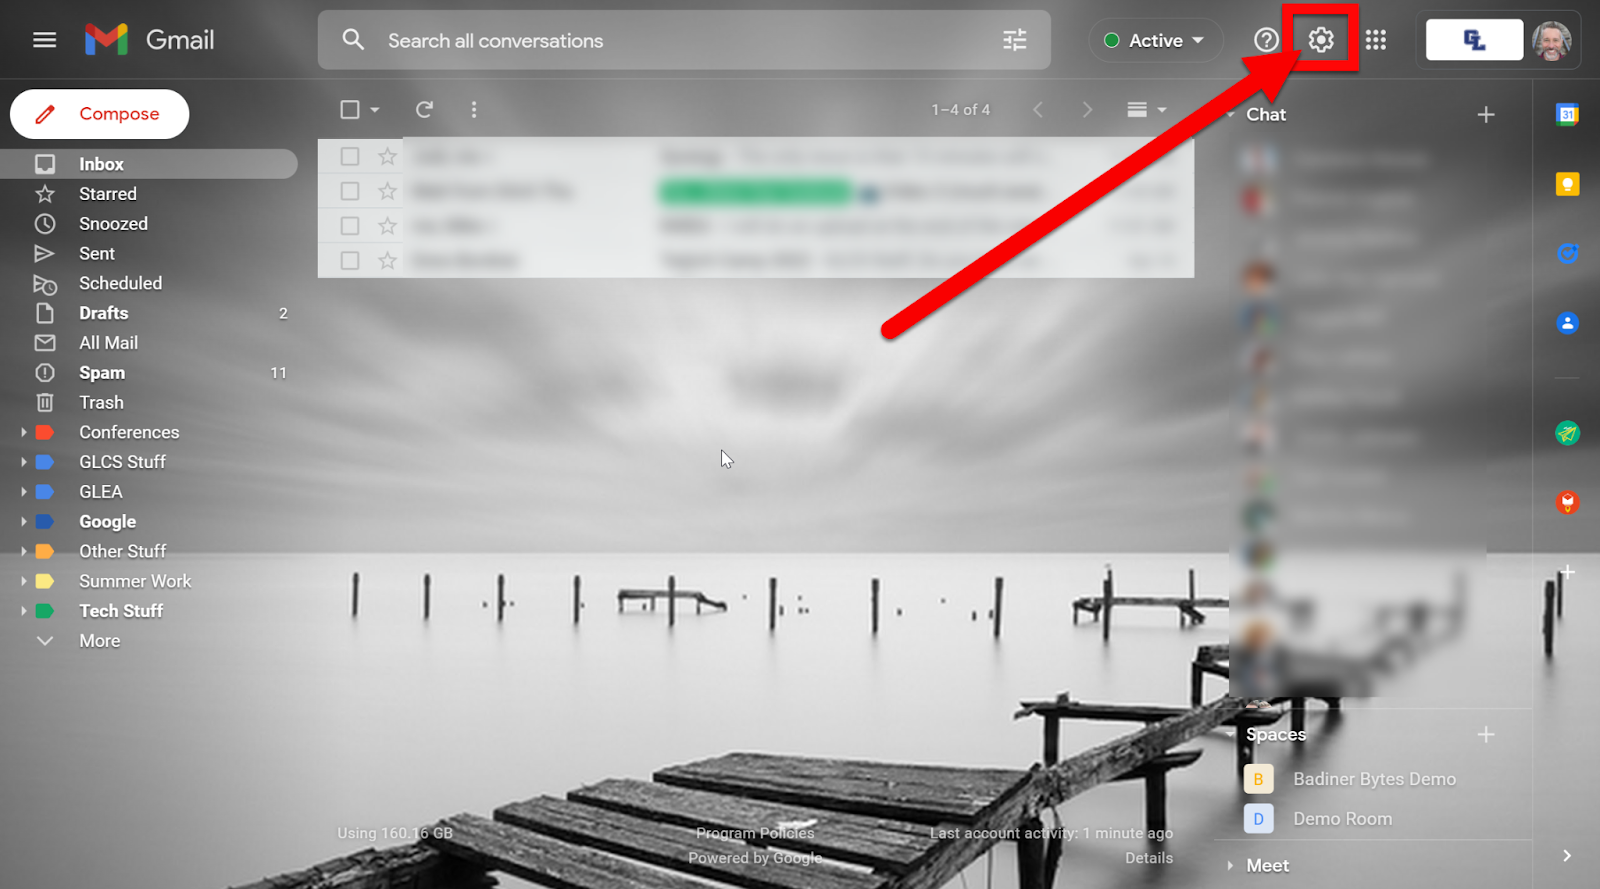
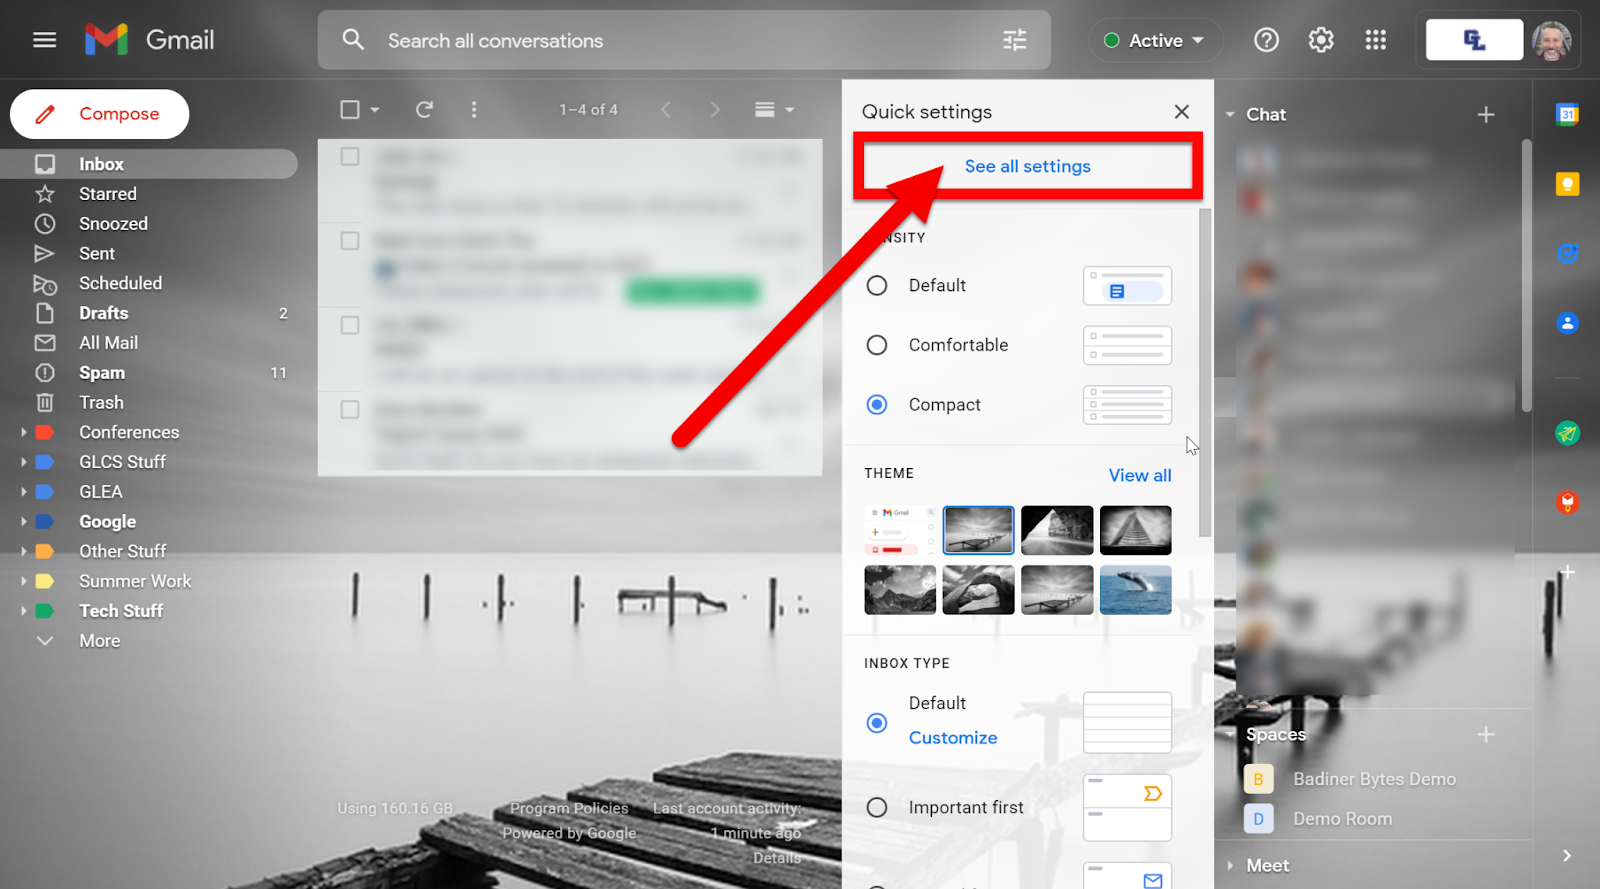
If your Gmail does not look like the image above, you are on the old layout. Start by clicking the gear in the top left.
Click on “See all settings”.
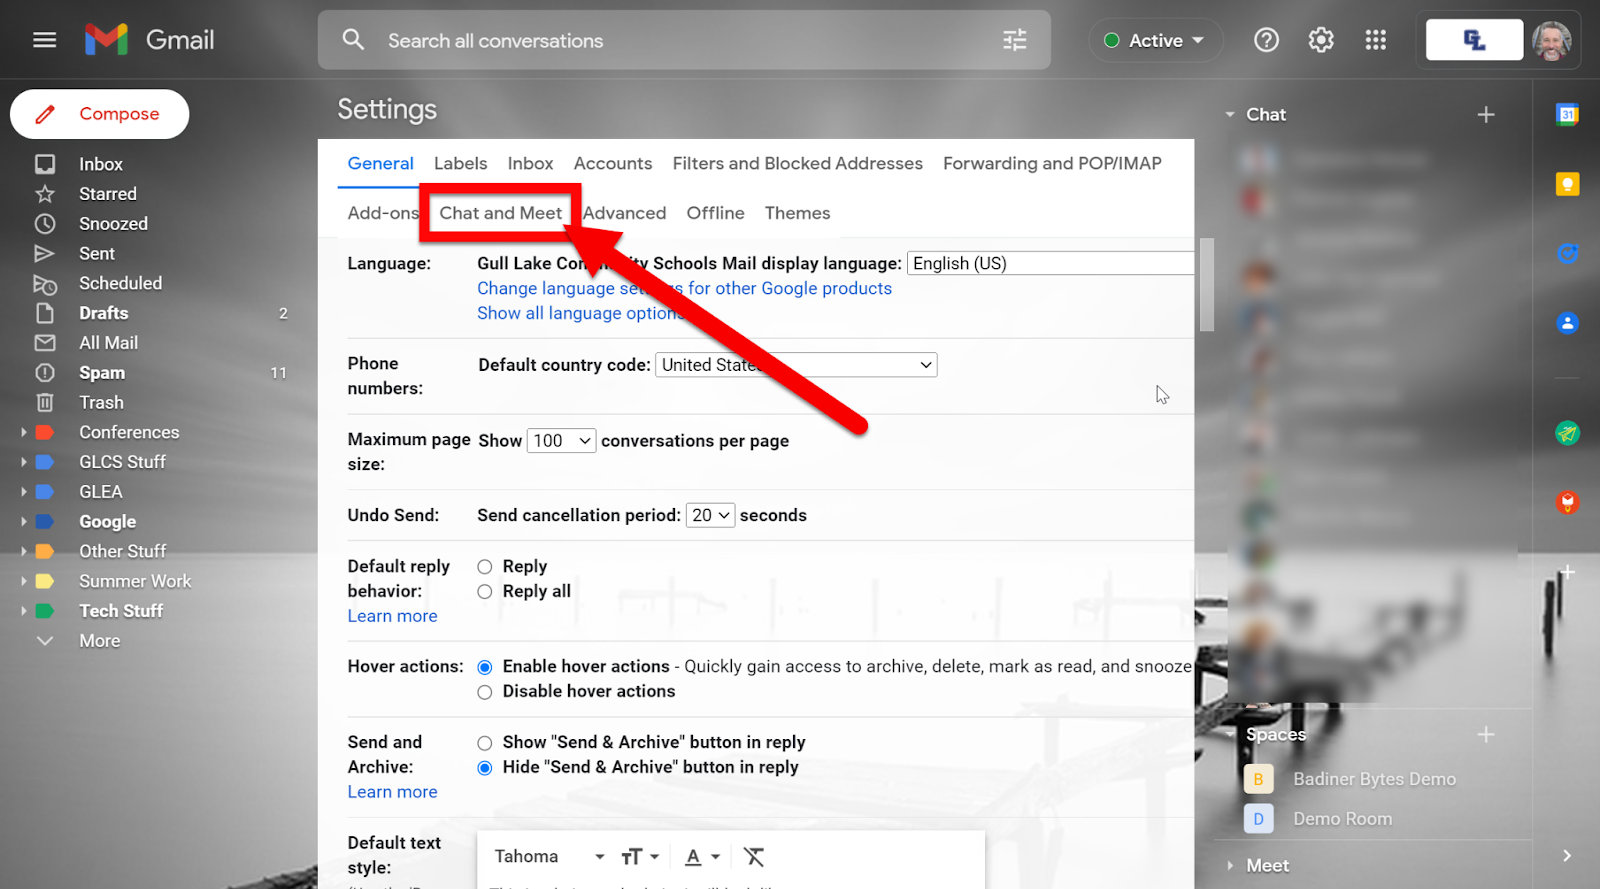
Click on “Chat and Meet”.
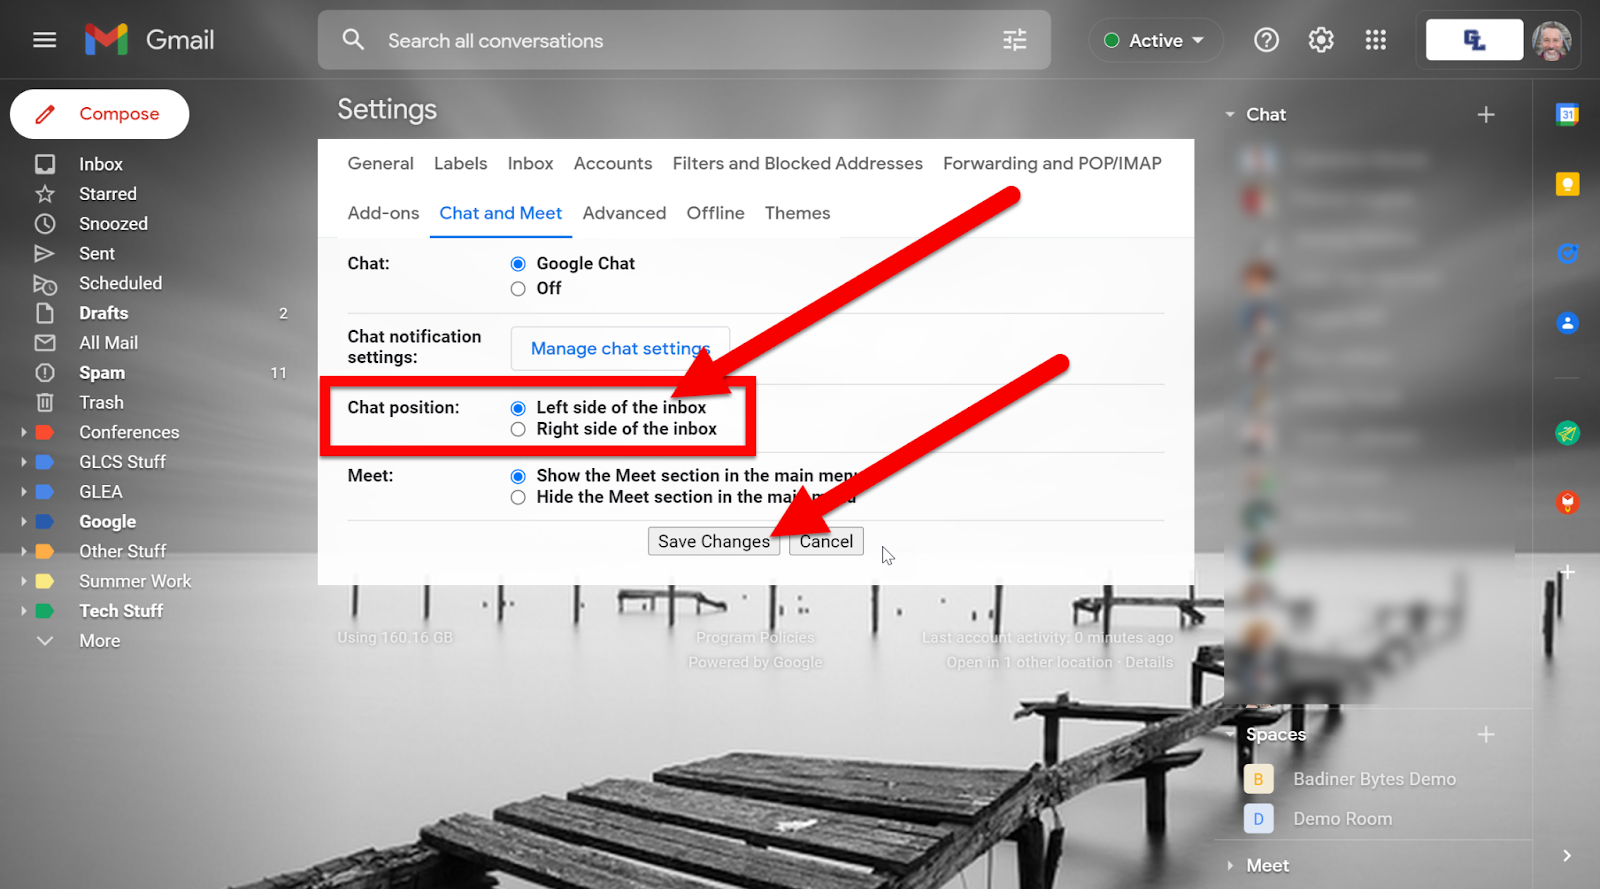
In the “Chat position” option select “Left side of inbox” and click “Save changes” at the bottom.
When you reload the inbox it will show the new Layout.
Navigating Menu:
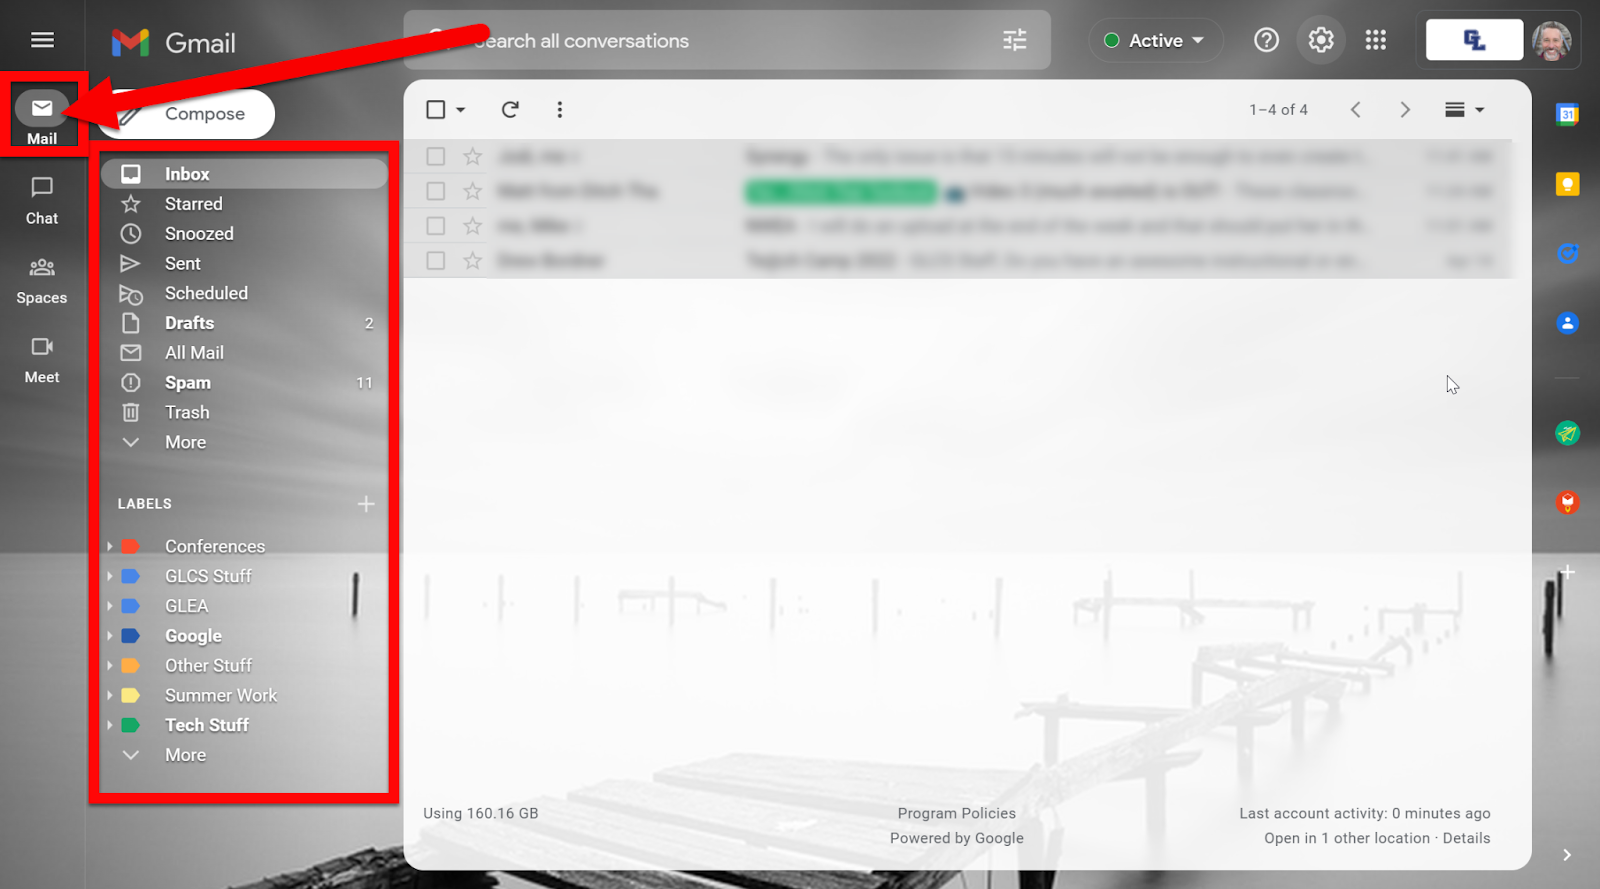
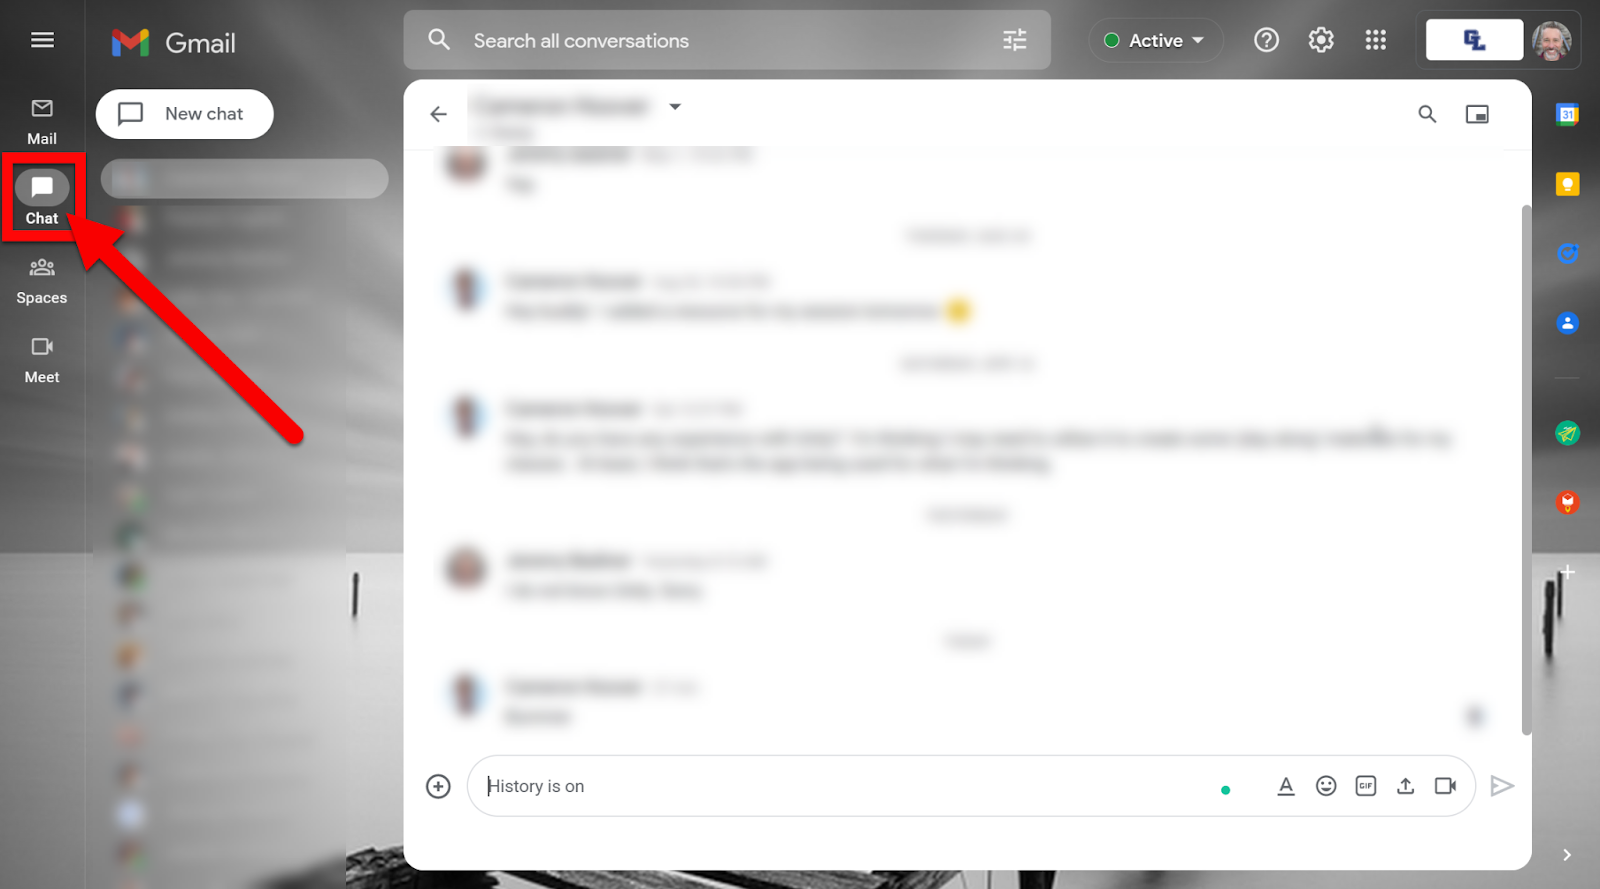
All the Google communication tools are now in your Gmail Inbox (like they are on the Mobile Versions on Android and iOS. You can view:
Mail:See your inbox and Labels.
Chat:View messaging
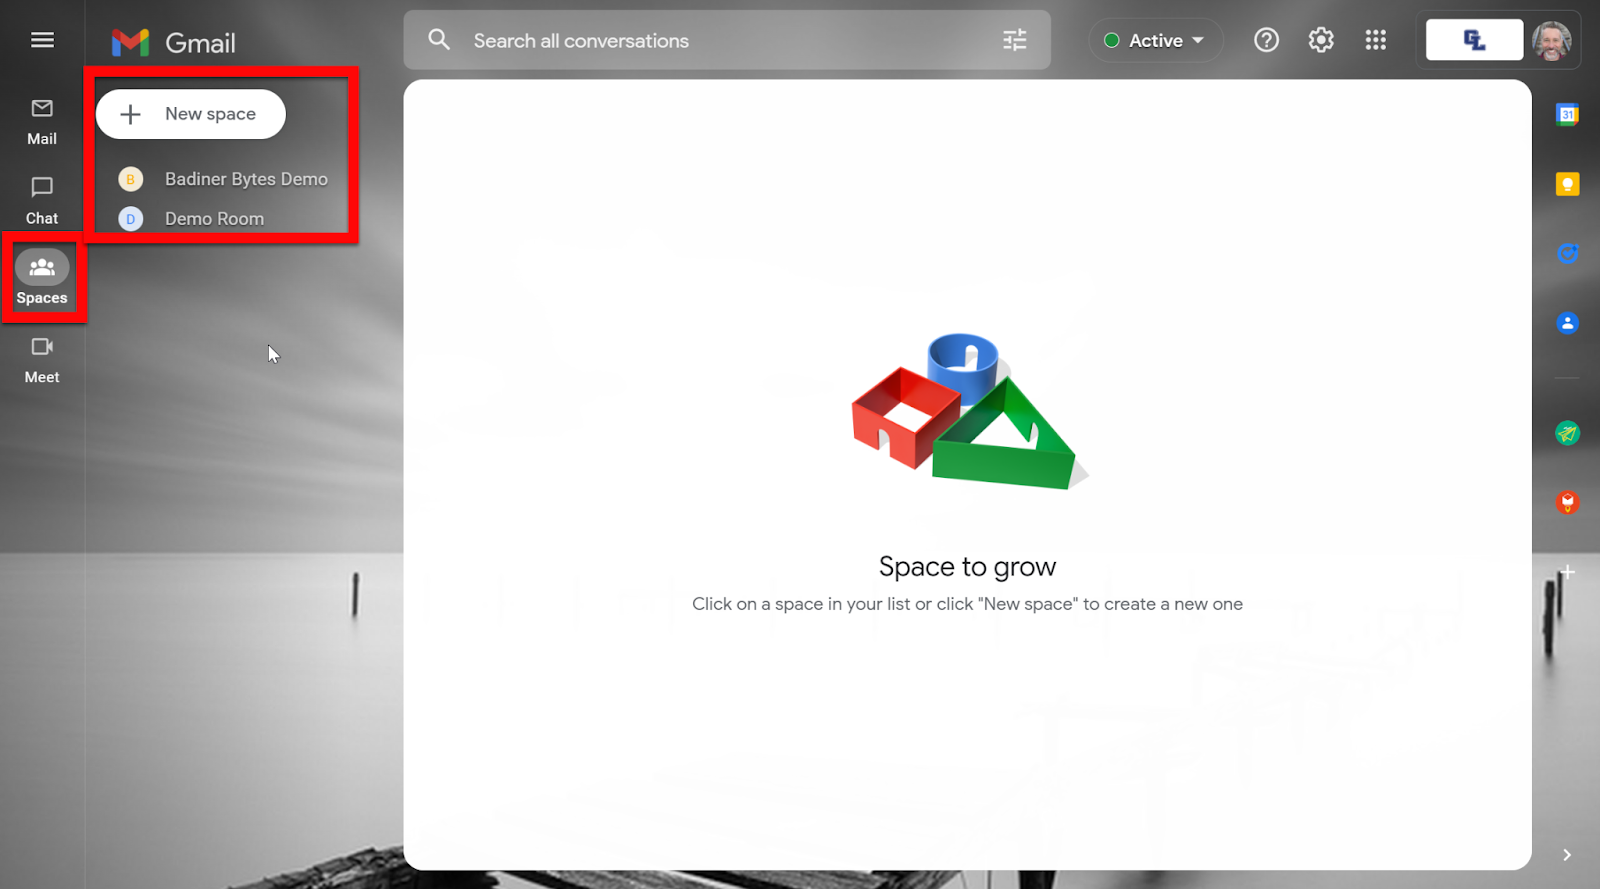
Spaces:See the groups that you are a part of withing Chat
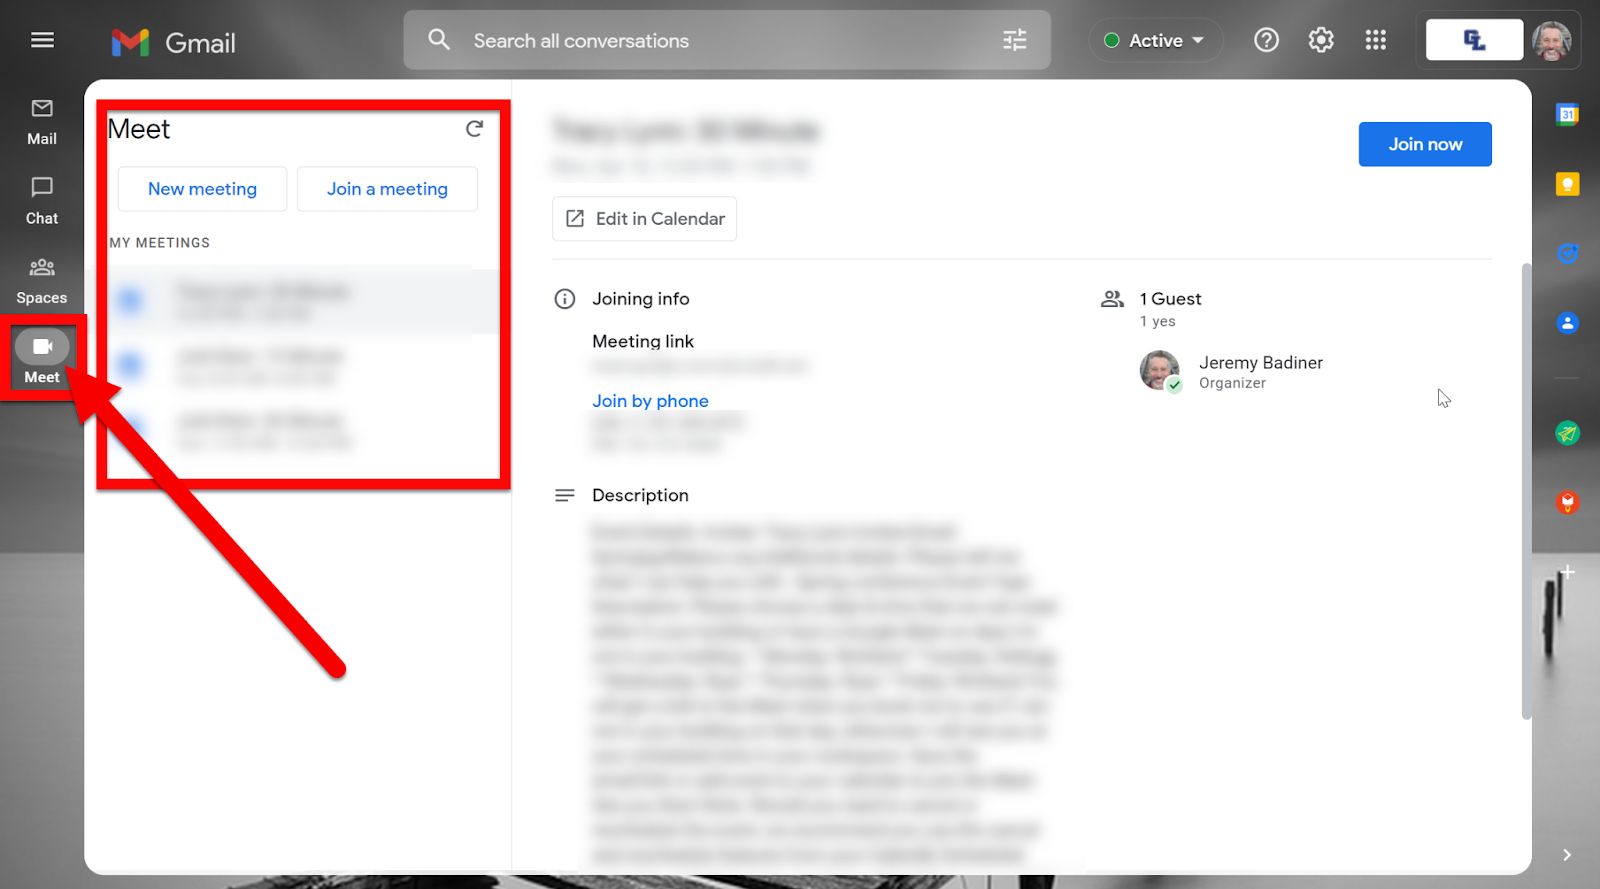
Meet:See, Join, or Create your Meet video calls
Head over to your Gmail inbox and explore the new layout.
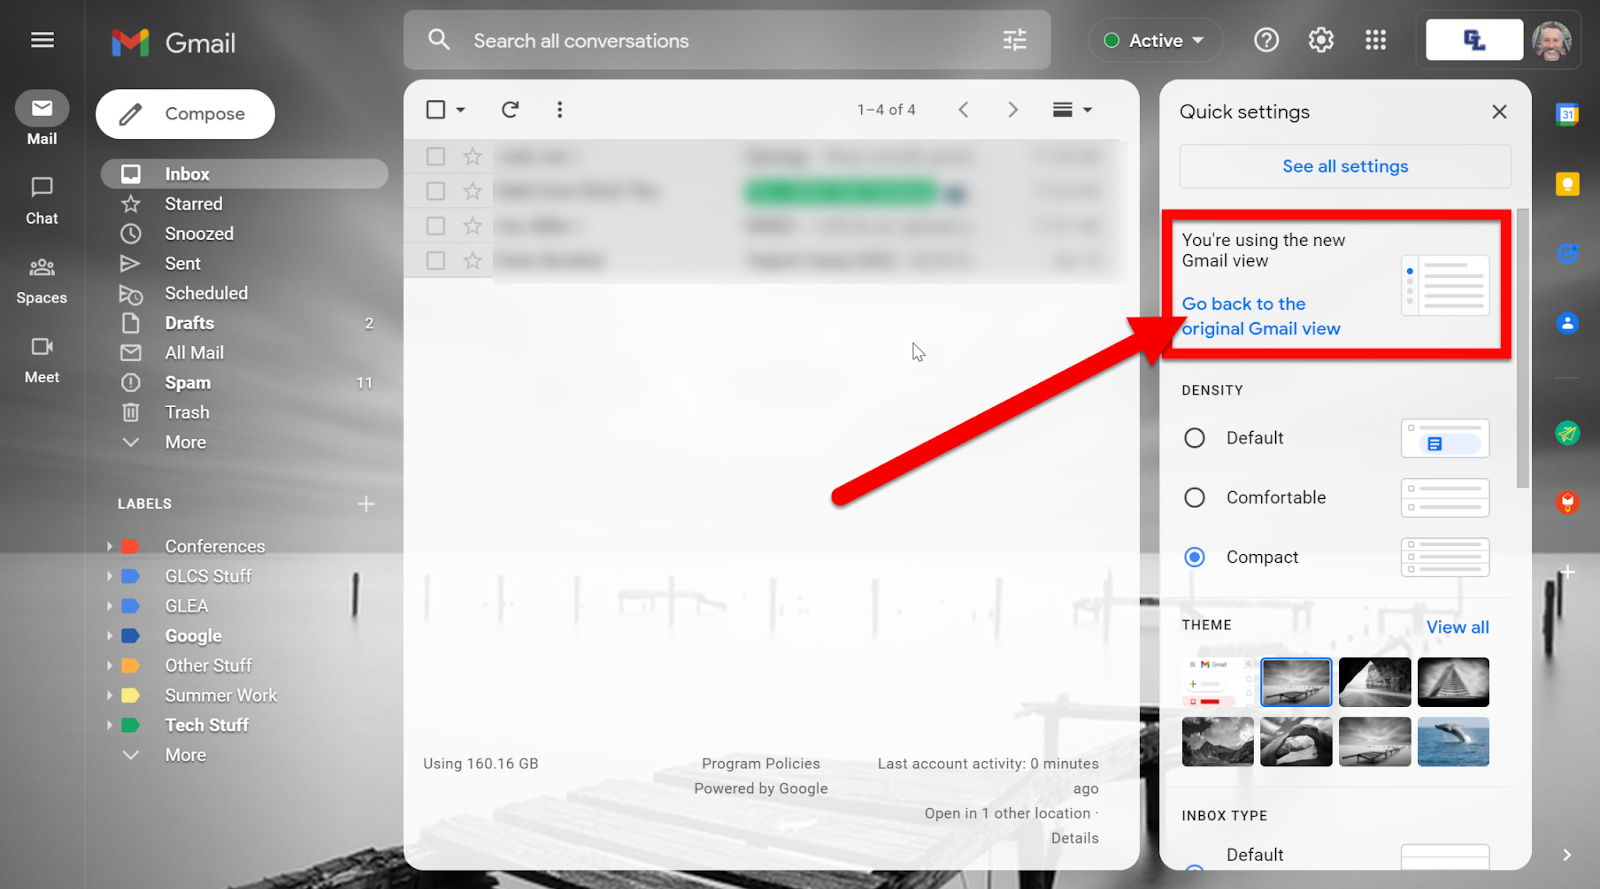
Note: You can always go back to the old layout by clicking on the gear in the top right and choosing “Go back to the original Gmail view”.
If you want these directions in a DOcument click HERE!
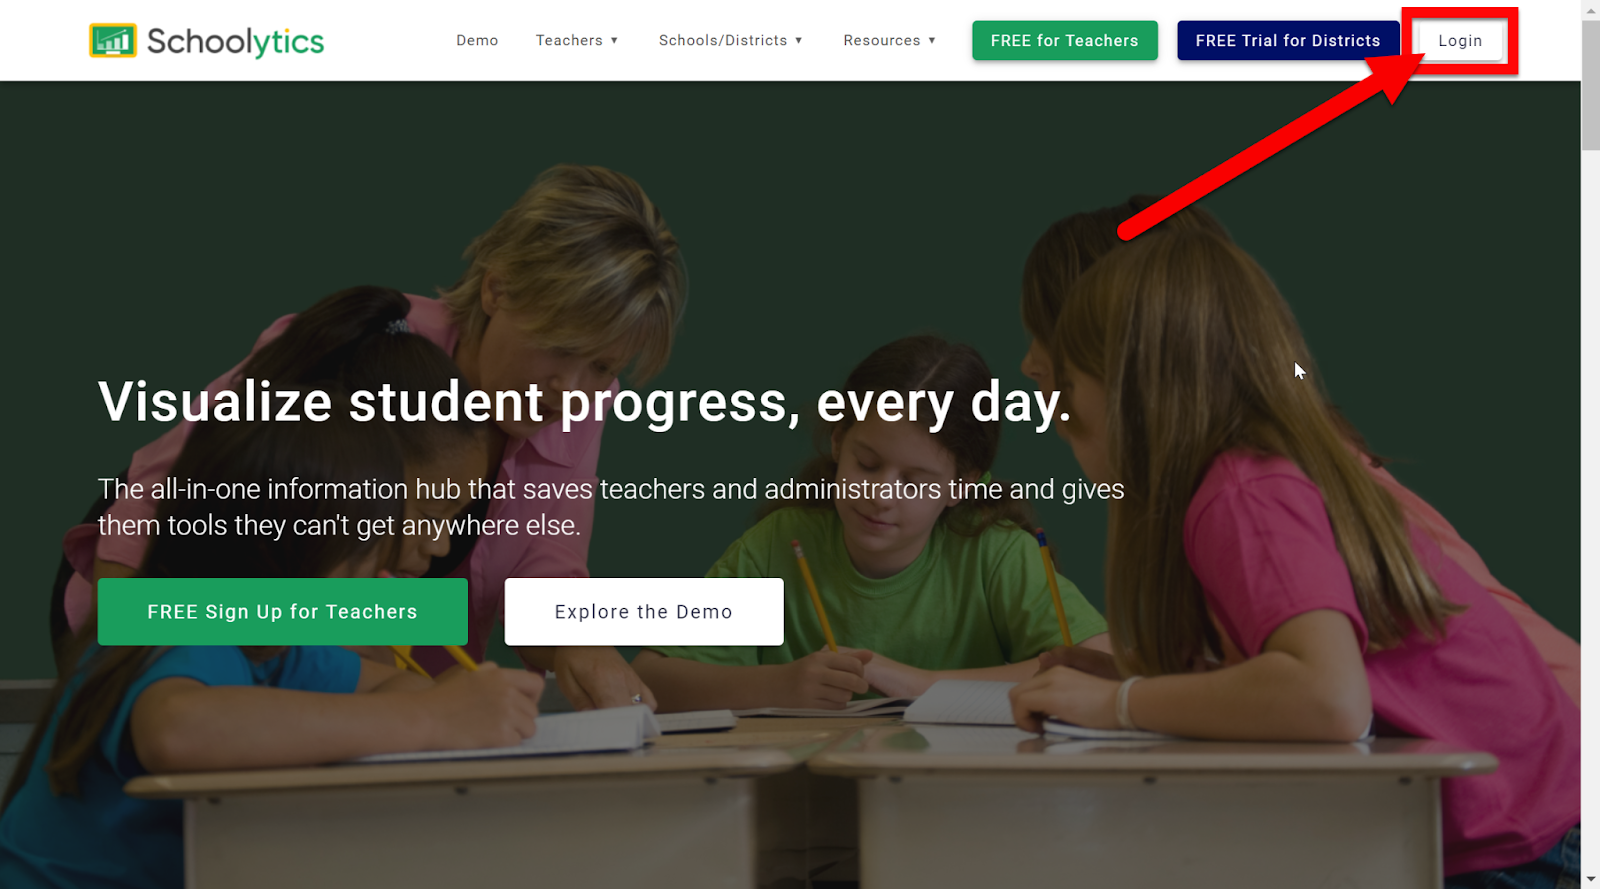
There is no doubt Google Classroom is awesome. Just the ease of creating, sharing, and assigning Drive files to students is worth the setup. There is an add-on (yep, it is even FREE) that will add superpowers to your Classroom. With Schoolytics you can see all your students’ data in one place, drill-down and see all the data on individual students, create Progress Reports, track assignments, manage missing work, create student groups, quickly search for previous assignments to reuse, and much more…and Schoolytics can do all this for 1 student, 1 Classroom, or even ALL your students or ALL your Classrooms! It is a “one-stop-shop” for all your Google Classroom needs! Check it out, it is FREE (the free version allows teachers to manage up to 10 Classrooms at a time…more than enough for any teacher).
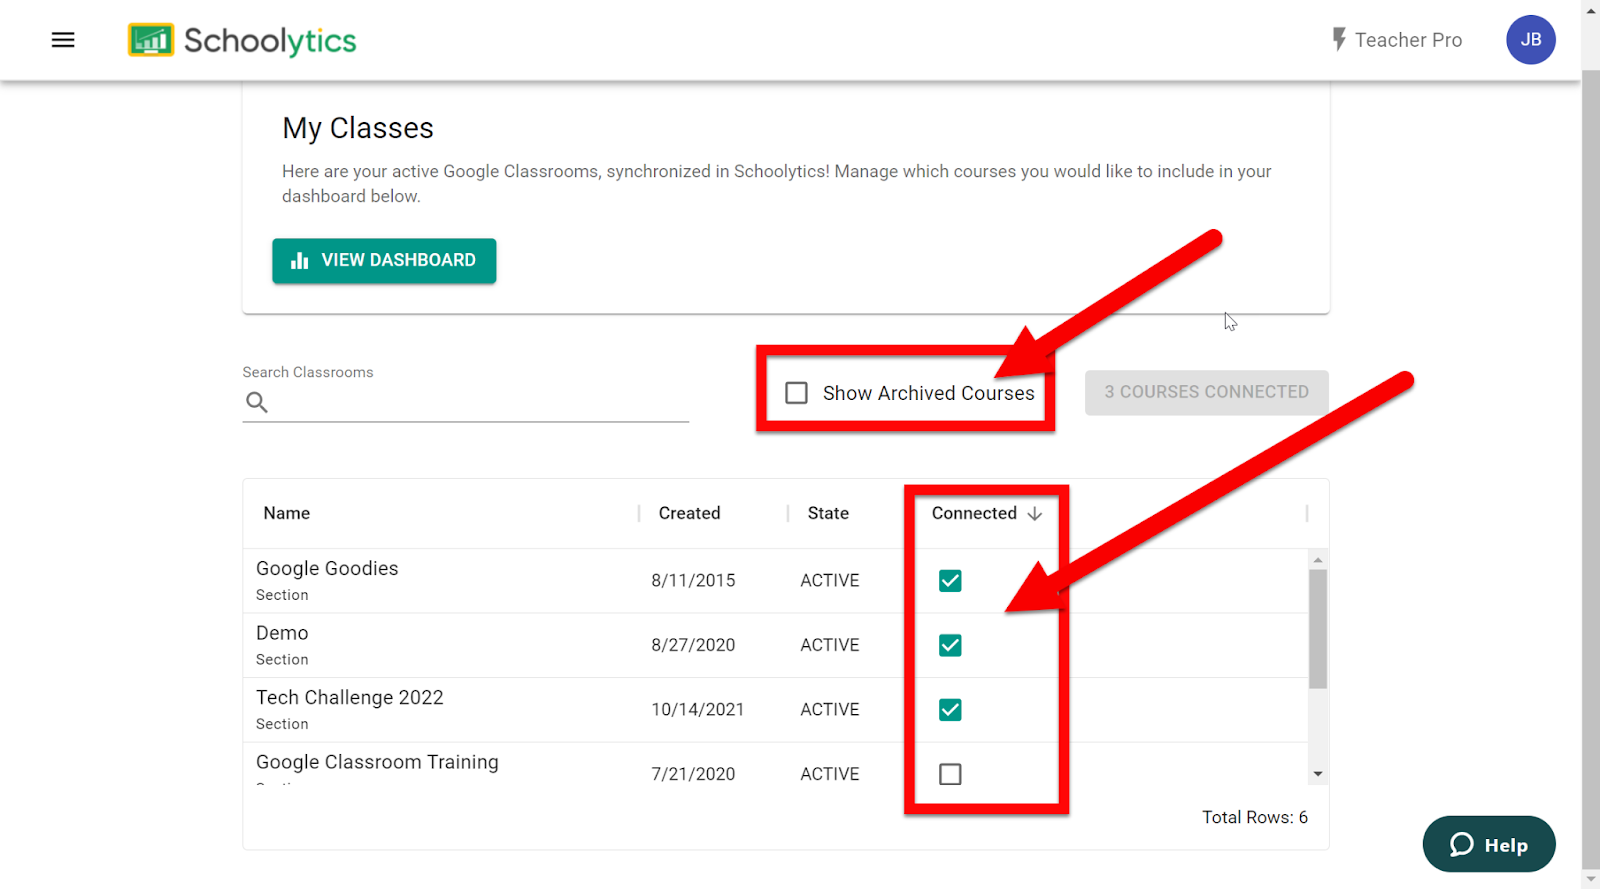
Select the Google Classrooms you would like to be able to collect, track, and use data from (you can add/remove any of these Classrooms at any time). You can even include previously achieved Classrooms if you wish, just keep the list to 10 or fewer Classrooms for free.
Using the Filters:
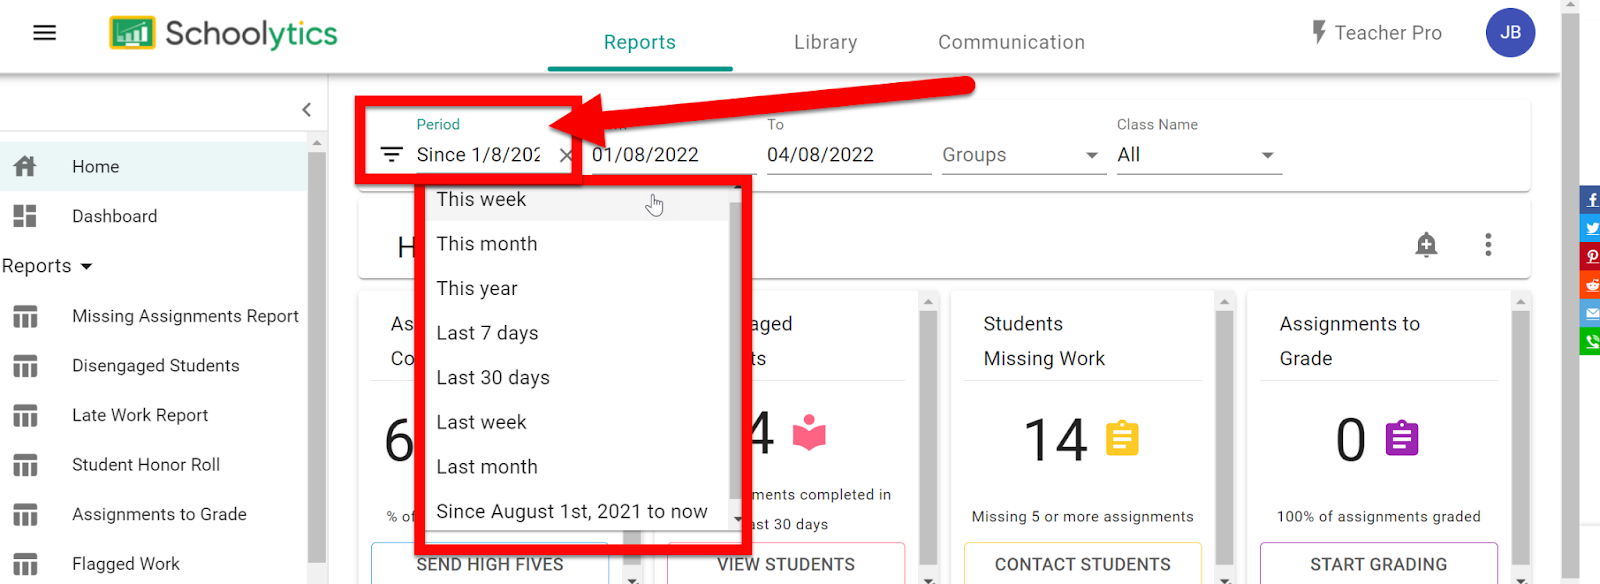
At the top of the page are always the filters to control what data you are viewing.
Period: choose overall time frame are you want to view
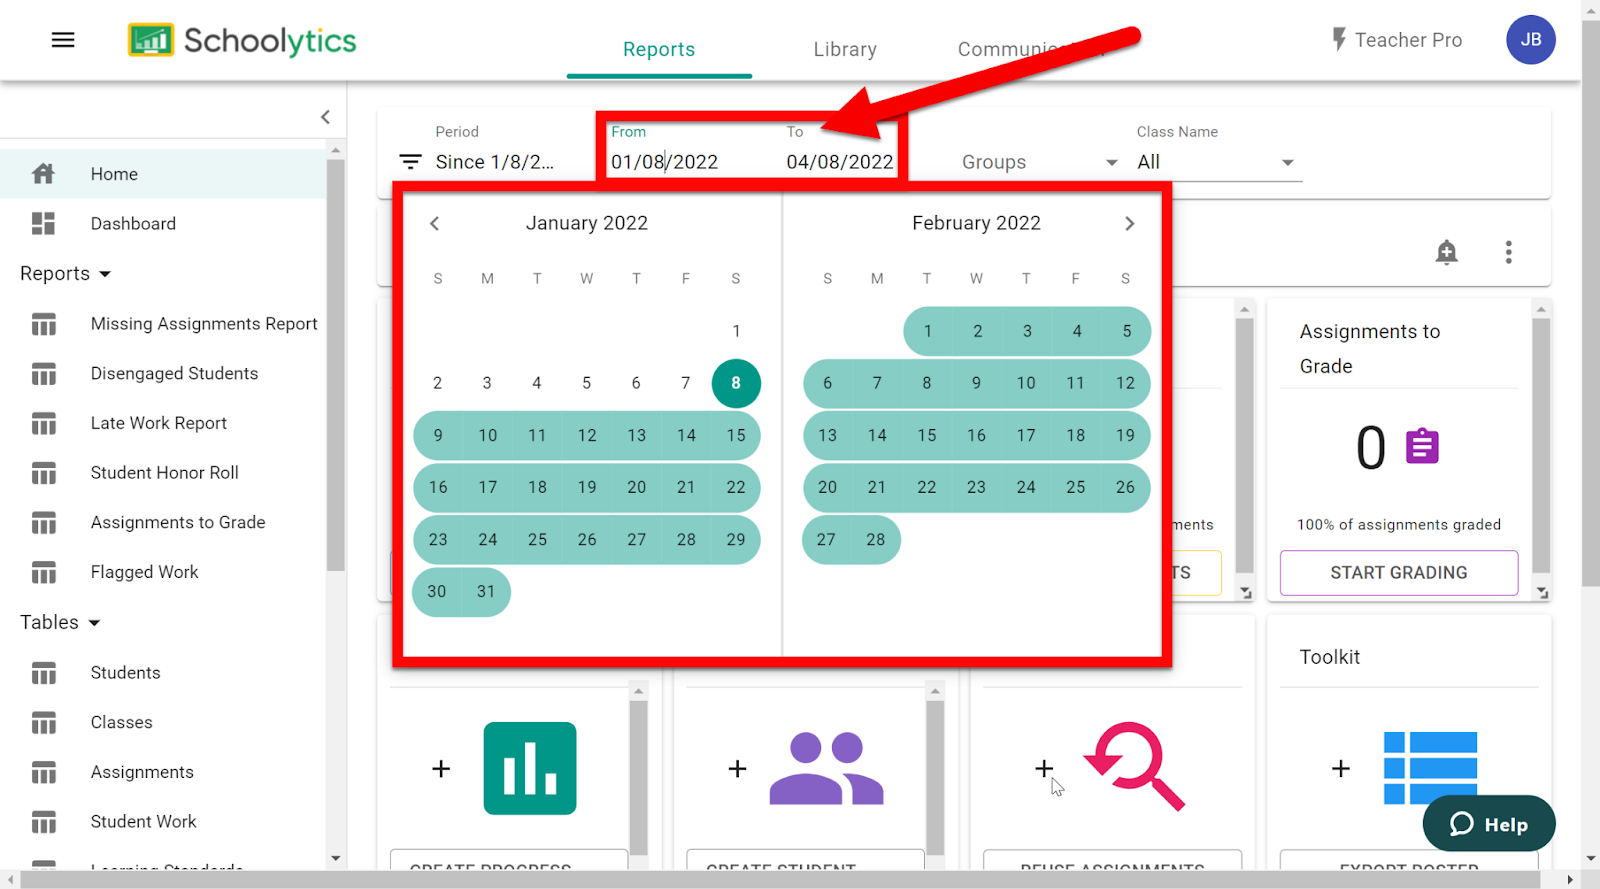
Dates: choose specific dates to see data from
Groups: set up custom groups of students to track
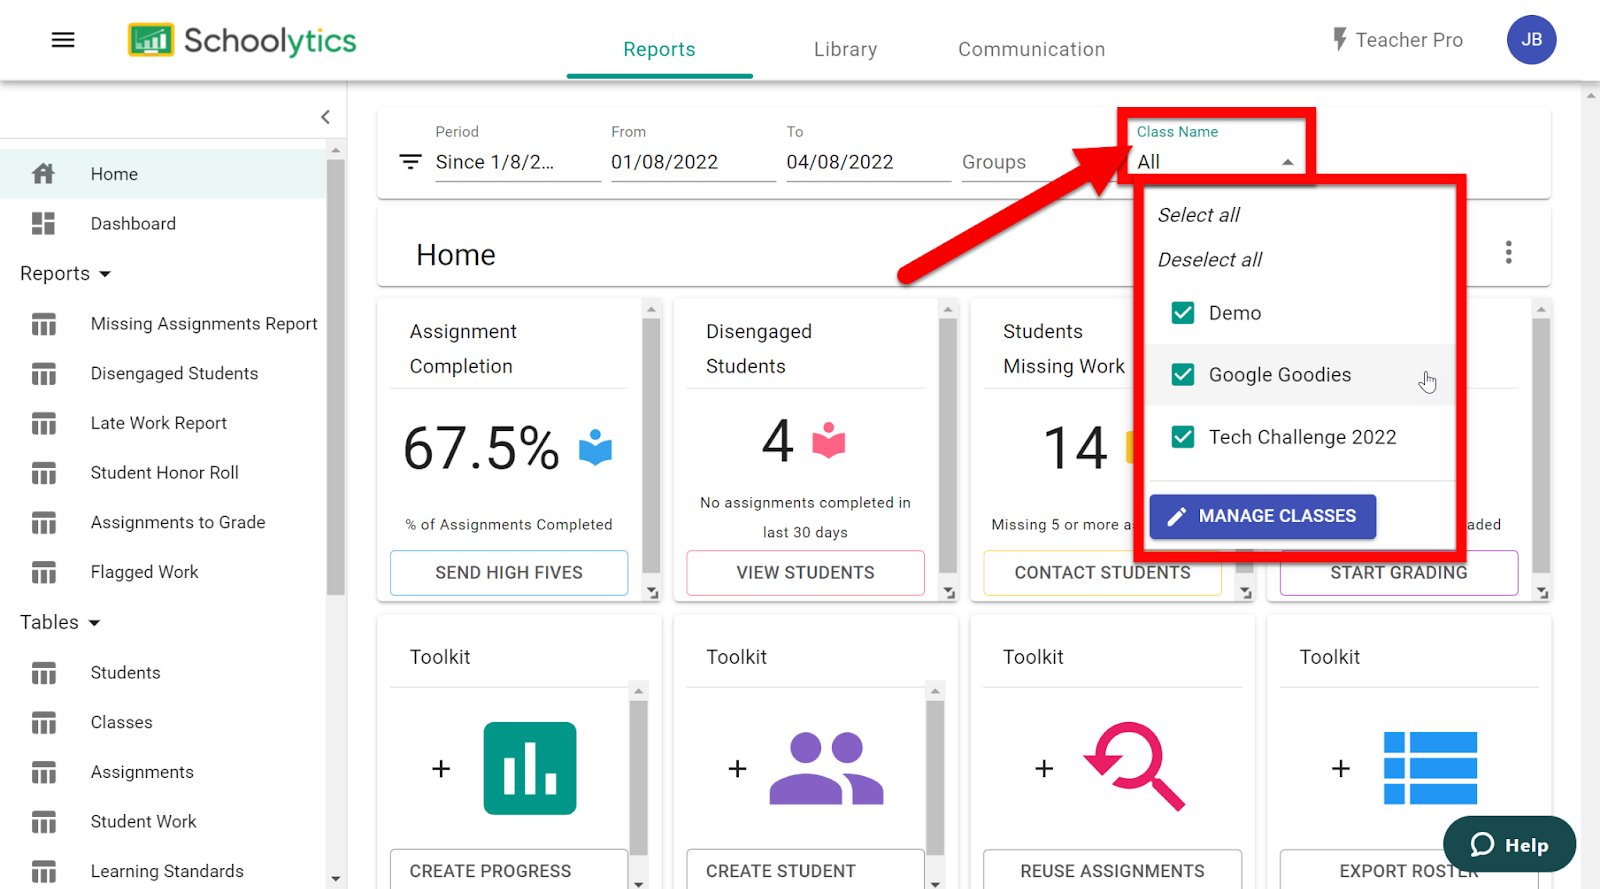
Class Name: choose Classrooms do you want to view data from
Progress Reports:
This might be the coolest part. You can create Progress Reports (as a PDF or an editable and shareable Google Document). These are really cool!
On the Home page click on “Progress Report”.
Adjust the filters to what you want to view data.
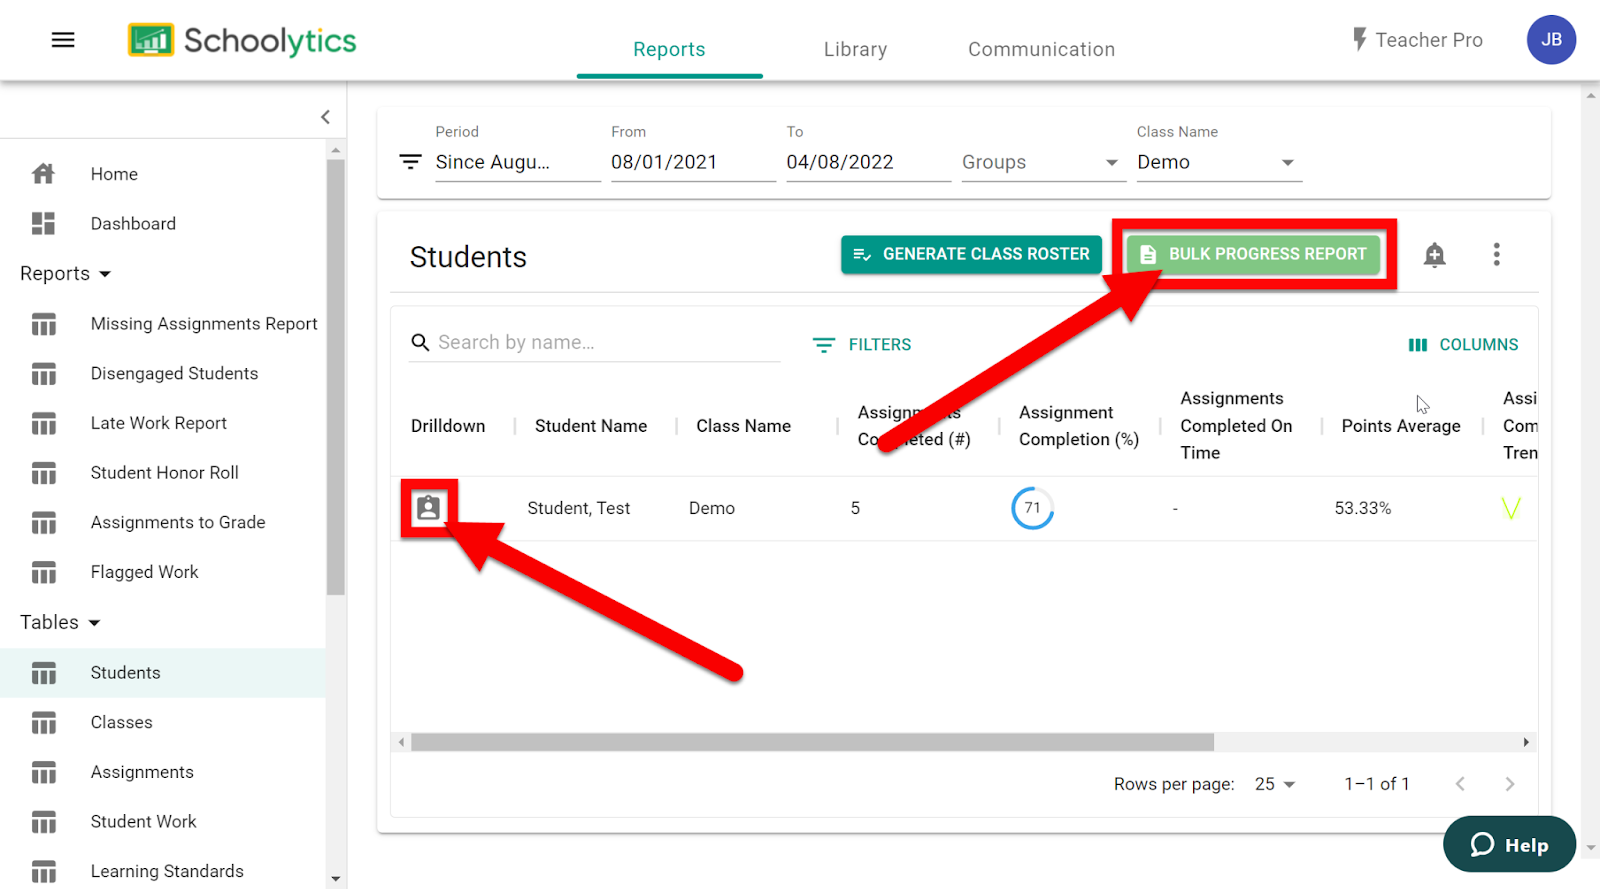
If you want Progress Reports for the whole class click “Bulk Progress Report”. If you want it on just one student click the icon to the left of their name.
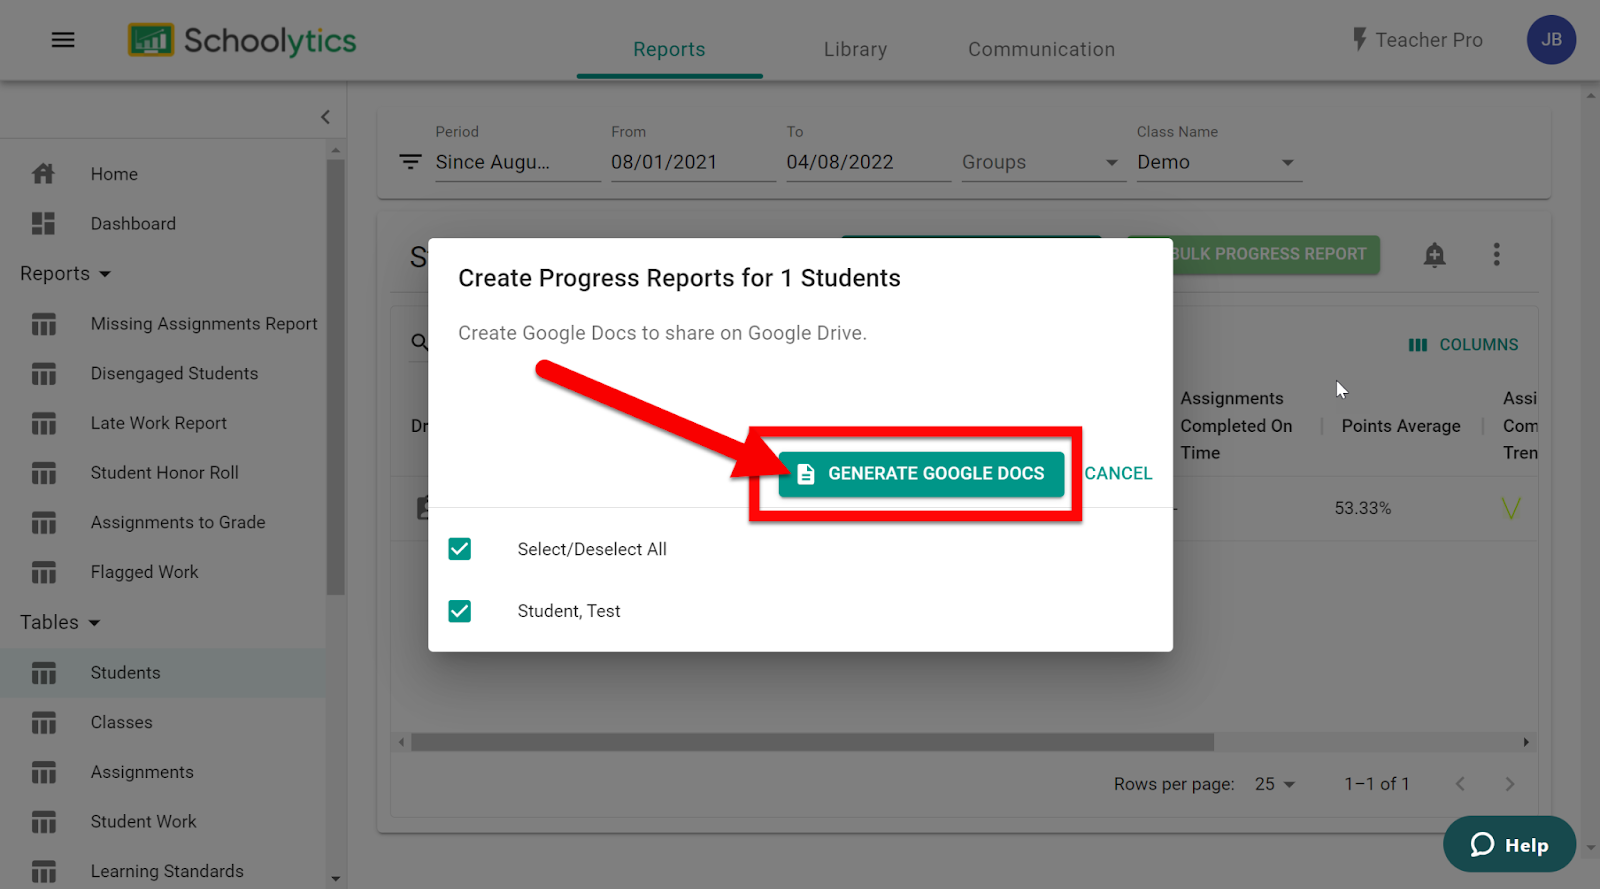
Whole Class:
Click “Generate Google Docs”. (You can also unselect any student to not run a report.)
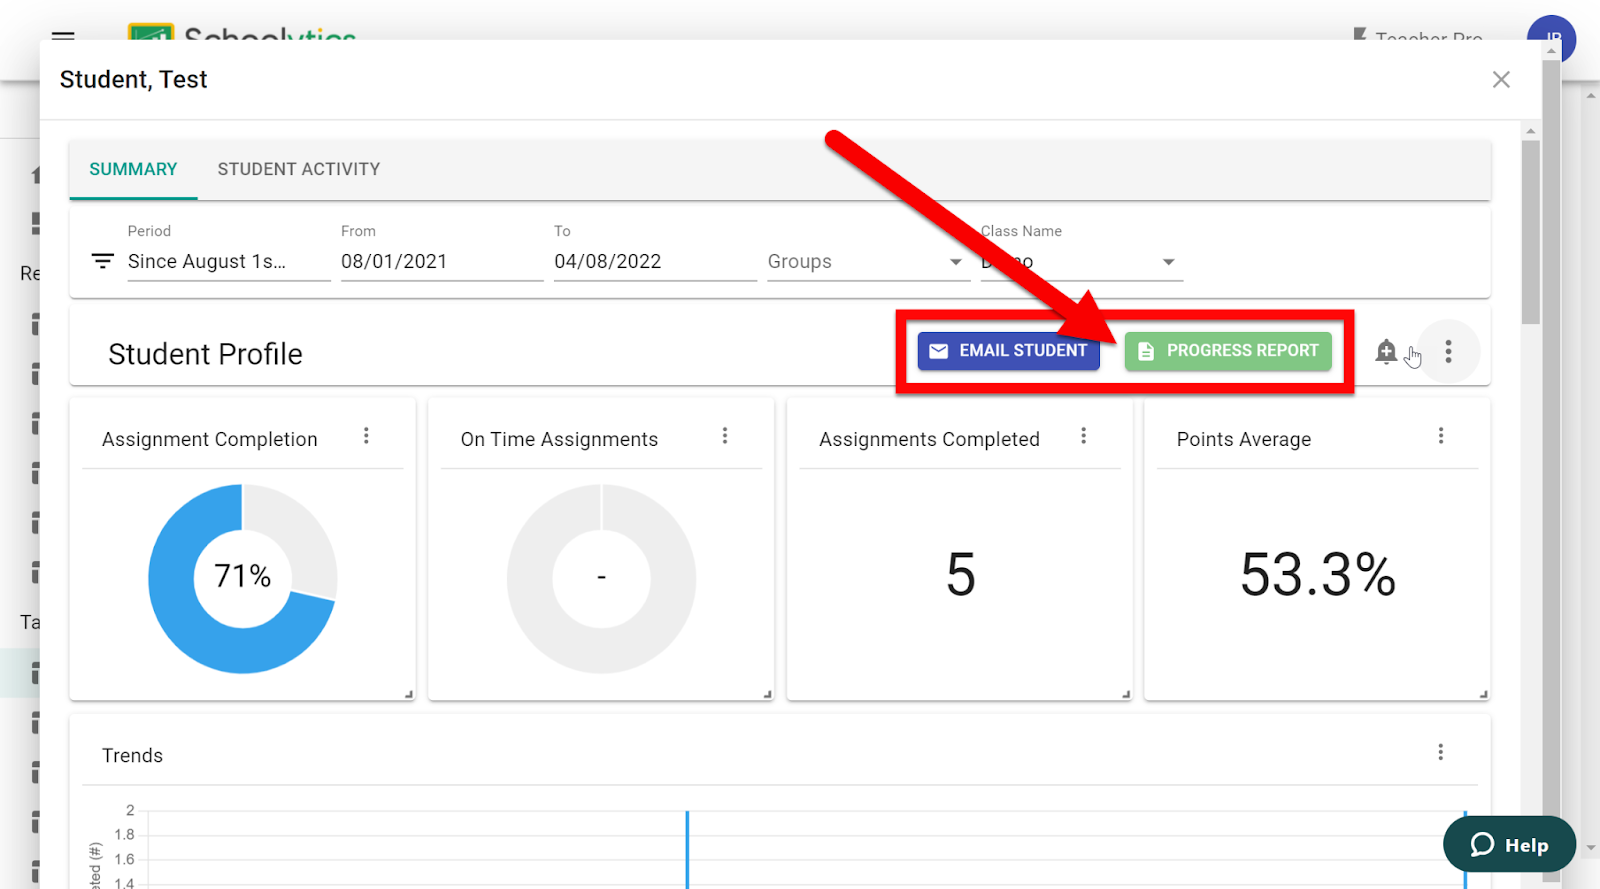
Individual Student:
You can click “Email Student” to send an email to this student or “Progress Report” to create a report.
You have the option to create a PDF or an editable Google Document of this report.
You will find your created Progress Reports in your Drive.
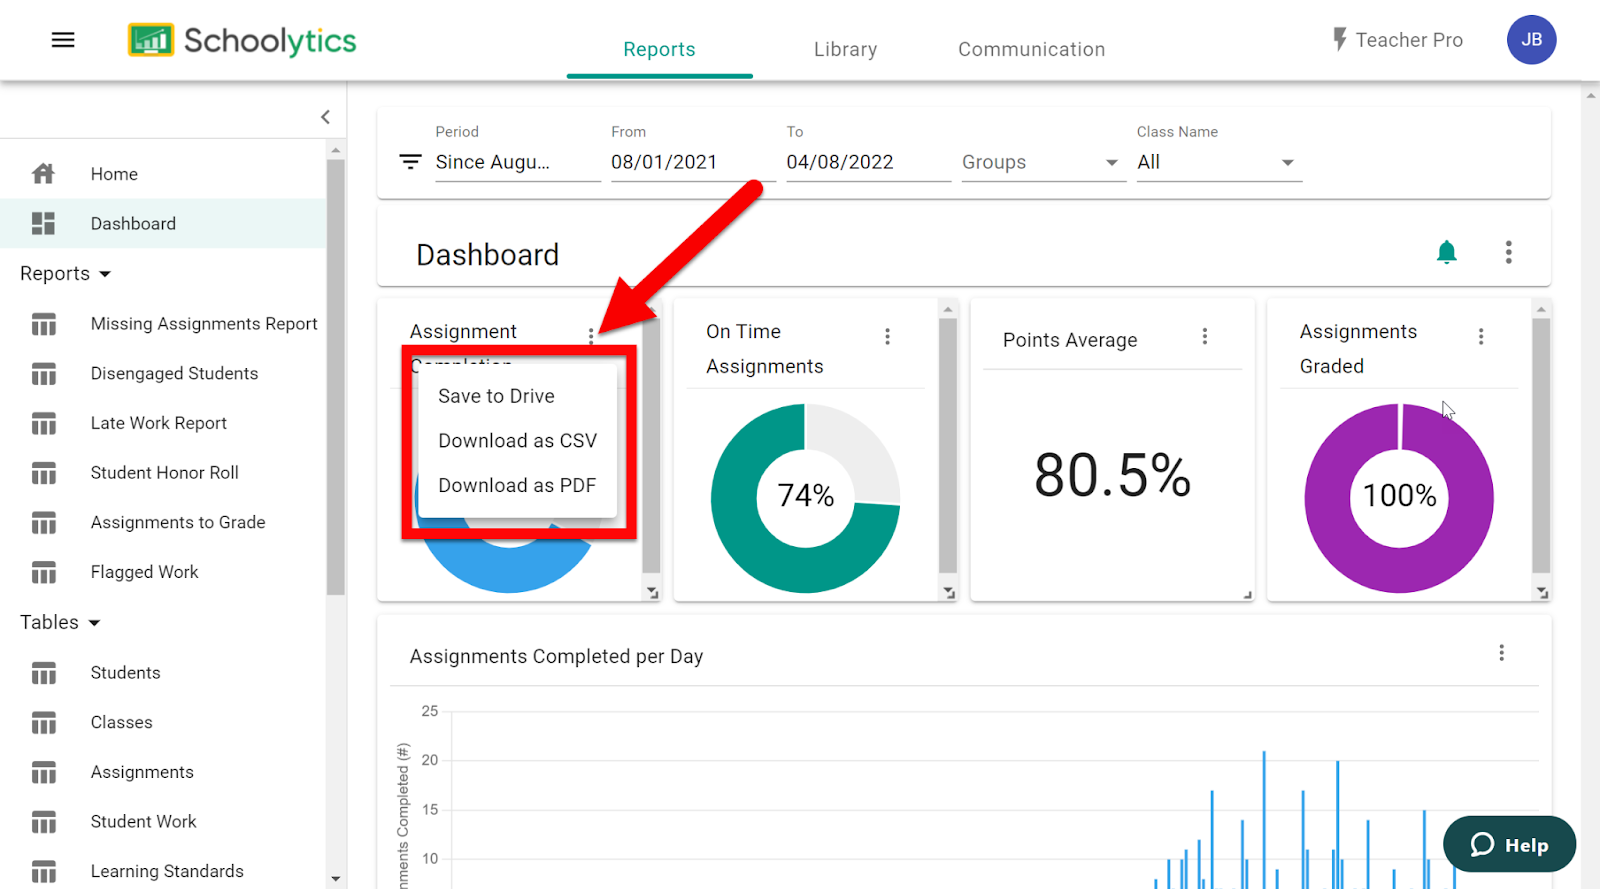
Overall Student Performance (At a Glance):
Click on “Dashboard” on the left and adjust the filters to show data for your desired Classrooms and dates.
You will see data on:
Assignment Completion
On Time Assignments
Points Average
Assignments Graded
Assignments Completed per Day
Specific data on included Classrooms
By clicking on the 3 dots to the right of any of these you can save to Drive, as a CSV, or a PDF.
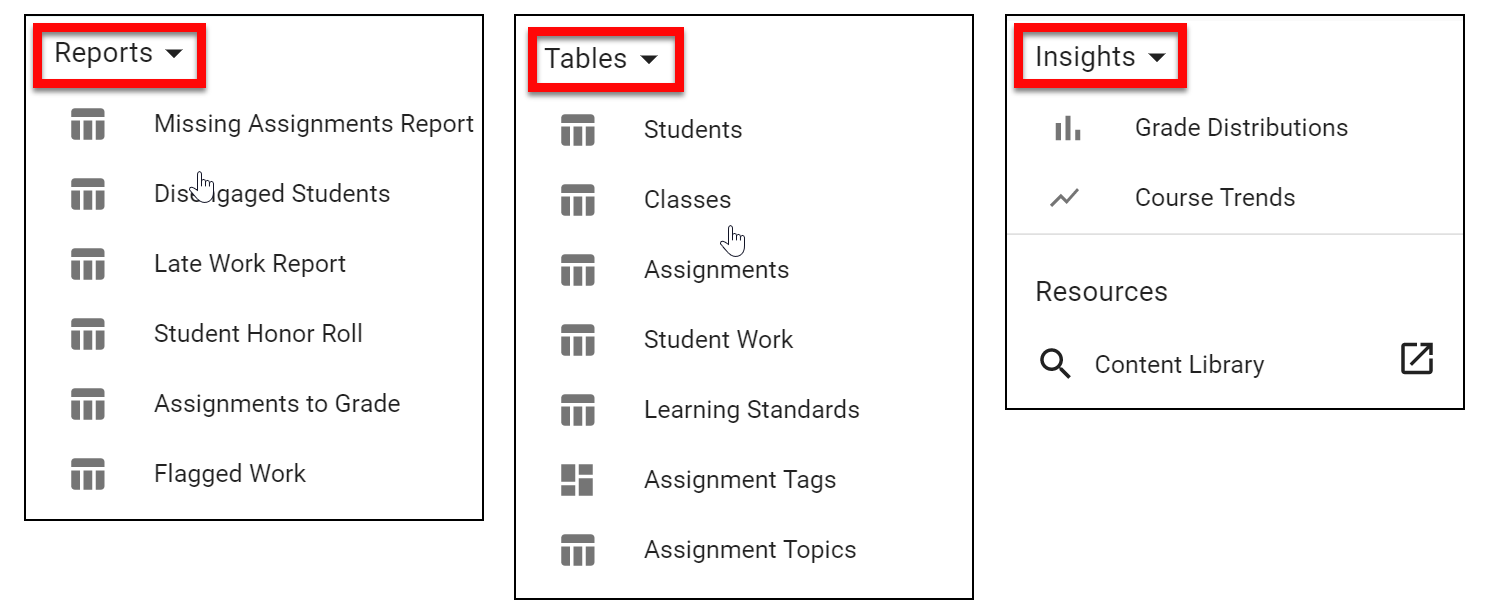
Other Features/Reports:
There are other features available as well.
Take a look at the left side and you will see other Reports, Tables, and Insights that are available.
Reusing Assignments:
Even though you can reuse assignments within Google Classroom, there is no way to easily search and find them. With Shoolytics you can search by assignment name from any connected Classroom!
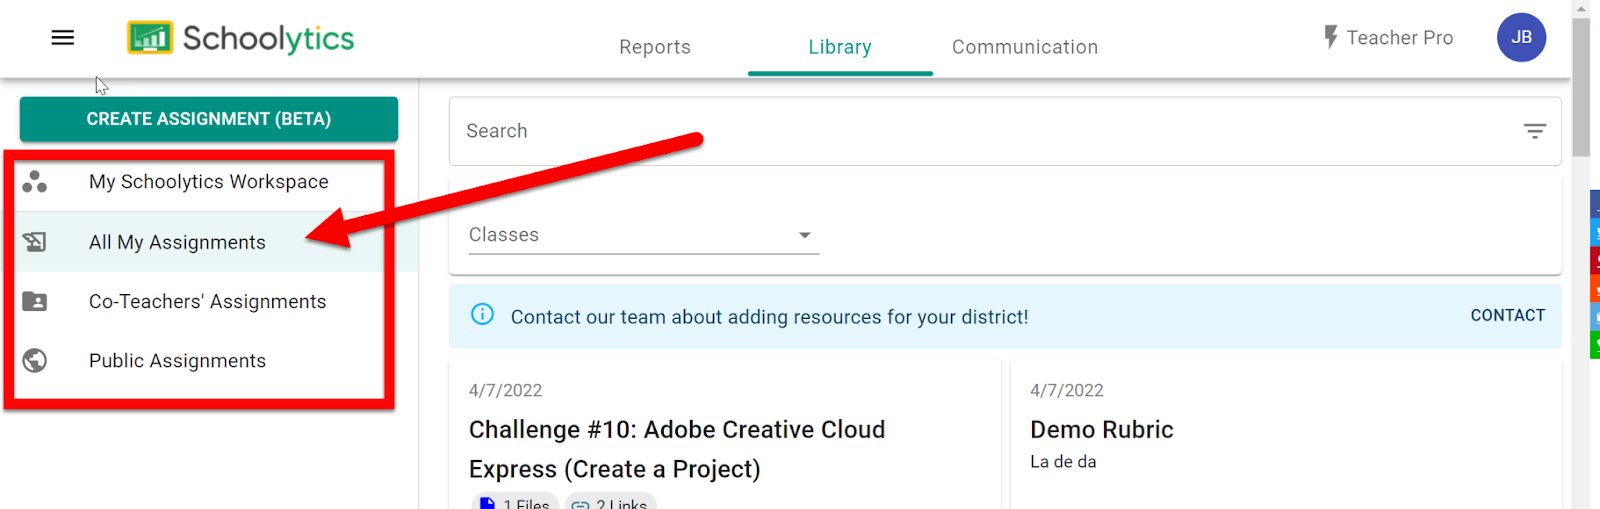
On the top click on “Library” or on the far left bottom click “Content Library”.
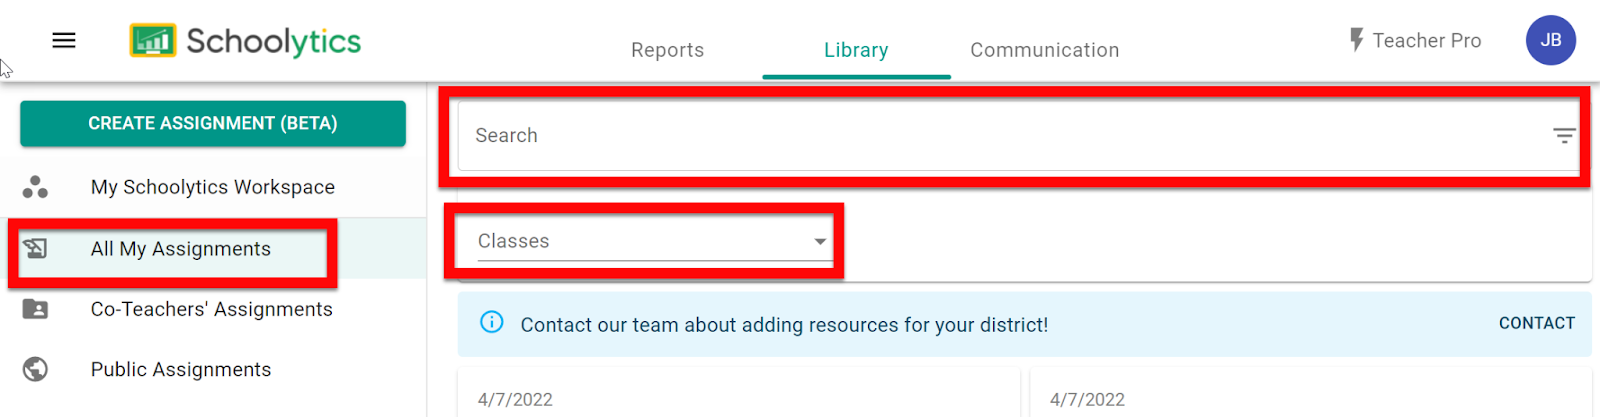
Click on the left side to choose where your assignments are located, usually “All My Assignments”.
My Schoolytics Workspace:paid version and will be District shared assignments
All My Assignments:listing of all the assignments you have from your included Classrooms
Co-Teachers’ Assignments:assignments from Co-Teaching Classrooms
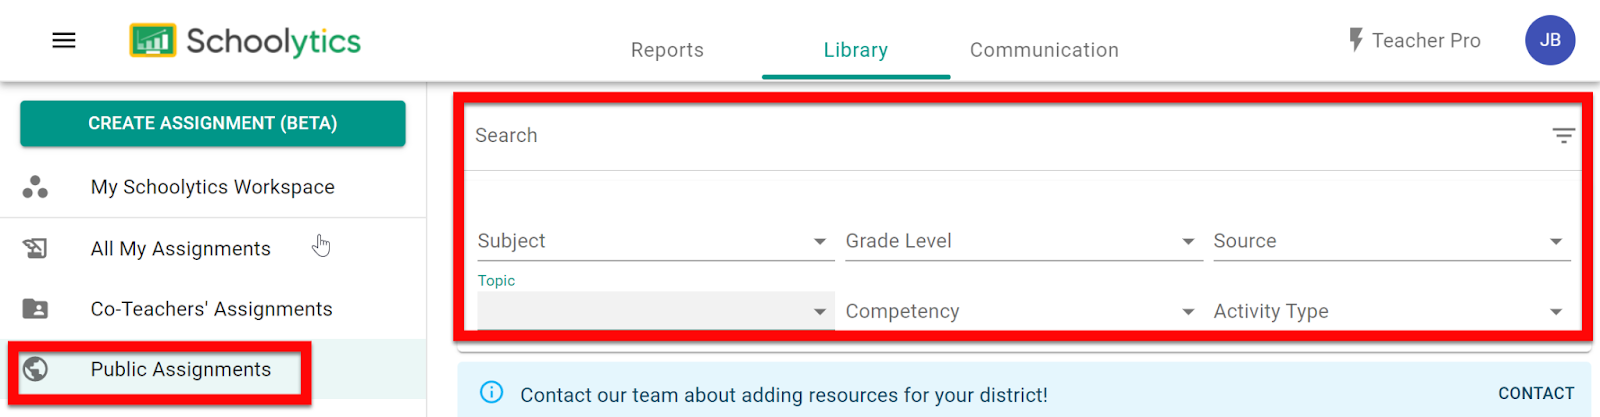
Public Assignments:other Schoolytics teachers who share their assignments
Use the Search box to easily find your past assignments from your own Classrooms.
If you are in the Public Assignments, there are filters to sort by Subject, Grade Level, Source, Topic, Competency, and Activity Type.
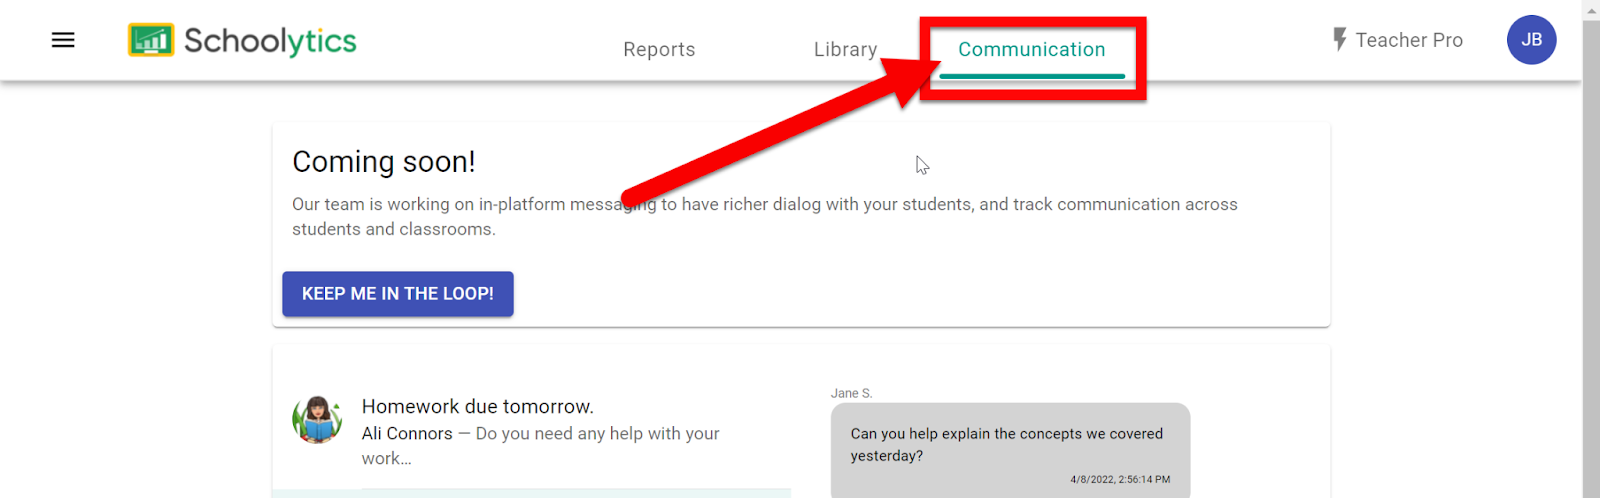
Communication Tools are Coming Soon!
Head over to Schoolytics and start digging into your Google Classroom Data!
I live by my favorite video editing software Camtasia. It is a great piece of software, but it is something I paid for in order to do complex video editing. Classroom teachers (and students) don’t have the need (or finances) to pay for expensive tools. Good thing Microsoft has one to use for FREE! It is not nearly as powerful as iMovie or other paid tools, but it does plenty to get you creating, editing, and making awesome videos!
Create a Video:
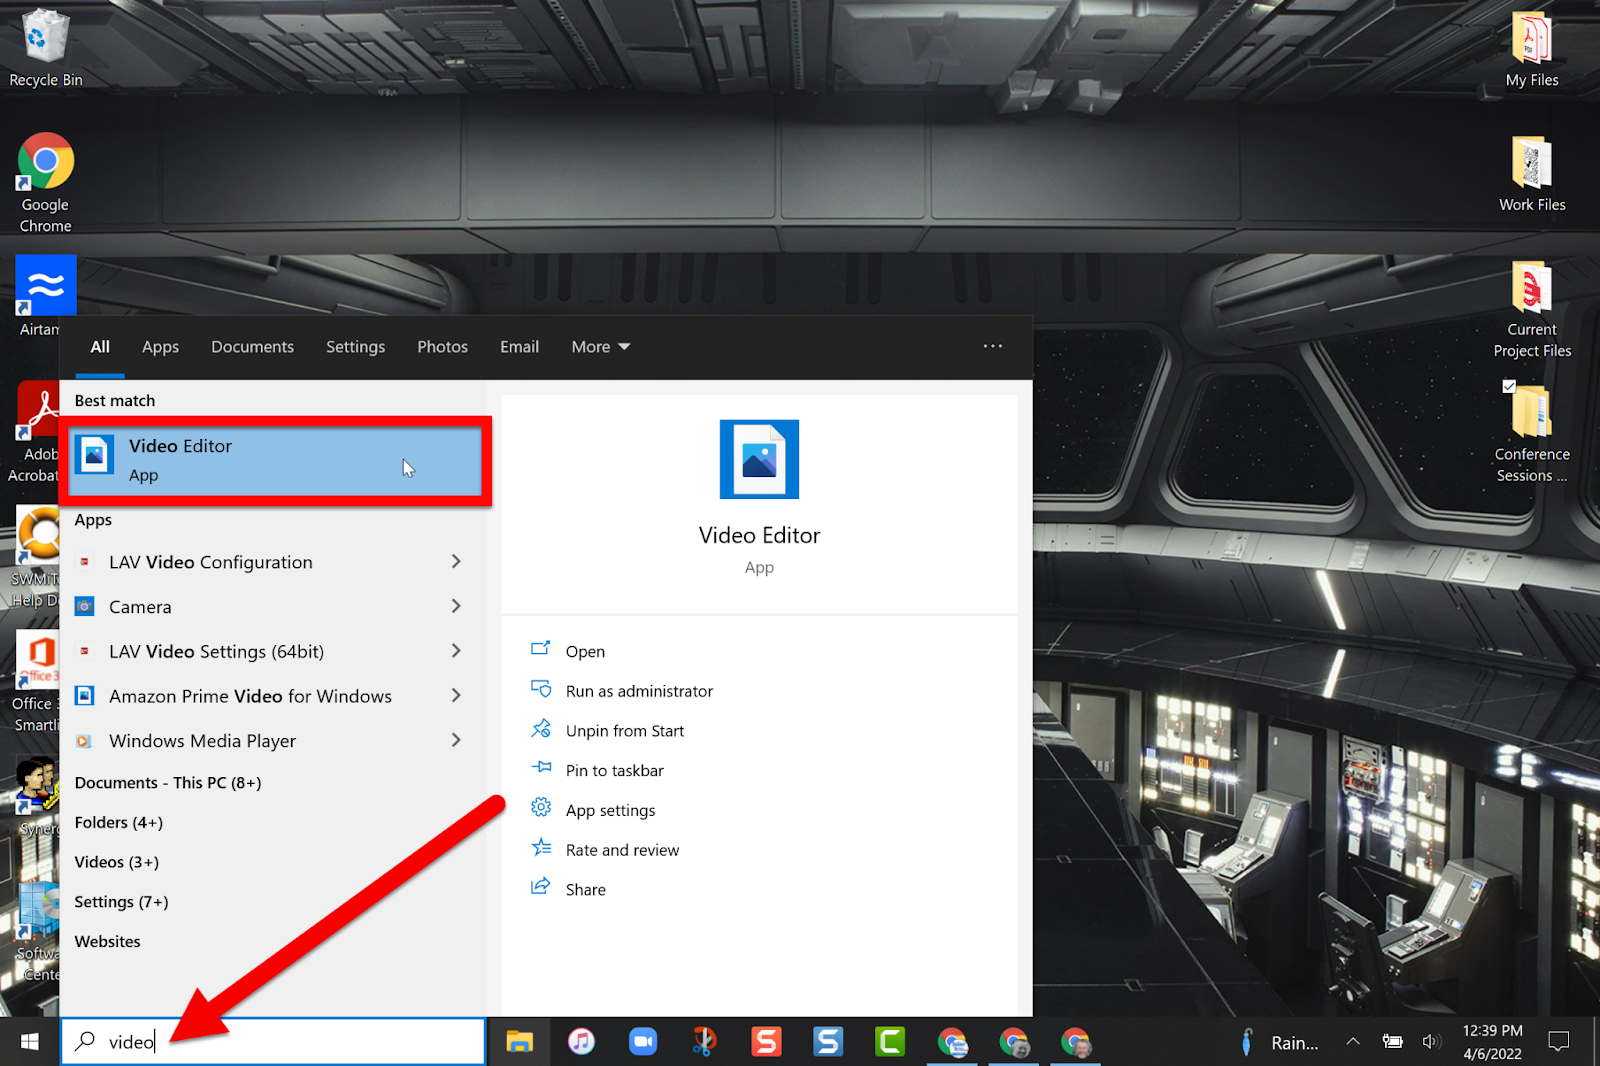
In the search bar at the bottom left type in “Video”. Then click on the Video Editor app.
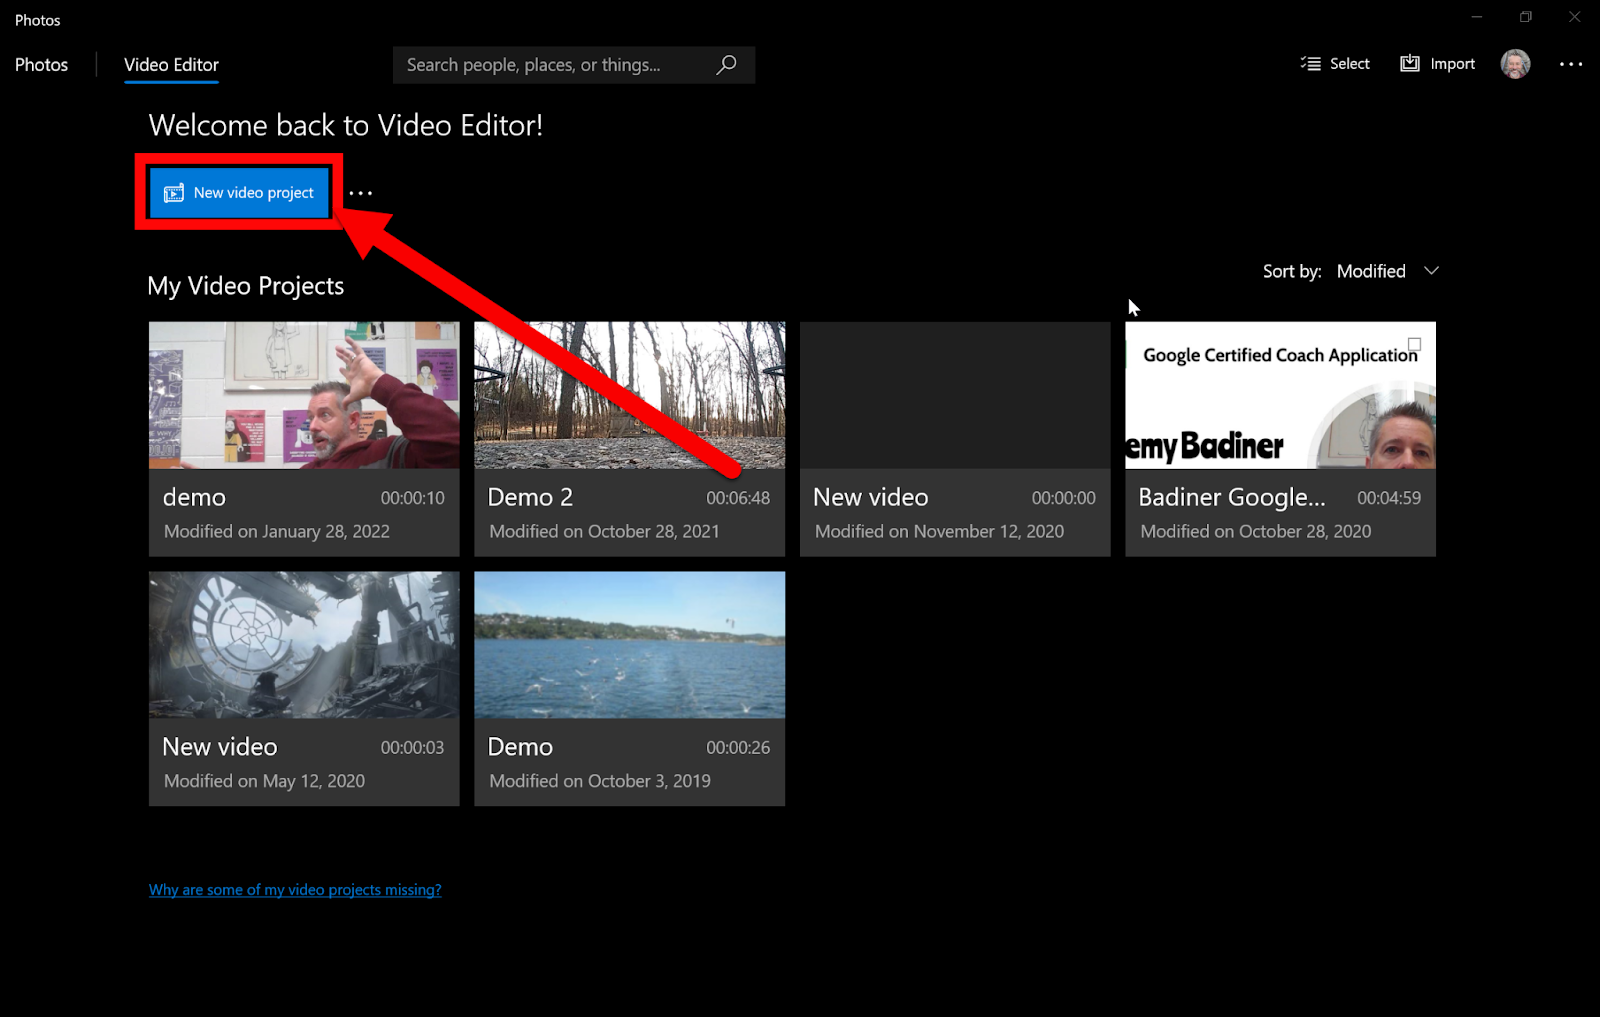
If you have never used this you will not have any projects listed. Click on the “New video project” button.
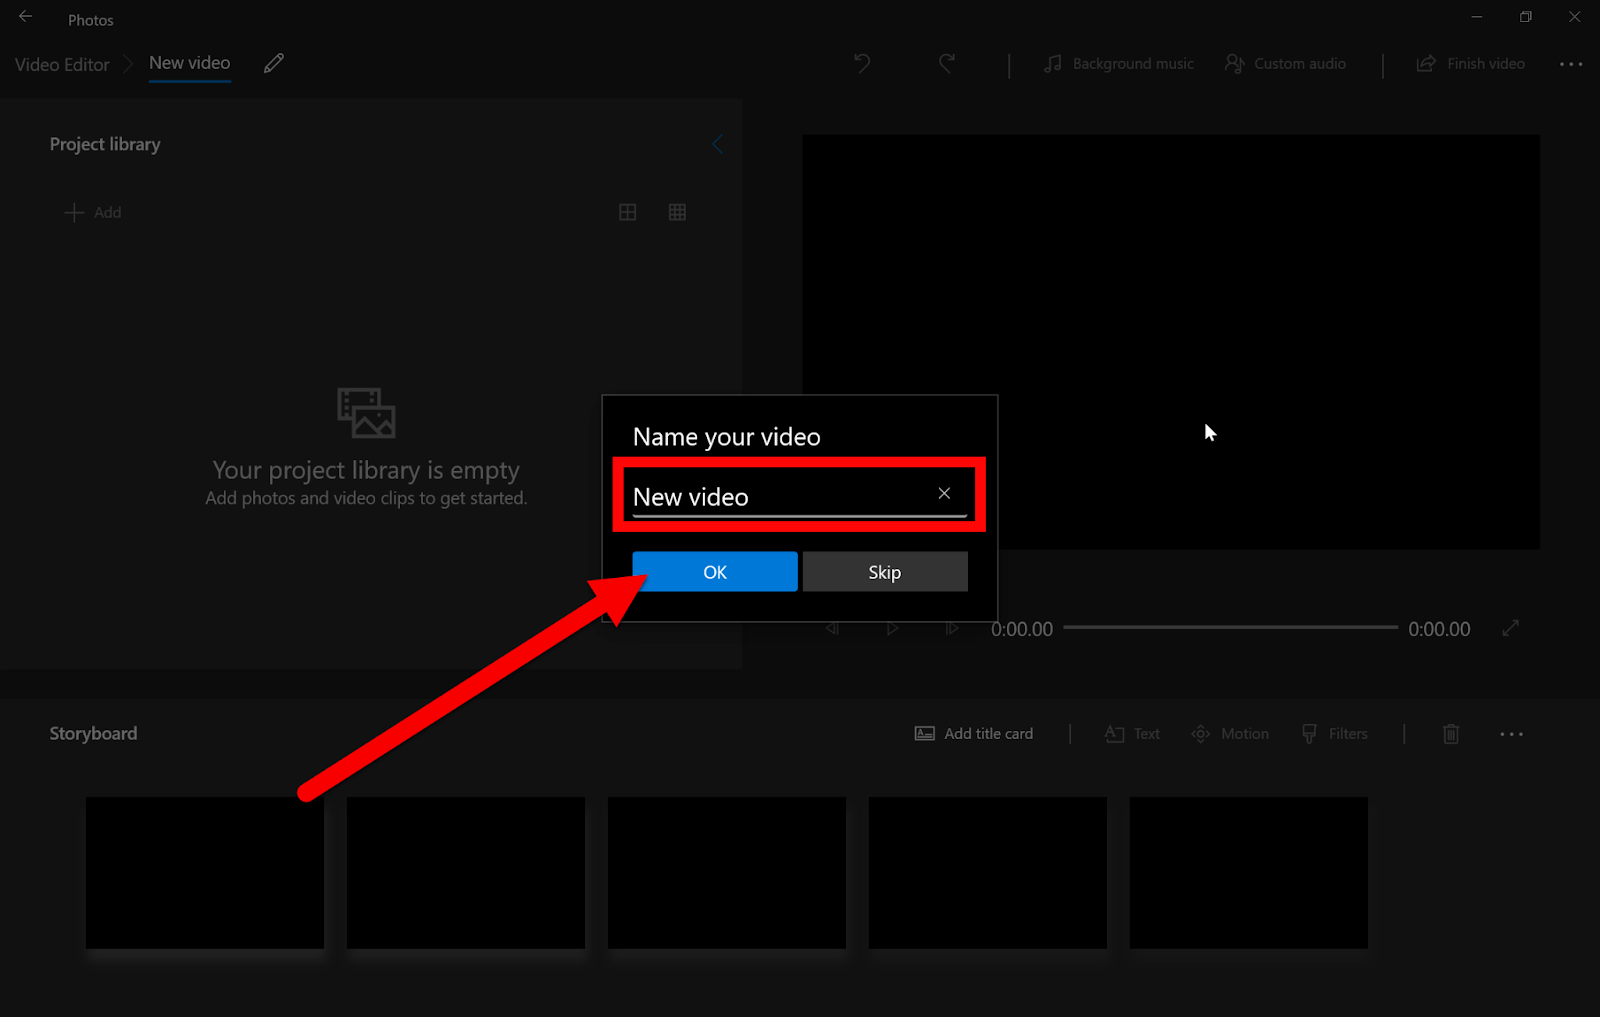
You will now need to name your project. Then click “OK”.
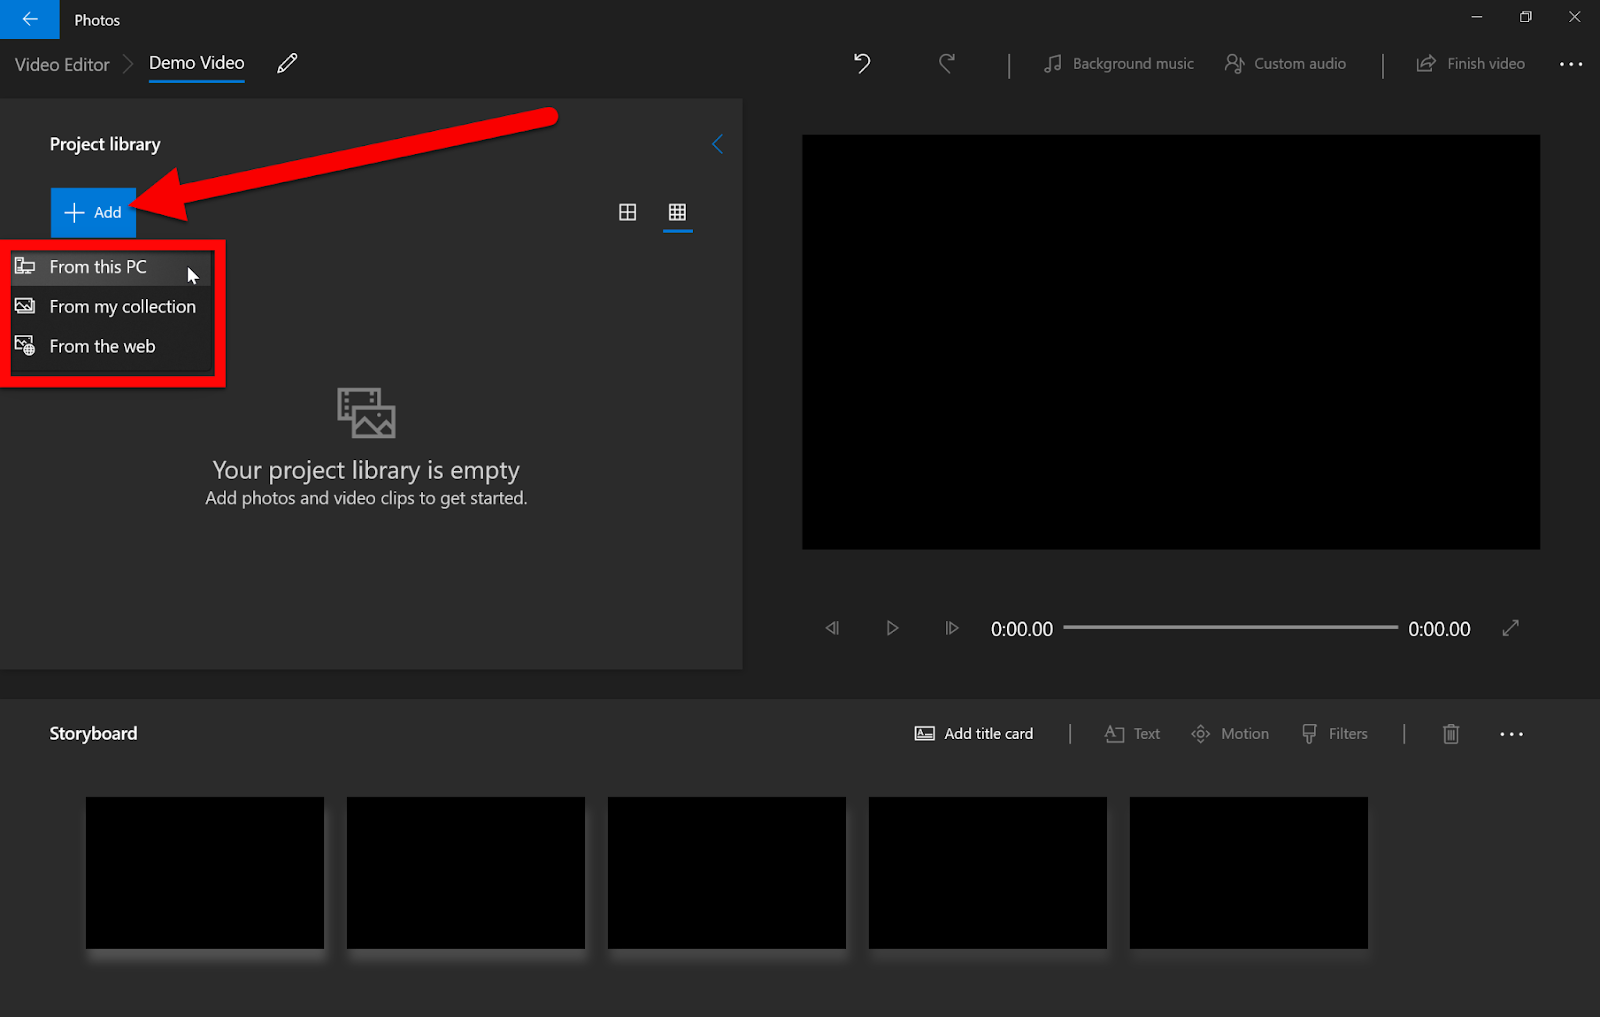
You now need to add media to your project. Click on the “Add” button and choose where your file is located and add it to the project. These files can be Videos or Images!
Drag the video file into the storyboard below.
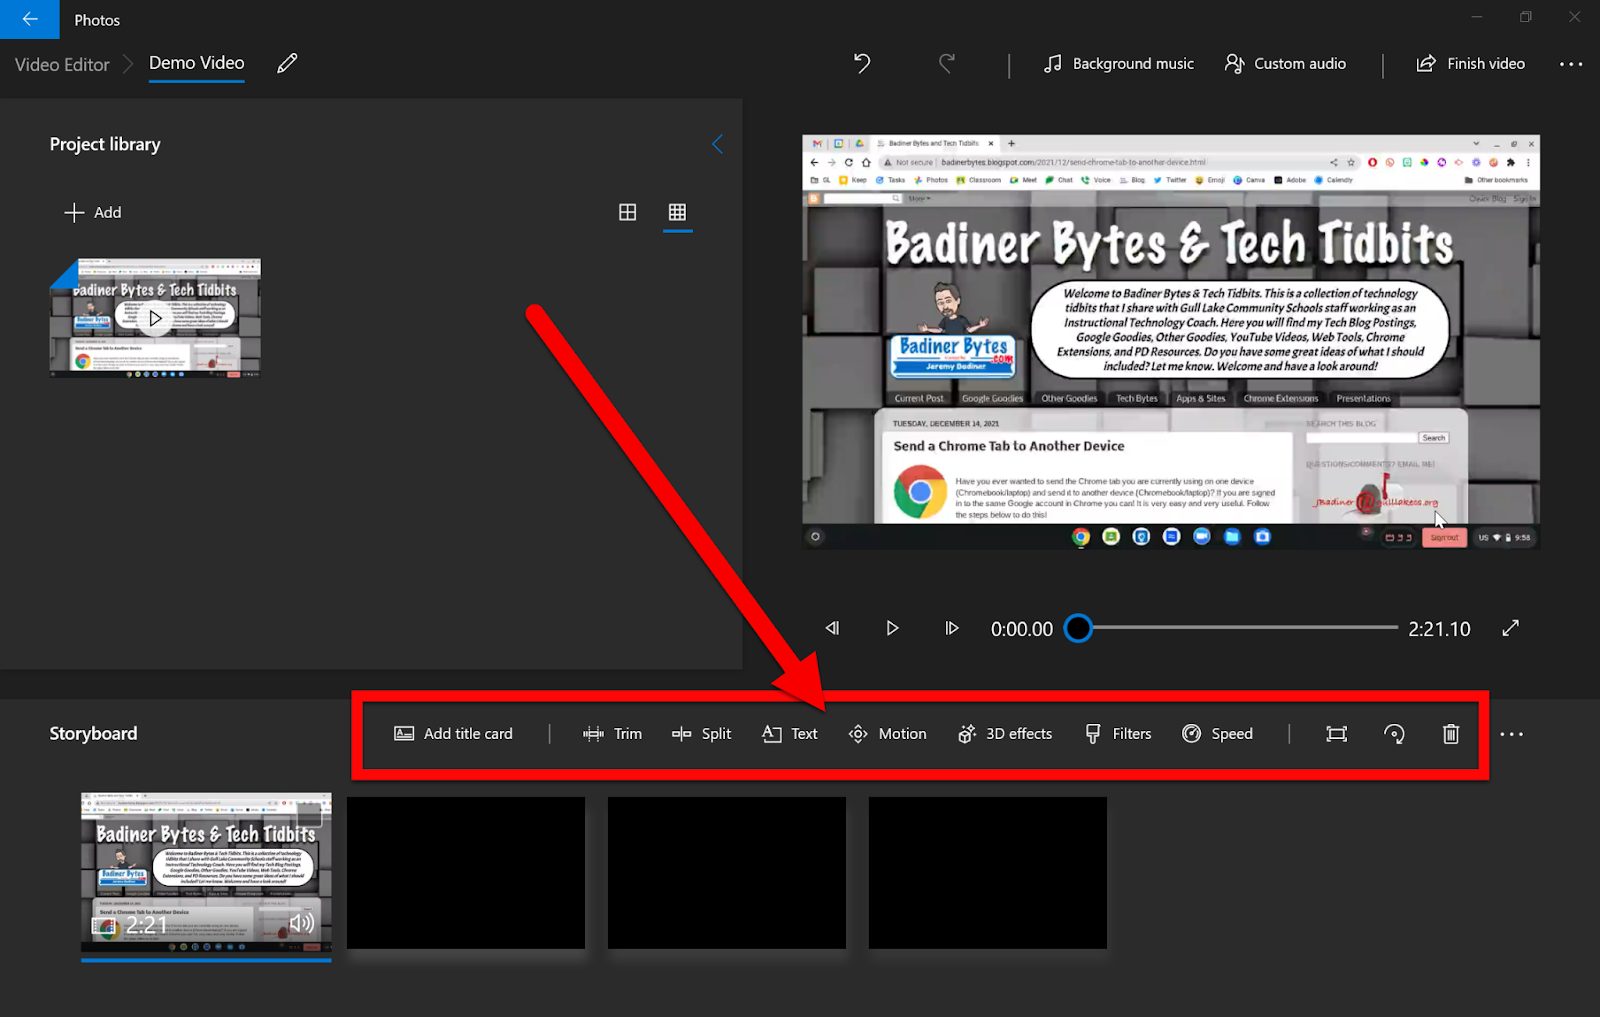
Edit Your Video:
Click on the video in the Storyboard. All the editing tools will be visible and clickable. If you can not click them you did not first click on the video clip in the storyboard.
Add Title Card:
Add a “slide” into the video. This is like a title screen.
Trim:
Remove the beginning or end of your video. Just slide your “start” or “End” point to remove the section you want.
Split:
Cut your video in a spot. This allows you to add other media or edit out sections from the middle of your video.
Text:
Add Text on your screen.
Motion:
Add motion effects to your video. This is a panning effect.
3D Effects:
Add cool special effects (already installed on the program) to your video.
Filters:
Change the color tone or add other filters to your video.
Speed:
Adjust the playback speed (slow down or speed up) of your video.
Remove Black Bars:
Zoom in or out to remove any black bars (if the video does not fit the format size).
Rotate:
Rotate your video by 90 degrees each click.
Delete:
Delete the selected video from the storyboard.
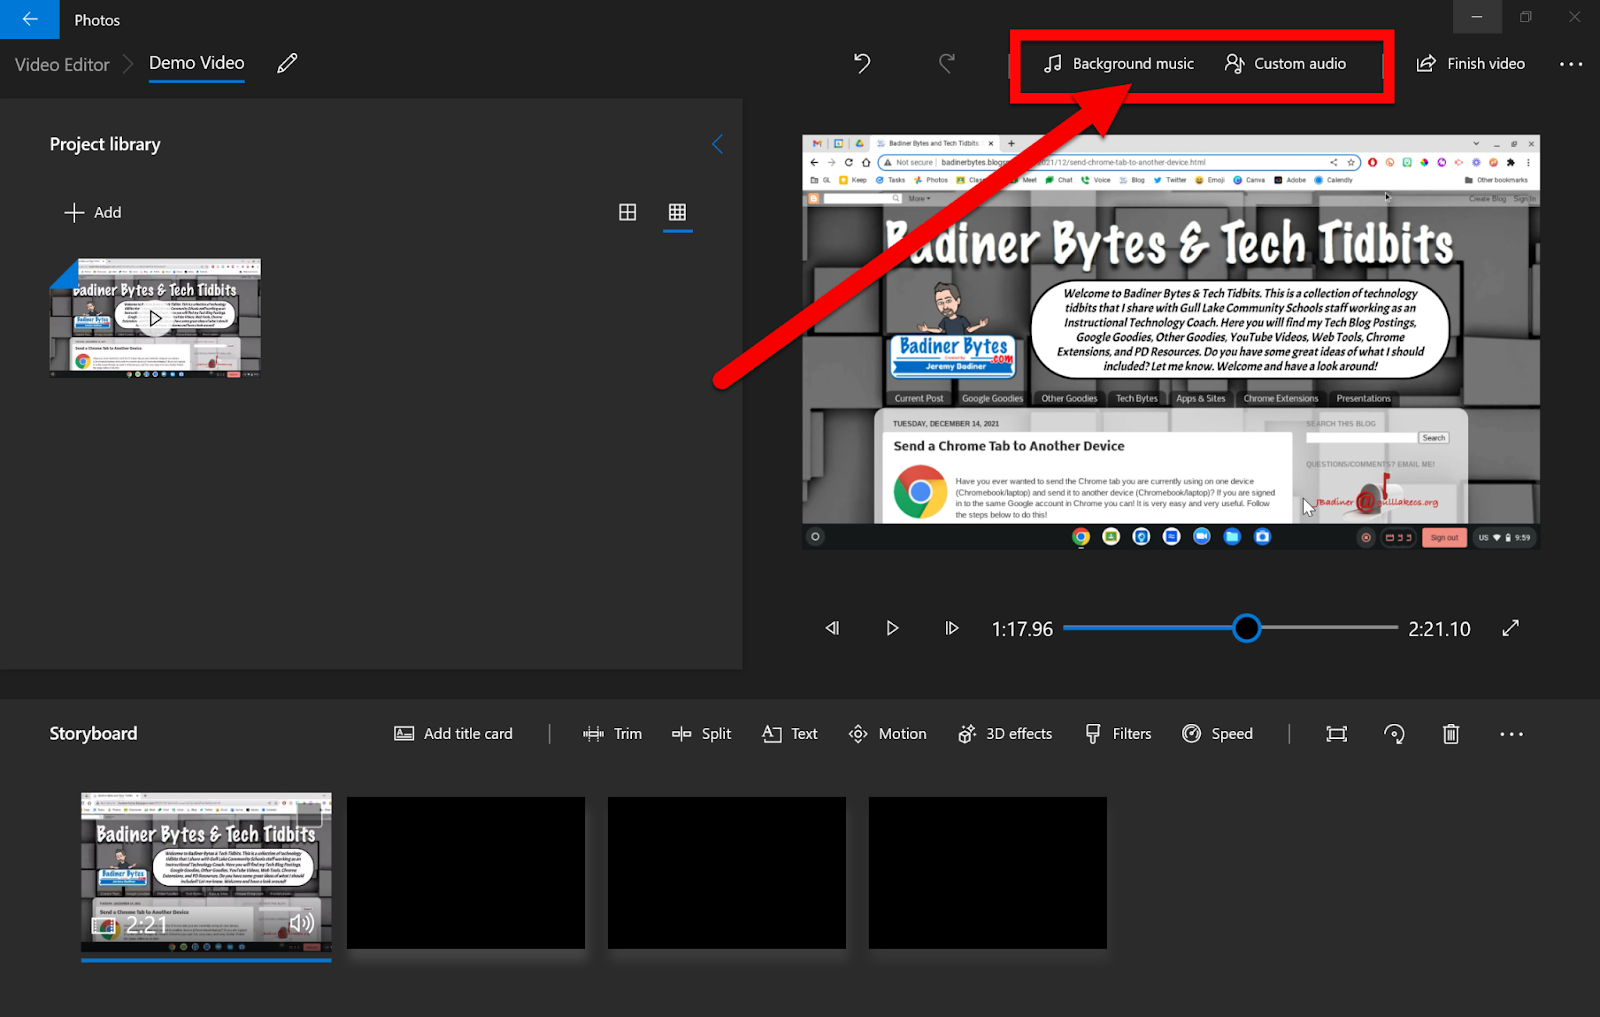
Add Audio to your video! You can use the pre-installed audio or add your own from your device!
Explore these editing tools and let your creativity flow!
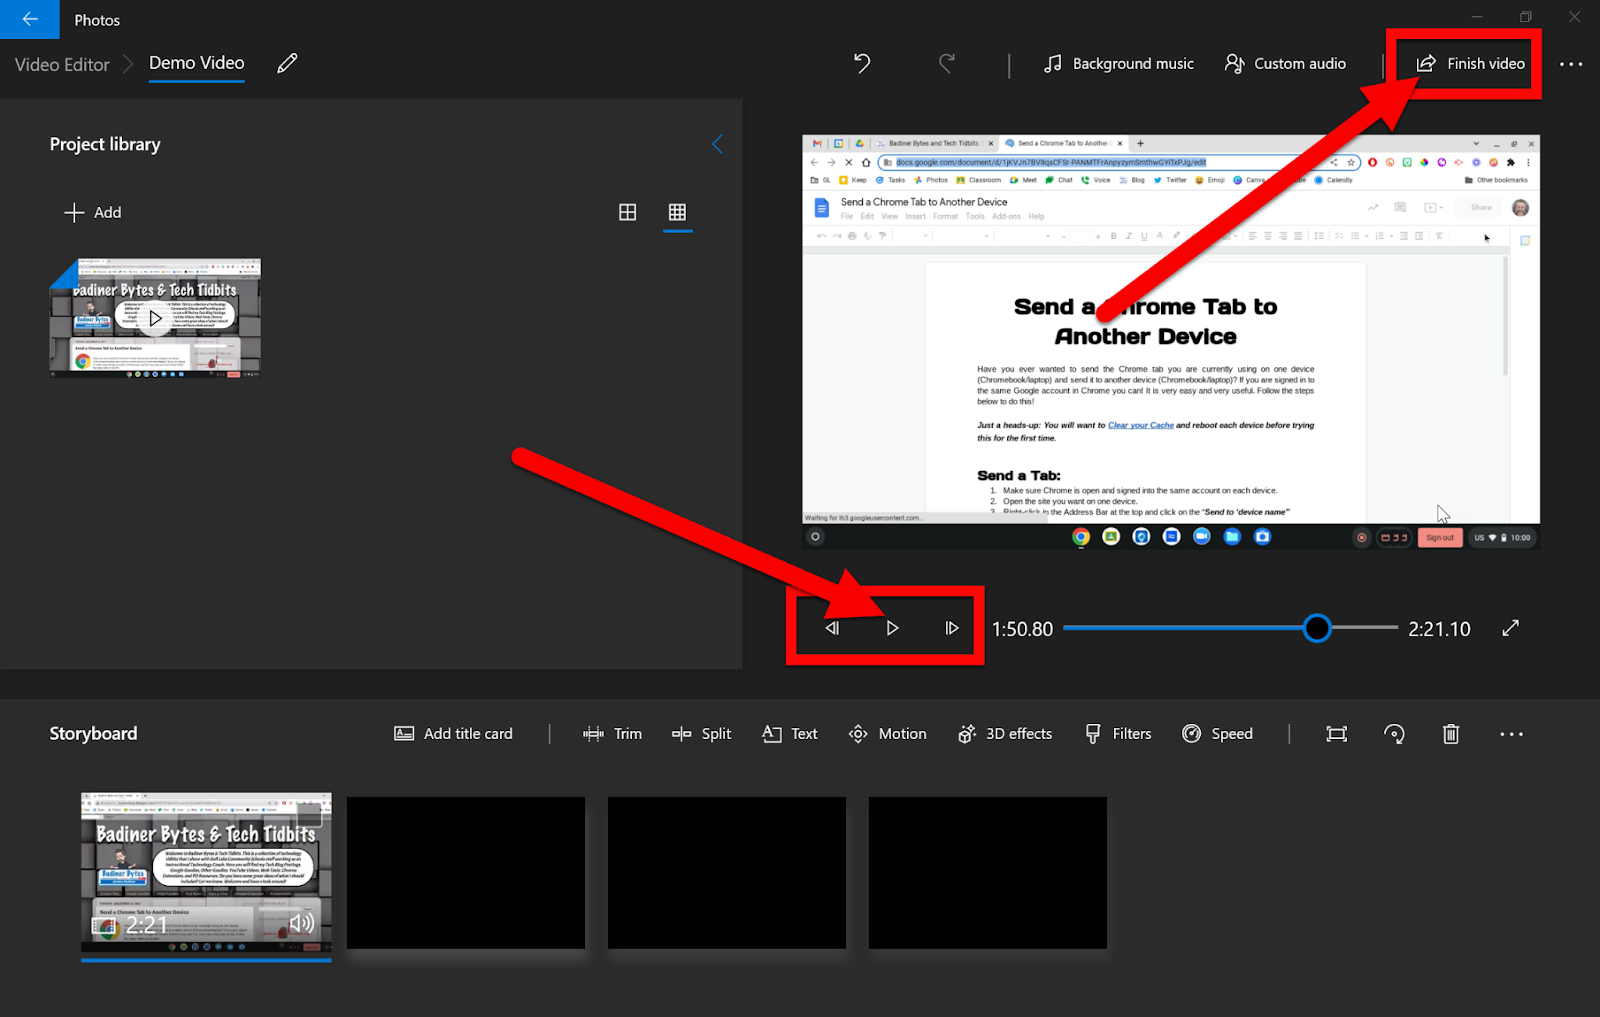
Publish Your Video:
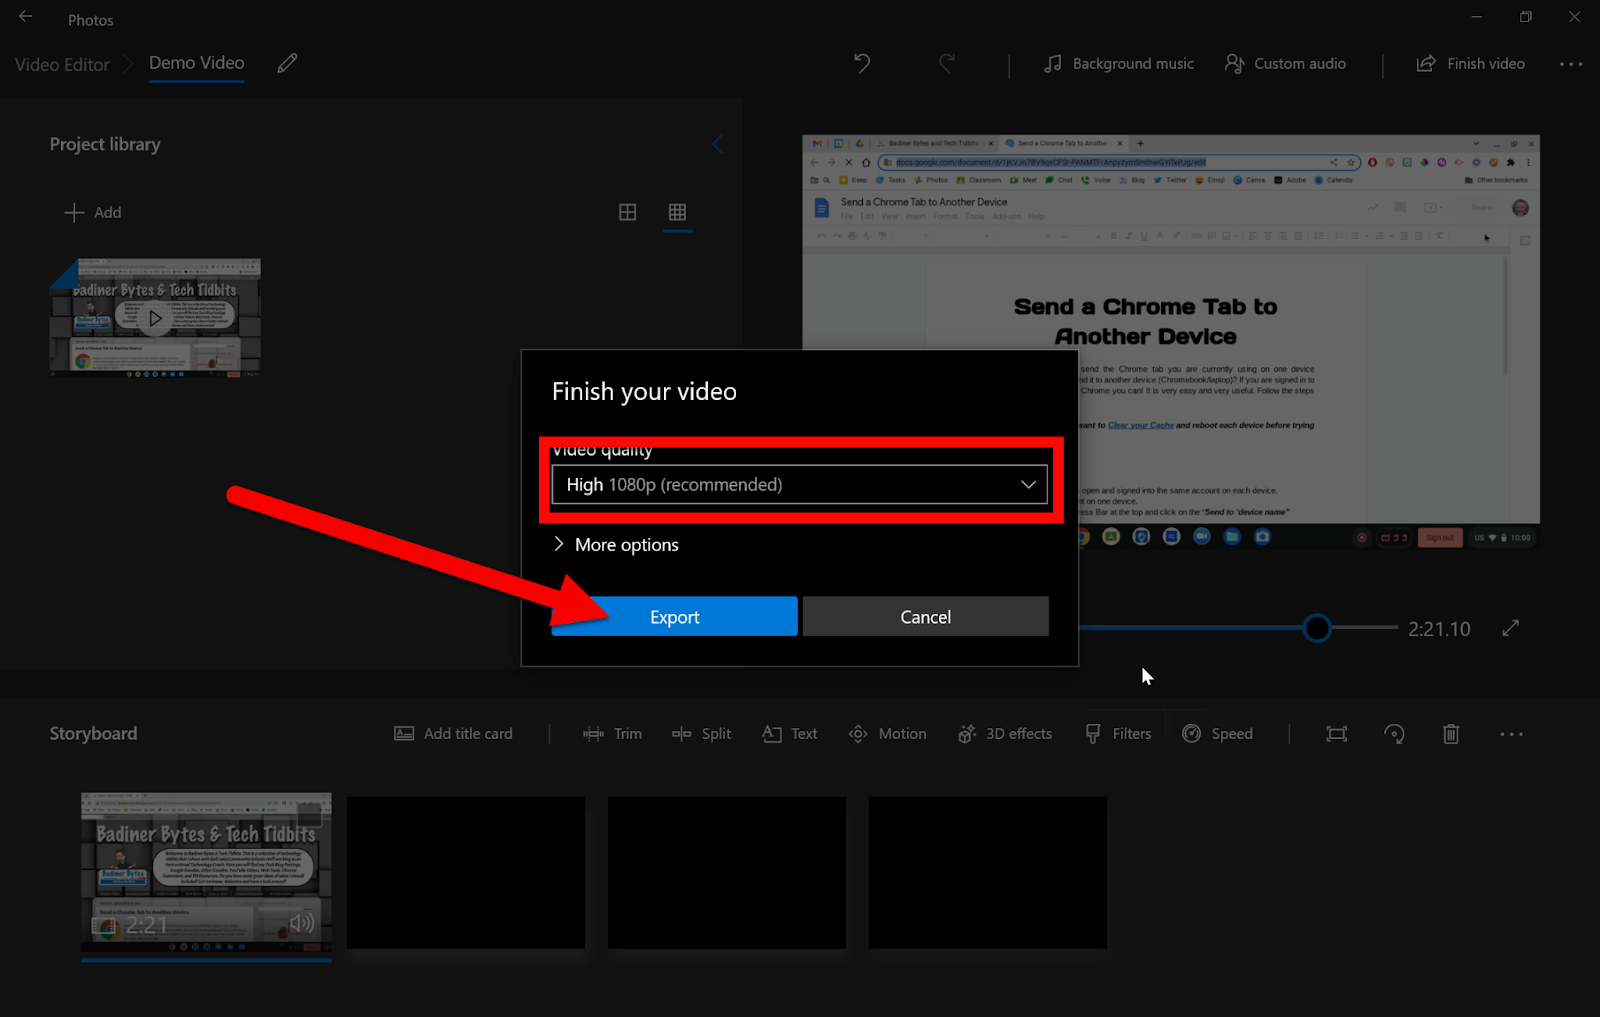
When you are done make sure to preview your video. Click the “Play” button to watch your creation. When you are sure you are done click “Finish video”.
Choose your resolution and click “Export”. You will need to select a location to save the file.
Upload this file to your sharing tool of choice (YouTube, Drive, anywhere!) and share your creation!