Wednesday, April 21, 2021

Google Chat in Gmail

Google is always (for good or bad) updating its tools. Over the past 2 years, we have all been told that Hangouts (one of the most awesome tools) was being dismantled. Hangouts allowed users to text message, place phone calls, and run video calls all in one app. It was great and many of us used it every day. Unfortunately, the day has finally come for us all to have a moment of silence for the passing of our beloved Hangouts. But have no worries! Google has replaced it with Google Chat. This is very similar to Hangouts with some added features. It is more deeply tied in with Drive and your work teams. Chat is a great way to direct message people with text messages, share Drive files, and collaborate in groups (all within a new section called “Rooms”). Below are steps to start using Chat to collaborate and discussing with others.

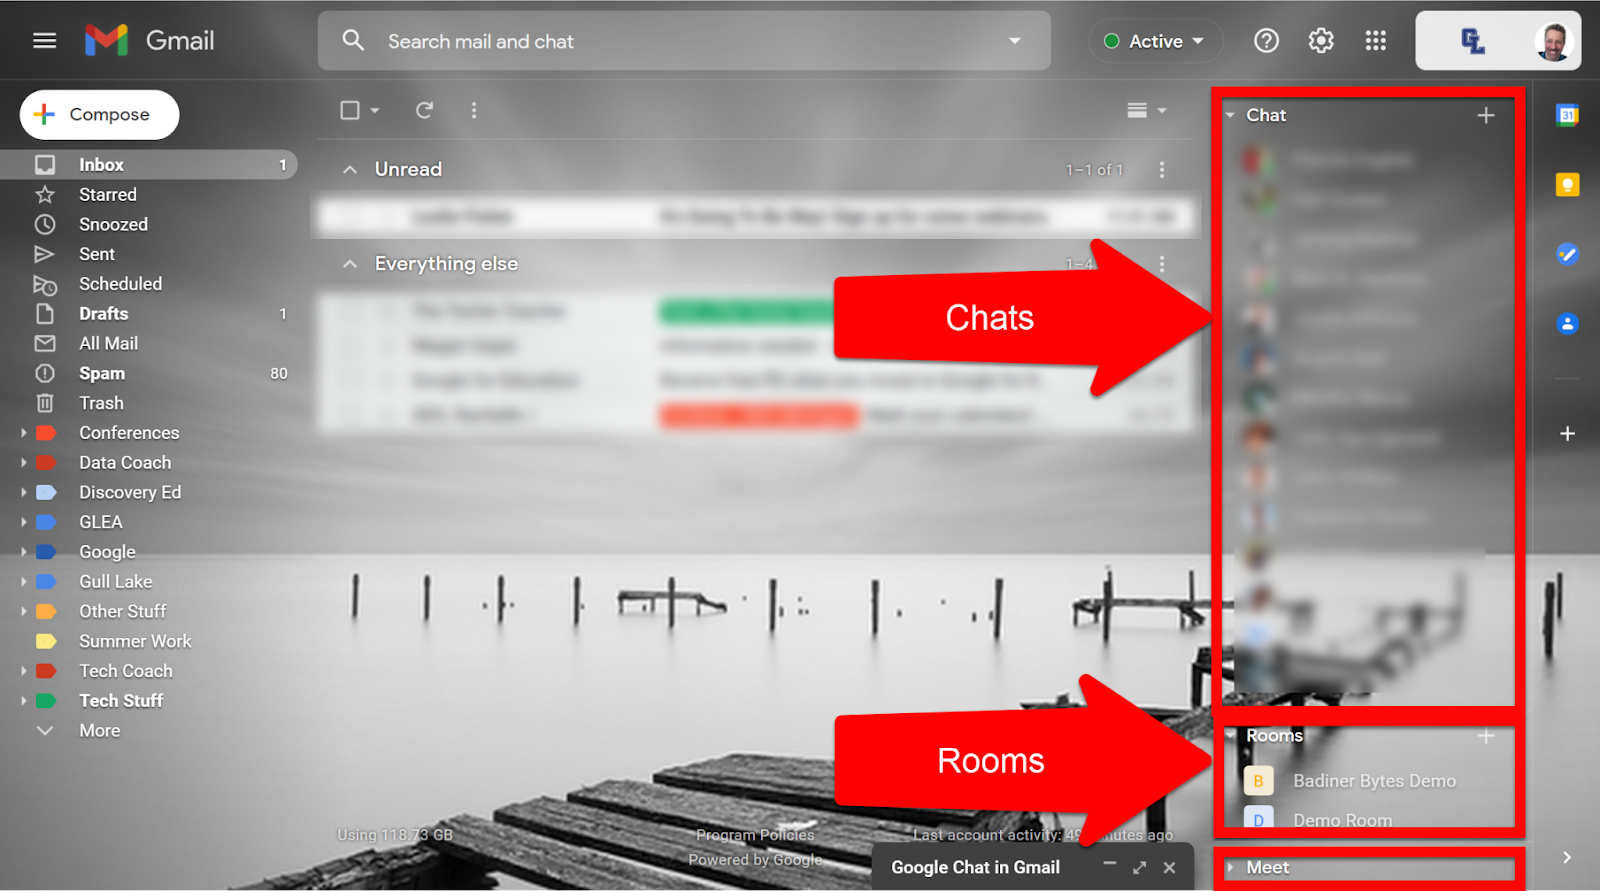
  • I highly recommend grade-level teams use Chat for quick messaging as they won’t get lost in the endless emails we all get! Any new message will be on the right side of Gmail (if you set it up like the directions show) and are easy to find and stay current.


Enable Chat in Gmail:

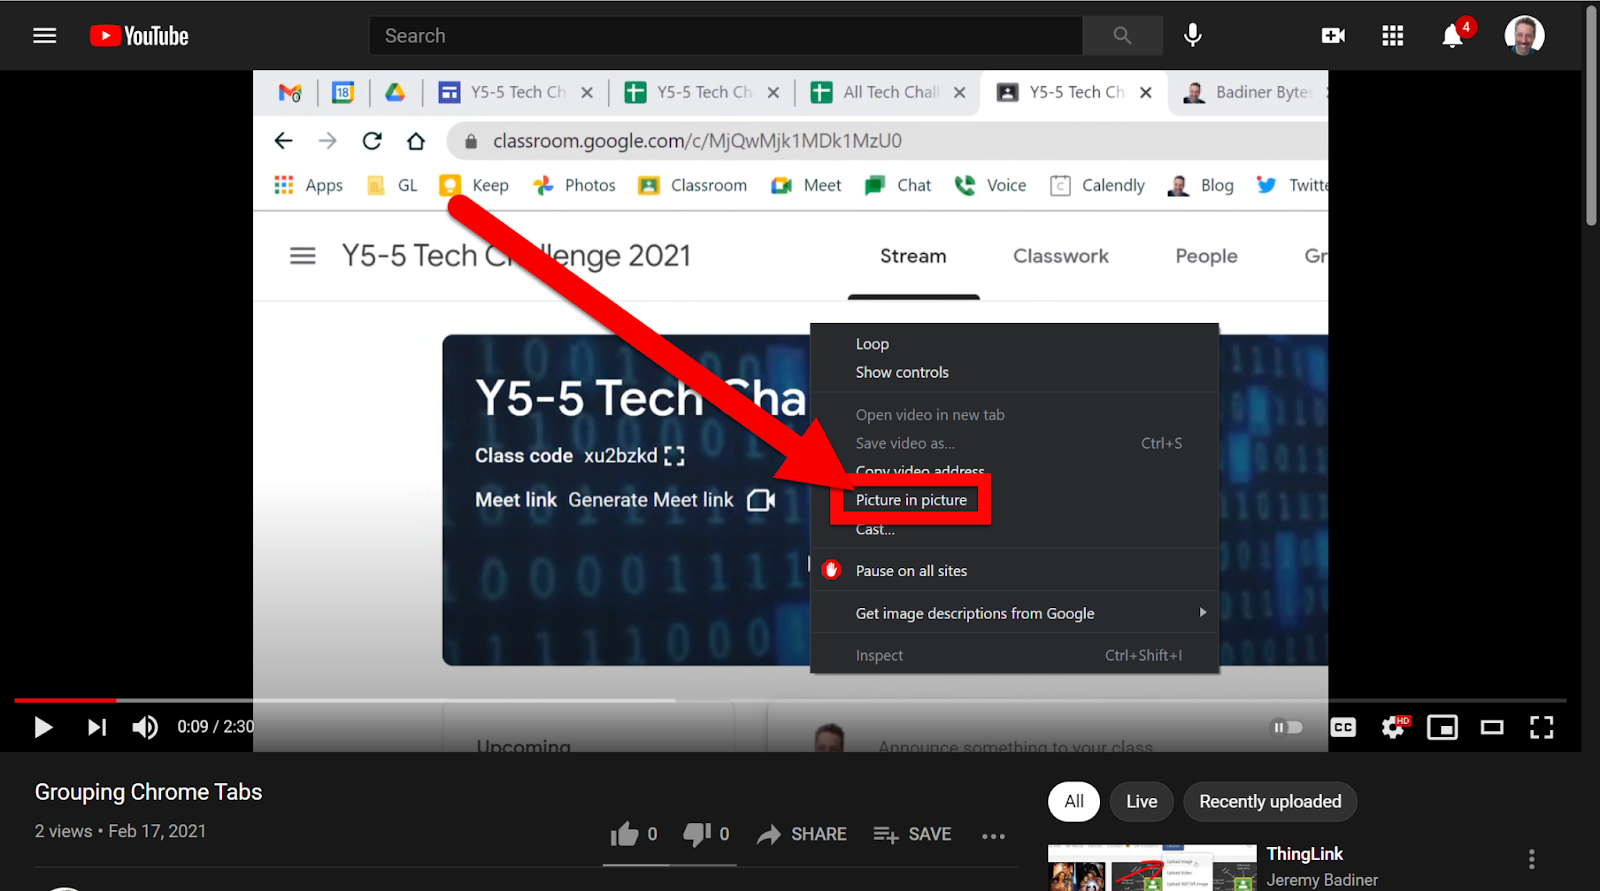
You might have seen a pop-up in your Gmail recently. No worries if you just ignored it. They looked like this:


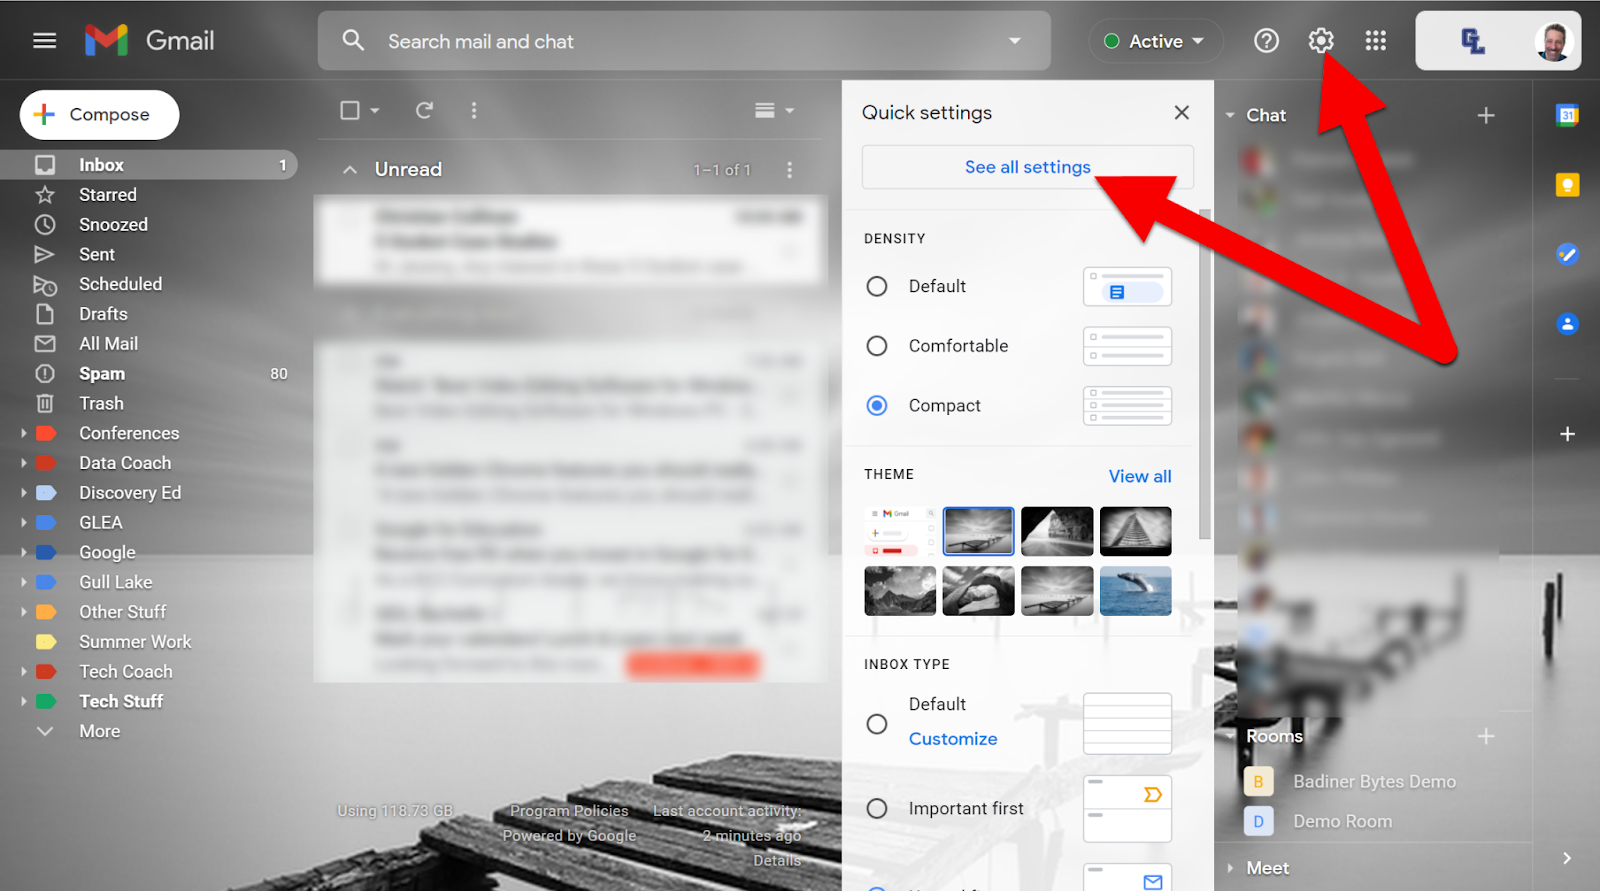
  1. Head over to Gmail and click the “Settings Gear” at the top right. Then select “See all settings”.


  1. Click on “Chat and Meet”.


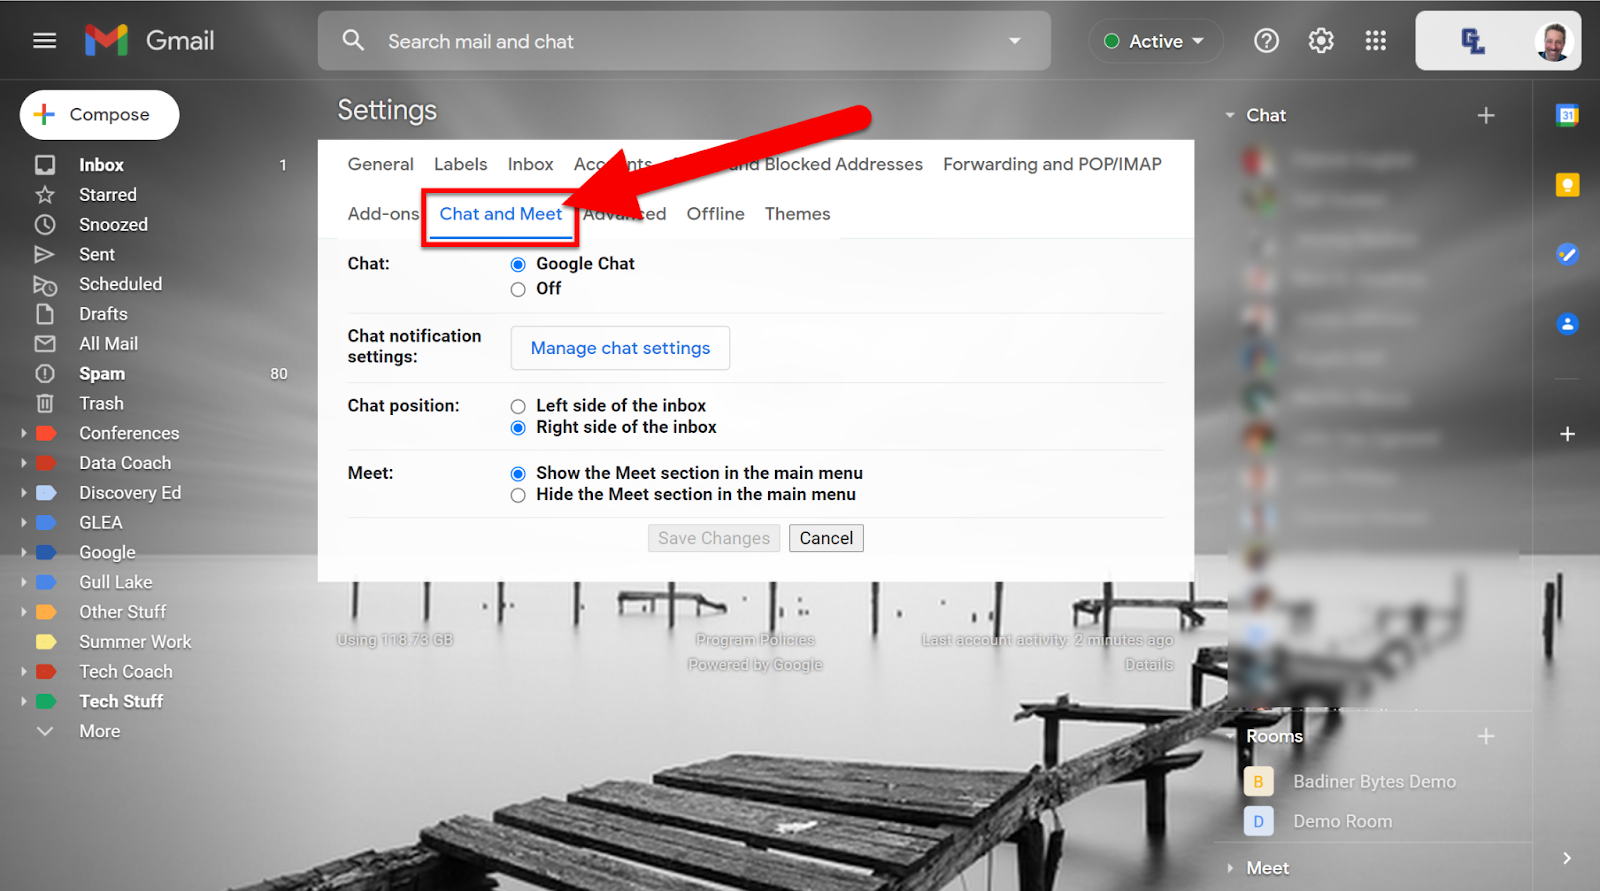
  1. Choose your settings. I recommend selecting “Google Chat” and selecting the Chat Position as “Right side of the inbox” (this will allow you to see more chats), and also under Meet “Show the Meet section in the main menu” to allow quick Google Meet access.


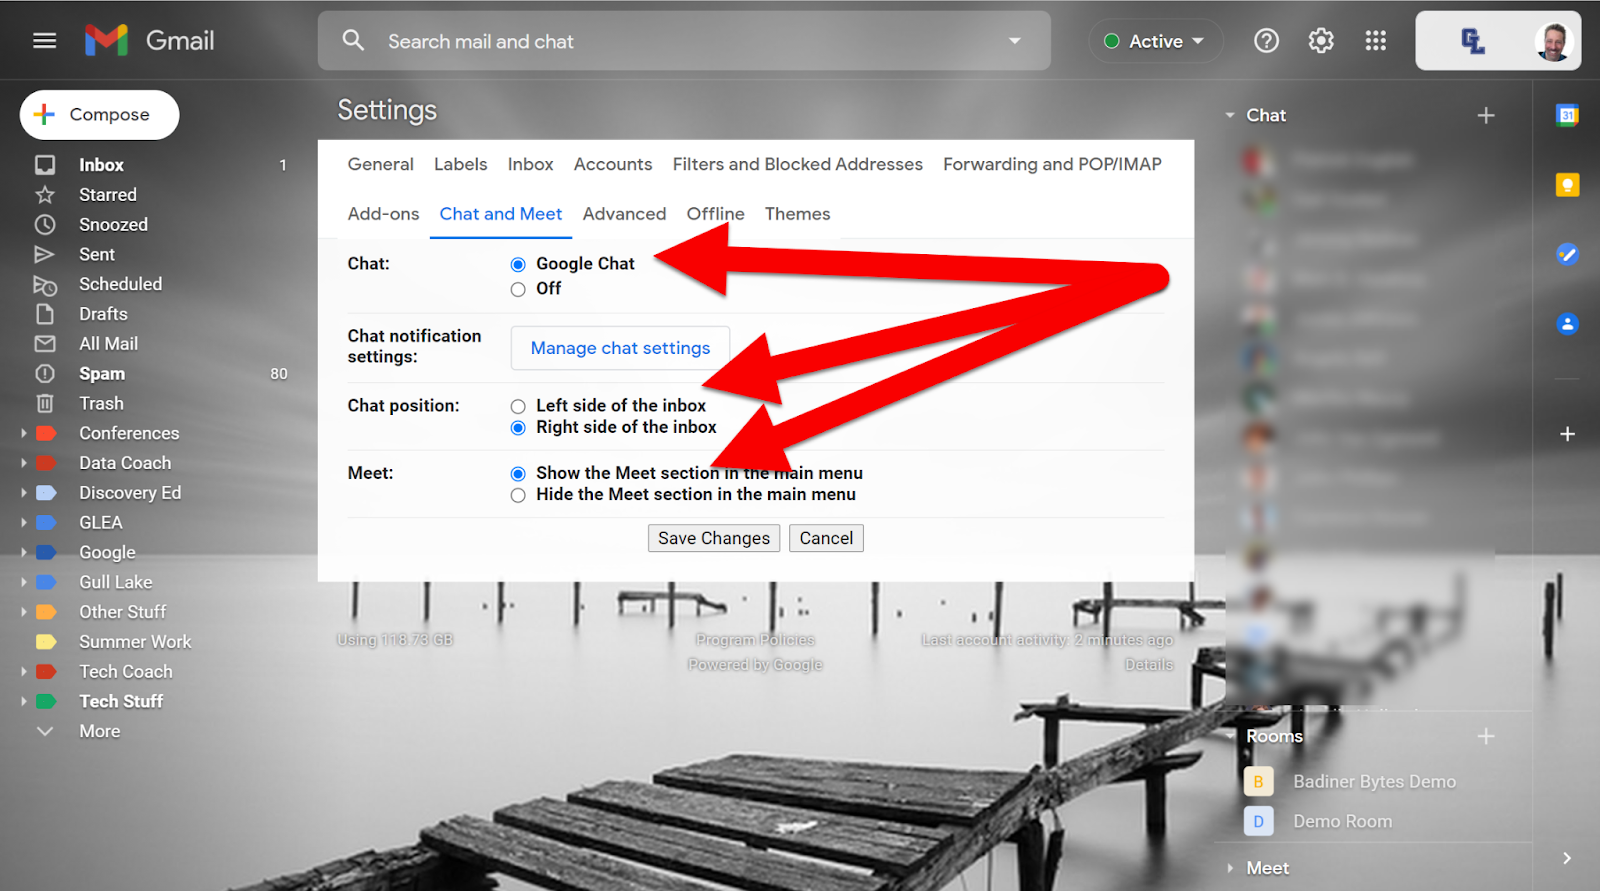
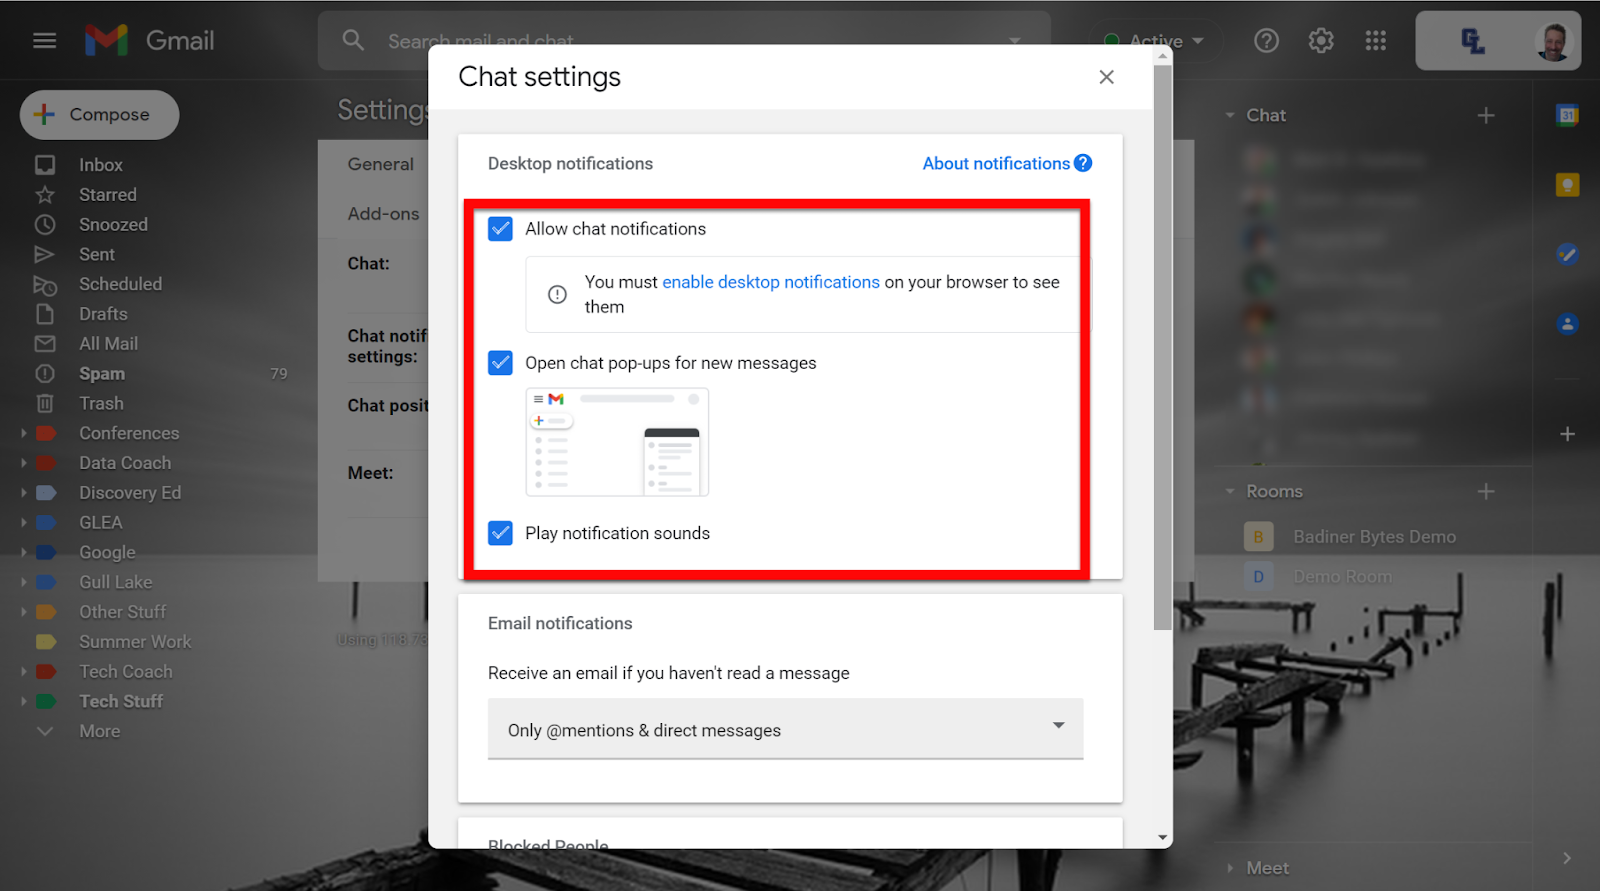
  1. In your domain, Chat Notifications might be disabled to avoid unwanted “surprises” popping up while you have your screen displayed for students to see. You will not be able to have Chat notifications as popups. I do have mine set this way so when I click on a Chat it does open in a popup window, though.


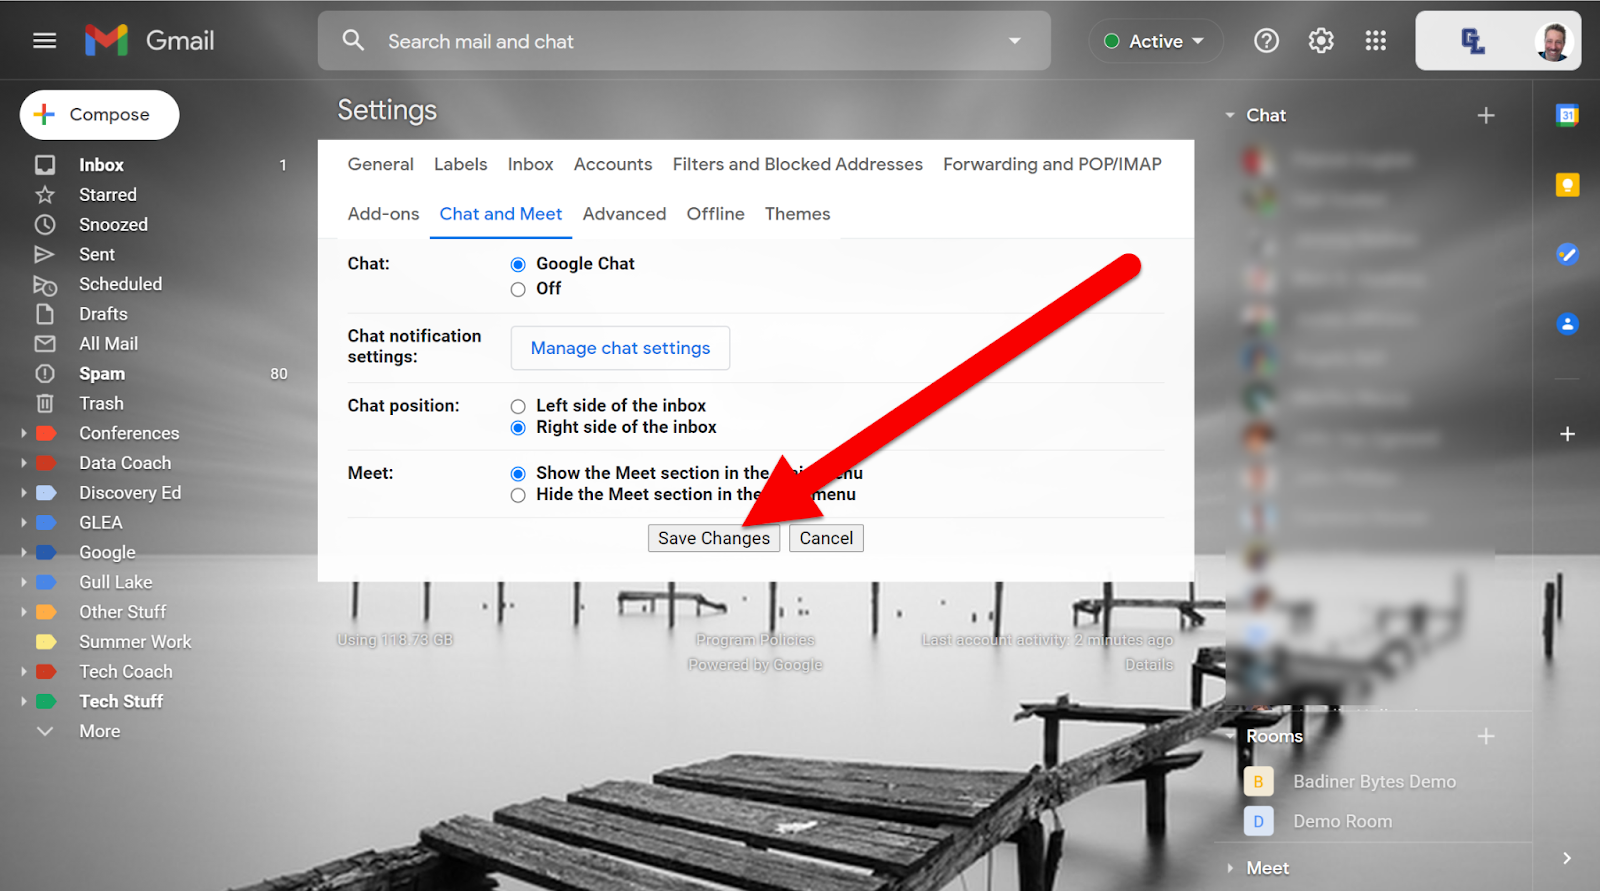
  1. Make sure to click “Save Changes” if you made changes.


Send a Chat:

  1. Open up Gmail. Click on the “+” icon in the top-right.

  2. Choose what you want to do:

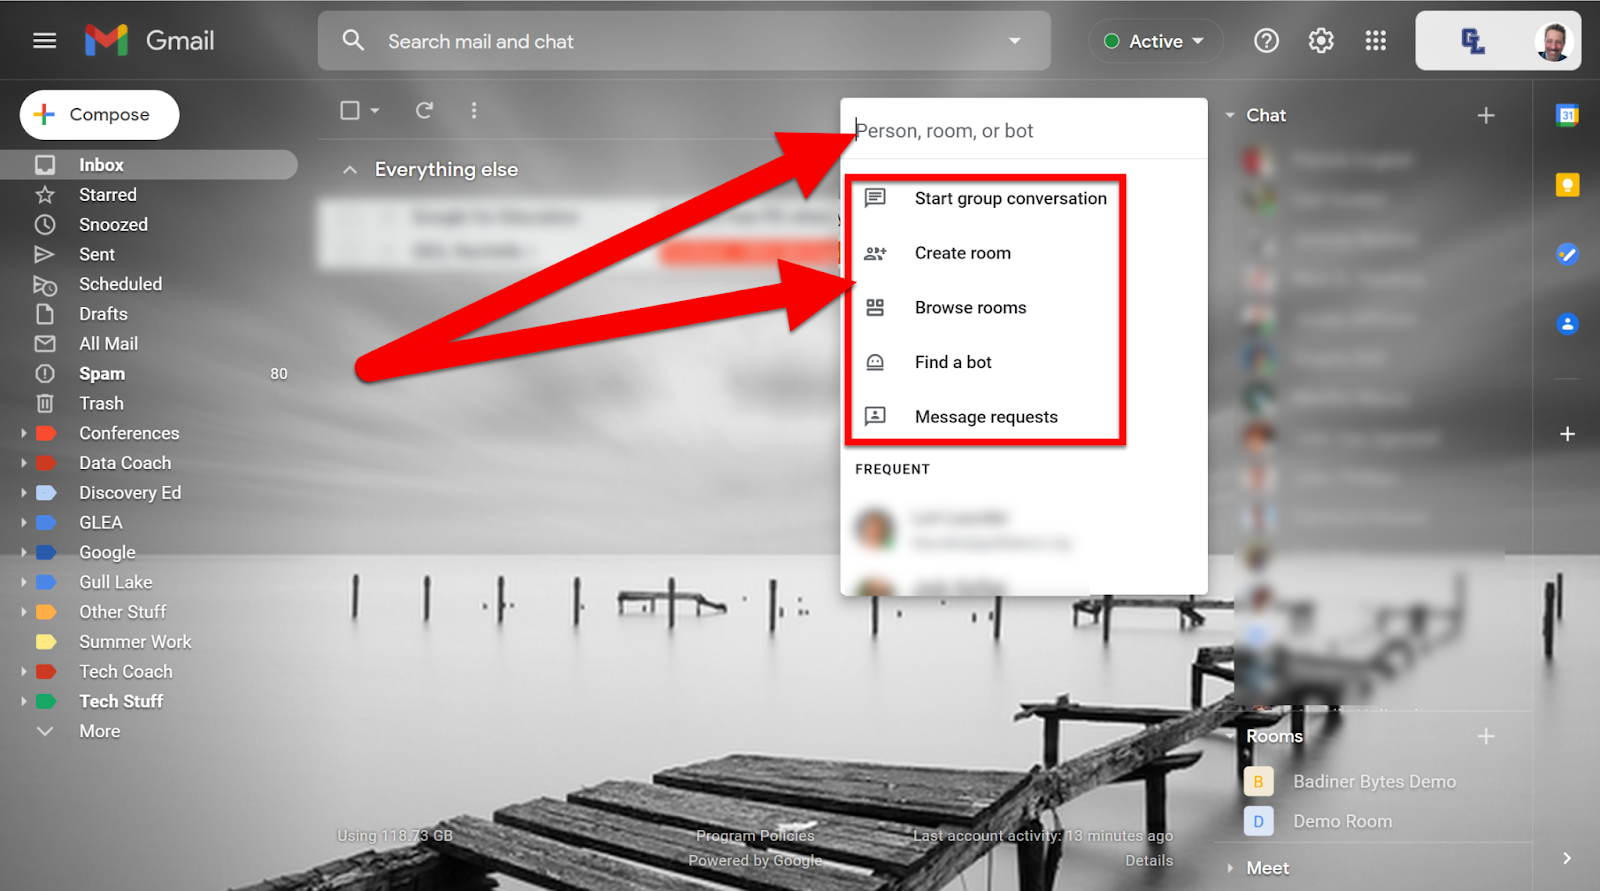
  1. Person, room, or bot: Start a Chat by entering a person’s name to start a message

  2. Start group conversation: Create a Chat Group (Group Message) with multiple participants

  3. Create a room: This is a group for project collaboration and communication and a place where people can share files, assign tasks, and stay connected

  4. Browse rooms: Search for rooms you have been invited to join

  5. Find a bot: Bots are special accounts you can chat with that provide a way for you to connect to services in Chat, such as looking up information, scheduling meetings, or doing tasks

  6. Message requests: Check if there have been requests sent your way
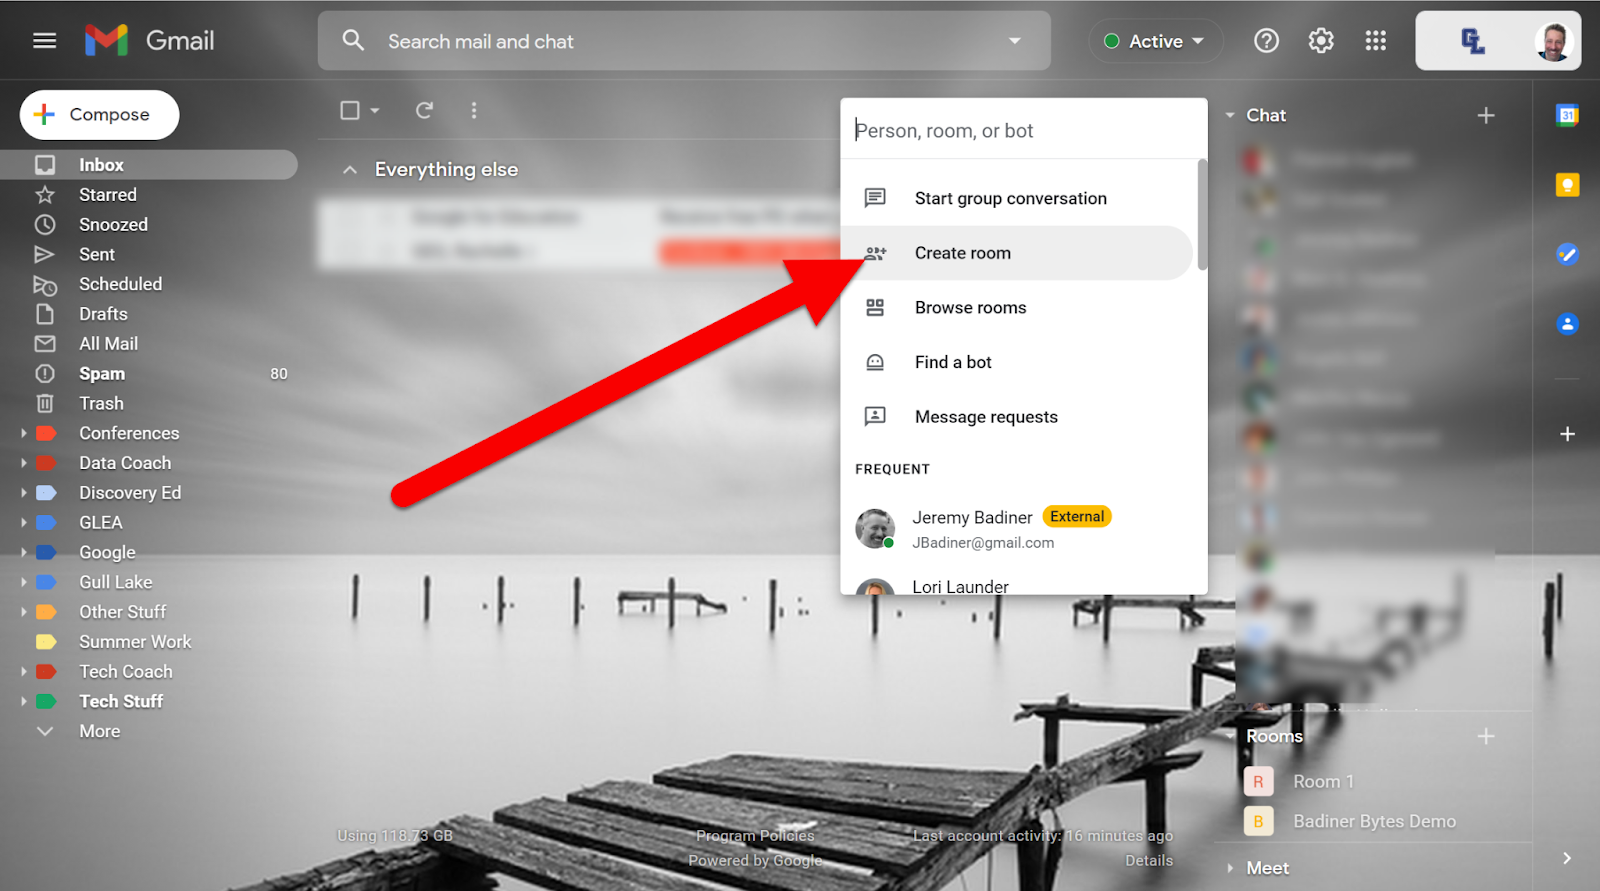


Create “Rooms”:

  1. Click on “Create room” to create a collaboration space.


  1. Add a name to this room and invite others.


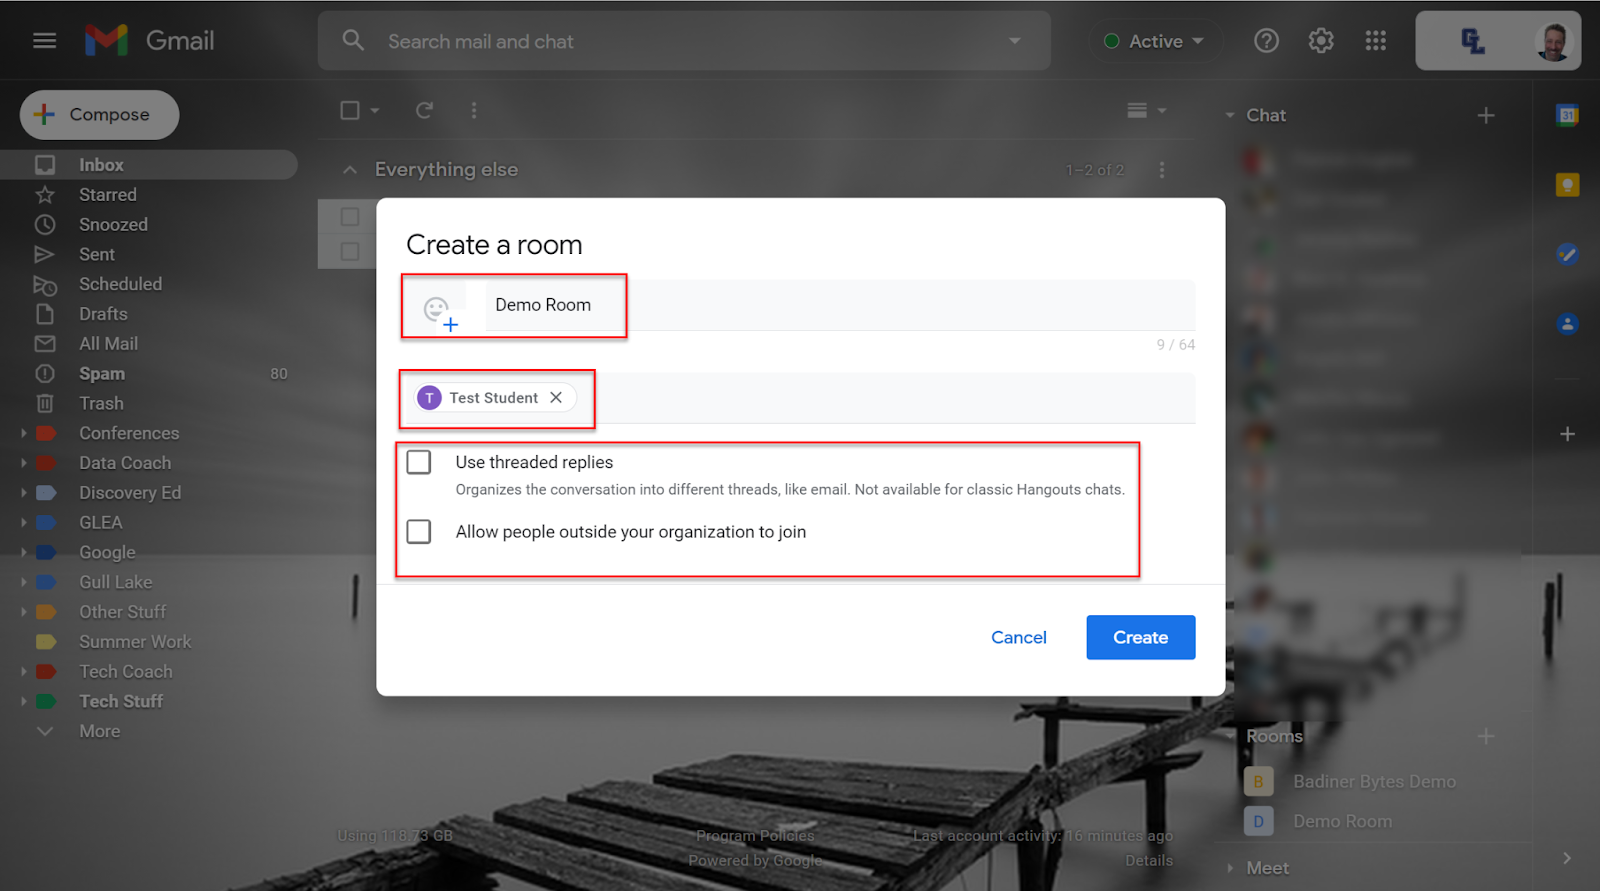
  1. You can add text messages (bottom) or send files/tasks (middle) to the participants of this group/Room.


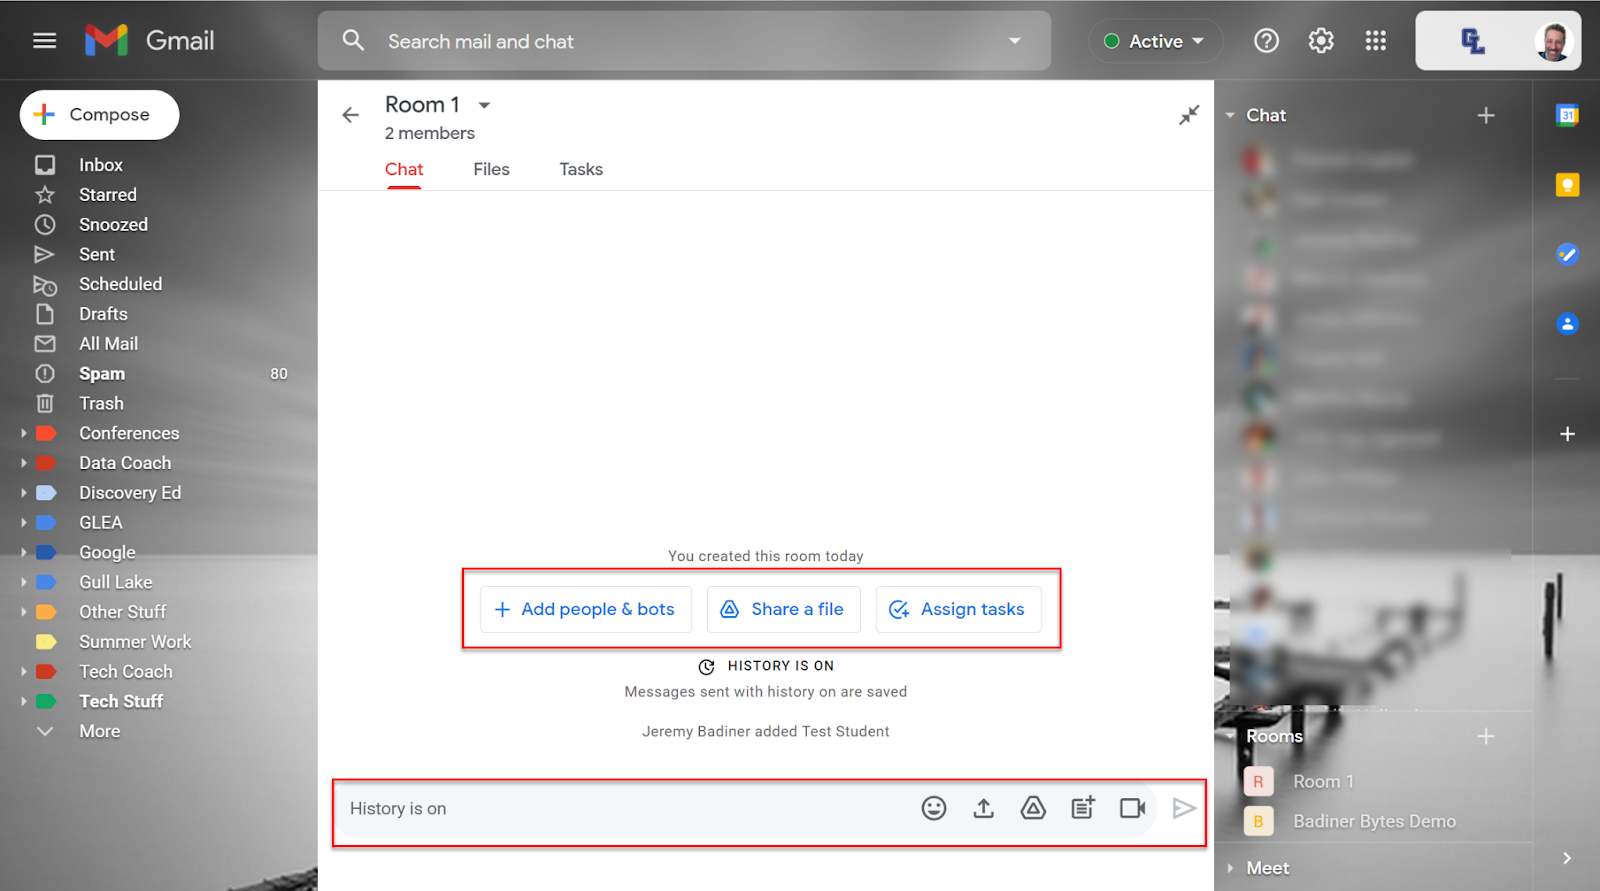
  1. Use Rooms to chat with your team, share files, and keep organized!


All these features are also available by going to chat.google.com or clicking on the Chat icon in the Google Waffle.


If you want these directions in a Document click HERE!


Wednesday, April 14, 2021

YouTube: Picture in Picture

We live in an amazing time. There are so many incredible “How-To” videos available on YouTube that we can learn how to do almost anything. Sometimes watching a video is tough when you are trying to actually do what it teaches you to do at the same time. If only we could pop that video out and watch it on top of our screen that we are working on. Wait, we CAN! Using Picture in Picture we have that ability! Check out the steps below to see how to do this. 


Enable Picture in Picture:

  1. Open the YouTube video you want to watch.

  2. Right-click on the video (a total of 2 times).


  1. Click on “Picture in Picture”.


  1. You can now drag this video anywhere on your screen and even resize it. Anything you are viewing will be behind the video. This includes Chrome Tabs and even the actual desktop screen.

  2. You can pause and play the video with the ”Play” or “Pause”  button in the video.


  1. When you are done you can click the “Expand” icon and return the video to the YouTube Tab.


Here is a video walk-through of these steps. Click HERE to watch.


If you want these directions in a Document click HERE!


Using the Chrome OS Clipboard


I find myself using the copy/paste feature all the time, but I hate going back to recopy something after I copied a newer item. On Windows, there is a way to get to your most recent list of copied material (Windows Button+V). Chrome OS also has a way to revisit the last 5 items you copied to the clipboard. Check out how it works below!


Gain Access to the Last 5 Copied Items:

  1. Copy (Control+C) a number of items while on a Chromebook.

  2. Hold the “Search” button down (magnifier icon above “Shift) and tap the letter “V”.


  1. A popup will appear with the last 5 items you copied.


  1. Click the item you want to paste. It will be pasted into your document/file you are using.


A quick video walkthrough is available here!


If you want these directions in a Document click HERE!


Tuesday, April 6, 2021

PC and Web Google Drive Sync

Uploading files to your Google Drive just got easier! You can now add (or remove) files in your Google Drive without using the web interface. There is now a Google Drive (G) folder installed on your District Issued PC. It is quick and easy to do. Check out the steps below to see how. 

  • (Warning...anything you do on your PC is reflected in your Google Drive so be careful if you are deleting files from the Google (G) Drive on your Computer. More details below.)


Find Your Google Drive Folder:

  1. Make sure you are on your School Issued PC (laptop or desktop).

  2. Two places to find File Explorer:

    • Click the Folder Icon on your taskbar at the bottom (I pinned mine by right-clicking the icon and selecting “Pin to Taskbar” so it is always available).


  • Click the “Start Button” (windows icon on the lower left) and click “Documents”.


  1. On the left side click on “Google Drive (G)”.


  1. You will see both “My Drive” (your Google Drive) and “Shared Drive” (your Shared Google Drives).


Add/Remove Files to Your Google Drive Folder:

  1. You can open your Google Drive (G) folder and drag/drop any file into this window. It will live sync to your online Google Drive within seconds.


Just a Warning: These two locations are always Live Syncing!

  • Anything you do in the Web Interface is also reflected in the PC Google Drive (G) folder.

  • Anything you do in the PC Google Drive (G) folder is also reflected in the Web Interface. 


Here is a video showing how all this works: PC/Web Google Drive Sync


If you want these directions in a Document click HERE!


Monday, April 5, 2021

Create YouTube Playlist with Videos Made for Kids

Creating YouTube Playlists is a great way to share awesome learning resources with your students and families. Sharing a playlist of videos is easy because you can reorder and structure them as you need. The only issue is when videos are marked “content made for kids”. By default, YouTube will not let you add a video that is marked as “content made for kids” to a playlist. That section is grayed out and not available. Below are the steps for a workaround to allow you to create YouTube Playlists including “content made for kids” videos. 


Add Videos to a Playlist:

  1. Do a YouTube search for the video you want to add to a playlist.

  2. On that screen click the 3 dots to the right of the video description (do not click on the video to open it to view the video...stay in the seach screen).


  1. You will have the option to add it to a playlist. Add it to a playlist or create a new one.


  1. Do this with all the videos you want to be added (remember, do not click to view the video, just use the search screen as videos marked “content made for kids” will not be able to be added to playlists from the playing screen).


  1. When you are done, head back into your YouTube “Home” and go to “Library”. 


  1. Find the playlist you want to share and click the text below it reading “View Full Playlist”. 


  1. Make sure it is set to “Public” or “Unlisted” so others can see it. If you need to change the setting (if it is marked “Private) click the pencil icon to edit and choose your selection from the dropdown list.


  1. Share this URL with your students/families. 


  1. If you want to reorder the videos in the playlist click the 3 dots to the right of a video and choose your action from the dropdown list.


Any time you update videos they will be live so there is no need to resent the link.


If you want these directions in a Document click HERE!