Saturday, September 19, 2020

Classwork with Whiteboard.fi

There are some good whiteboard tools out there, but some require paid versions of programs and others are only visible to only the person working on their board. The few free ones out there often require extra work from students to share with the teacher (example: student creates a whiteboard drawing and has to download their work as an image, then upload to the teacher to see). Whiteboard.fi is different. It is a tool that allows the teacher to see all the students’ work in live-action on one screen while everyone in the class is working. The other benefits are that this is free and that no teacher or student accounts are needed! Check out how Whiteboard.fi works below. 


Things to remember:

  • These boards are NOT saved after each session. Teachers have the option to save all student work as a PDF, and students have the option to save their board as an image, but once the class is over, the boards are deleted.

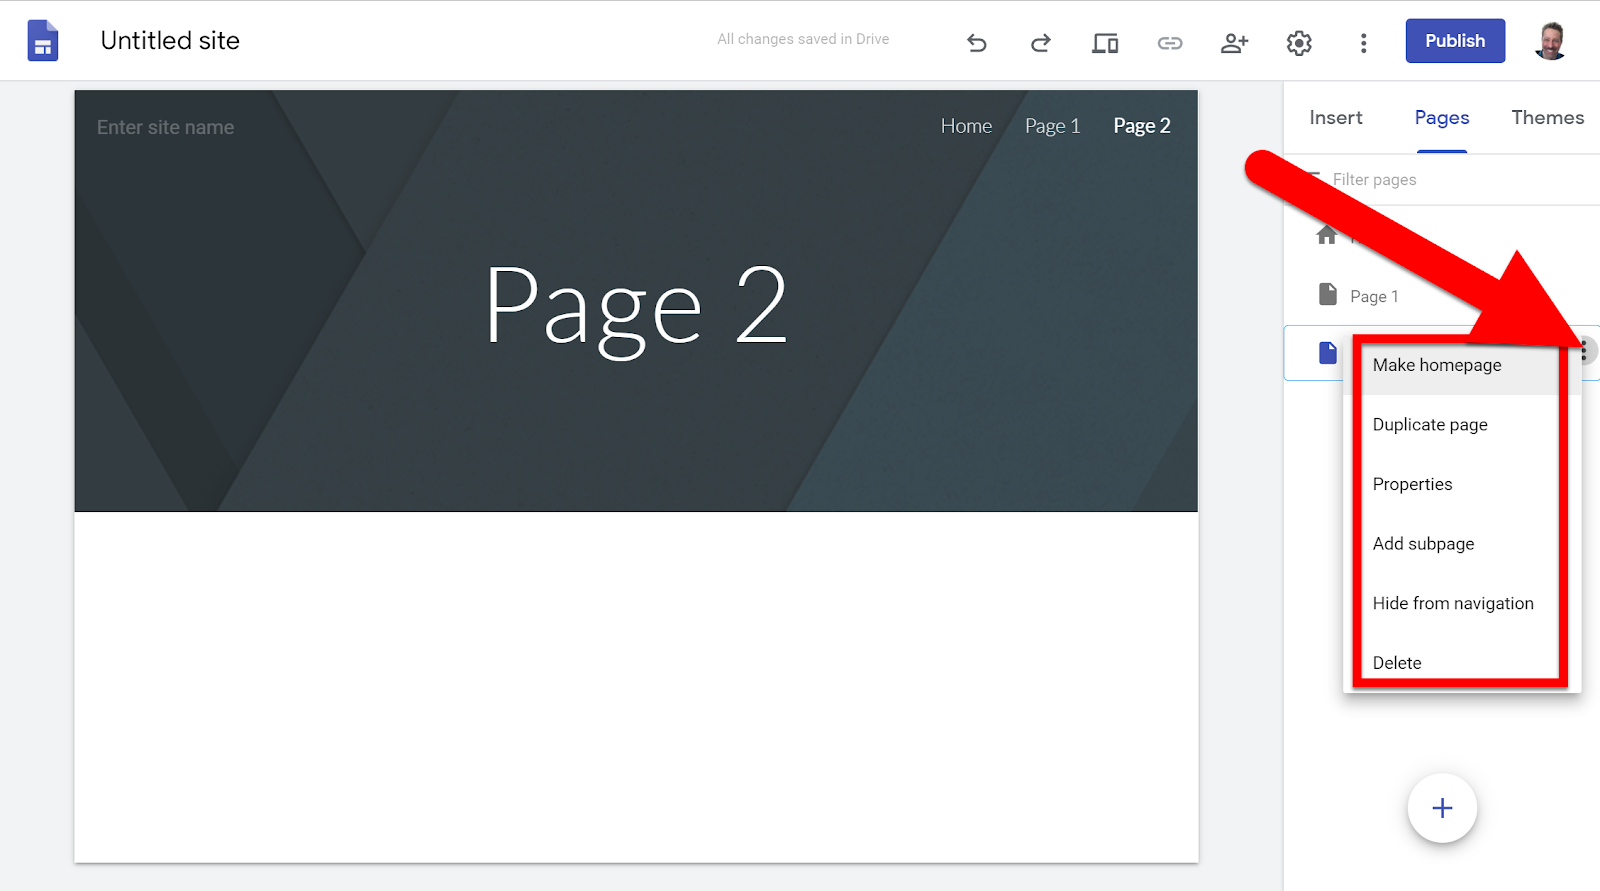
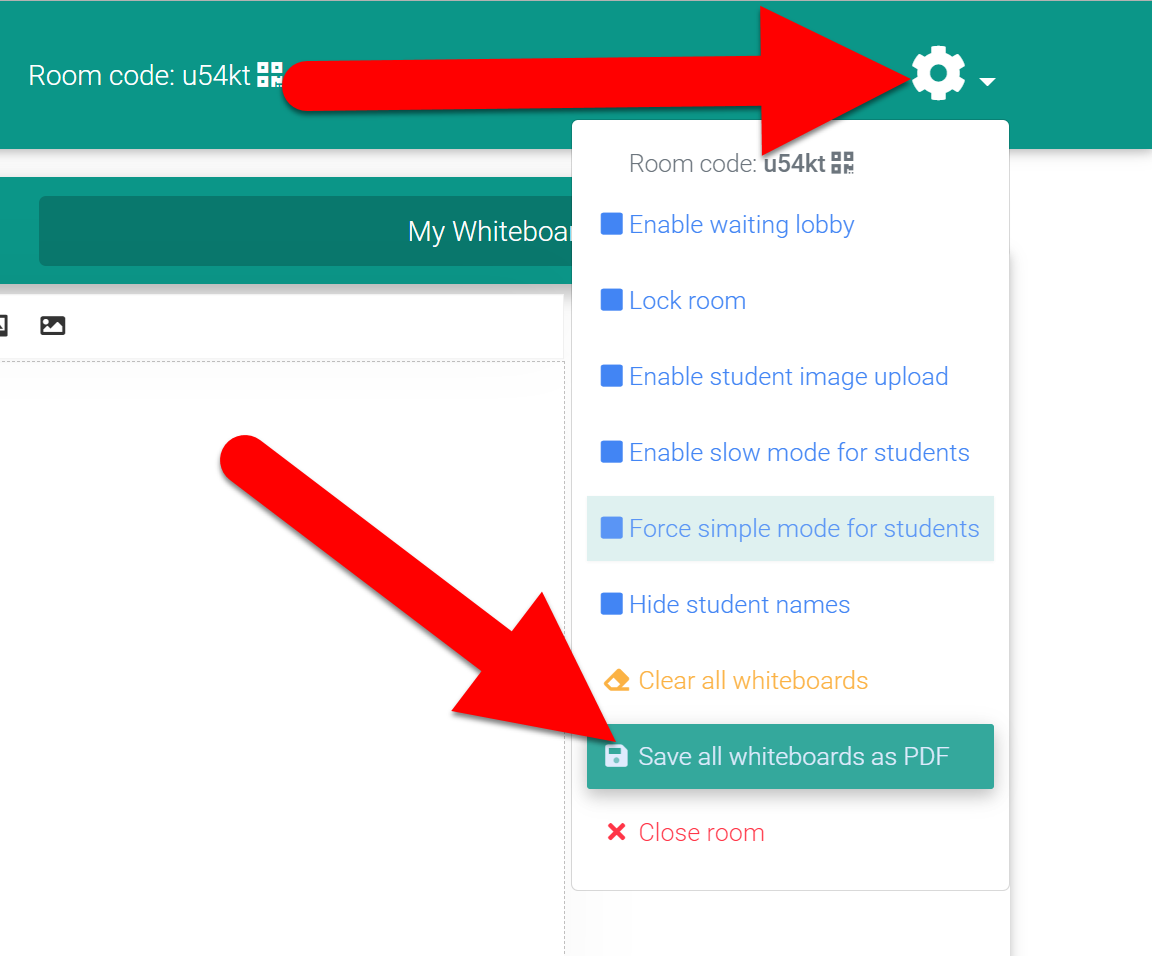
  • There are other options to explore not shared in this write-up. You can see these additional options when you are in Teacher Mode and click the Gear in the top right.


Create a Class:

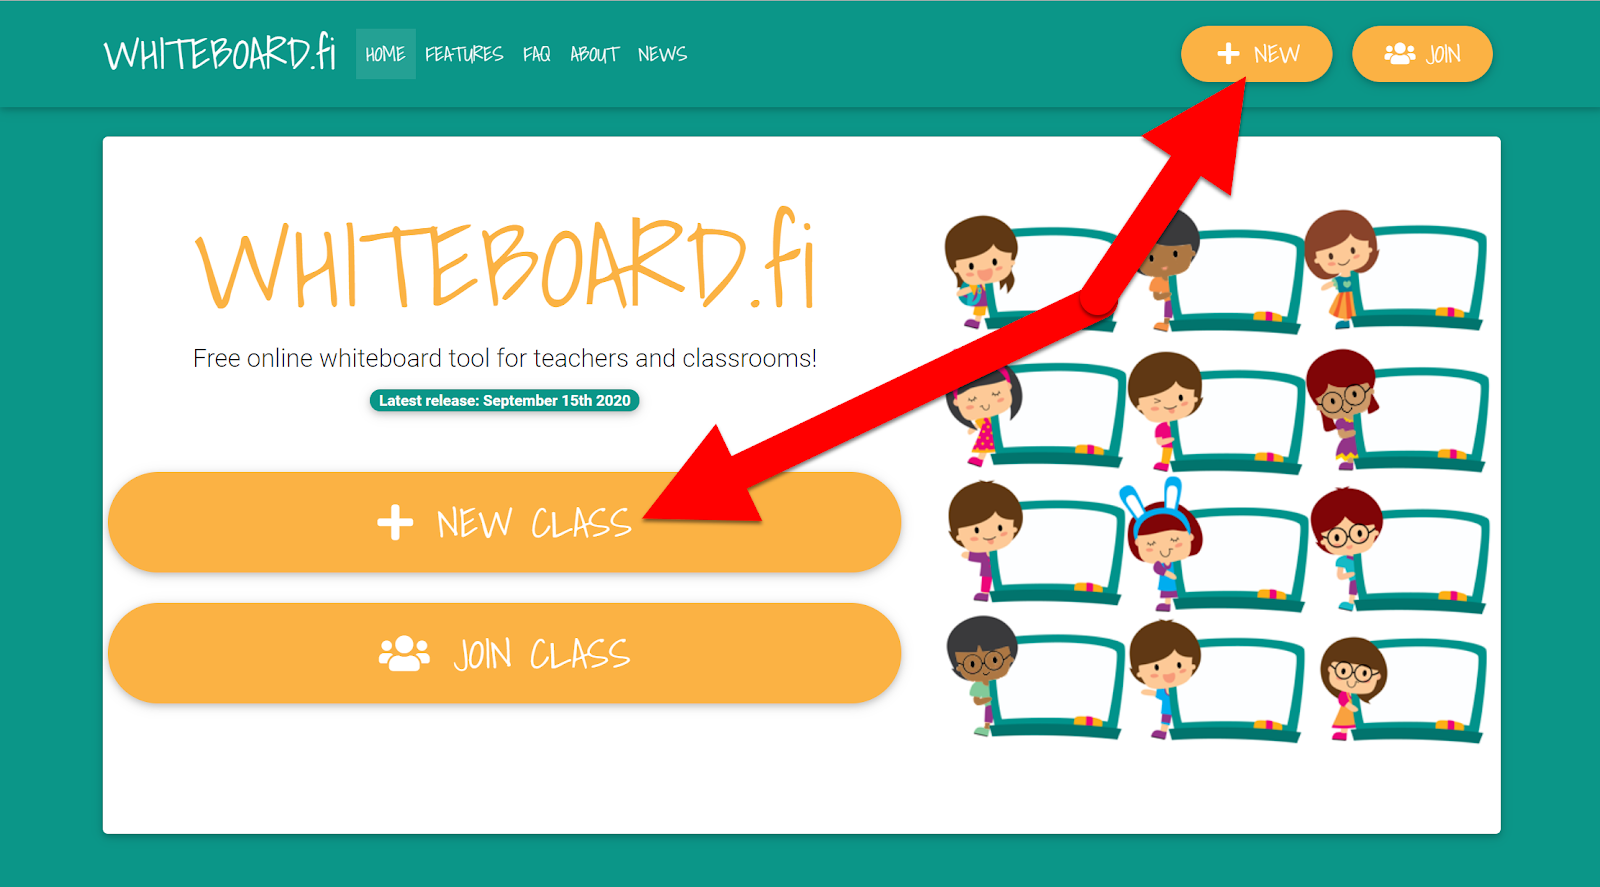
  1. Head over to whiteboard.fi.

  2. Click on “New Class”.


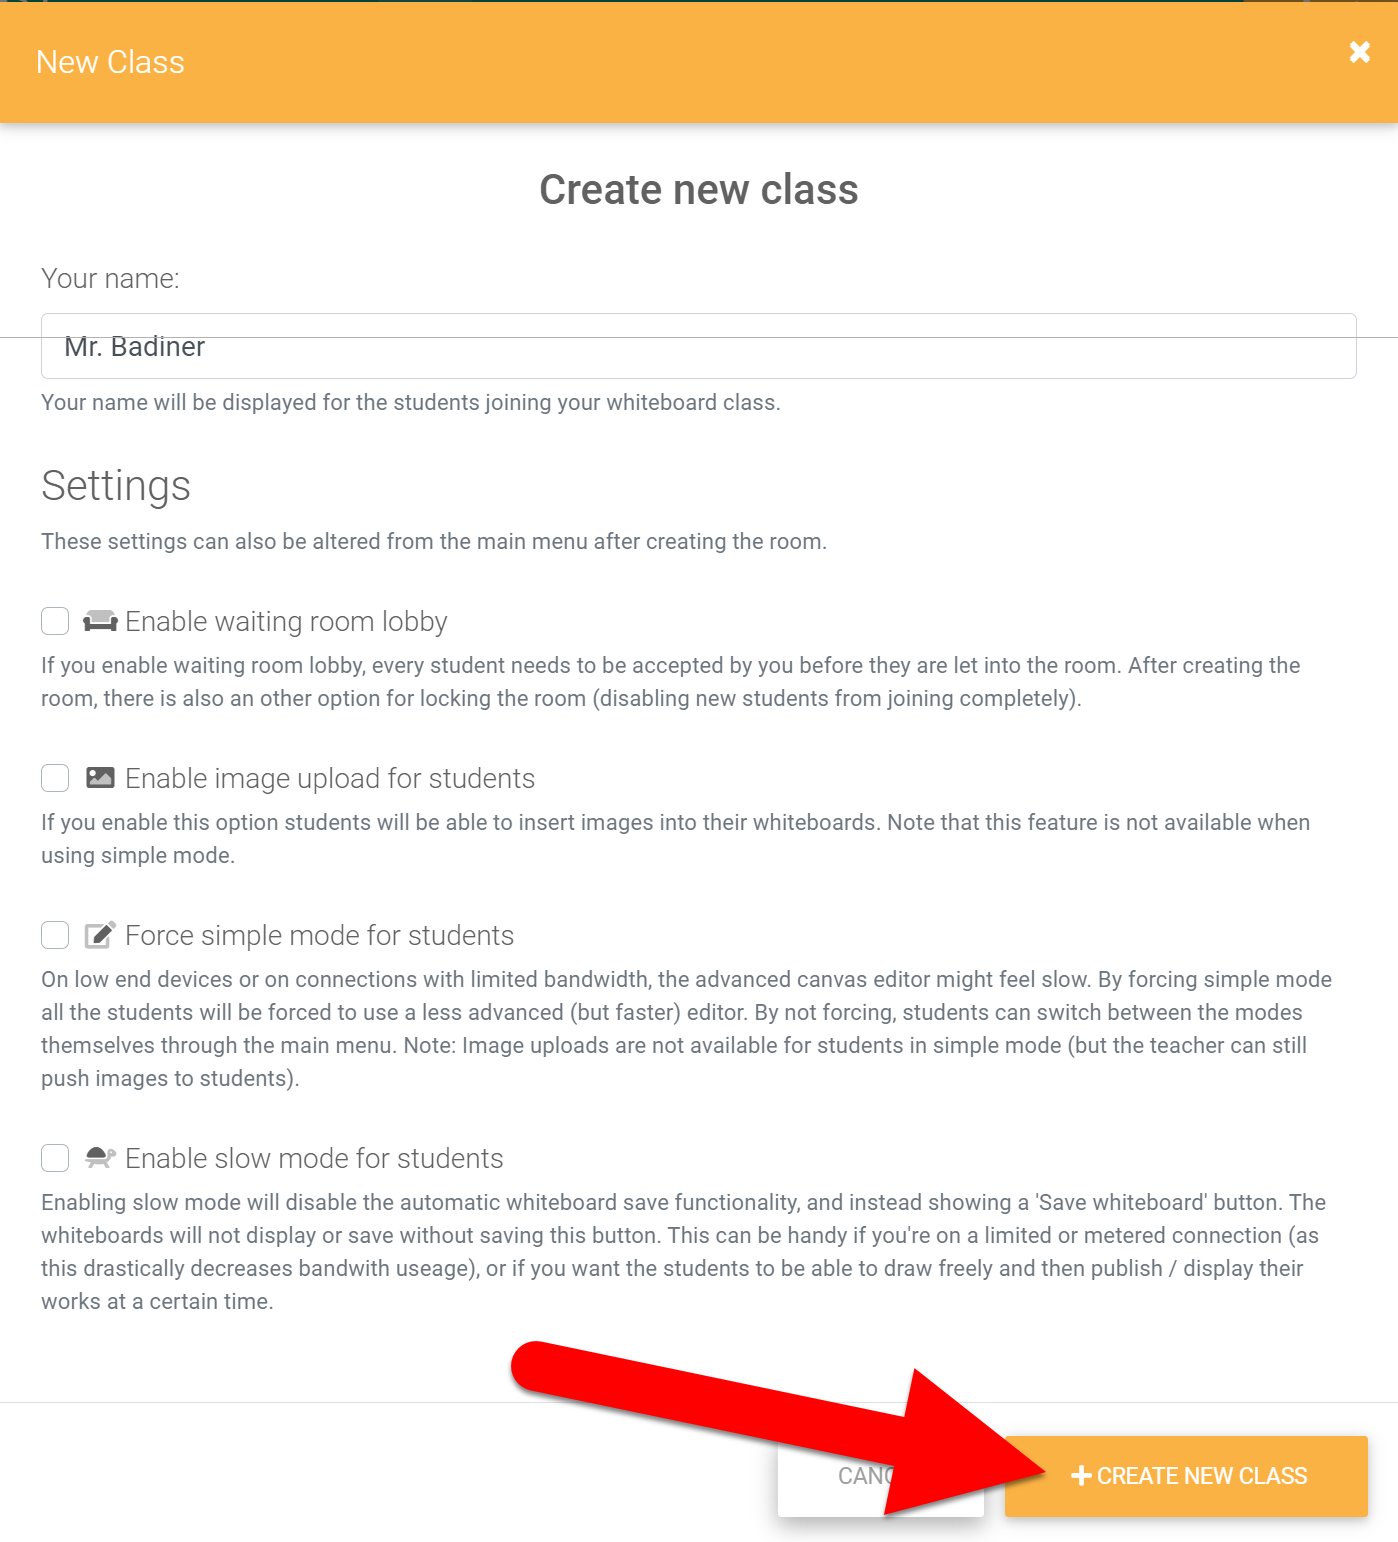
  1. Name your class and adjust any settings and click “Create New Class”. 


Invite Students:

  1. Share the link or display the QR Code.


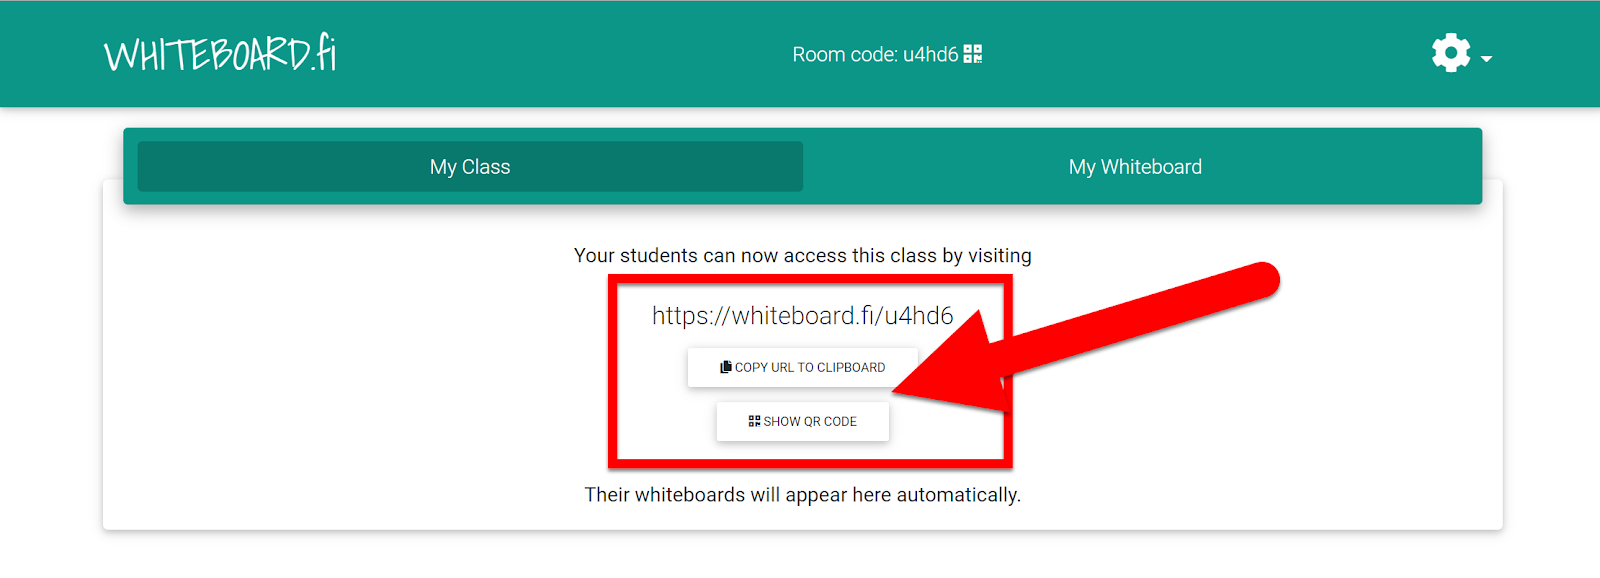
  1. Students type in their name and click “Join Whiteboard Class”.


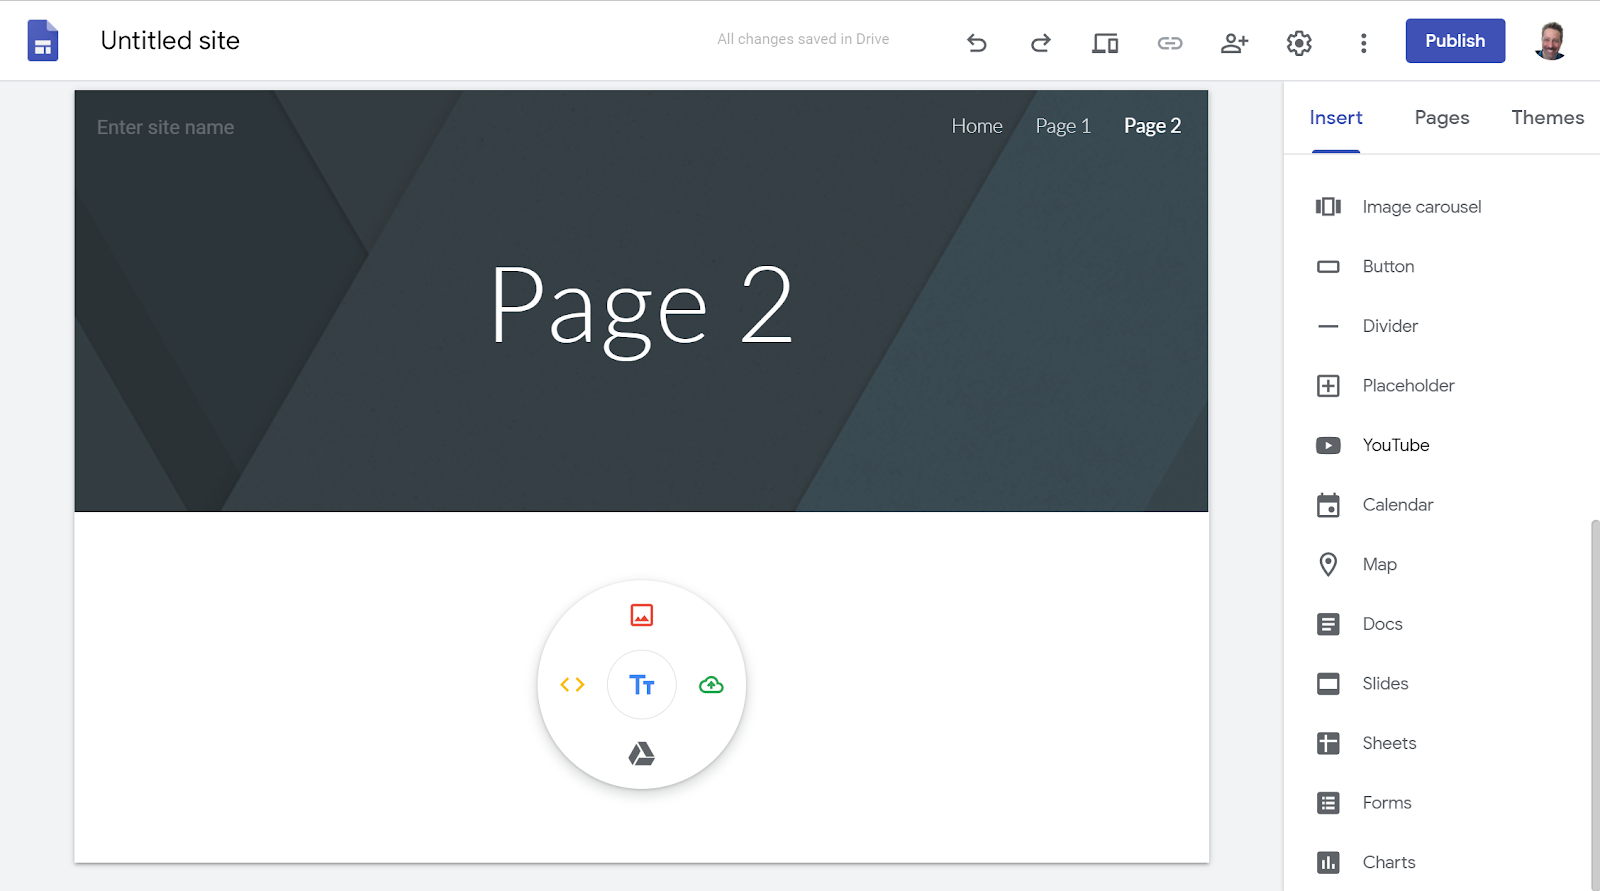
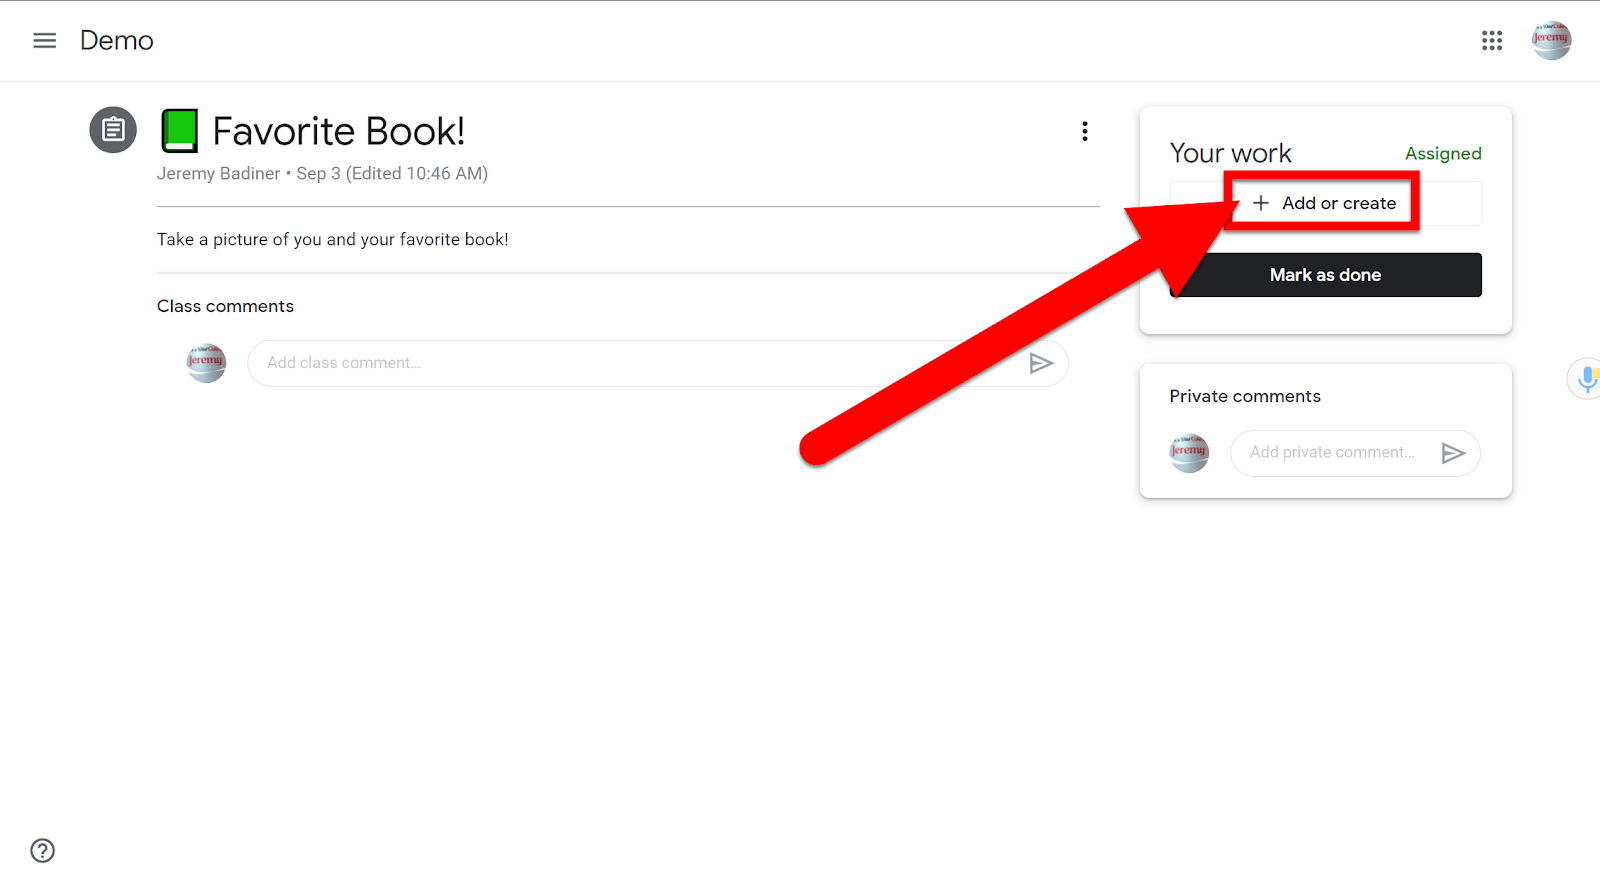
  1. Students can now draw and add shapes, text, or images to their Whiteboards.


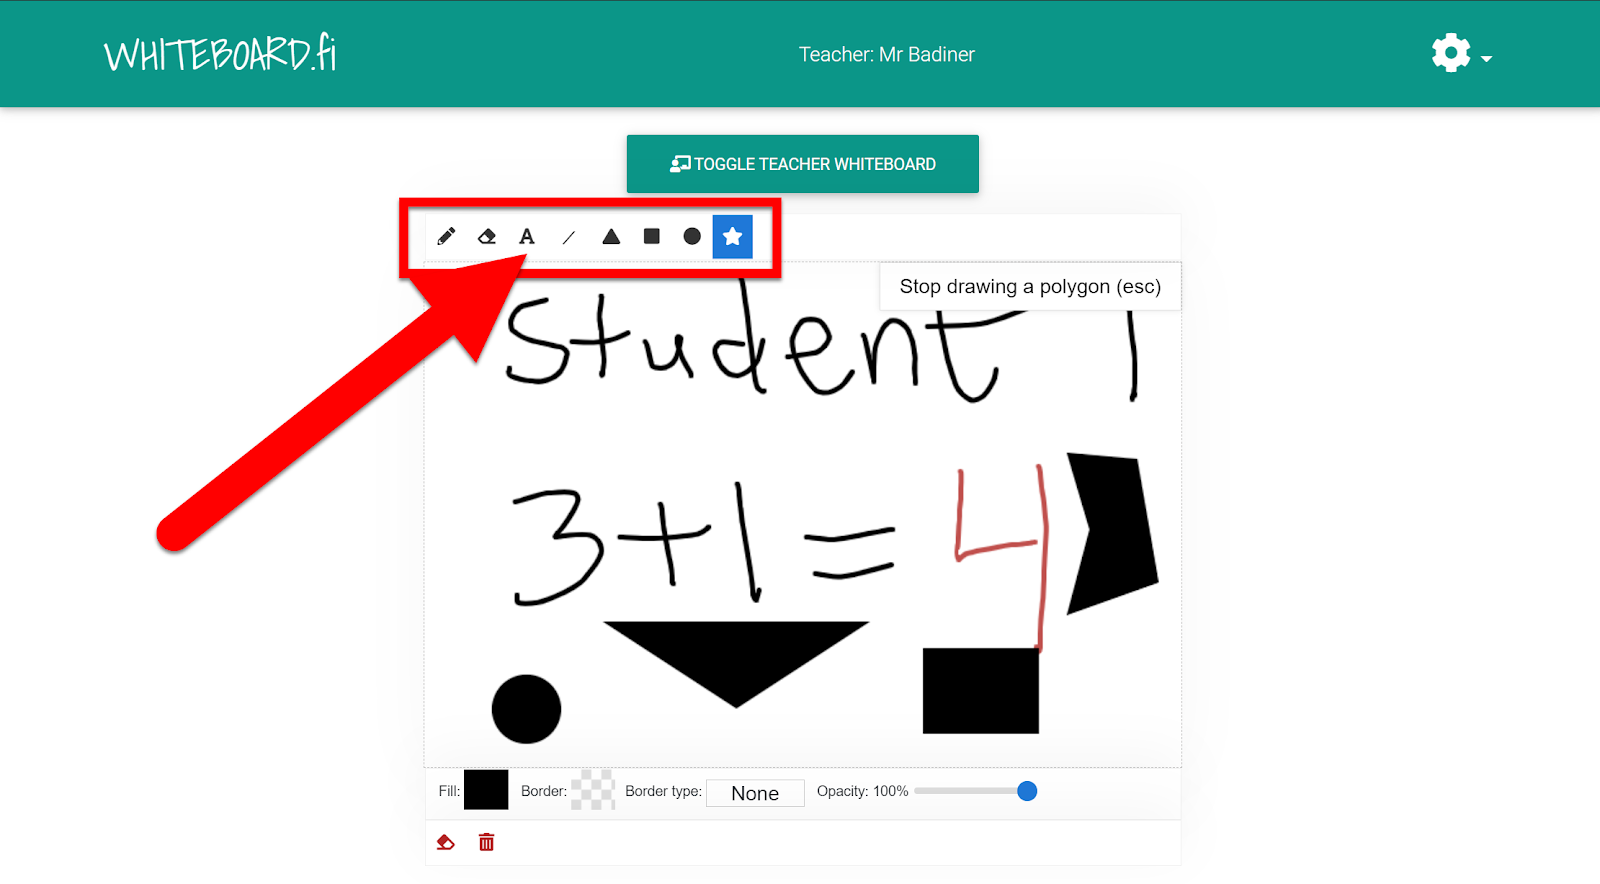
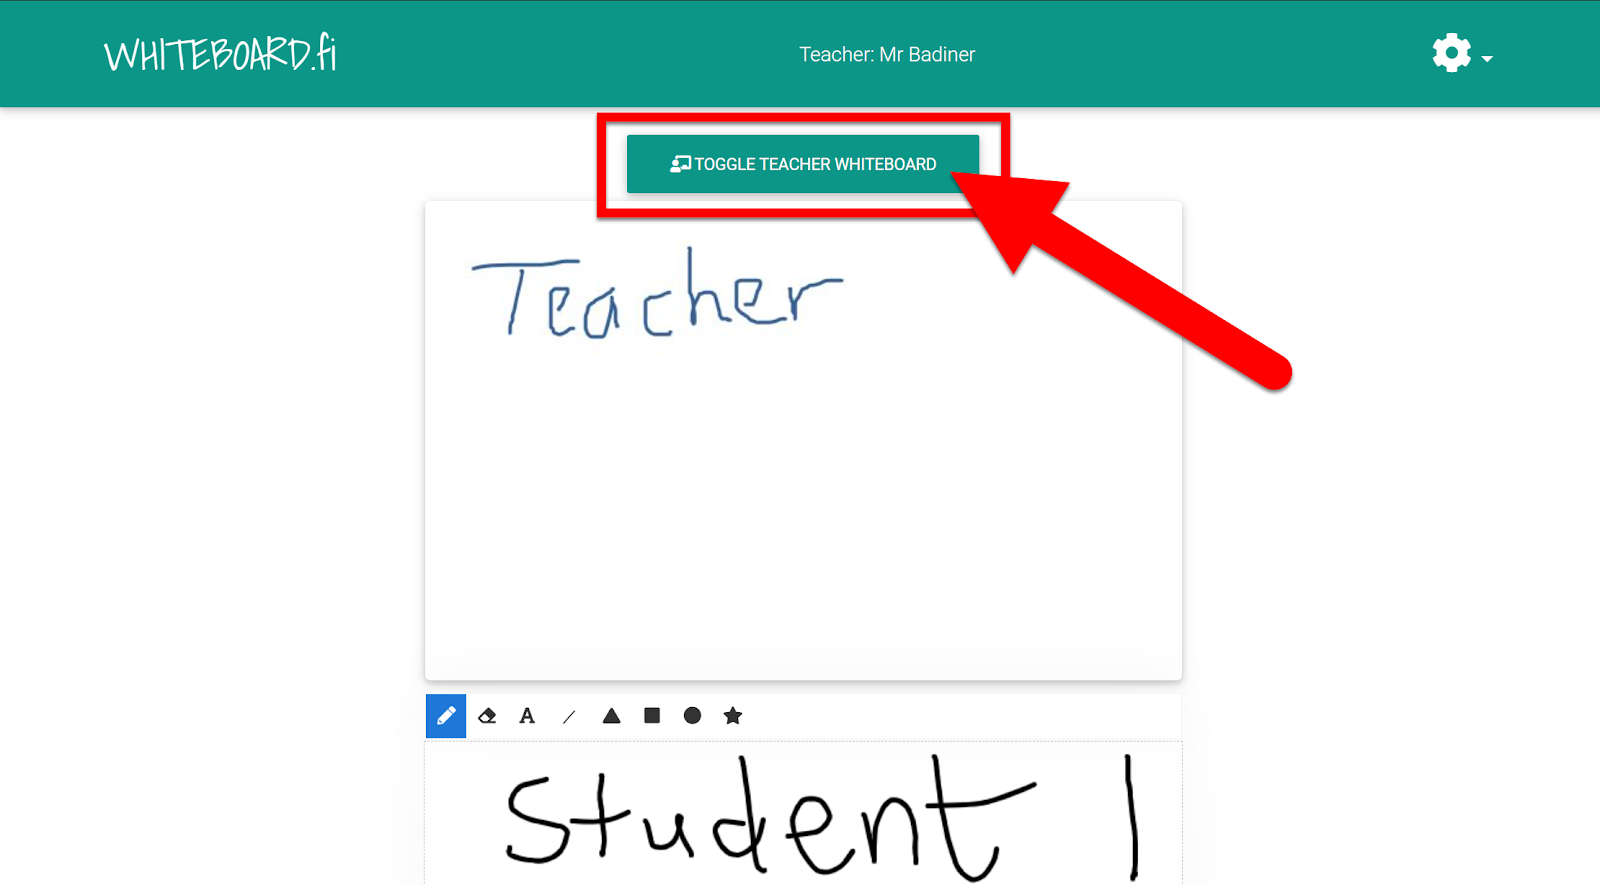
  1. Students can see the Teacher Whiteboard by clicking “Toggle Teacher Whiteboard”.


Whiteboard Tools:

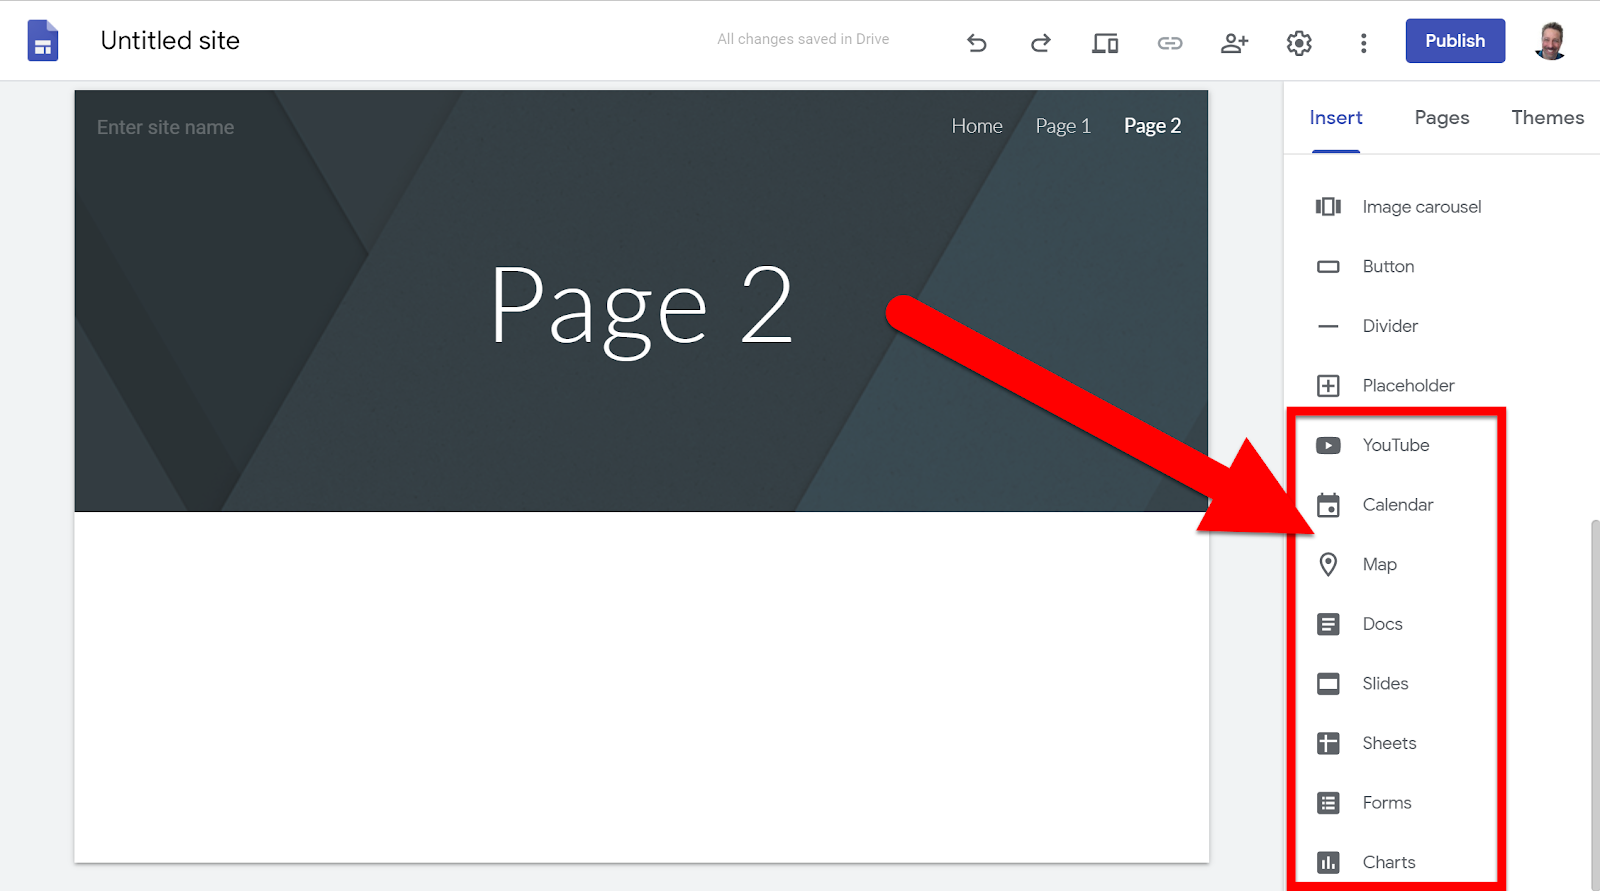
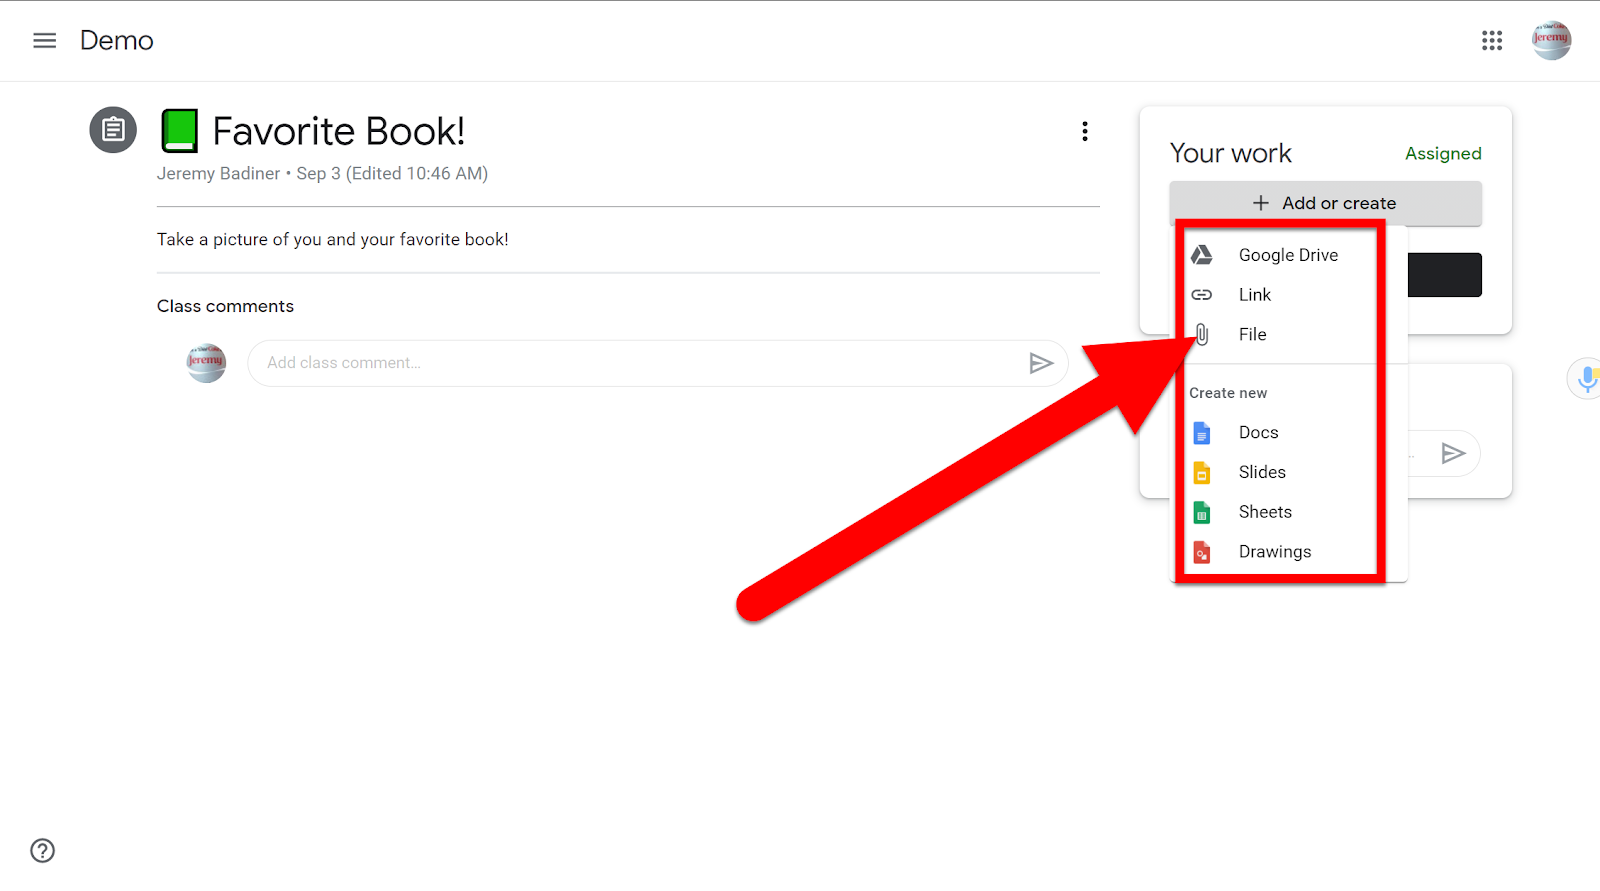
  1. Top Toolbar: Drawing, Eraser, Line, Shapes, Image, Background

  2. Bottom Toolbar: Erase All, Clear Whiteboard, Grid, Music Sheet, Emoji, Math Editor


Watch Class Work:

  1. In the teacher view click on “My Class”. This will allow teachers will see each student’s whiteboard in live time.

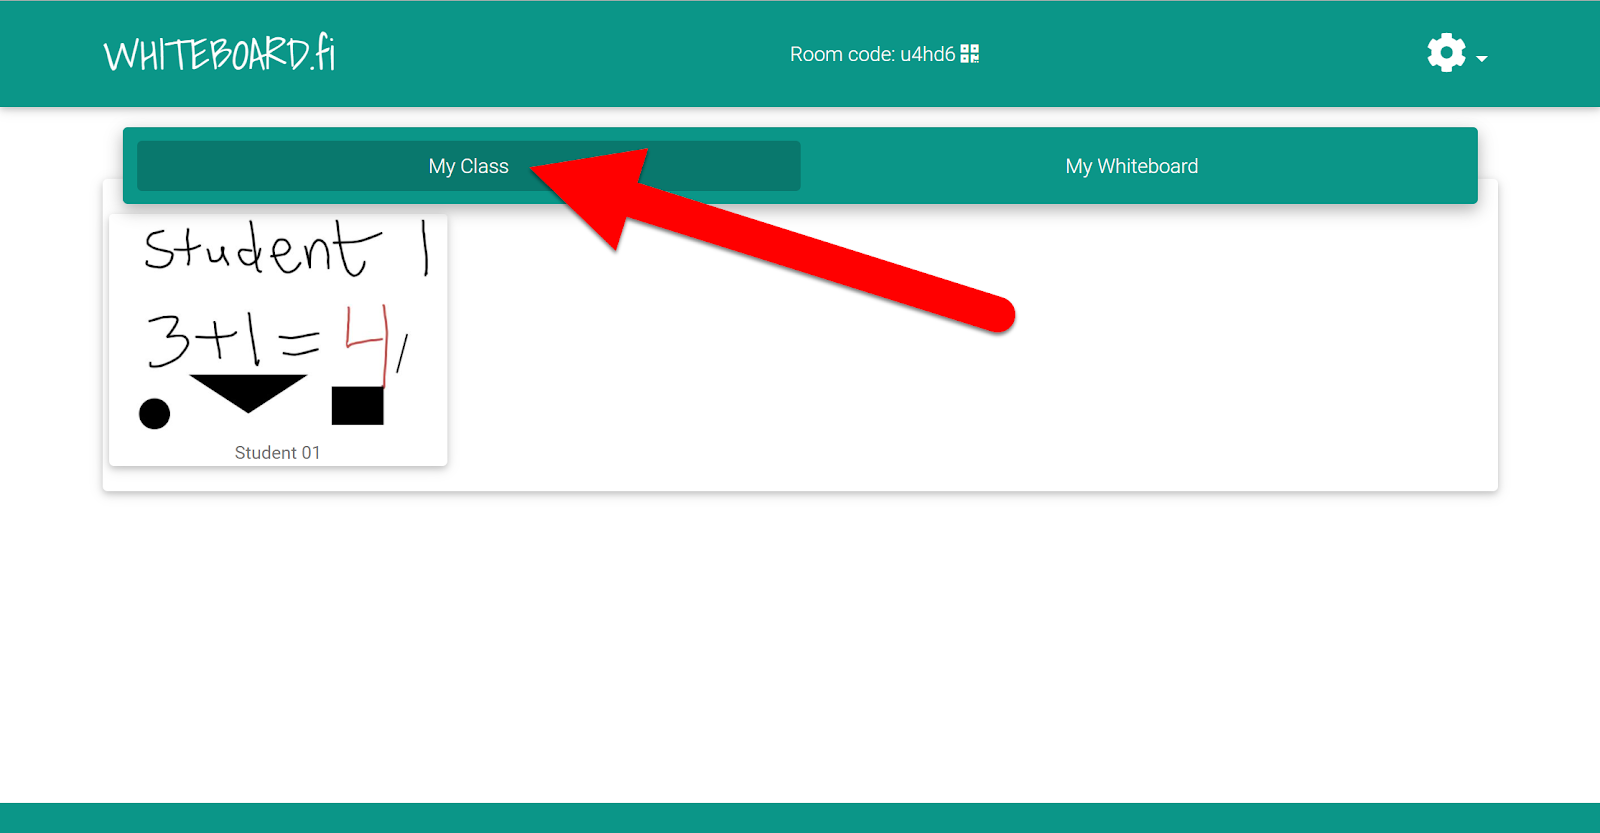
  • If you are unable to see updated student work you may need to make sure students have clicked off of the last tool they used (that is when the “save” action takes place.


Save Class Work:

  1. Teacher View:

    • Click the gear icon in the top right corner.

    • Click “Save all Whiteboards as PDF”.
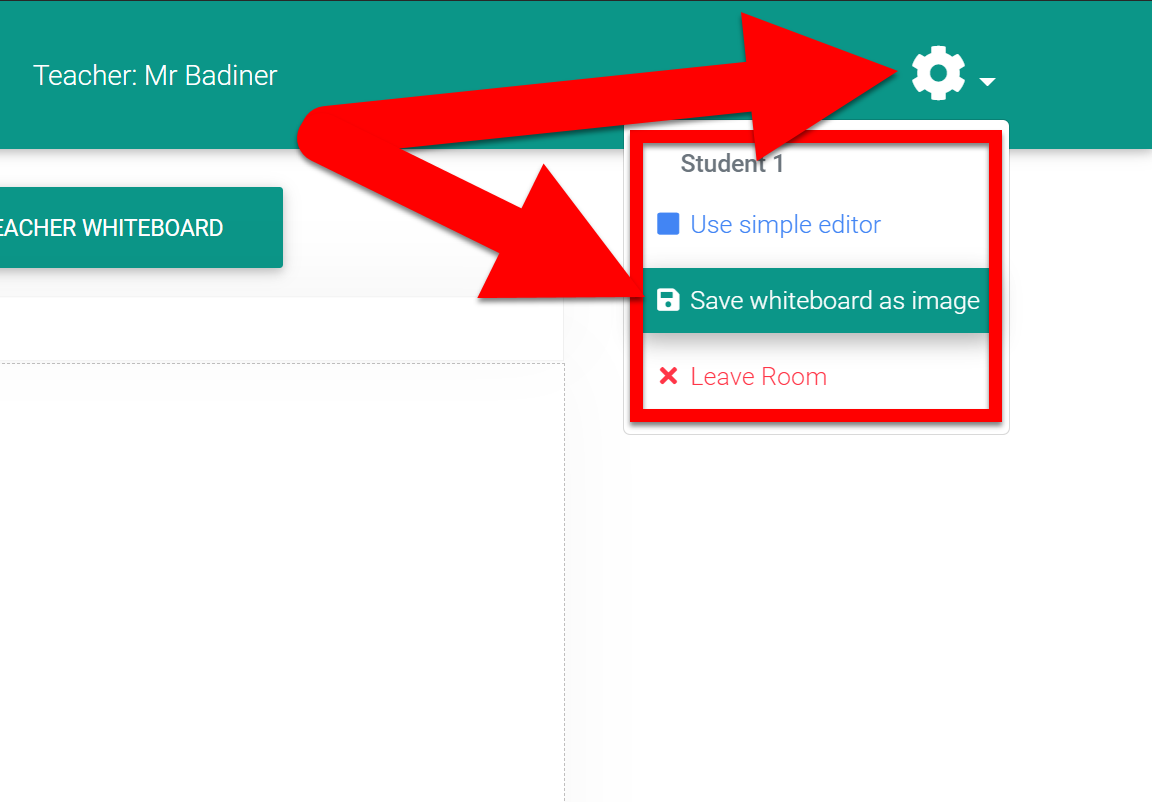

  1. Student View:

    • Click the gear icon in the top right corner.

    • Click “Save all Whiteboard as Image”.


End a Class: 

  1. Click on the Gear in the top right corner and then click on “Close Room”.


  • Make sure to save the student work to PDF before exiting the Class if you want a record of their work.


If you want these steps in a Document click HERE!

Friday, September 18, 2020

Latest Updates to Google Meet


Google Meet is receiving some updates over the next few months. Here are the ones hitting domains now and over the next couple of weeks! 


Disable Students from Using the Chat or Screen Share Features:

  • Click on the blue shield image in the bottom left corner.


  • Select which feature you wish to disable for participants. You can always enable them during the call if you wish.


Quick Access:

  • Click on the blue shield image in the bottom left corner

  • Turn on or off “Quick Access”.

    • On: Allow others into your Meet without having to manually allow.

    • Off: Everyone who is not invited (even those within your domain) must ask to join the Meet.


View Up to 49 Participants in Grid View (Without an Extention!):

  • Click on the 3 dots in the lower right corner.

  • Click on “Change layout”.

  • Click on “Grid”.

  • Use the slider at the bottom to select the max number of participants you wish to view.


Blur Your Background:

  • Click on the 3 dots in the lower right corner.

  • Click on “Turn On Blur Background”.

  • To turn off blur, follow the same steps, and click “Turn Off Background Blur”.


Keep an eye out for these Meet updates to roll out to our domain!


If you want these directions in a Document click HERE!

Tuesday, September 15, 2020

Creating a Google Site

Creating a Google Site is easy! Google has taken all the hard work out of this process and given users a simple, fast, and easy interface to make everyone look like a webmaster. With Google Sites, you can share content, create professional web pages, and organize resources for others. Had into Google Drive and easily create a Google Site in minutes.


Create a  New Site:

  1. Go to your Drive, click “New”, then “More”, then choose “Google Sites”.


Setting Up Your Site’s Look & Layout:

  1. Templates:

    • If you are not feeling creative, you can use some of the pre-designed Site templates to get started.


  1. Themes:

    • This is where it gets easy. There are a few themes to choose from. These themes set banner, font style, and color. You can tweak these a little in the extra setting.


  1. Navigation Bar: 

    • This is where the page links appear. You can choose to have them located at the top of the page or on the left side. You can set the background color of the Navigation Bar as well.


Creating Pages:

  1. You can create as many pages as you want. These can be reordered, hidden from view, and made as subpages.

    • Create a Page: Click on “Pages” in the top right and click the “+” button at the bottom right. Then name the page.


    • Reorder and create Subpages: Drag and drop to reorder pages. If you drag a page onto another page name it will become a subpage of that page.


    • Page Options: You have many options if you click the 3 dots to the right of the page number. (Make as Homepage, Duplicate the Page, Properties, Add Subpage, Hide from Navigation, and Delete)


Creating and Adding Content:

  1. Inserting items:

    • Click the Insert tab in the top right. (You can also double click anywhere on the page to add these.)


    • In the site editor, you can double click for these quick insert options.


    • You can easily add Google Items as well! (Reminder: make sure to have all Google Files set as Sharable with the audience you are sending the Google Site to.)


  1. Customizing Page Headers:

    • You can add text or an image to the header. You can choose from Google’s gallery or upload your own image as artwork.


  1. Editing Content:

    • You can adjust any content’s location, size, formatting, and width in the site.


Publish & Share Site:

  1. Click the “Publish” button to make your site live!


  1. You have the opportunity to set your web link, who can see the site, and if it is searchable on Google.


  1. Just a tip, while in the editing view, your site looks different than it will when published. I recommend always clicking the “Preview” icon before clicking “Publish” to verify your site looks like you intend. 


  1. When you are ready to share your site with the world click the drop-down arrow to the right of the “Publish” button and click “View published site”. This will give you the web link (in the new tab’s address bar) of your site. Copy this and share it out!


Here is an example of a Google Site. I copy/pasted all the content of this “How-To” into a site in just a few minutes.


https://sites.google.com/gulllakecs.org/demo1/home


If you want these directions in a Document click HERE!

Saturday, September 12, 2020

Chromebook Split Screen

There are extensions out there to help users manage to split a Chromebook Screen. This can even be done without adding more extensions to hog resources. There are some very easy and quick keystrokes to make your Chromebook show 2 Chrome tabs at once.


Split Screen to the Left:

  1. Have Chrome open.

  2. Hold down the Alt Key and tap the “[“ Key.


  1. This will put your Chrome browser to the left of your screen.


Split Screen to the Right:

  1. Have Chrome open.

  2. Hold down the Alt Key and tap the “]“ Key.


  1. This will put your Chrome browser to the right of your screen.


Split Screen to the Left & the Right:

  1. Have Chrome open.

  2. Hold down the Alt Key and tap the “[“ Key.

  3. This will put your Chrome browser to the left of your screen.

  4. Drag one of your tabs off the main Chrome screen so it is separate.

  5. Hold down the Alt Key and tap the “]“ Key.

  6. This will put your now separated Chrome browser to the right of your screen.

  7. You will see both Chrome tabs/browsers (one on Left, one on the Right).

  8. When you are done, drag the right tab back into place on the left Chrome browser.


Here is a video showing how easy it is to do: Video Here


If you want these steps in a document click Here!

Thursday, September 10, 2020

Student Uploading File to Classroom

You have your kiddos using Google Classroom as their hub for learning and need them to turn in work to you. The issue, you can not show them how to do this. One of the issues with Classroom is that Teaches can not see their Classroom as a student. Yikes. No worries. Take a look (and share) the steps below to show students (and parents) how to upload files (images, PDFs, videos, other files) from their device into an assignment.


Upload a File to a Classroom Assignment:

  1. Get into your Classroom with the student login.

  2. Head to the “Classwork” tab.

  3. Click on the assignment you need to upload a file into.


  1. Click on “View Assignment”.


  1. Click on the “+ Add or Create” button in the top right.


  1. Choose where the file is located and browse for it.


  1. Find the file in your Drive, device, or other location.


  1. Select the file and add it.


  1. Click on “Turn in”.


  1. Click on “Turn in” on the pop-up.


Here is a video walk-through to help as well: Upload File into Google Classroom


If you want these directions in a Document, Click HERE!