

Create a New Site:
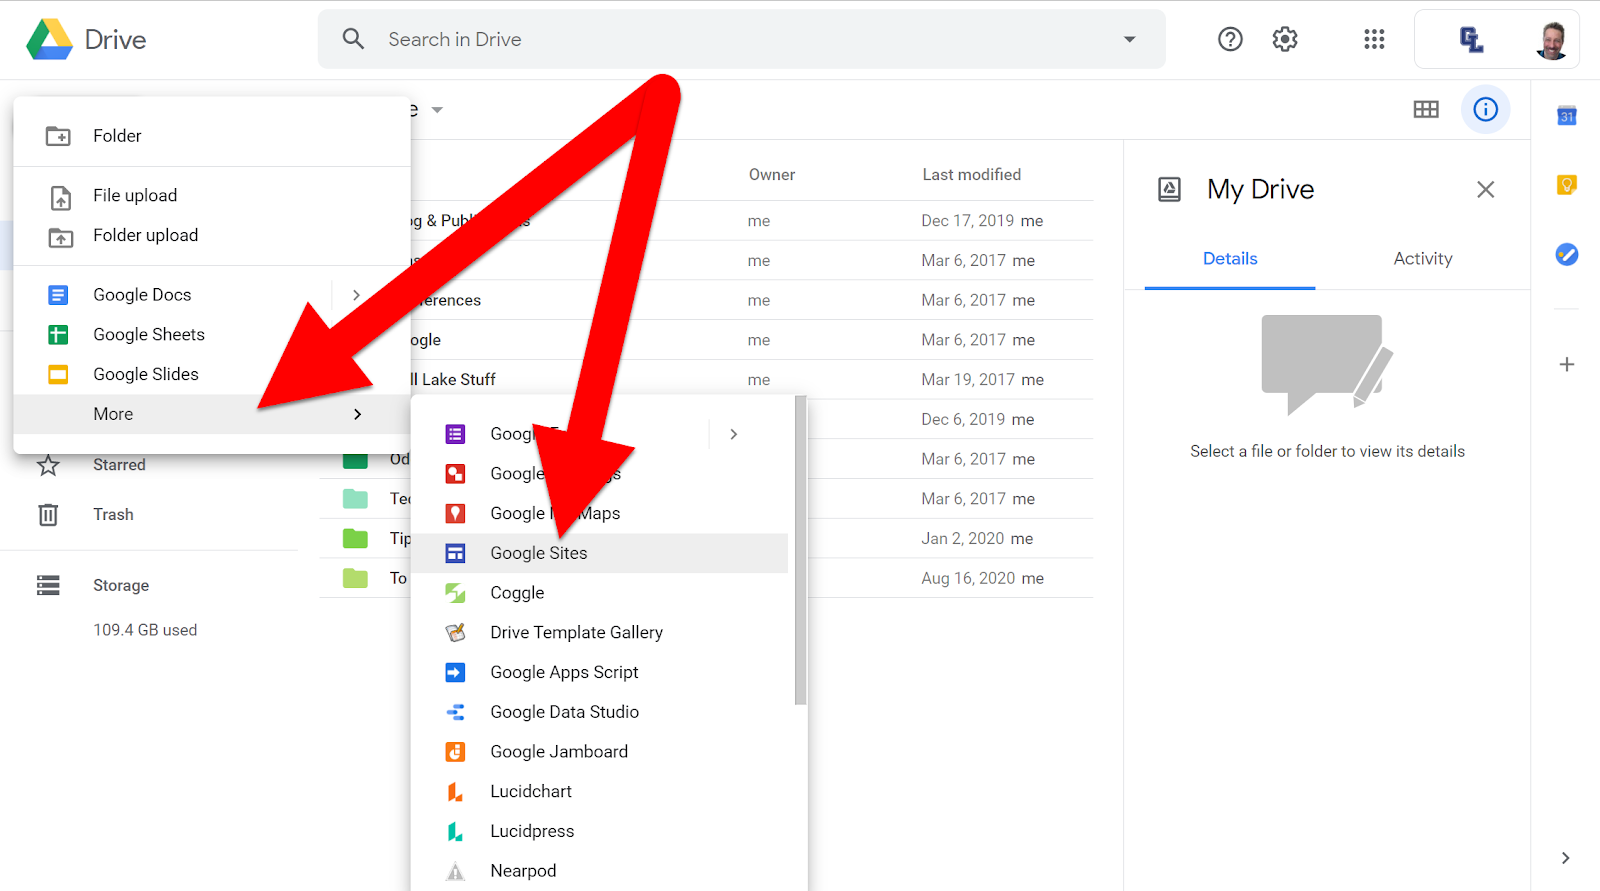
Go to your Drive, click “New”, then “More”, then choose “Google Sites”.
Setting Up Your Site’s Look & Layout:
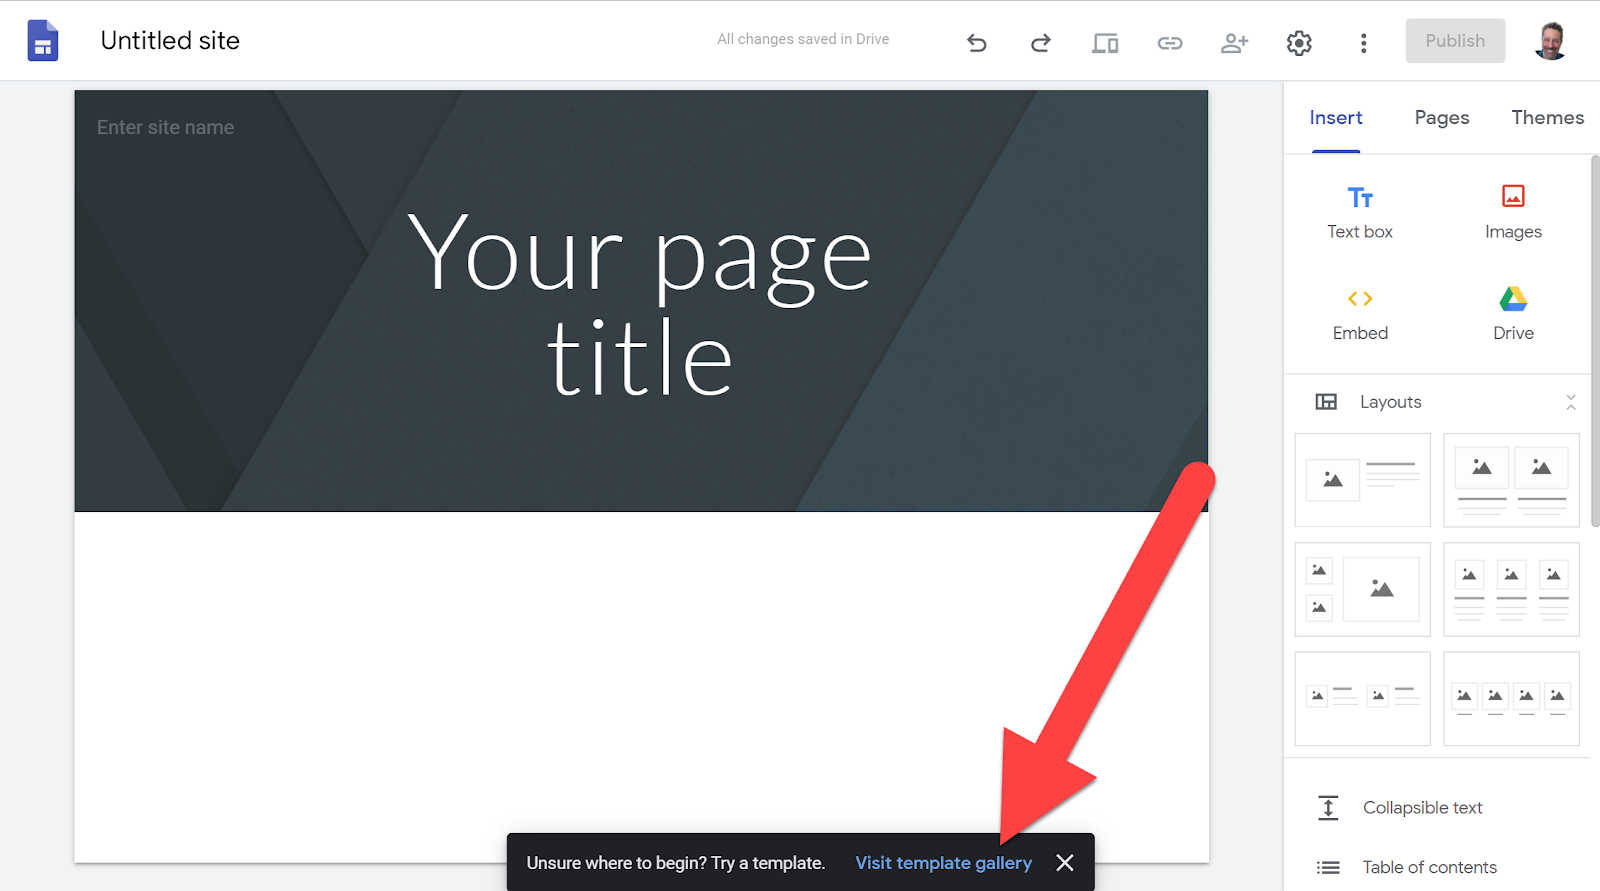
Templates:
If you are not feeling creative, you can use some of the pre-designed Site templates to get started.
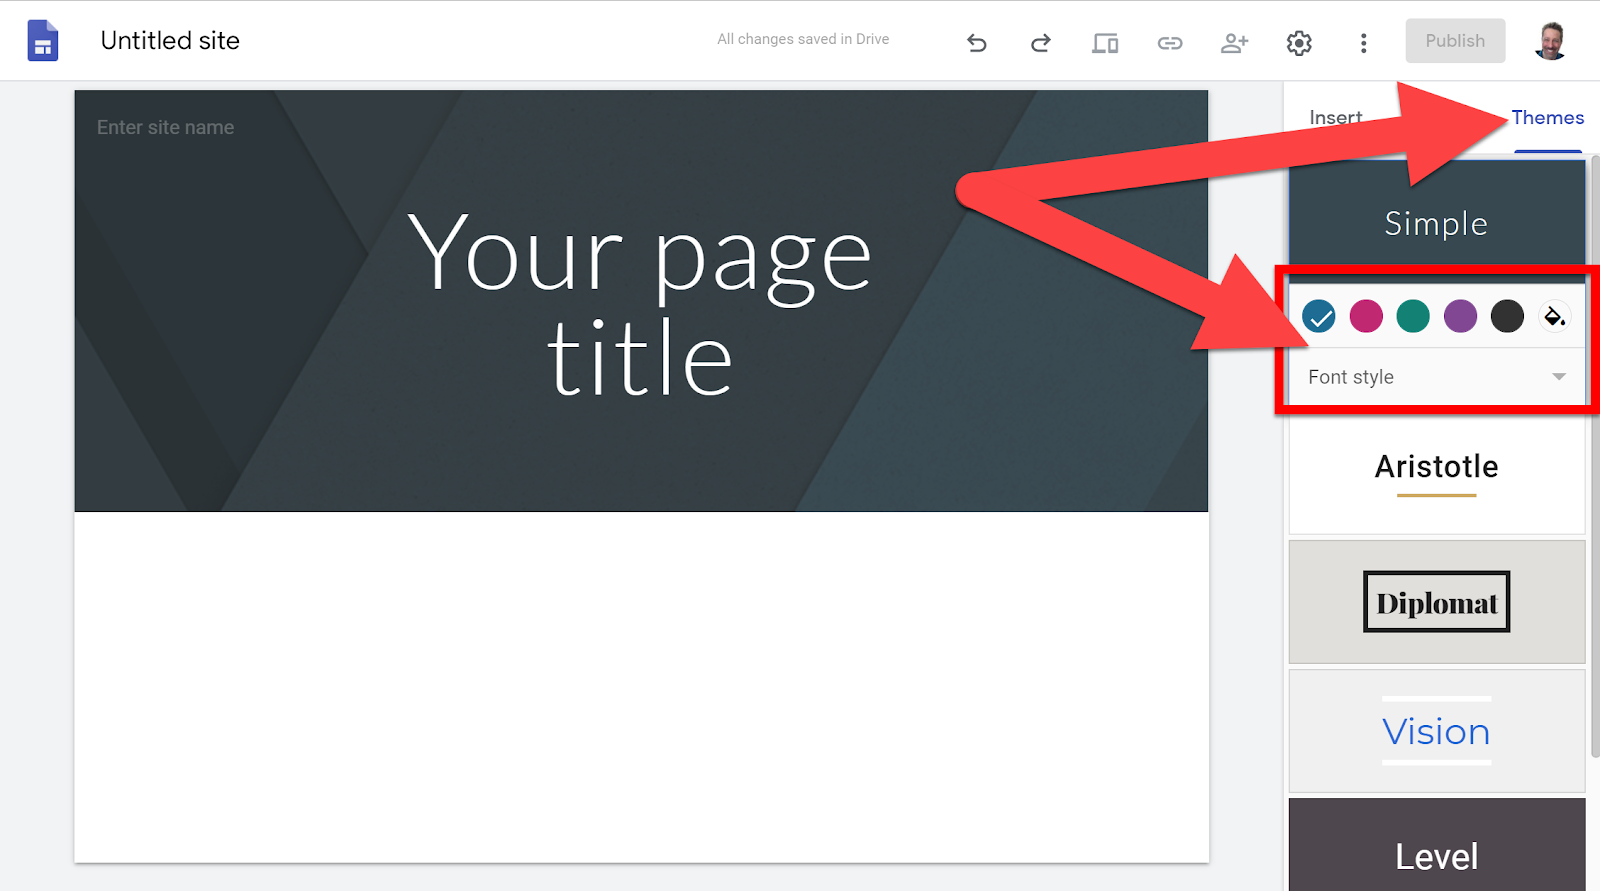
Themes:
This is where it gets easy. There are a few themes to choose from. These themes set banner, font style, and color. You can tweak these a little in the extra setting.
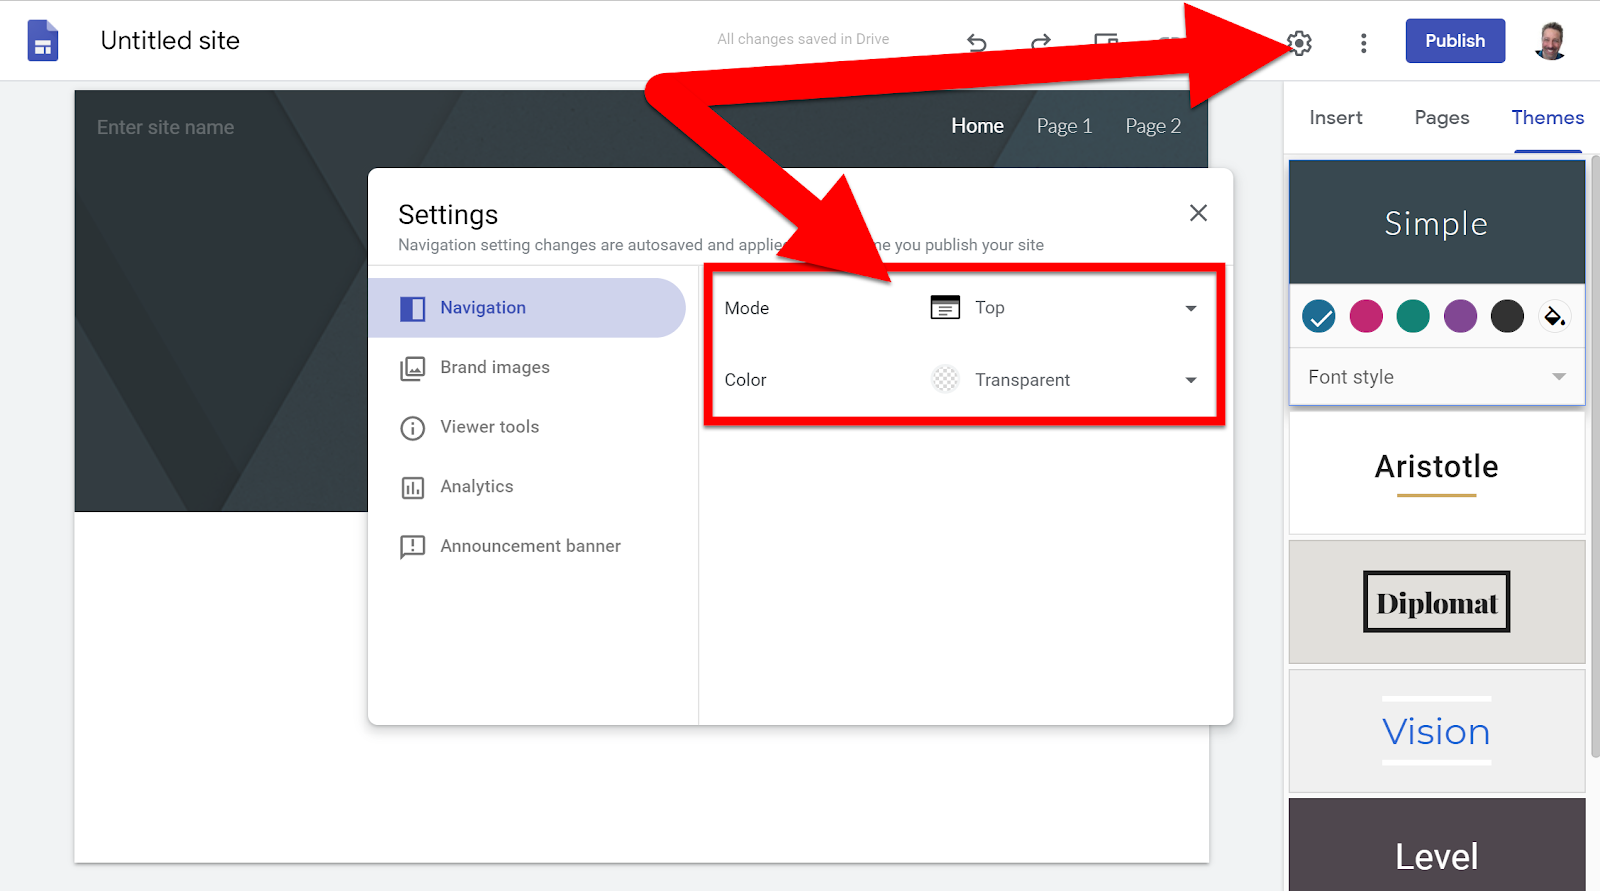
Navigation Bar:
This is where the page links appear. You can choose to have them located at the top of the page or on the left side. You can set the background color of the Navigation Bar as well.
Creating Pages:
You can create as many pages as you want. These can be reordered, hidden from view, and made as subpages.
Create a Page: Click on “Pages” in the top right and click the “+” button at the bottom right. Then name the page.
Reorder and create Subpages: Drag and drop to reorder pages. If you drag a page onto another page name it will become a subpage of that page.
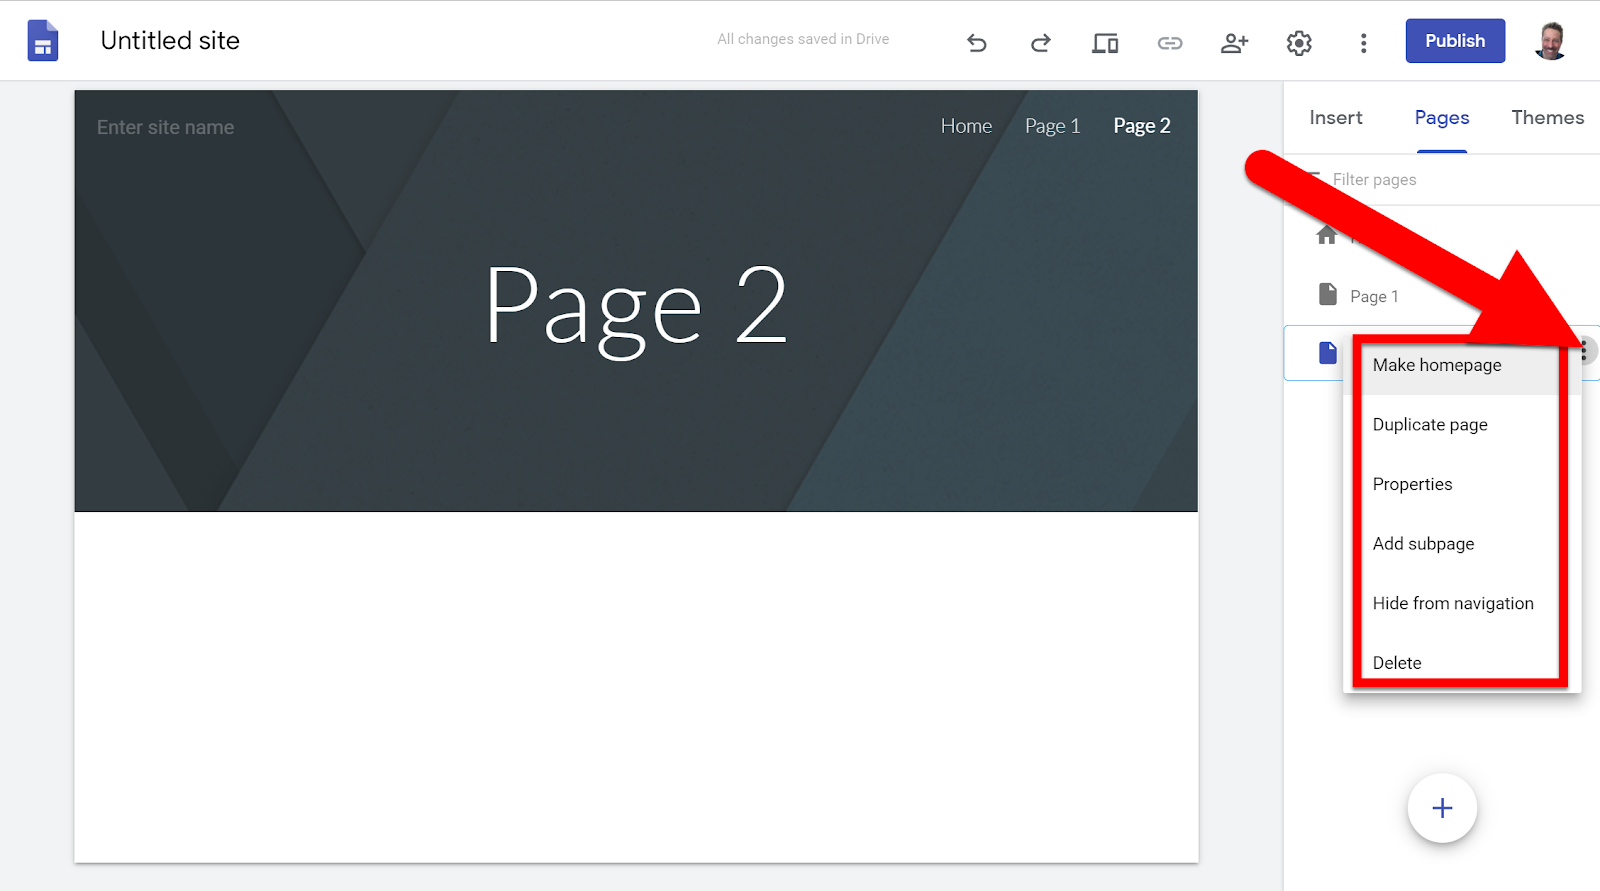
Page Options: You have many options if you click the 3 dots to the right of the page number. (Make as Homepage, Duplicate the Page, Properties, Add Subpage, Hide from Navigation, and Delete)
Creating and Adding Content:
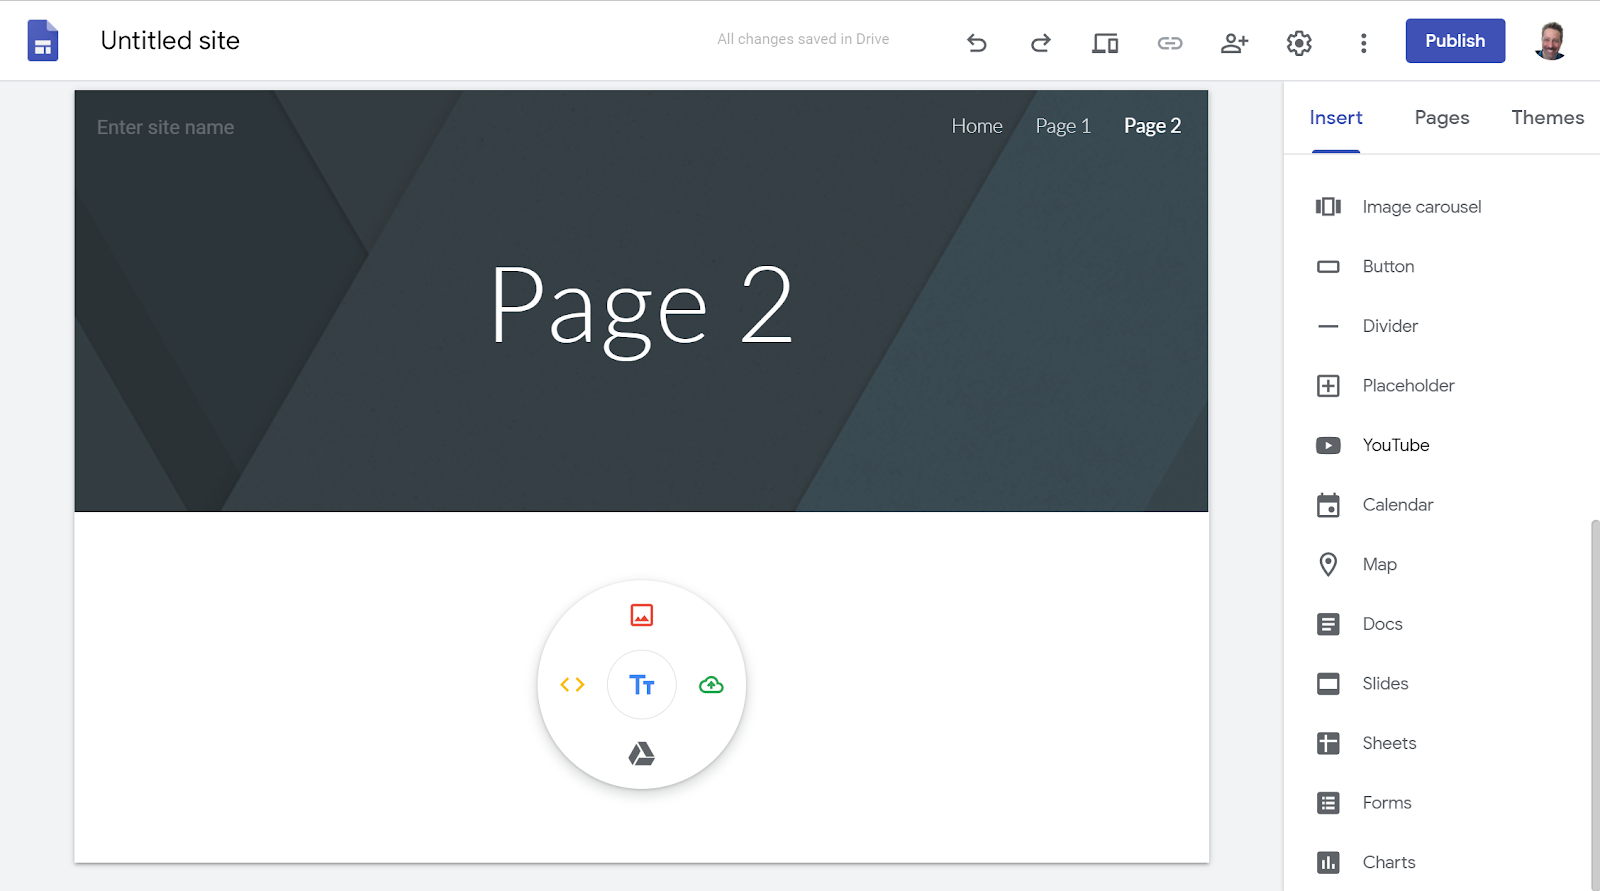
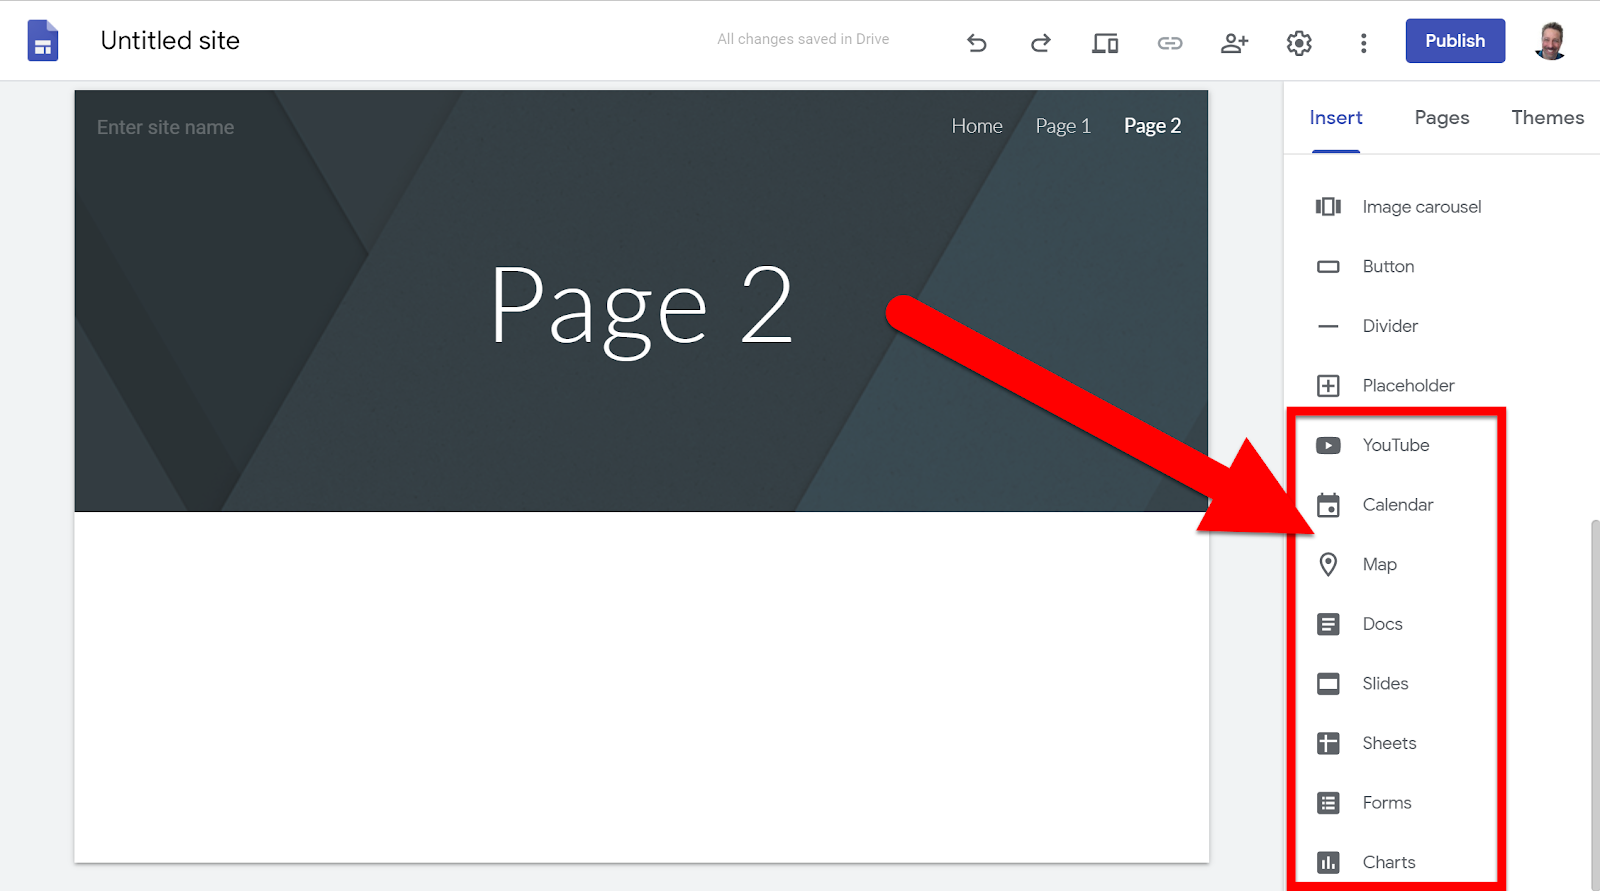
Inserting items:
Click the Insert tab in the top right. (You can also double click anywhere on the page to add these.)

In the site editor, you can double click for these quick insert options.
You can easily add Google Items as well! (Reminder: make sure to have all Google Files set as Sharable with the audience you are sending the Google Site to.)
Customizing Page Headers:
You can add text or an image to the header. You can choose from Google’s gallery or upload your own image as artwork.
Editing Content:
You can adjust any content’s location, size, formatting, and width in the site.
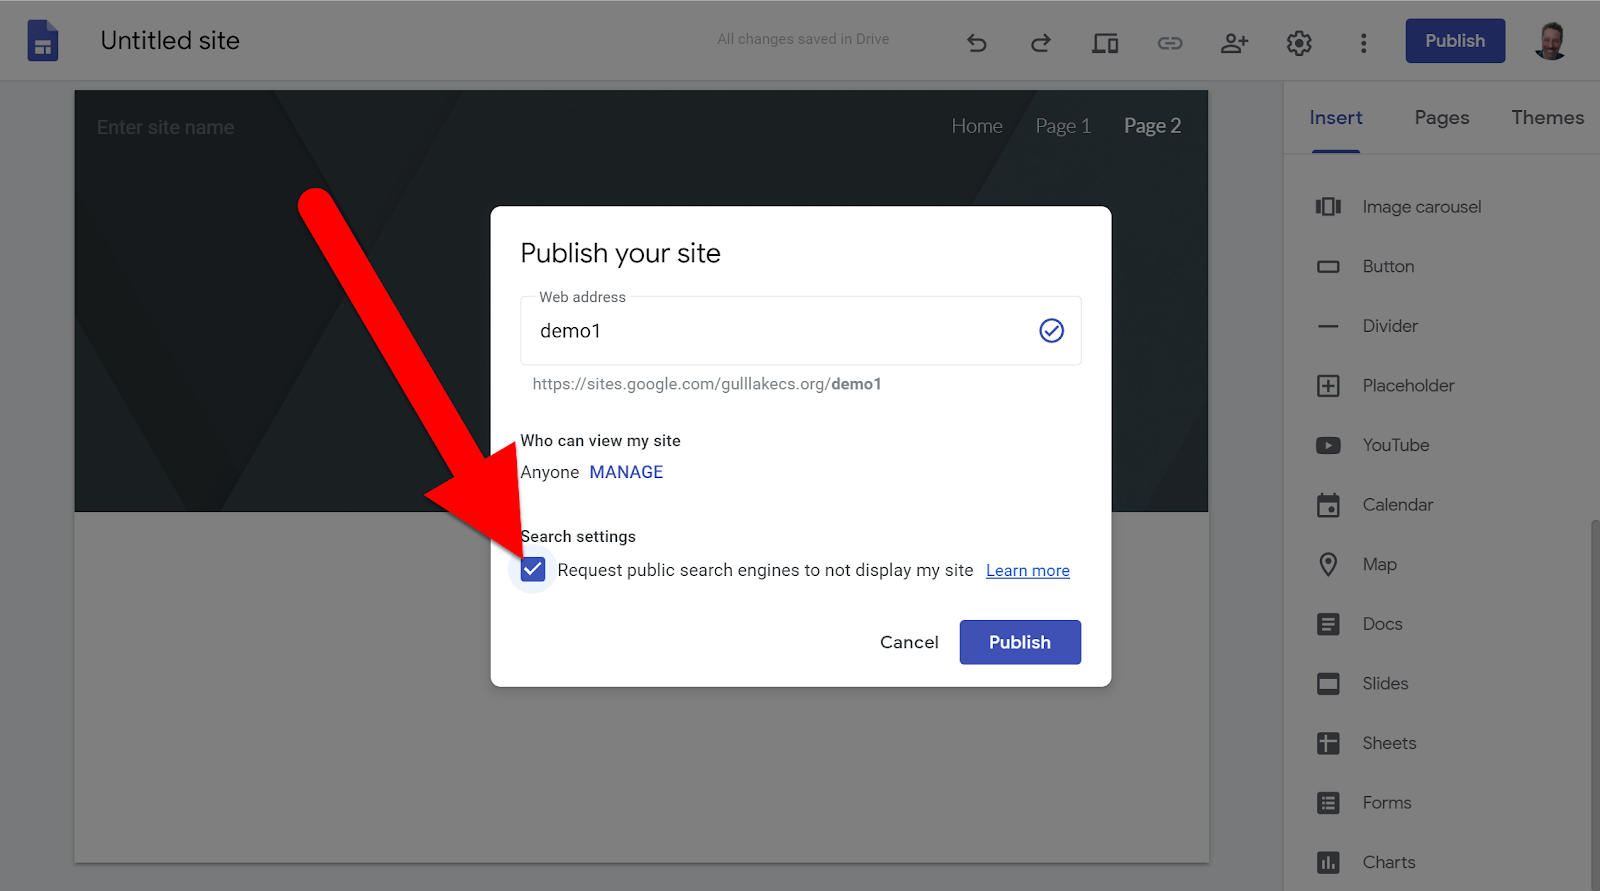
Publish & Share Site:
Click the “Publish” button to make your site live!
You have the opportunity to set your web link, who can see the site, and if it is searchable on Google.
Just a tip, while in the editing view, your site looks different than it will when published. I recommend always clicking the “Preview” icon before clicking “Publish” to verify your site looks like you intend.

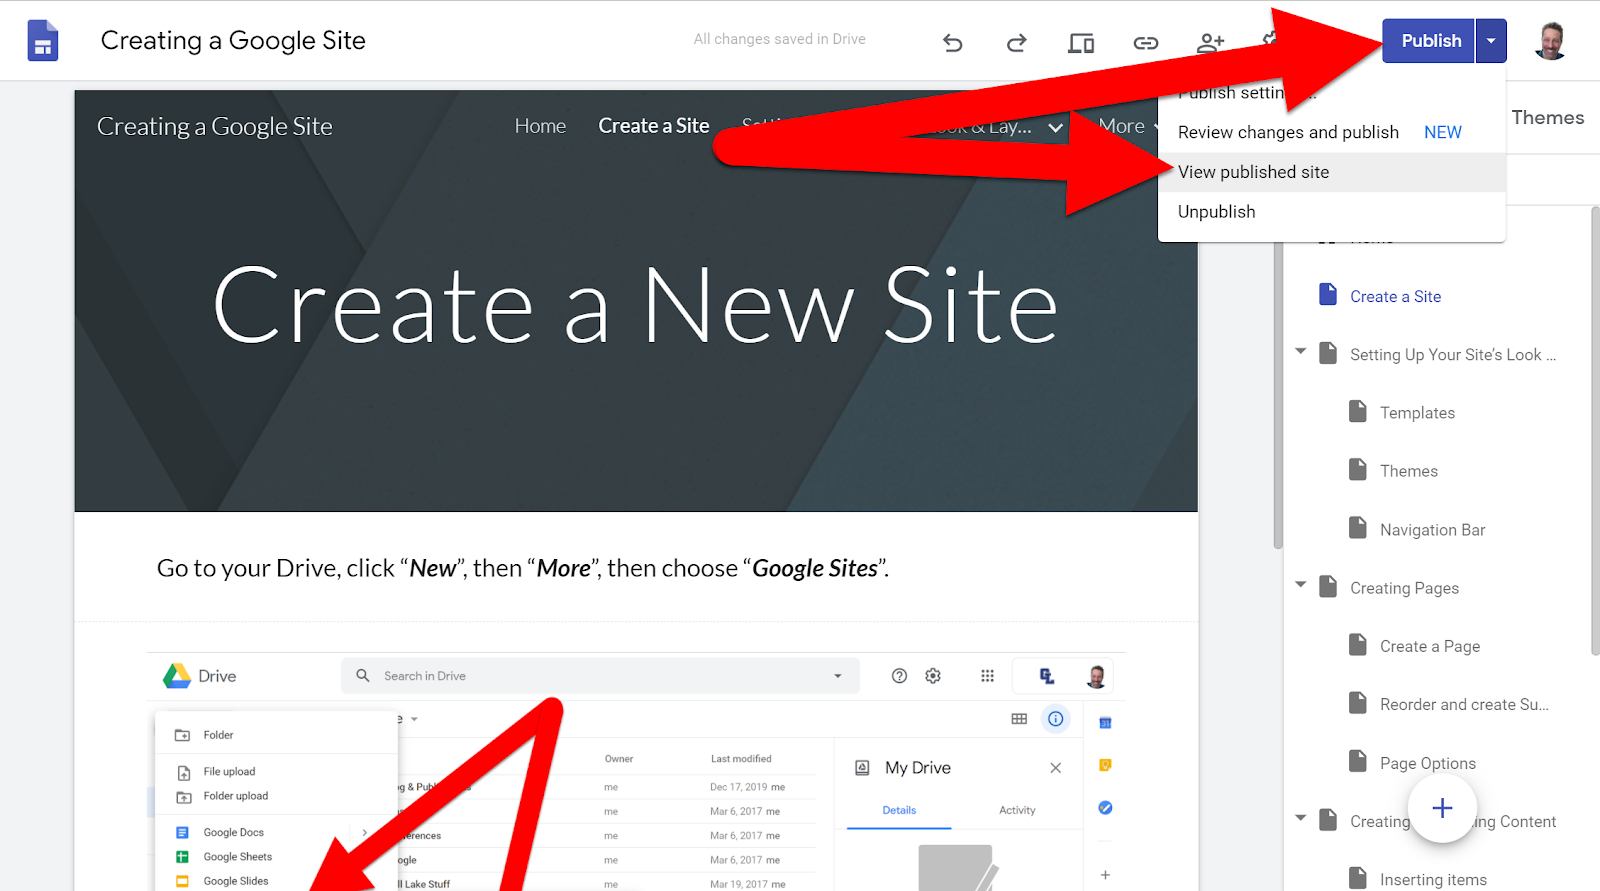
When you are ready to share your site with the world click the drop-down arrow to the right of the “Publish” button and click “View published site”. This will give you the web link (in the new tab’s address bar) of your site. Copy this and share it out!
Here is an example of a Google Site. I copy/pasted all the content of this “How-To” into a site in just a few minutes.
https://sites.google.com/gulllakecs.org/demo1/home