Thursday, April 18, 2024

Mail Merge in Canva


Using Mail Merge to create labels, certificates, documents, and emails is a huge timesaver for any teacher. Microsoft Word has it built in, Google uses an extension, and Canva has this option as well! Now you can make any of your awesome creations in Canva personalized with just a little work. Check out the following directions to start!


Create a Mail Merge in Canva:

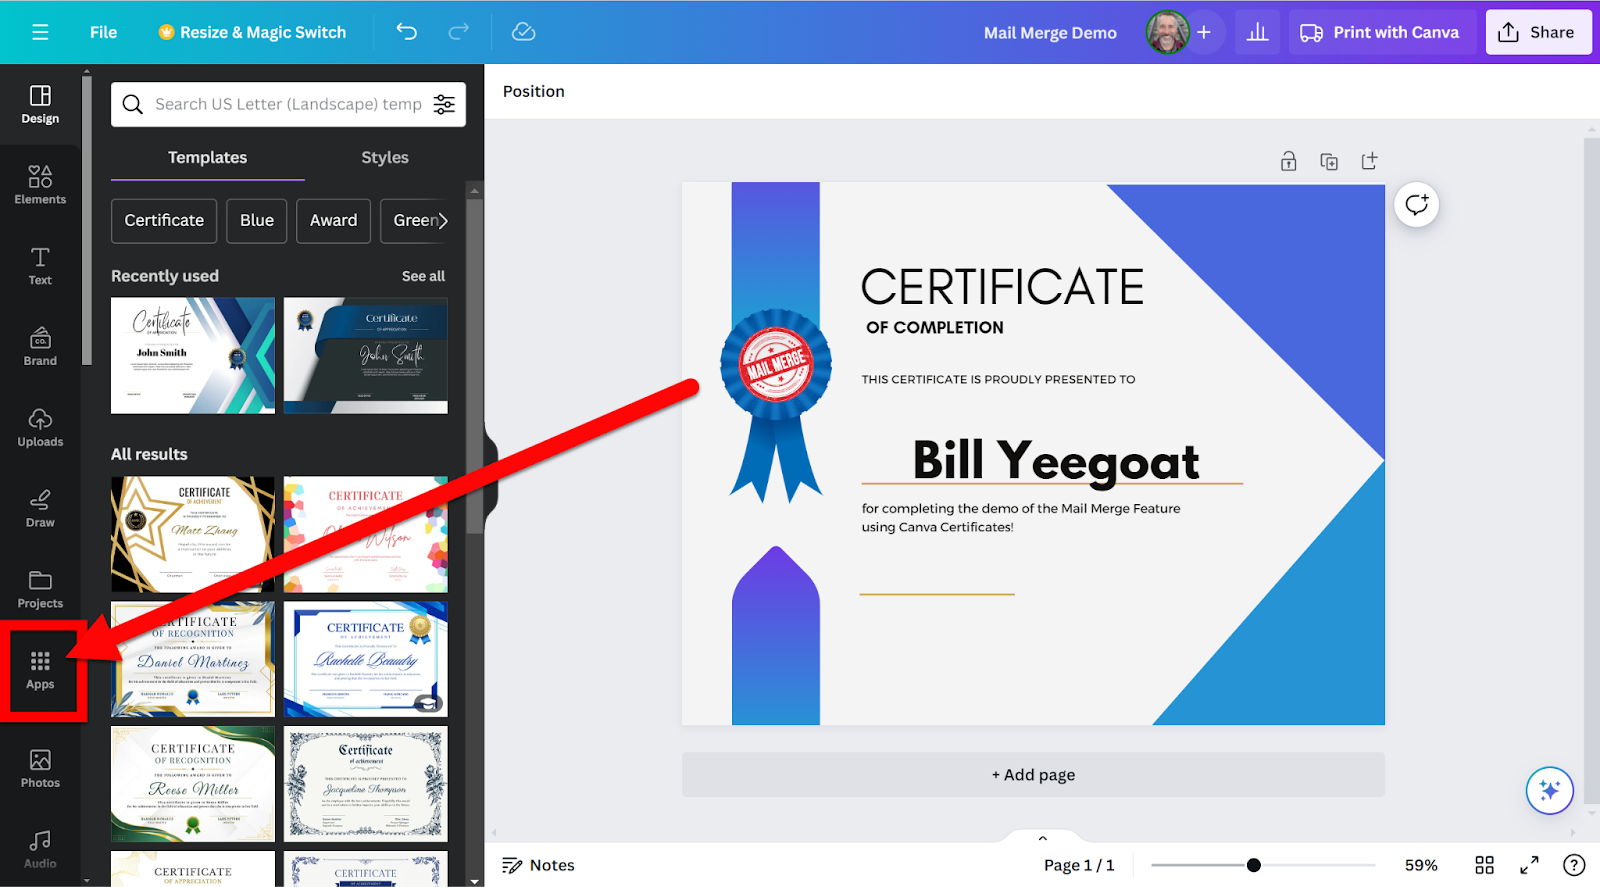
  1. Create (or even better use a template) a certificate, document, or whatever you want as your template for your mail merge in Canva.

  2. Once you are ready click on the “Apps” icon on the left.


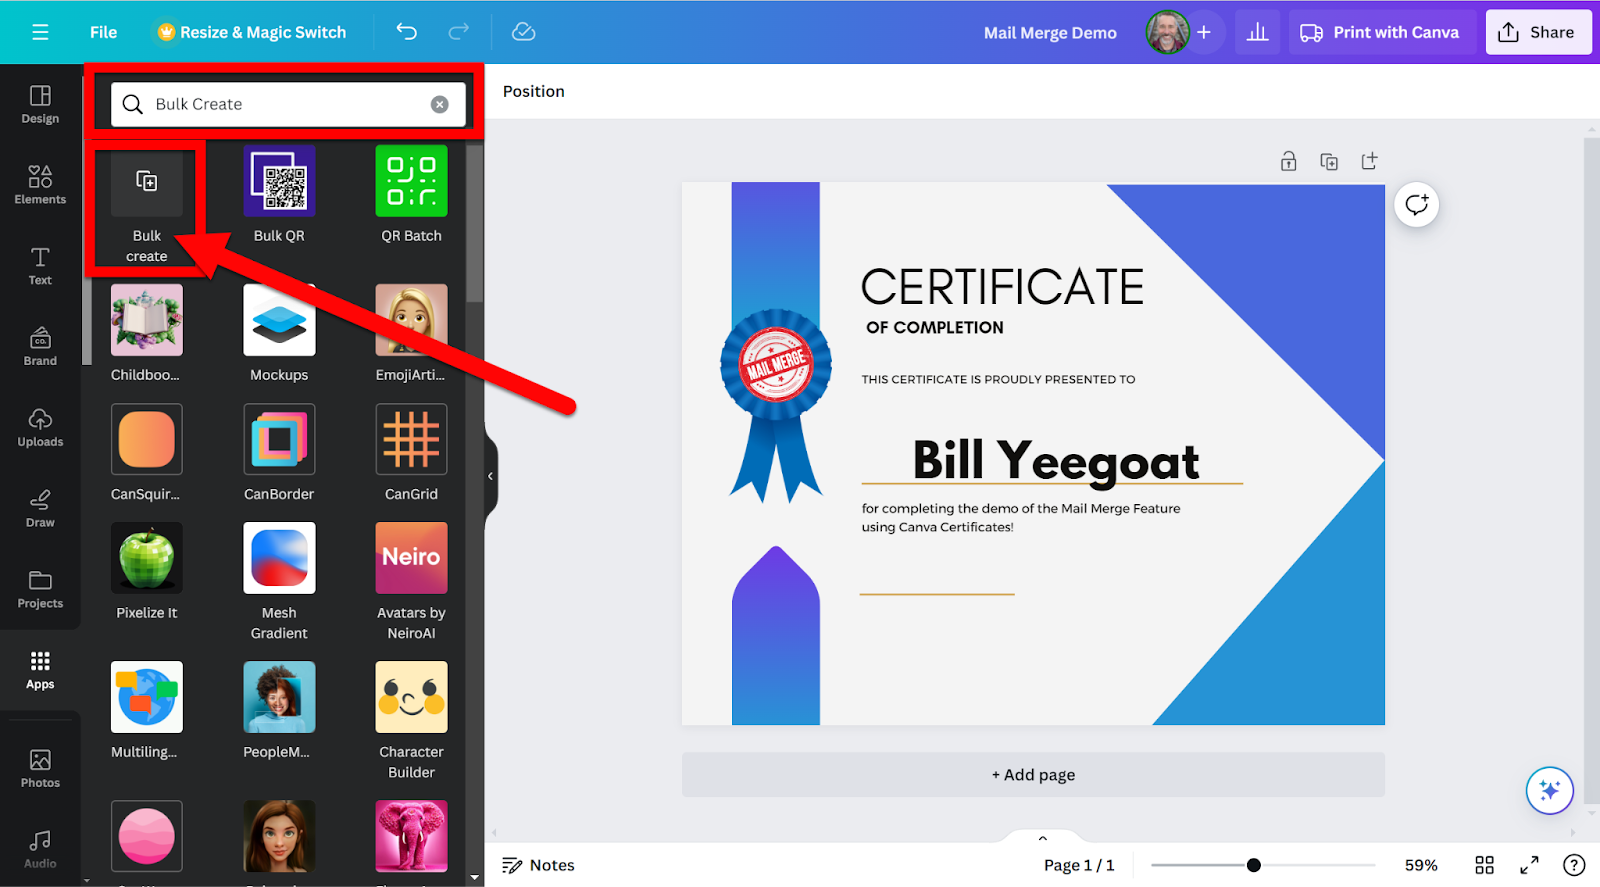
  1. Search for “Bulk Create”. Click on the app that shows up.


  1. Choose to enter your data manually or upload a file (whichever you wish). 


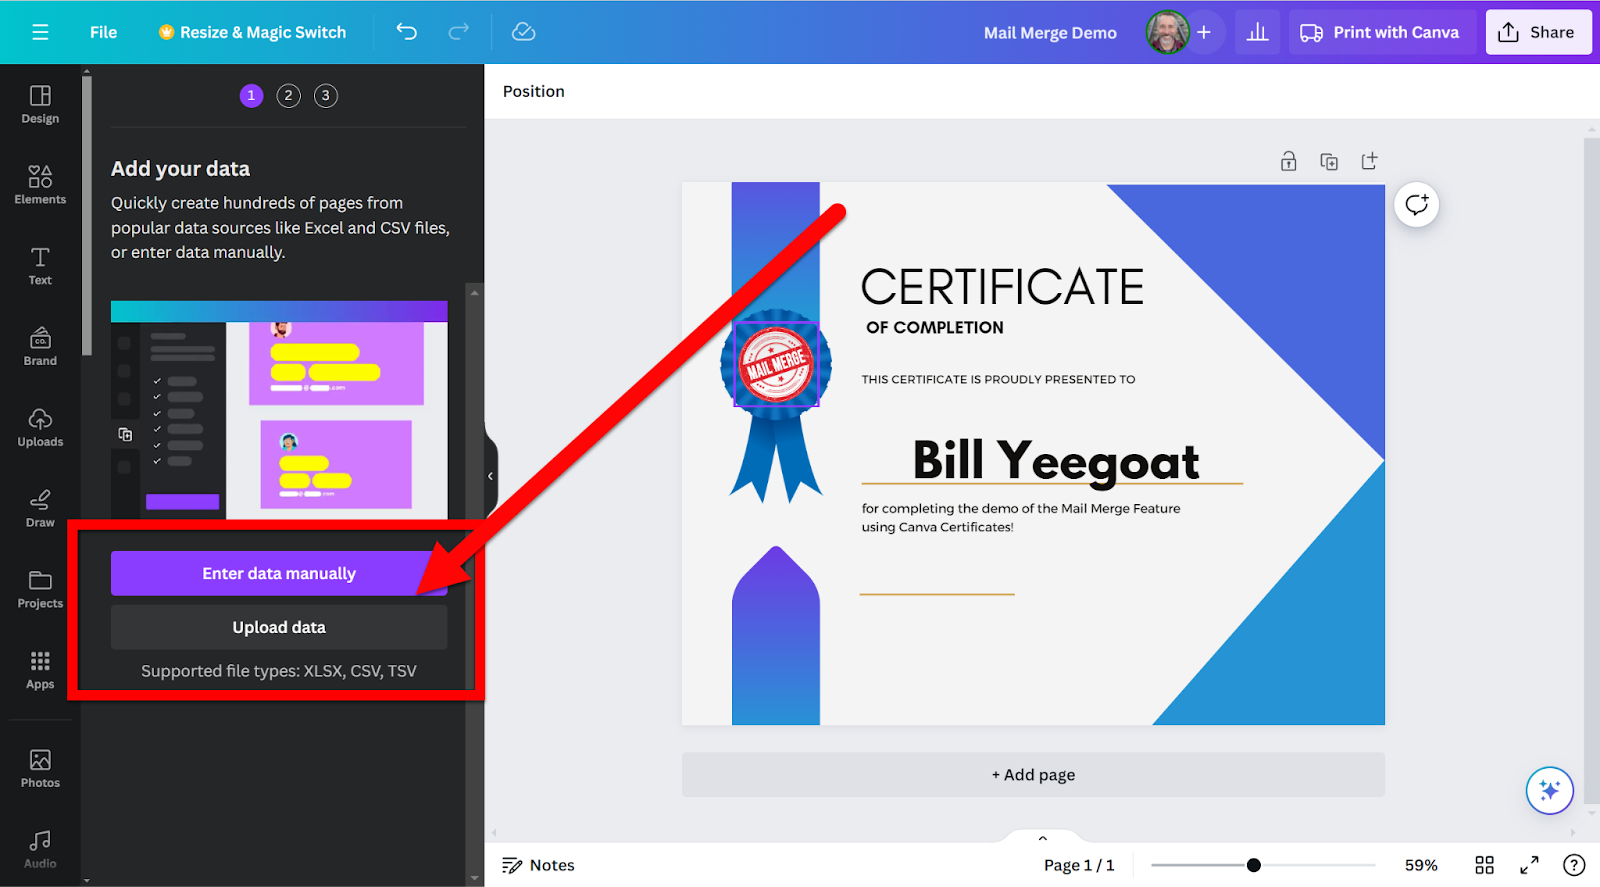
  1. I would use Upload a file so I can reuse the data set with other files. You just need to create a spreadsheet with column headers that define the data you want merged. My file has columns for First Name, Last Name, and Full Name so I have options in later merges. Then you just need to download this as a CSV file.


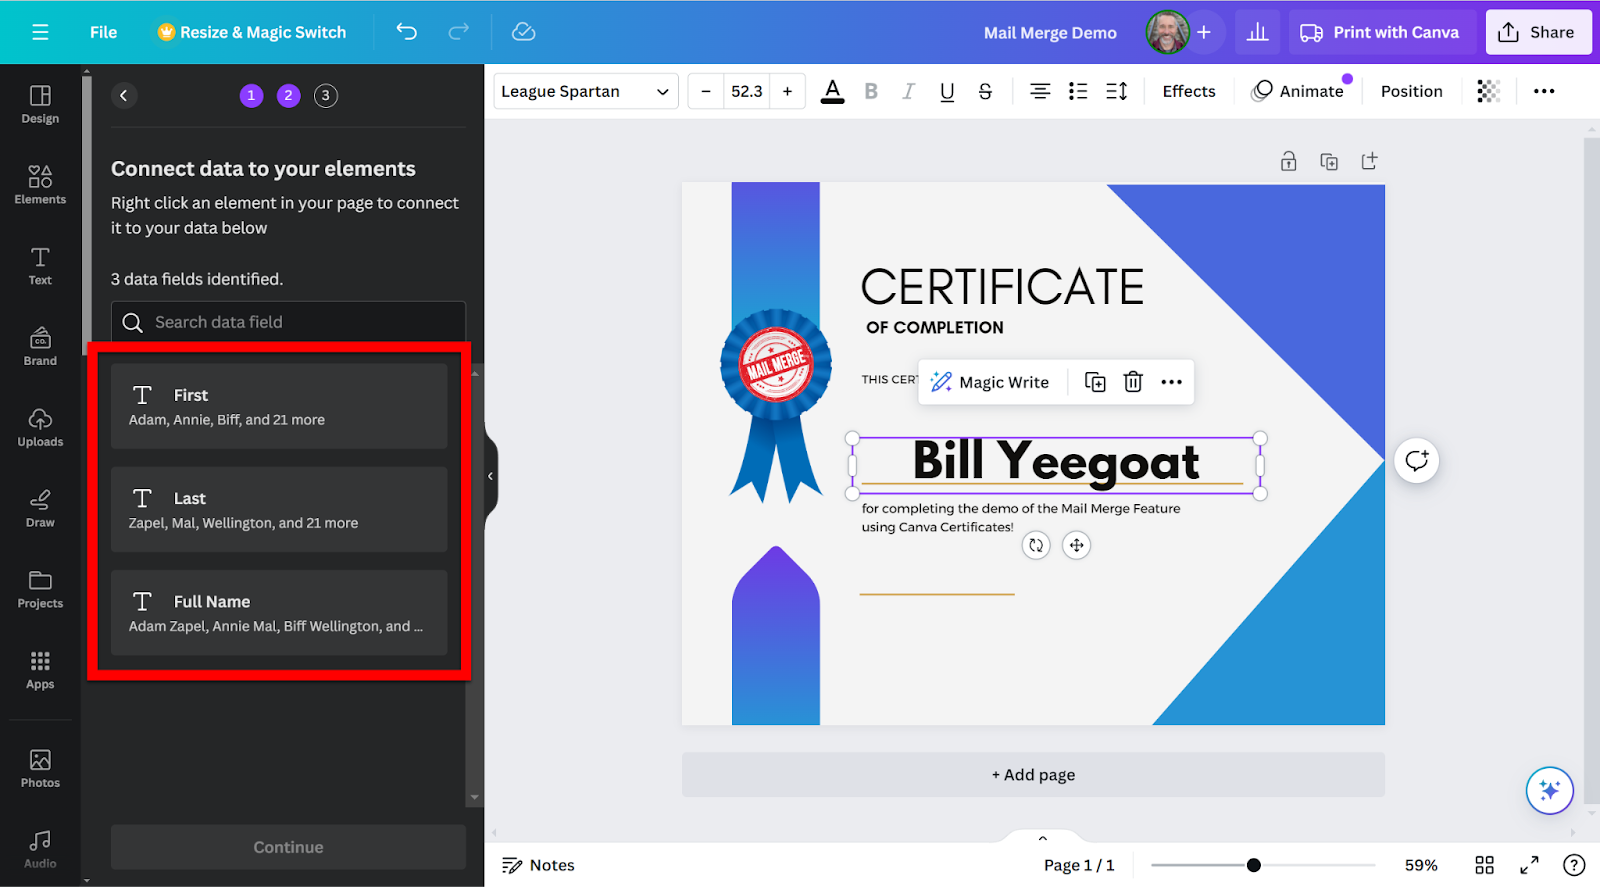
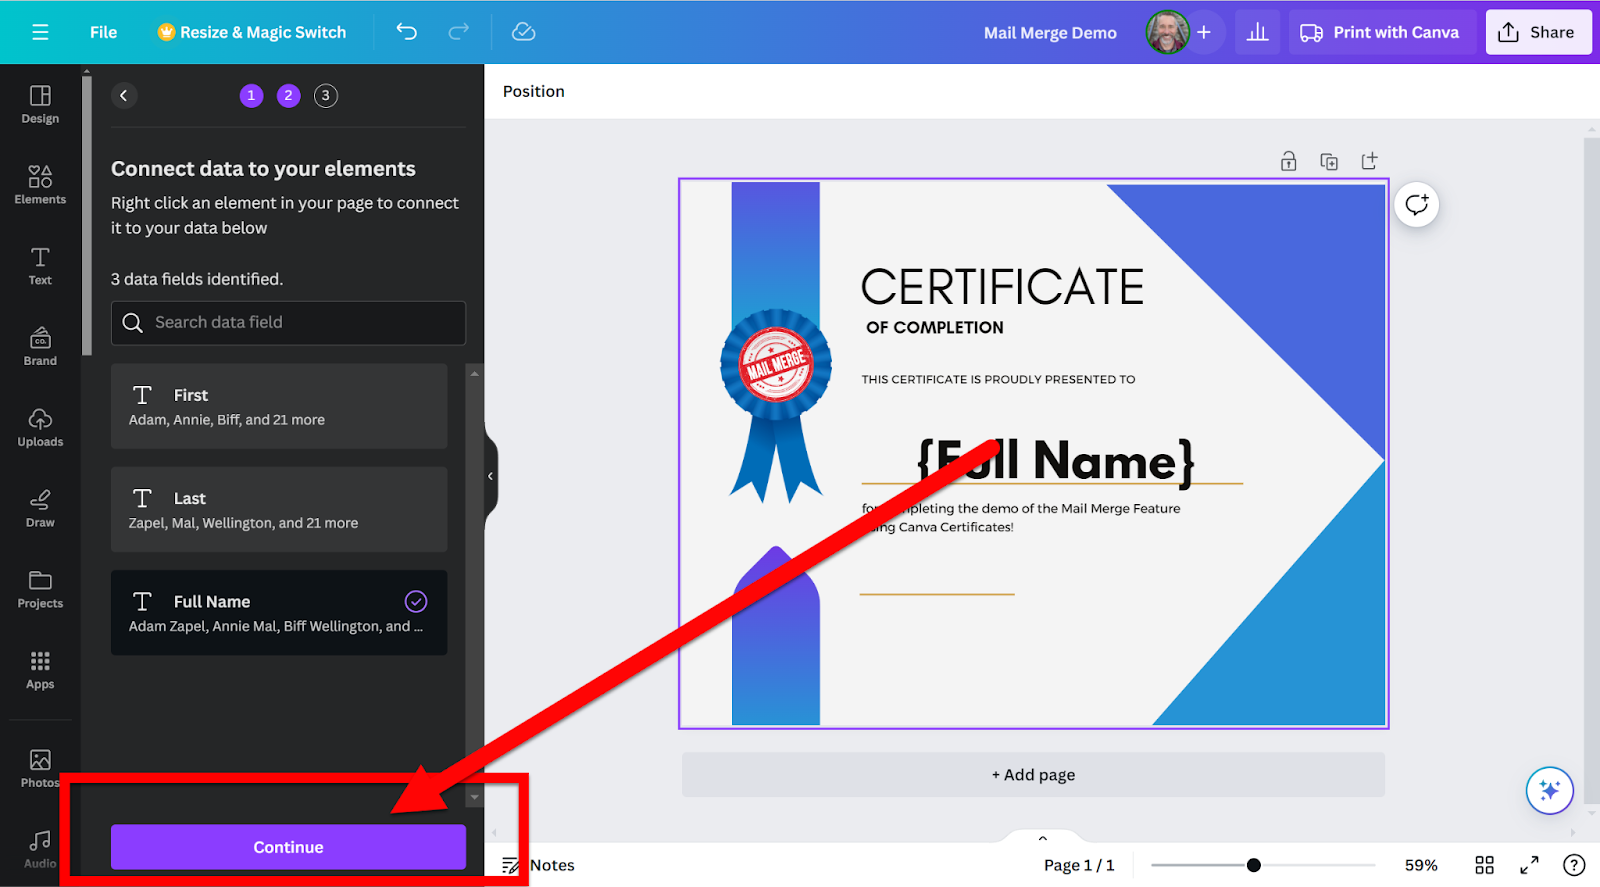
  1. All you need to do is right-click where you want the name (or other merge info) inserted and choose “Connect Data”. Then select the column of your data you want to insert.


  1. Click on “Continue”.


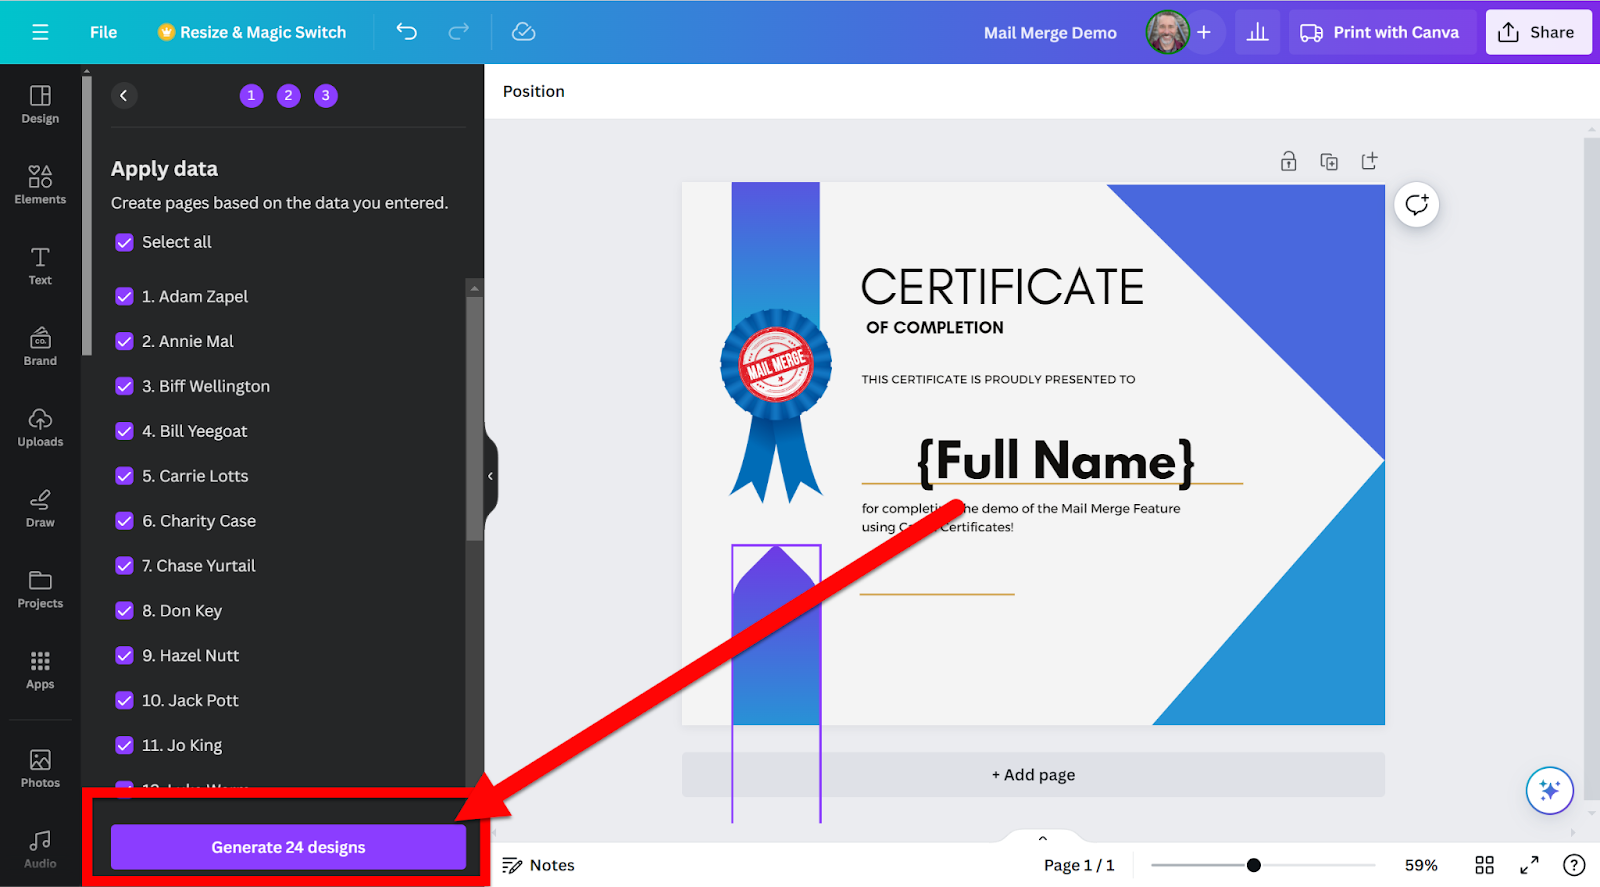
  1. You will see all the items that will be merged. Click “Generate xx designs” to see the merged file.


  1. Now you can print this and have a copy personalized for your needs! This merged file is also saved in your library for later use.


Click HERE to see a Video Walkthrough of all these steps!


Head to Canva and start making your awesome personalized creations!


If you want these directions in a Document click HERE!


Thursday, April 11, 2024

Fake Text Animator

Let’s face it, no one talks on the phone anymore. Text messaging, whether text, SnapChat, What’s App, or other apps is how students communicate. There is a great website that allows you to create fake message communications with your choice of names and then you can download these as a video or GIF. This is a great tool for showing characters in a story interacting, science gurus explaining a topic, and many other instructional uses!


Create a Text Communication:

  1. Head over to chat-animator.com

  2. Scroll down to the member list and name the participants that you need. You can also upload an image for their avatar.


  1. Then work on the conversion they may have below using the dropdown for the character and entering text in the box to the right.


  1. Do this to the next one below as a response, and repeat working down for each next response.

  2. If you need more messages, click the “Add another Message” button.


  1. You can change the speed the conversations move at the top.


  1. When you are done, choose how you want to save this. You can save it as a video or a GIF. Keep in mind that GIFs will play in any Document, Slide, or anywhere images can be used. Videos will require tools that can play videos (Slides or stand-alone videos). I would suggest clicking the GIF button just to do it. The video will process and then prompt to download. The GIF will show below (scroll down) and then you can right-click on it and “Save as”. Then you will have the video and the GIF.


Now you can add this to a project or share in any way you want!


Video Walkthrough HERE!


If you want these directions in a Document click HERE!


Monday, April 1, 2024

Creating Resources with Diffit

Although we all have resources from our textbooks, most of the time we need to create our own. New resources may need to be more specific, cover material better, or need to be adjusted for the number of questions or amount of content. Doing this from scratch is a lot of work. This is where sites like Diffit come in handy. This site will create all the resources you would ever need with just a simple web search. You need to give Diffit a try!


Create Resources:

  1. Head to web.diffit.me

  2. Sign in with Google.

  3. Using the “Literally Anything” tab, choose a Topic and Grade Level for the material then click on “Generate Resources”.


  1. You will have a resource created with a reading selection, vocabulary, multiple styles of quiz questions, and more. Click on the green “Get Student Activities” button.


  1. Scroll through and choose the type of resource you want to create to share with your students. Some of these activities will be “Subscription Only” like creating Google Forms, but many will be free.


  1. You will have the option of how to share this resource. The Free version will allow you to save this as a PDF. 


  1. Even with this limitation, all you have to do is edit the original in any of the text/editing areas.


  1. Share and enjoy your customized resources! To see all your created resources, head to the My Resources” tab at the top.


Here are some Diffit training links to learn more! Learn More About Diffit 


If you want these directions in a document click HERE!