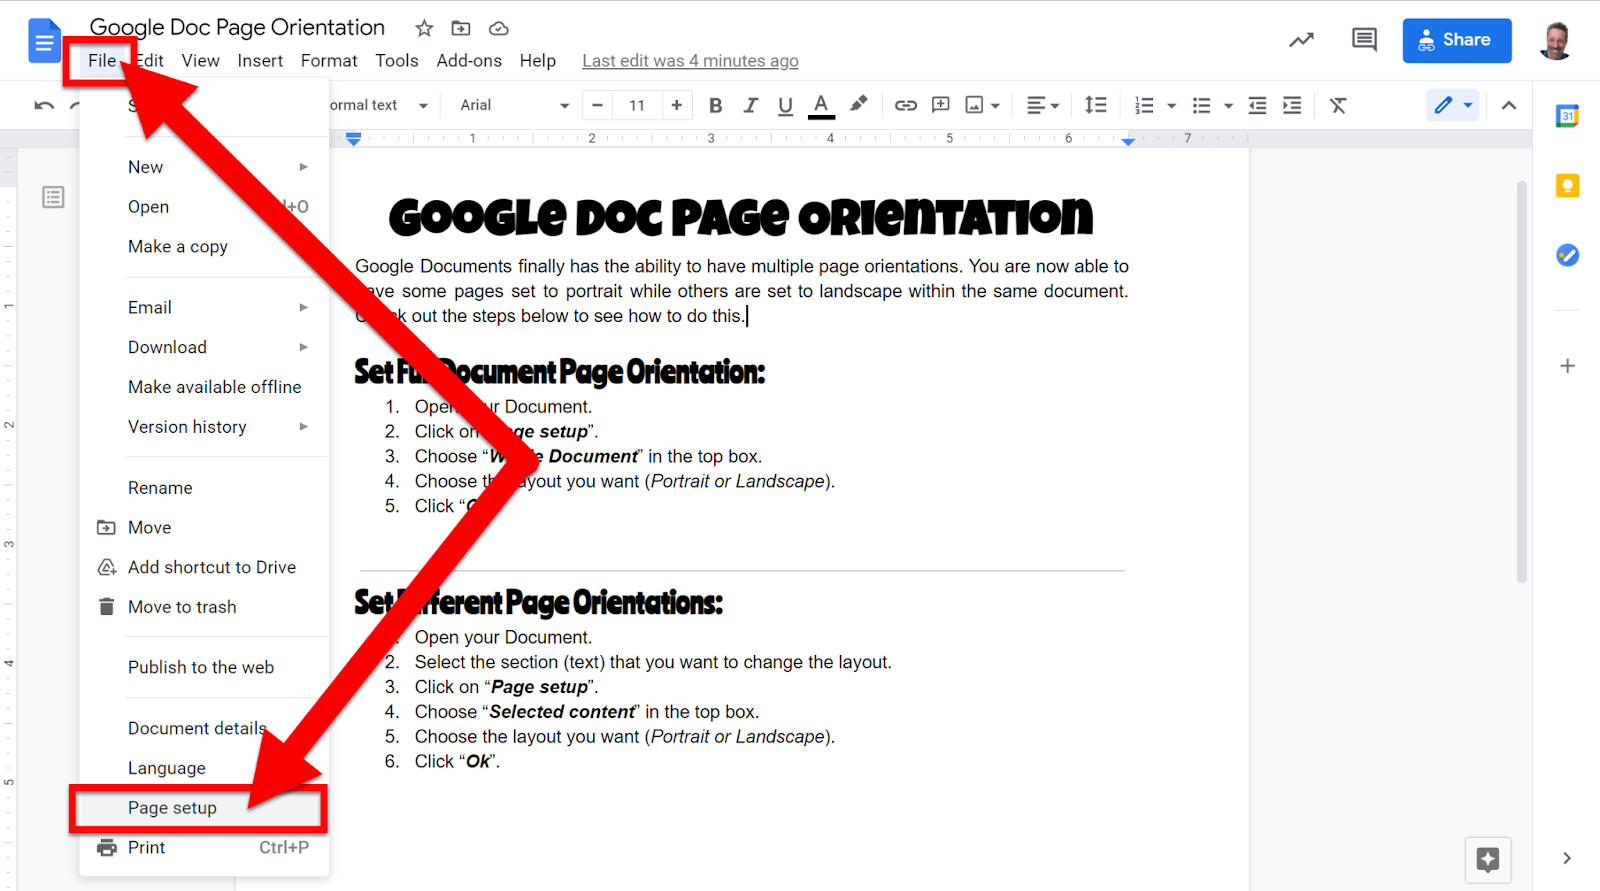
Create a Document Template:
This is the Document that all your data will be put into. When you are typing up the Document and get to a place where you want the data to be imported, put “<<” before the data label and “>>” after it.
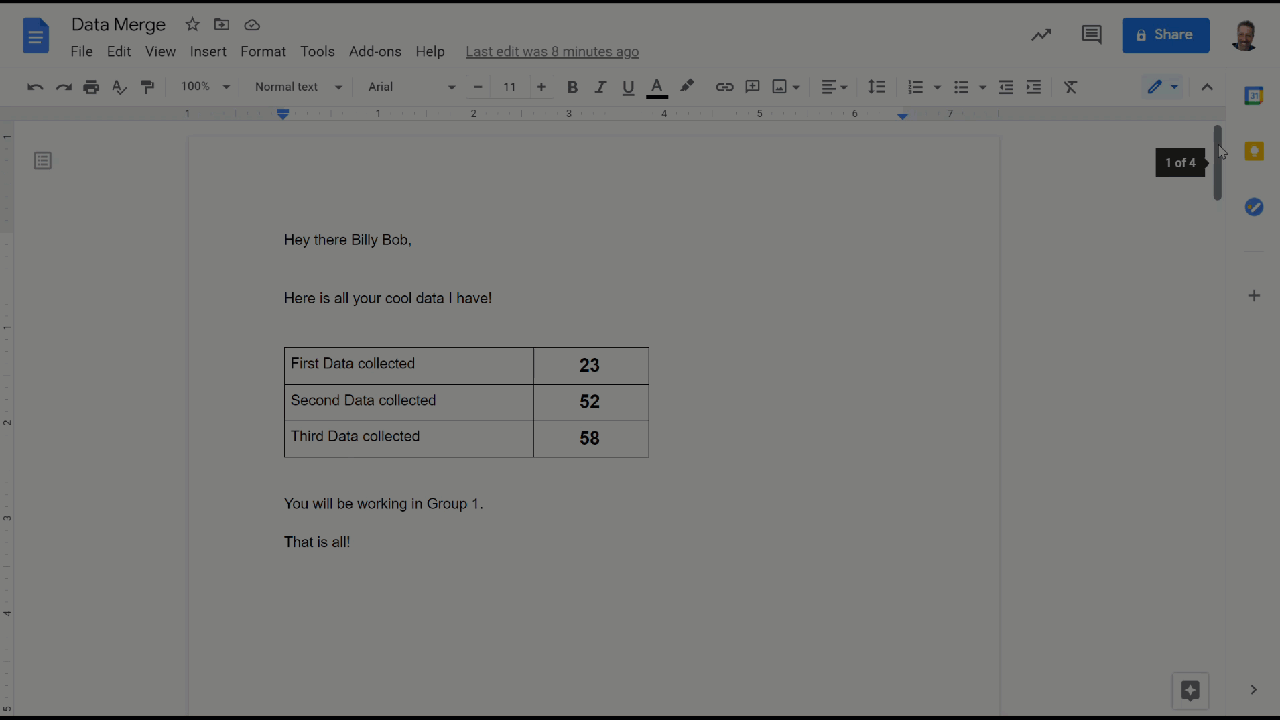
Example: <<Name>> will import what is listed in my Spreadsheet under the “Name” header.
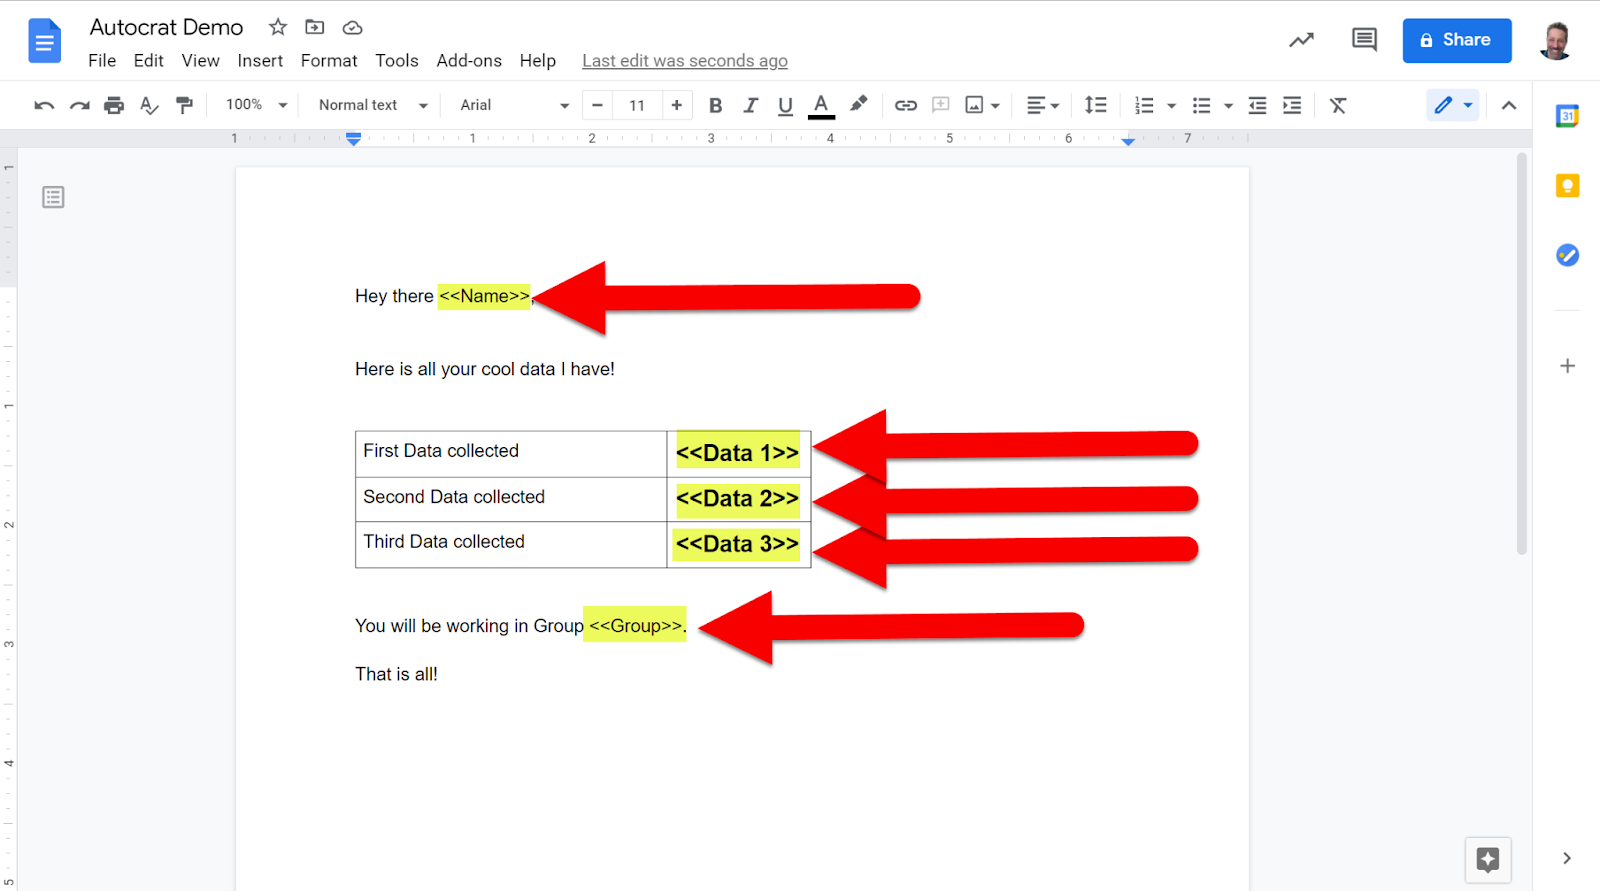
Any and all formatting you do in the document will carry through even after the import. For example, you can see in the image above that I bolded and made the Data larger. When the data comes over it will keep that bold and size.
Tip: I always save this in a folder in my Drive with the data Spreadsheet for ease of use.
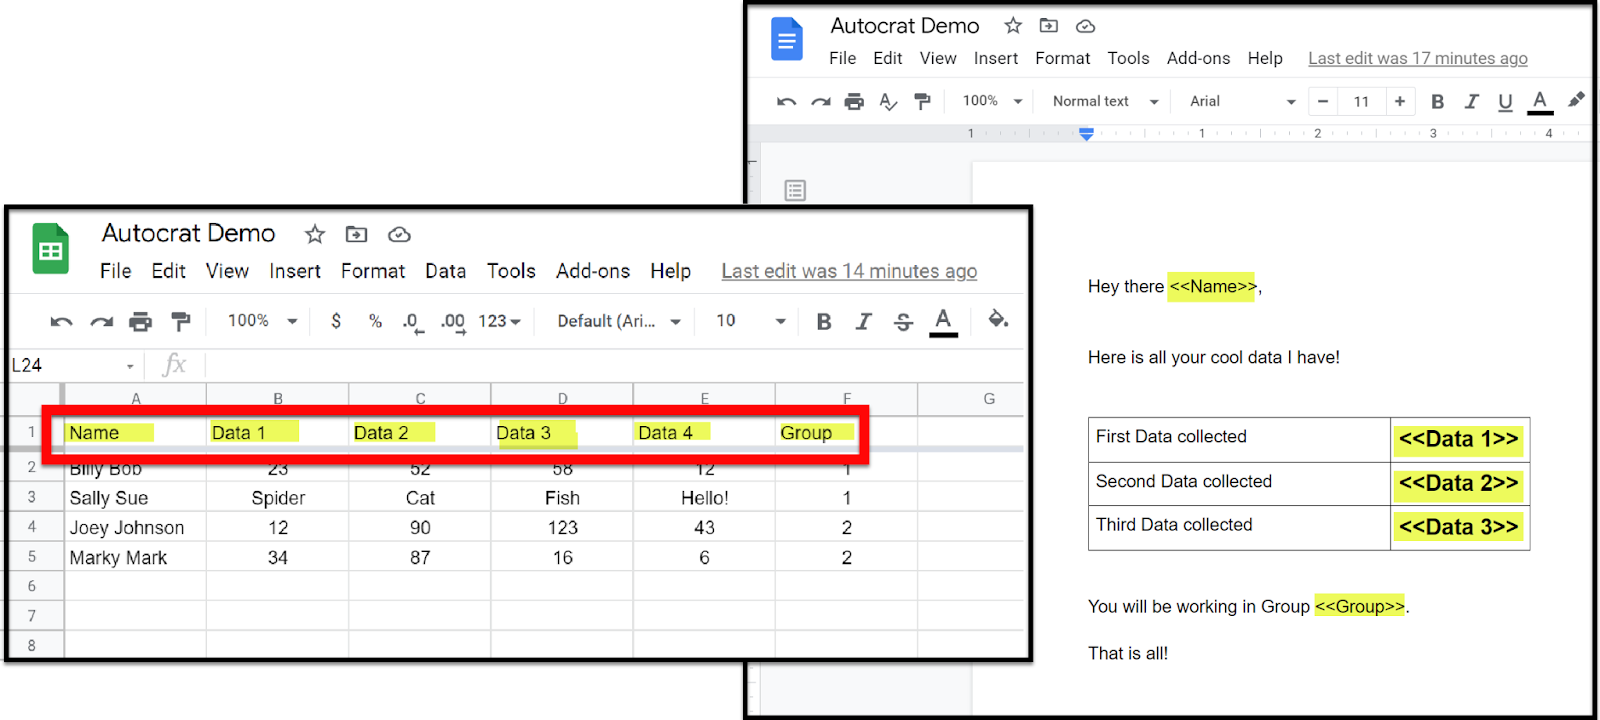
Create a Spreadsheet with Data:
Create a Google Spreadsheet.
Enter in headers at the top that tell you what the data is (this MUST MATCH EXACTLY what is in the Document).
Setting up Autocrat:
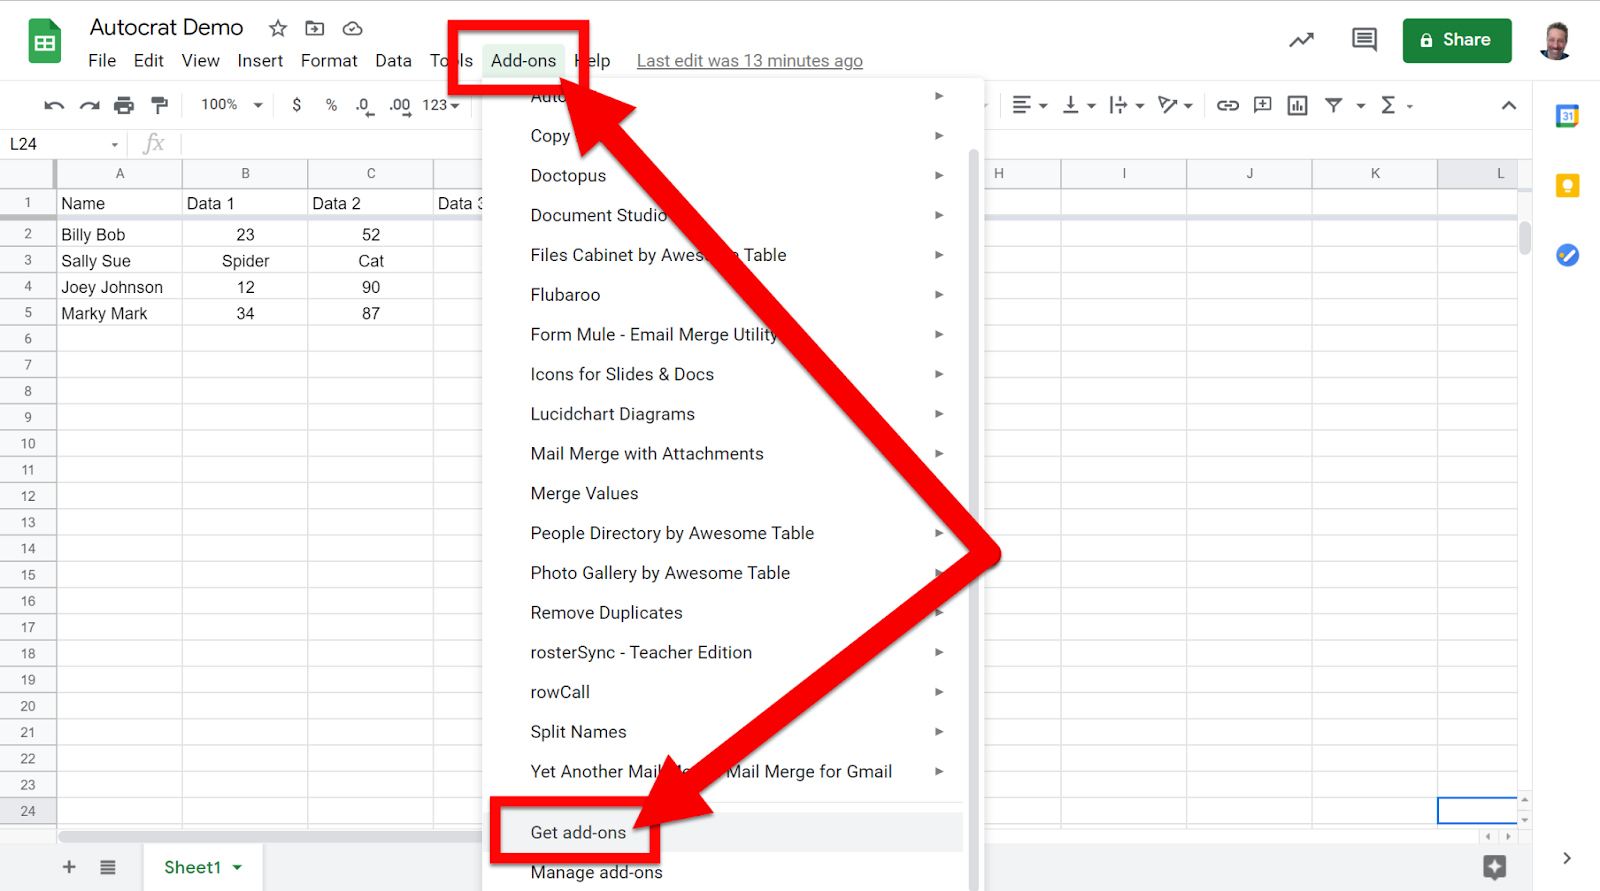
When you have all your data done you will need to install the Google Sheets Add-on called Autocrat (this only has to be done once in your account).
Click “Add-ons” at the top of your Sheet
Click “Get Add-ons”. Search for Autocrat.
Install.
Get back to your Spreadsheet and click “Add-ons” at the top, click “Autocrat”, then click “Launch”. You will need to allow permissions the first time you run this. Go ahead and allow it. You may need to re-launch Autocrat.
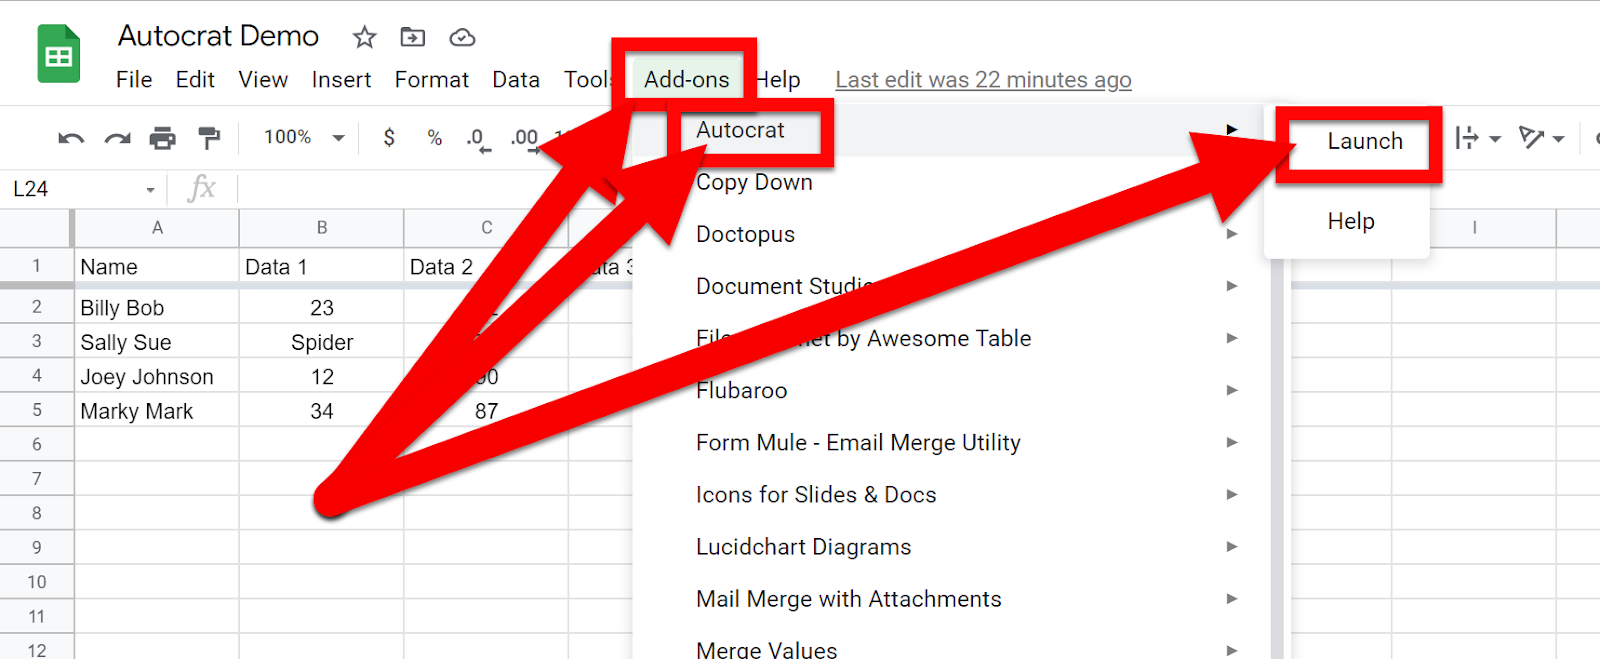
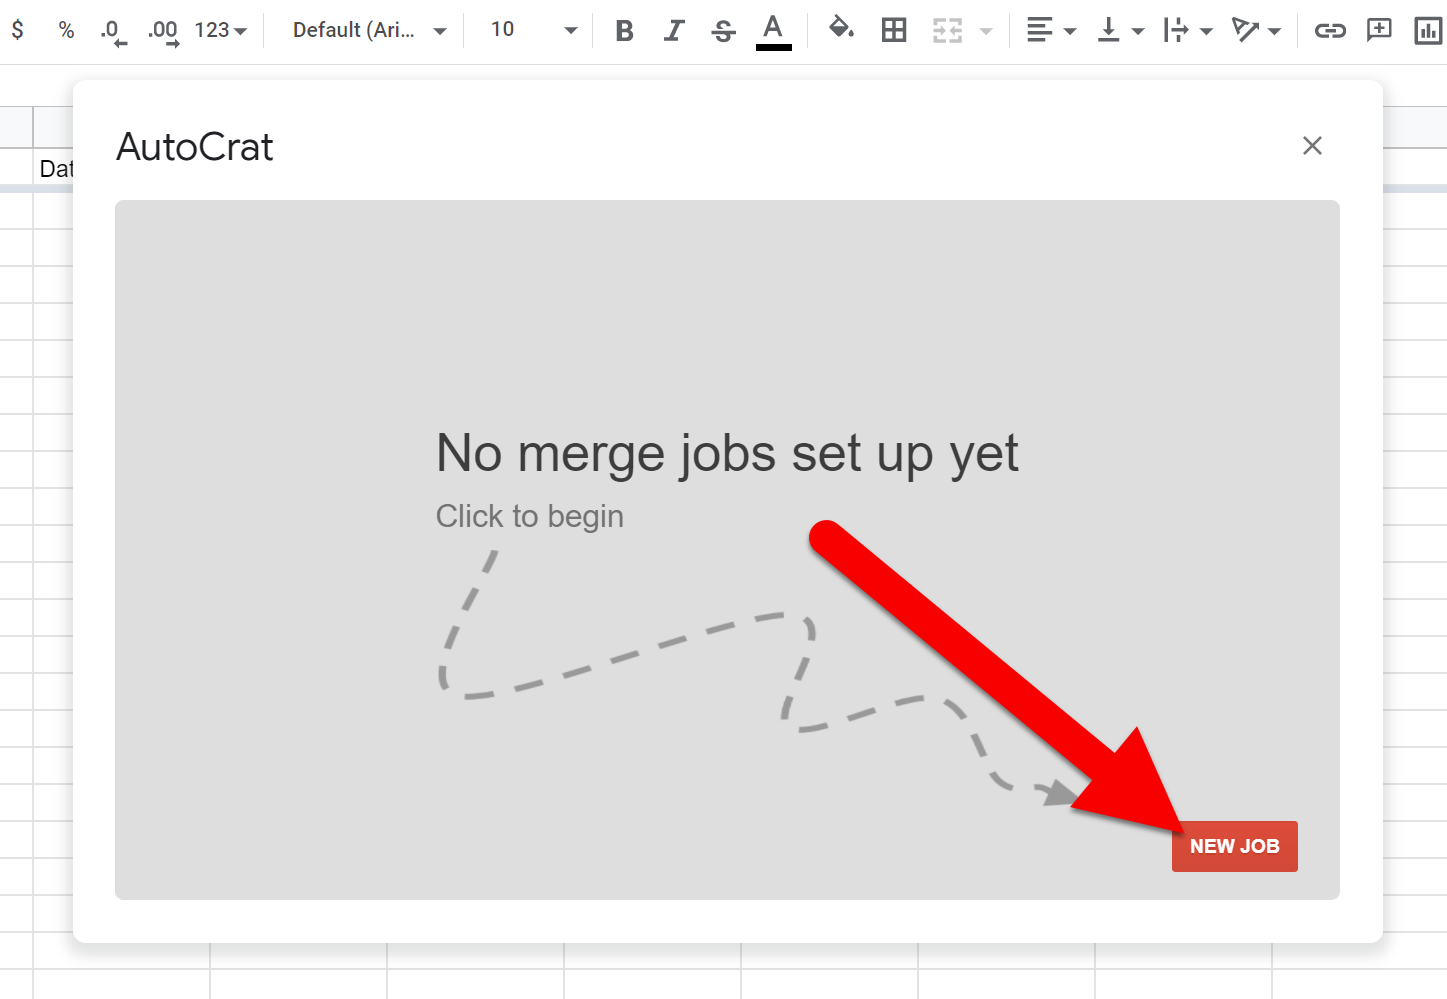
Click “New job”.
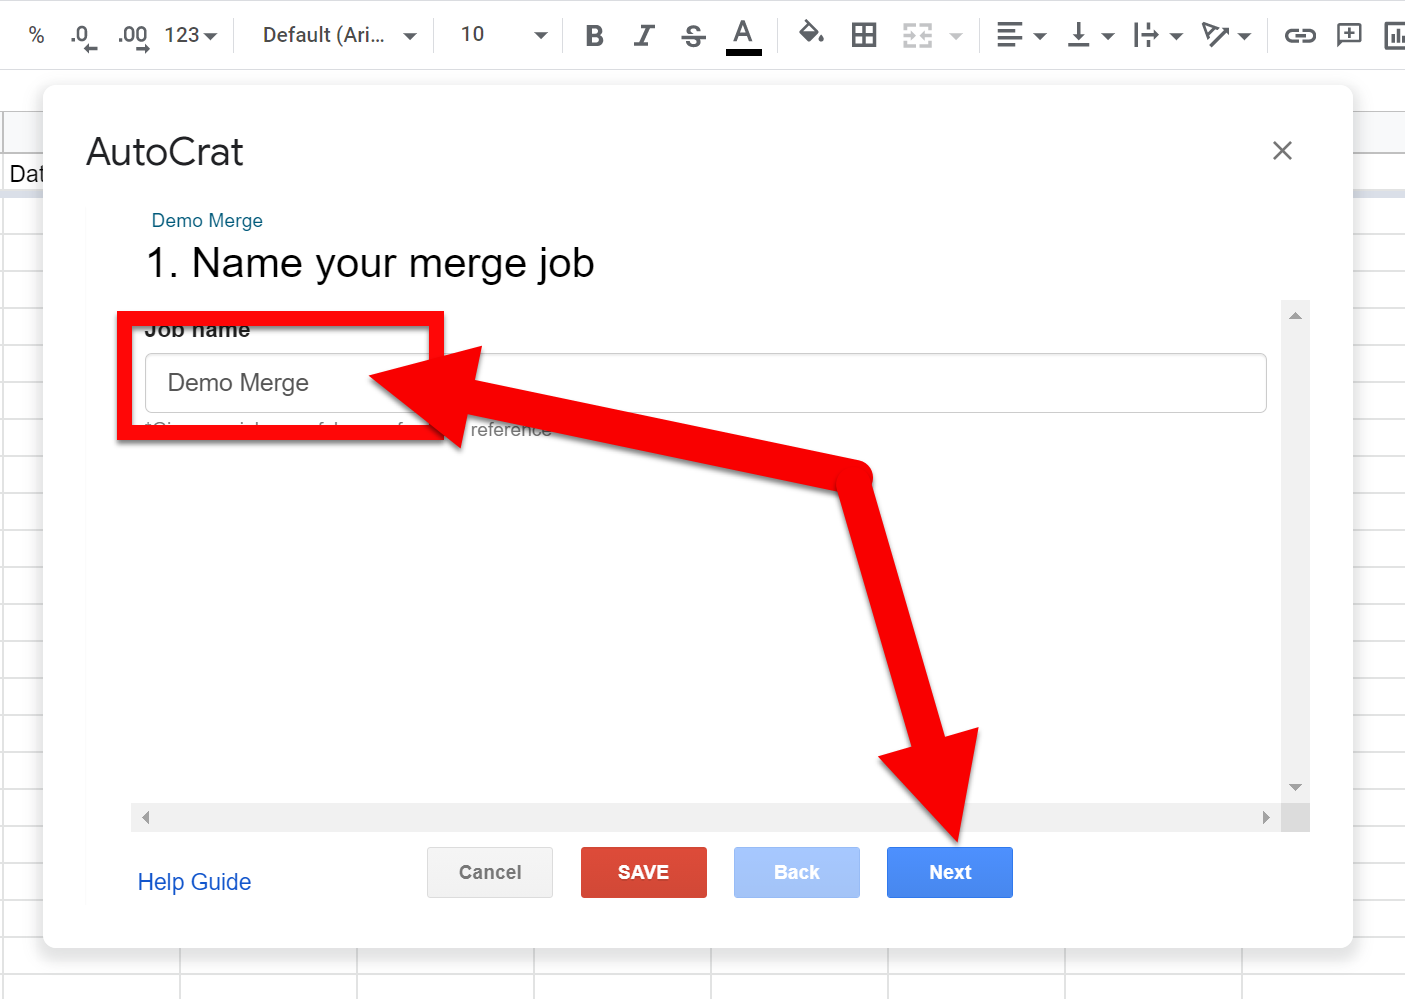
Name the Merge. This can be any name you want and is not tied to anything but running the import. Click “Next”.
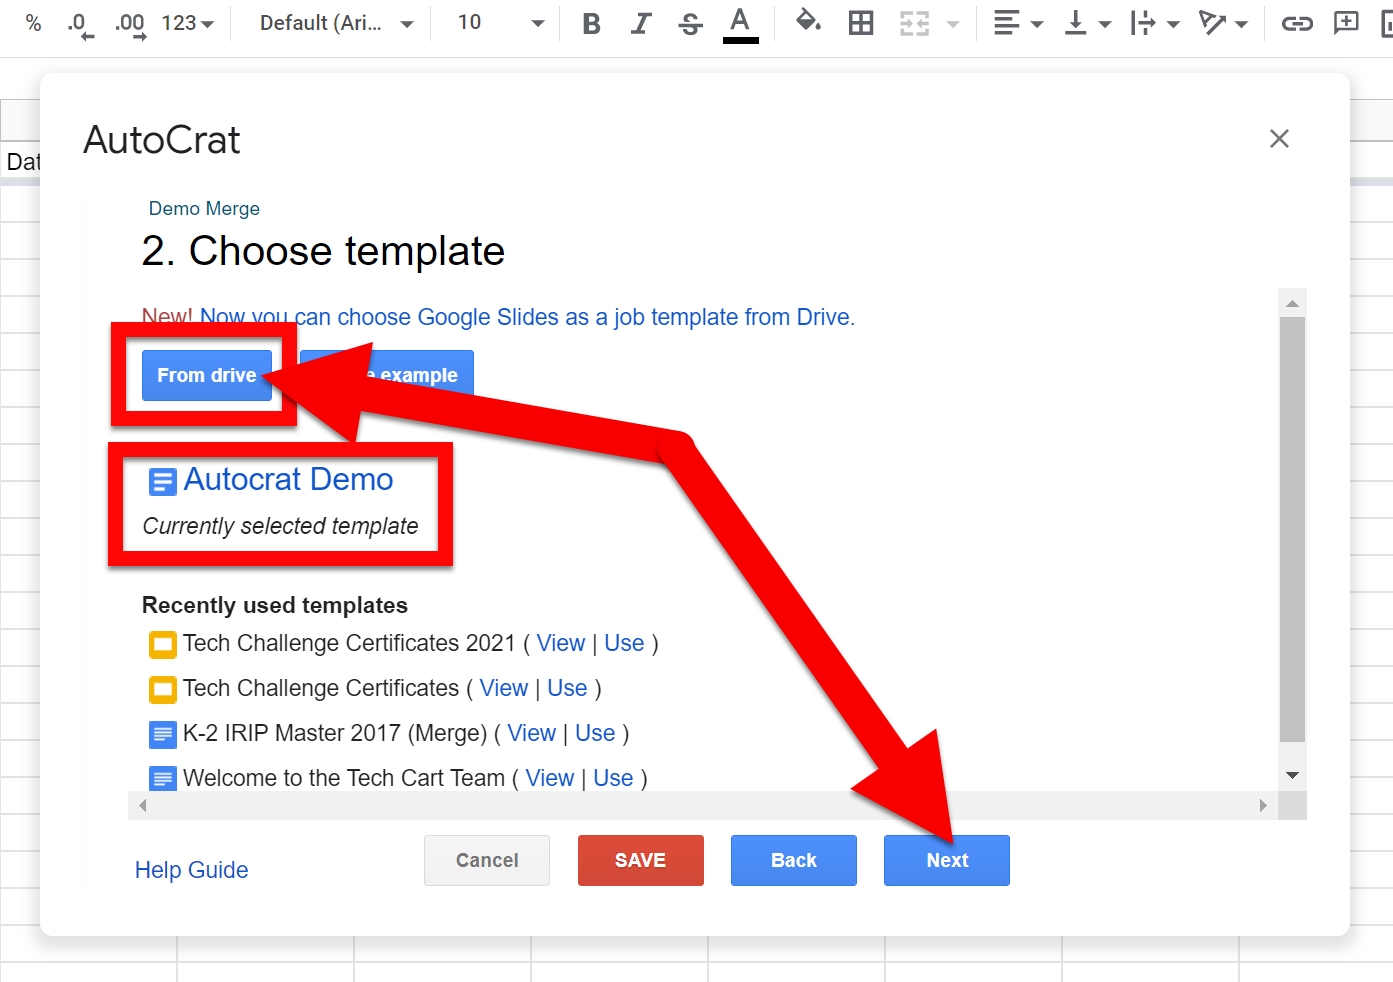
Choose the template you are sending the Spreadsheet data. This is the Document (or Slide) you just created. Click “From Drive” and locate the Document you created with the << >> tags in it and select it. Click “Next”.
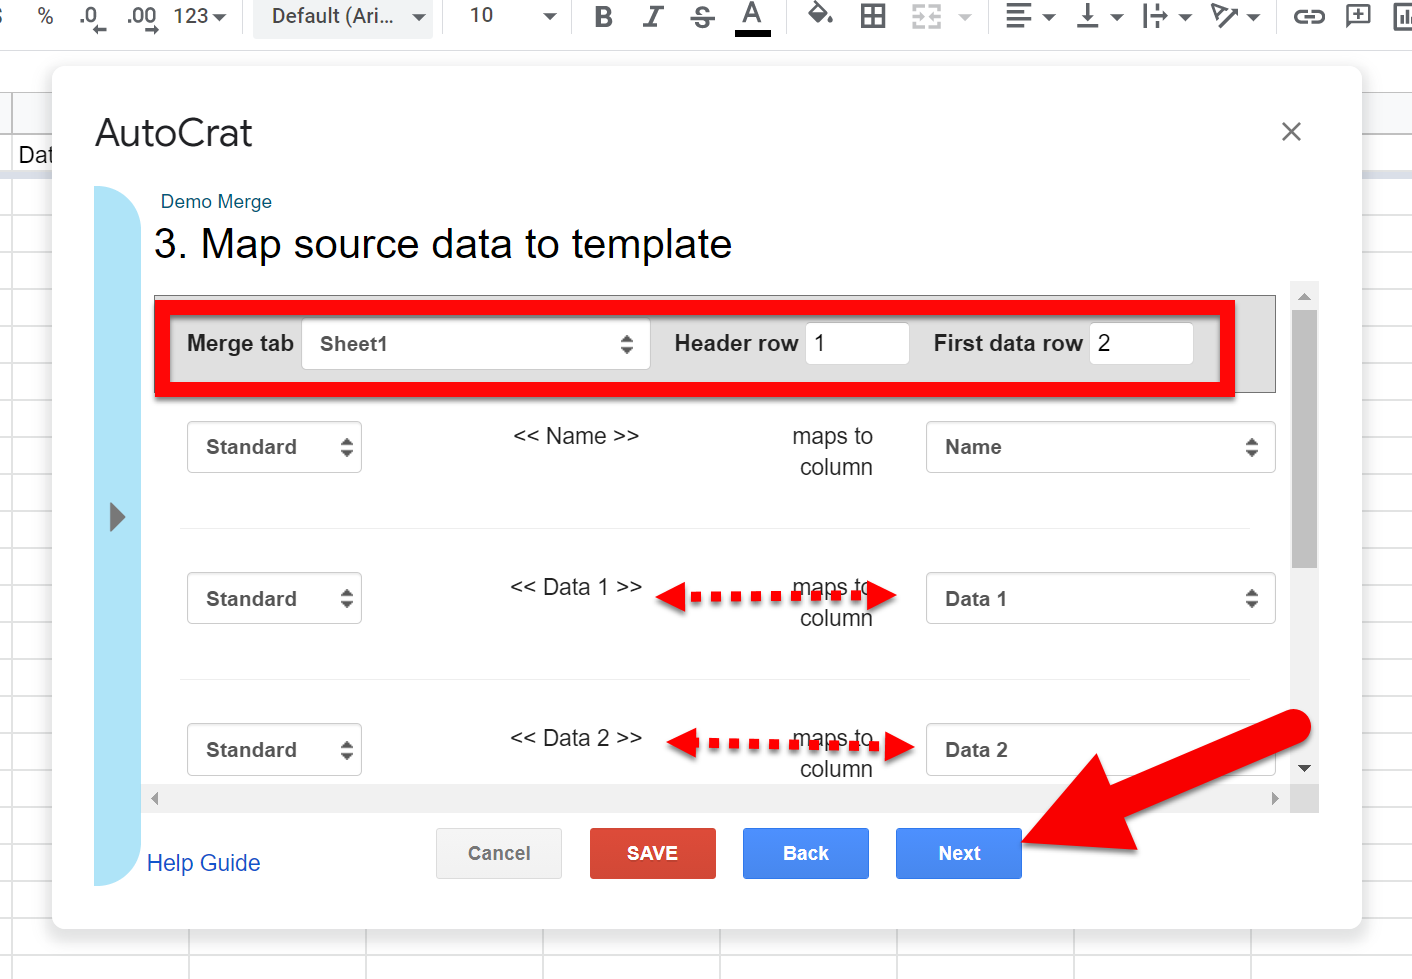
Choose the Sheet number (tab at the bottom of the spreadsheet), and what row is Header and what row the data begins (usually Sheet 1, Header is Row 1, and data is row 2). Make sure the Data labels all match up (they usually do). Click “Next”.
Choose how you want the merge to be merged and then click “Next”.
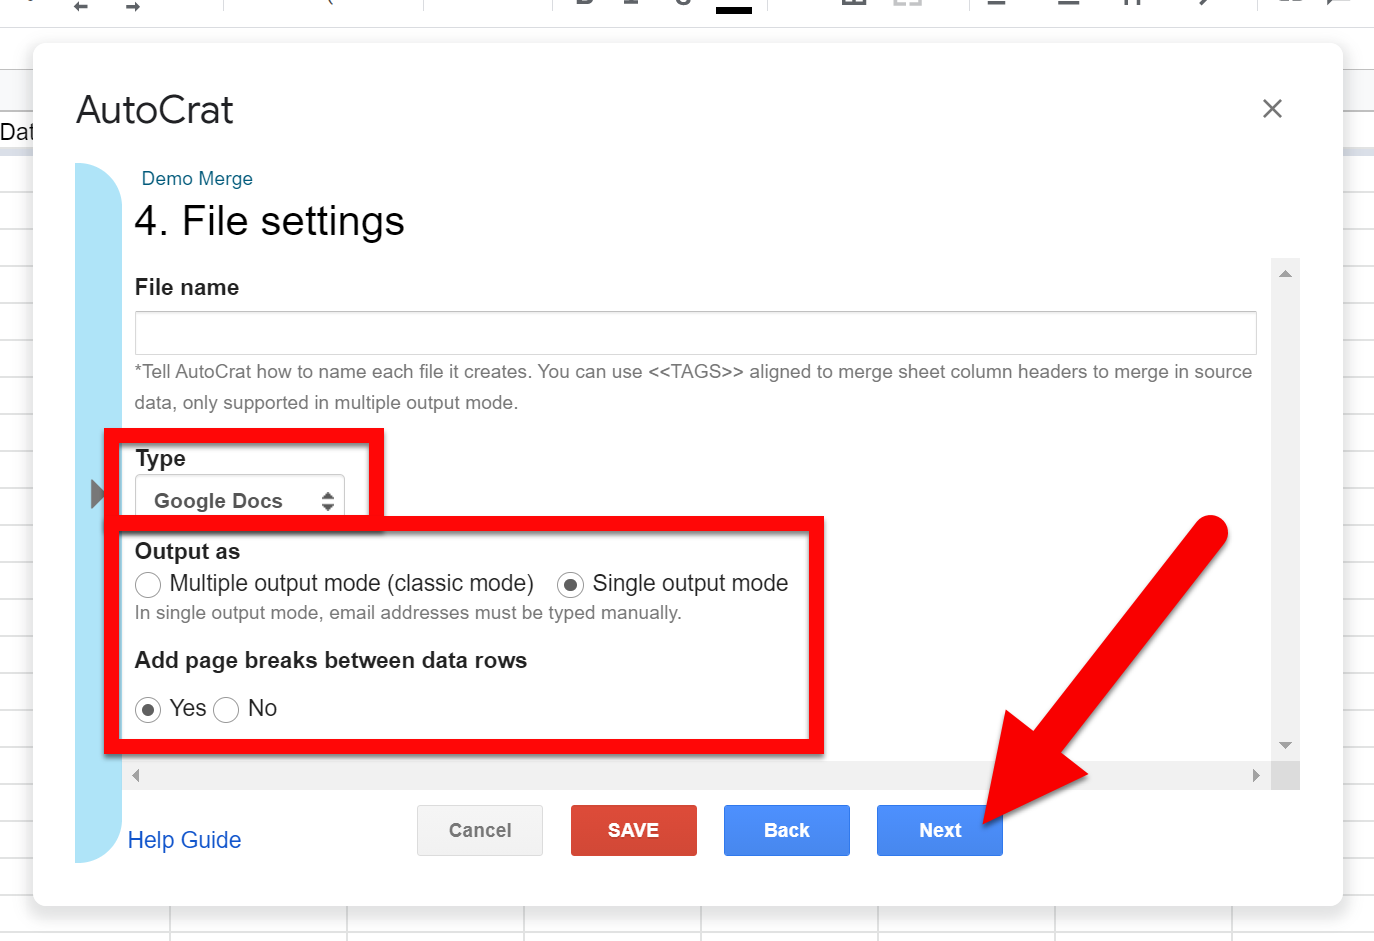
File Name: You need to name the saved file.
Multiple Output: If you are doing Multiple Output, you will need to include the student name by adding “<<Name>>” in the title. You can look at possible merge fields by clicking the blue arrow to the left.
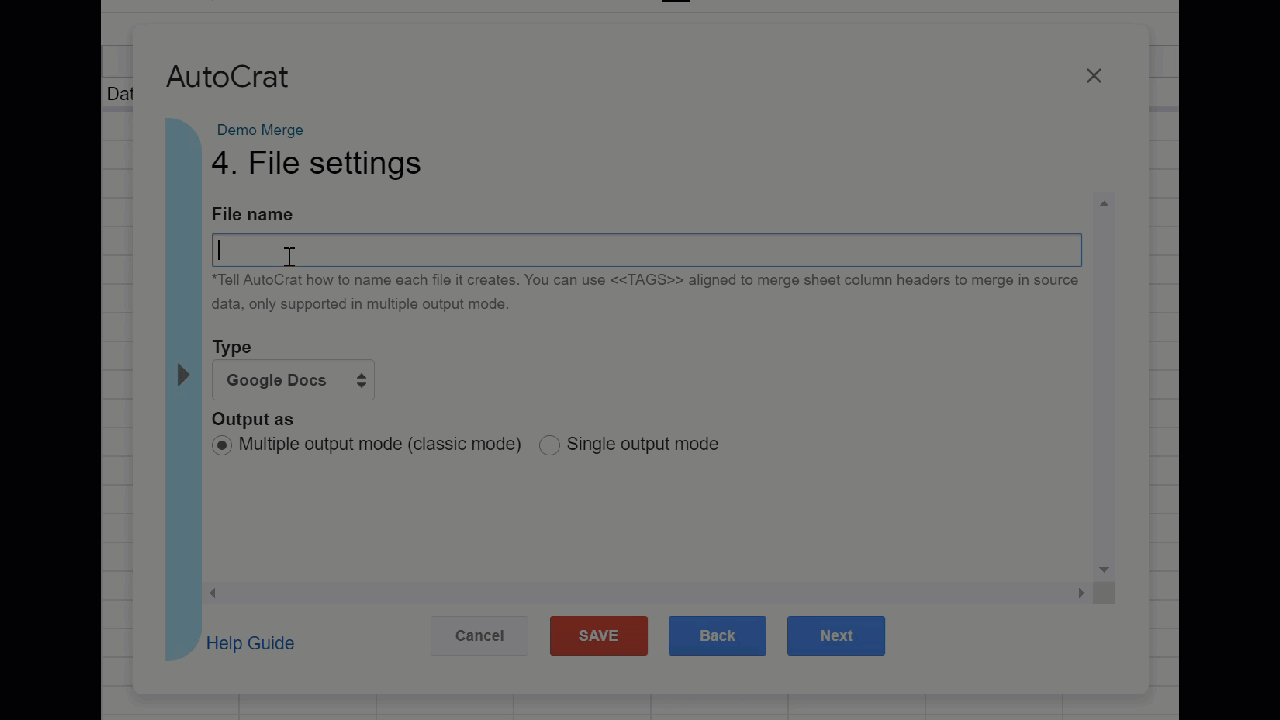
Single Output: If you are doing Single Output you can just name what you want the single document called.
Type: You can choose the merge to be a PDF or a Google Document.
Output as:
Multiple Output: Every row in your sheet (usually a name) gets its OWN Document created. That means there will be MULTIPLE Documents created so you can do individual sharing/printing.
I use this when I want to share a merged document with individual people so they can see just their data.
Single Output: All the merges will be put into a SINGLE document for easy printing.
I use this when I want to print every merge file and then hand it out or keep it for myself. If I do this I always include the page break so each document is on its own page.
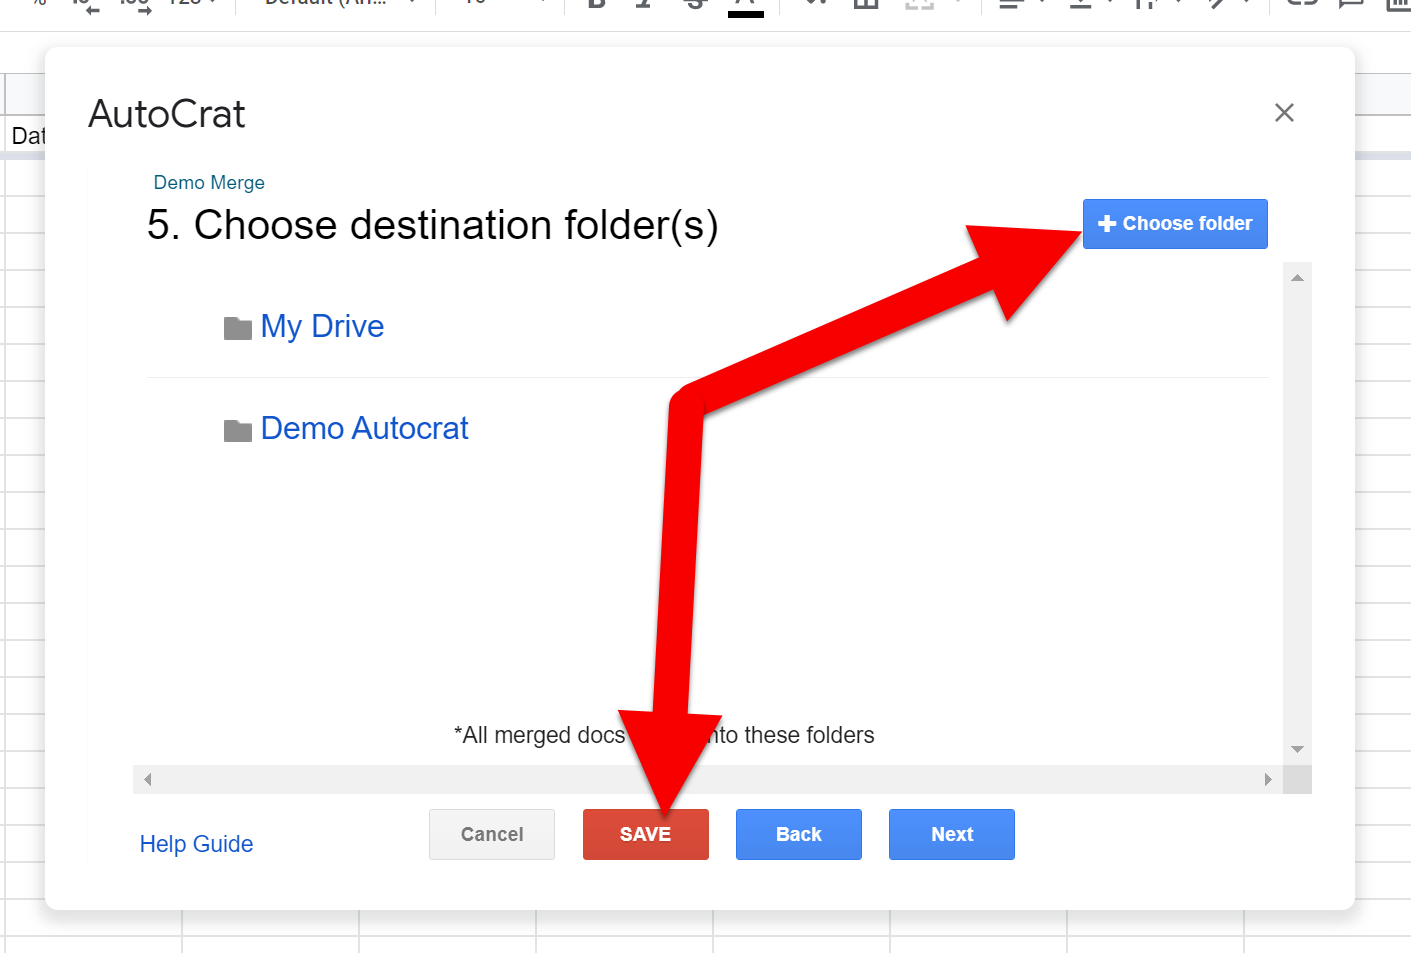
Choose where you want the merged file (or files) to go. I always choose the same folder the Spreadsheet and Template Document are in. Click "Save”. There are more options (like my favorite like email a copy when a form is submitted), but they are beyond this basic how-to.
Running Autocrat:
You have done all the work to set up your merge. Now it is time to run it (the easy part)!
If you left the Autocrat screen you will need to go back into your Spreadsheet, click “Add-ons”, “Autocrat”, and click “Launch”. Otherwise, all you need to do is click the “Play” button.

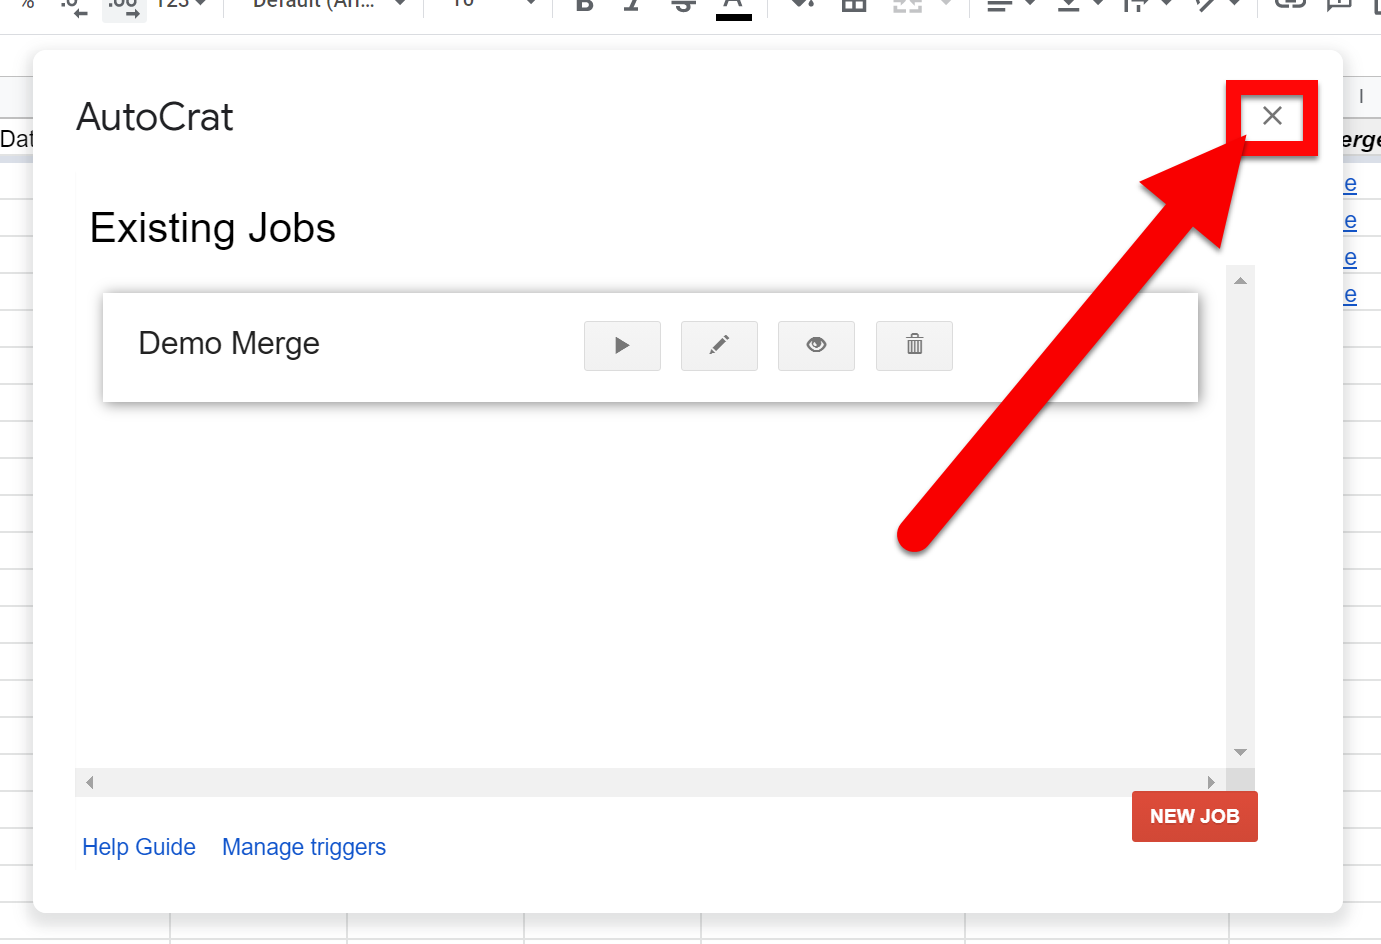
It will run and show you its progress as it goes.
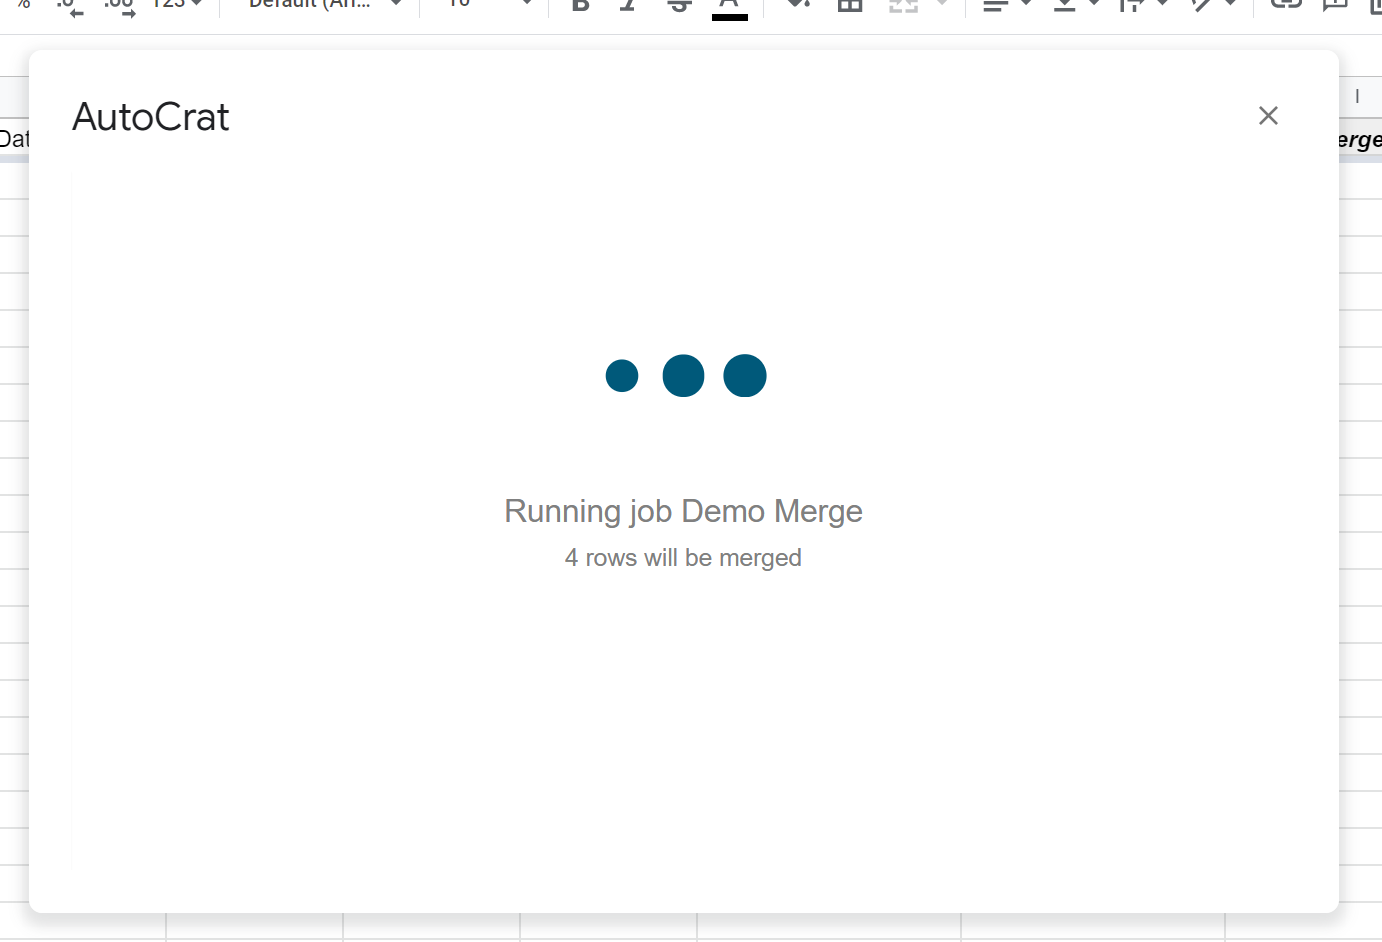
When it is done click “X” and go back into your Spreadsheet.
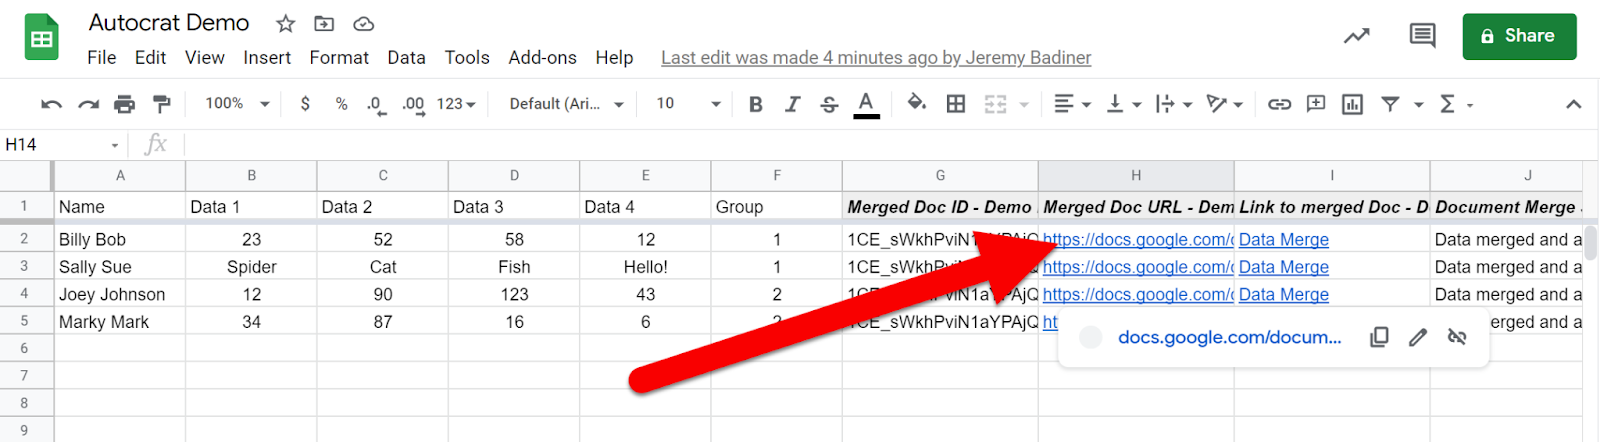
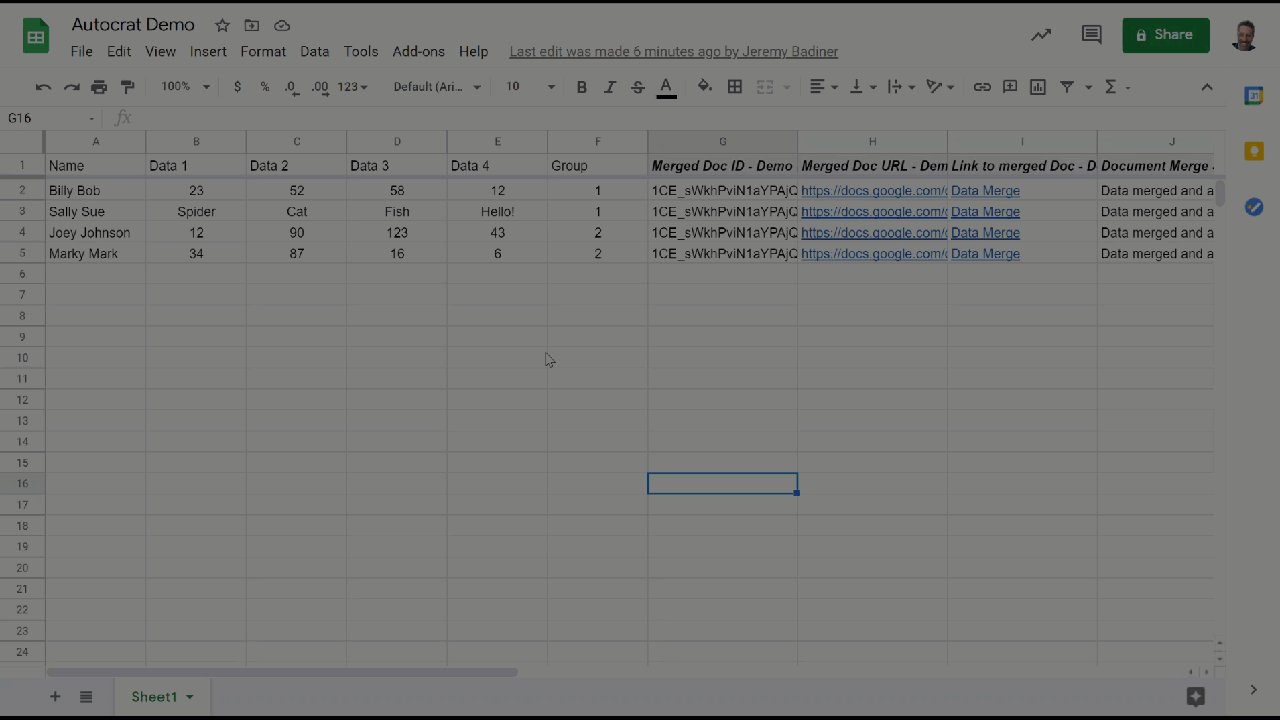
You will see a link to the Document(s) (and they will be in the folder you saved them to). You can click the link in the spreadsheet and the Document will open.
Final Merge (I did Single Output):
Note:
If you want to run the merge again, you MUST delete the old files from your Drive folder (the previously run documents) and delete the text from the columns in the Spreadsheet that Autocrat put in. Otherwise, previously run files will not run.
Here is a Video Walk-Through as well.