Tuesday, February 23, 2021

Distraction-Free YouTube

Tired of all those ads & distracting videos popping up when you share a YouTube video? There are sites that help strip all those away, but many are limited are going to a paid platform. Here is an easy workaround to share YouTube videos with students without distractions!


Original

Distraction-Free!


Add a - (yout-ube):

  1. Open the YouTube video you want to share.

  2. In the URL (from the address bar, NOT the “Share Button”) add a hyphen (“-”) between the “t” and “u” in YouTube (yout-ube). 


  1. Copy the new link and share that link out. 

  2. Click this link to see how it looks: yout-ube.com/watch?v=KdxEAt91D7k


Change “watch” to “watch_popup”:

  1. Open the YouTube video you want to share.

  2. In the URL (from the address bar, NOT the “Share Button”) add “_popup” after the word “watch” in the URL. 


  1. Copy the new link and share that link out. 

  2. Click this link to see how it looks: https://www.youtube.com/watch_popup?v=KdxEAt91D7k 


If you want these directions in a Document click HERE!


Wednesday, February 17, 2021

123app: Many Useful Tools

There are all kinds of awesome free sites out there that will do what you need (create audio, edit video, convert files, etc…). The problem is that they all do one thing, meaning you need to have a whole list of these sites to do all you need. That may not be the case, after all! 123apps is a collection of free tools to help you out! Check it out before searching for that audio recorder or video converter when you need one. Head there now and bookmark the site for later use!


Tools 123apps Offers:

  1. Head over to 123apps.com.

  2. Check out the tools available (categories listed at the top).


  1. Some of the tools available:

Audio:

Video:


  1. Give them a try!


Some Notes: 

  • There is the option to “Sign In”. I have used the audio recorder many times over the past year. I do not sign in and have never needed to so there is no need to sign in. 

  • Some of the tools may be blocked in your district as they are links to other sites. 


If you want these directions in a Document click HERE!

Monday, February 8, 2021

Interactive PDFs: TeacherMade

Although I am not a huge “worksheet” person, there is a time and place for them. Especially if you can make them interactive (and even self-grading assessment tools! There is a great tool that can do just this, TeacherMade. TeacherMade allows you to take any PDF you have and convert it into an interactive (and even self-grading) activity. Check out all you can do below! I know this is long, but it is mostly images to help you see the steps. Hang in there!


Create an Interactive Activity from a PDF:

  1. Head to teachermade.com (make an account if you do not have one). 

  2. Click on “My Worksheets” and “Actions” at the top right. Then choose “Create Worksheet”.


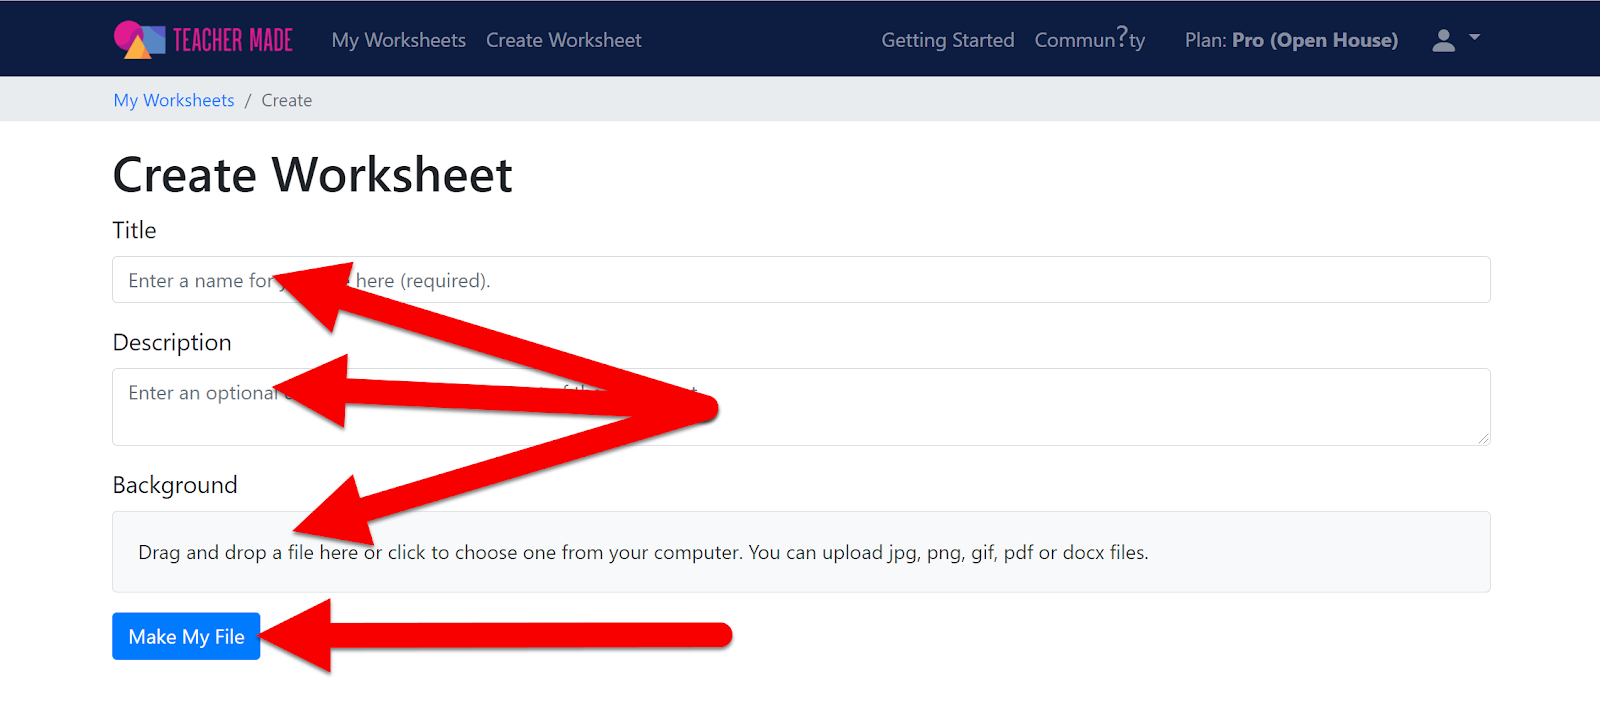
  1. Enter in the title of your activity, and description if you wish, and drag/drop the background (this is the PDF file of your worksheet they are filling in). Then click “Make My File”.


  1. This is when you can now add the interactive components. Hovering over the tools will popup the name. 


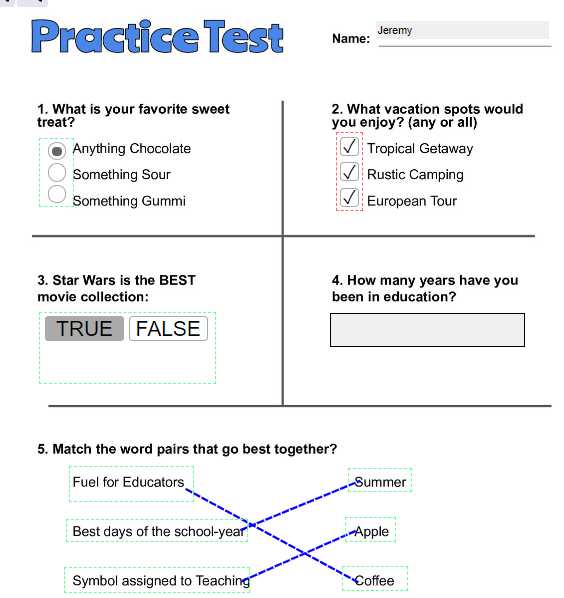
  1. Below are some samples on how to add the common elements:

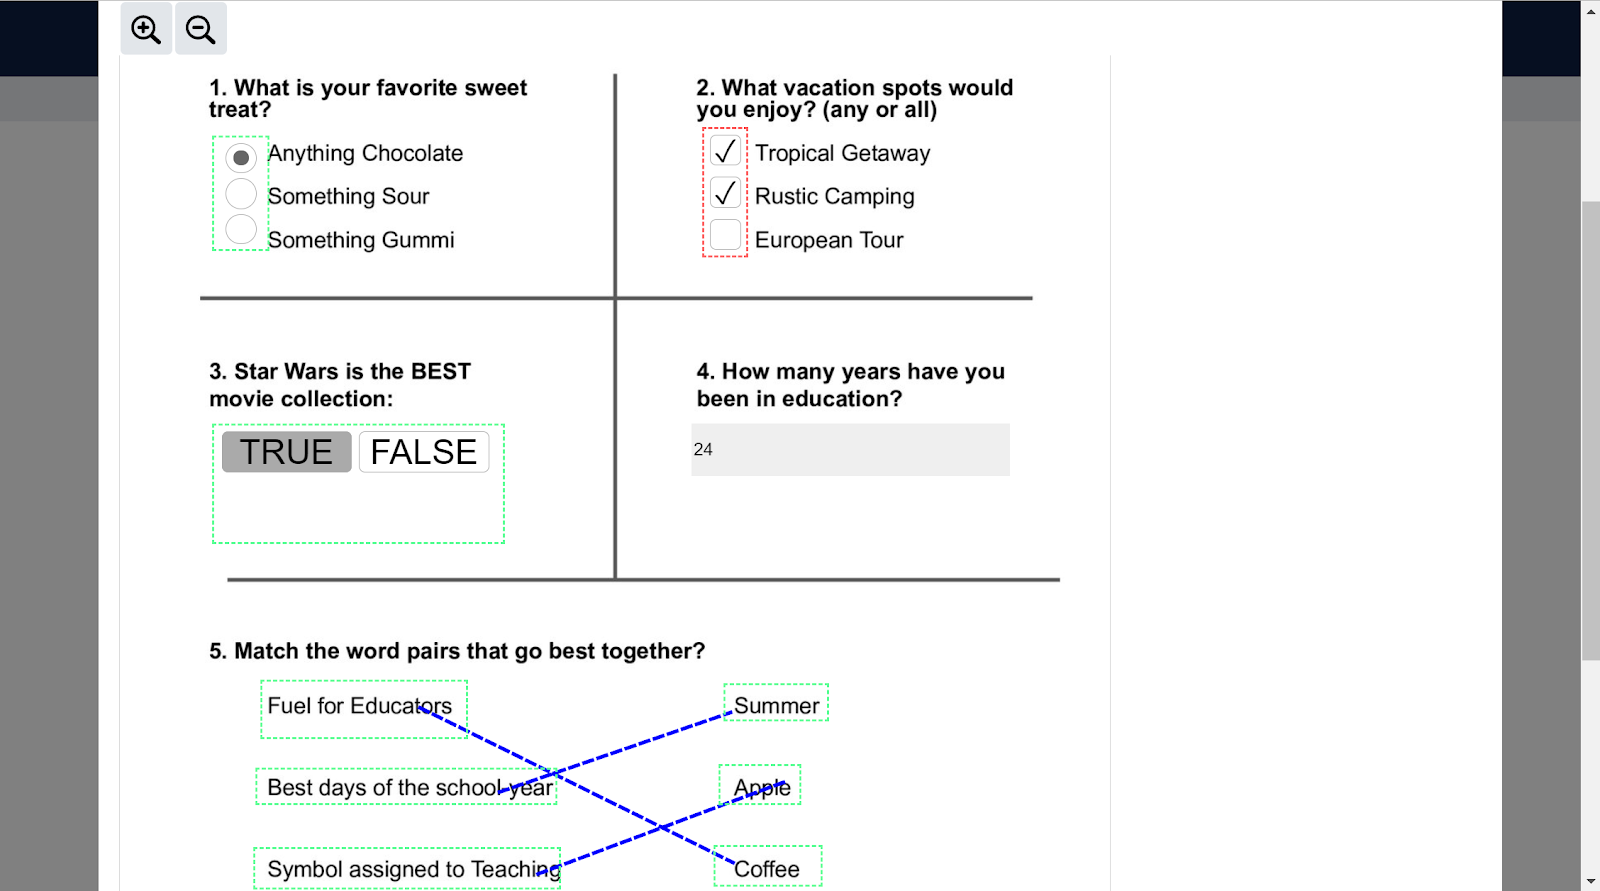
Multiple Choice: (make sure to mark one correct)

Checkbox: (make sure to mark one or more correct)


True and False: (make sure to mark one correct)

Short Answer: (you can edit font and formatting)


Matching: (make sure to match them correctly)


  1. Once you have added in your question type, and are done click “File and choose “Close”.


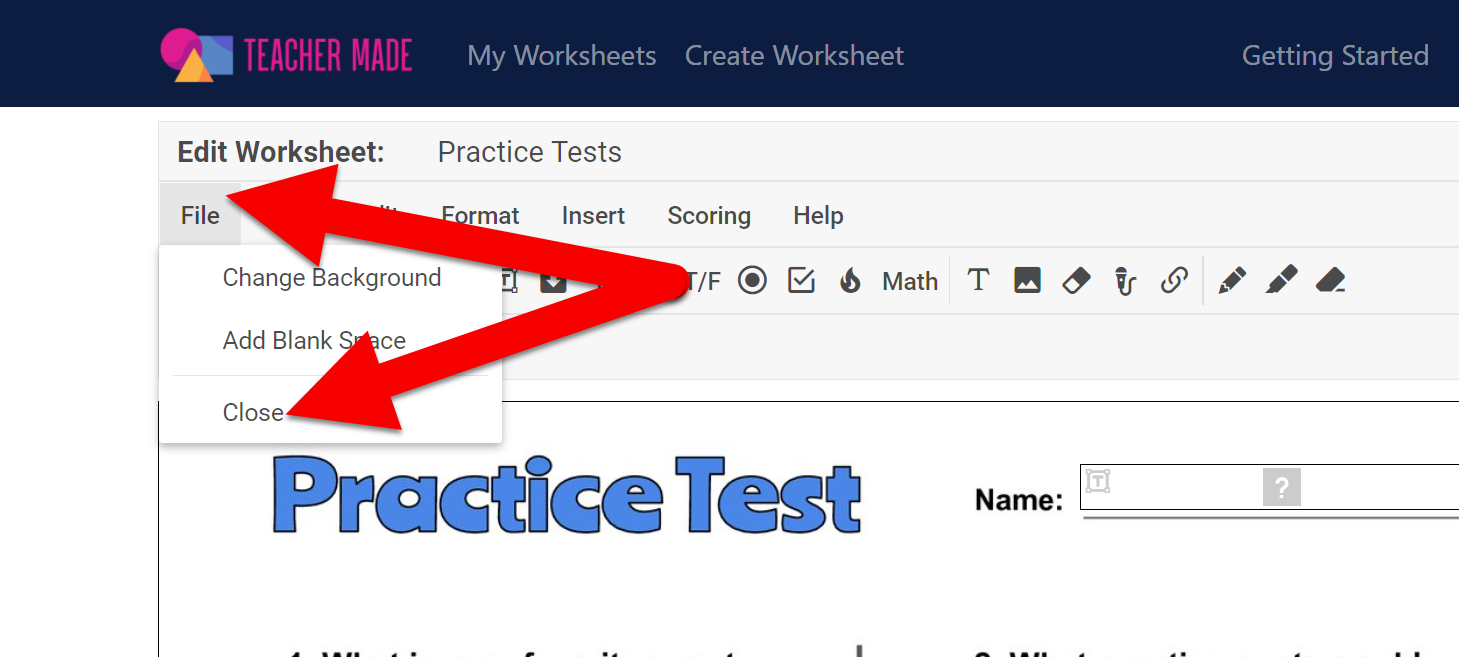
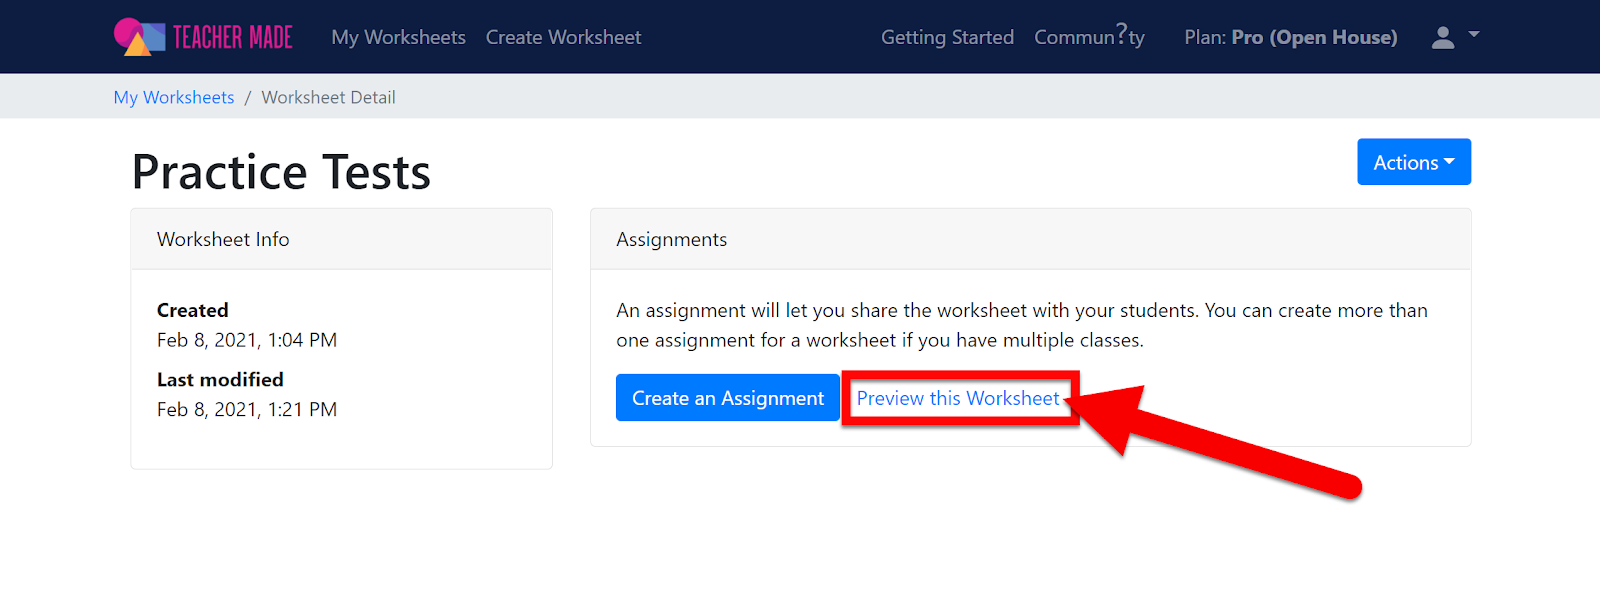
  1. You can choose to preview your activity to make sure it works correctly.


  1. When you are done previewing click “Check My Answers” at the bottom and you will see how you did (green is correct, red is wrong).


  1. Click the “X” in the top right corner and then click “Create Assignment”. 


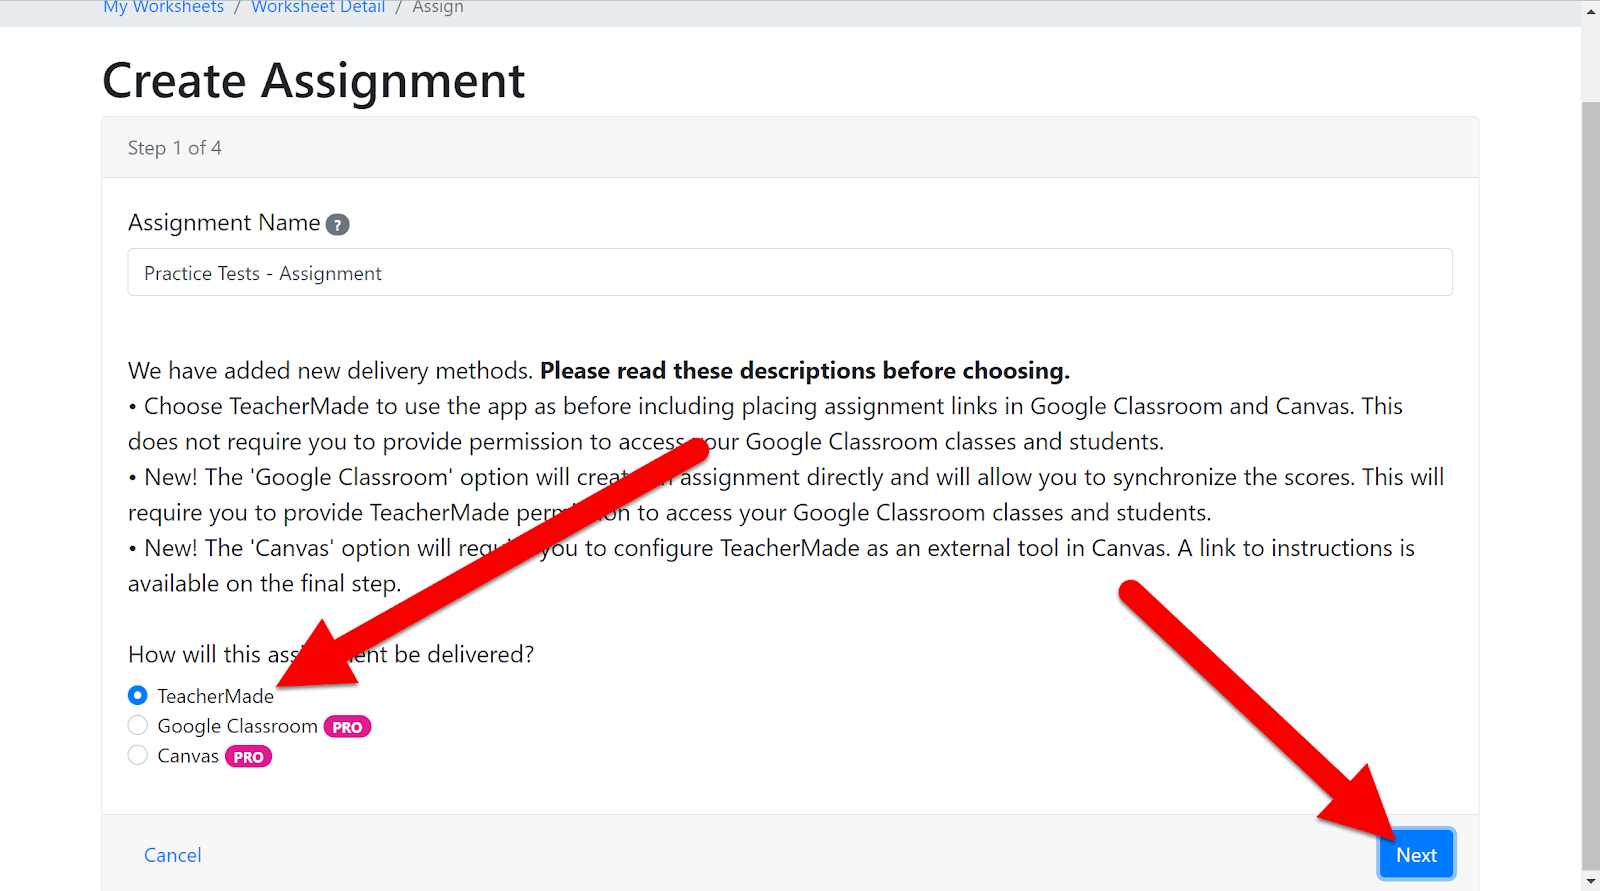
  1. Choose how you want to share this with your students. Free accounts must choose “TeacherMade”. 


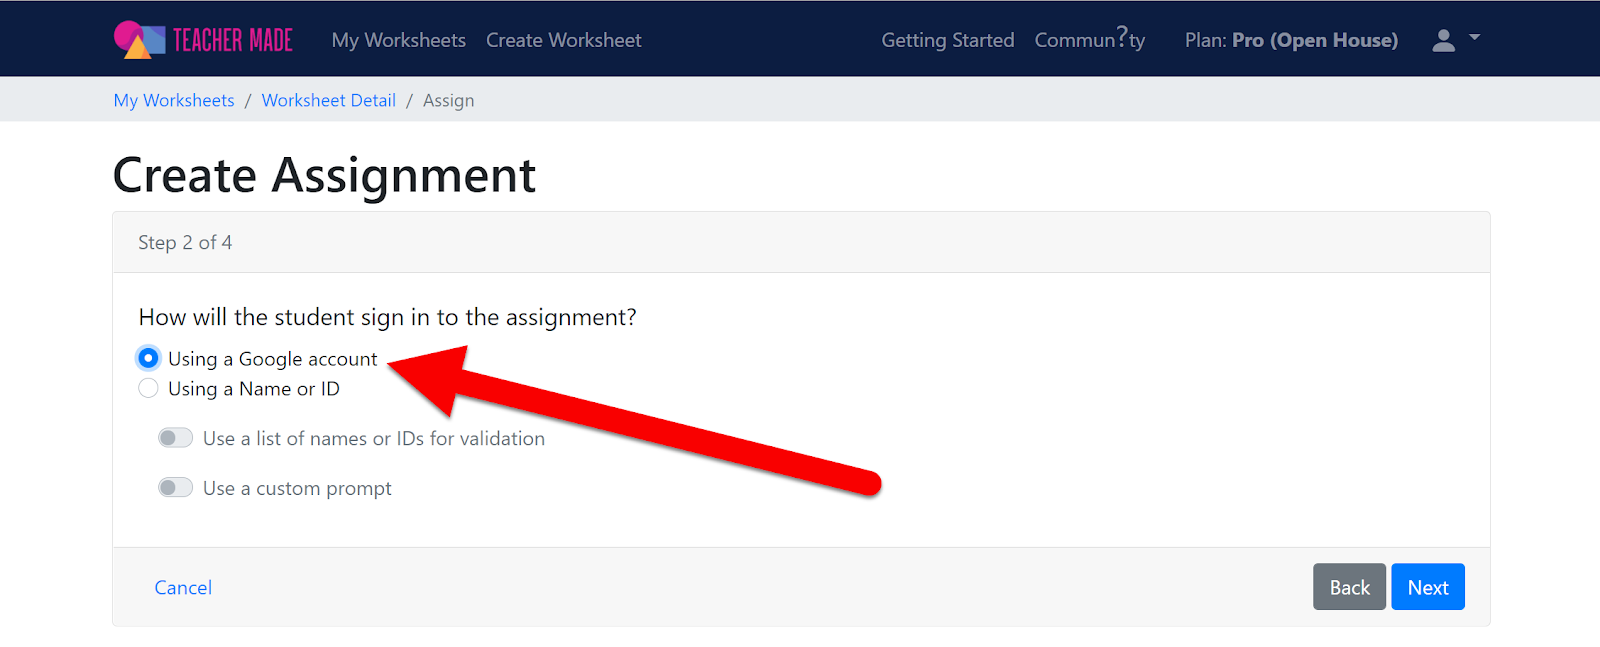
  1. Choose “Using a Google Account”.


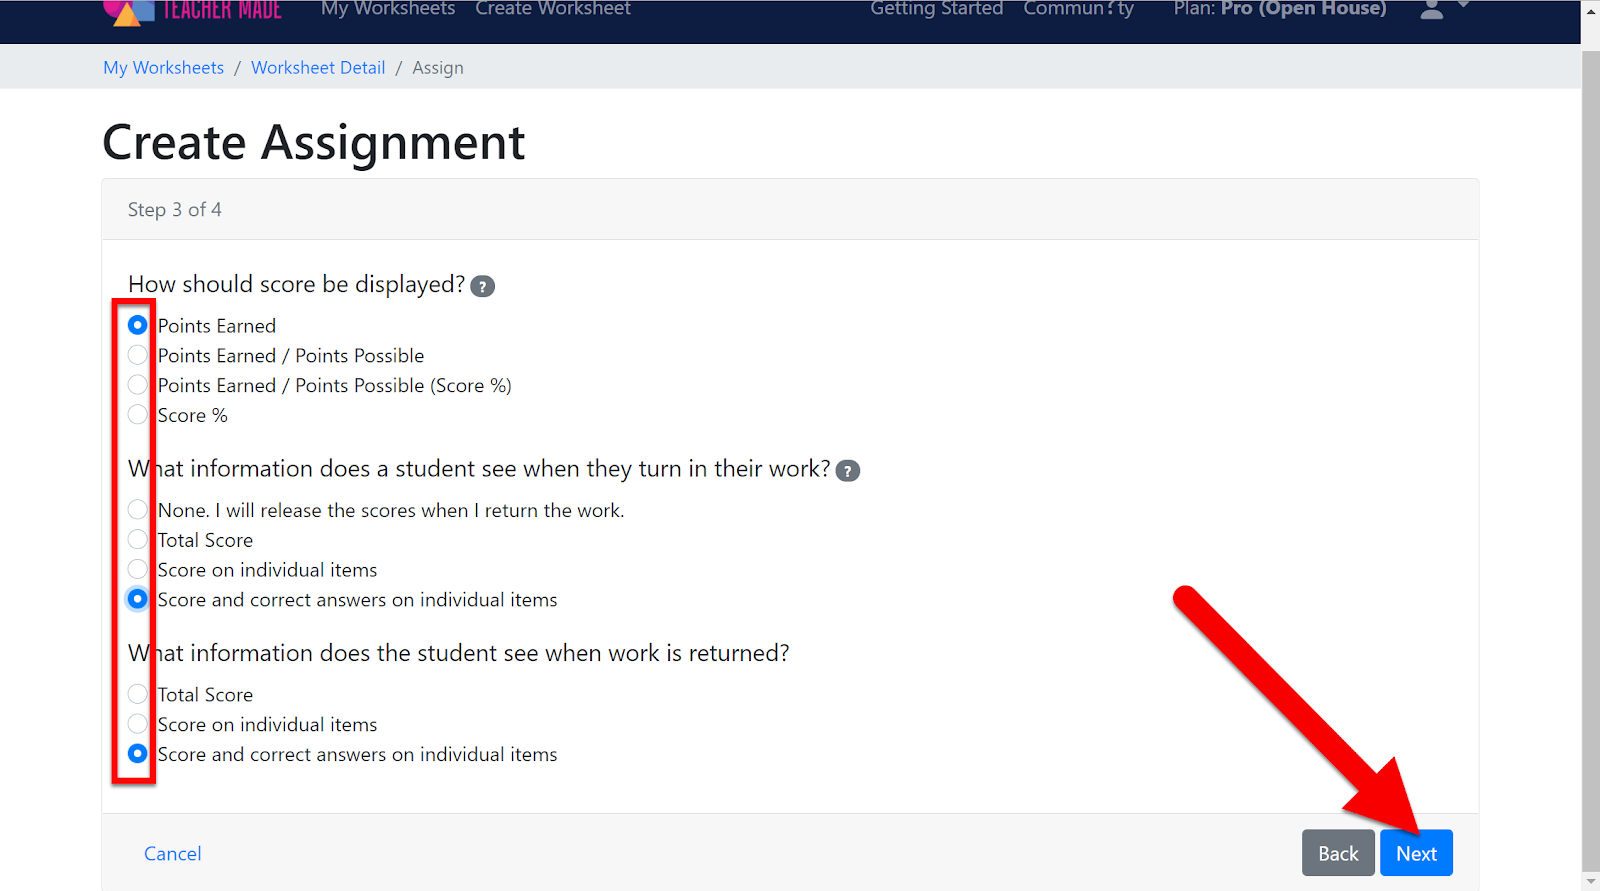
  1. Set you scoring as you prefer and click “Next”.


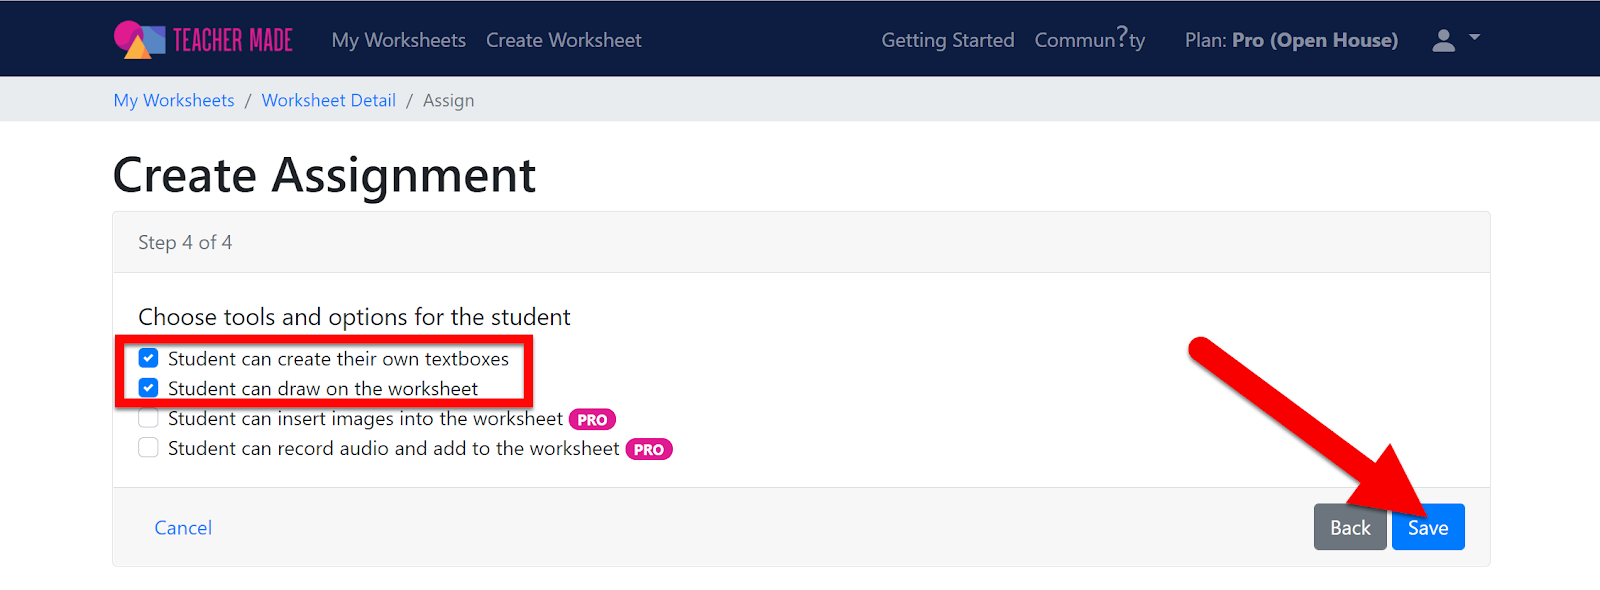
  1. Choose the options you want your students to be able to use (free will not let you use the bottom 2). Click “Next”.


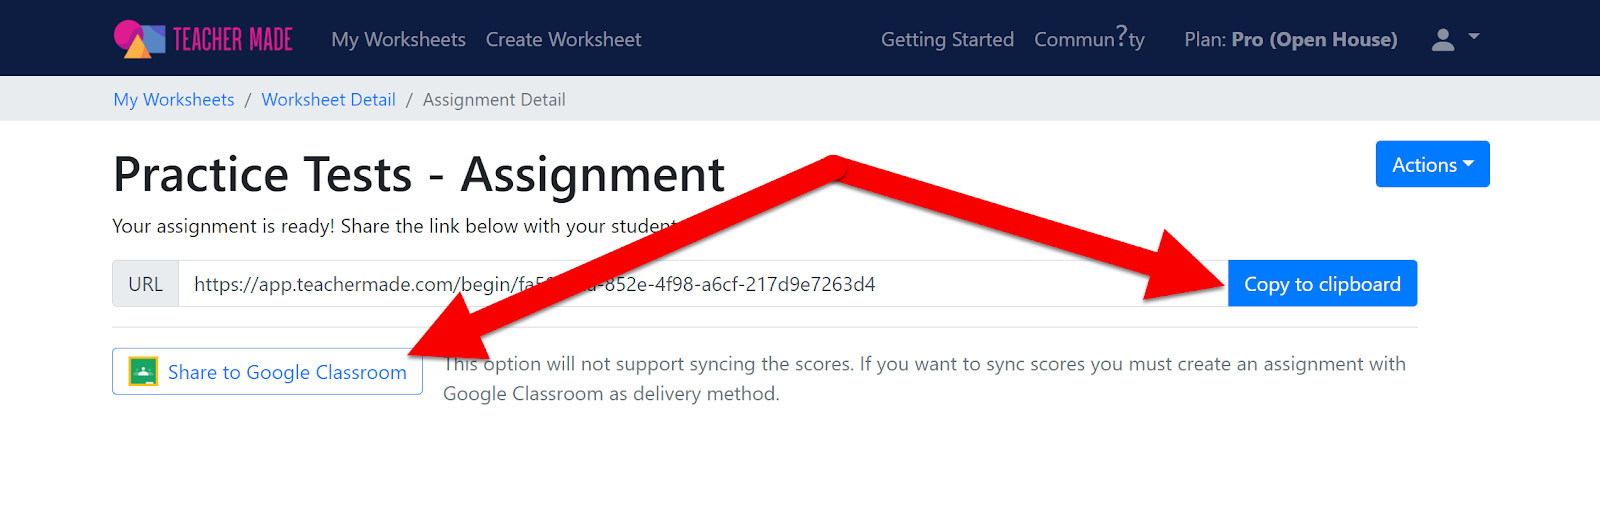
  1. Choose how you want to share this. Copy the URL or create a Google Classroom post.


Student Access:

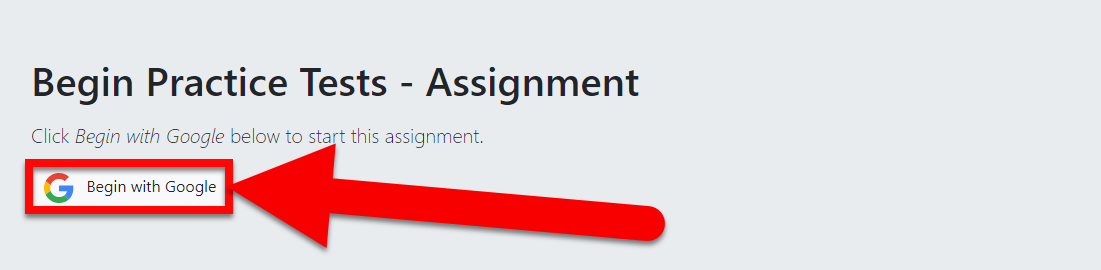
  1. Students will click the link (or assignment in Google Classroom) to access the assignment. They will click “Begin with Google”.


  1. They will complete the assignment and click “I’m Done”.


  1. They will see their scores (if you set it to allow them to see them when they submit).


Teacher Access/Viewing Completed Assignments:

  1. Head to “My Worksheets” on the main page. 

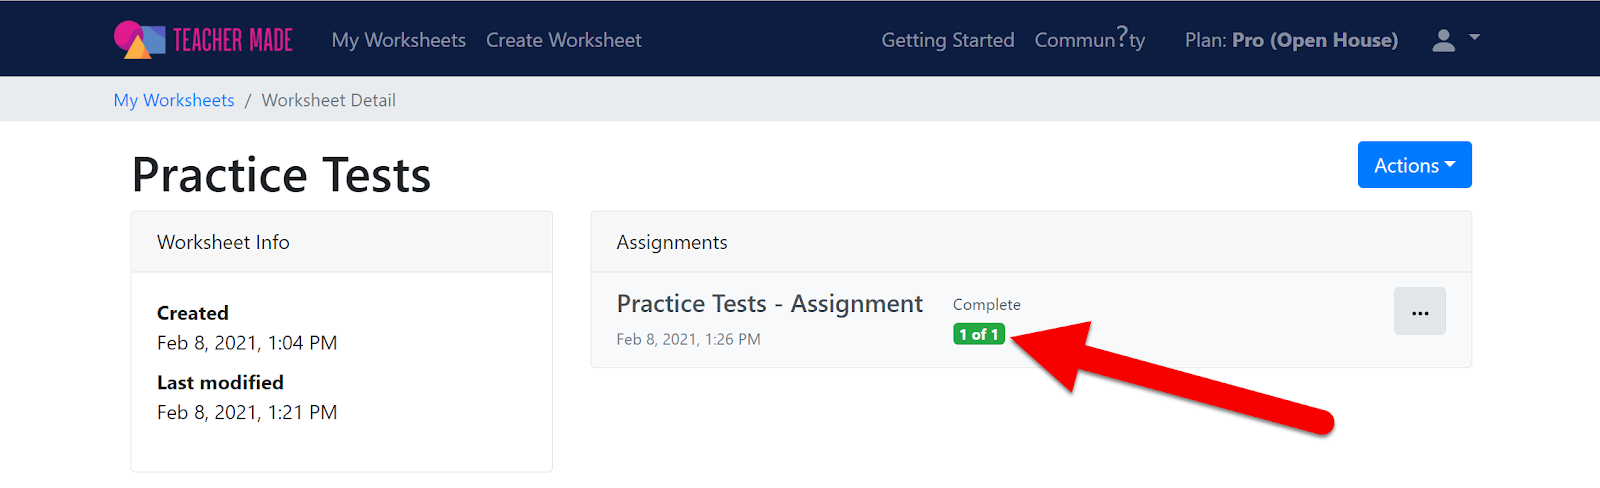
  2. Click on the assessment you want to see turned in work from. On the next screen click the green box showing how many are turned in.


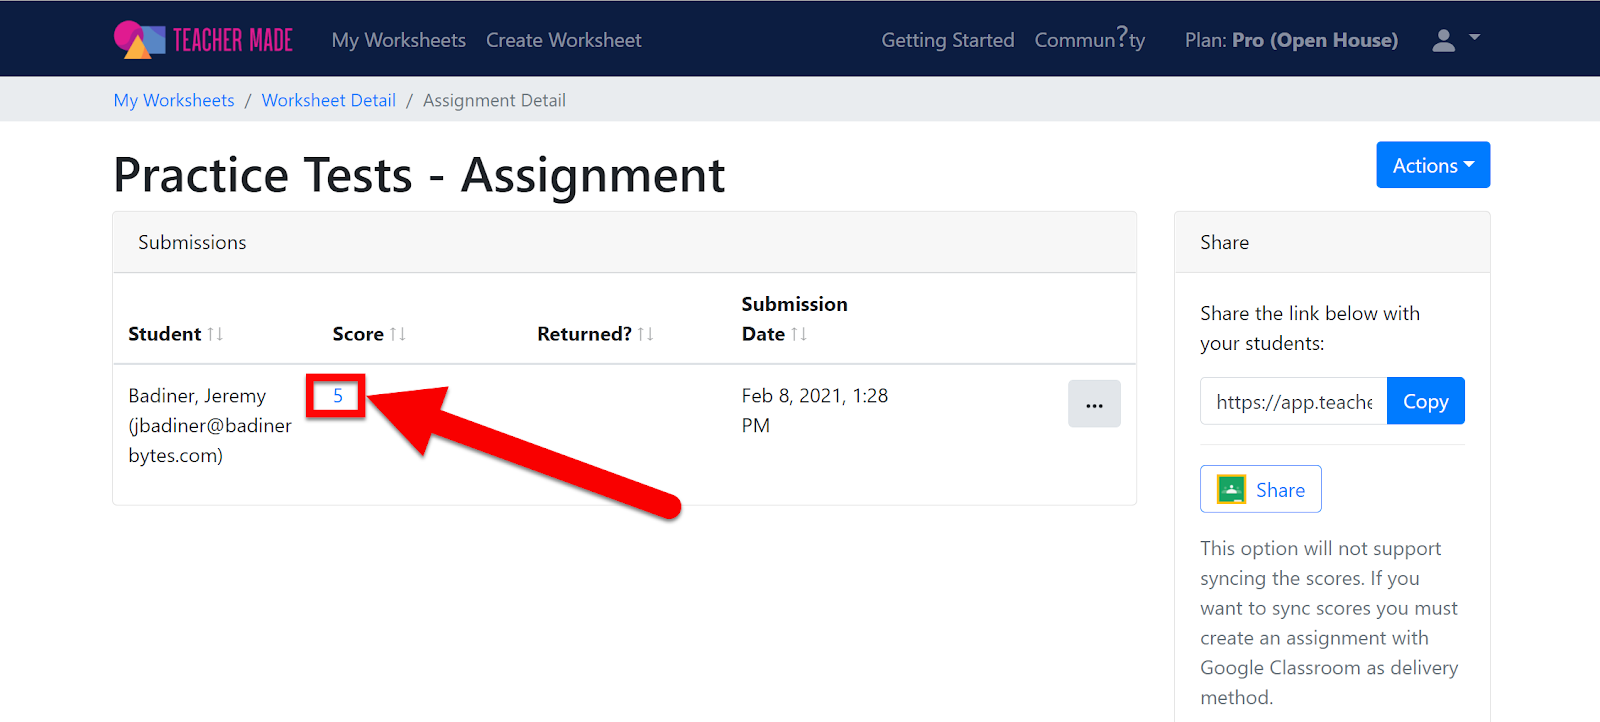
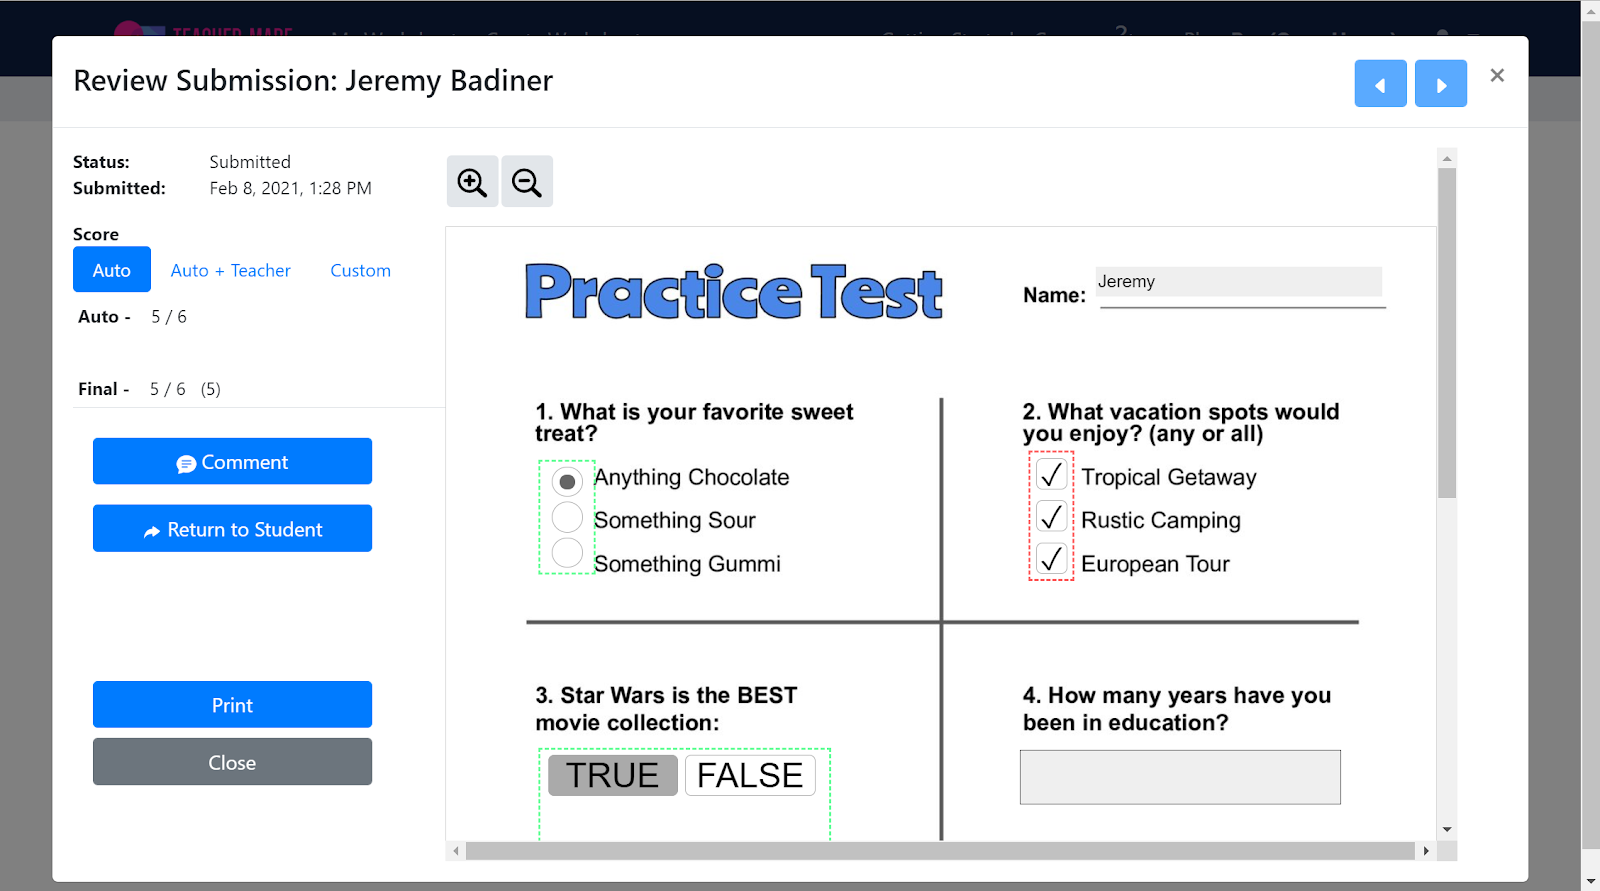
  1. You will see the list of students that turned in an activity. Click on the score to see the actual document/answers.


There are a lot more options, but this will get you started. Video Walkthrough Here! Head over to TeacherMade and check out what else you can do. Have questions? Check out the community forum!


Here is a Video Walkthrough:


If you want these directions in a document click HERE!
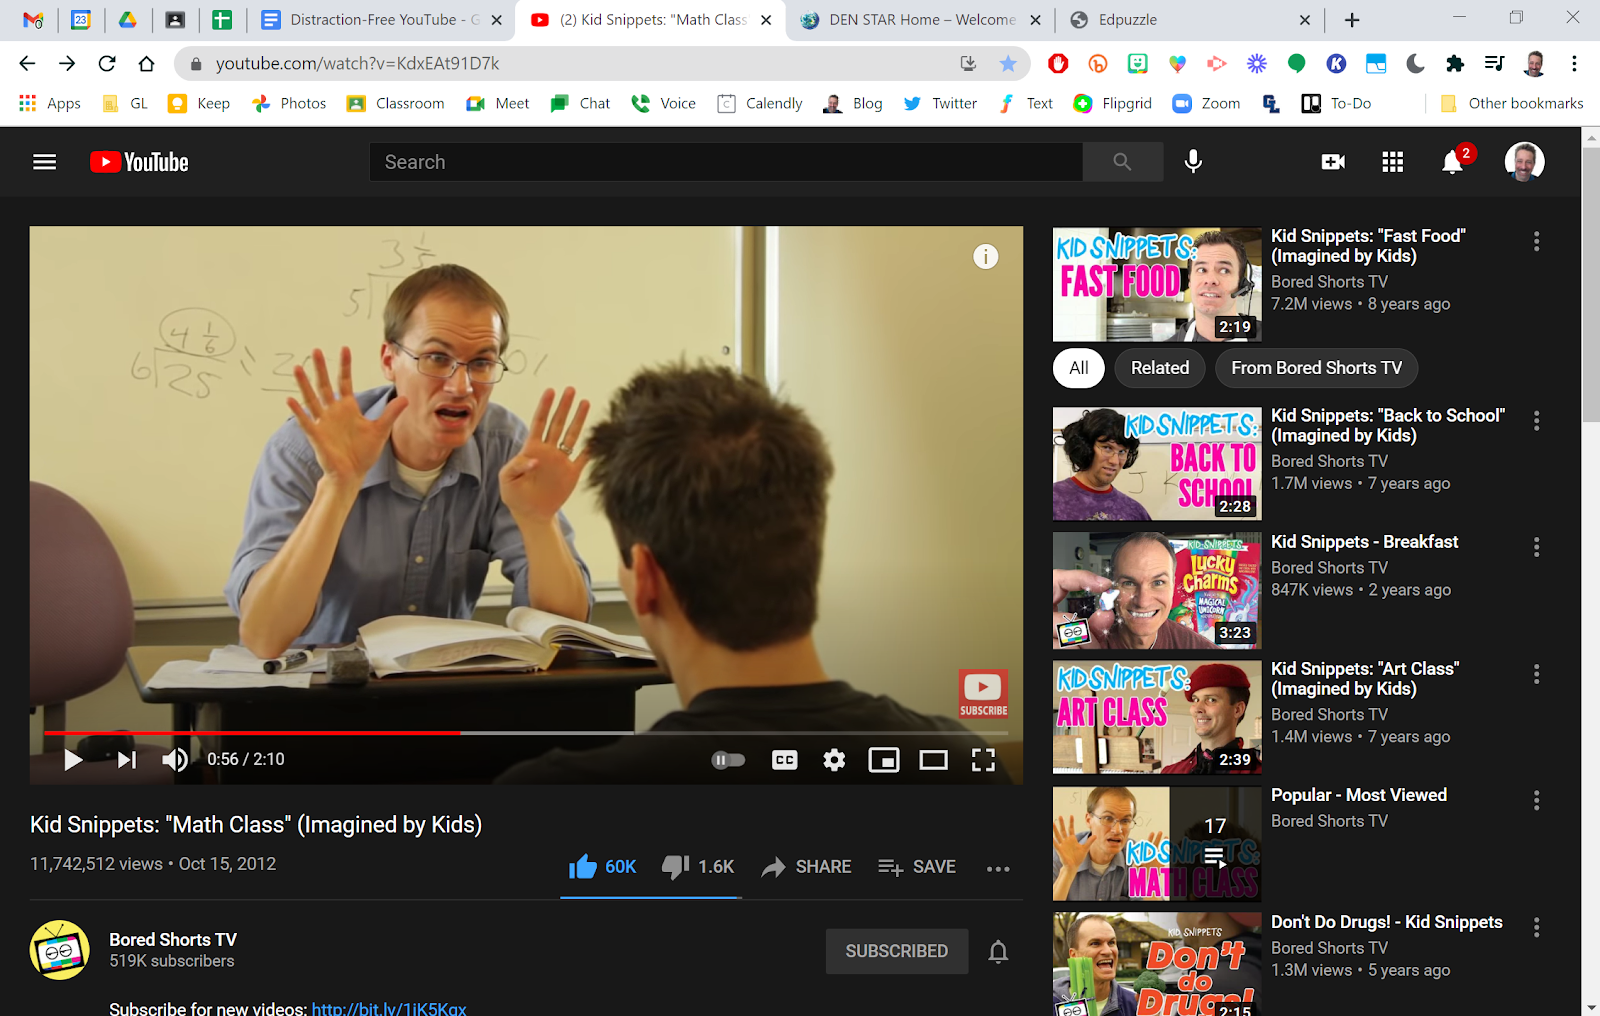


Thursday, February 4, 2021

Share Your Computer Access with Chrome Remote Desktop

As a Tech Coach (and a tech-savvy family member) I am always trying to help staff troubleshoot tech issues or explain how to do things. Often times I am not in the same building or available to sit with them in person. Sometimes I wish I could just control their computer from wherever I am. The good news is I can! By installing the Chrome Remote Desktop Extension on both devices, I can be granted permission to access and control their computer or Chromebook. This works well when someone just needs a quick tip or a long how-to help session and I am not sitting right next to them. Follow the steps below to start helping others from afar!


Setting Up Remote Desktop:

  1. The first step is to make sure BOTH computers have the Chrome Remote Desktop Extension installed. 

  2. Once the app is installed launch it. You will be asked to install a small program. Go ahead and approve.


  1. After both computers have installed all software you are ready to share. 


Sharing Your Screen:

  1. Click the Chrome Remote Desktop Extension.

  2. Choose “Remote Support” at the top and click the blue “+ Generate Code” button.


  1. Share the code that is now generated with the person you wish to have access to your device. This code will expire in 5 minutes.


  1. Once the person you are granting control to enters the code you will see a prompt to allow them permission. Click “Share”.


  1. They will have control of your mouse and access to your device. You still have control and can move the mouse and take over their control. When you are done all you need to do to stop the sharing is open the tab that the extension created and click “Stop Sharing”. This disconnects their device from yours and you are done!


Controlling Somone Else’s Screen:

  1. Click the Chrome Remote Desktop Extension.

  2. Choose “Remote Support” at the top and click the “Connect to another computer” box. Enter in the access code they shared with you and click “Connect”.


  1. You will see an image showing that you are connecting. Just wait a moment.


  1. Control their device as you see fit. When you are done you can have them disconnect (directions above) or you can go to the same screen by controlling their device and click “Stop Sharing”. This disconnects your device from theirs and you are done!


It is that simple and easy! 


Things to keep in mind:

  • Only grant permission to control your device to people you know.

  • The person controlling your device has FULL access and sees what you see on your device.

  • The access code is only good for 5 minutes. If emailing/connecting takes longer you will need to restart the process.


If you want these directions in a Document click HERE!

Check Video & Audio Quality Before a Meet

Nothing is worse than joining a video call and having video or audio issues. Meet now has a tool that lets you make sure your device is running well and audio and video are ready. 


Check Video and Audio Quality:

  1. Open up a Meet link (or begin a new meeting) at meet.google.com

  2. Click on the icon for “Check your audio and video” below your video.


  1. Adjust your hardware as needed, then click “Next”.


  1. Capture a video and audio sample by clicking “Start”.


  1. See your results. Click “Check again” if you need to alter anything and want to run another test.


Close this out by clicking the “X” in the top right and you are ready to join your meeting knowing your hardware is ready!


If you want these directions in a Document click HERE!