Take an Image Capture:
Click on the clock in the bottom right corner and click on “Screen Capture”.
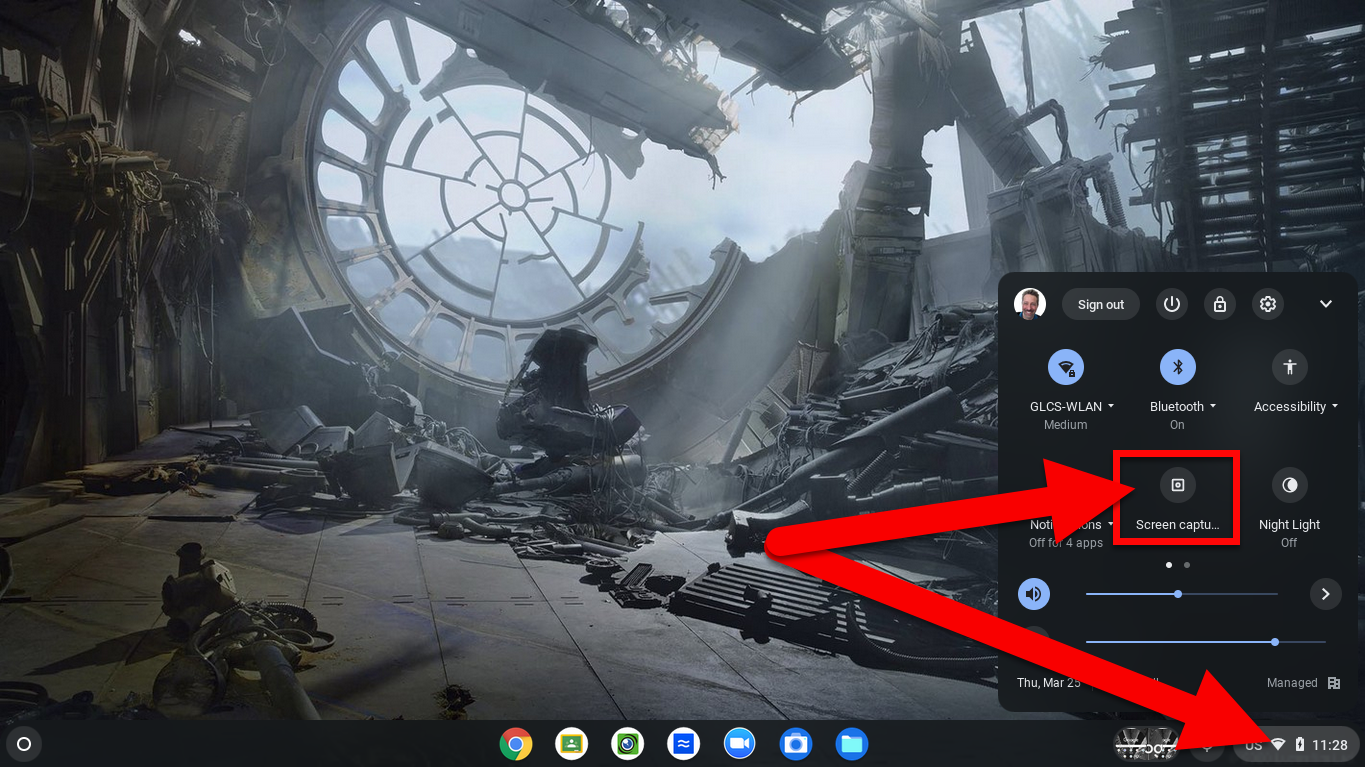
Select the “Camera” icon.
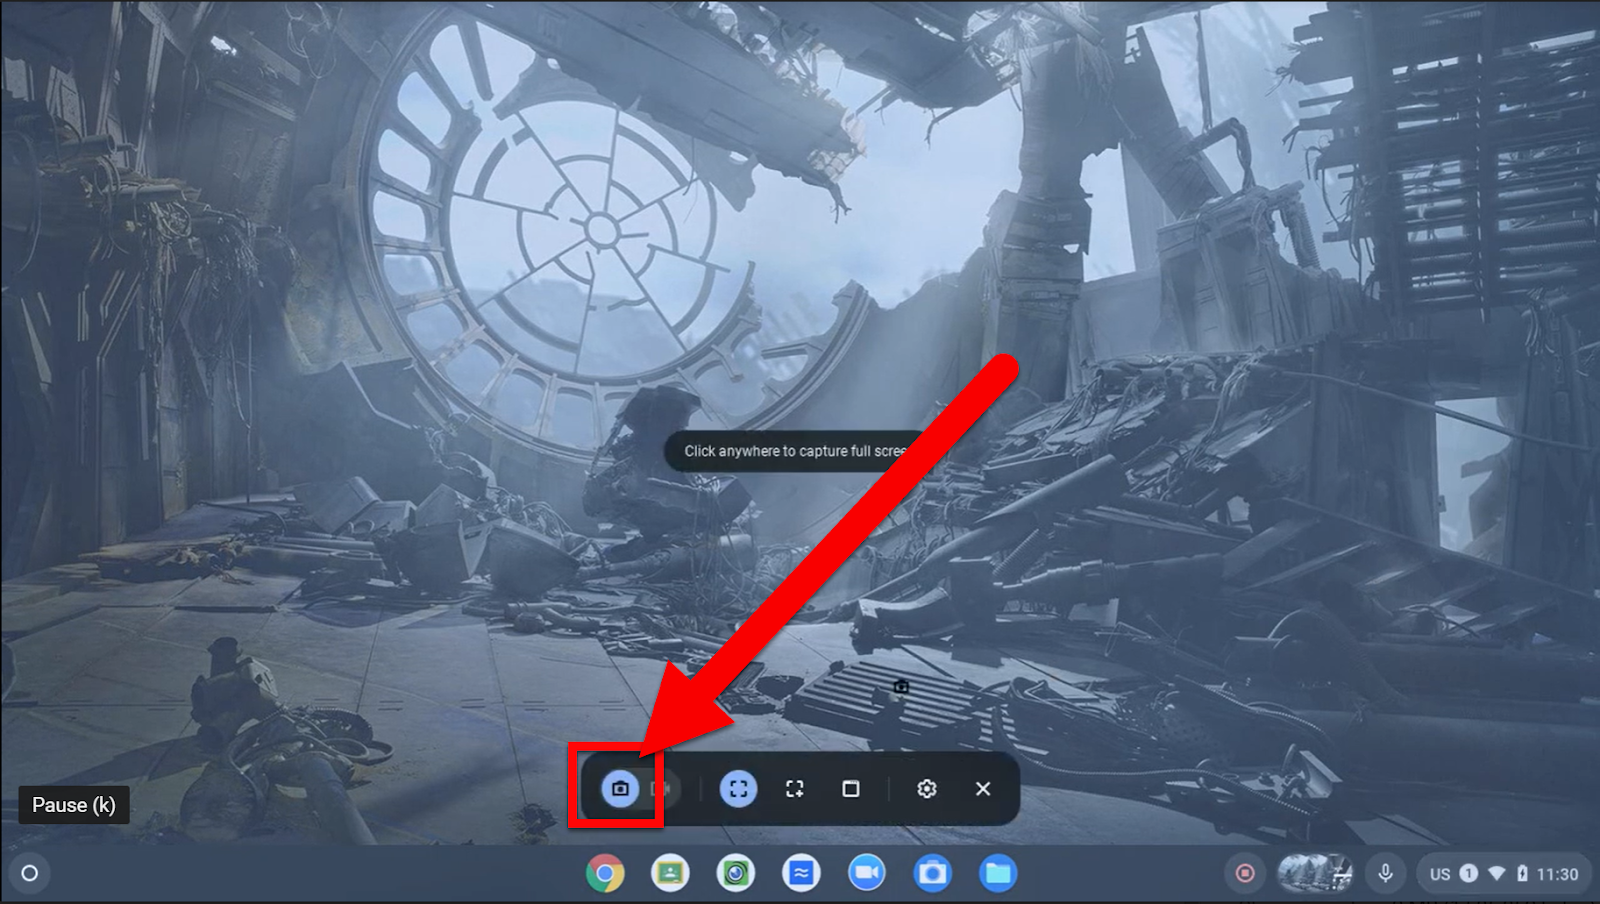
Choose what you want to capture:
Full Screen
Partial Screen
Chrome Tab
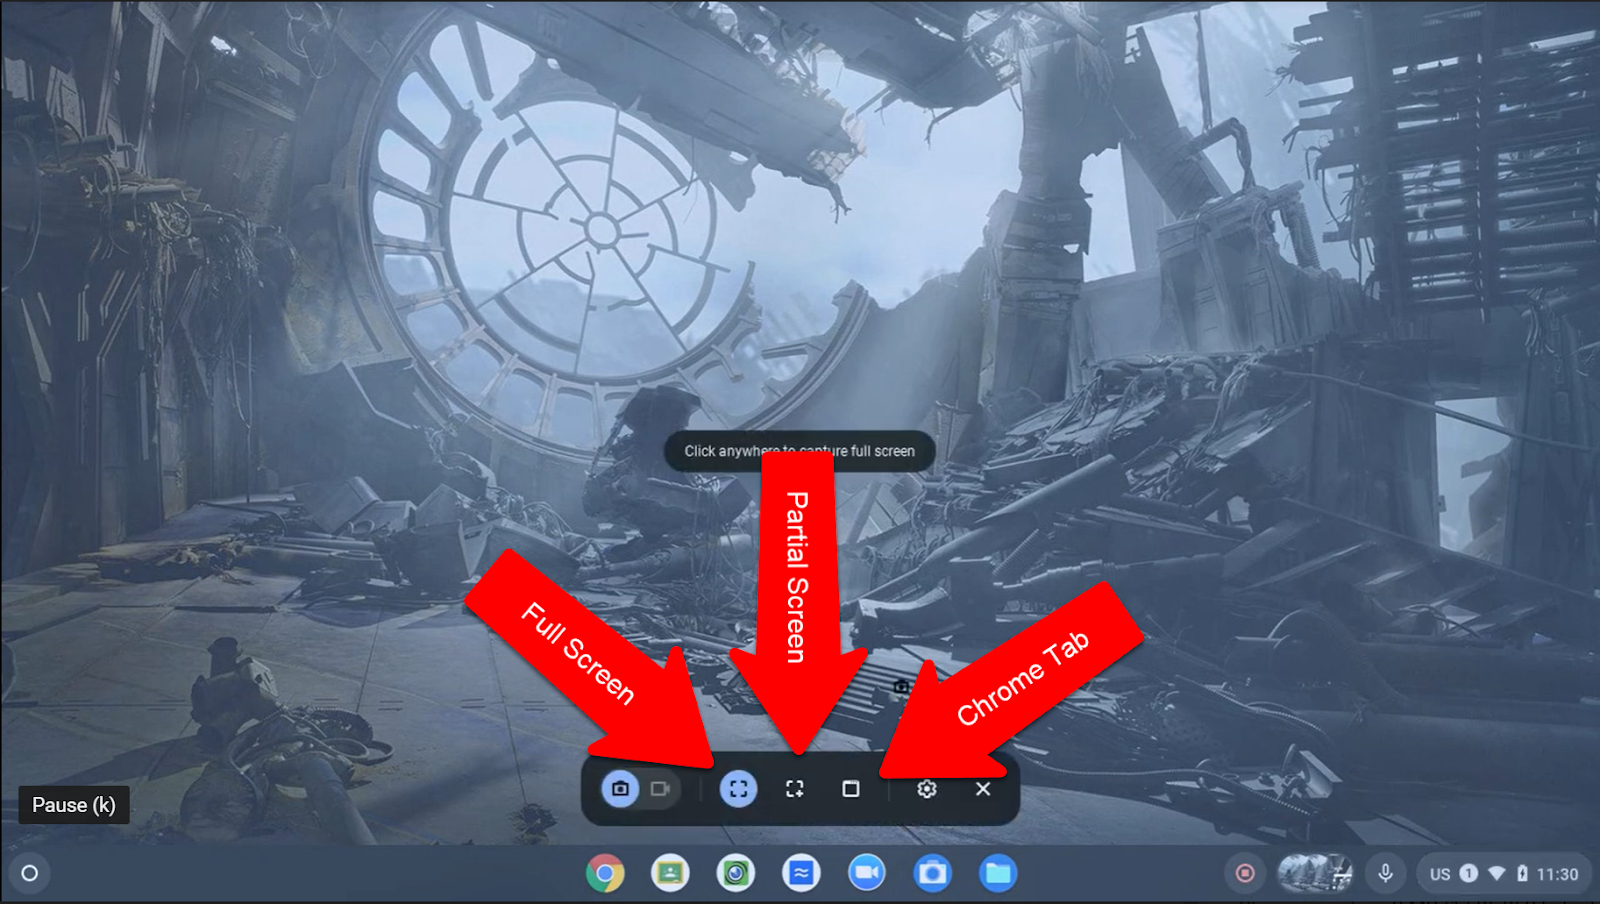
Click “Capture” or “Click anywhere to capture full screen” on the screen.
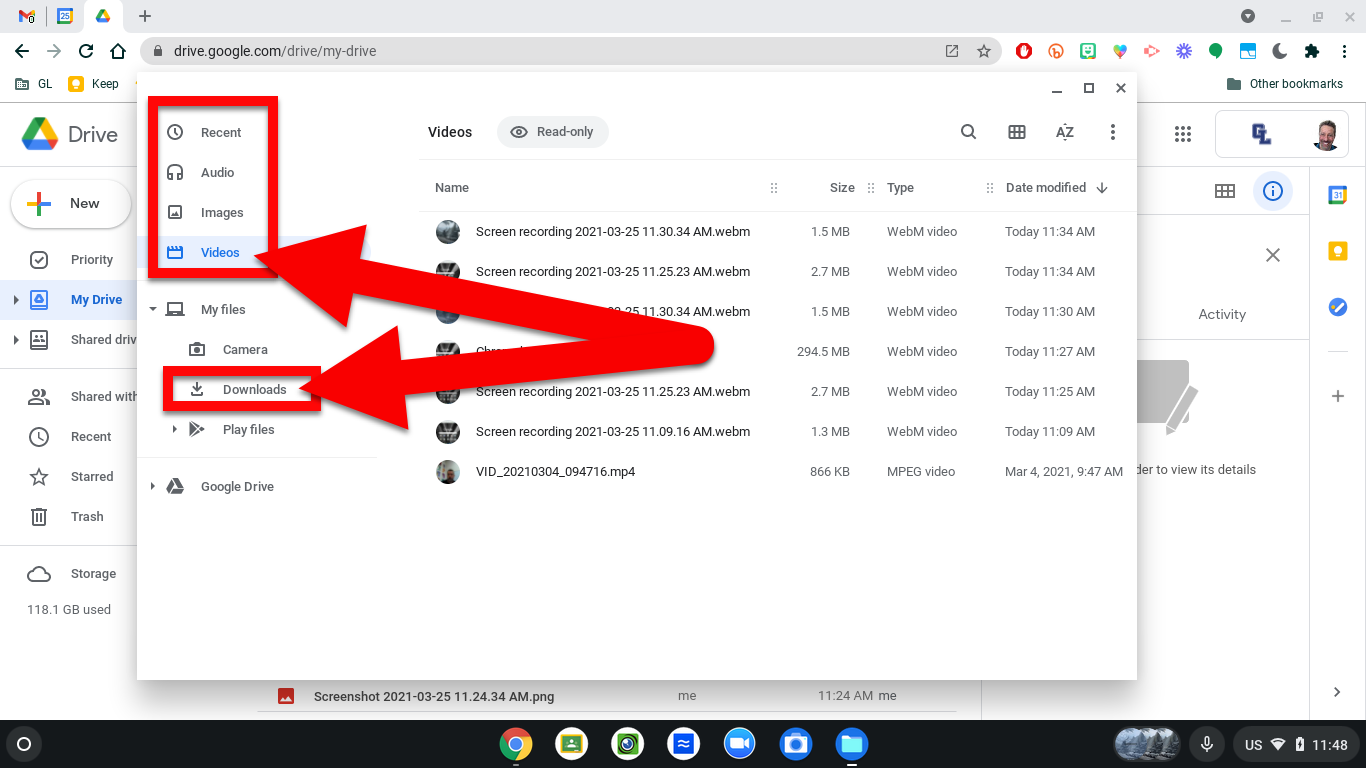
These images will be saved to your “Downloads” file, as well as your “Images” section.

Take a Video Capture:
Click on the clock in the bottom right corner and click on “Screen Capture”.
Select the “Video” icon.
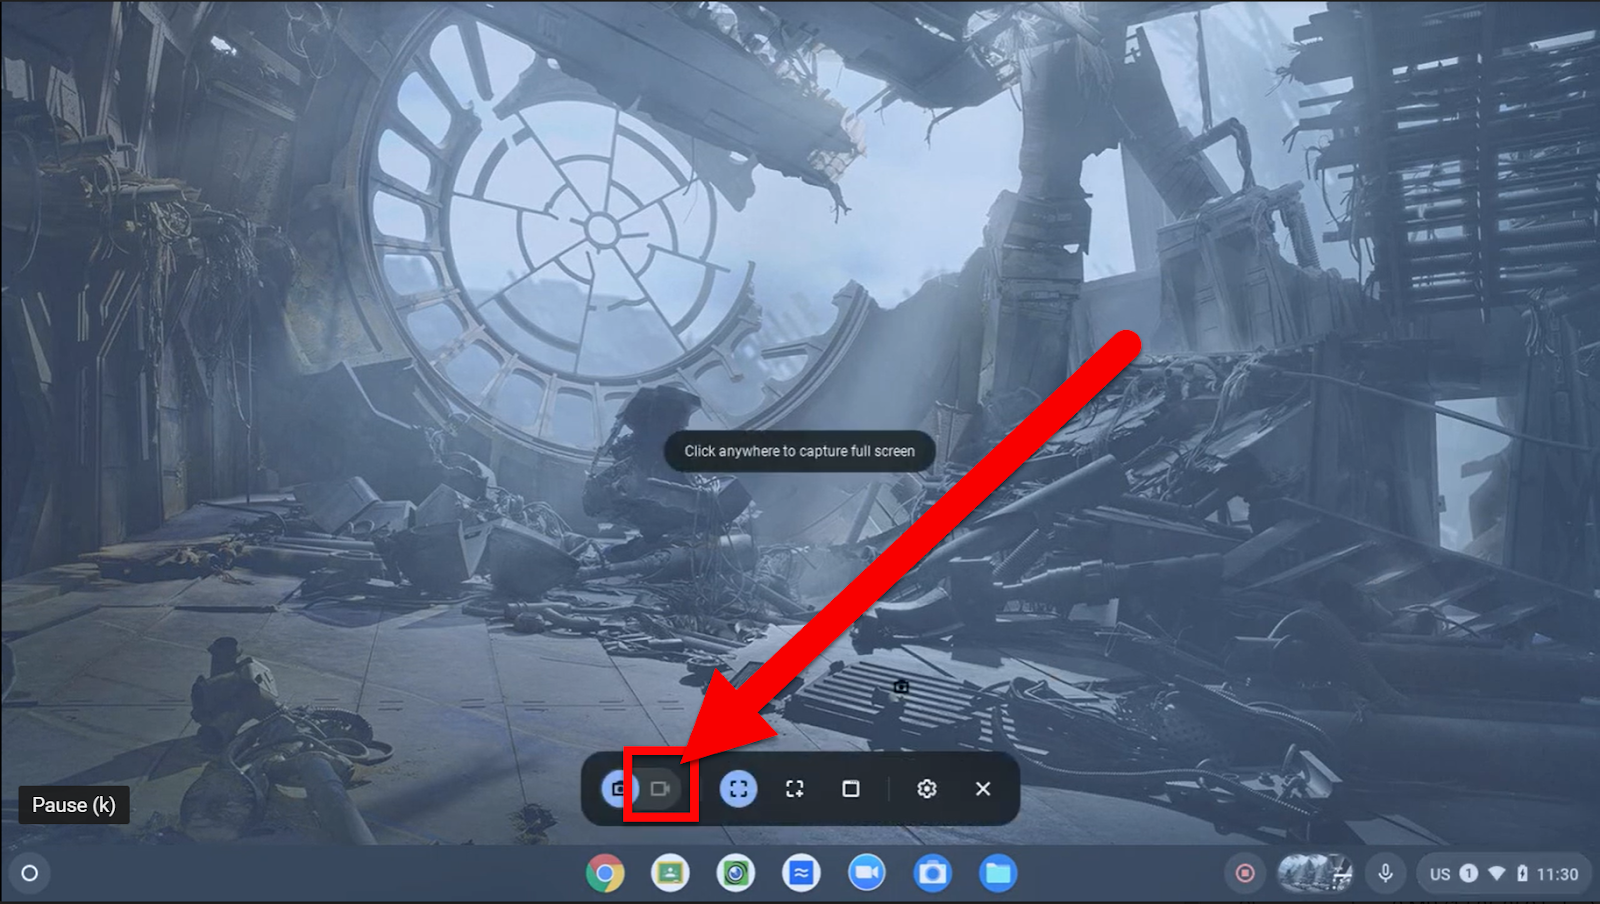
Choose what you want to capture:
Full Screen
Partial Screen
Chrome Tab
You will want to double-check that your audio is (or is not) recorded depending on what you want. Click the setting gear and enable or disable audio recording.
Click “Capture” or “Click anywhere to capture full screen” on the screen.
These videos will be saved to your “Downloads” file, as well as your “Videos” section.
For a quick Video walk-through click here: Chromebook Screen Capture