Wednesday, December 16, 2020

Trello: A Great To-Do List

I am a "To-Do" list person. If it is on a list, I "might” get to it! There are lots of tools to help create lists, but Trello can top many. It allows multiple lists, drag-and-drop movement from lists, and collaboration! With the free account, you get 10 boards (think of these as a desktop with lists on them). Give Trello a try and start organizing your life!


Create an Account:

  1. Start by heading to https://trello.com

  2. Click “Sign In” and choose your method of signup.

  3. You will; be asked to create a Team. This is just the name of your Trello Collection.


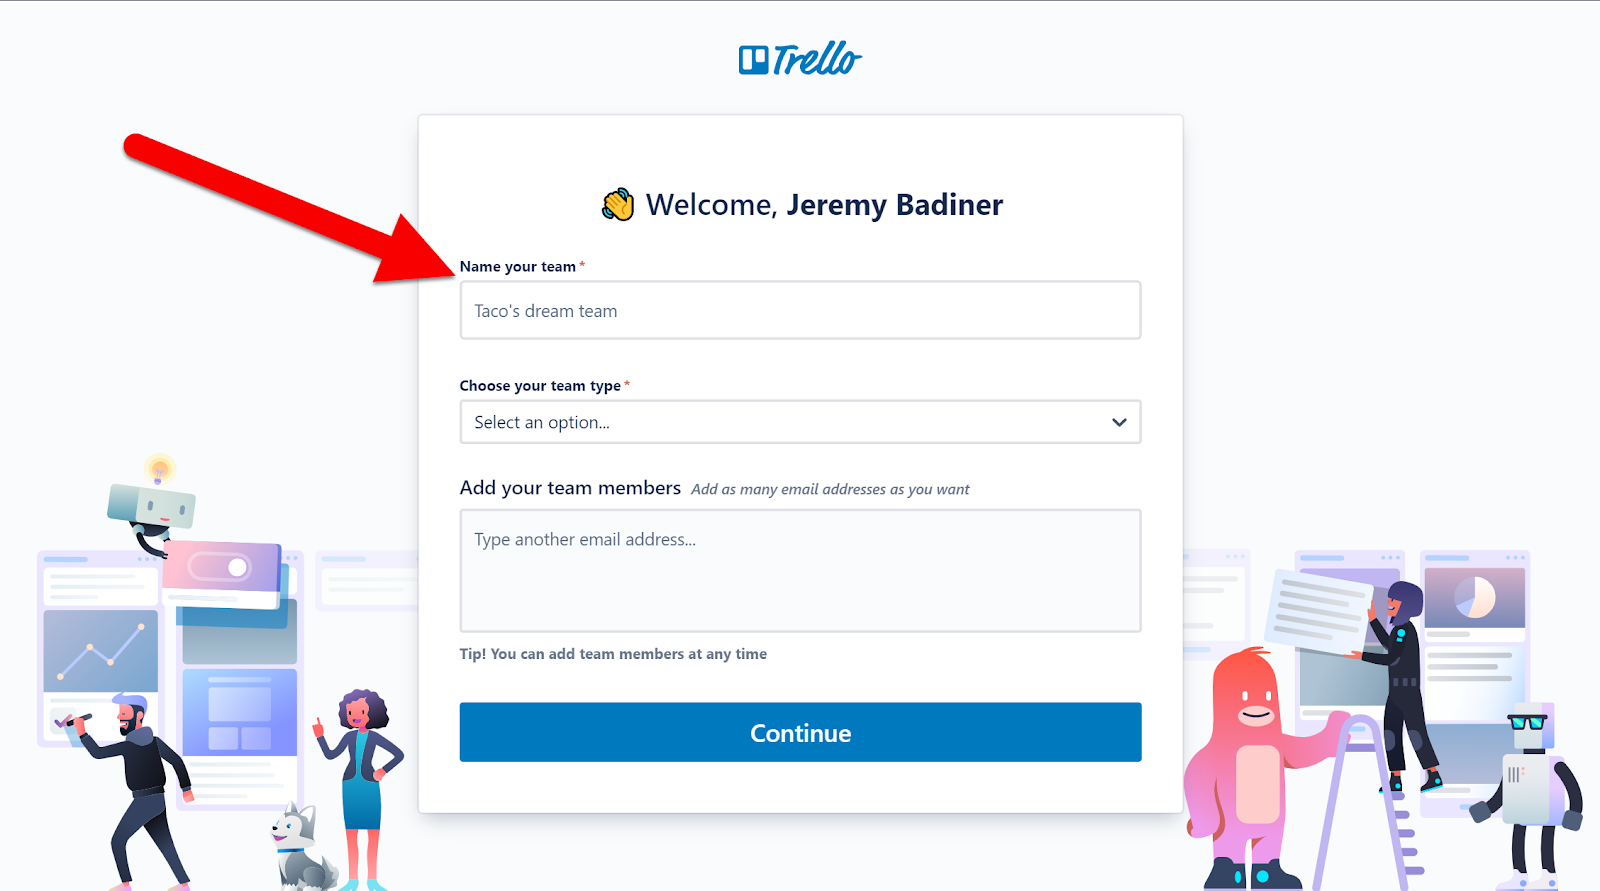
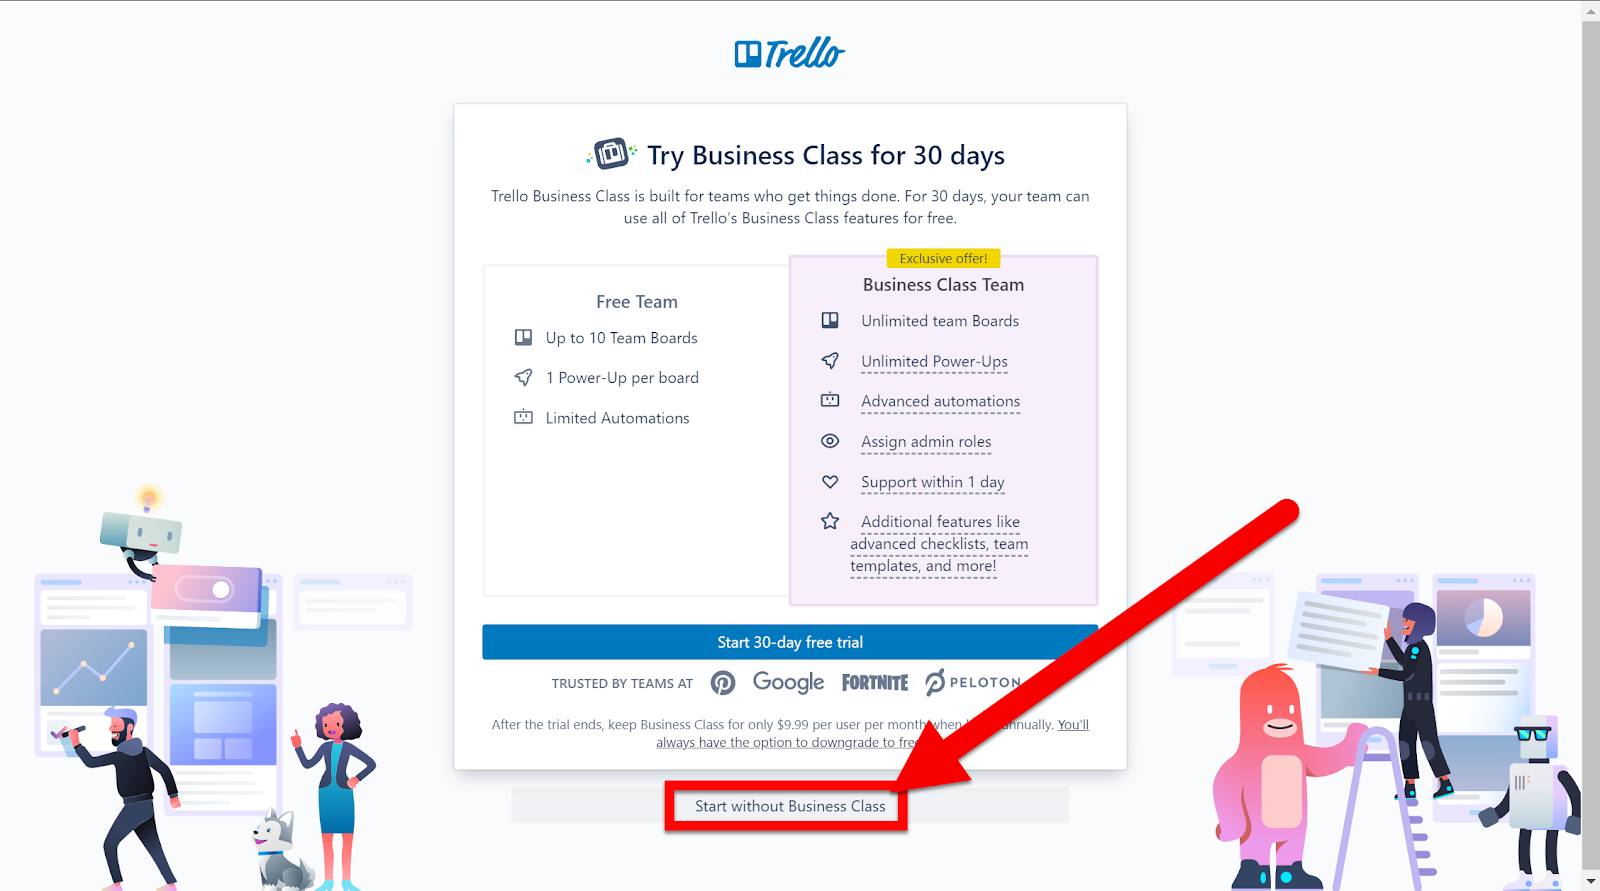
  1. You will then be shown that you can get a free “Trial”. No need for this. Scroll to the bottom and click “Start without Business Class”. The free version gives you 10 boards.


Create a Board:

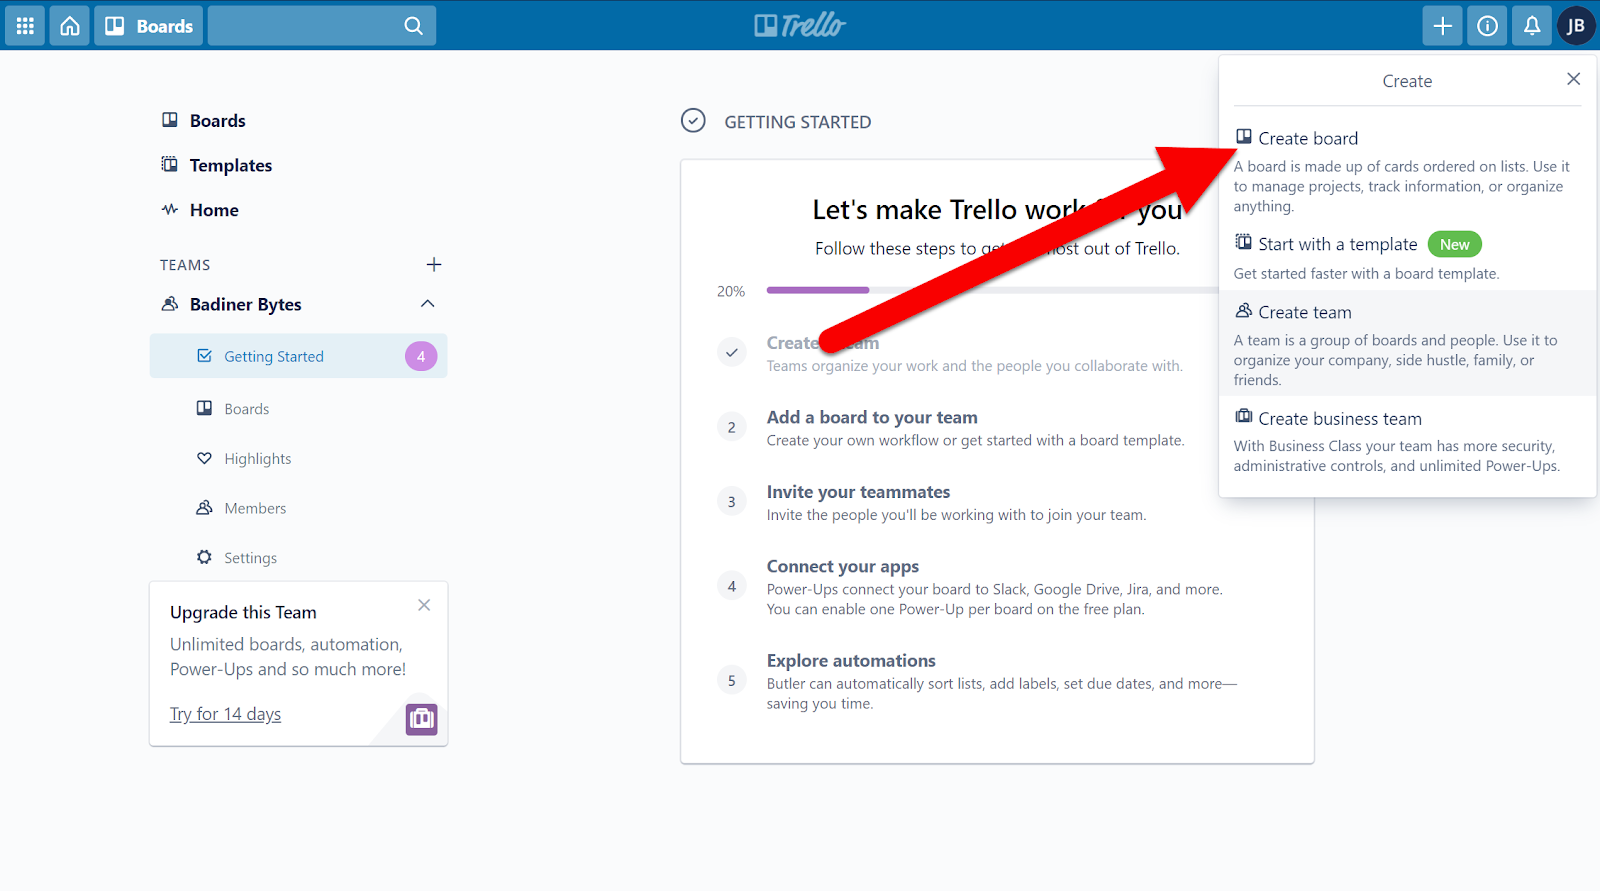
  1. Click the “+” icon in the top right corner.


  1. Click “Create board”.


  1. Title your board.


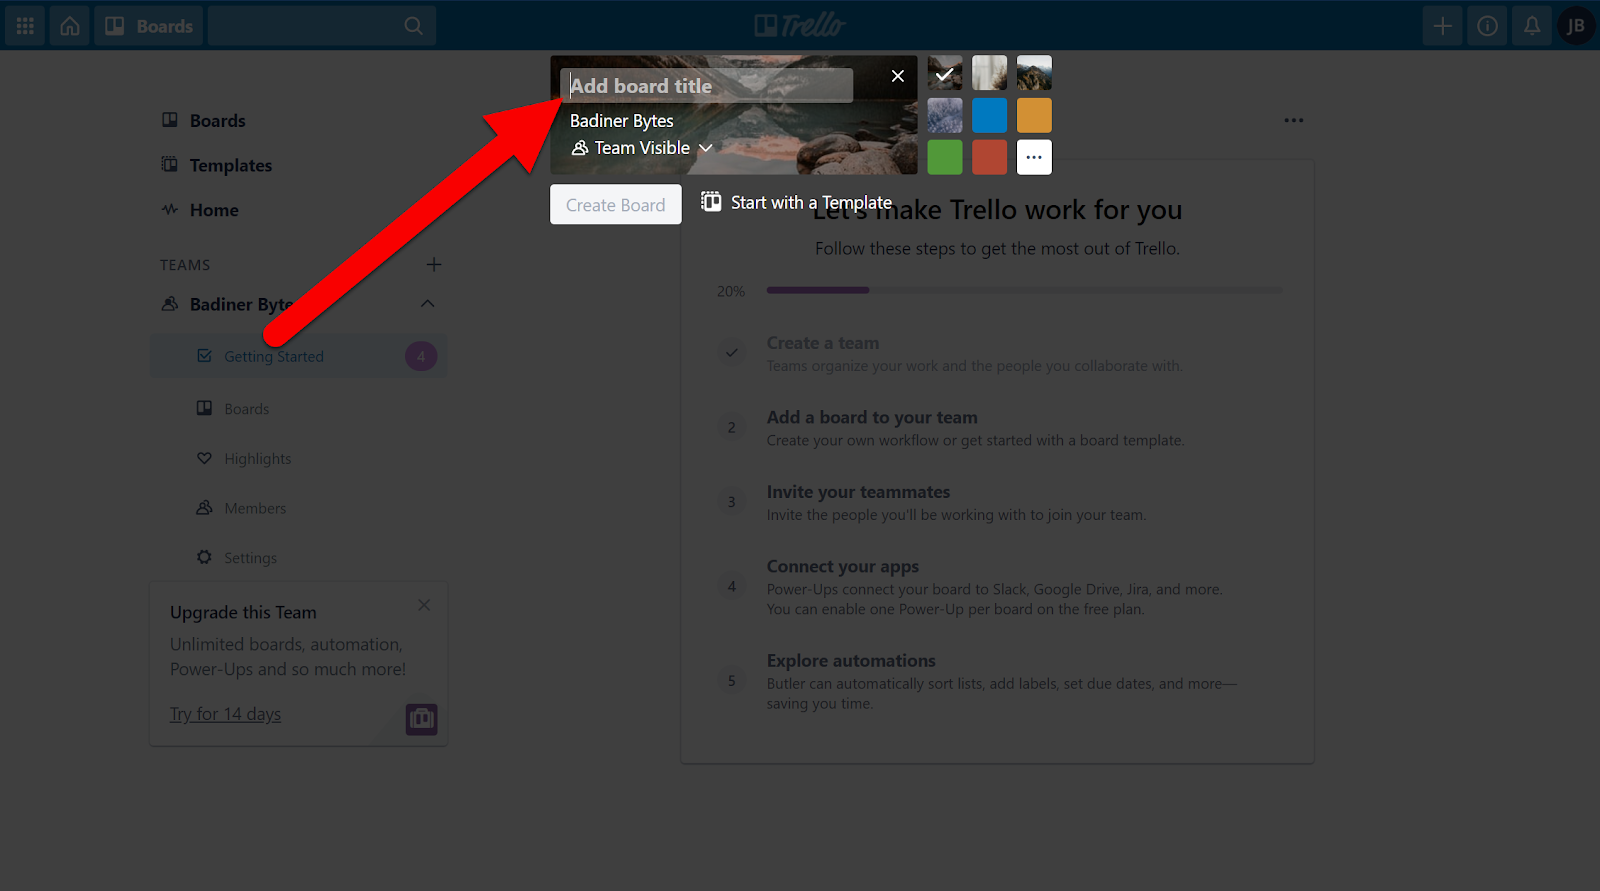
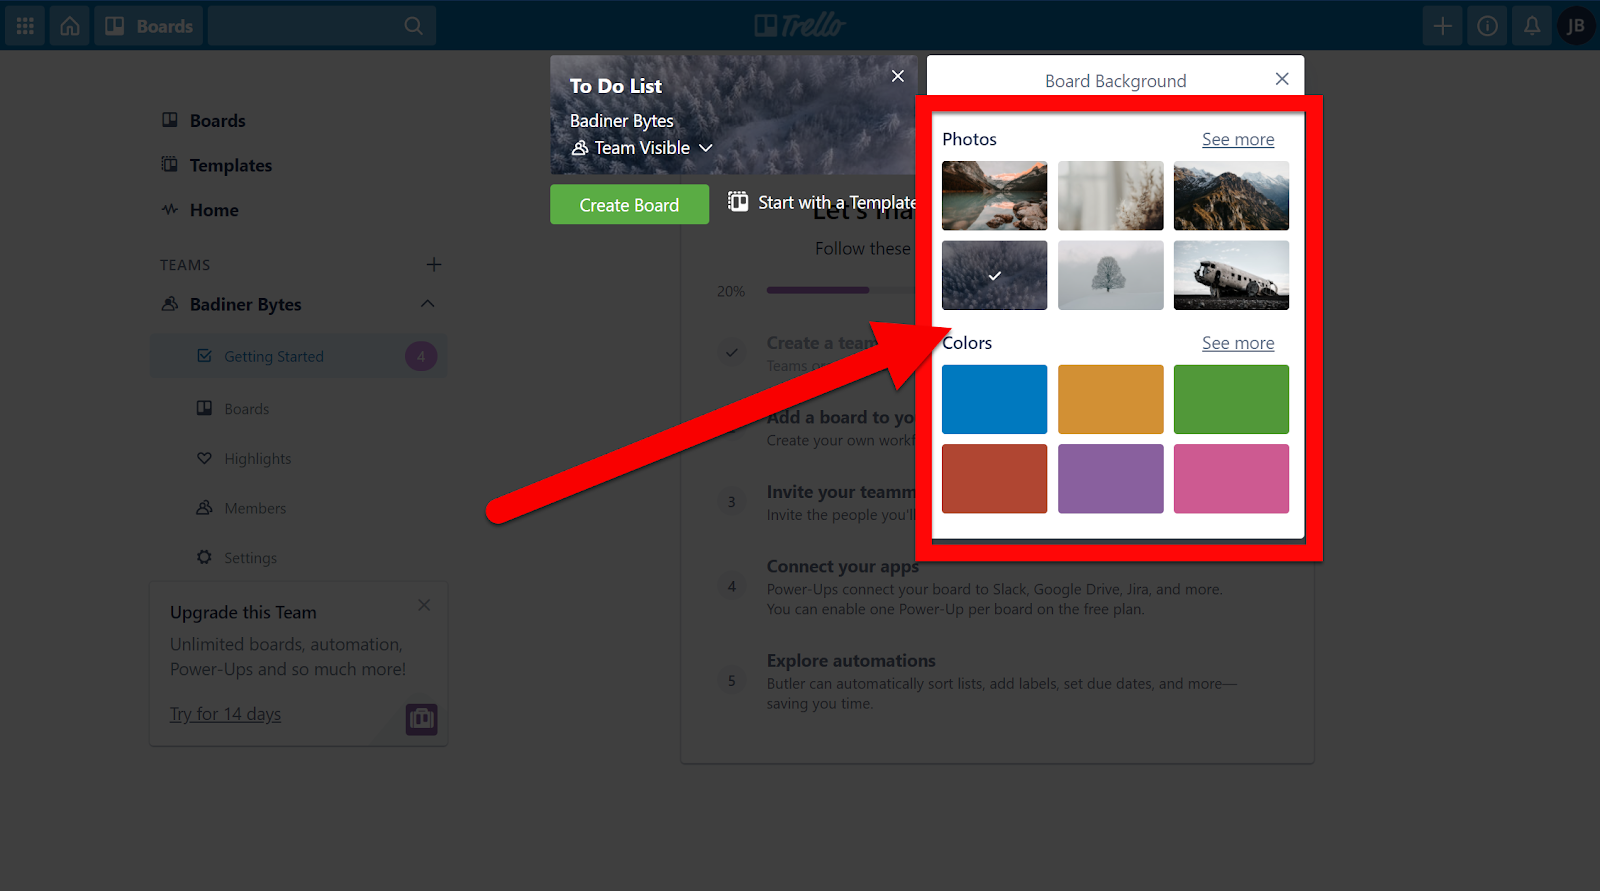
  1. You can choose an image or background color (from Trello’s library).


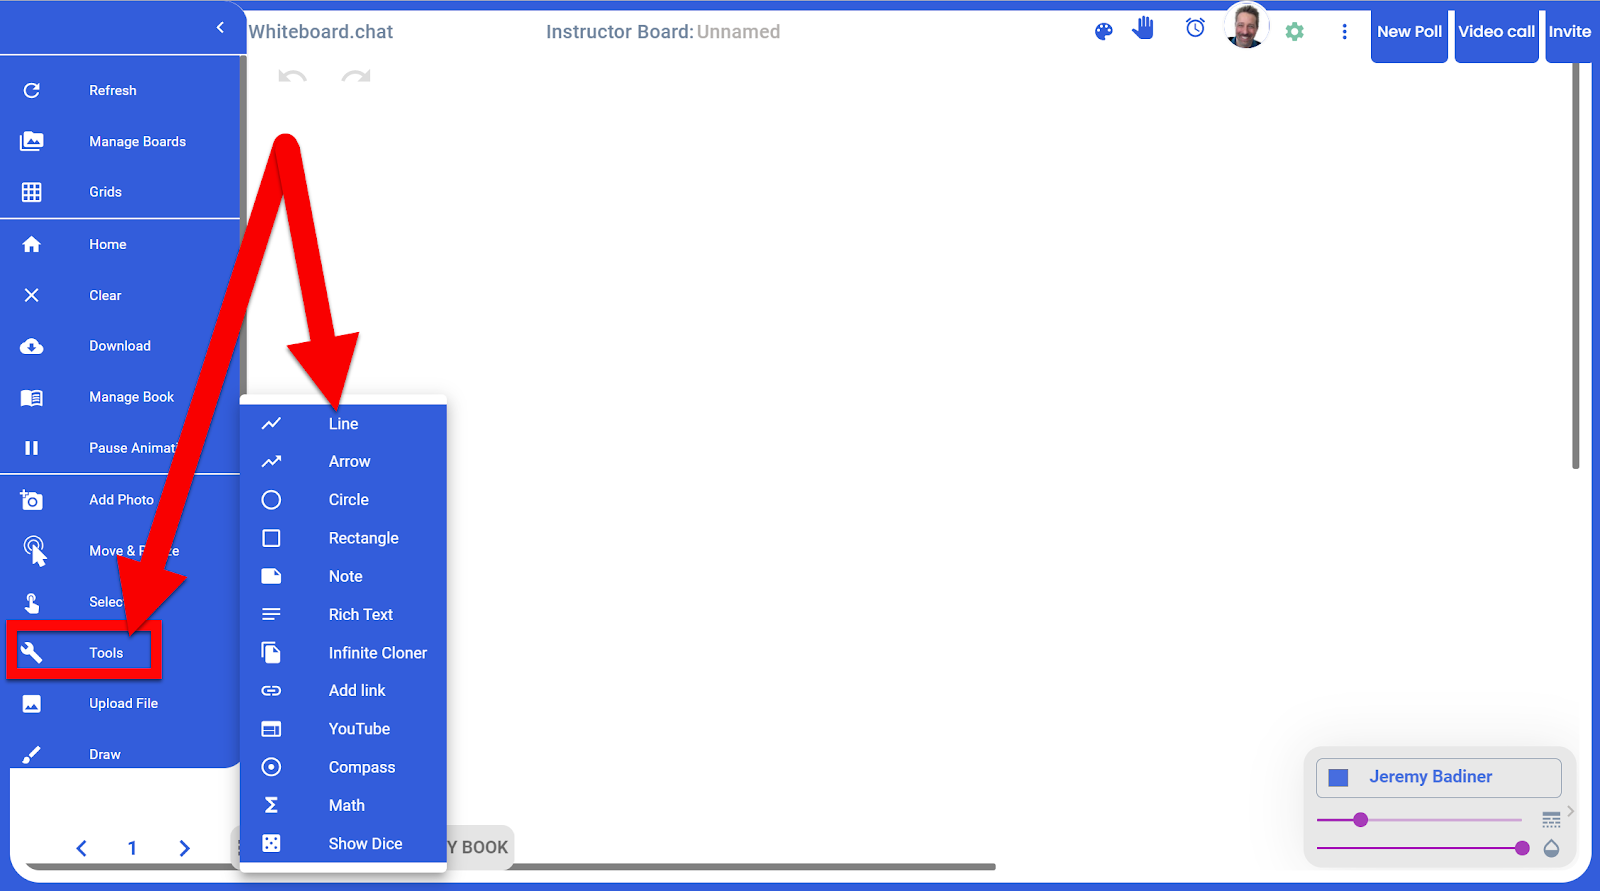
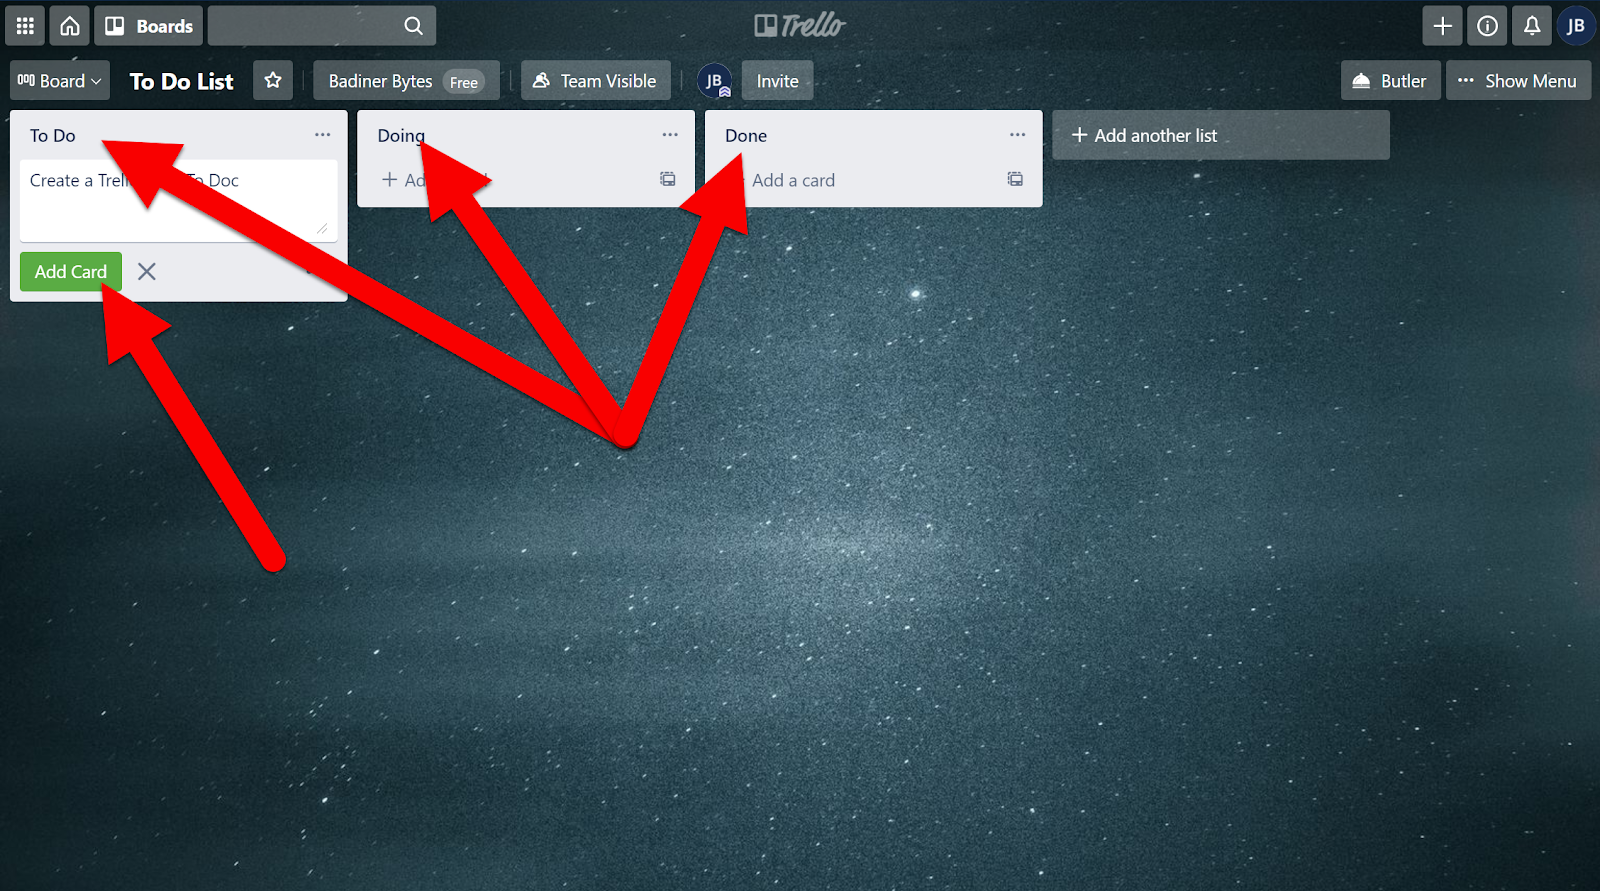
  1. You can name each list and add items to them by clicking “Add Card”.


  1. If you click the words of an item, there are a lot of options to add to each item.

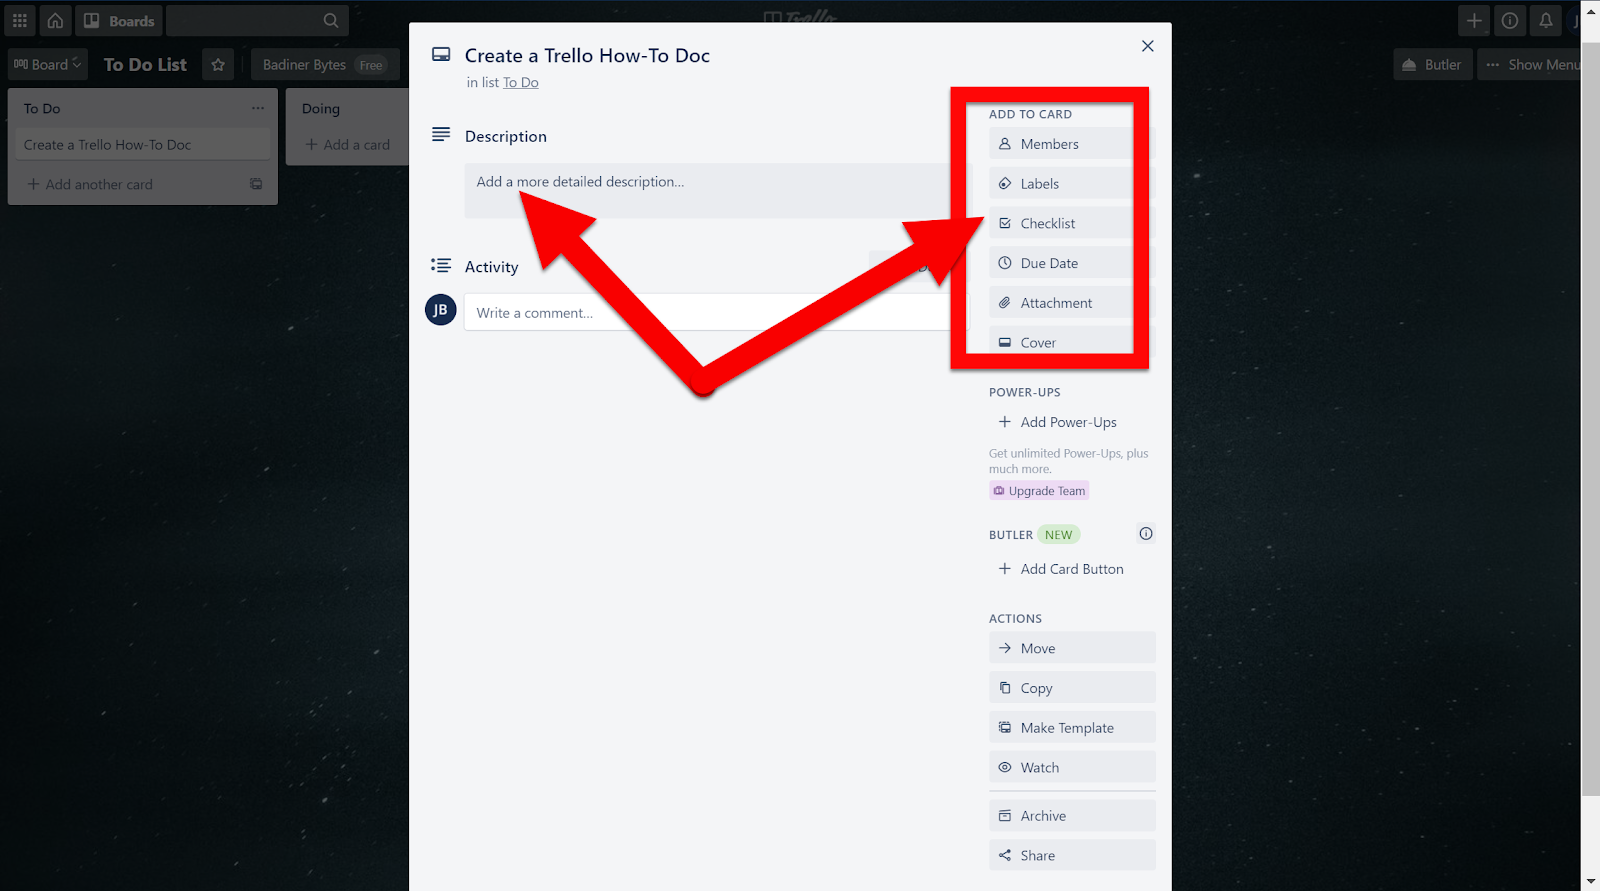
    • Add a Description: Some details about this list

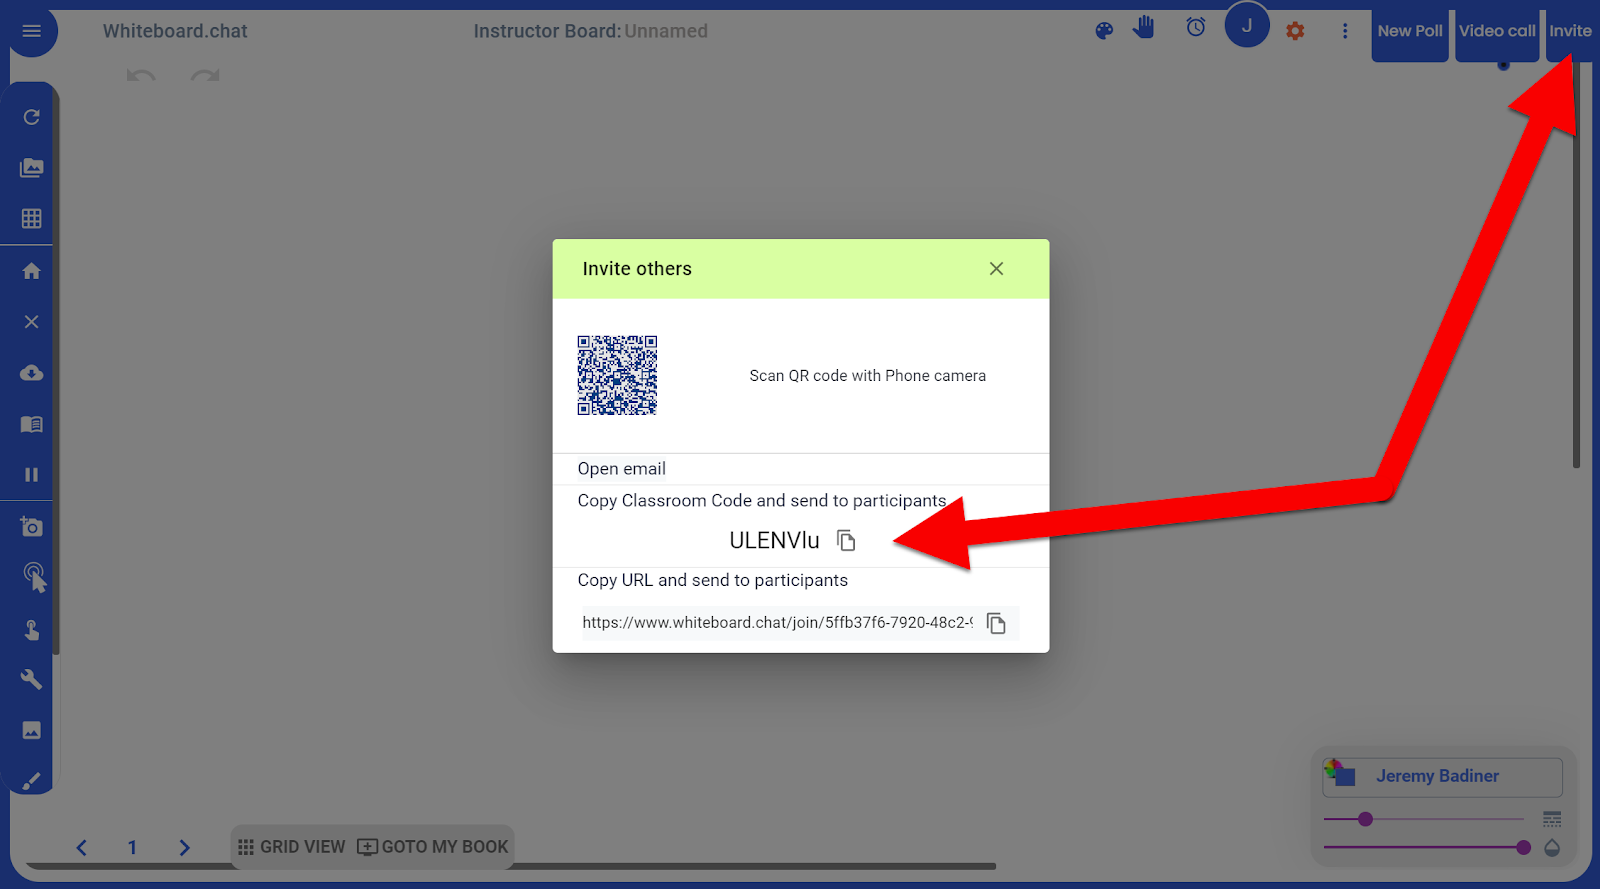
    • Members: Invite others to collaborate

    • Labels: add color to the item for easy visual sorting

    • Checklist: add and check off items on a list

    • Due Date: create due dates for list items

    • Attachment: add a Google Drive file or upload from a device or other program

    • Cover: add an image to this list item from a library


  1. You can click-and-drag items from one list to another.


  1. There is an extension (List Highlighter for Trello) that allows you to color-code all your lists as well. Here is an example of mine with the extension installed (see how each list has a color background).


Give Trello a try and see if you can get a handle on all those To-Do lists!


If you want these directions in a Document click HERE!

Thursday, December 10, 2020

Jamboard: A Collaboration Tool

Teachers are always looking for ways to plan, brainstorm, and organize their ideas. These activities even get better when they are collaborative. Google created Jamboard with this in mind. Jamboard is a touchscreen monitor, but you do not need all that expensive hardware to use the tool. You can install the app from Google Play or iOS App Store on your mobile device or just go to Chrome and use the web-based platform. The boards you make live in your Google Drive and can even be shared with others. The best part, these can be live collaborative projects! Even better, Jamboard is integrated into Google Meet! Give the mobile version or the web version a try and start planning!


Using Jamboard:

There is a lot that you can do with this tool without the expensive board. Give some of these activities a try.

  1. Create a new board:

    • Go to jamboard.google.com: Click the + icon

    • In Drive click “Create”, “More”, then “Google Jamboard”.

    • On the Google Waffle click on “Jamboard”.

    • If you are using a Google Meet the is a button to create a Jamboard and share during your meeting!


  1. Explore the tools on the left side:

    • Pen: Draw lines and shapes with different styles and colors (pen, marker, highlighter, brush).


    • Eraser: This is used to clear small areas on the board.


    • Sticky Note: This is where it gets cool. Add notes, choose a color, resize, rotate, and drag them anywhere you want.


    • Image: Add an image from the web, your device, or Drive then resize and rotate.


    • Shape: Easily choose between 8 pre-designed shapes.


    • Text: Add text to your board and set its size, alignment, color, and rotation.


    • Laser Pointer: If you are presenting this board you can point things out with a disappearing laser tail pointer.


    • Set a Background: Make the background of your board what you wish. Choose from the presets or upload your own image as the background t= make this an interactive activity.


    • Clear the Frame: Clearing the board is quick and easy with the click of this button.


    • Add more “Boards”: Do you want more room or pages to work on? Add more! On the top, there is a place to add more frames.


    • More Settings: Rename your Jam, save the board as a PDF or image, or remove a frame.


    • Share this board with others: You can share a Jamboard just like a Google file and share it by right-clicking in Drive and sharing or clicking the big blue “Share” button.


Mobile Version:

There are differences between these two versions. The mobile version does everything the web version does, plus the following:


  1. Allow for handwriting to turn into text.

    • This is pretty cool. Write letters and they turn to written text if you choose the Aa button.


  1. Allow for drawn shapes to be cleaned up

    • This takes hand-drawn images and “perfects” them into a clean drawing. This will happen if you have the shape tool turned on


  1. Share Drive files.

    • Any Drive file can be added to the board for collaboration.


Whether you are using the mobile version or the web version, you will find many uses for Jamboard. Dig in, create a board, and explore all the possibilities! 


If you want these directions in a Document click HERE!


Wednesday, November 18, 2020

Insert Image from Search

We all insert images from Google Searches into our emails and files (Docs, Slides, Drawings, etc). Most of us do this by downloading the image and then inserting it into the desired place. There is an easier way that does not involve downloading the image. Check out these steps to see how! 

  • Important: Make sure to only use copyright-free images and not just a basic Google search for images that you put in Docs, Slides, and Drawings. Remember, if you are in one of those tools and use the “Insert” option at the top they are already copyright-free. That is the best method.


Insert an Image:

  1. Have your email or Document open on one tab.

  2. Open another tab to do your Google image search.

    • Always look for copyright-free images using “Tools”, “Usage Rights”, and choose “Creative Commons”.


  1. Click on the image you want to use. It will then appear in the top right.


  1. Drag that image to the tab that you want to attach it. Drop it in your email or Doc.


Below are examples of how to do it in Email and Docs.


Email:


Document:


If you want these directions in a Document click HERE!


Tuesday, November 17, 2020

Remove Unused Google Meet Extensions & Using Meet’s Built-In Grid View

Ok...the days of needing any of the Google Meet Grid View extensions are over. This is now built into Google Meet. What does that mean for many of you? You need to remove all those Grid View extensions as they are fighting each other, causing issues, using a TON of Chromebook/PC resources, and slowing down your device. The more extensions you have, the more resources are used all the time and the slower your device.


One Way to Remove Extensions:

  1. Click on the Puzzle Piece in the top right of Chrome.

  2. Click the 3 dots to the right of the extension you are no longer using.

  3. Click on "Remove from Chrome..."

8574FDE8-246C-4205-8685-F0CDE0D0DA08.GIF


You should do this for any extension you are no longer using, not just Meet Grid View. Now is a great time to remove all those extensions you forgot you installed. The ones that you cannot remove are pushed by the District.


How to use the Built-In Grid View in Meet:

  1. Click the 3 dots in the bottom right corner.

  2. Click on "Change Layout".

  3. Choose "Tiled".

  4. Slide the slider at the bottom to the right.

Meet Grid View.gif


You will have to do this each time you start a meeting. Unfortunately, there is no saving this to default.


See all Participants in Meet While Presenting:

The only issue is when you are presenting you get that box that says "You are Presenting" (like we really need to be told?). This is usually the issue for those using 2 monitors (if you only use one you only see the screen you are sharing and not any participants).

  • If you take that screen with the "You are Presenting" showing and hold Control and tap the -  button then the "You are Presenting" box will shrink. All your kids will show up (the more you tap the - button the smaller that box gets and the more kiddos you can see). 

  • When you want to go back to normal you can hold Control and tap the + button. Not perfect, but gets the job done.


If you want these directions in a Document click HERE!


The Powerful Whiteboard.chat

There are many whiteboard apps and tools out there. Many need subscriptions to do much. Whiteboard.chat is different. It has many tools and add ons, and is 100% free for teachers! It has the options for multiple pages, connections for up to 100 people, collaboration, save to PDF feature, video calling, teacher view (see all student work in live time), uploading backgrounds and PDF, and so much more! Oh, did I mention that it is 100% FREE! Whiteboard.chat is a Free, full-featured, and powerful whiteboard tool. There is more to it than most will ever need, but enough to make it your “go-to” whiteboard tool. It even has an option to limit what is available to students (this helps with our young learners). Check it out and play around with it!


  • This is just a basic “Get Started” doc. There is so much to this tool that it would take many docs and videos to share them all. The Whiteboard.chat team does a great job on their YouTub channel with all their YouTube Videos.


Create a Whiteboard:

  1. Head to Whiteboard.chat.

  2. Click “Start Drawing”.


  1. Choose what you wish to do (Teach, Collaborate, or manage boards).


  1. Click the 3 lines in the top left corner to see tool labels.


  1. The “Tools” option has many helpful tools.


  1. You can upload an image or PDF as the background for students to draw or write on. This is a great way to create “fillable” activities.


Share a Whiteboard:

  1. Click on the “Invite” button in the top right. Then share either the QR Code, Classroom Code, or the URL with your students.


  1. When they join twitch the QR Code or the URL they will be directly in your Whiteboard (nothing more to do to join). If they use the Classroom Code they will need to enter that code in the code box. All will be asked to enter in their name. 


  1. If you want them to be signed in (I recommend) have them click the Gear in the top right and then your sign-in method (sign in with Google).


  1. Each student will be assigned a different color. They can change this if they wish (bottom right).

  2. Anything you draw or add to your Whiteboard will be added to their Whiteboard in real-time. 


See Student Work:

  1. Here is where Whiteboard.chat gets COOL! You can see their work in real-time. 

  2. Click on “Grid View” at the bottom. YOu will see all your students’ screens. You can click on any of them and join their screen and add to their Whiteboard. 


  1. You can just see or collaborate with each of your students. There are MANY more options to look at in their feature as well!


This is just a very basic “Get Started” walk-through. There is so much more you can do with Whiteboard.chat. You can collaborate, invite teachers, share a student board with the class, video call, and so much more. Check out all you can do by learning more directly from Whiteboard.chat with their YouTube Videos or join any of their many webinars!


If you want these directions in a document click HERE!