Showing posts with label Whiteboard. Show all posts

Tuesday, November 17, 2020

The Powerful Whiteboard.chat

There are many whiteboard apps and tools out there. Many need subscriptions to do much. Whiteboard.chat is different. It has many tools and add ons, and is 100% free for teachers! It has the options for multiple pages, connections for up to 100 people, collaboration, save to PDF feature, video calling, teacher view (see all student work in live time), uploading backgrounds and PDF, and so much more! Oh, did I mention that it is 100% FREE! Whiteboard.chat is a Free, full-featured, and powerful whiteboard tool. There is more to it than most will ever need, but enough to make it your “go-to” whiteboard tool. It even has an option to limit what is available to students (this helps with our young learners). Check it out and play around with it!


  • This is just a basic “Get Started” doc. There is so much to this tool that it would take many docs and videos to share them all. The Whiteboard.chat team does a great job on their YouTub channel with all their YouTube Videos.


Create a Whiteboard:

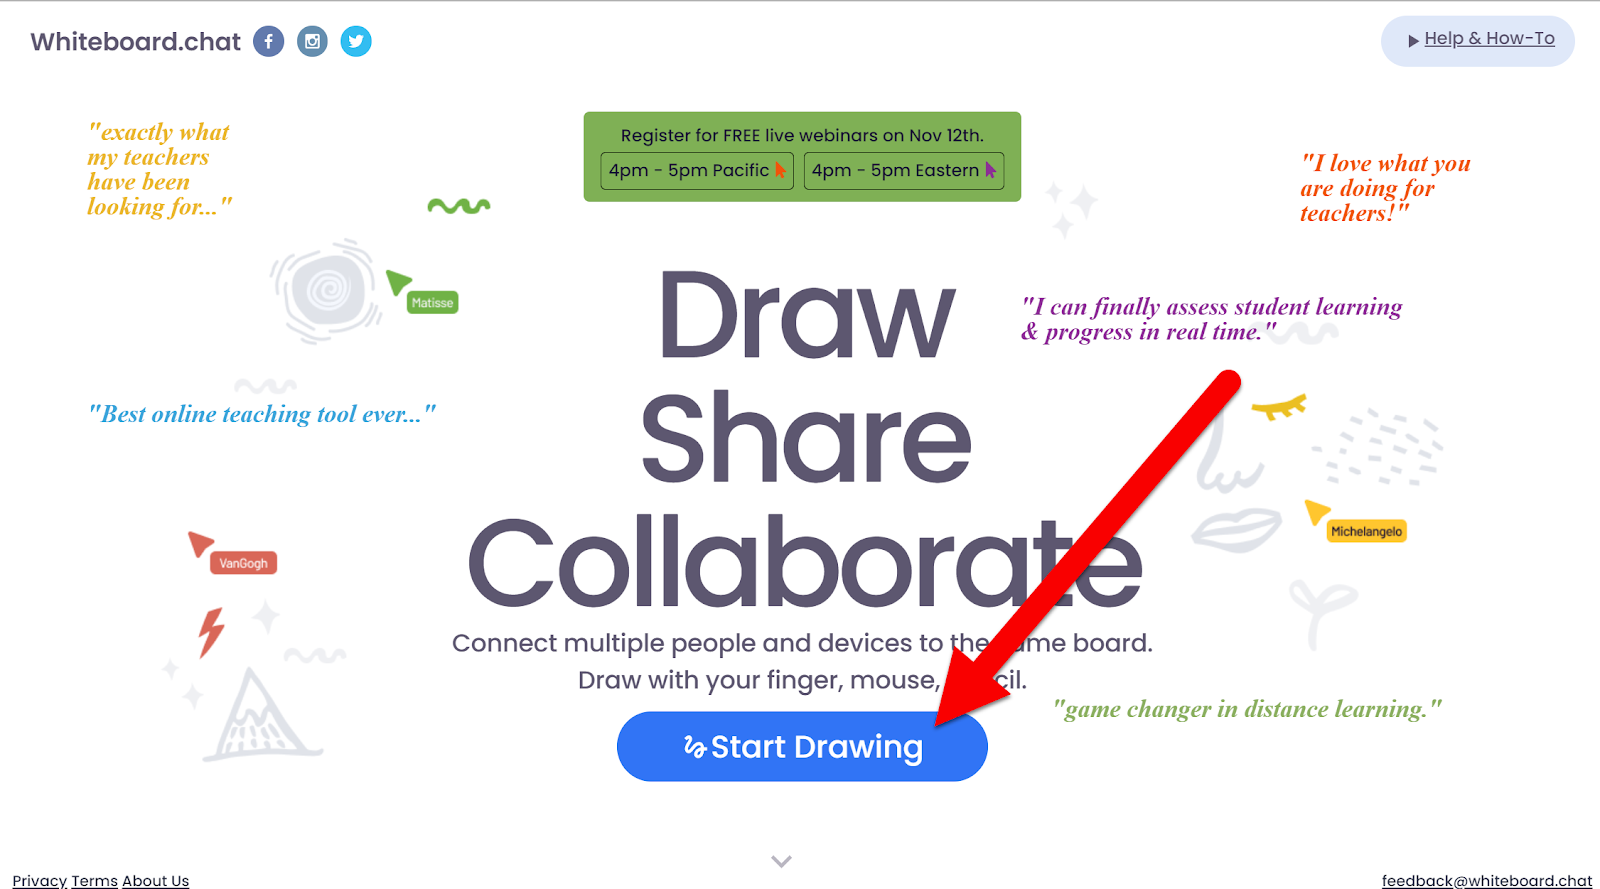
  1. Head to Whiteboard.chat.

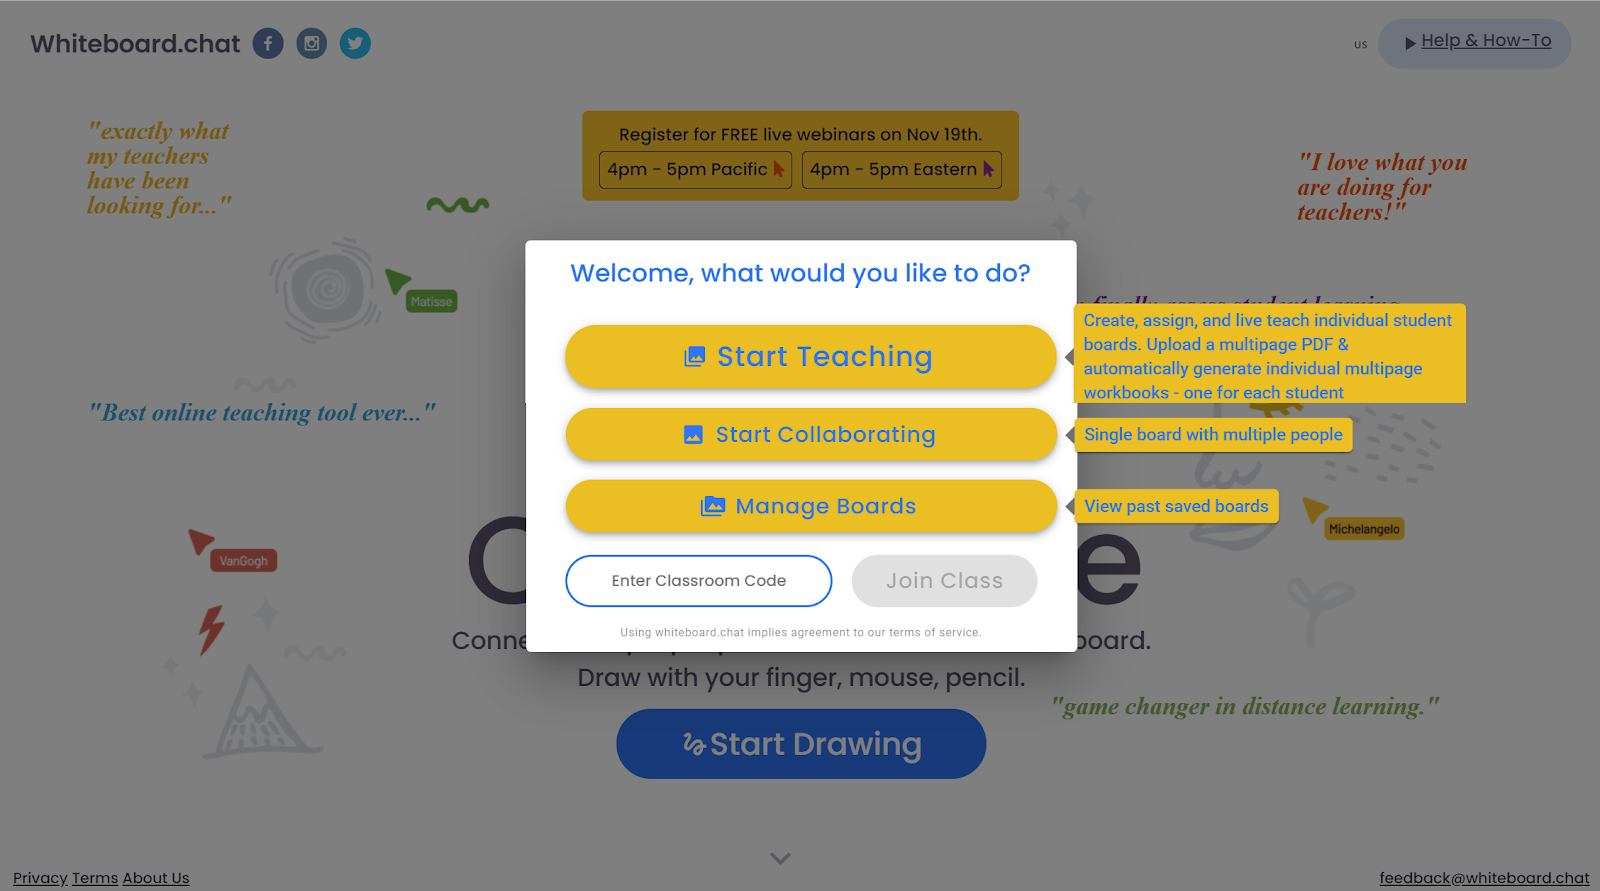
  2. Click “Start Drawing”.


  1. Choose what you wish to do (Teach, Collaborate, or manage boards).

  1. Click the 3 lines in the top left corner to see tool labels.
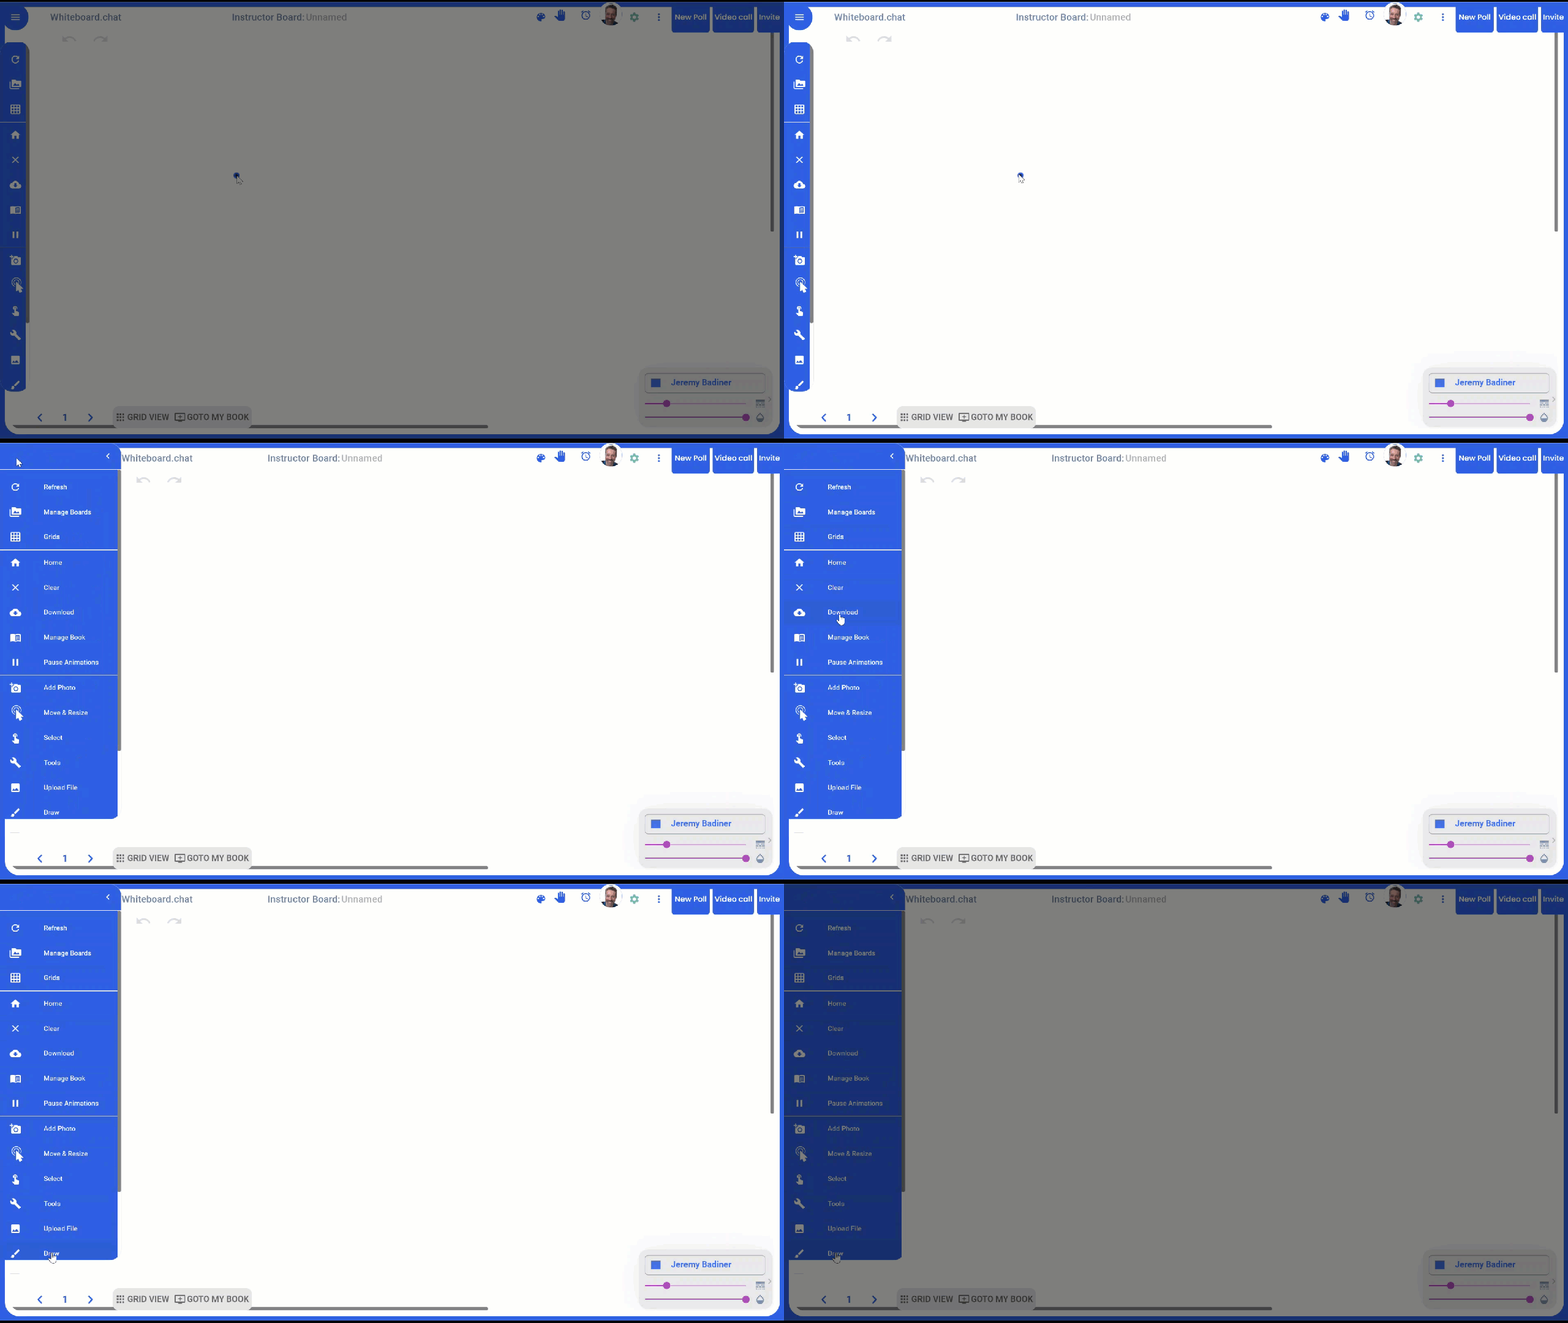

  1. The “Tools” option has many helpful tools.
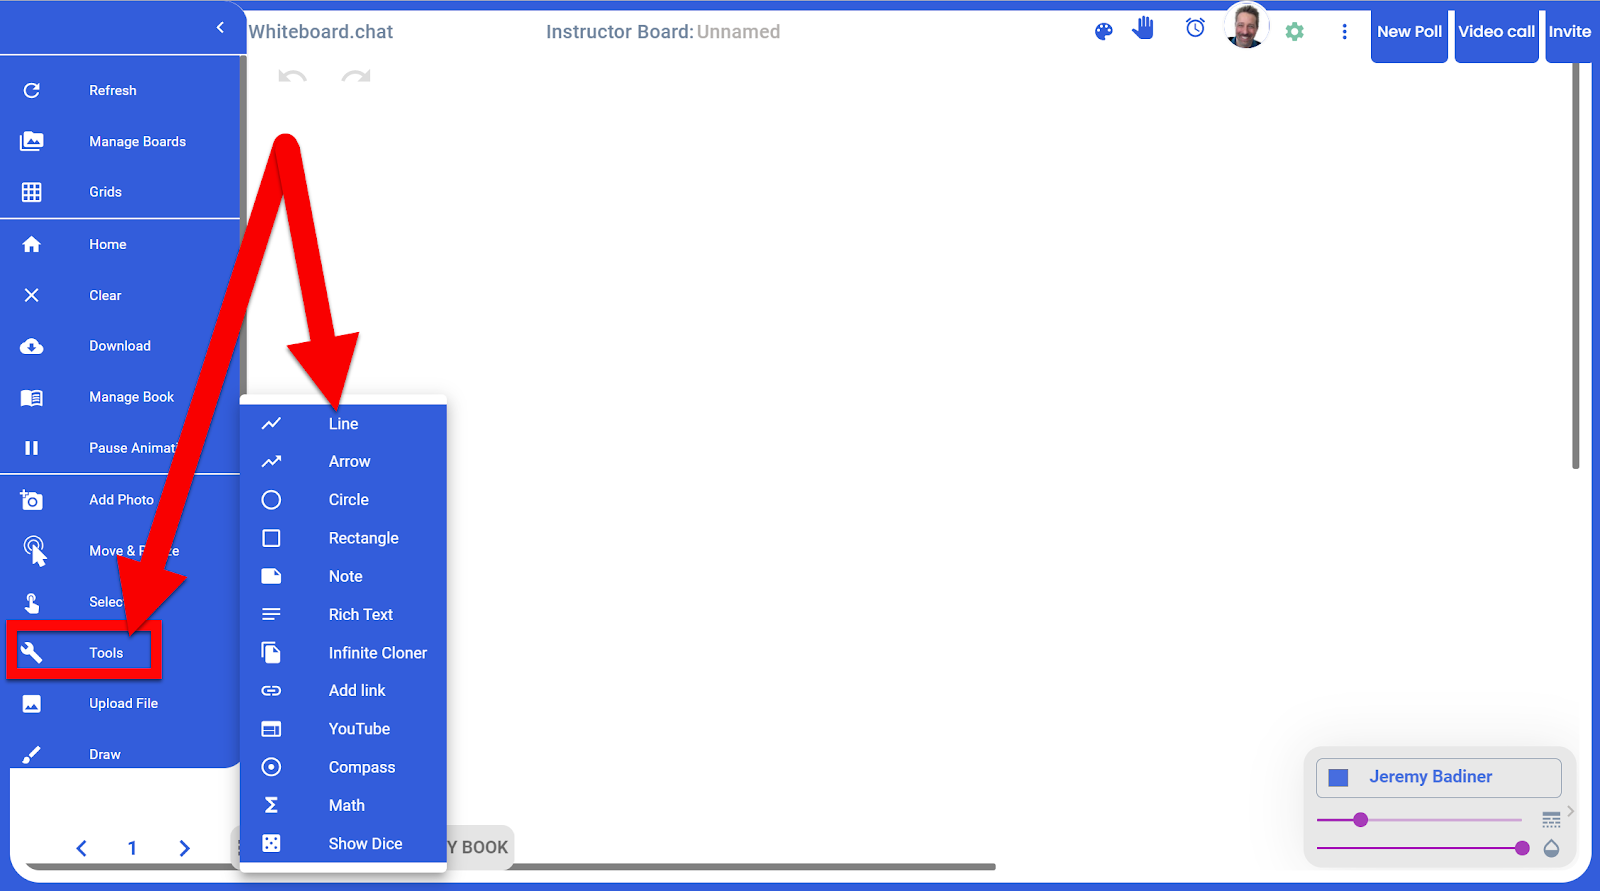

  1. You can upload an image or PDF as the background for students to draw or write on. This is a great way to create “fillable” activities.


Share a Whiteboard:

  1. Click on the “Invite” button in the top right. Then share either the QR Code, Classroom Code, or the URL with your students.
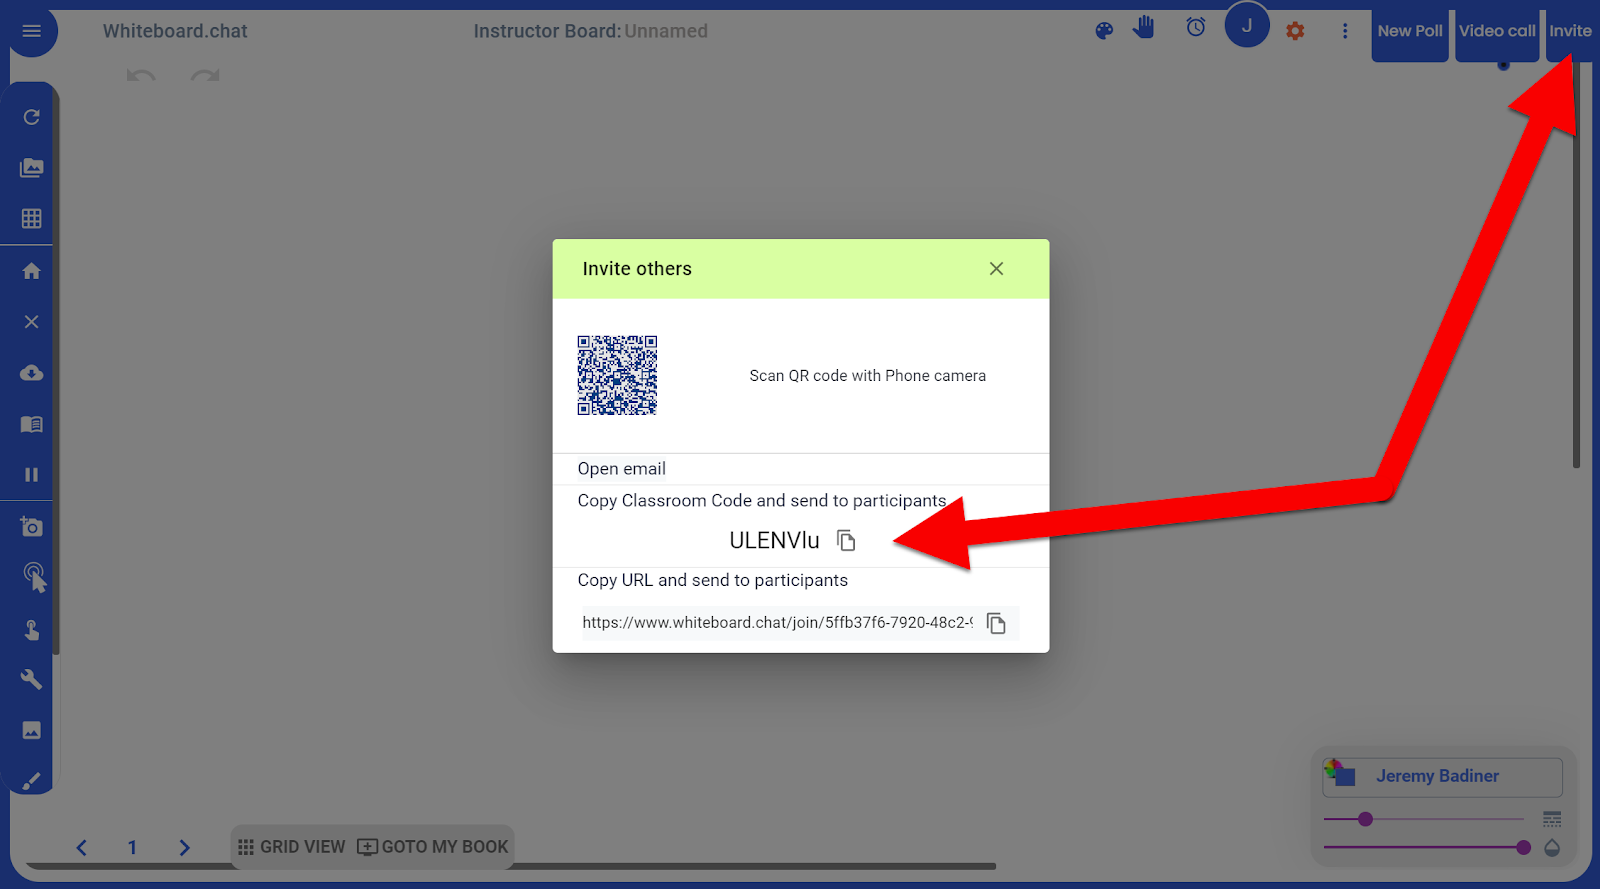

  1. When they join twitch the QR Code or the URL they will be directly in your Whiteboard (nothing more to do to join). If they use the Classroom Code they will need to enter that code in the code box. All will be asked to enter in their name. 


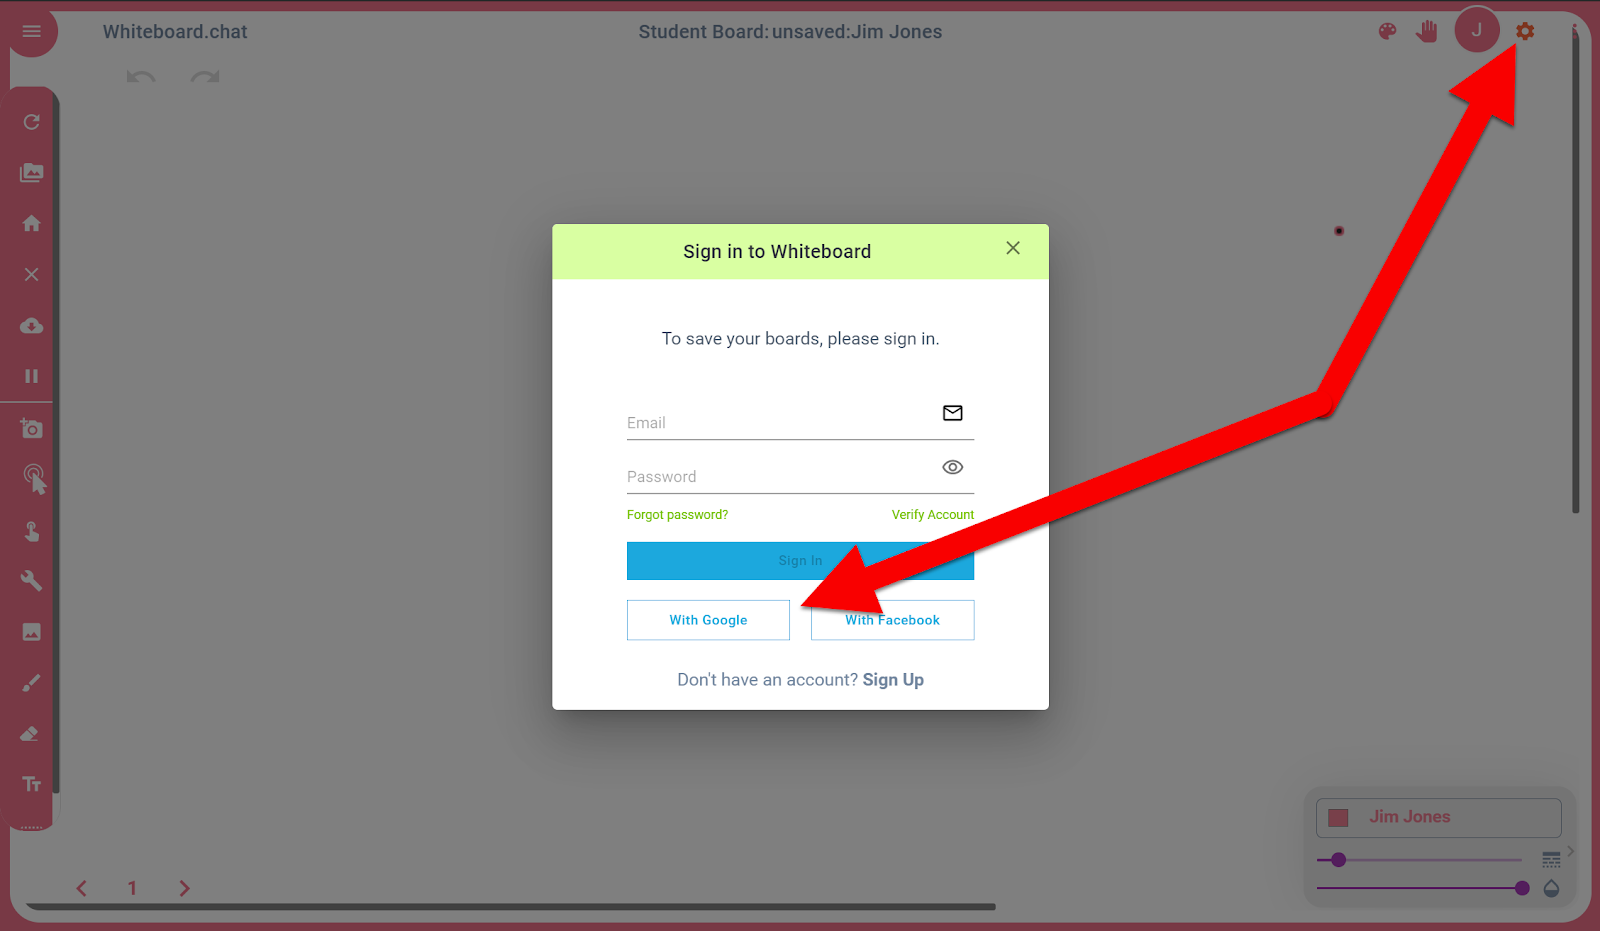
  1. If you want them to be signed in (I recommend) have them click the Gear in the top right and then your sign-in method (sign in with Google).

  1. Each student will be assigned a different color. They can change this if they wish (bottom right).

  2. Anything you draw or add to your Whiteboard will be added to their Whiteboard in real-time. 


See Student Work:

  1. Here is where Whiteboard.chat gets COOL! You can see their work in real-time. 

  2. Click on “Grid View” at the bottom. YOu will see all your students’ screens. You can click on any of them and join their screen and add to their Whiteboard. 
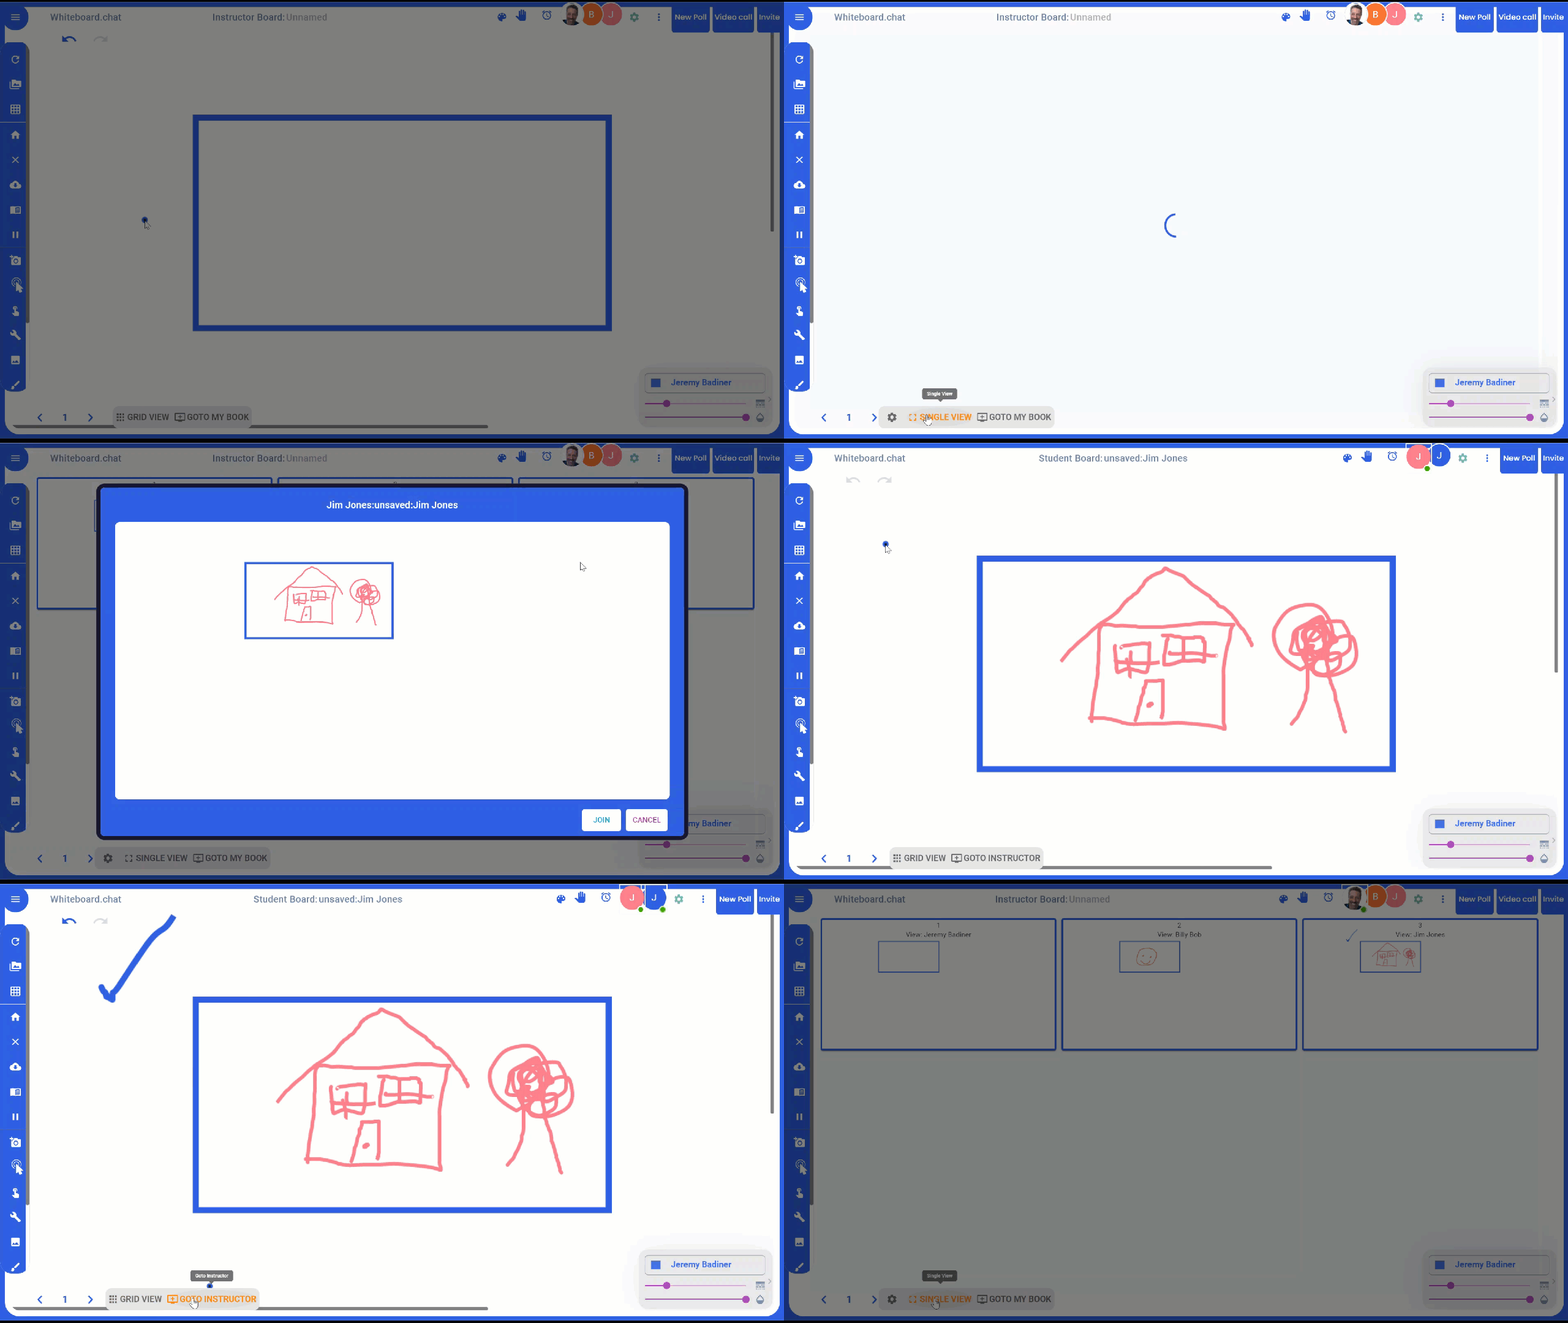

  1. You can just see or collaborate with each of your students. There are MANY more options to look at in their feature as well!


This is just a very basic “Get Started” walk-through. There is so much more you can do with Whiteboard.chat. You can collaborate, invite teachers, share a student board with the class, video call, and so much more. Check out all you can do by learning more directly from Whiteboard.chat with their YouTube Videos or join any of their many webinars!


If you want these directions in a document click HERE!

Saturday, September 19, 2020

Classwork with Whiteboard.fi

There are some good whiteboard tools out there, but some require paid versions of programs and others are only visible to only the person working on their board. The few free ones out there often require extra work from students to share with the teacher (example: student creates a whiteboard drawing and has to download their work as an image, then upload to the teacher to see). Whiteboard.fi is different. It is a tool that allows the teacher to see all the students’ work in live-action on one screen while everyone in the class is working. The other benefits are that this is free and that no teacher or student accounts are needed! Check out how Whiteboard.fi works below. 


Things to remember:

  • These boards are NOT saved after each session. Teachers have the option to save all student work as a PDF, and students have the option to save their board as an image, but once the class is over, the boards are deleted.

  • There are other options to explore not shared in this write-up. You can see these additional options when you are in Teacher Mode and click the Gear in the top right.


Create a Class:

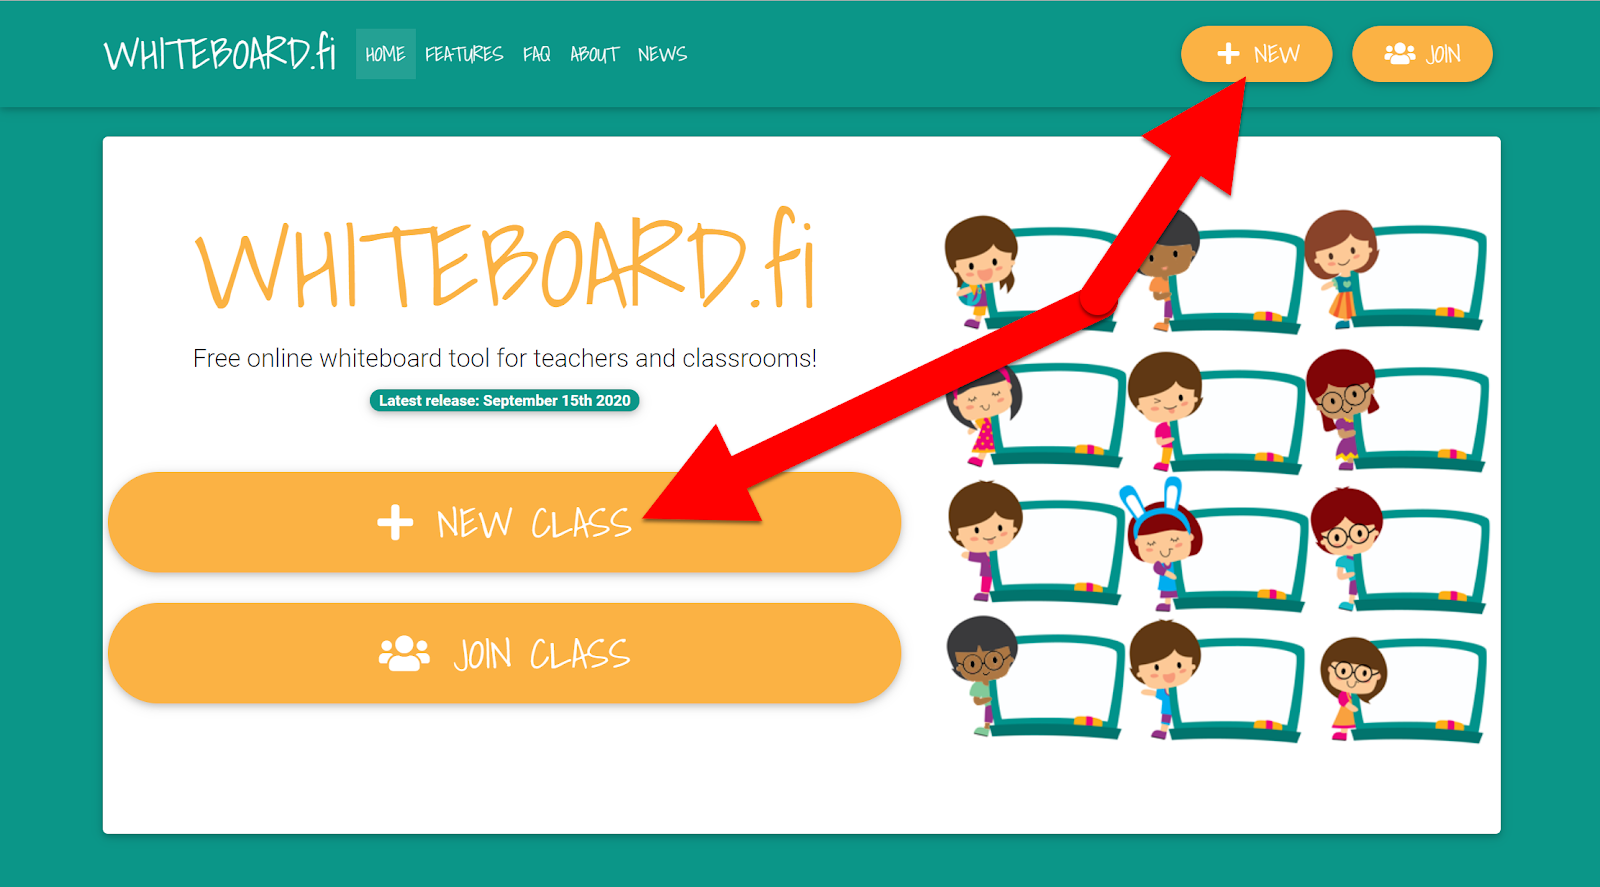
  1. Head over to whiteboard.fi.

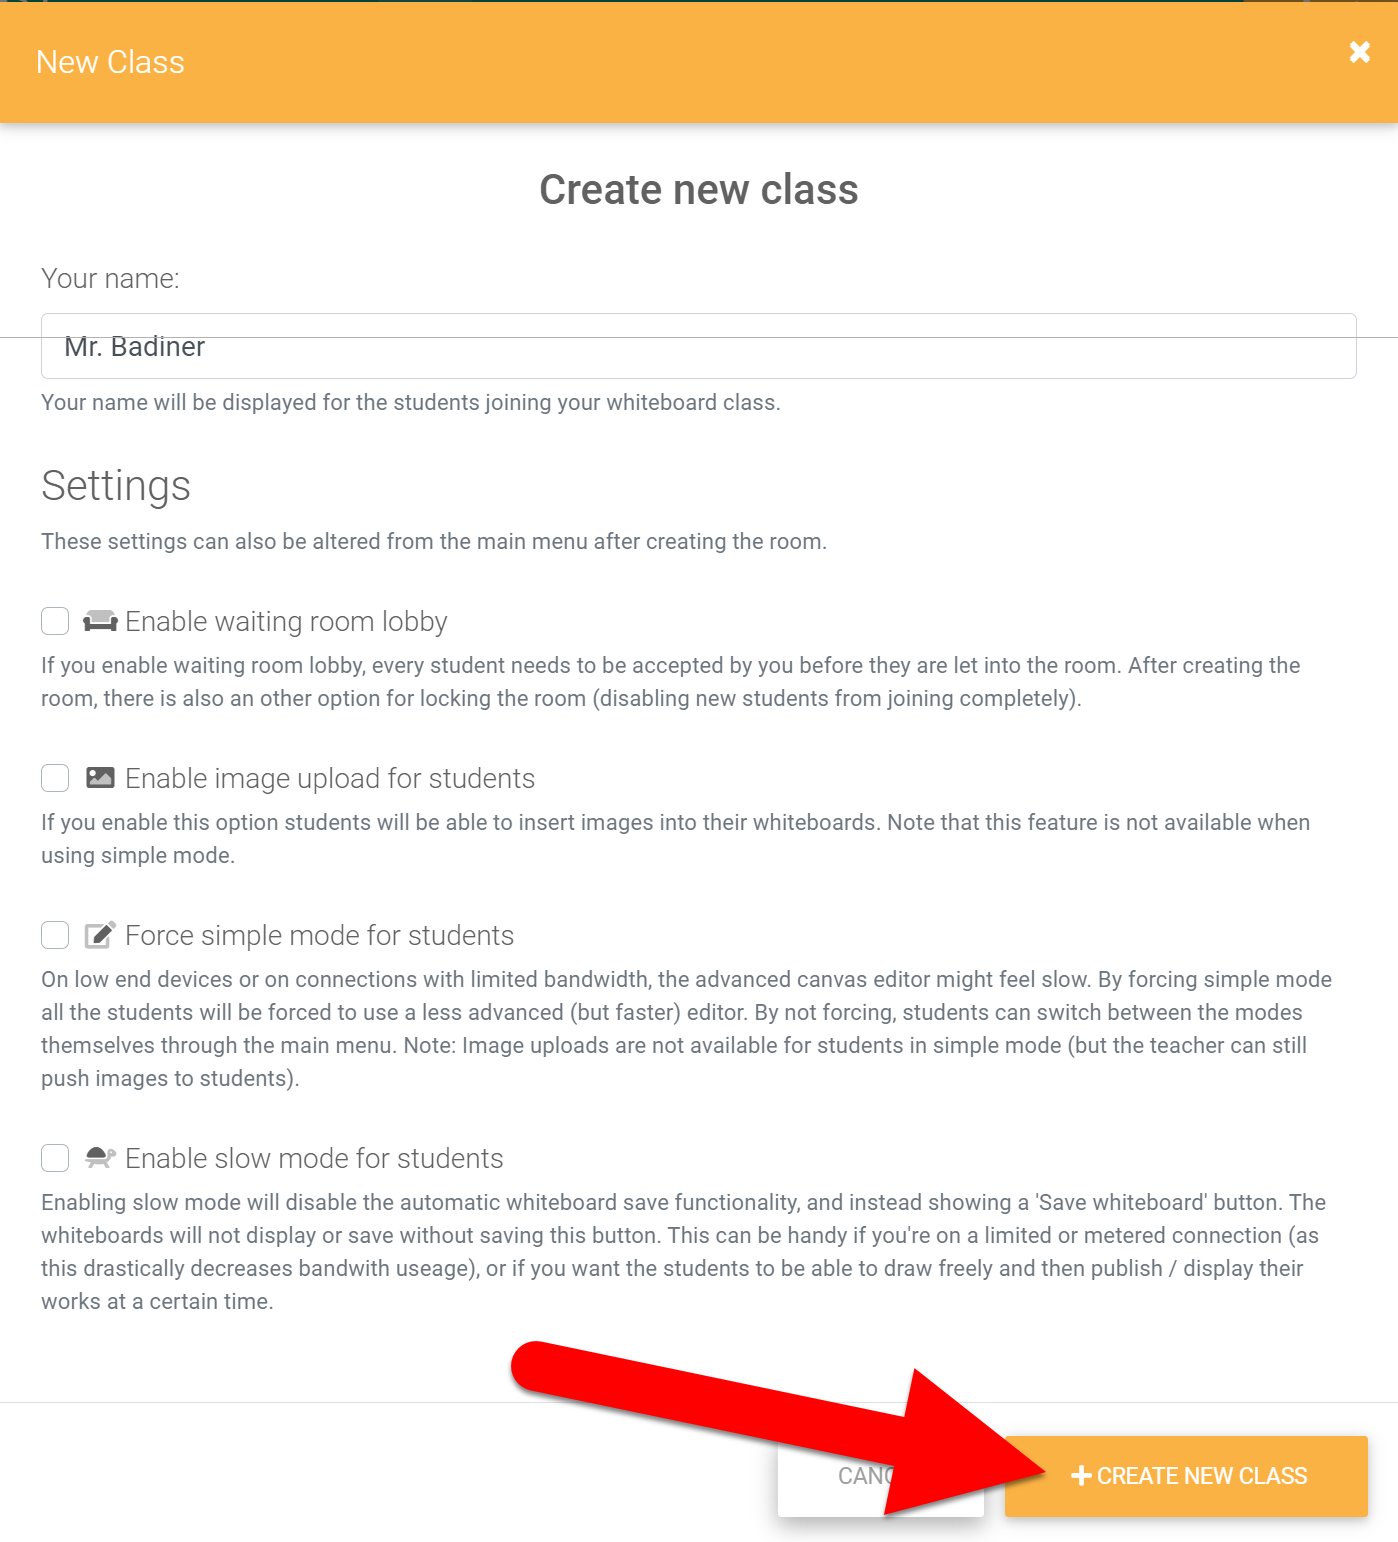
  2. Click on “New Class”.


  1. Name your class and adjust any settings and click “Create New Class”. 


Invite Students:

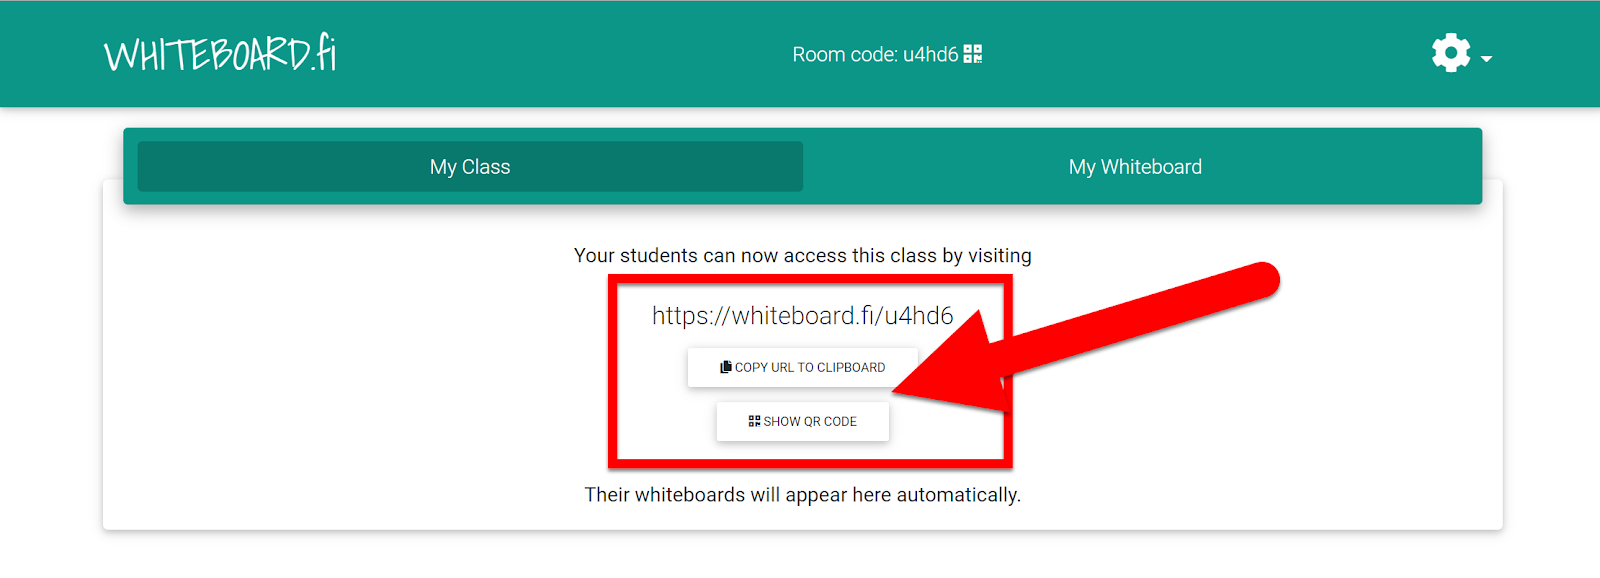
  1. Share the link or display the QR Code.


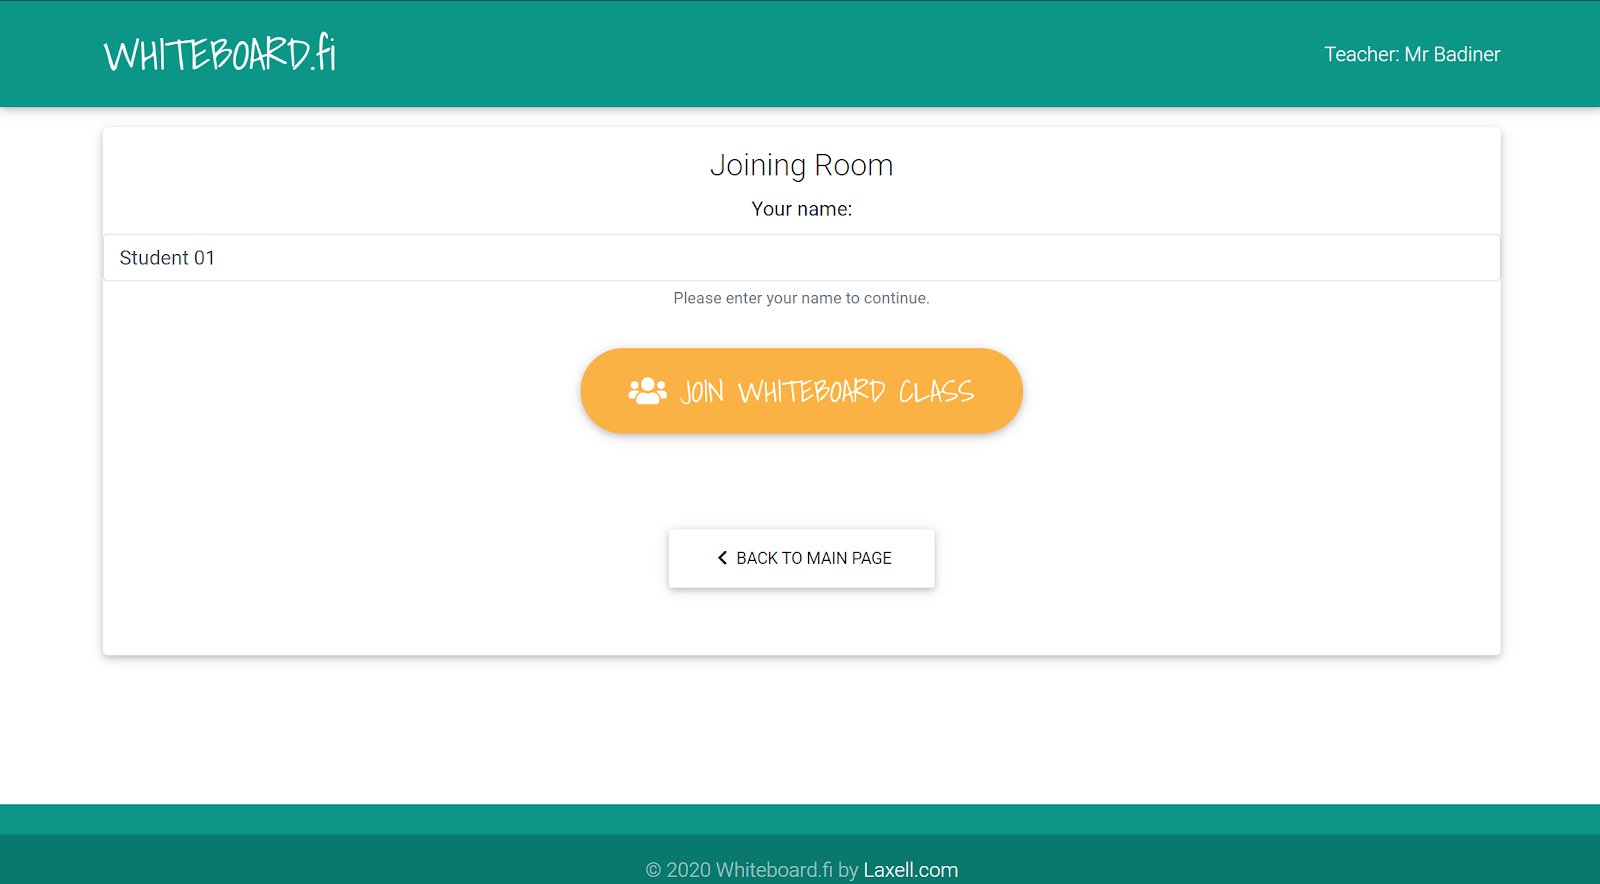
  1. Students type in their name and click “Join Whiteboard Class”.


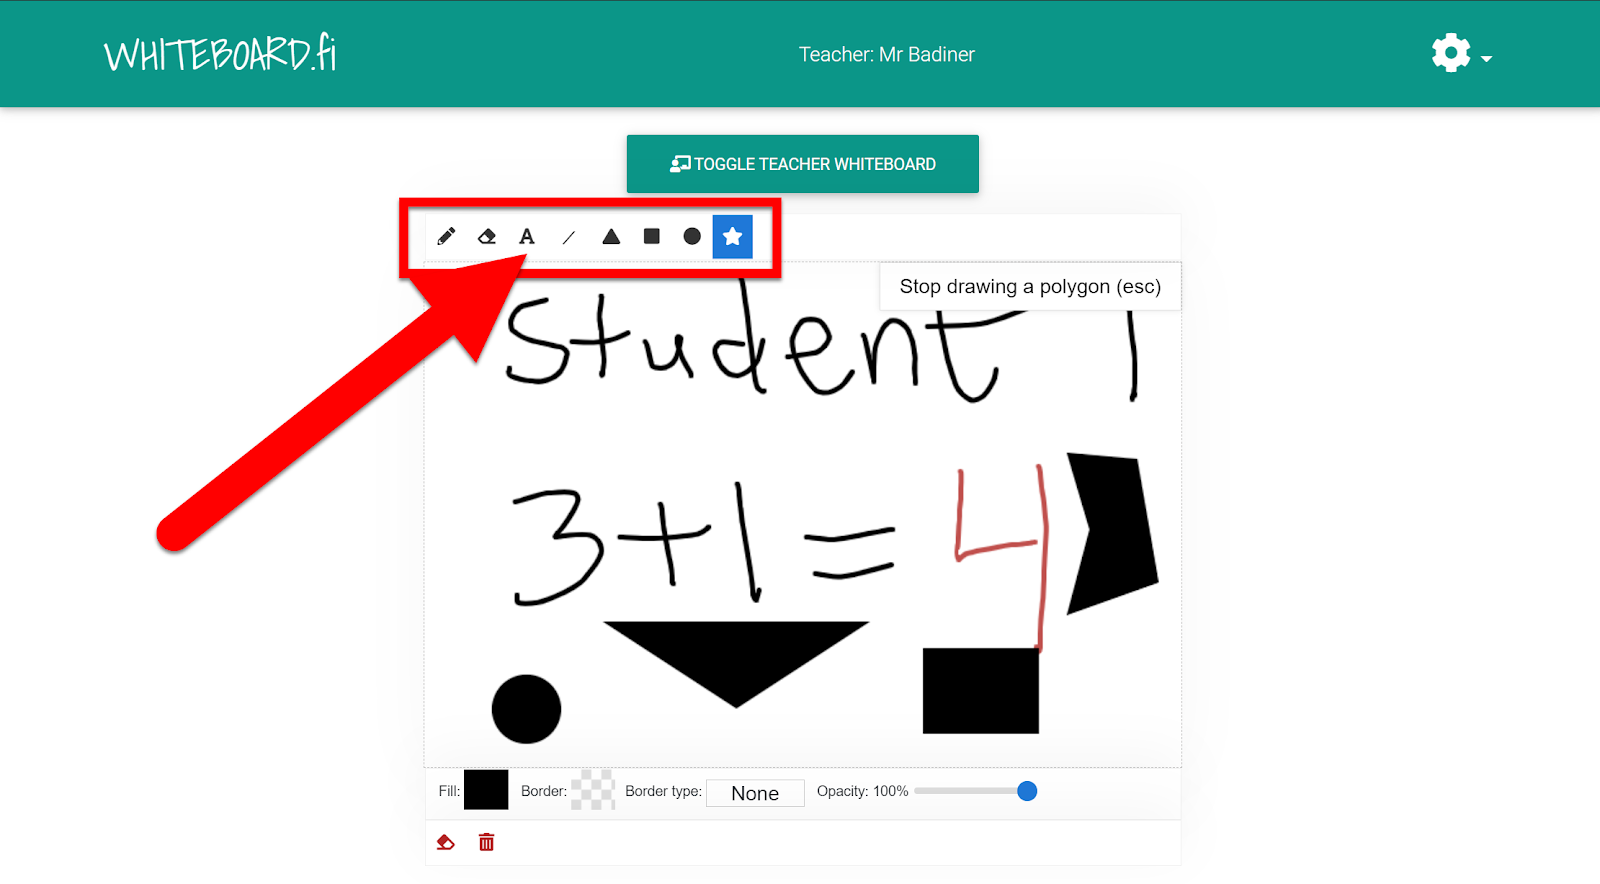
  1. Students can now draw and add shapes, text, or images to their Whiteboards.


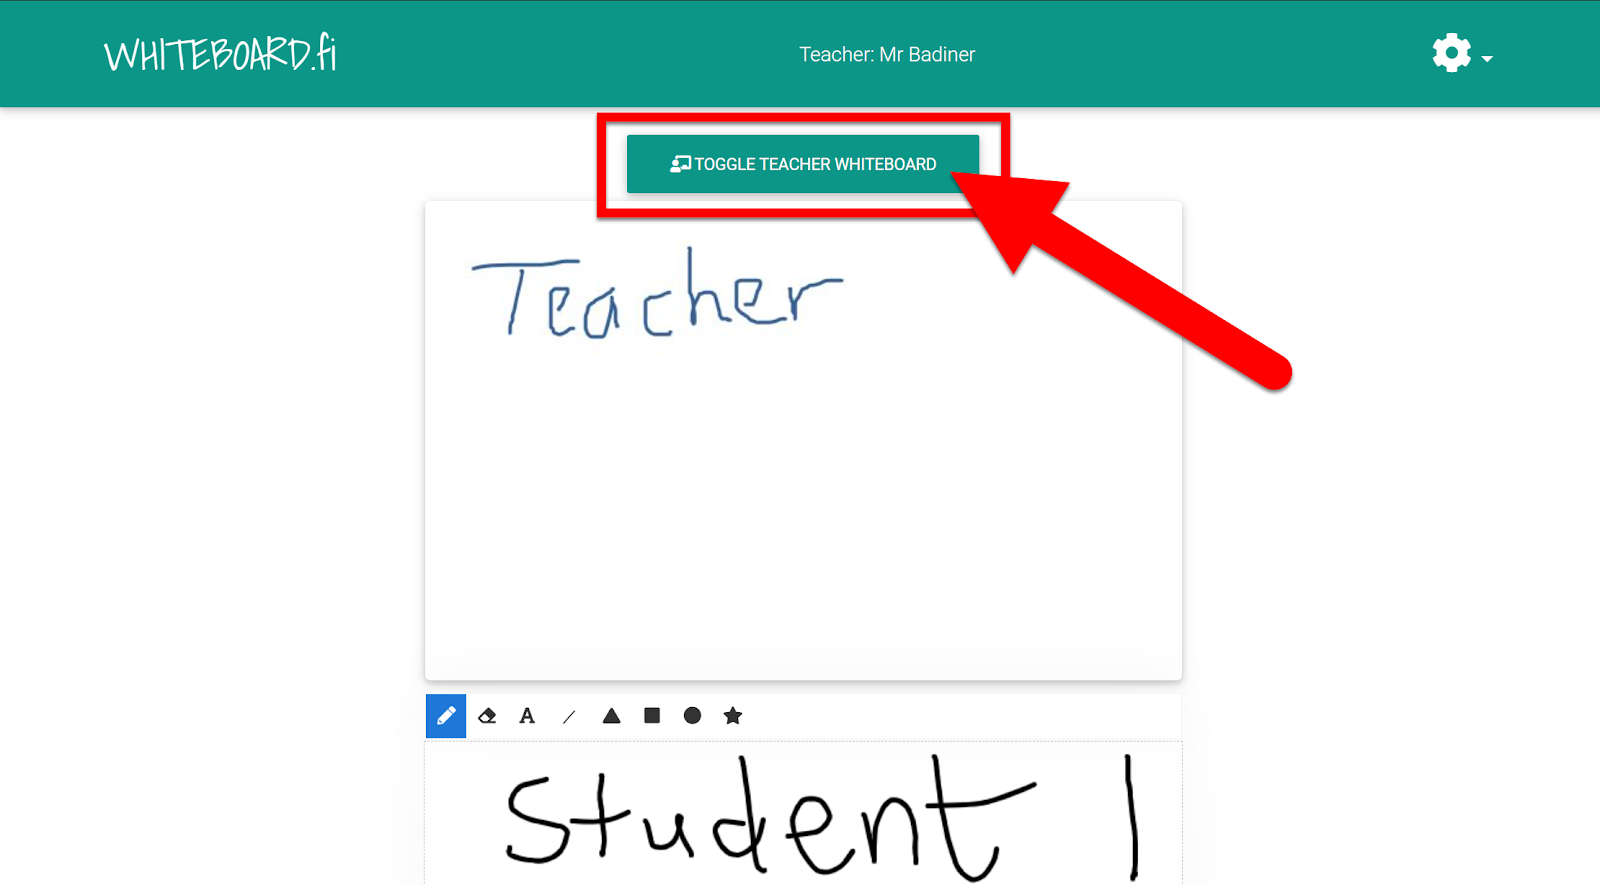
  1. Students can see the Teacher Whiteboard by clicking “Toggle Teacher Whiteboard”.


Whiteboard Tools:

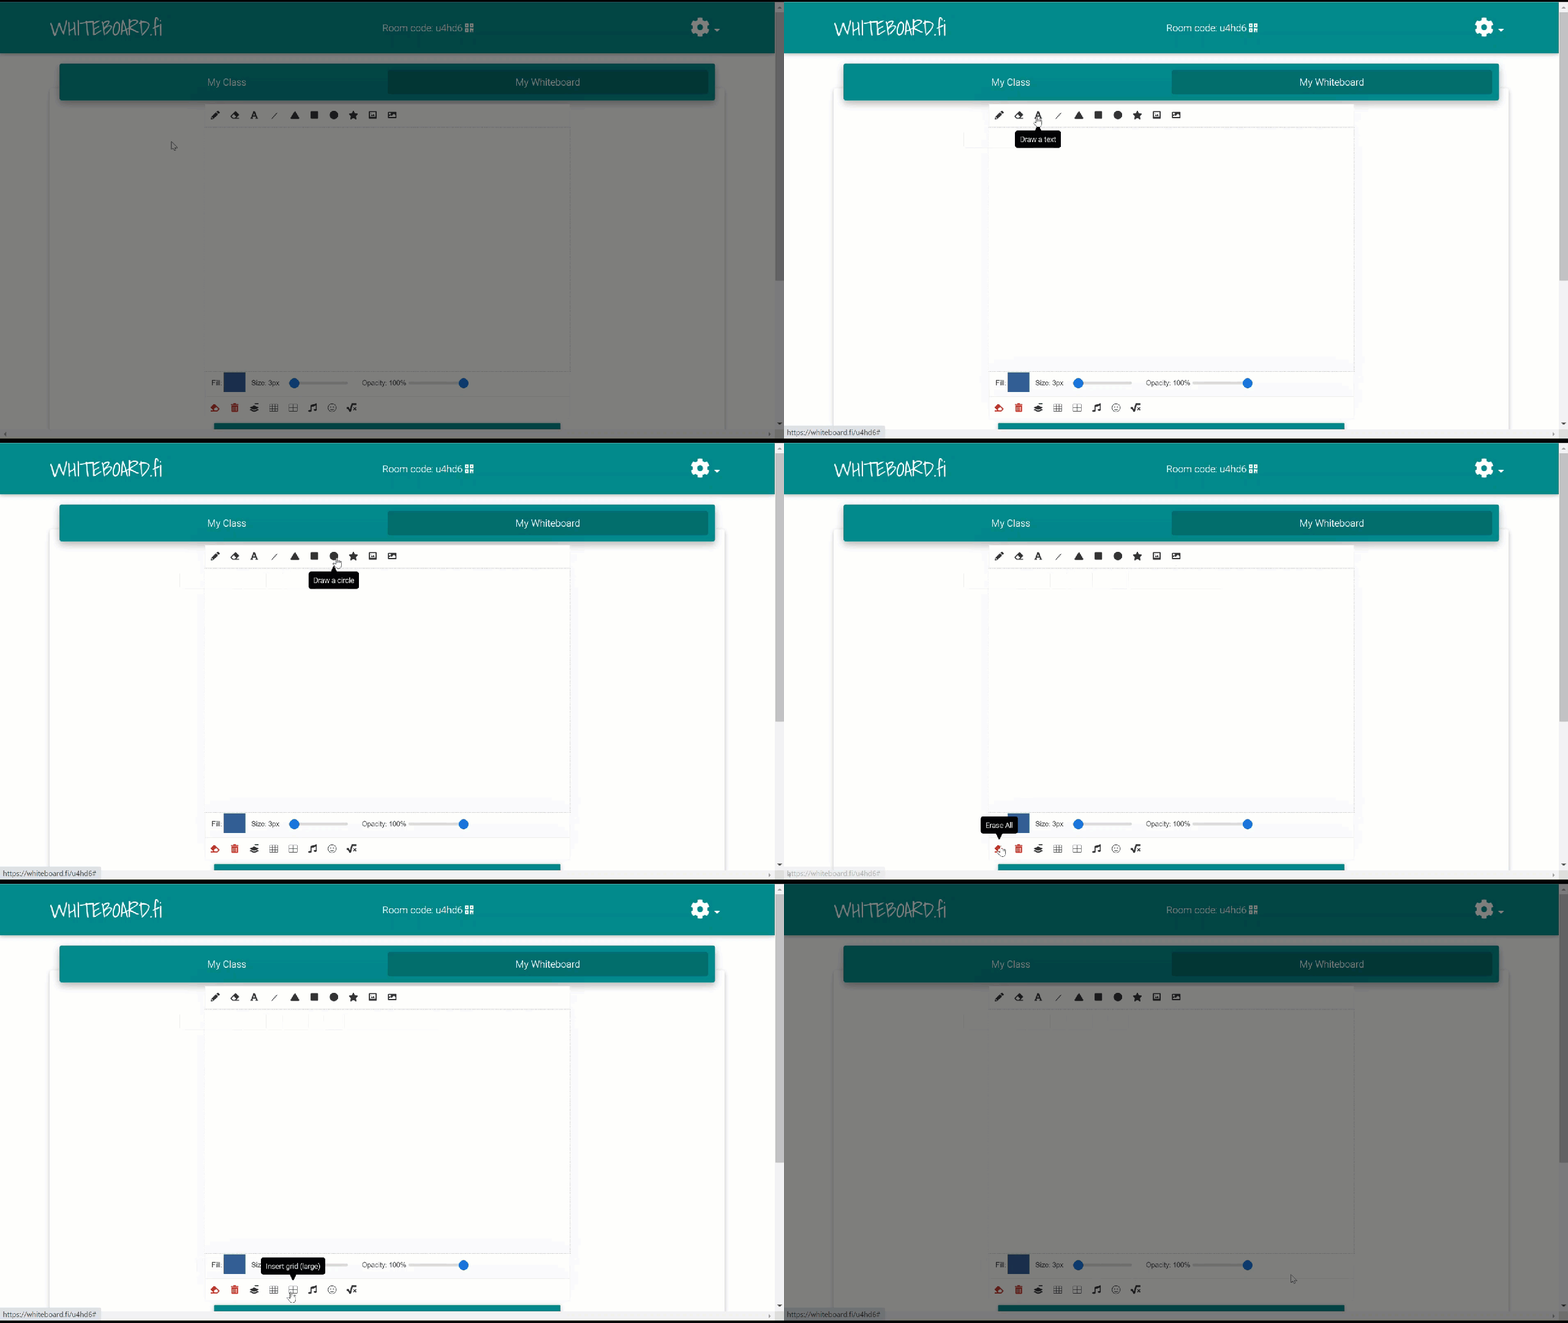
  1. Top Toolbar: Drawing, Eraser, Line, Shapes, Image, Background

  2. Bottom Toolbar: Erase All, Clear Whiteboard, Grid, Music Sheet, Emoji, Math Editor


Watch Class Work:

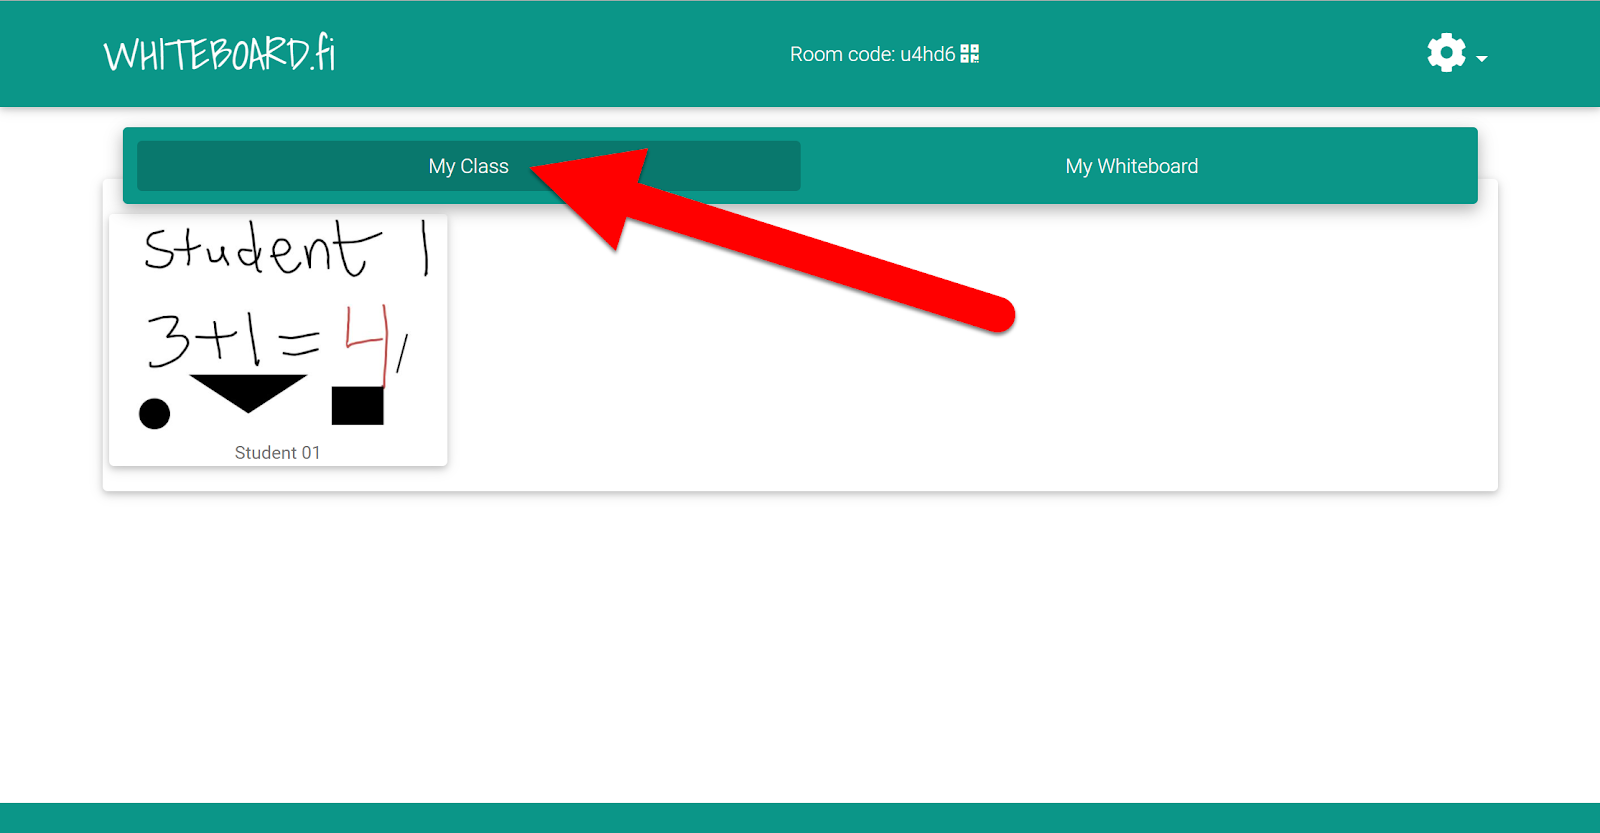
  1. In the teacher view click on “My Class”. This will allow teachers will see each student’s whiteboard in live time.

  • If you are unable to see updated student work you may need to make sure students have clicked off of the last tool they used (that is when the “save” action takes place.


Save Class Work:

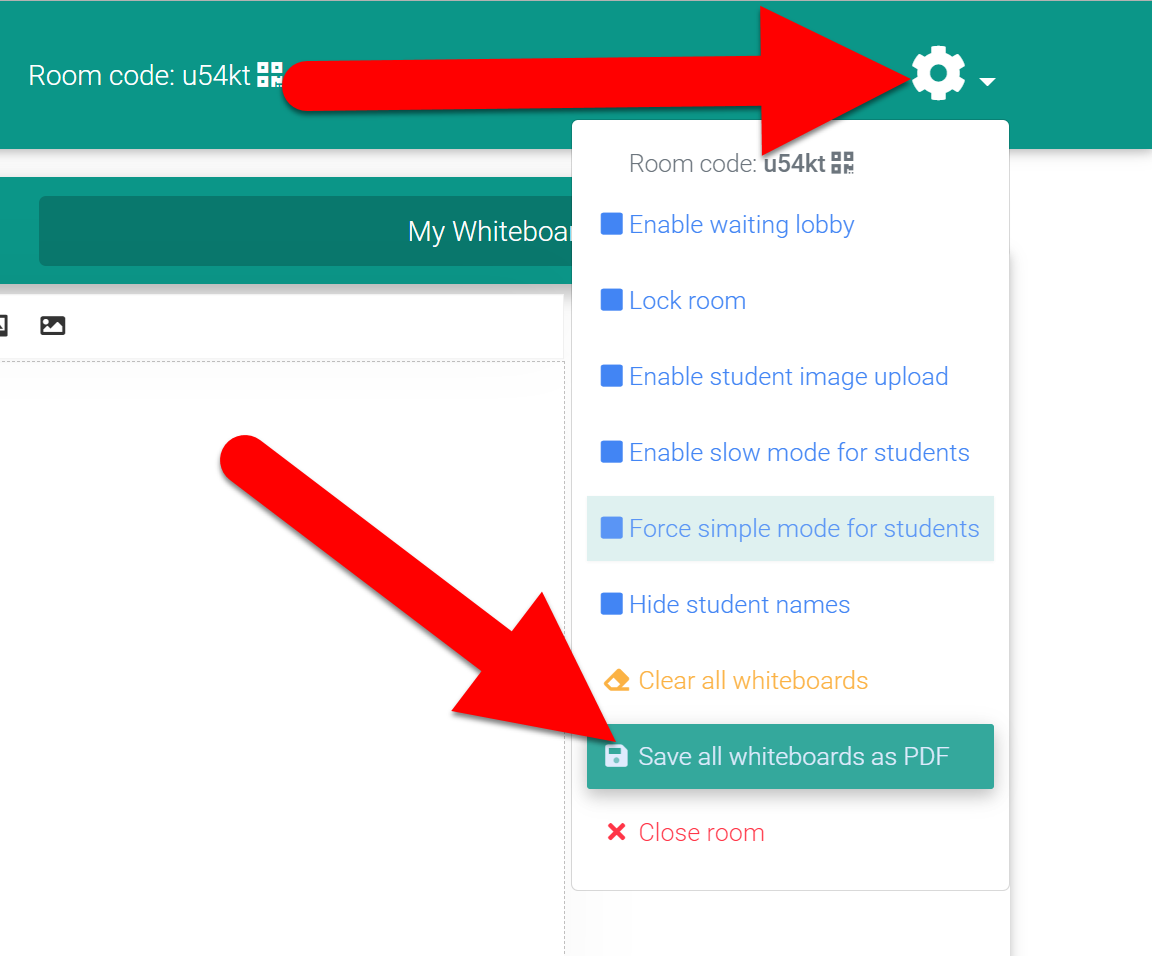
  1. Teacher View:

    • Click the gear icon in the top right corner.

    • Click “Save all Whiteboards as PDF”.


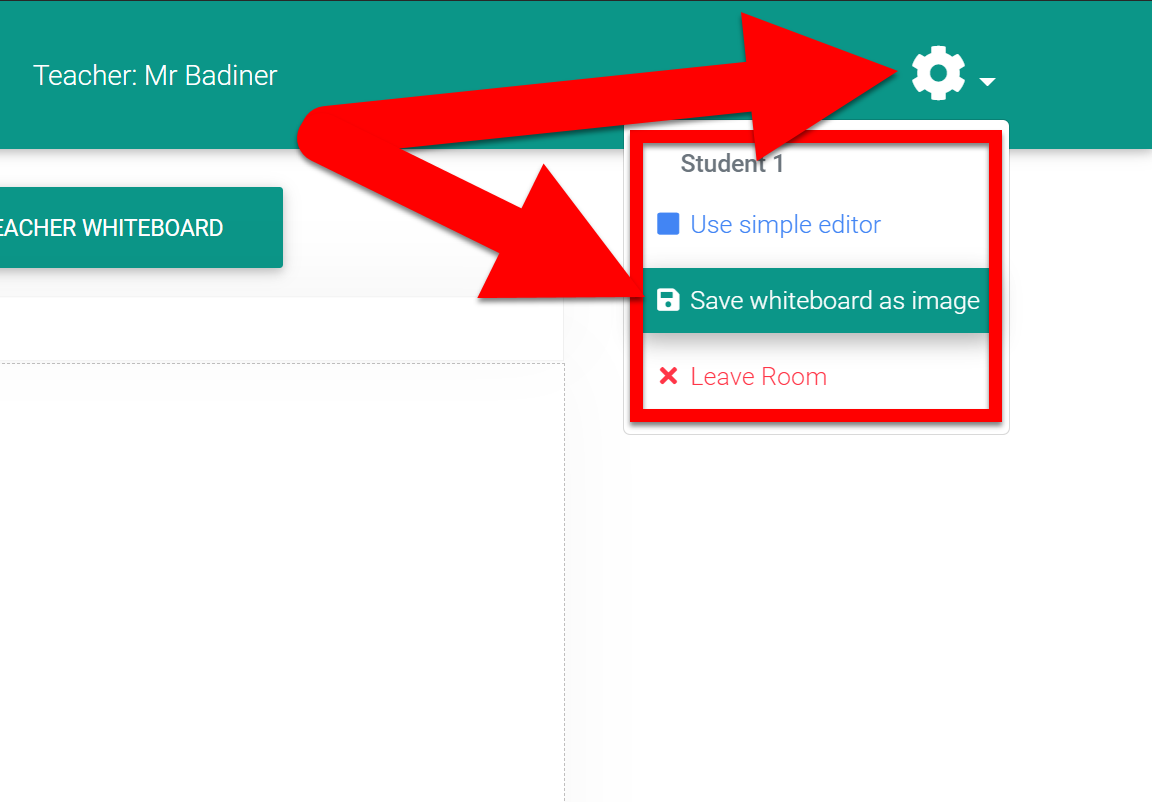
  1. Student View:

    • Click the gear icon in the top right corner.

    • Click “Save all Whiteboard as Image”.


End a Class: 

  1. Click on the Gear in the top right corner and then click on “Close Room”.


  • Make sure to save the student work to PDF before exiting the Class if you want a record of their work.


If you want these steps in a Document click HERE!