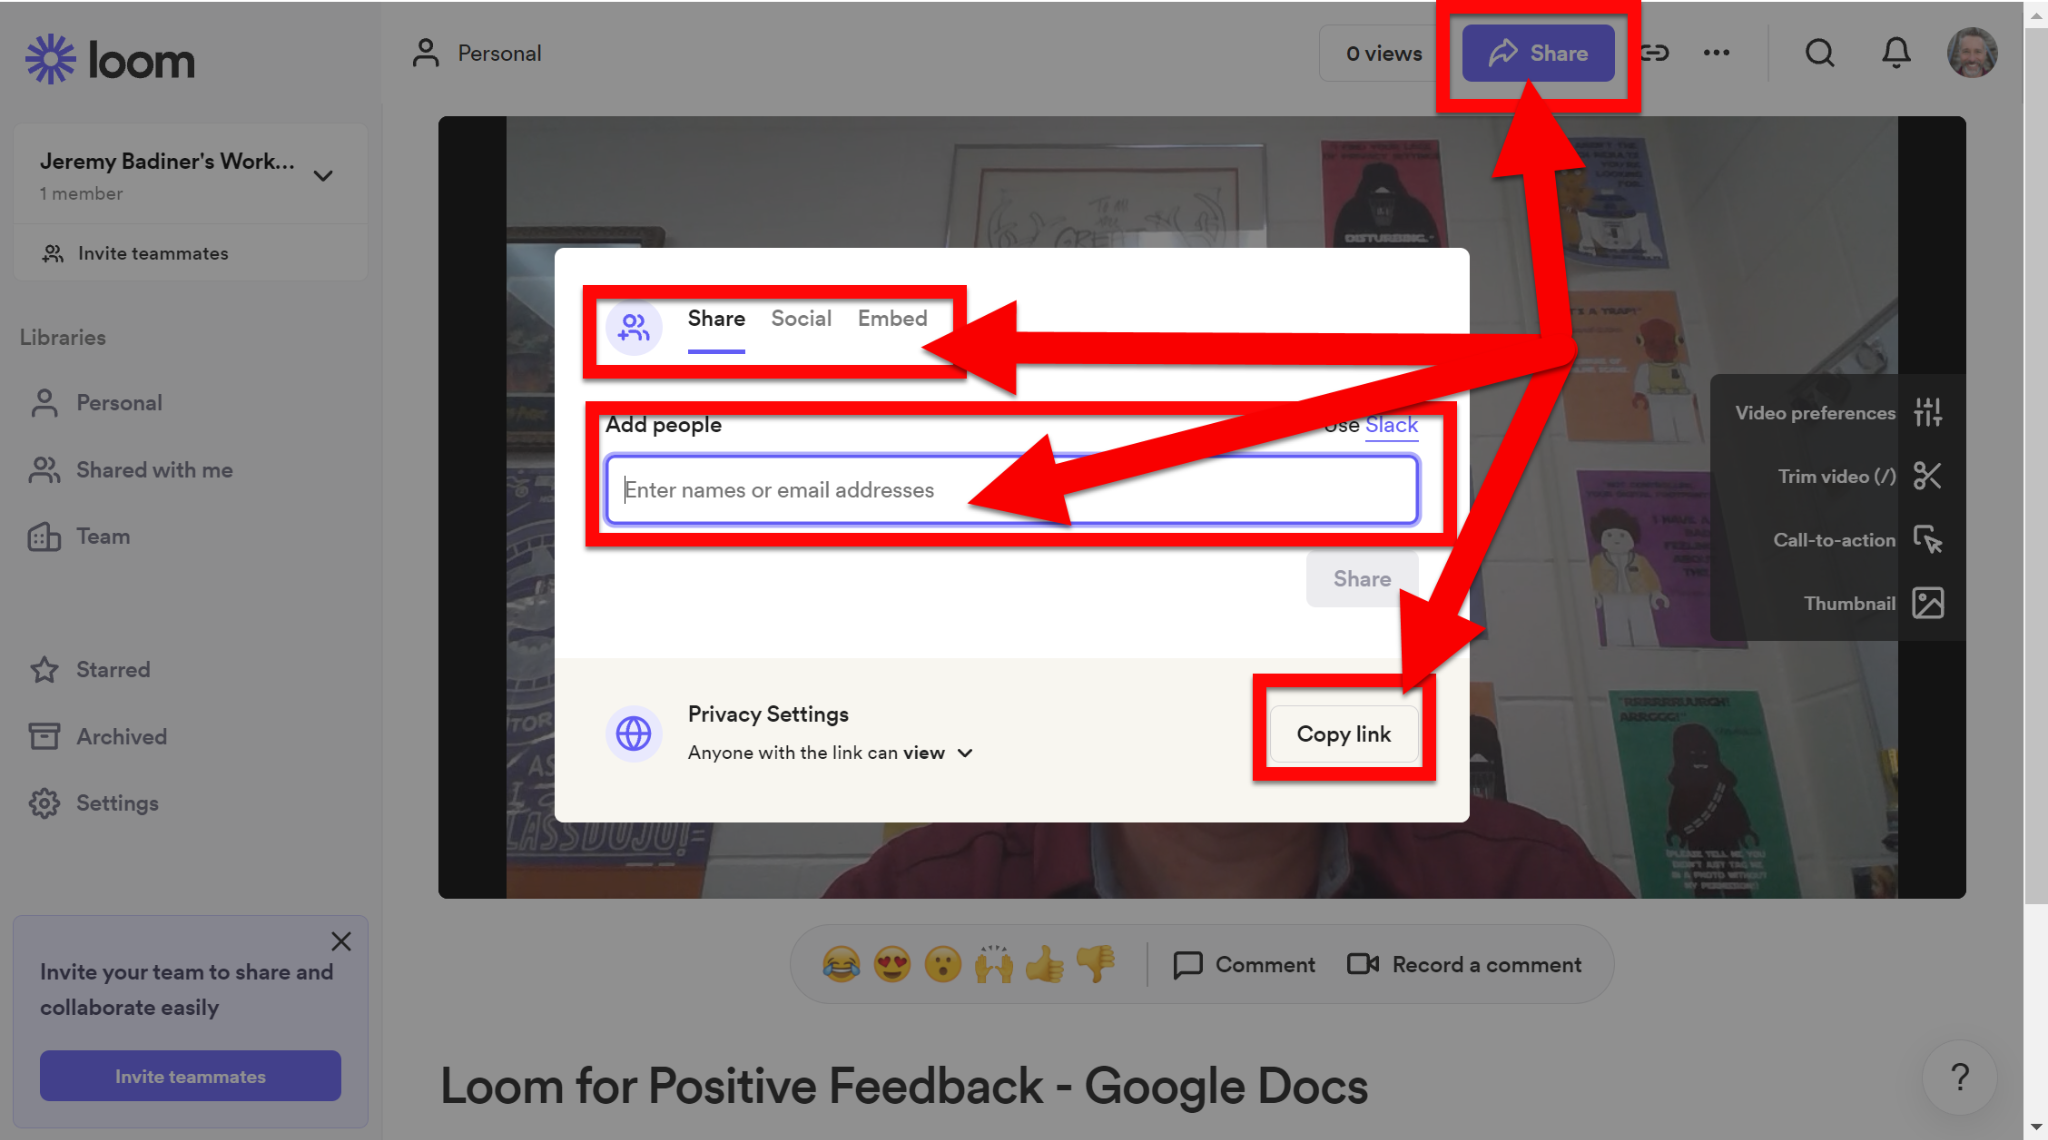
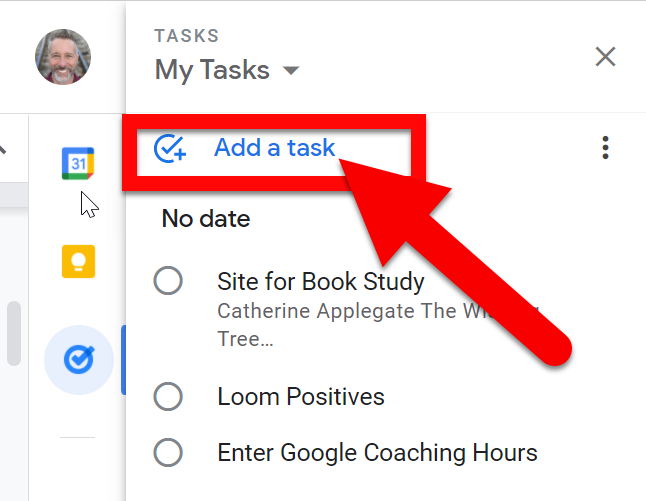
Monday, October 25, 2021

Get Organized with Google Tasks

Getting (and staying) organized is important for us all. Sometimes it feels like a losing battle. There are so many apps and tools out there to help that sometimes they just make you feel less organized. One tool that helps me is Google Tasks. The reason I use it is that it lives within the Google tools I am already using daily. It is simple and part of the Google Workspace so it is easy for me to always have access to it when needed. Check it out and see if it can help you stay organized as well.


Open Google Tasks

  1. On your computer, go to Gmail, Drive, or Calendar.

  2. On the right, click the “Tasks” icon.


Create a Task

  1. On your computer, go to Gmail, Drive, or Calendar.

  2. On the right, click the “Tasks” icon.

  3. Click on “Add a task”.

  • When you create a task, you can:

    • Add details

    • Set a date and time

    • Add subtasks

    • Make it repeat on certain days 

    • You can create up to 100,000 tasks.

  • Tips:

    • If you add a date and time to your task, you get notifications at the scheduled dates and times. For tasks without a time, notifications appear at 9:00 AM. Tasks with a date also appear in your Google Calendar app.

    • You can edit, complete, unassign, or delete group tasks assigned to you from your personal task list. If you change group tasks in your personal task list, these tasks are updated or deleted in Google Chat spaces.
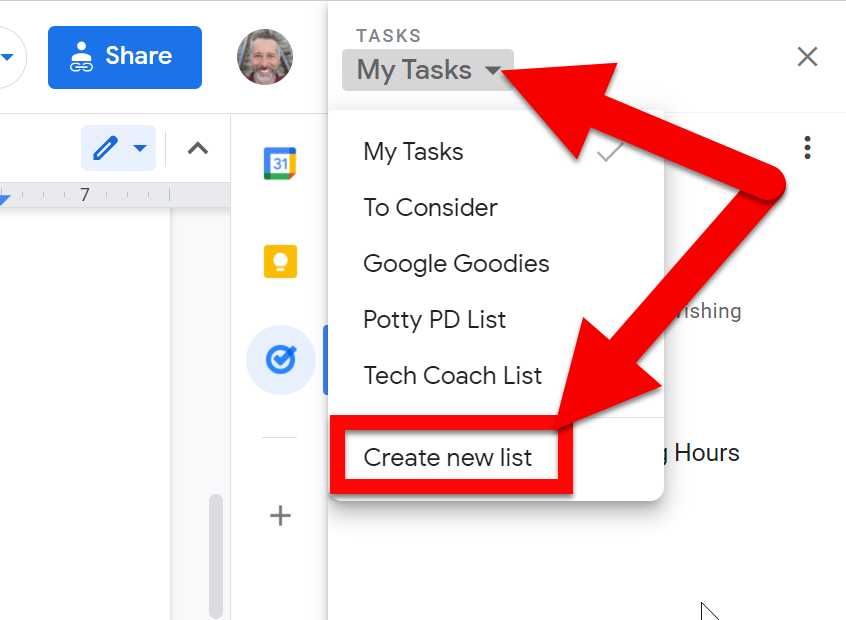

Create a List

  1. On your computer, go to Gmail, Drive, or Calendar.

  2. On the right, click “Tasks”.

  3. At the top, click the “Down arrow”.Drop down arrow

  4. Click “Create a new list”.

  1. Enter a name.

  2. Click “Done”.


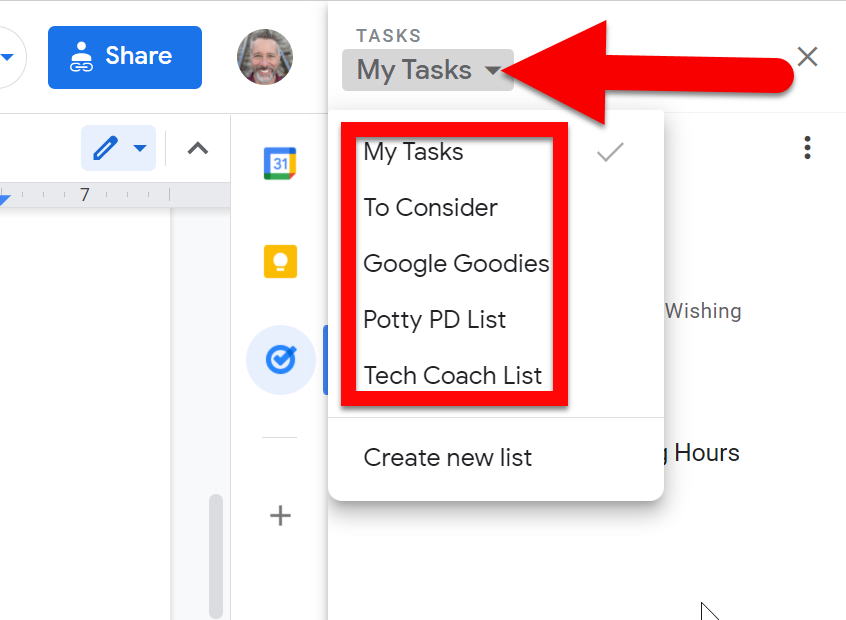
Switch Between Lists

  1. On your computer, go to Gmail, Drive, or Calendar.

  2. On the right, click Tasks”.Drop down arrow

  3. At the top, click the Down arrow”.

  4. Click the list you want.
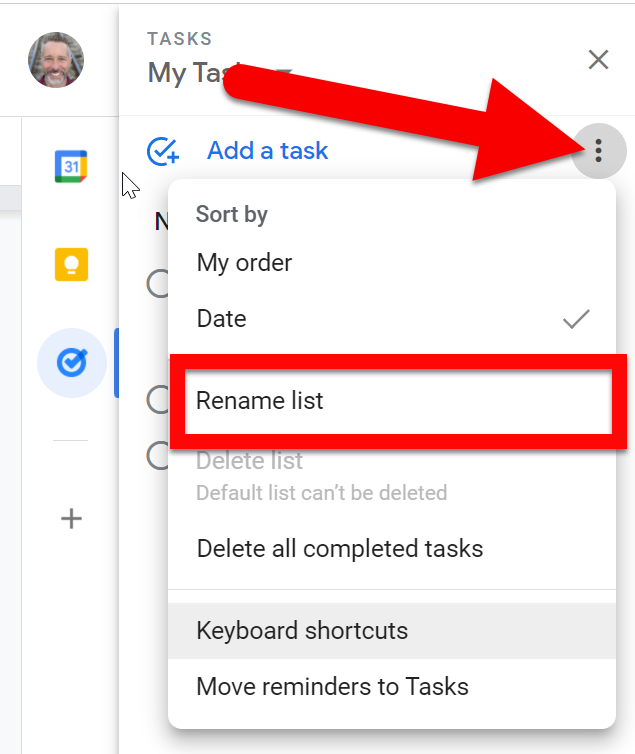

Rename a List

  1. On your computer, go to Gmail, Drive, or Calendar.

  2. On the right, click “Tasks”.

  3. Click “More”.More

  4. Click “Rename list”.

  5. Enter a name.

  6. Click “Done”.


Reorder Lists

  1. On your computer, go to Gmail, Drive, or Calendar.

  2. On the right, click “Tasks”.

  3. At the top, click the “Down arrow”.Drop down arrow

  4. To reorder lists, select an option: 

  • Click and drag the list you want to move.

  • Highlight a list with the arrow keys and press Alt + the Up or Down arrow key to move a list up or down. 


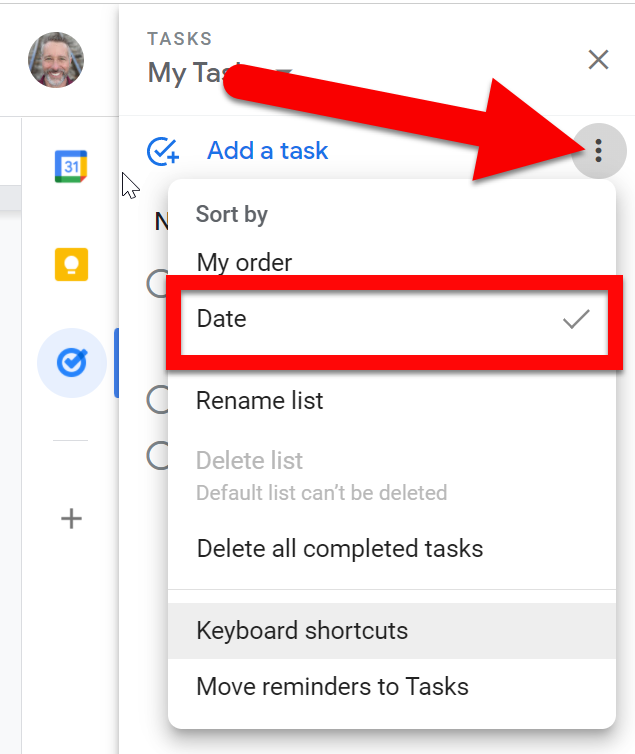
Sort Tasks by the Due Date

  1. On your computer, go to Gmail, Drive, or Calendar.

  2. On the right, click “Tasks”.

  3. Click “More”. More

  4. Under "Sort by" click “Date”.


Move a Task to a Different List

  1. On your computer, go to Gmail, Drive, or Calendar.

  2. On the right, click “Tasks”.

  3. Next to the task you want to move, click “Open menu”.More

  4. Click the list name you want to move the task to.

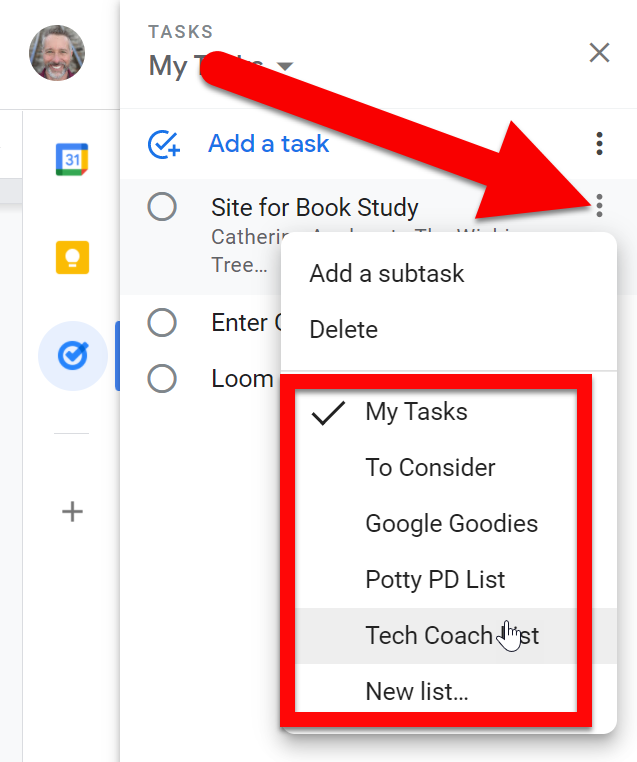
Tip: Tasks set to repeat can't be moved to a different list.


Reorder Tasks

  1. On your computer, go to Gmail, Drive, or Calendar.

  2. On the right, click “Tasks”.

  3. Click a task and drag it where you want. You must have “My order” selected as your order type. To reorder a task you're editing, on the left, click and hold Drag


Mark Tasks Complete

  1. On your computer, go to Gmail, Drive, or Calendar.

  2. On the right, click “Tasks”.

  3. Click on the circle to the left task you have completed to check it off. 

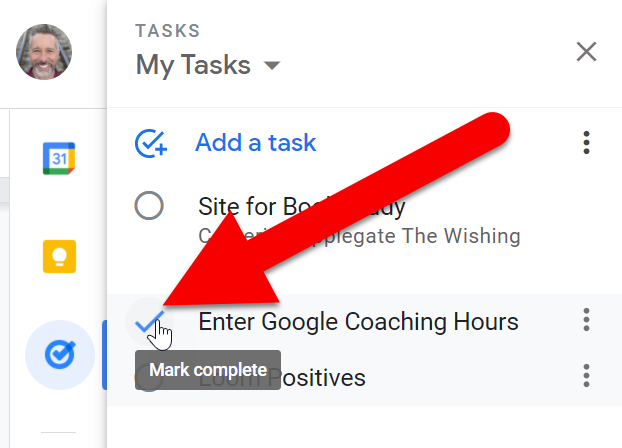
  1. It will go to the  “Completed” list below.


Find Your Completed Tasks

  1. On your computer, go to Gmail, Drive, or Calendar.

  2. On the right, click “Tasks”.

  3. To see completed tasks click "Completed" (at the bottom) click the “Down arrow”. Drop down arrow

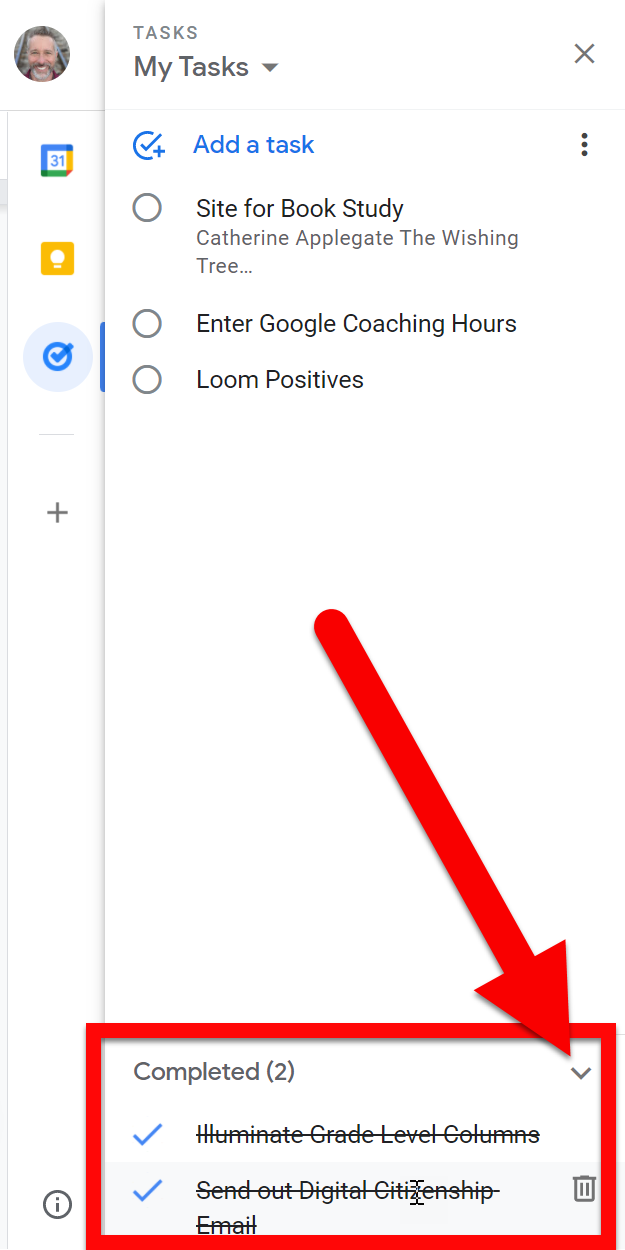
  1. To hide, click the “Up arrow”.Up arrow

  • I tend to click the trash can when done so they don’t build up in the “Completed” list.


Give Google Tasks a try to see if it works to help you stay better organized!


 (Install Google Task from the Play Store for Android devices and the App Store for iOS devices.)


If you want these directions in a Document click HERE!

Thursday, October 7, 2021

Loom for Positive Feedback

We all know how important feedback is for everyone, students and adults alike. In most cases, it is a comment on a paper or test or even that star or smiley face that makes a student’s day. What if we could take that positive feeling we get from simply written feedback to the next level? Video feedback is the next level! By using tools like Loom we can power up our feedback to students and supercharge our impact on student achievement!


Create a Free Loom Account:

  1. You will need to install the Loom Chrome Extension.

  2. Then head over to loom.com/education and set up your free EDU account.

  3. Click on “Get Loom for Free” and sign in with your Google account.


  1. Follow the steps and set up your account as you see fit.


  1. Head back to loom.com/education and click on the “Verify Education Account” button. Once this form is submitted and approved you will have all the paid features for free as an educator! Yay!


Create Feedback Videos:

  1. There are a couple ways to give feedback.

    • Send a Video of Just You Sharing Feedback: (This is the quickest and easiest.)

      • Click on the Loom Chrome Extension to start your feedback.

      • Choose “Camera Only” from the dropdown box at the top and click “Start Recording”. 

      • You will see a countdown start. When it reaches “0” you are recording. You will see just a small circle (size is adjustable in settings) but it does record the whole view like any other camera. Just make sure your face is centered in the circle. Record your feedback. When you are ready to stop, click the blue check near your video circle.


  • You will be taken to a new Chrome tab with your recording. You can rename your video at the bottom.


  • You will find the “Share” button at the top. Click it to see your sharing options. Choose what best fits your needs. I always use the “Copy Link” option.


  • Send a Screencast of You and Your Student’s Work: (This allows you to create a screencast to point specific things out in the students’ work.)

    • Click on the Loom Chrome Extension to start your feedback.

    • Choose “Screen and Camera” or “Screen Only” from the dropdown box at the top and then click “Start Recording”.  You will then choose “Full Desktop” to record the whole computer screen (including background and applications not running in a browser) or “Current Tab” to record just the current Chrome tab.


  • You will see a countdown start. When it reaches “0” you are recording. You will see a small circle video of yourself if you selected “Screen and Camera”. You can move this anywhere you want at the start or during your recording as well as hide it at any time. Make sure your face is centered in the circle. Record your feedback and move your mouse, scroll the screen, and change tabs as you need (if you selected “Full Desktop”). When you are ready to stop, click the blue check near your video circle.


Share Videos as Feedback:

  1. Using the “Share” button in a video brings up the sharing options.

  2. A few ways to share:

    • Share the Link: This is the easiest. Just copy and paste this wherever you want to provide feedback (email, comments in a document, social media, or anywhere you can paste a link)!

    • Add People: This allows you to share the video with specific people. 

    • Share to Social Media: There are links to all your Social Media applications.

    • Embed: Get the embed code to put this on a website.

    • Share in Email: This has a built-in awesome feature. After installing the Loom Chrome Extension there is now a Loom icon in your email when you compose. Click it and you can create a new video or attach the last one you created! So cool!


Things to consider:

  • Loom stores all your videos on their servers. Unlike other services (like Screencastify) the videos are not stored in your Google Drive, however, you can download them and save them to your Drive if you wish.

  • Make sure your settings are correct for you in Loom. I use “Anyone with the link can view” so I can easily send videos to anyone without sharing specifically with them. If you want to make it more secure, make sure to set it to “Only people added cab access”.


If you want these directions in a Document click HERE!