Wednesday, December 11, 2019

Projects with Google Earth

Google Earth has changed over the years. In the past, it was a huge downloadable program. Now it is a web-based tool that is easy to use. One of the things that you can do is create projects. Creating a project in Google Earth is easy, can be collaborative, and can be viewed by anyone you want (just like all other Google Tools). Head over to Google Earth and create something to share! Here is an example of what a quick tour can look like: Demo.


Create a Project:
  1. Click on the “Projects” icon.


  1. If this is your first Project you will click the “Create” button. If you’ve created a project before, you’ll see a list of your projects and you can click the “New project” button.


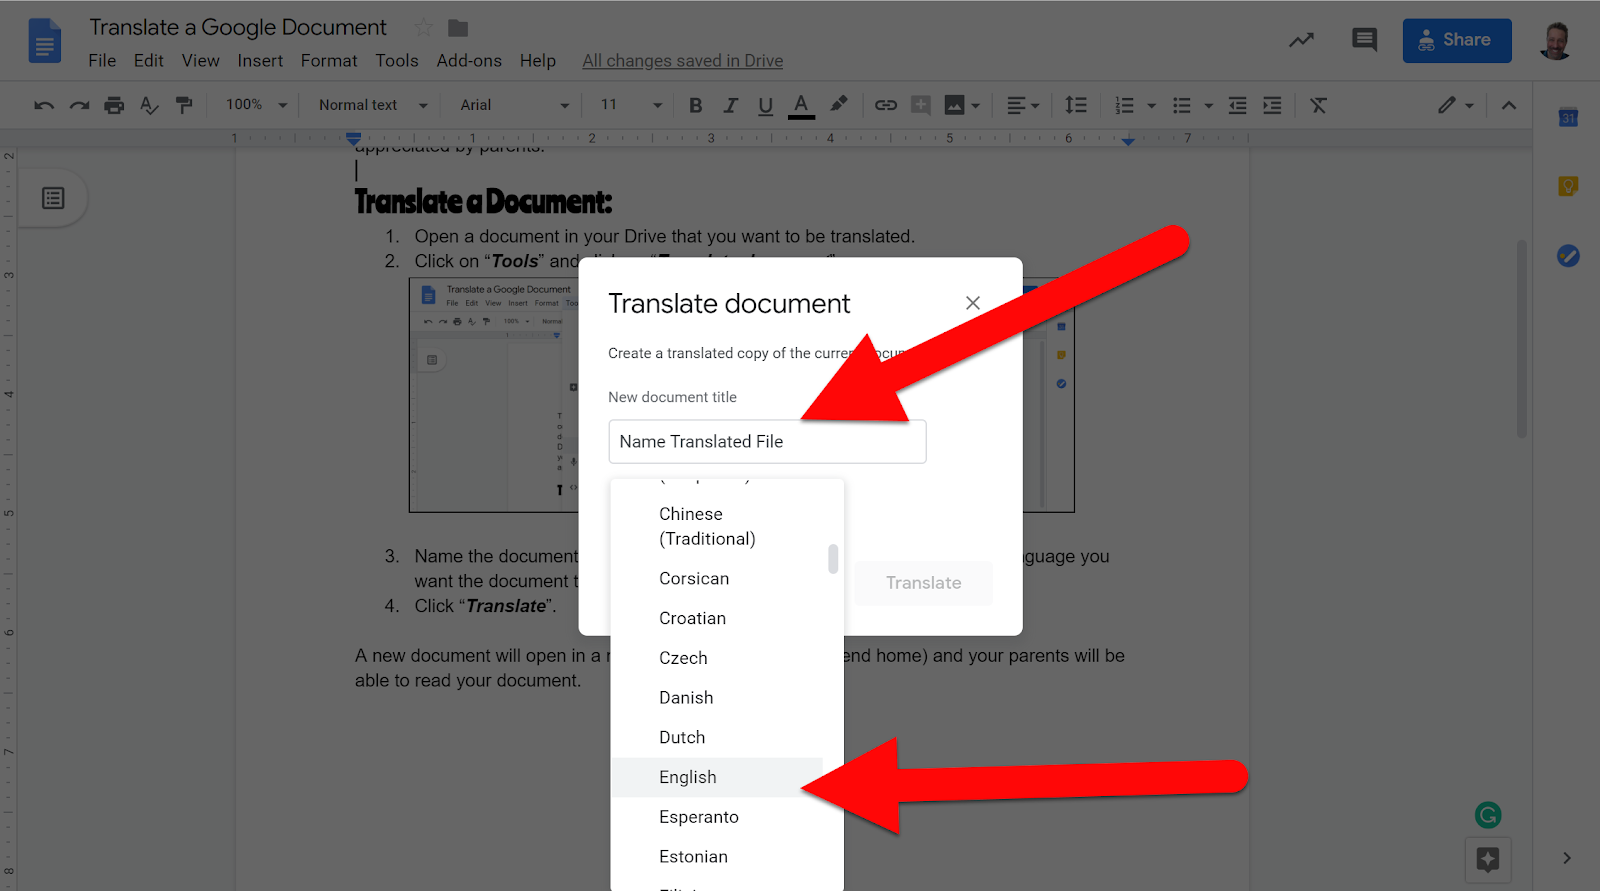
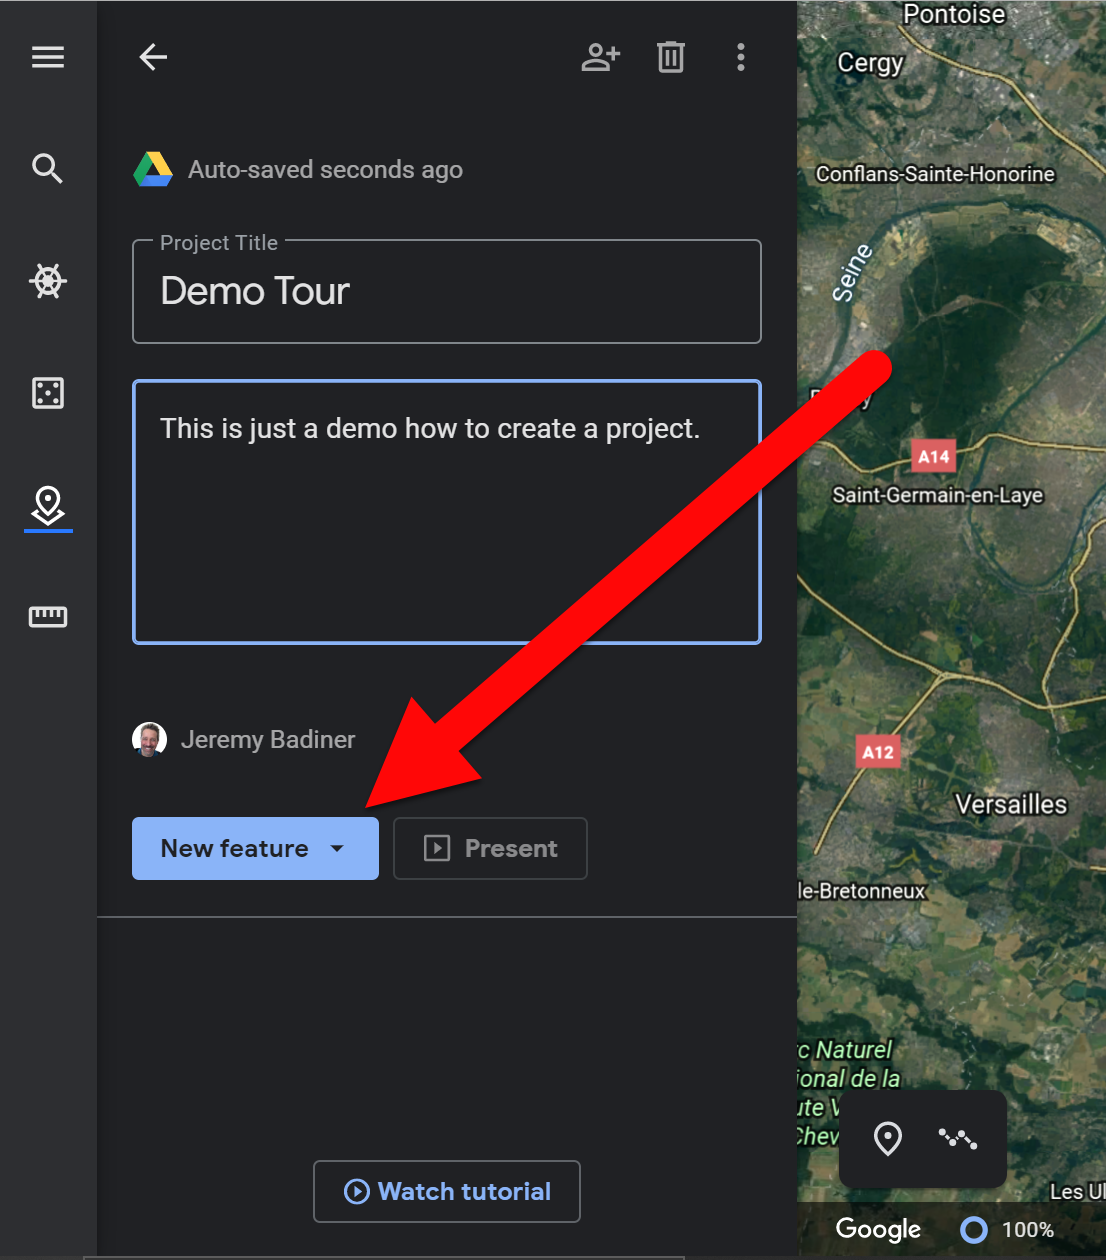
  1. You will need to name your project as well as add a description. By default, information from Google will be in the box. You can relace with your own, as well as your own images/videos.


  1. You can add places to your project by clicking “New feature” and searching or adding a placemark.


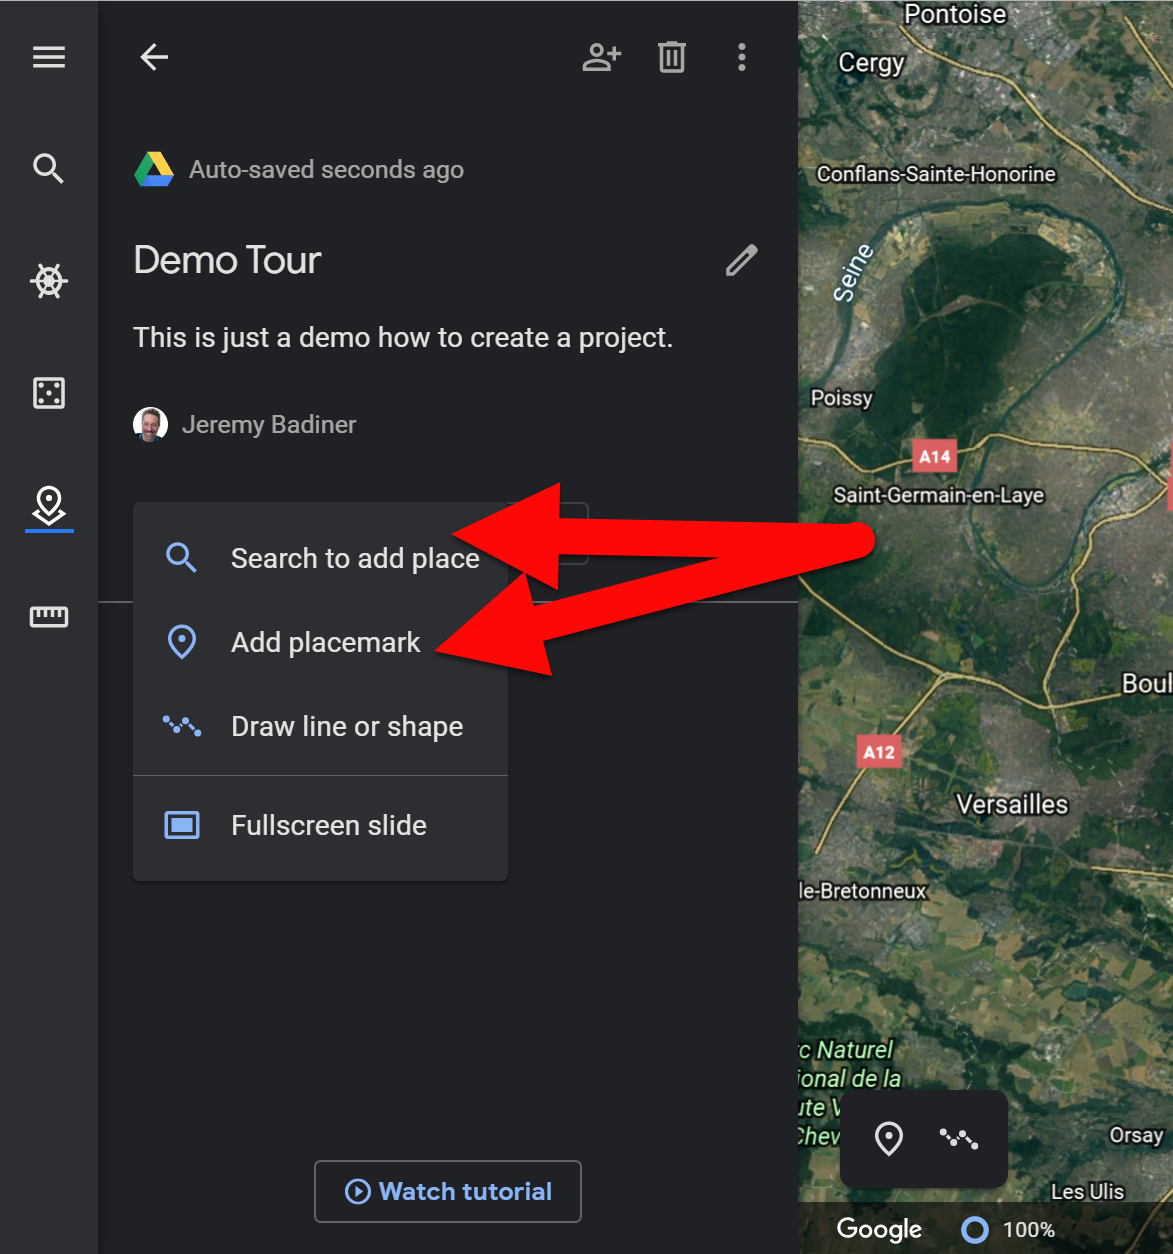
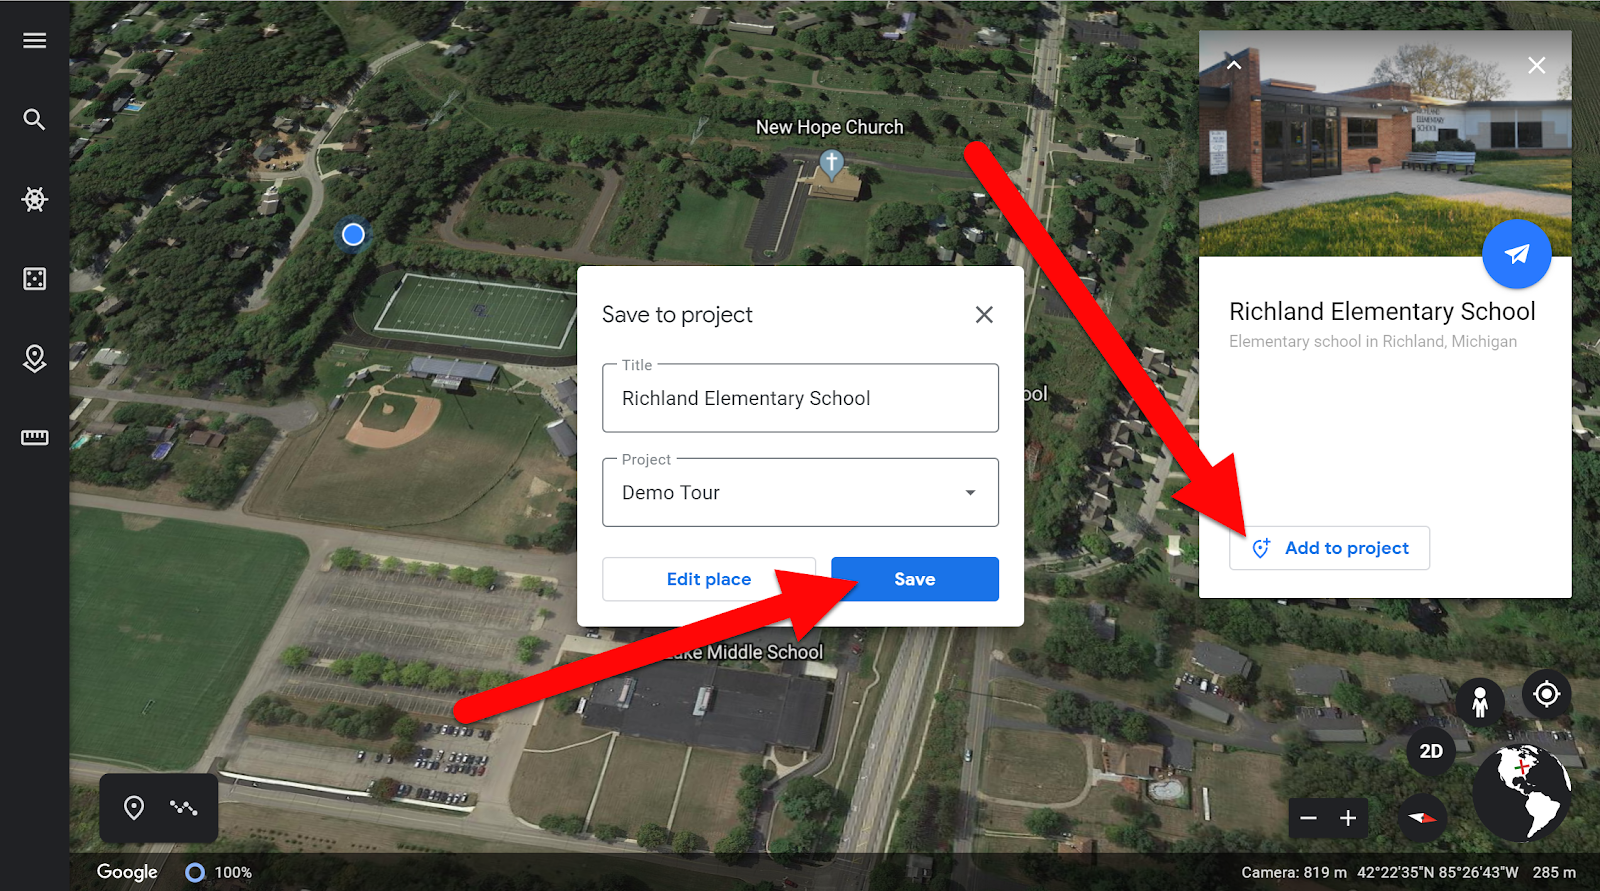
  1. When searching you will be asked to “Add to project”. You will be able to choose the project to add (placemark) and also be able to edit the pin style and details.


  1. You can edit these pins at any time as well. They are listed to the left of your screen. You can edit, reorder, hide from view,  and delete as you see fit.


  1. To view your project click “Present”. 


Share a Project:
After your project is complete you can share using either of these methods.
  1. Share from Google Earth:
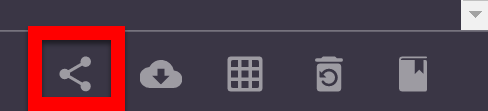
    1. Click the share icon at the top of the editing section.
    2. Click “Advanced”.
    3. Click “Change” in the who has the access section.
    4. Choose your share settings.
    5. Share out the link.
  2. Share from Drive:
    1. In Drive find the folder created by Google Earth (Named “Google Earth”).
    2. Right-click on the file and choose “Share”.
    3. Click “Advanced”.
    4. Click “Change” in the who has the access section.
    5. Choose your share settings.
    6. Share out the link.


Project Tools:
  1. Add Photos & Videos (add images and videos to place markers)
  2. Edit Placemark (add a “pin” that sets a location the project will visit)
  3. Add 3D Views (view location in 2d “top-down” or 3D “live” view)
  4. Edit Information Text (add details to the location)
  5. Draw a Line or Shape (add lines or shapes to your map to show routes, items, etc)
  6. Add Slides (adds a full-screen intro/detail slide anywhere it is needed)
  7. 3D/2D Views (change between two and three-dimensional imagery)
  8. Fly around location (view the placemark in a 360 degree “fly-around view)
  9. Street View (click icon and place on highlighted places on the map to see Street View)
  10. Fly to Your Location (click to return to your true present location)


Project Ideas:

  • Geography tours of the world, regions, or landmarks.
  • Battles of the Revolutionary or Civil wars
  • Map of a character’s journey in a novel study
  • Track a historical person’s life travels
  • Show the timeline of anyone's life
  • Planned future travels
  • Collection of past visited locations
  • Comparing different cities/regions of the world
  • Documenting locations discussed in lessons
  • Identify important locations in a story/history
  • Do a collaborative class/group map
  • Create a "Where are they now?" map
  • … and so many more ways to use this cool tool!


If you want these steps in a document click HERE!

Thursday, December 5, 2019

Translate a Google Document

There are many ESL students in our rooms today. Google has us covered in normal conversations through the Google Translate app and site. By using the App on our mobile devices and the site on our laptops we can make communication better for everyone. Google Documents also has a built-in translator! This means all those notes, newsletters, and updates you send home to parents can be in their own language! It is easy, quick, and will be greatly appreciated by parents.


Translate a Document:
  1. Open a document in your Drive that you want to be translated.
  2. Click on “Tools” and click on “Translate document”.


  1. Name the document (it is creating a copy of the original) and choose the language you want the document translated into.


  1. Click “Translate”.


A new document will open in a new tab. Print this (or email/send home) and your parents will be able to read your document.


Just a note: This is not perfect. There will be grammar and other errors, but at least your families will be able to get the main idea and they will appreciate knowing details from your classroom!


If you want these steps in a document click HERE!

Sunday, November 24, 2019

Create Filters in Gmail

With all the emails we get there are days we can all get overwhelmed. Fear not...there is an easy way to help organize, sort, and prioritize your incoming email! By setting Gmail filters you can have those “not so important” emails never hit your inbox, send incoming emails to pre-set labels, or even mark emails as read when they hit your inbox without opening them. There are other options as well. Check out what you can do with filters in Gmail to keep your inbox under control!


Create Filters:
  1. In your Gmail inbox, click on the gear and click “Settings”.

  1. At the top, click on “Filters and Blocked Addresses”. Then click on “Create a new filter”.

  1. Type in the email address you wish to create a filter in the top line. There are other options to include, but I always stick with just the email section. You can use any of the others to set filters as well.

  1. You are given options for what you want to happen when the email hits your inbox. For example, if you want it to be marked as read and added to a specific label you have created you would check those two boxes. Then click “Create filter”.

  1. You will end up back at your inbox. Something to keep in mind, you can set colors for your labels. Click the 3 dots to the right of your label name, then the little arrow to the right, and choose the color you want the label to be set. 


Head to your inbox and start setting those filters to get your inbox under control!


If you want these directions in a document click HERE!

Sunday, November 17, 2019

Online Math Manipulatives

Manipulatives make learning easier and more relevant to students. They allow exploration and play in learning. Online activities can never replace true “hands-on” learning, but they can be a great addition to your math resources. Virtual manipulatives are a great way to have students share what they learn, explore different ways to do activities, and understand simple or complex concepts. There are many sites out there, but I really like the Mathigon Polypad site. It is free and has a lot to offer both lower and upper elementary students. Check it out!


Explore Polypad:
  1. Head over to mathigon.org/polypad.


  1. Change the canvas to match your needs. Just click the Canvas icon on the bottom left then choose the design you want.


  1. Choose what manipulatives to explore. You just click on the shape/tool you want or drag it to the canvas. You can rotate it as well.
    • Polygons
    • Number Block (Base 10)
    • Number Bars (Parts of a Whole Tiles)
    • Fraction Bars
    • Algebra Tiles
    • Pentominoes
    • Tangram


  1. Share your creation! 
    • Click the “Share” icon to share what you made. This is not a live link (any changes you make after sharing are not visible to others) nor is it collaborative. It just gives others a link to your creation at the moment of sharing.
    • Download your creation! Click the “download” icon and save your canvas.


  1. Explore “Activities
    • There are 12 different activities (most for upper elementary and higher) to explore. 

  1. Explore “Courses”.
    • These are designed for middle school and up.

Let your students explore, learn, and play!


If you want these directions in a document click HERE!