It is no surprise that Canva is one of my favorite tools. It can create anything you need and make you look like a seasoned professional without much work! One of the great features of Canva is its ability to translate files. Check out how to make your creations readable to anyone, no matter what language they speak!
Translate Text in a Document or Slide:
Either upload an existing Document or Slide Deck or create a new one in Canva.
Click on the “Apps” icon on the left side.
Type “Translate” and choose the app shown.
Choose the language you want to translate to. You can select the whole page or just selected text.
Clicking on “Settings” will let you choose some options including duplicating the document or add duplicate slides if in Slide Show and translate them. By duplicating you do not lose the original English version.
You can now choose the Tone of you translation and then click “Translate” at the bottom.
You now have 2 pages in your document. You can switch between them at th bottom. One is the English (original) version and one is the Spanish version
Here is a video walkthrough on how to translate a Google Slides deck. Click Here!
If you want these directions in a Document, click HERE!
Have you ever wanted a visual for students to quiet down while a presentation is being watched? Or need the support of a Mic Drop animation after one of your hilarious Dad Jokes? Canva has you covered! You can do these and MORE while presenting with Cnva! Check it out!
Canva Presentation Keyboard Animations:
Open a Canva Presentation. If you don’t have one, upload a Google Slide into Canva and use that one!
Start presenting the Presentation.
Tap any of these letters to get the following result:
B - blur the current slide
C - confetti explosion
M - Mic Drop
D - Drum roll
O - floating bubbles
Q - shhh, quiet down
U - curtain animation
0-9 - Timer (in minutes)
Head over to a Canva Presentation and make it ANIMATED!
If you want these directions in a Document click HERE!
There are lots of sites to use AI to generate images. Gemini, CahtCPT, MagicSchool AI, and more. My “go-to” tool for almost anything is Canva. You can also have AI generate images here. It is easy and free. You are limited to 500 images every 21 days, but the results are awesome. Check it out!
Create an Image:
Log into your Canva account at canva.com. Make sure you have the Educator Account. If you are new to Canva or have not been "verified", head here (https://www.canva.com/education) to get verified and get all the upgrades for FREE!
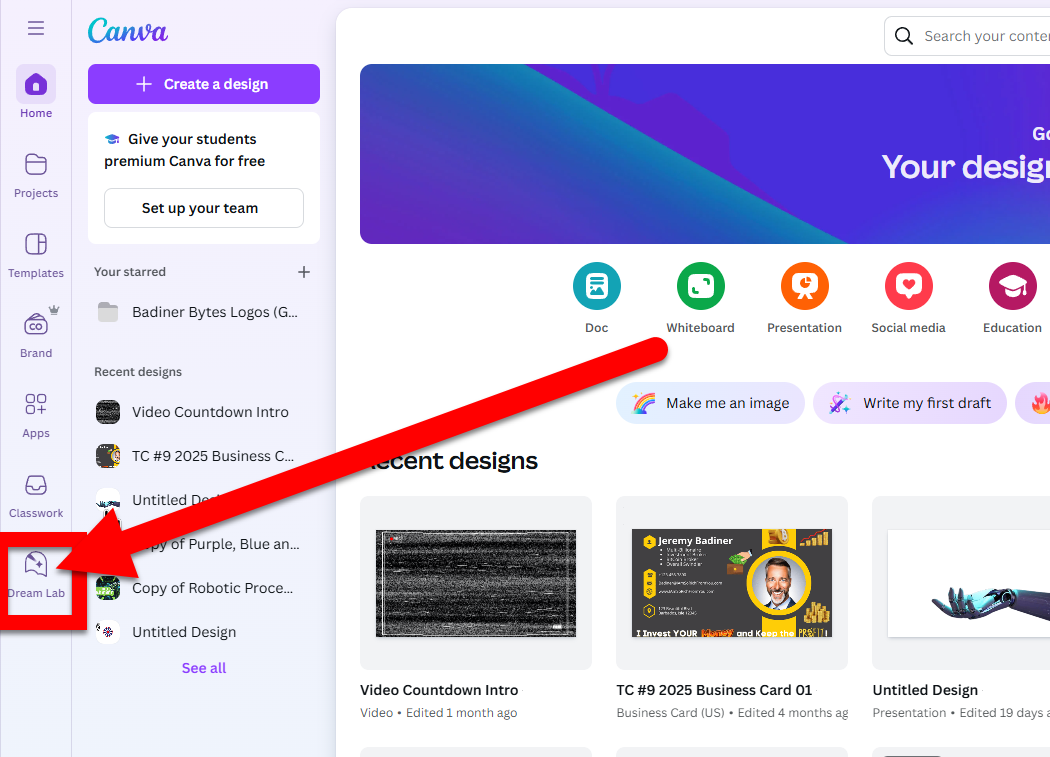
On the left side at the bottom click “Dream Lab”.
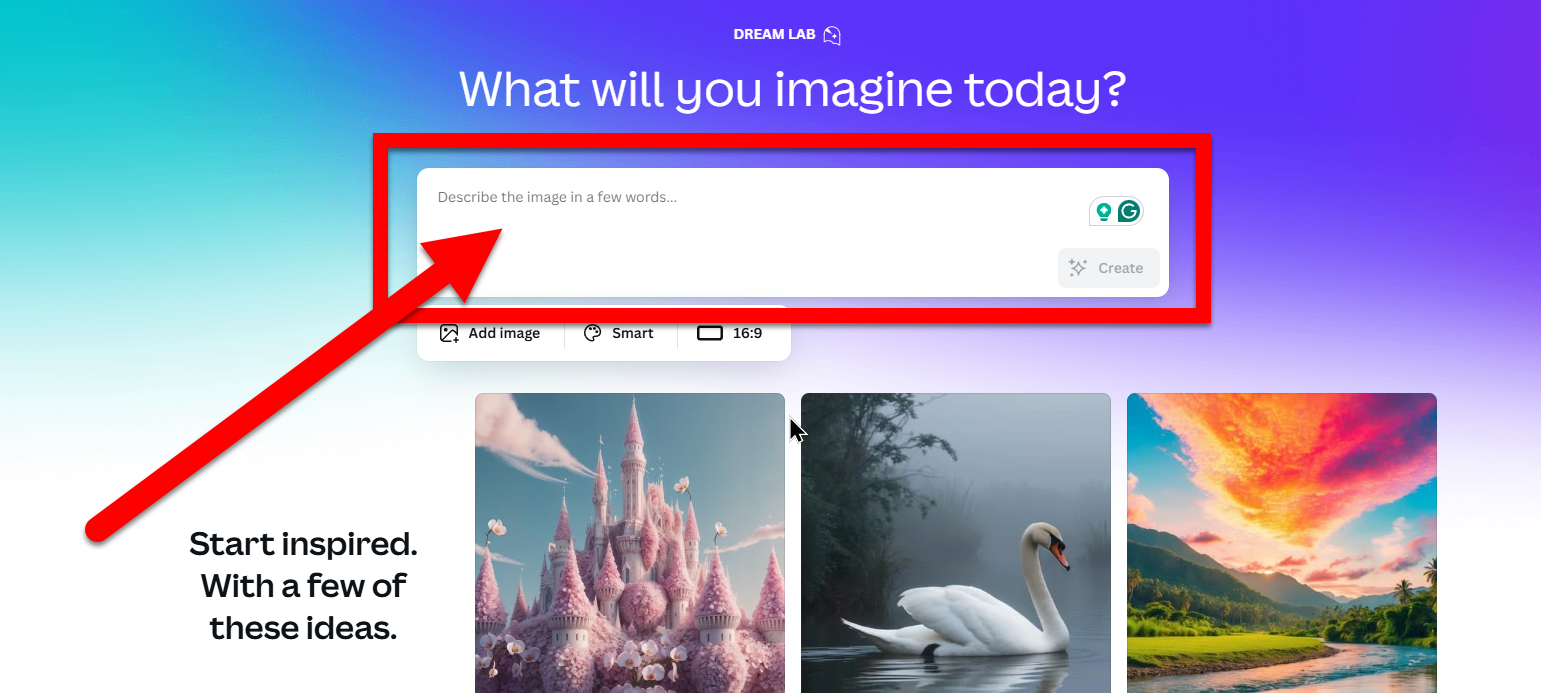
In the top box, and type in a description of the image you want created.
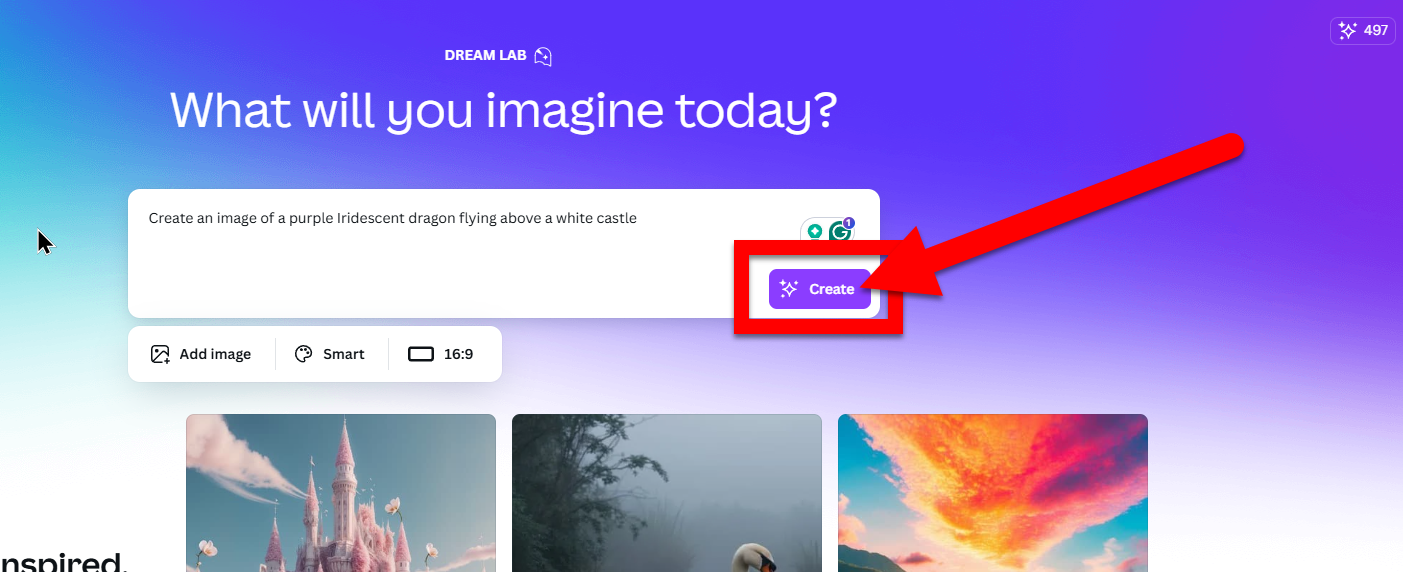
Click “Create”.
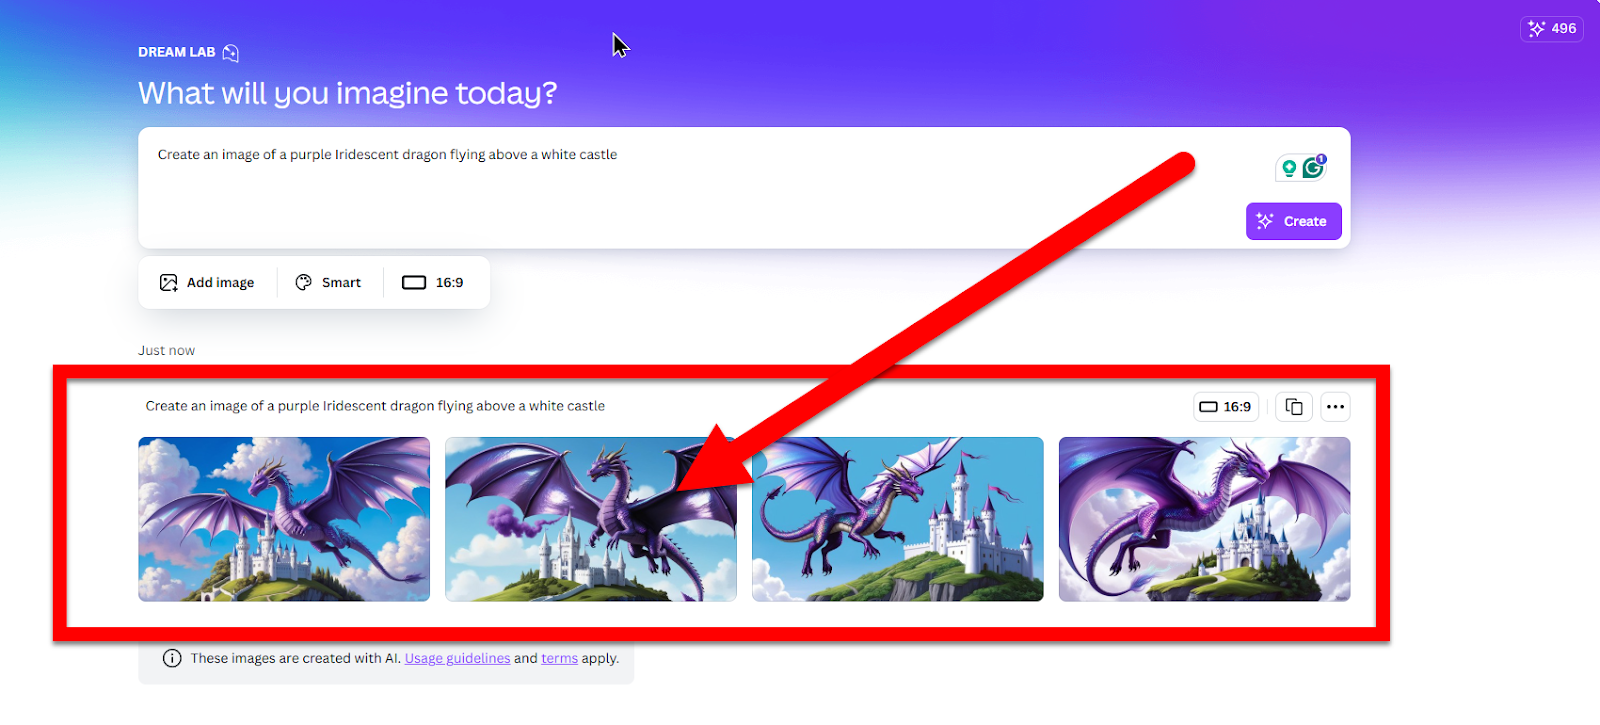
The new image is created below. Click “Create” again to generate another set of images.
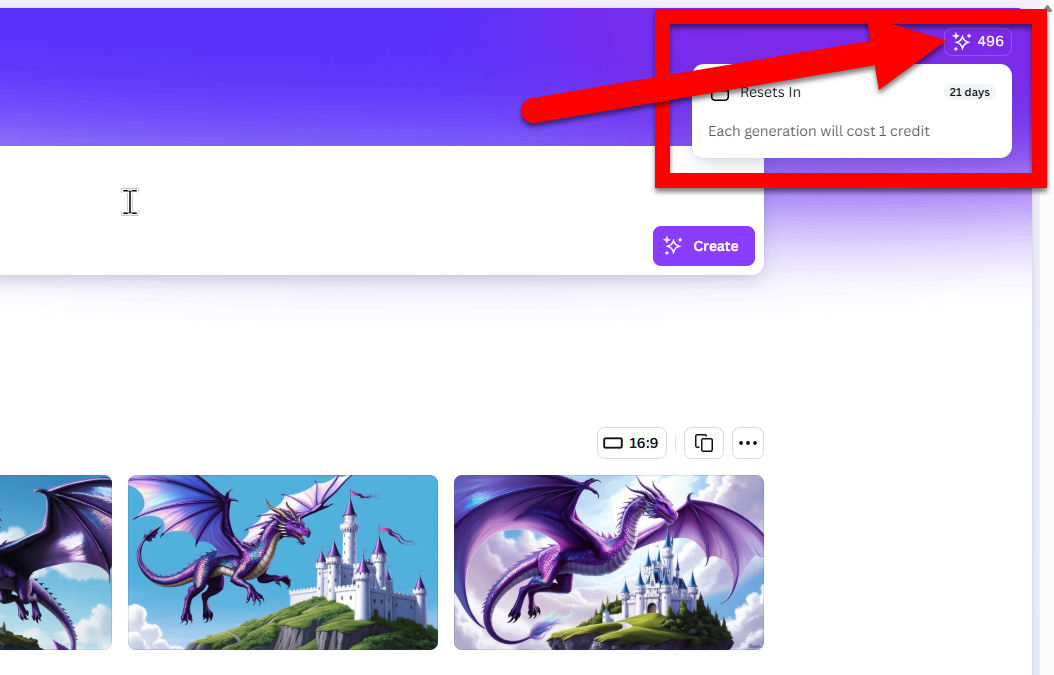
Keep an eye on the number in the top right. This is how many creations you have left. They reset every 21 days.
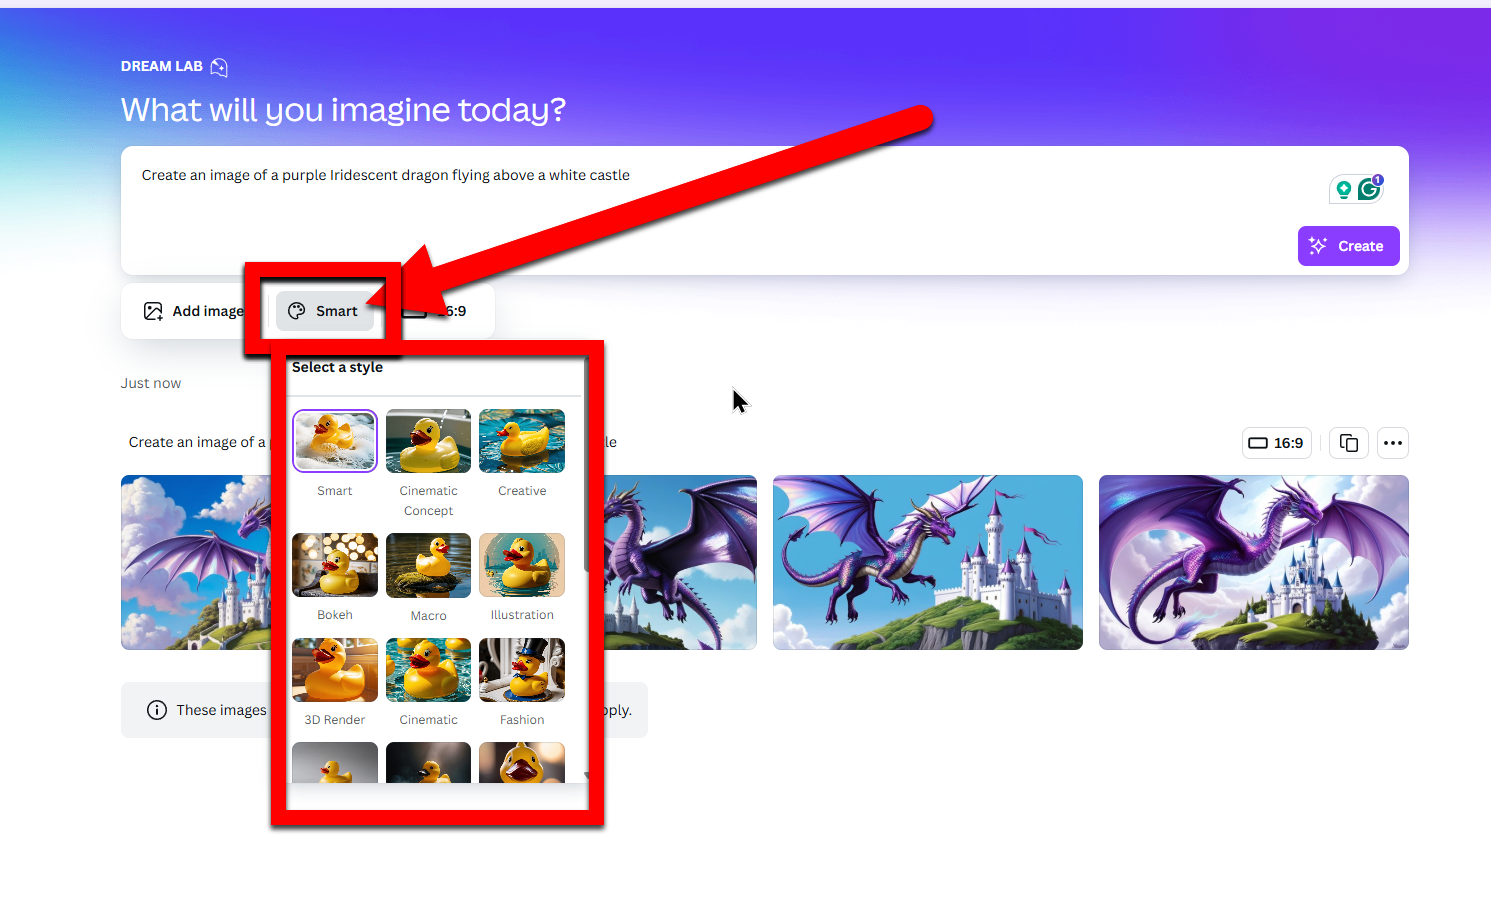
You can change the style with the “Smart” button.
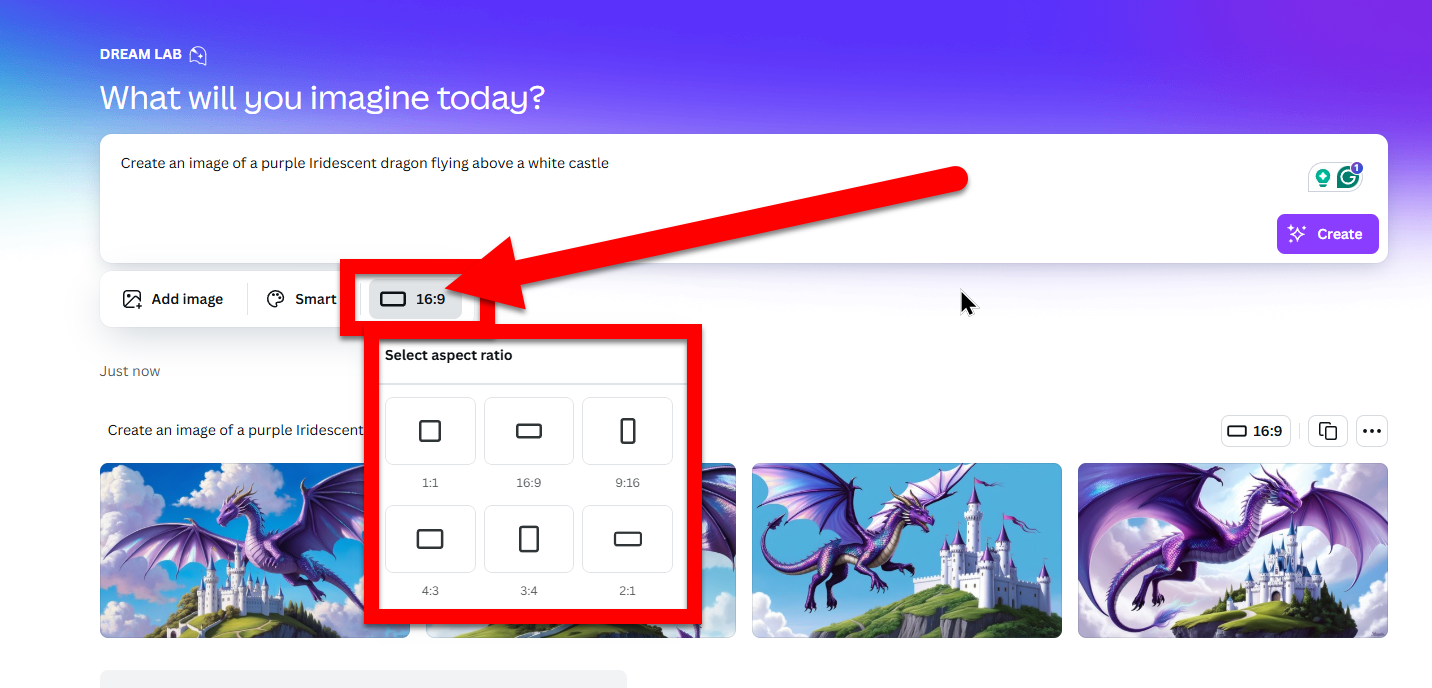
You can change the image size with the “Aspect” button.
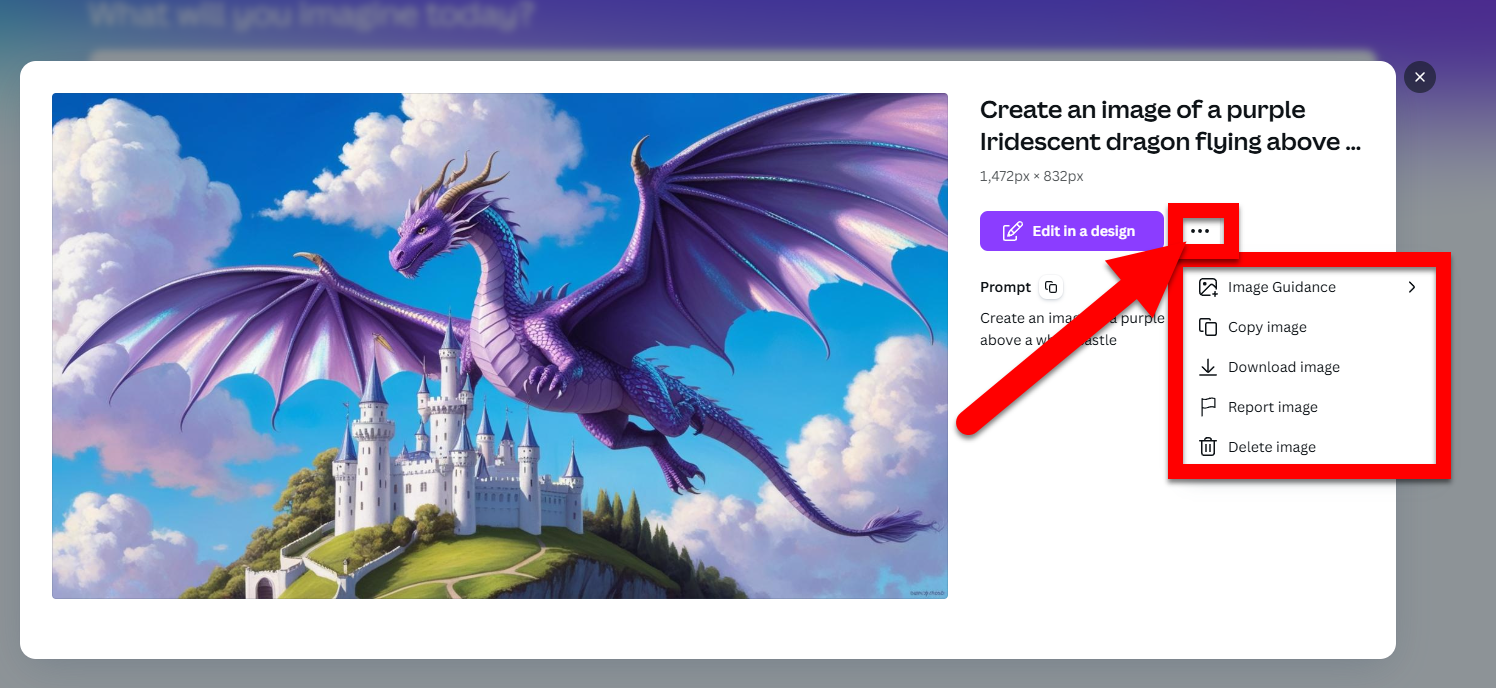
Click the image you want to keep and the 3 dots to copy or download your image.
Head over to Canva and get creating!
If you want these directions in a Document, click HERE!
Using Mail Merge to create labels, certificates, documents, and emails is a huge timesaver for any teacher. Microsoft Word has it built in, Google uses an extension, and Canva has this option as well! Now you can make any of your awesome creations in Canva personalized with just a little work. Check out the following directions to start!
Create a Mail Merge in Canva:
Create (or even better use a template) a certificate, document, or whatever you want as your template for your mail merge in Canva.
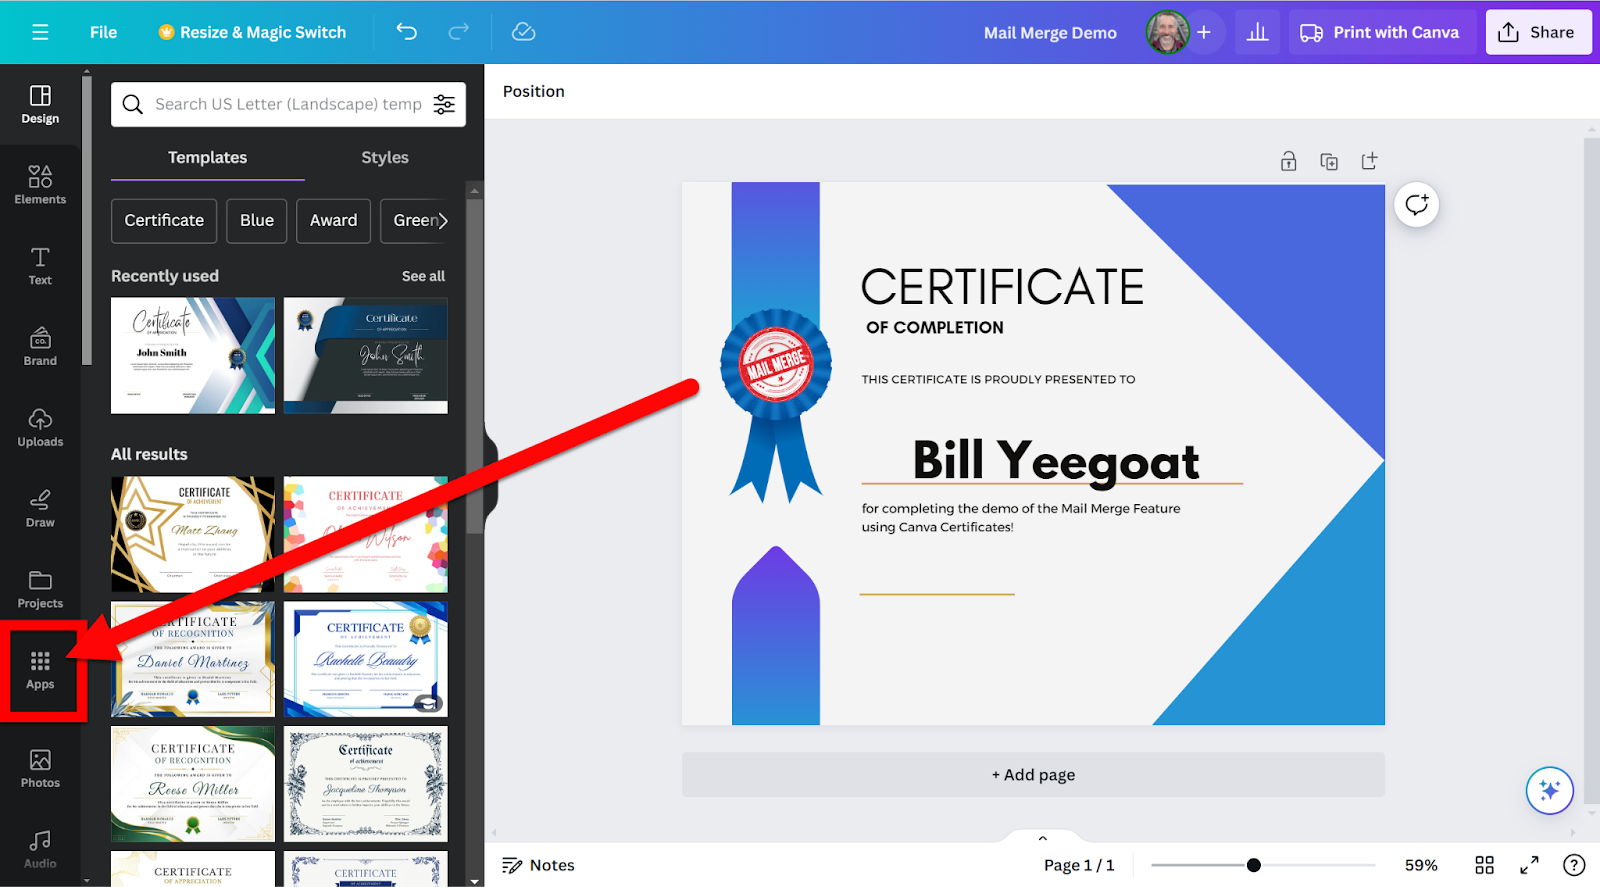
Once you are ready click on the “Apps” icon on the left.
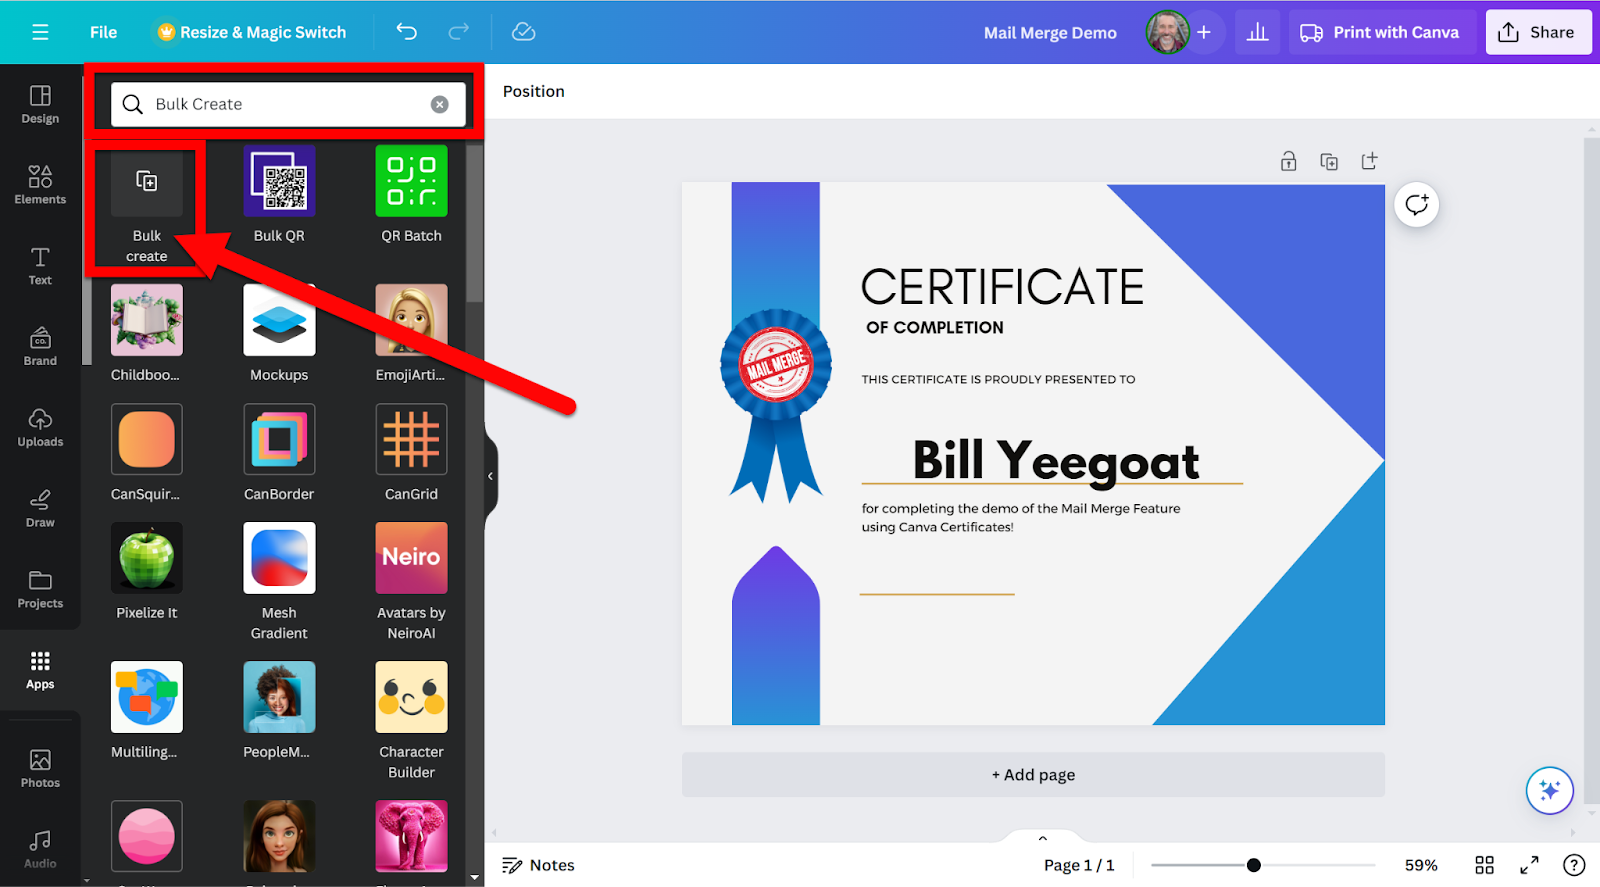
Search for “Bulk Create”. Click on the app that shows up.
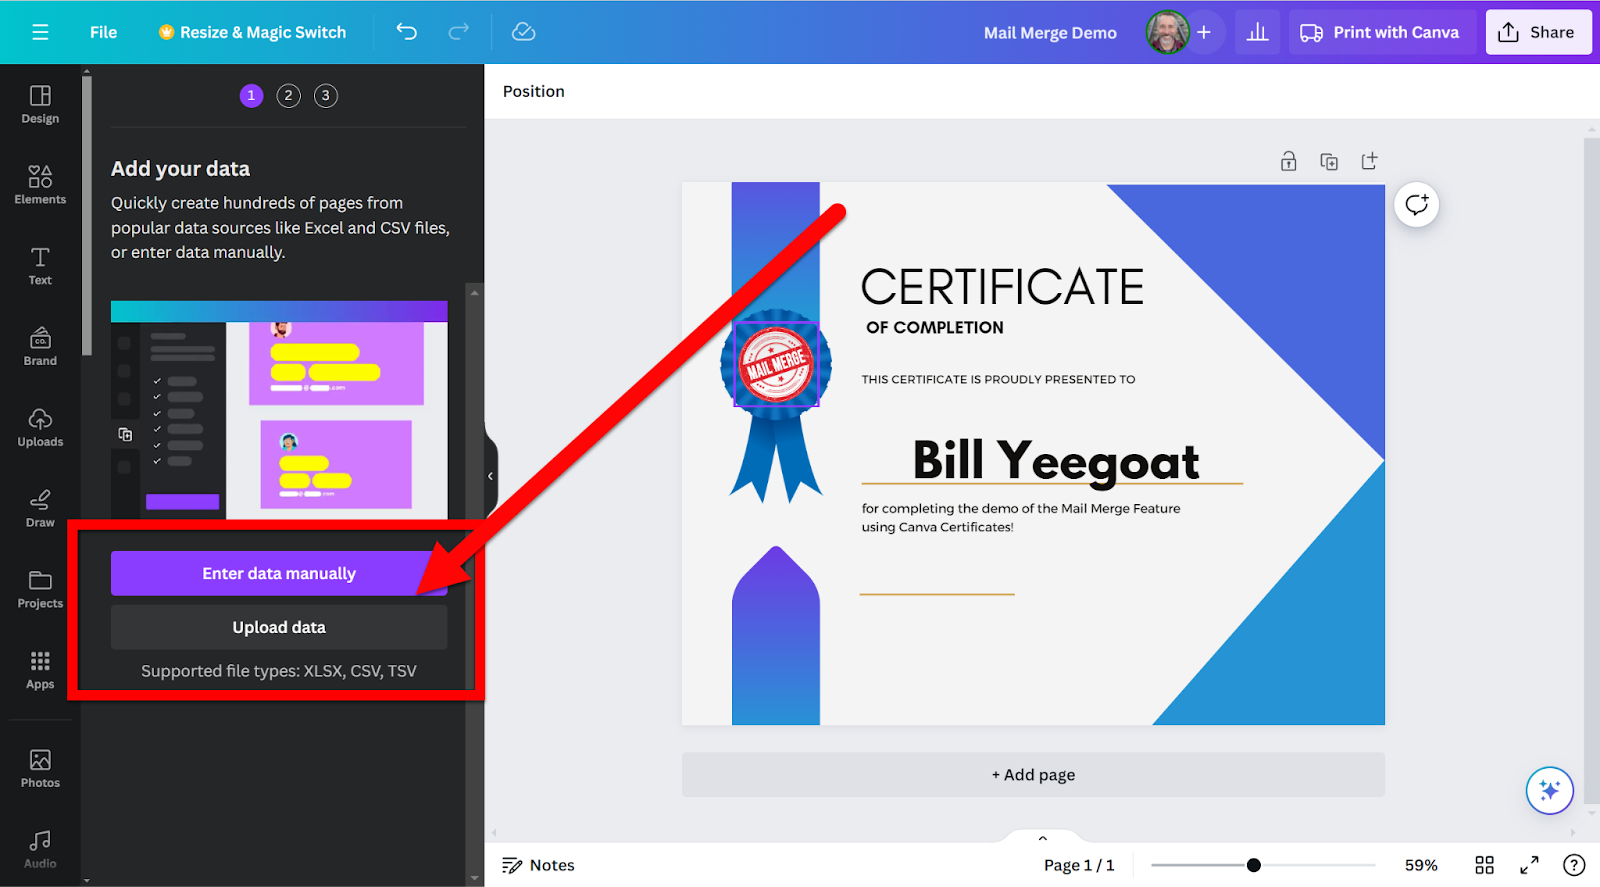
Choose to enter your data manually or upload a file (whichever you wish).
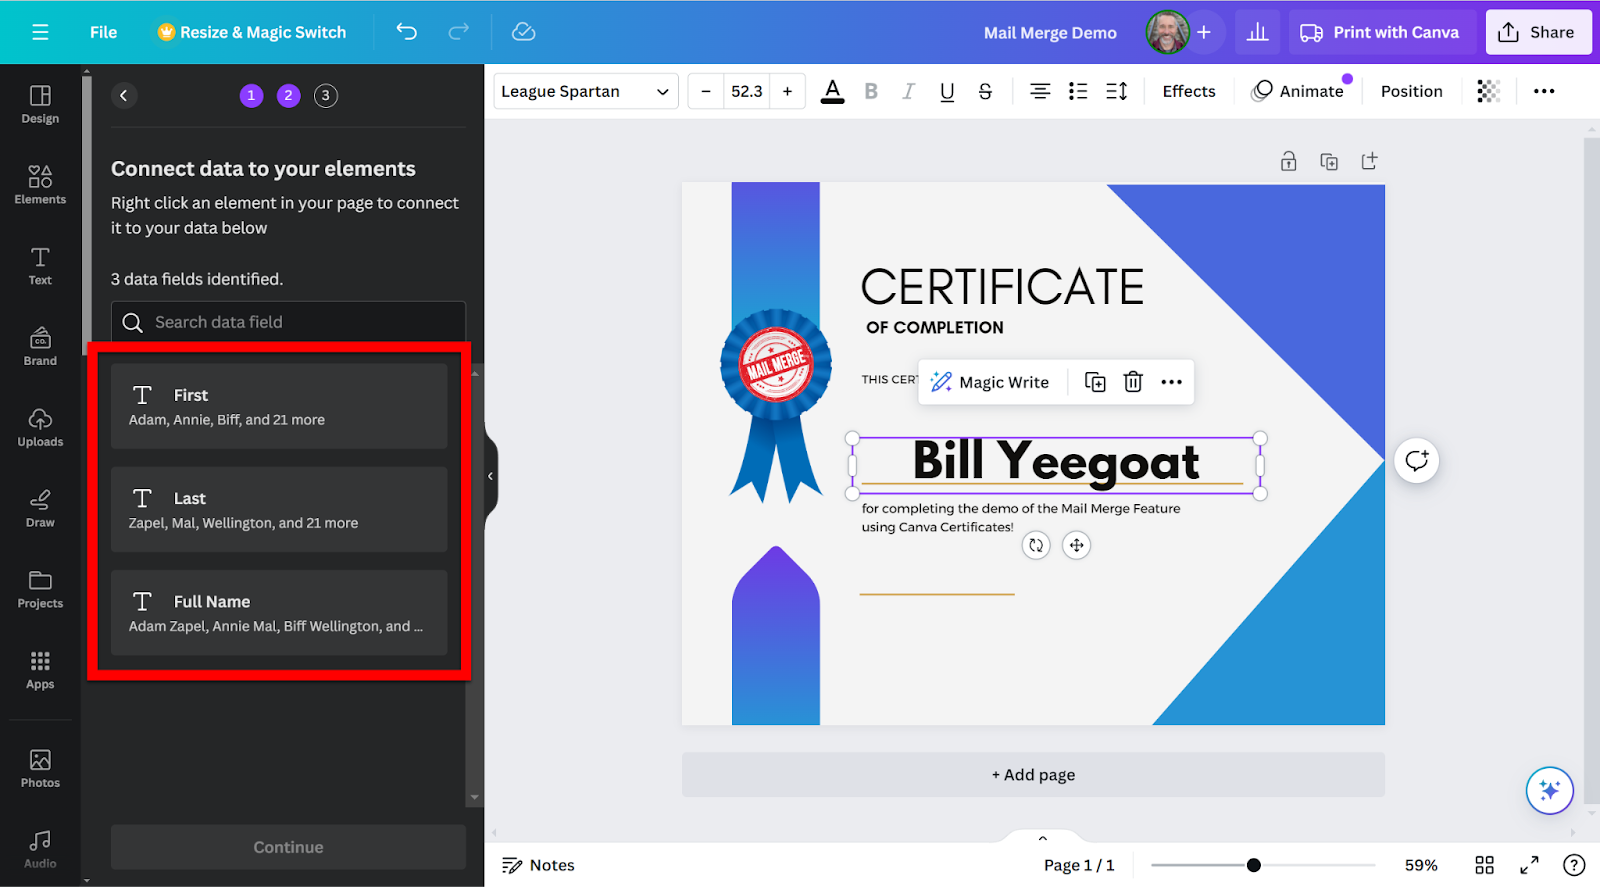
I would use Upload a file so I can reuse the data set with other files. You just need to create a spreadsheet with column headers that define the data you want merged. My file has columns for First Name, Last Name, and Full Name so I have options in later merges. Then you just need to download this as a CSV file.
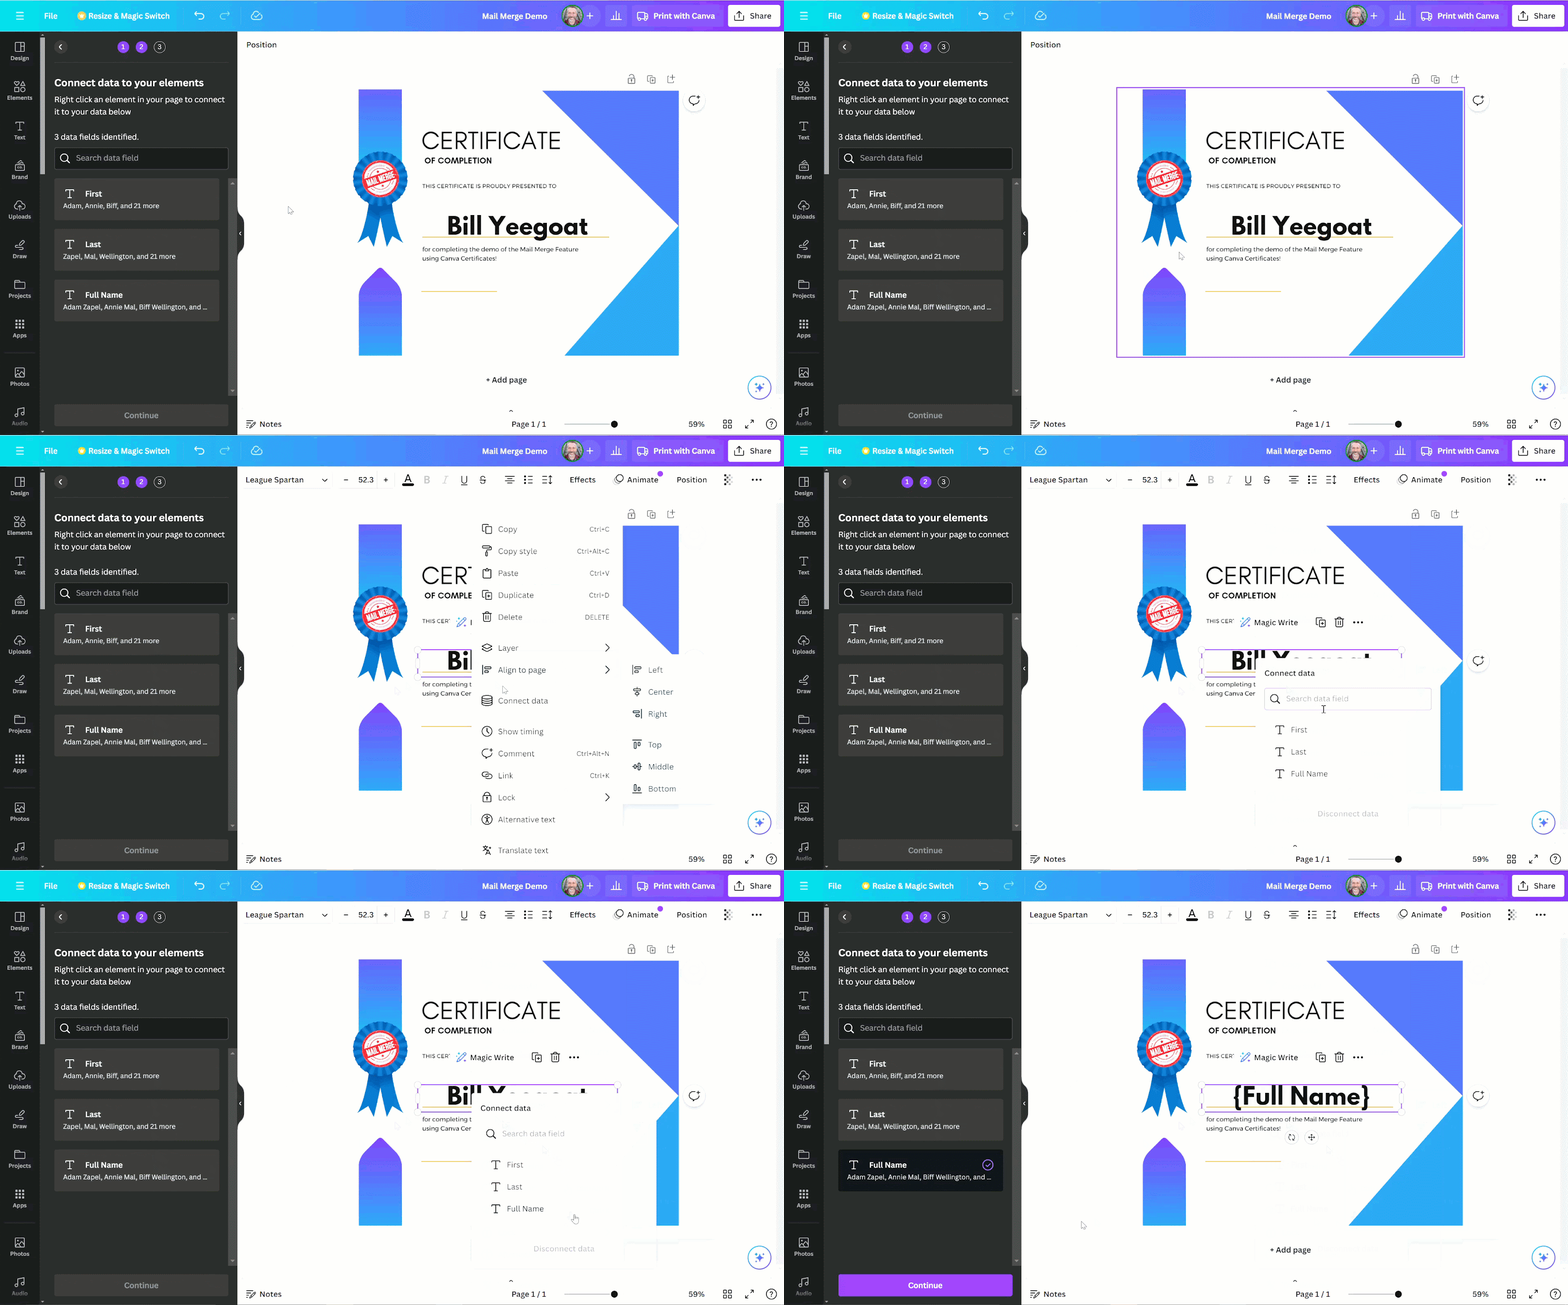
All you need to do is right-click where you want the name (or other merge info) inserted and choose “Connect Data”. Then select the column of your data you want to insert.
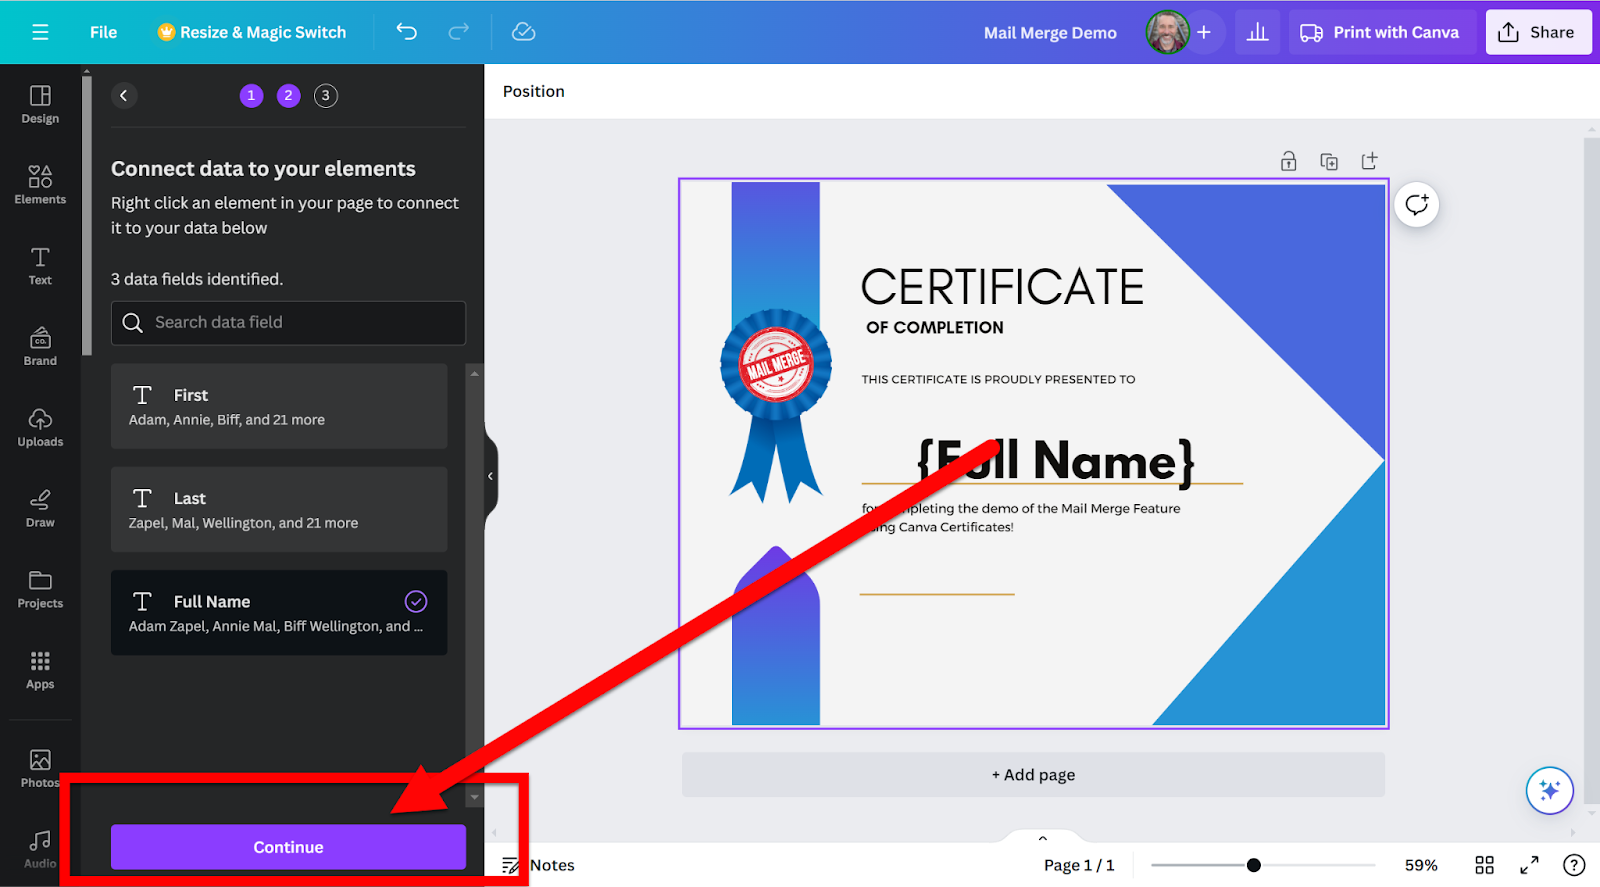
Click on “Continue”.
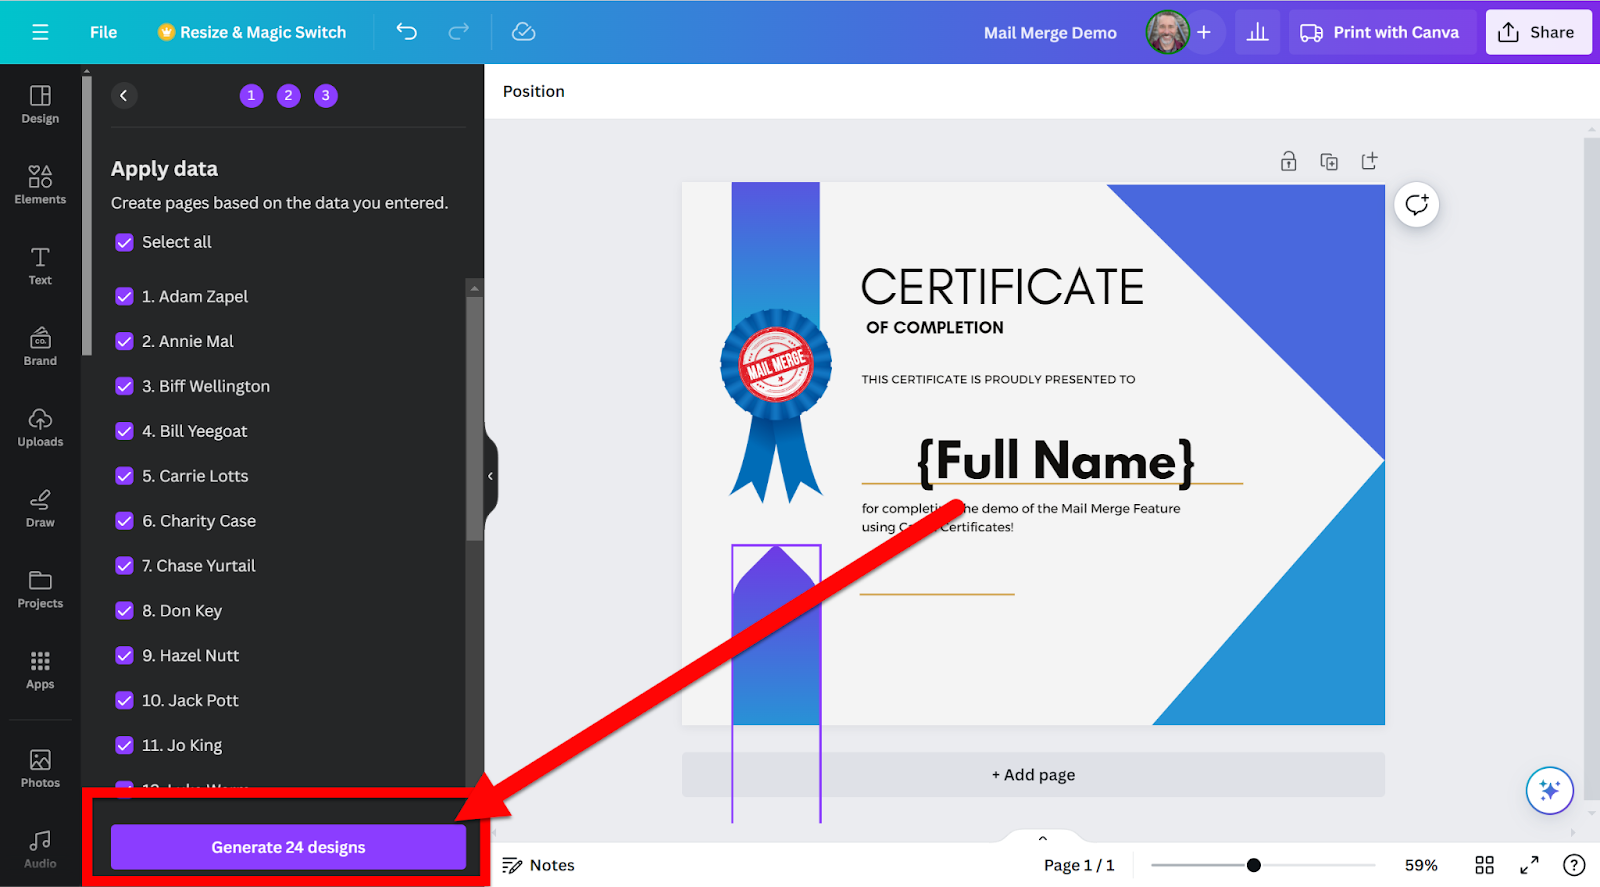
You will see all the items that will be merged. Click “Generate xx designs” to see the merged file.
Now you can print this and have a copy personalized for your needs! This merged file is also saved in your library for later use.
Click HERE to see a Video Walkthrough of all these steps!
Head to Canva and start making your awesome personalized creations!
If you want these directions in a Document click HERE!