Showing posts with label Text. Show all posts

Wednesday, May 6, 2026

Satellite Text Images


NASA has a cool site that lets you create words from letters derived from satellite images. Each letter is a satellite image that has an object shaped like the letter. This is worth taking a look at and creating a text masterpiece!


Create Text:

  1. Head over to science.nasa.gov/specials/your-name-in-landsat.

  2. Enter the text you want created in the box at the bottom of the page.


  1. Click “Enter” to see your creation. If you want it changed, click “Enter” again to recreate.


  1. If you want to keep it, click the Download icon and keep your creation as an image. You can also click the QR code icon to share this image with a QR code.


Start creating some awesome satellite-generated text images!


If you want these directions in a document, click HERE!


Tuesday, May 27, 2025

Fake Text Animator

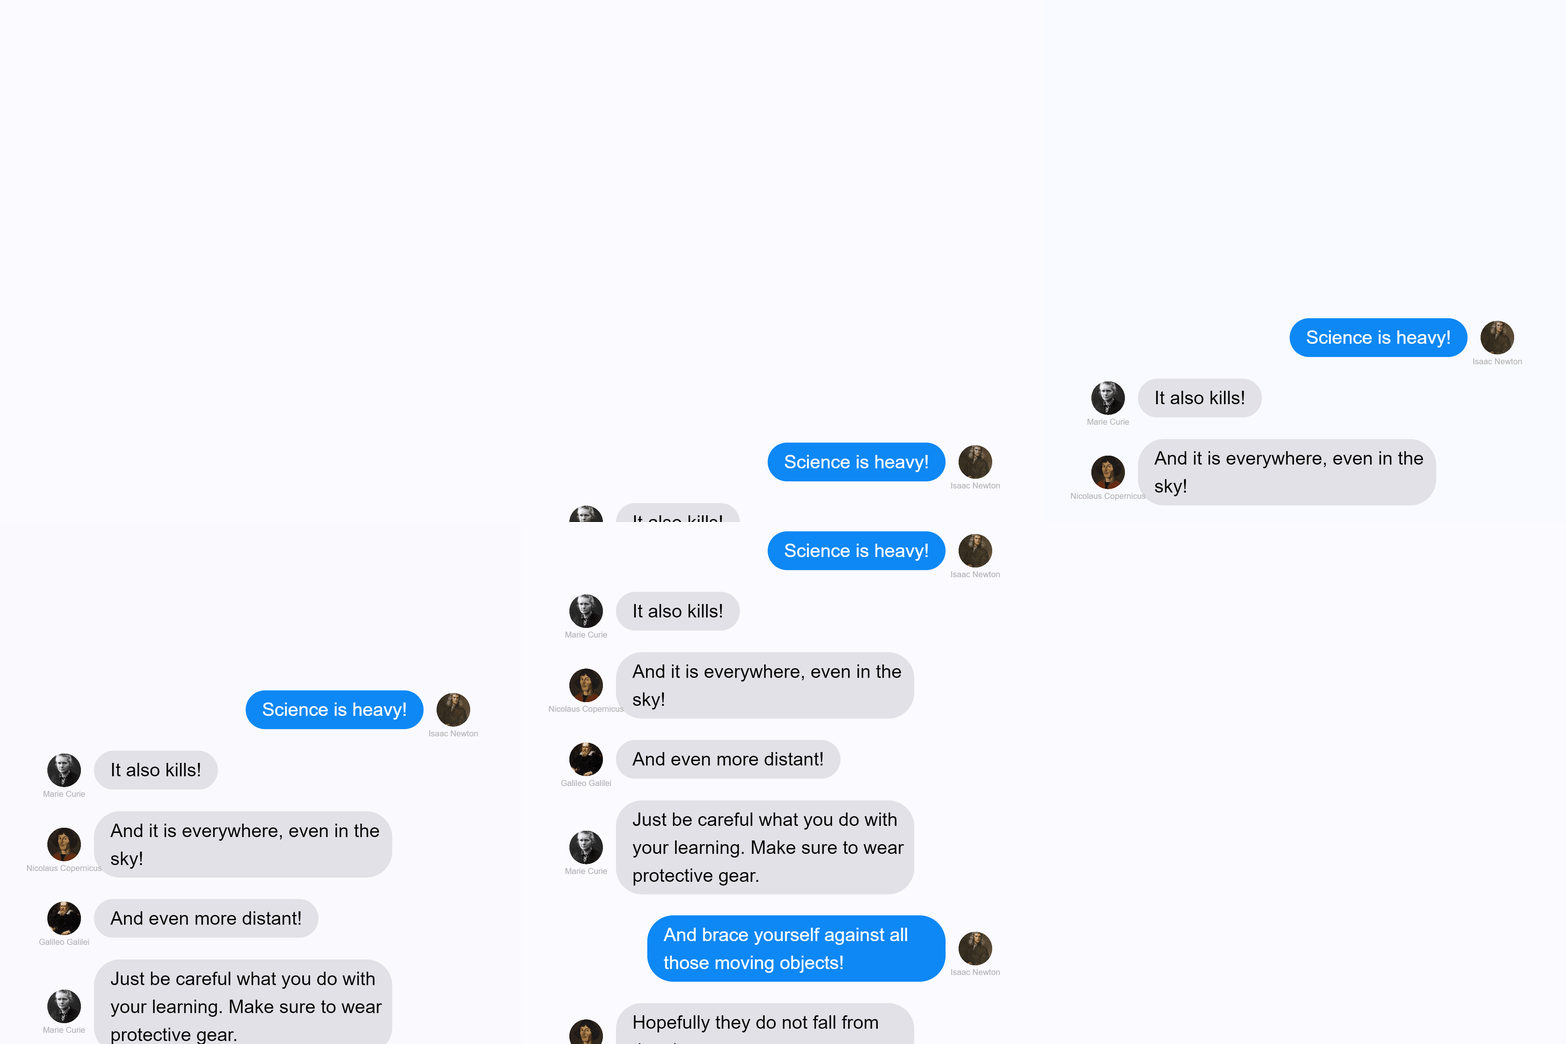
Let’s face it, no one talks on the phone anymore. Text messaging, whether through text, Snapchat, WhatsApp, or other apps, is how students communicate. There is a great website that allows you to create fake message communications with your choice of names, and then you can download these as a video or GIF. This is a great tool for showing characters in a story interacting, science gurus explaining a topic, and many other instructional uses!


Create a Text Communication:

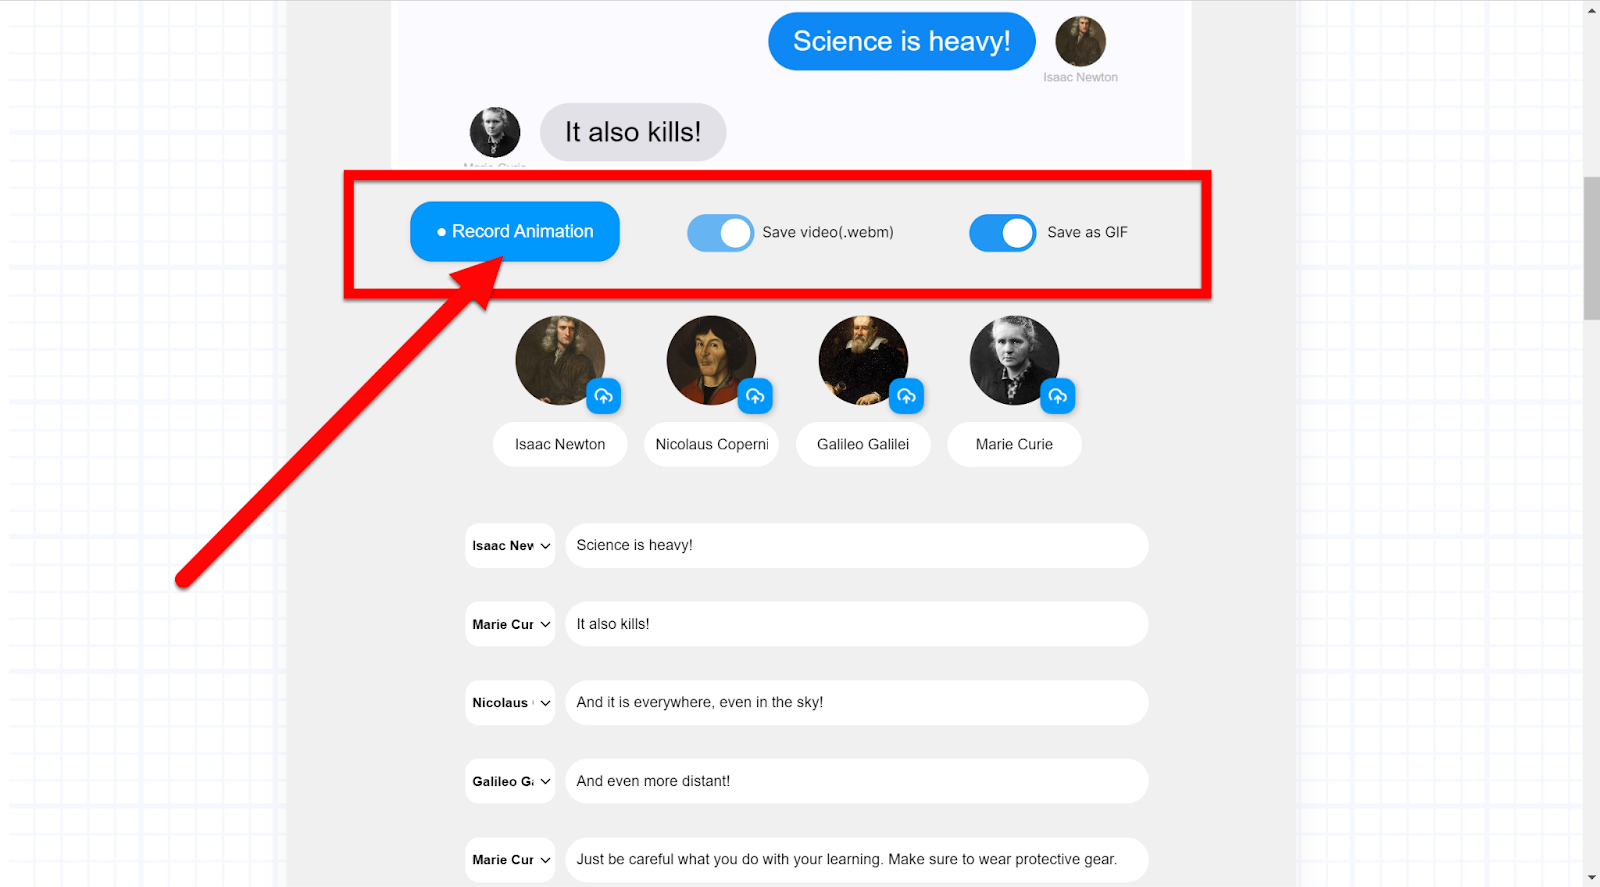
  1. Head over to motion-tools.com/chat-animator/


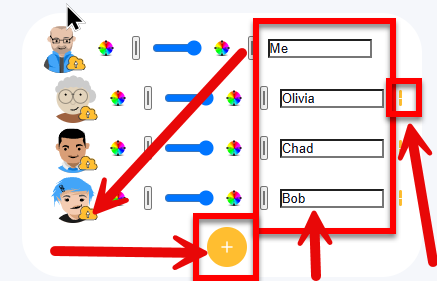
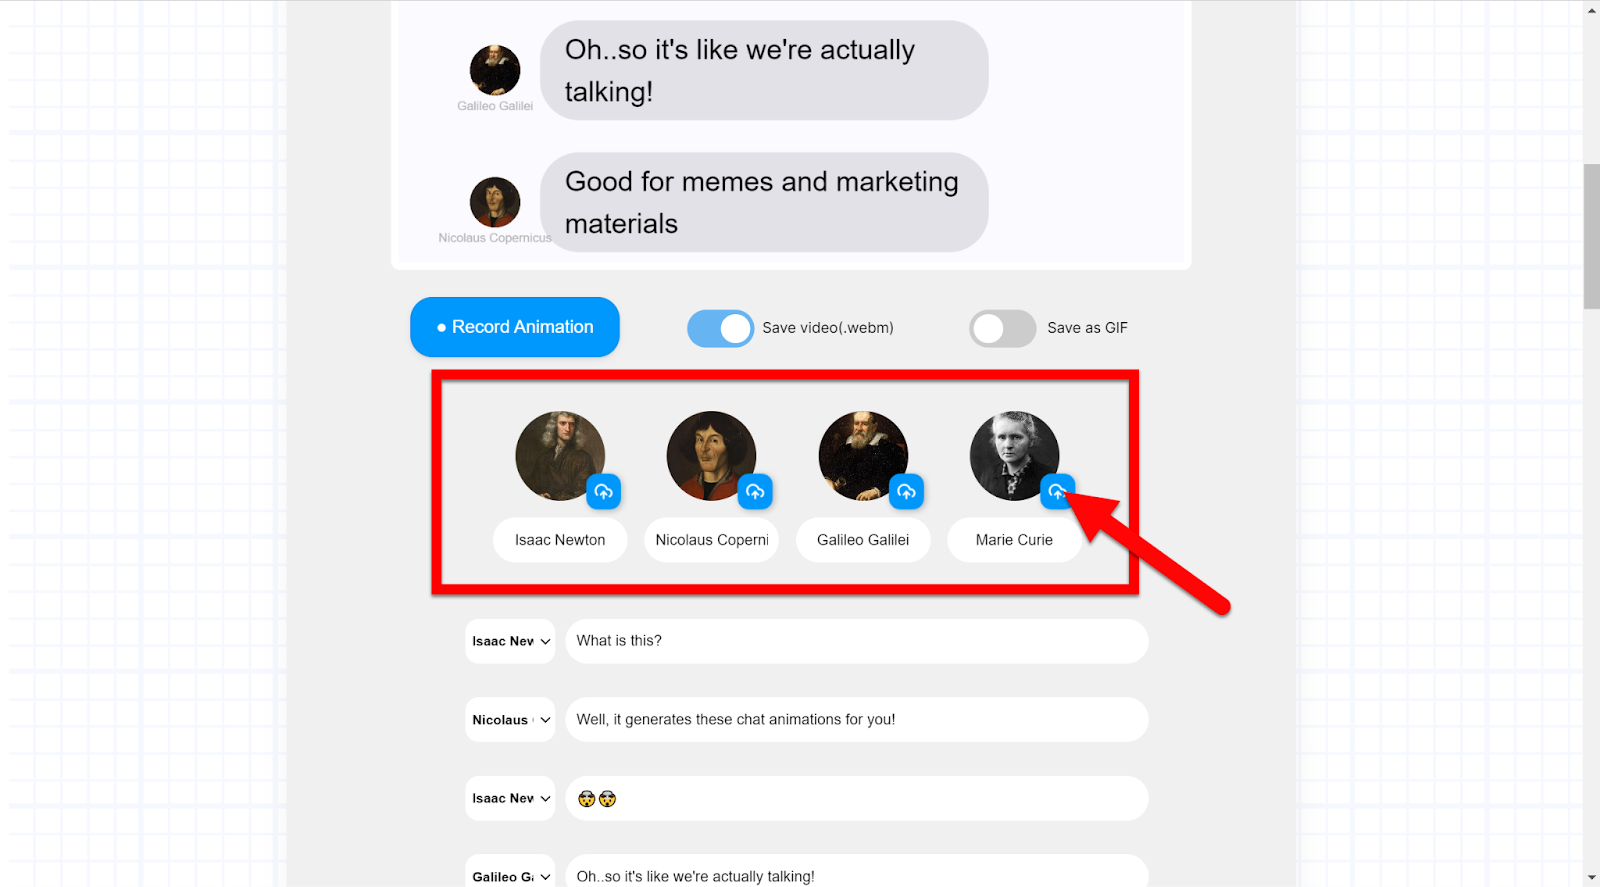
  1. Scroll down to the member list and name the participants that you need. 

    • The top member will be the chat placed on the right side. 

    • Clicking the yellow icon to the right deletes the member.

    • The yellow plus icon adds a member. 

    • You can also upload an image for their avatar by clicking the yellow cloud icon on the member.


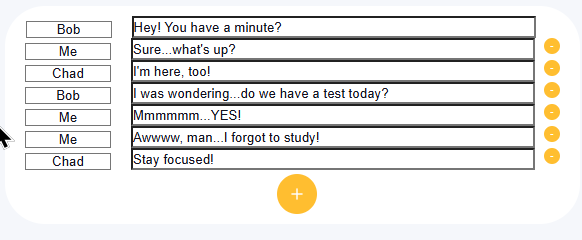
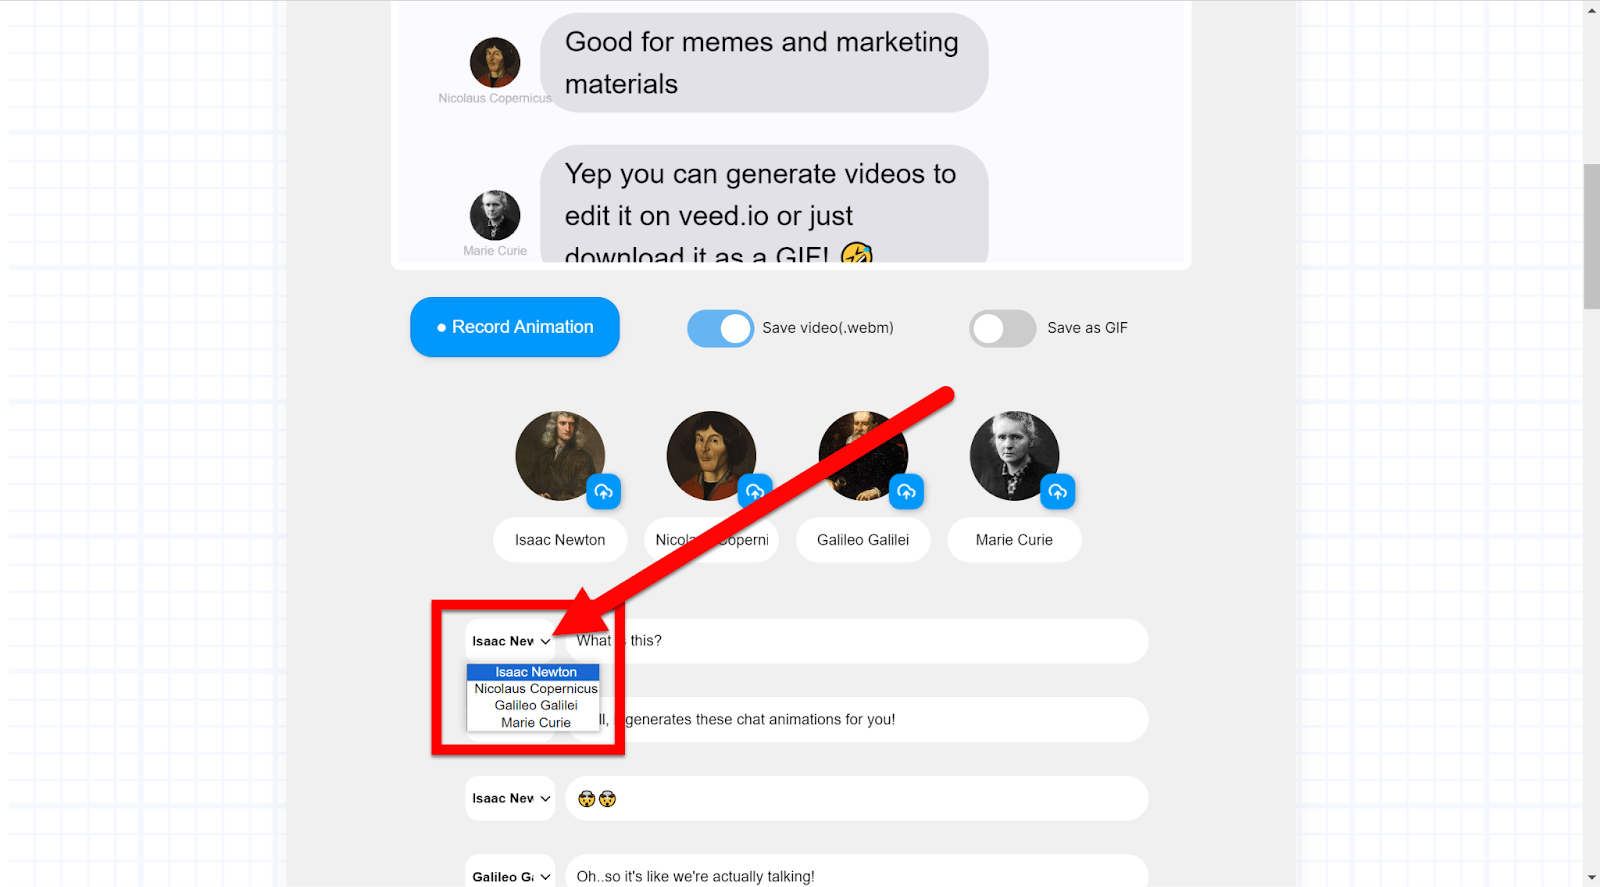
  1. Then work on the conversion they may have below using the dropdown for the character and entering text in the box to the right.


  1. Do this to the next one below as a response, and repeat working down for each next response.

    
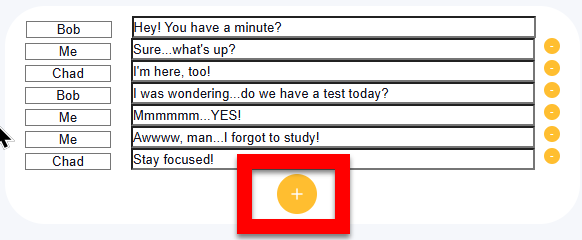
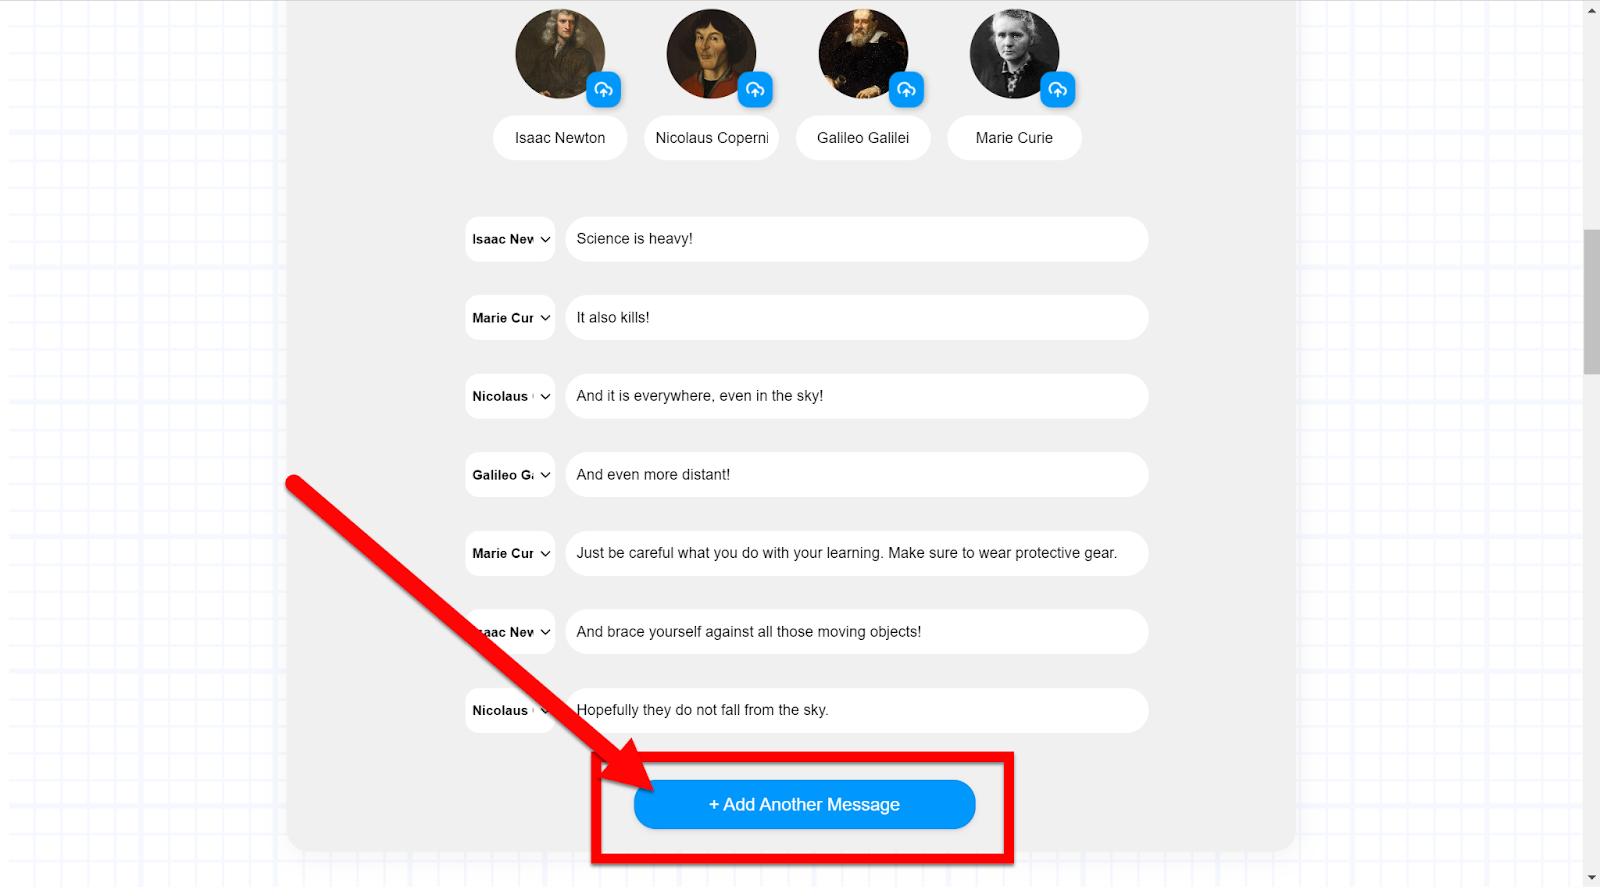
  1. If you need more messages, click the Plus button.


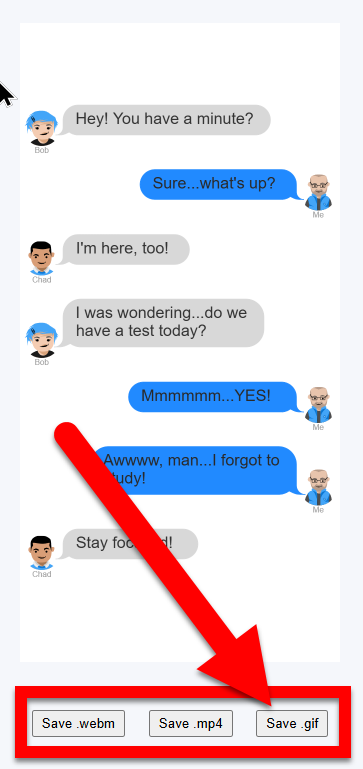
  1. When you are done, choose how you want to save this. You can save it as a video or a GIF. Keep in mind that GIFs will play in any Document, Slide, or anywhere images can be used. Videos will require tools that can play videos (such as Slides or standalone videos). I suggest clicking the GIF button just to have it. The video will process and then prompt you to download. 


Now you can add this to a project or share in any way you want!


If you want these directions in a document, click HERE!

Thursday, April 11, 2024

Fake Text Animator

Let’s face it, no one talks on the phone anymore. Text messaging, whether text, SnapChat, What’s App, or other apps is how students communicate. There is a great website that allows you to create fake message communications with your choice of names and then you can download these as a video or GIF. This is a great tool for showing characters in a story interacting, science gurus explaining a topic, and many other instructional uses!


Create a Text Communication:

  1. Head over to chat-animator.com

  2. Scroll down to the member list and name the participants that you need. You can also upload an image for their avatar.


  1. Then work on the conversion they may have below using the dropdown for the character and entering text in the box to the right.


  1. Do this to the next one below as a response, and repeat working down for each next response.

  2. If you need more messages, click the “Add another Message” button.


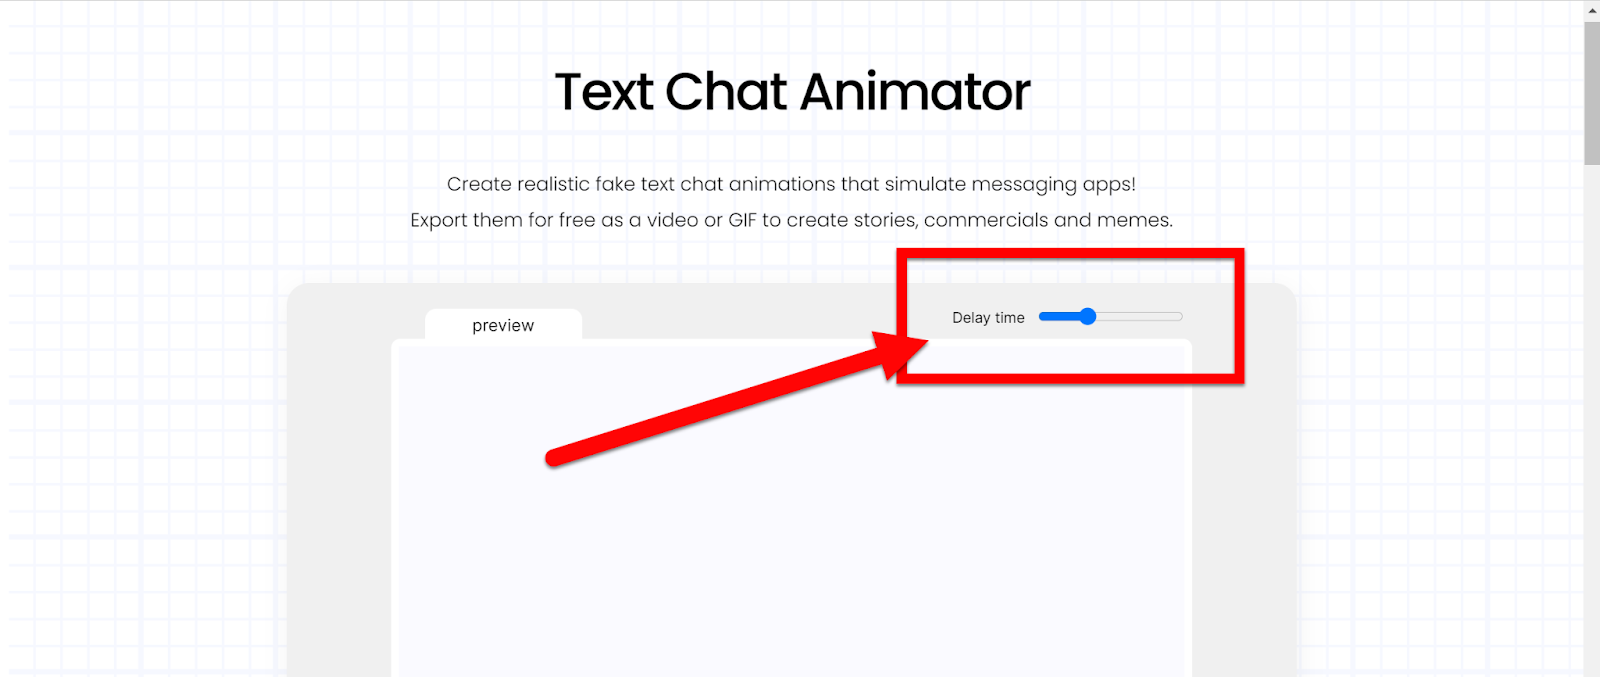
  1. You can change the speed the conversations move at the top.


  1. When you are done, choose how you want to save this. You can save it as a video or a GIF. Keep in mind that GIFs will play in any Document, Slide, or anywhere images can be used. Videos will require tools that can play videos (Slides or stand-alone videos). I would suggest clicking the GIF button just to do it. The video will process and then prompt to download. The GIF will show below (scroll down) and then you can right-click on it and “Save as”. Then you will have the video and the GIF.


Now you can add this to a project or share in any way you want!


Video Walkthrough HERE!


If you want these directions in a Document click HERE!


Friday, October 14, 2022

Curving Text with Adobe Creative Cloud Express

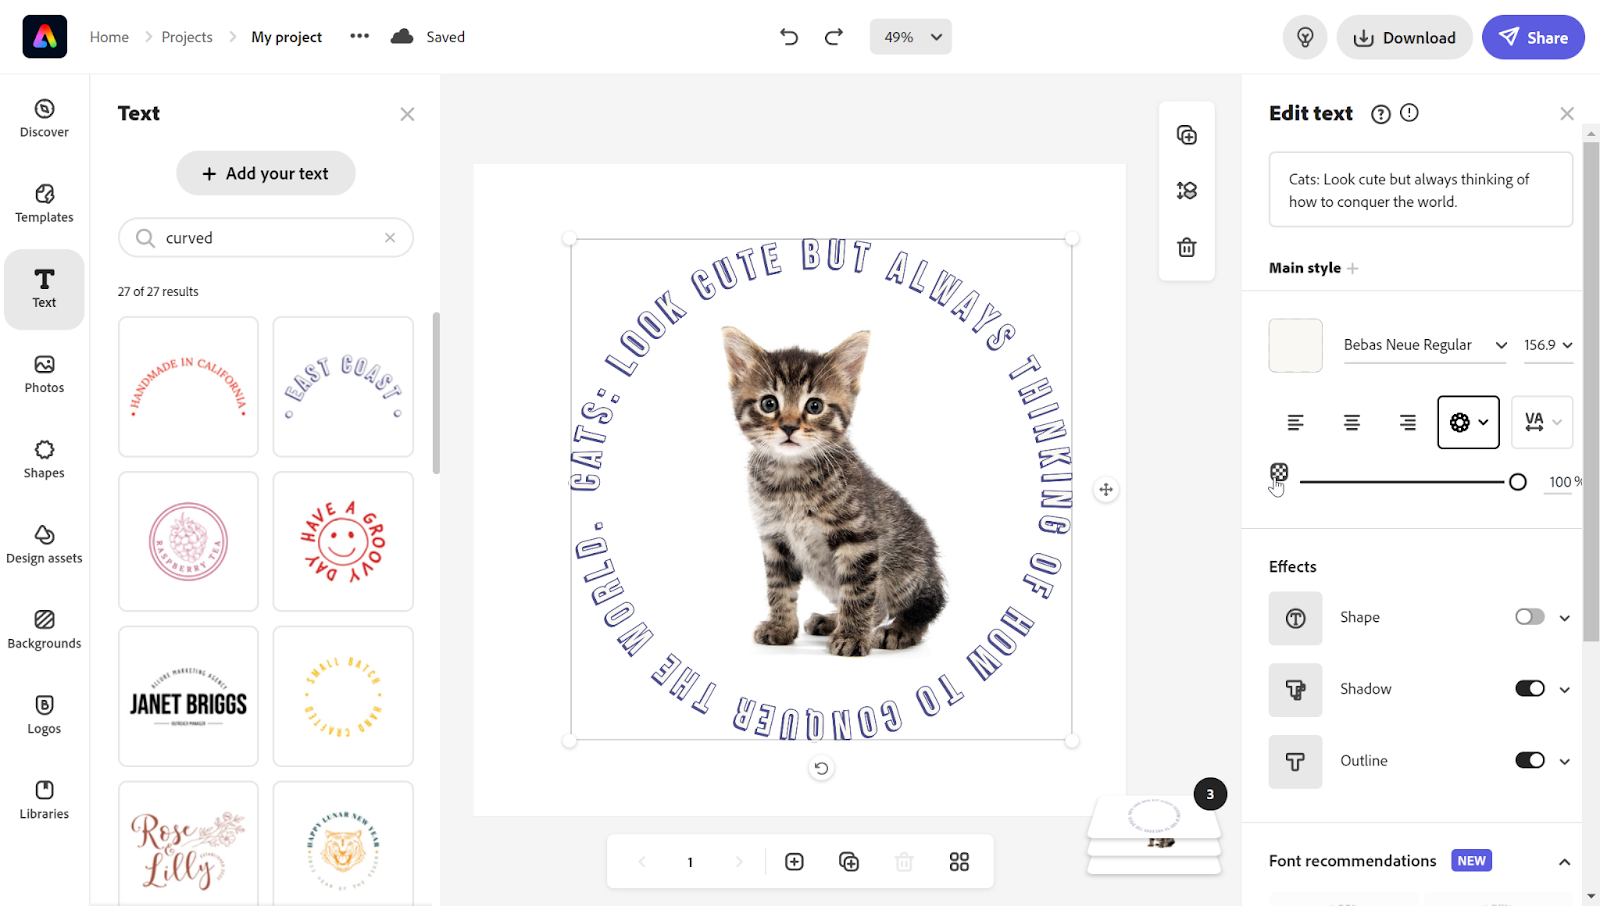
Adobe Creative Cloud Express is an easy tool that allows teachers and students to create awesome projects! You can easily create all sorts of visual projects like flyers, web pages, videos, images, graphics, and more. With the EDU account, we have access to all the cool tools, resources, and projects. Students can easily use Adobe Creative Cloud Express to create projects to demonstrate their learning. It has many awesome features. One of my favorites is the ability to add curved text to images. Check out how to do this below!


Start a Project:

  1. Head to https://express.adobe.com/sp/ and sign in with your Enterprise Account.

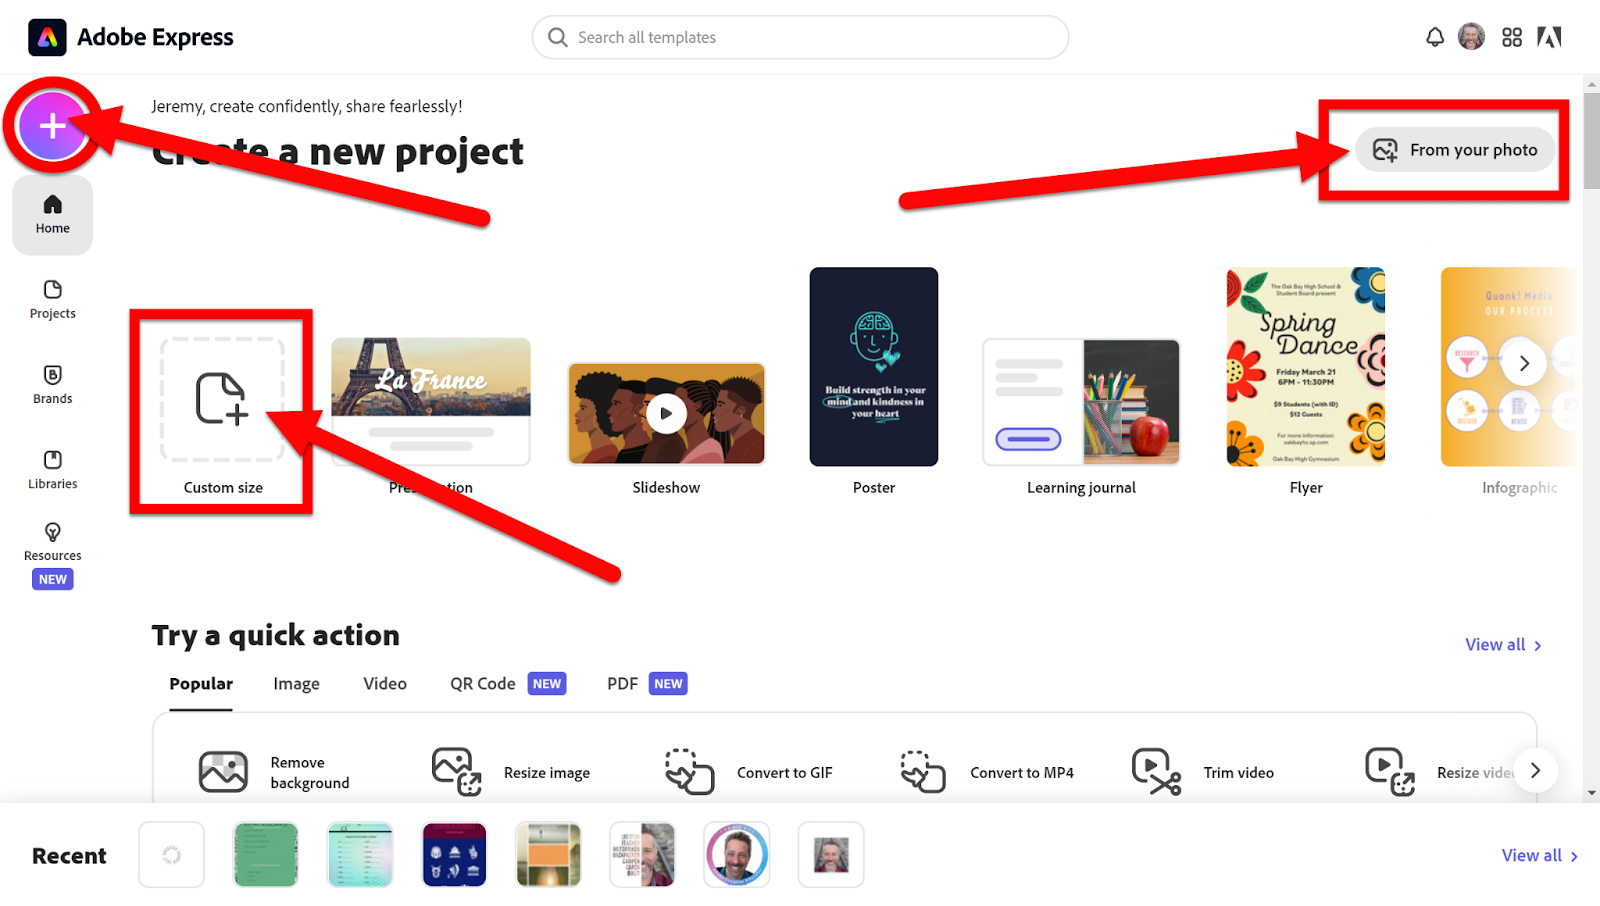
  2. On the main page, you will see a list of easy-to-create projects. You can also click on the purple “+” icon on the left to see more tools. Click on “Custom Size” or “From your photo” to make a quick project.

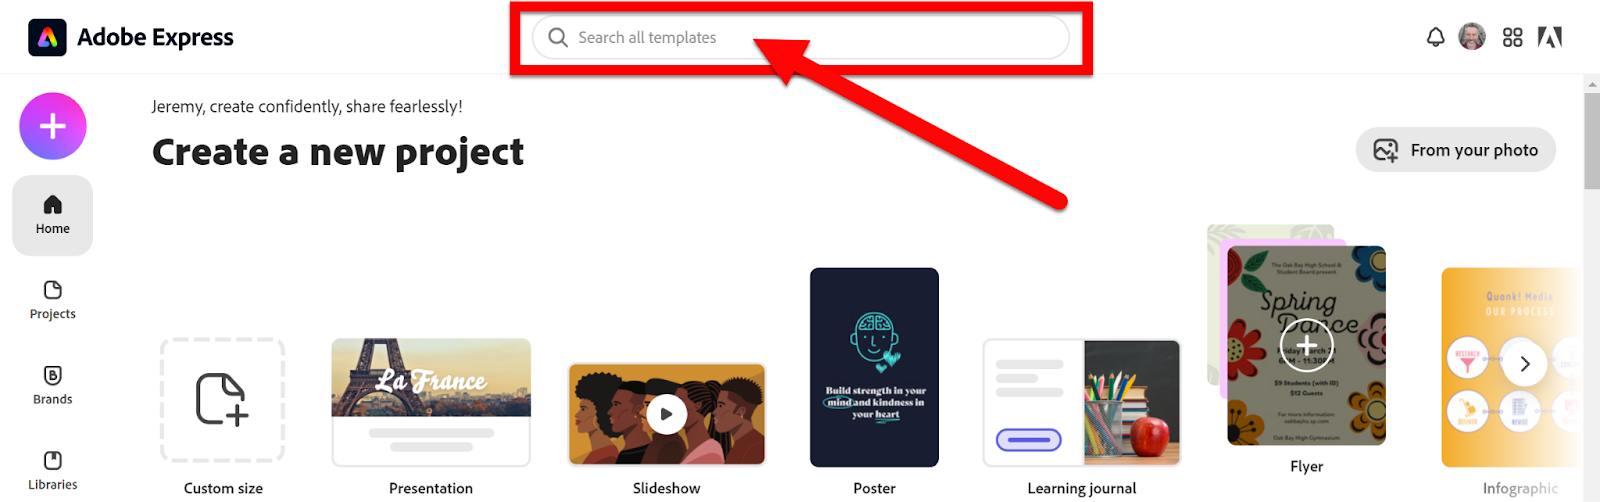
  1. In addition, you can search for templates with the Search Box or filter by project type.

  1. Choose one to use.


Add Curved Text

  1. Add some images or a background to your project.

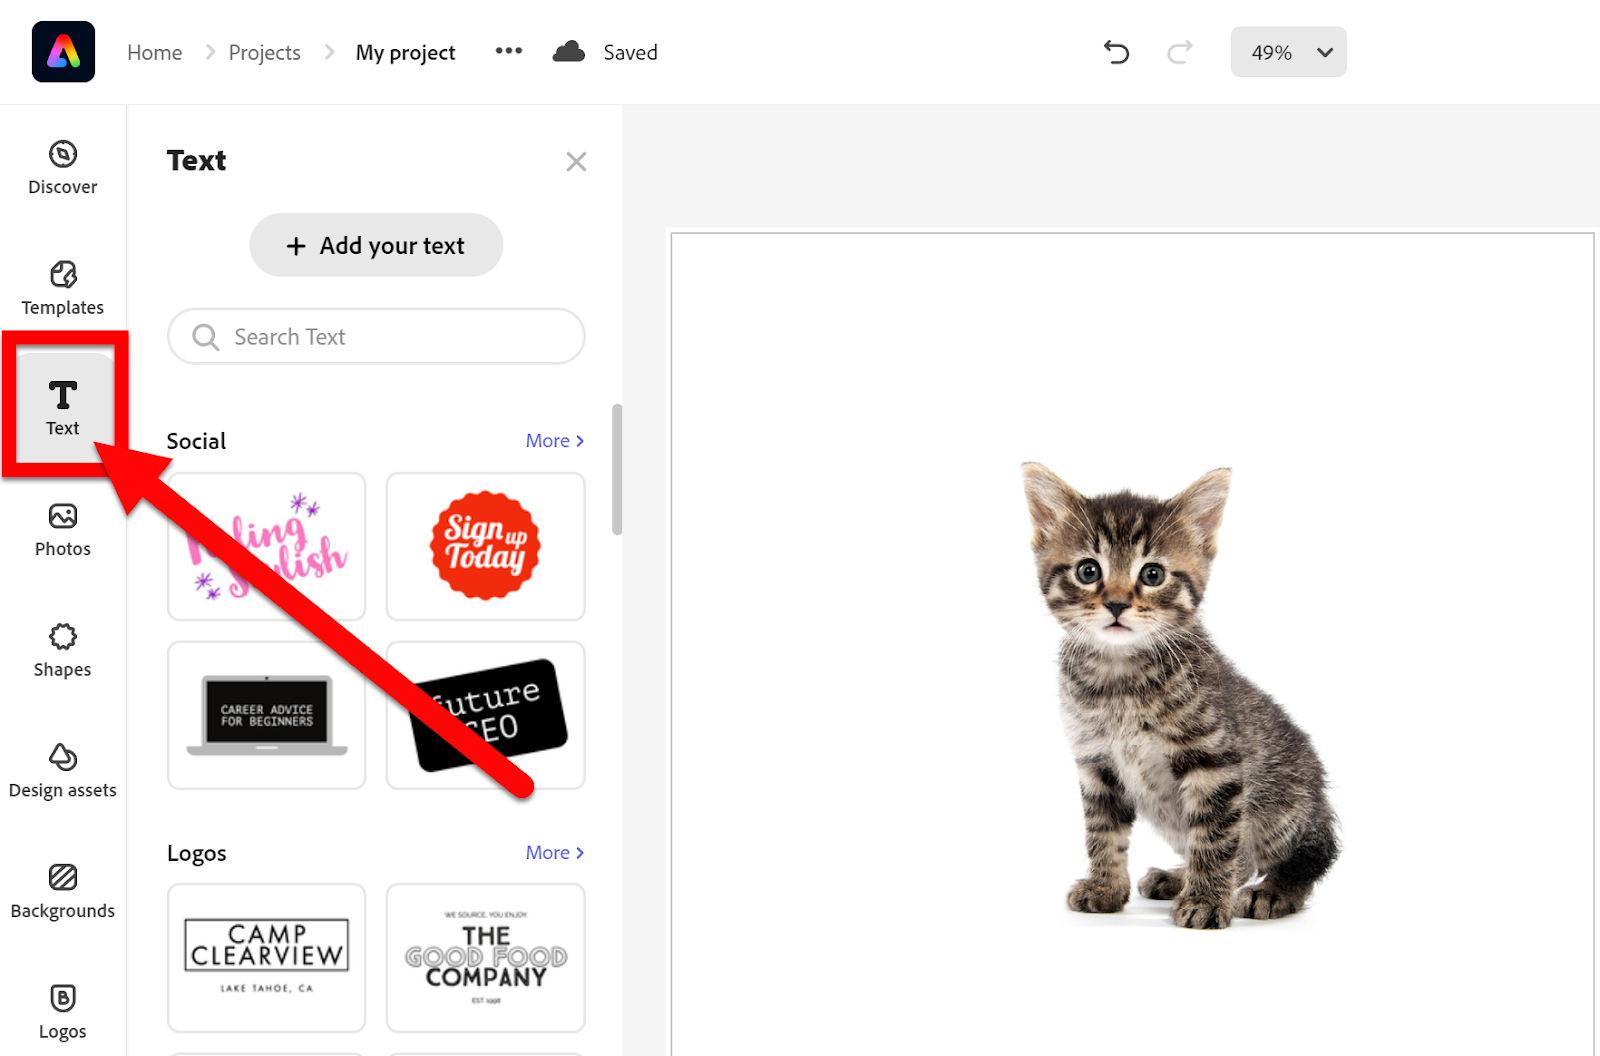
  2. Click on “Text” on the left.


  1. Type “Curved” in the search box and hit enter.
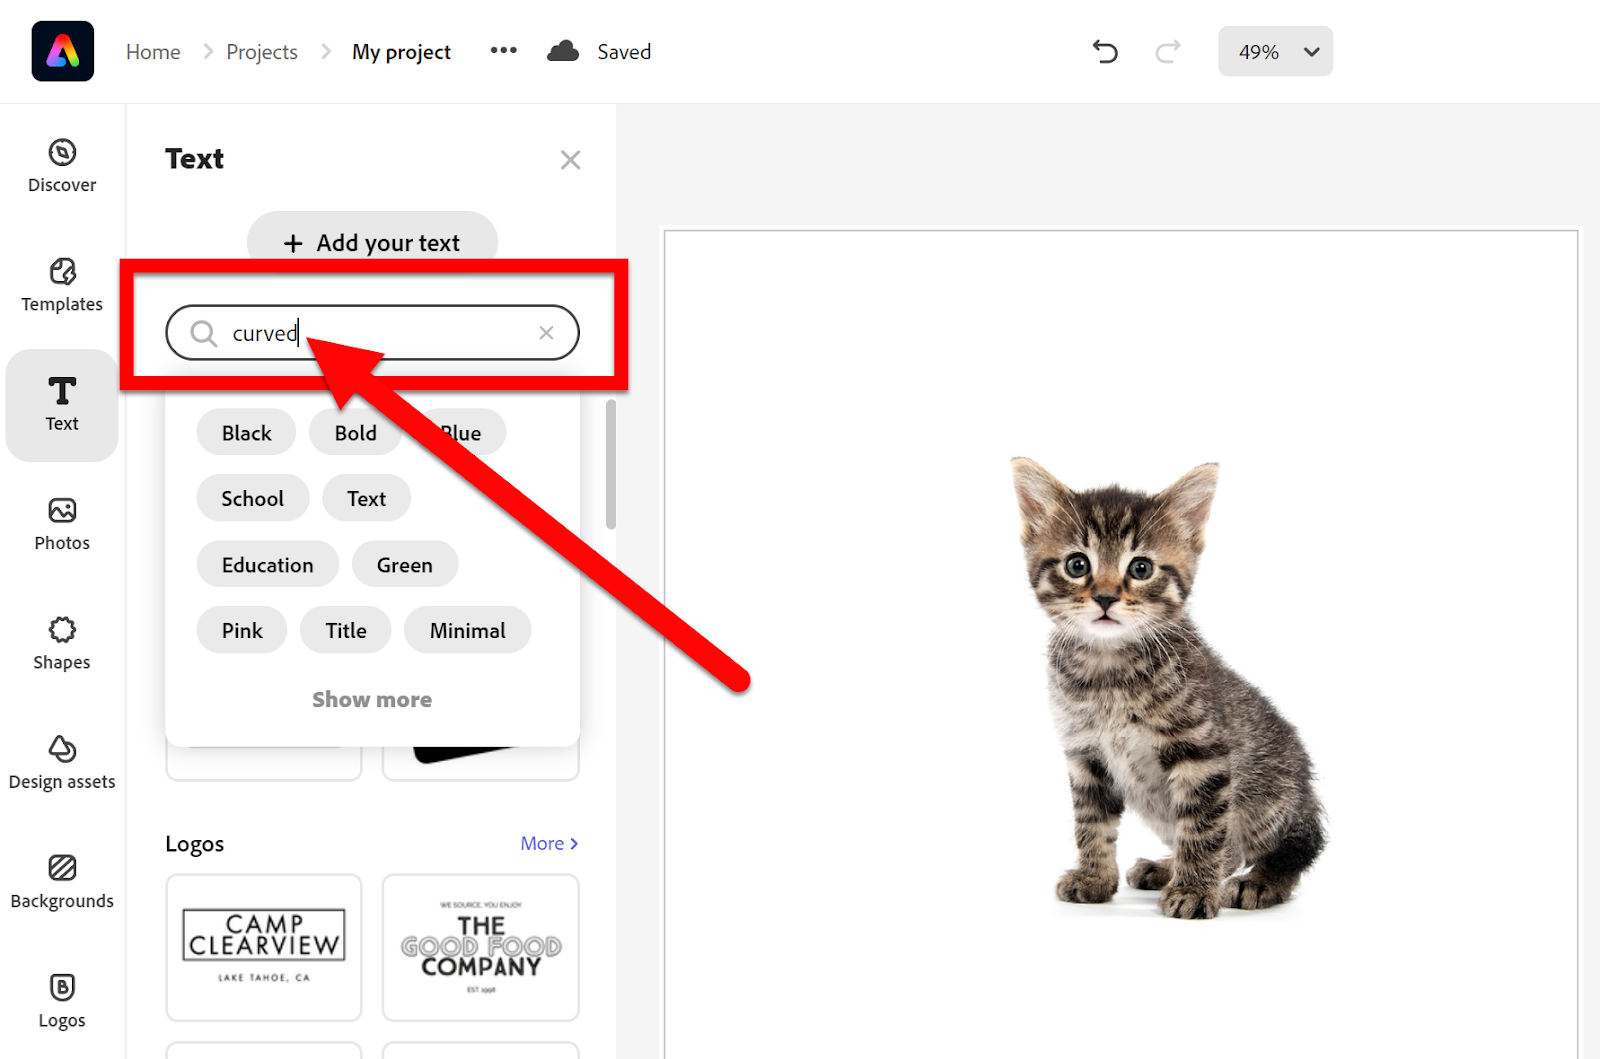

  1. Choose one of the curved styles at the top.
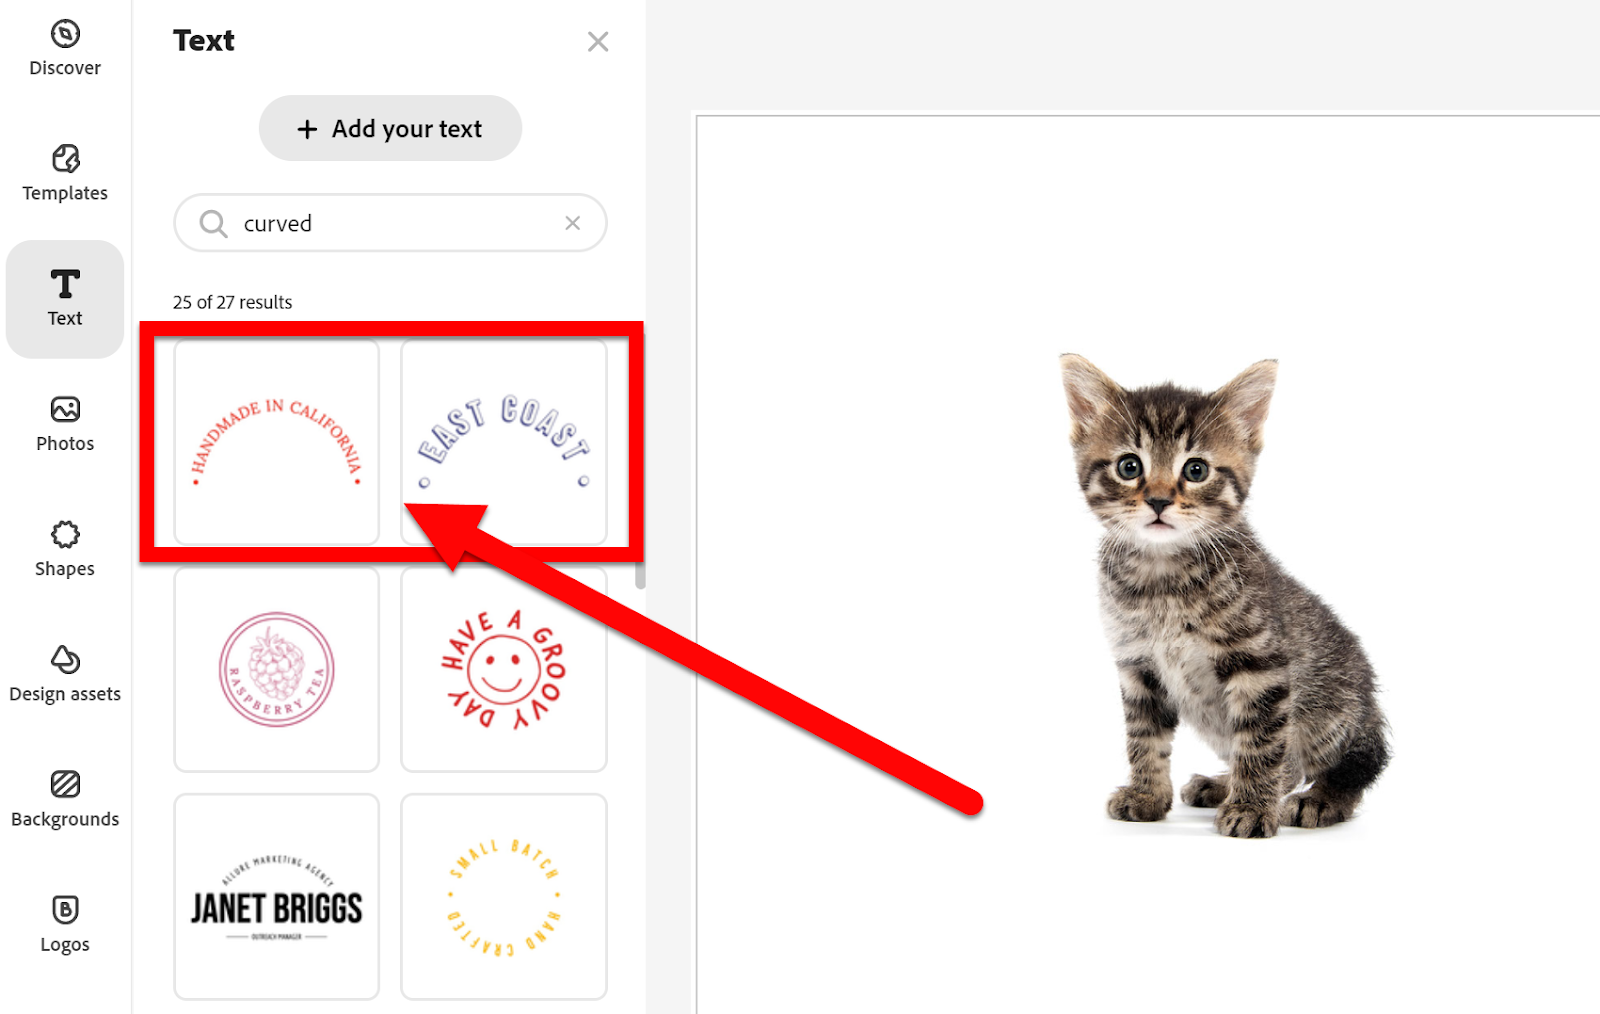

  1. Drag the inserted text to where you want it on your image.

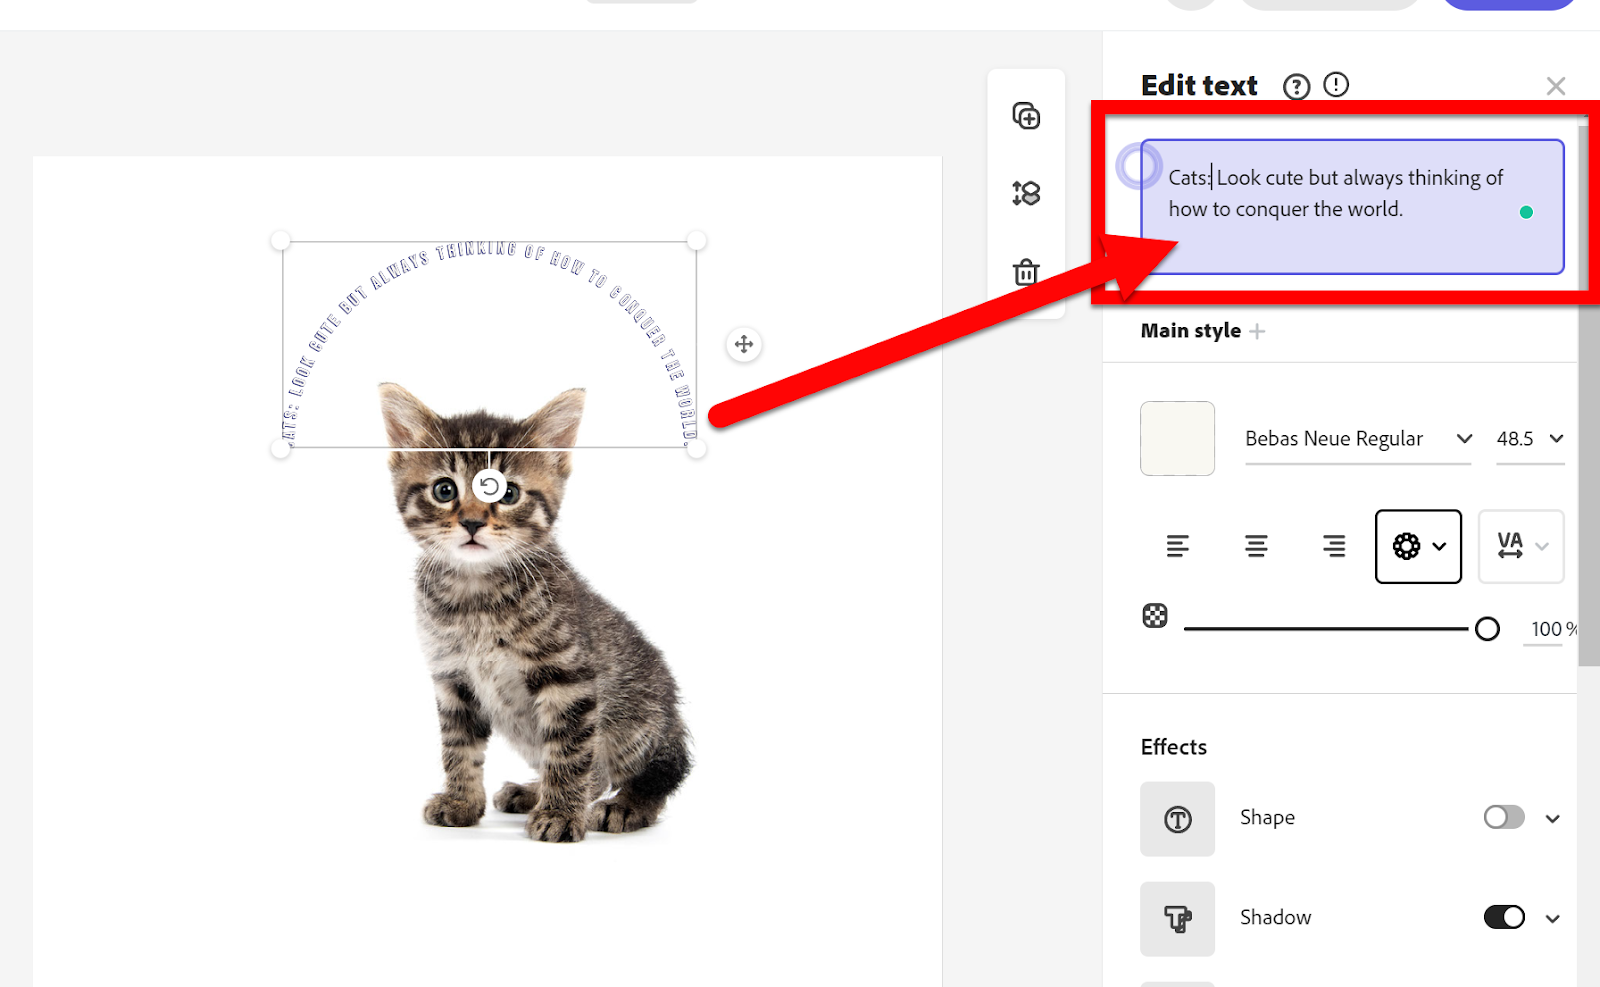
  2. Edit your text.


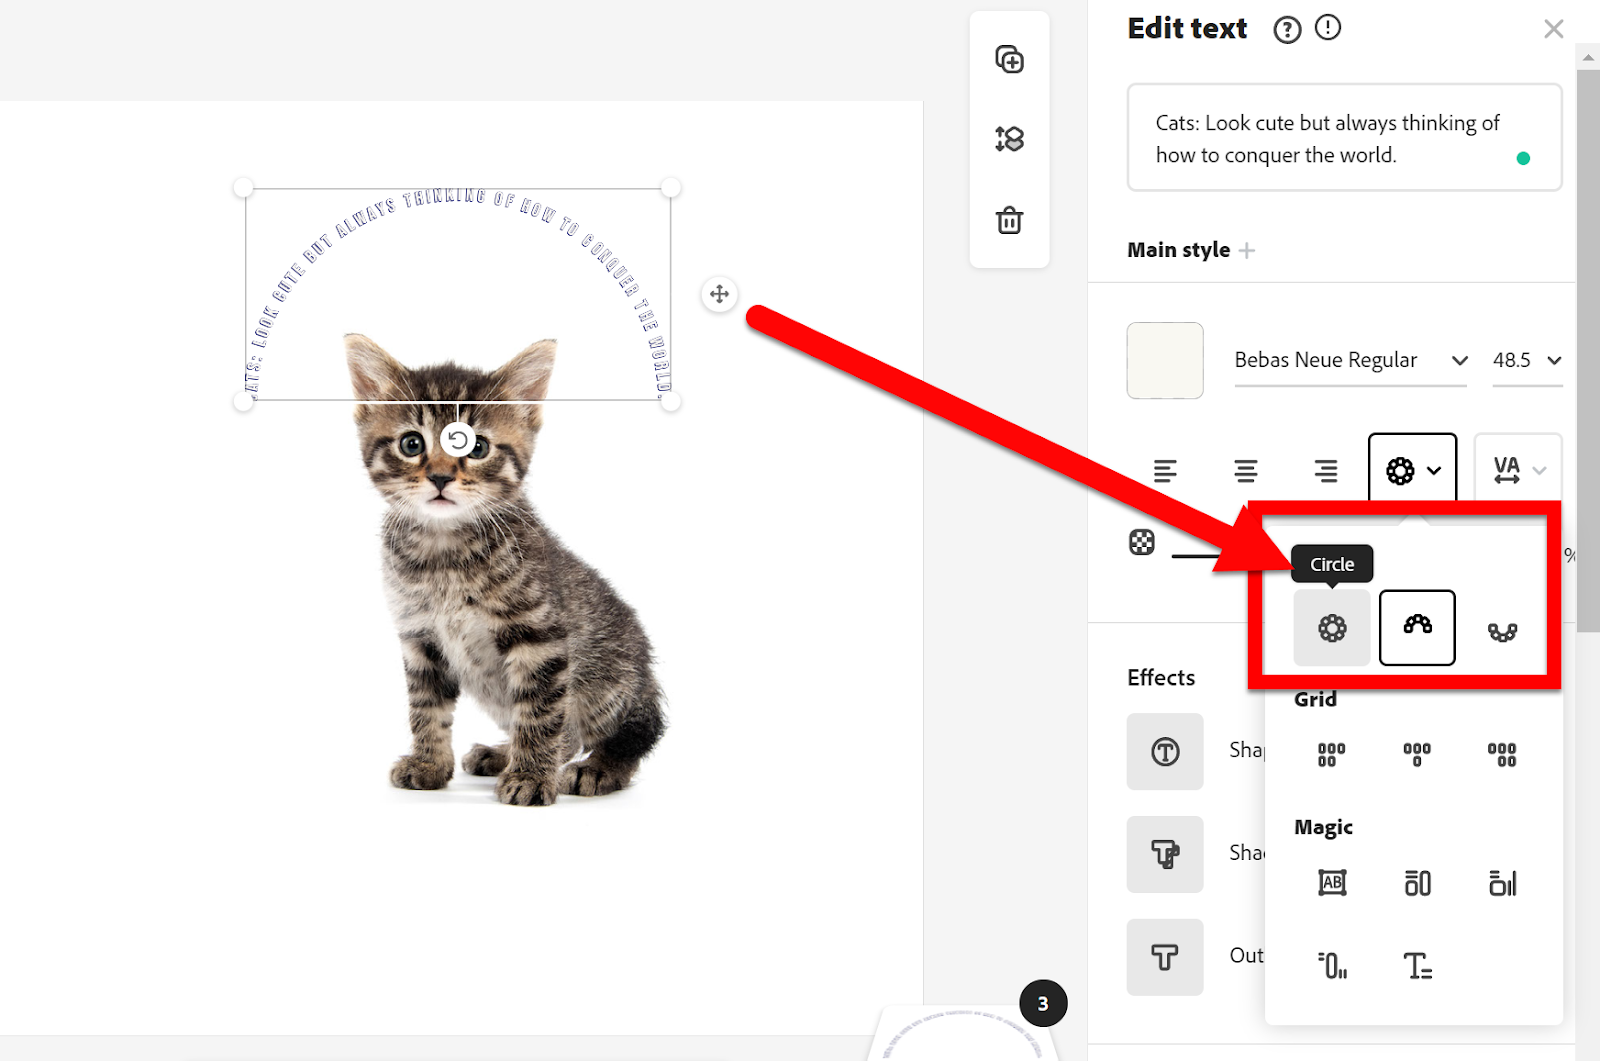
  1. Change the type of curve by clicking the Curved icon.
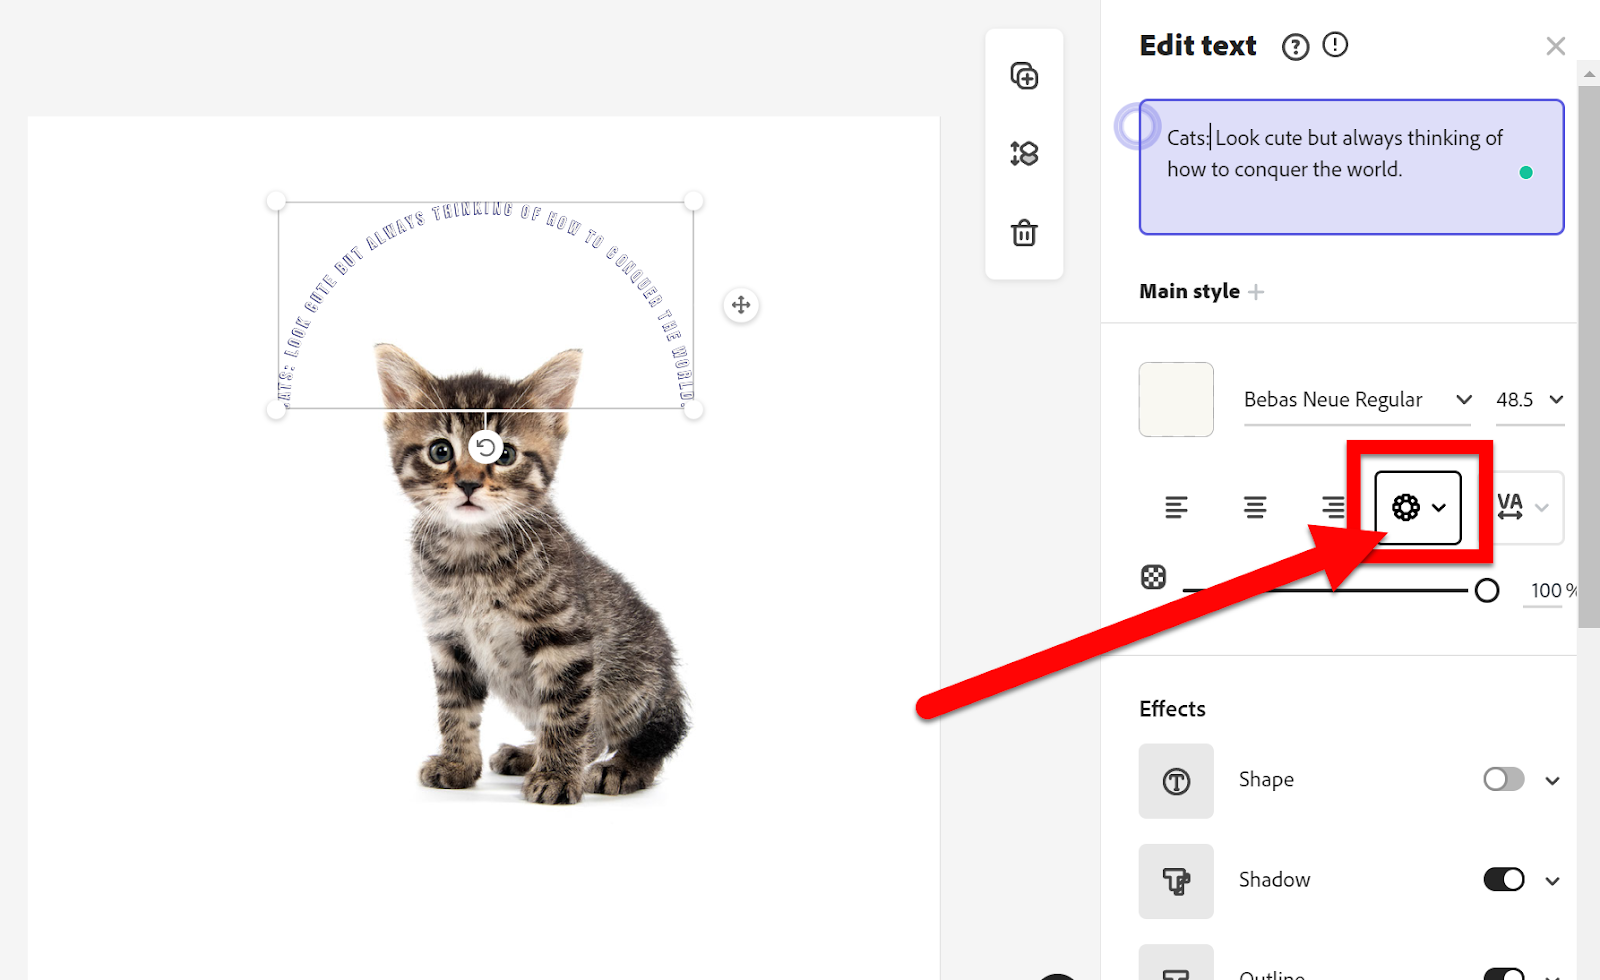

  1. Choose the style you want.


  1. Resize the text on your image.


Share Adobe Creative Cloud Express Projects:

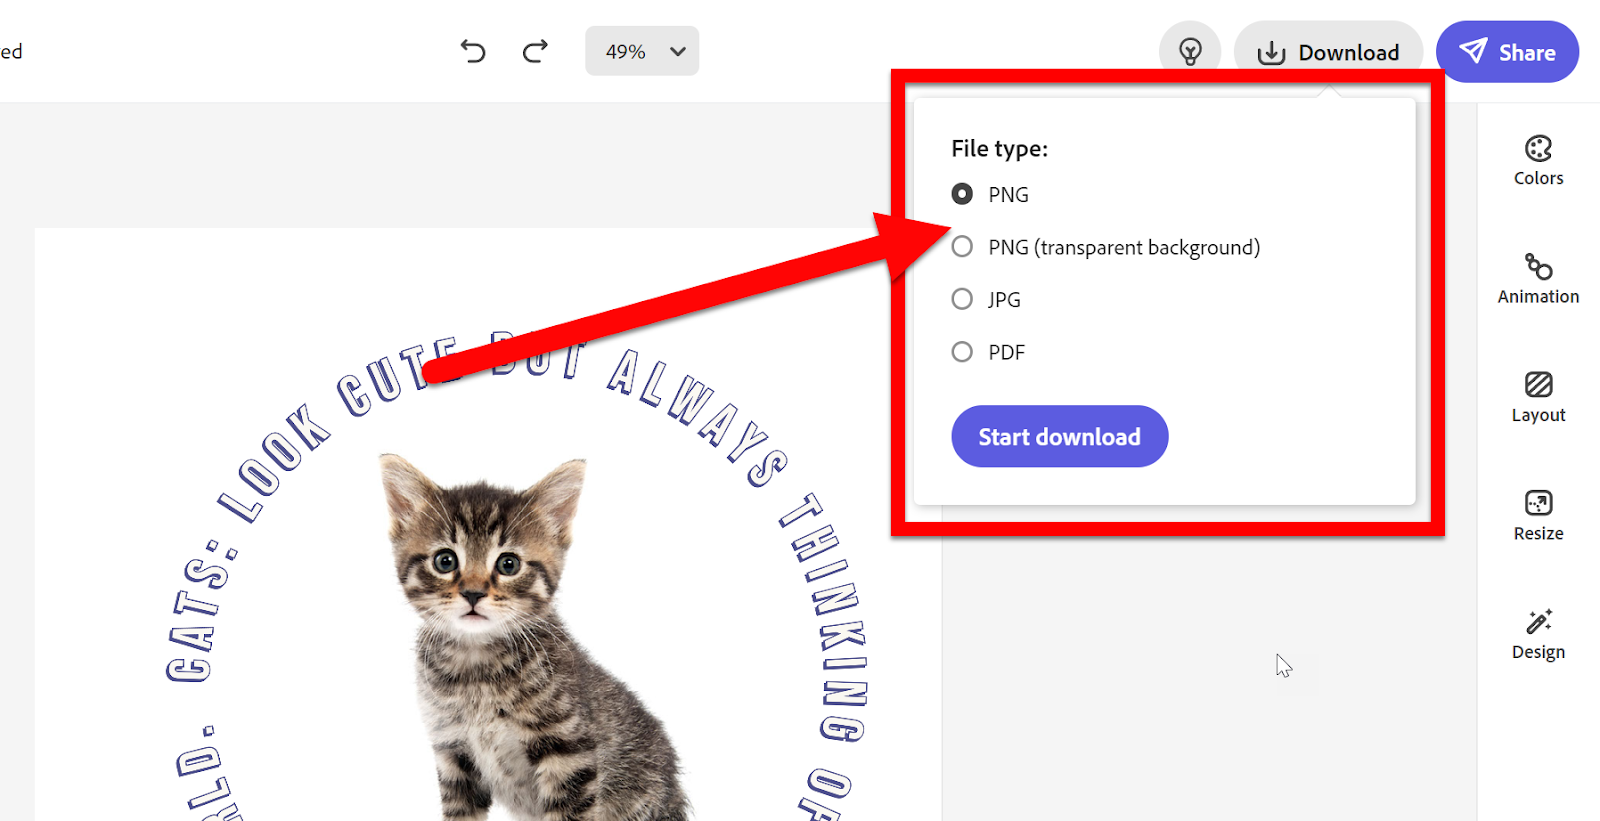
  1. After you create a project you will want to share it. You can share a link to this file or download it as an image. Because you are creating an image you should choose “Download”. 


  1. Choose the image format that best fits your needs. I always choose PNG. If you want the background to be transparent, you MUST choose PNG. 


Head to Adobe Creative Cloud Express & Start CURVING Your Text!!


If you want these directions in a Document click HERE!


Tuesday, May 7, 2019

Quickly Share Text with Your Class

We all do it. We want our students to see a web link or basic text on the projector so we go to Drive, open a new Document, type up the text or web link, change the font to a larger size, and then project so the class can see it. But wait, there is an easier way!
Give Gzaas a try. It is super easy and quick!


Steps:
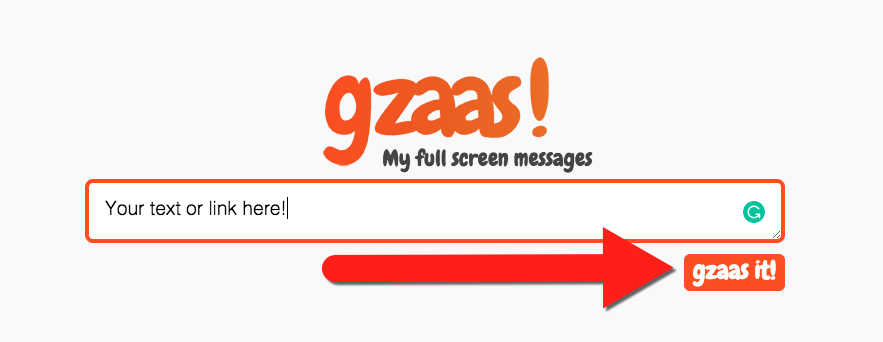
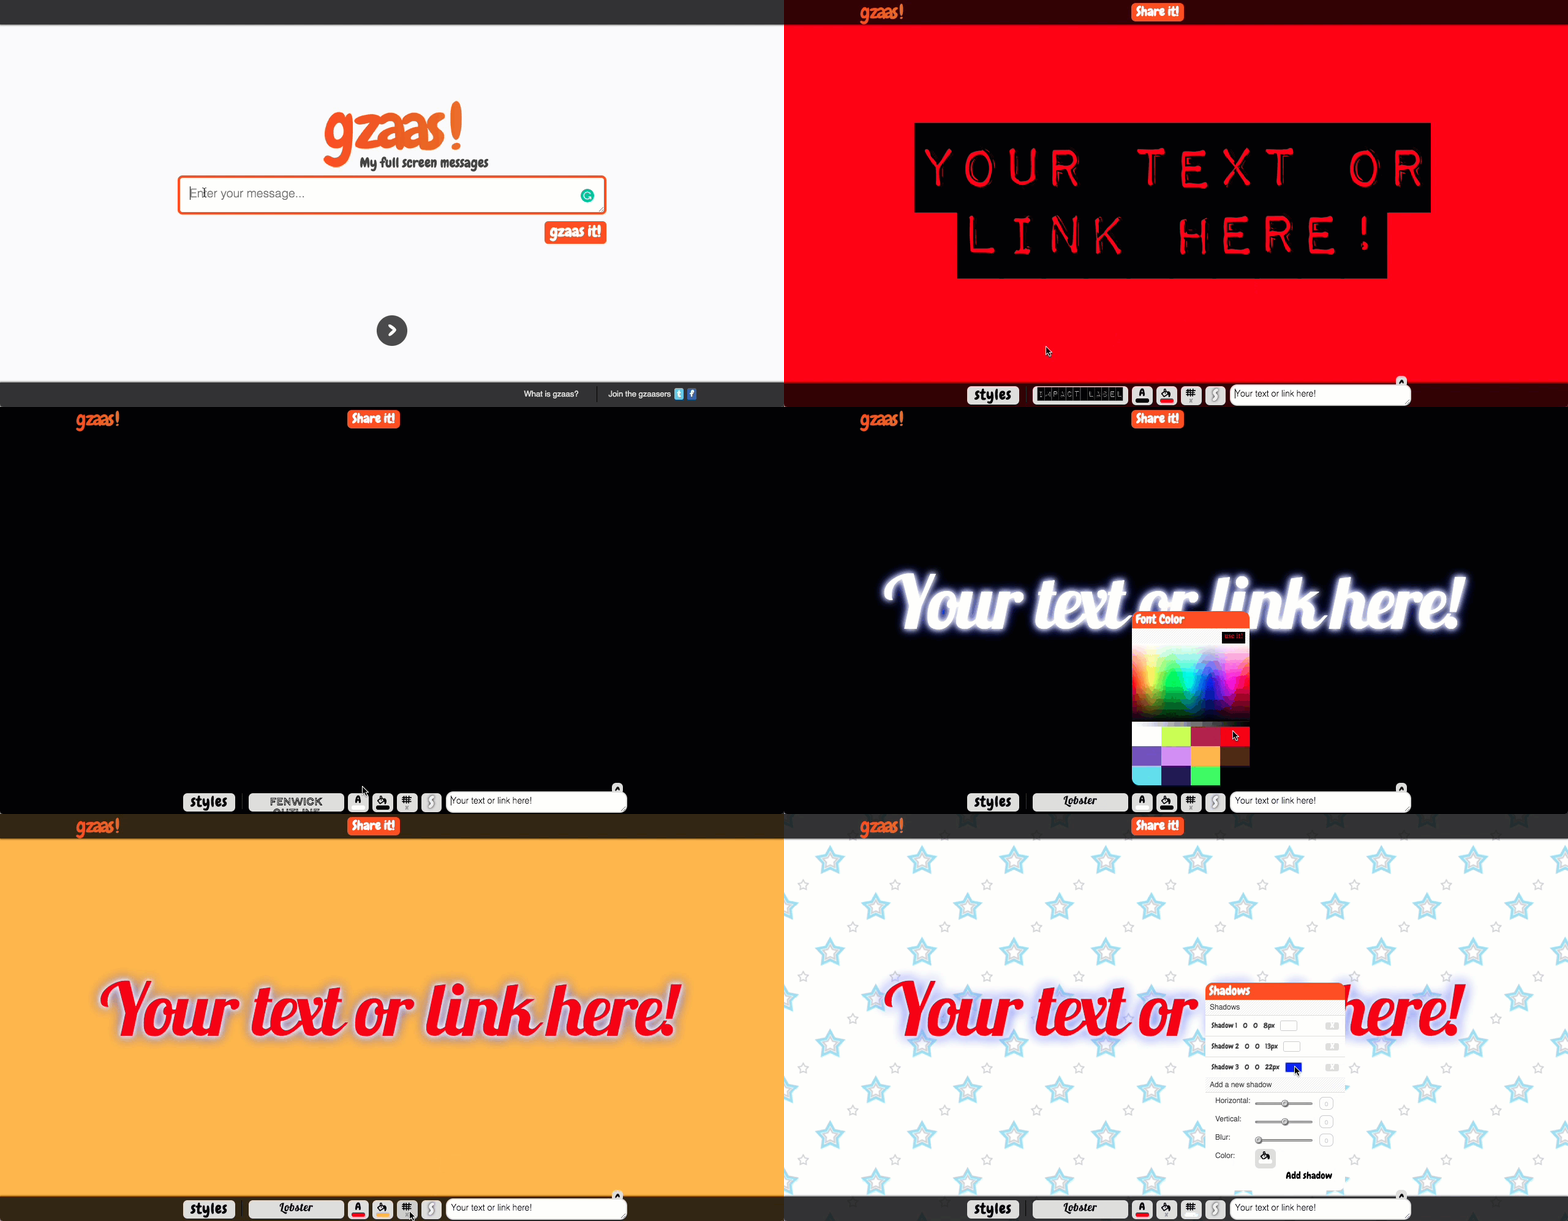
  1. Go to https://gzaas.com.
  2. Type in the text you want to appear on the screen and click “gzaas it”.


  3. Project this screen for your students to see!


Feel Like Getting Creative?:
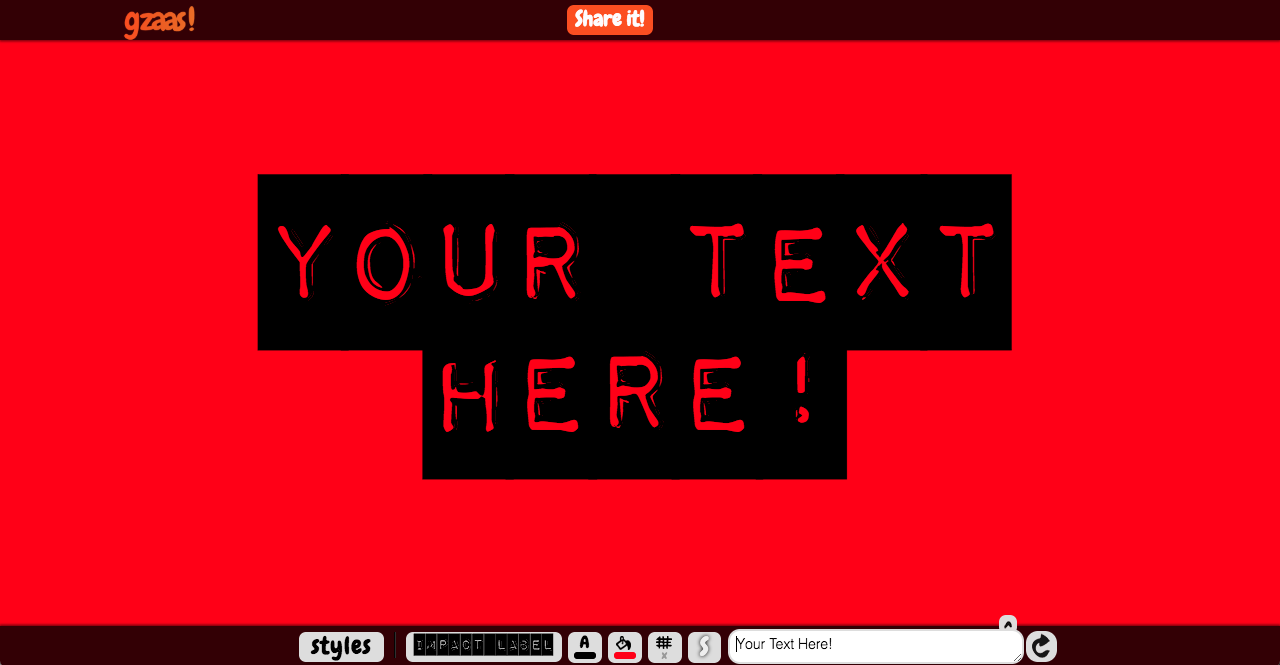
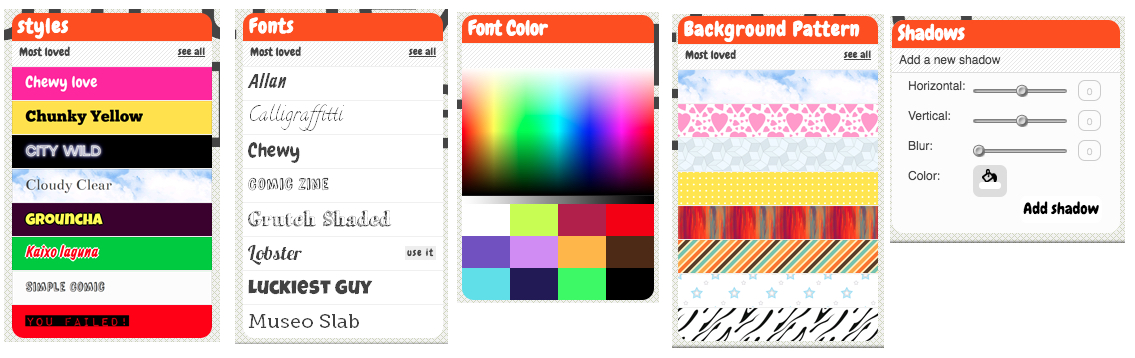
  1. After you make your Gzaas change the style, edit the font, font color, background color or pattern, and explore text shadow!


Go wild and share quick text with your class!


If you want these directions in a document click HERE!