Looking for ways to visualize your data? Google Sheets can create awesome charts and graphs. Open a Google Sheet, add some data, and EXPLORE!

Showing posts with label Google Sheets. Show all posts
Showing posts with label Google Sheets. Show all posts
Monday, November 15, 2021
Tuesday, September 7, 2021
Google Sheets Templates

Style Templates:
Open a Google Spreadsheet.
Enter in some data for a chart or graph.
Click “Format”.
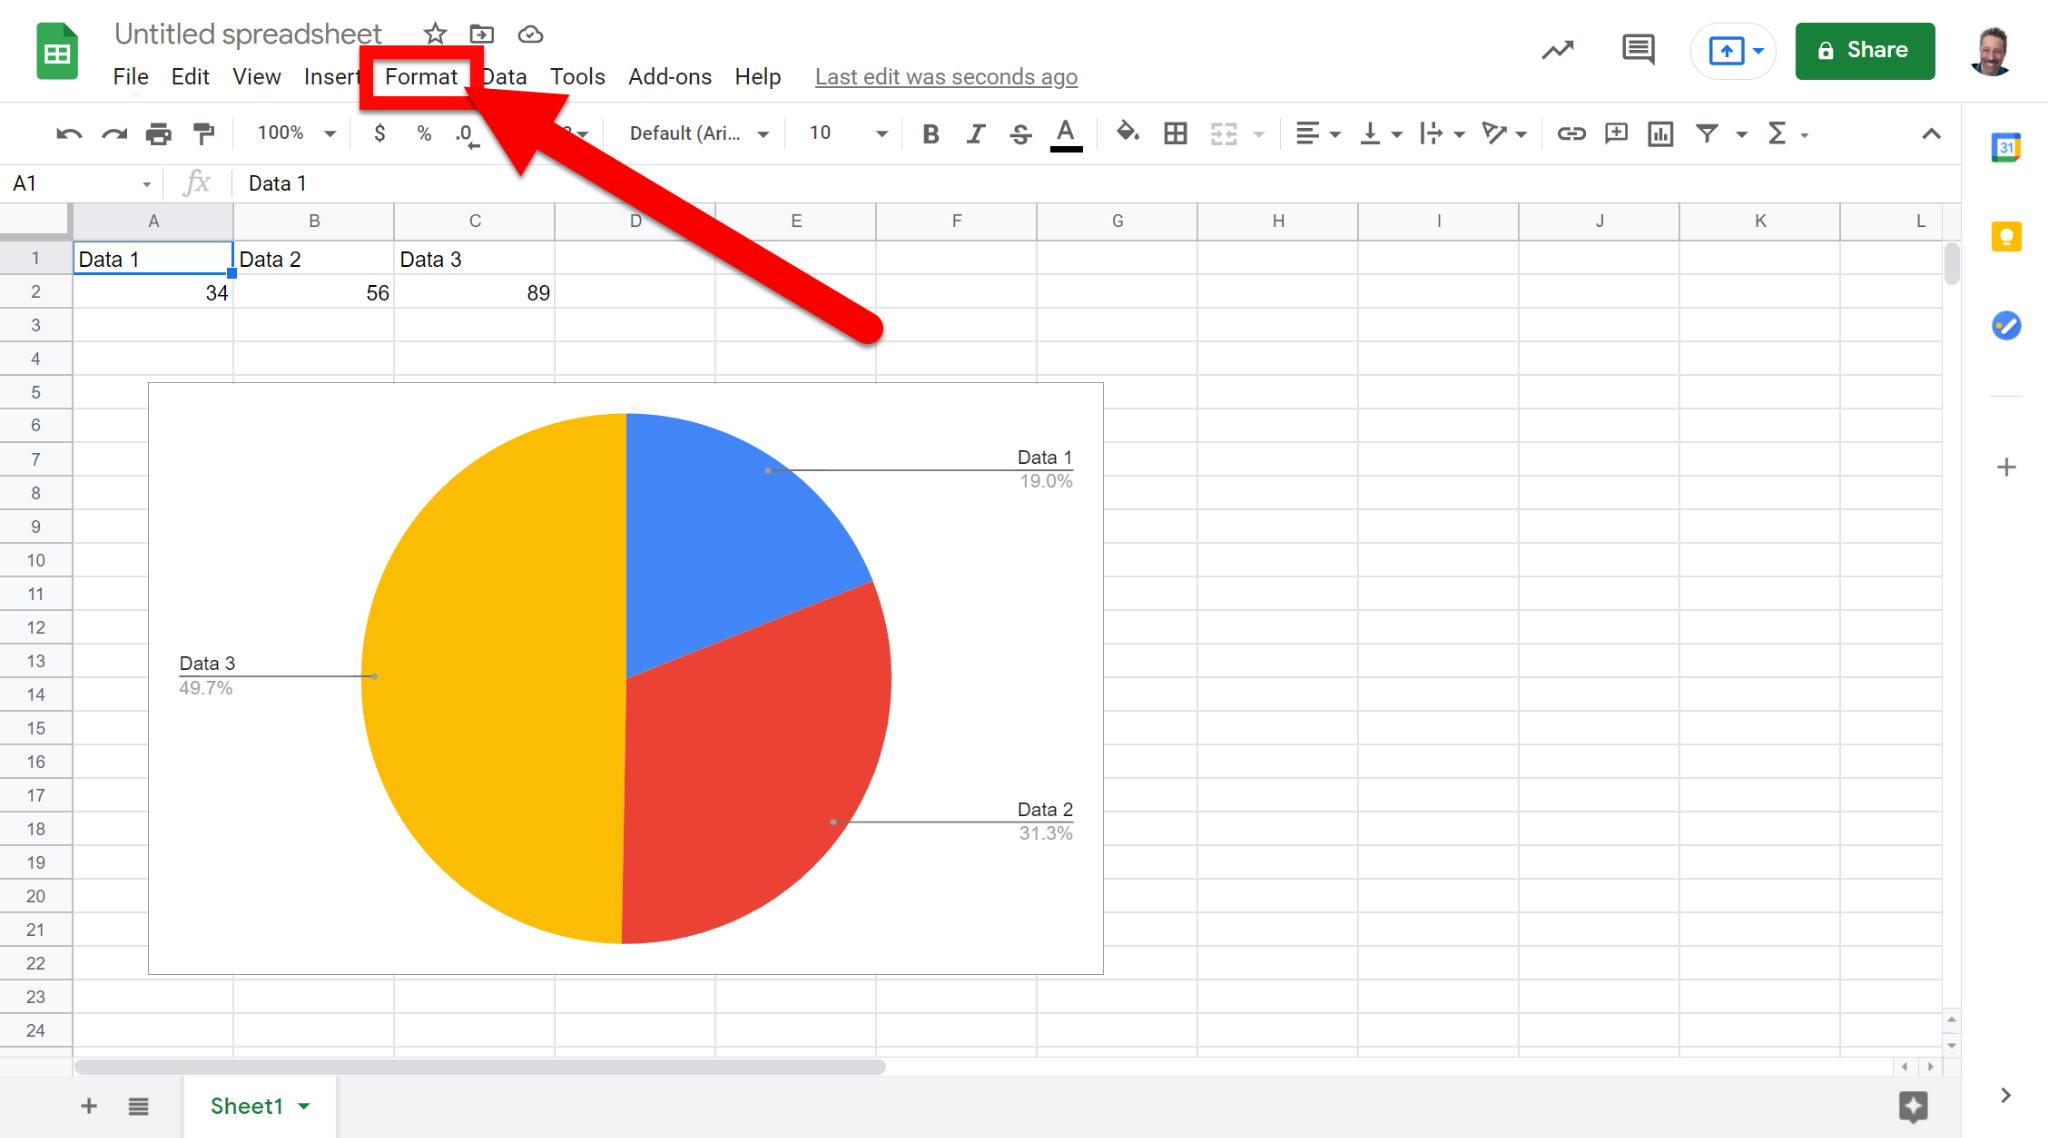
Click “Template”.
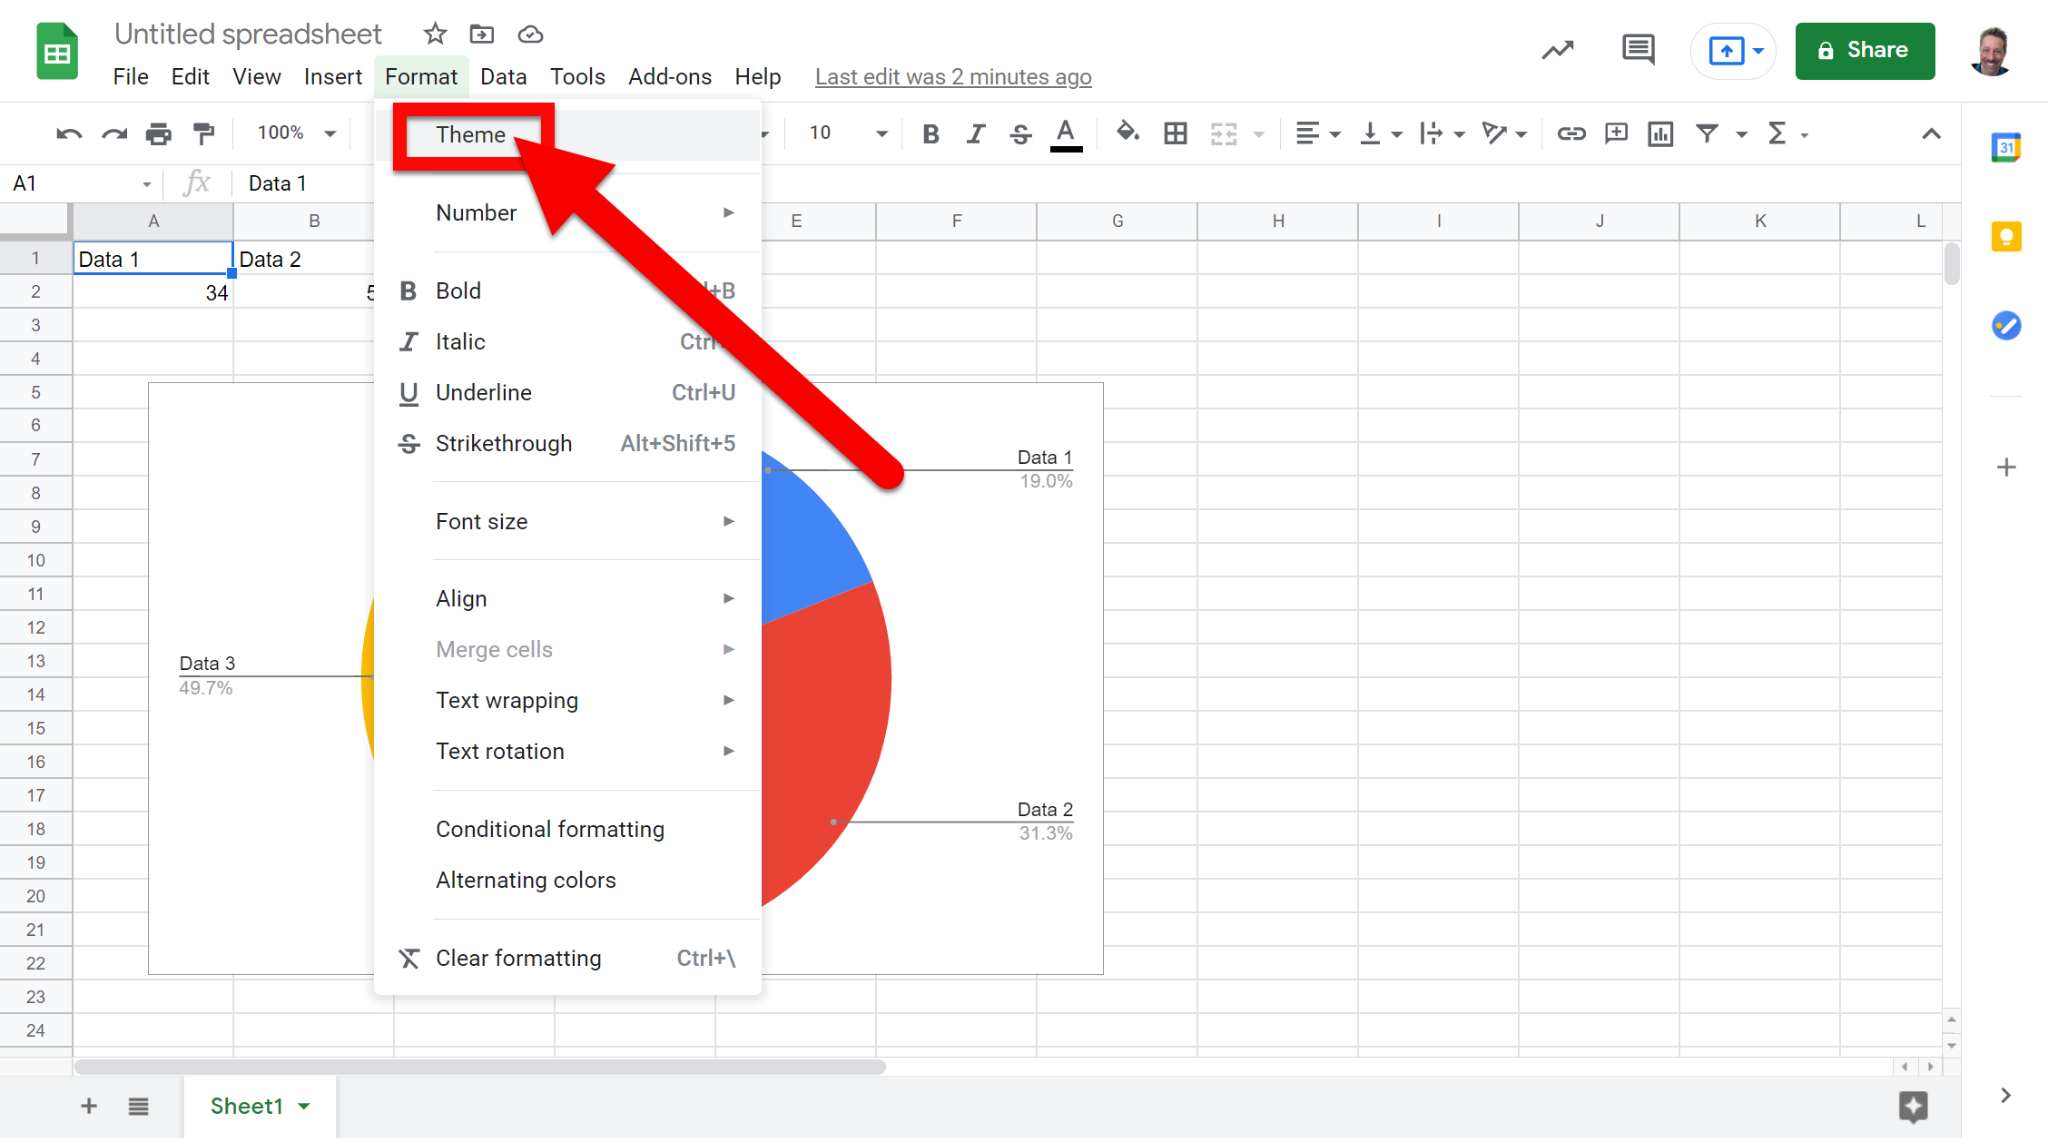
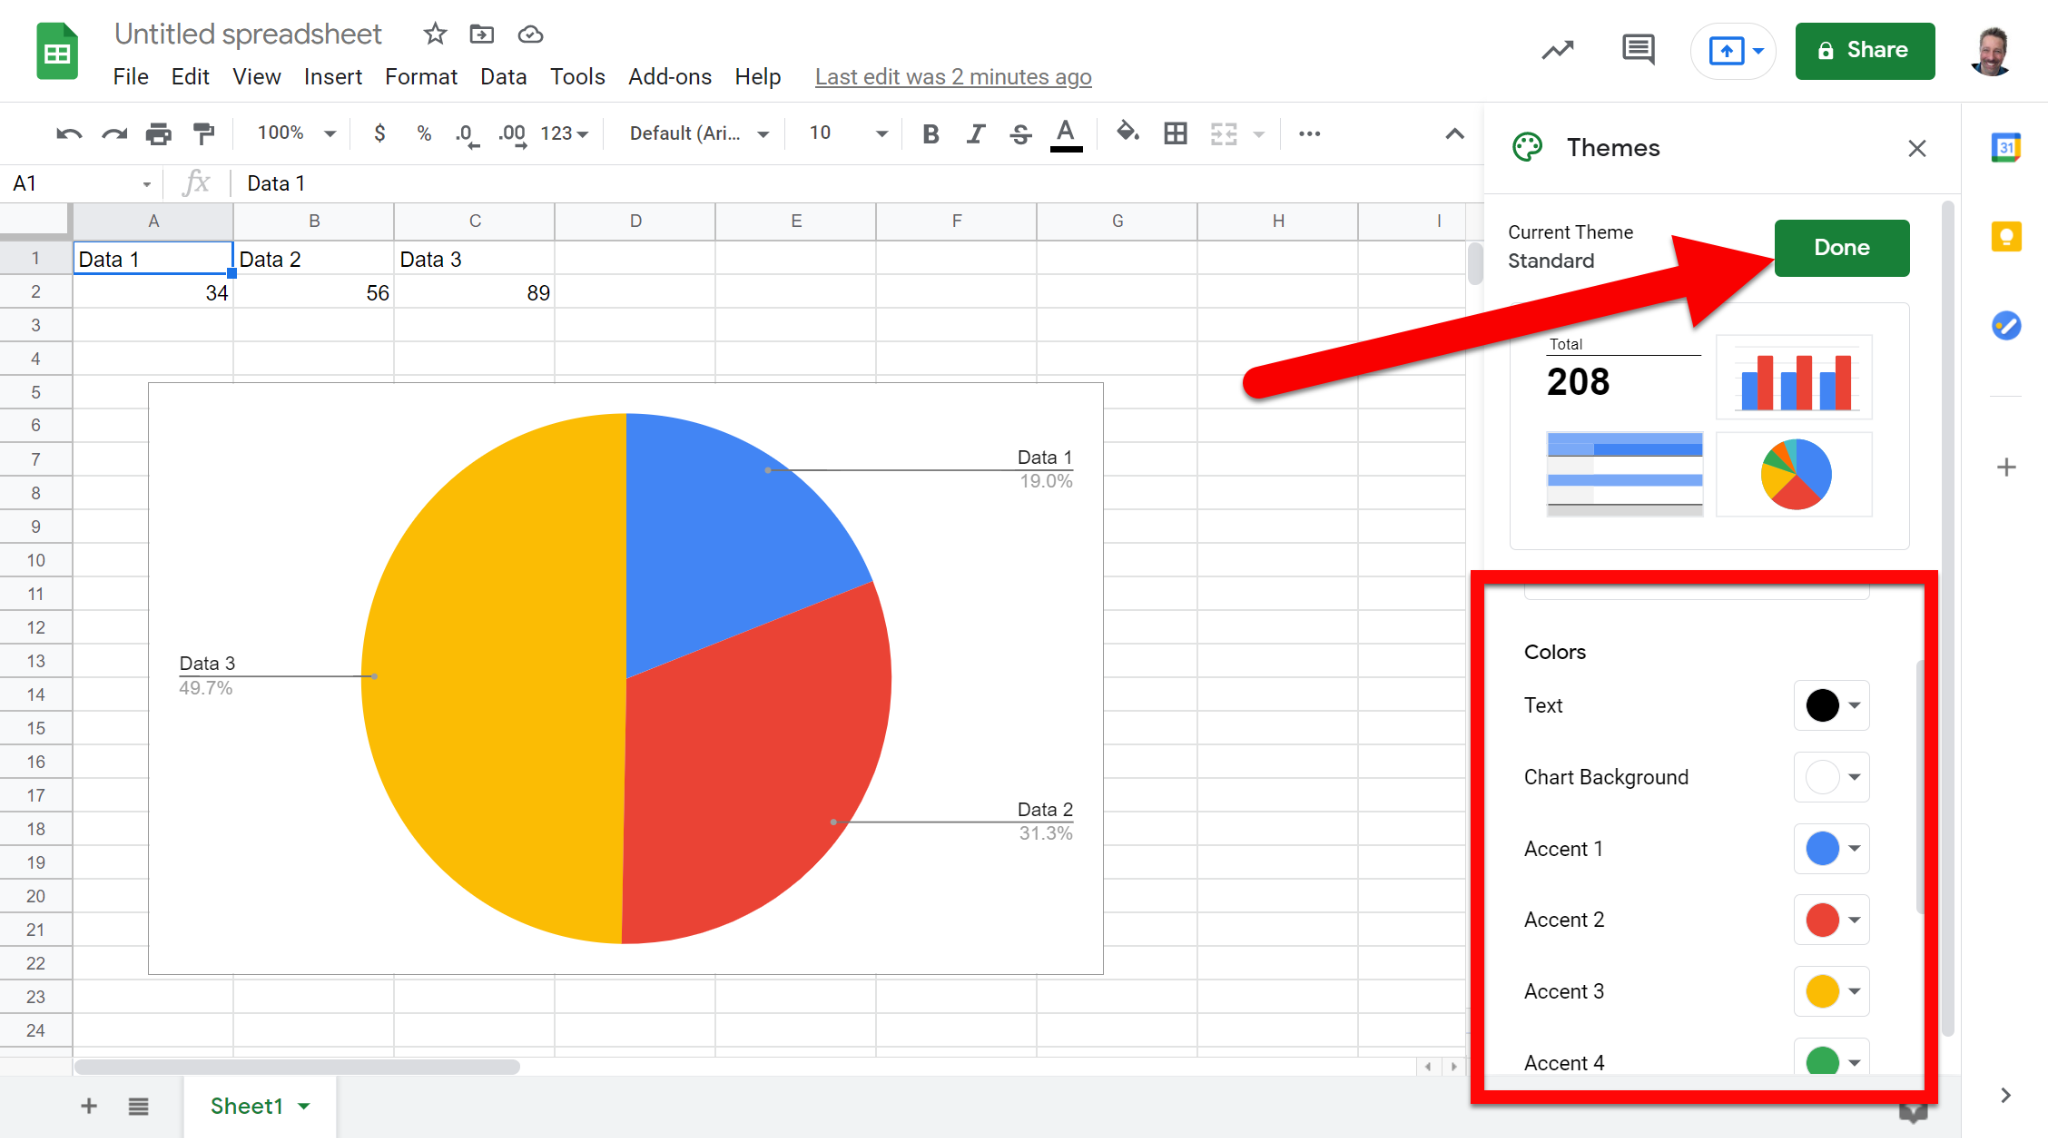
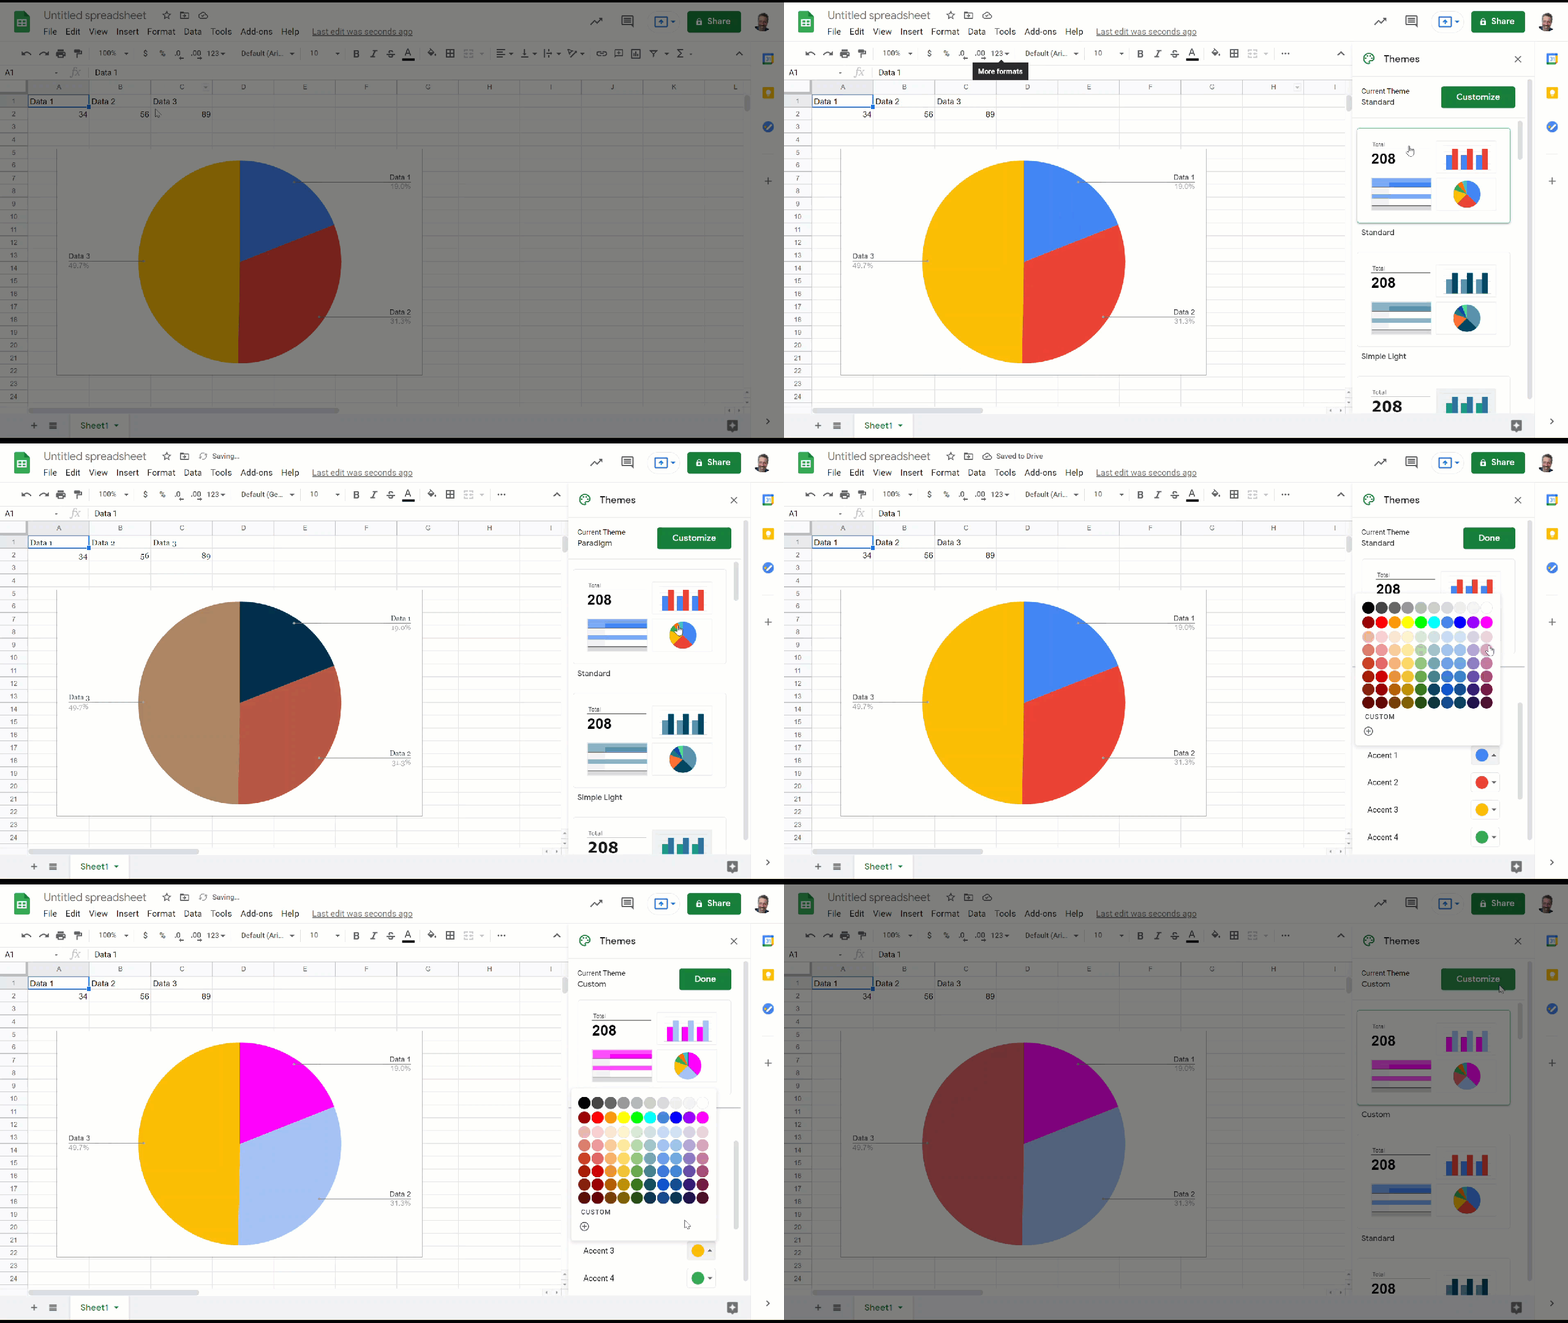
On the right side, you will see a list of default templates. You can choose one of these.
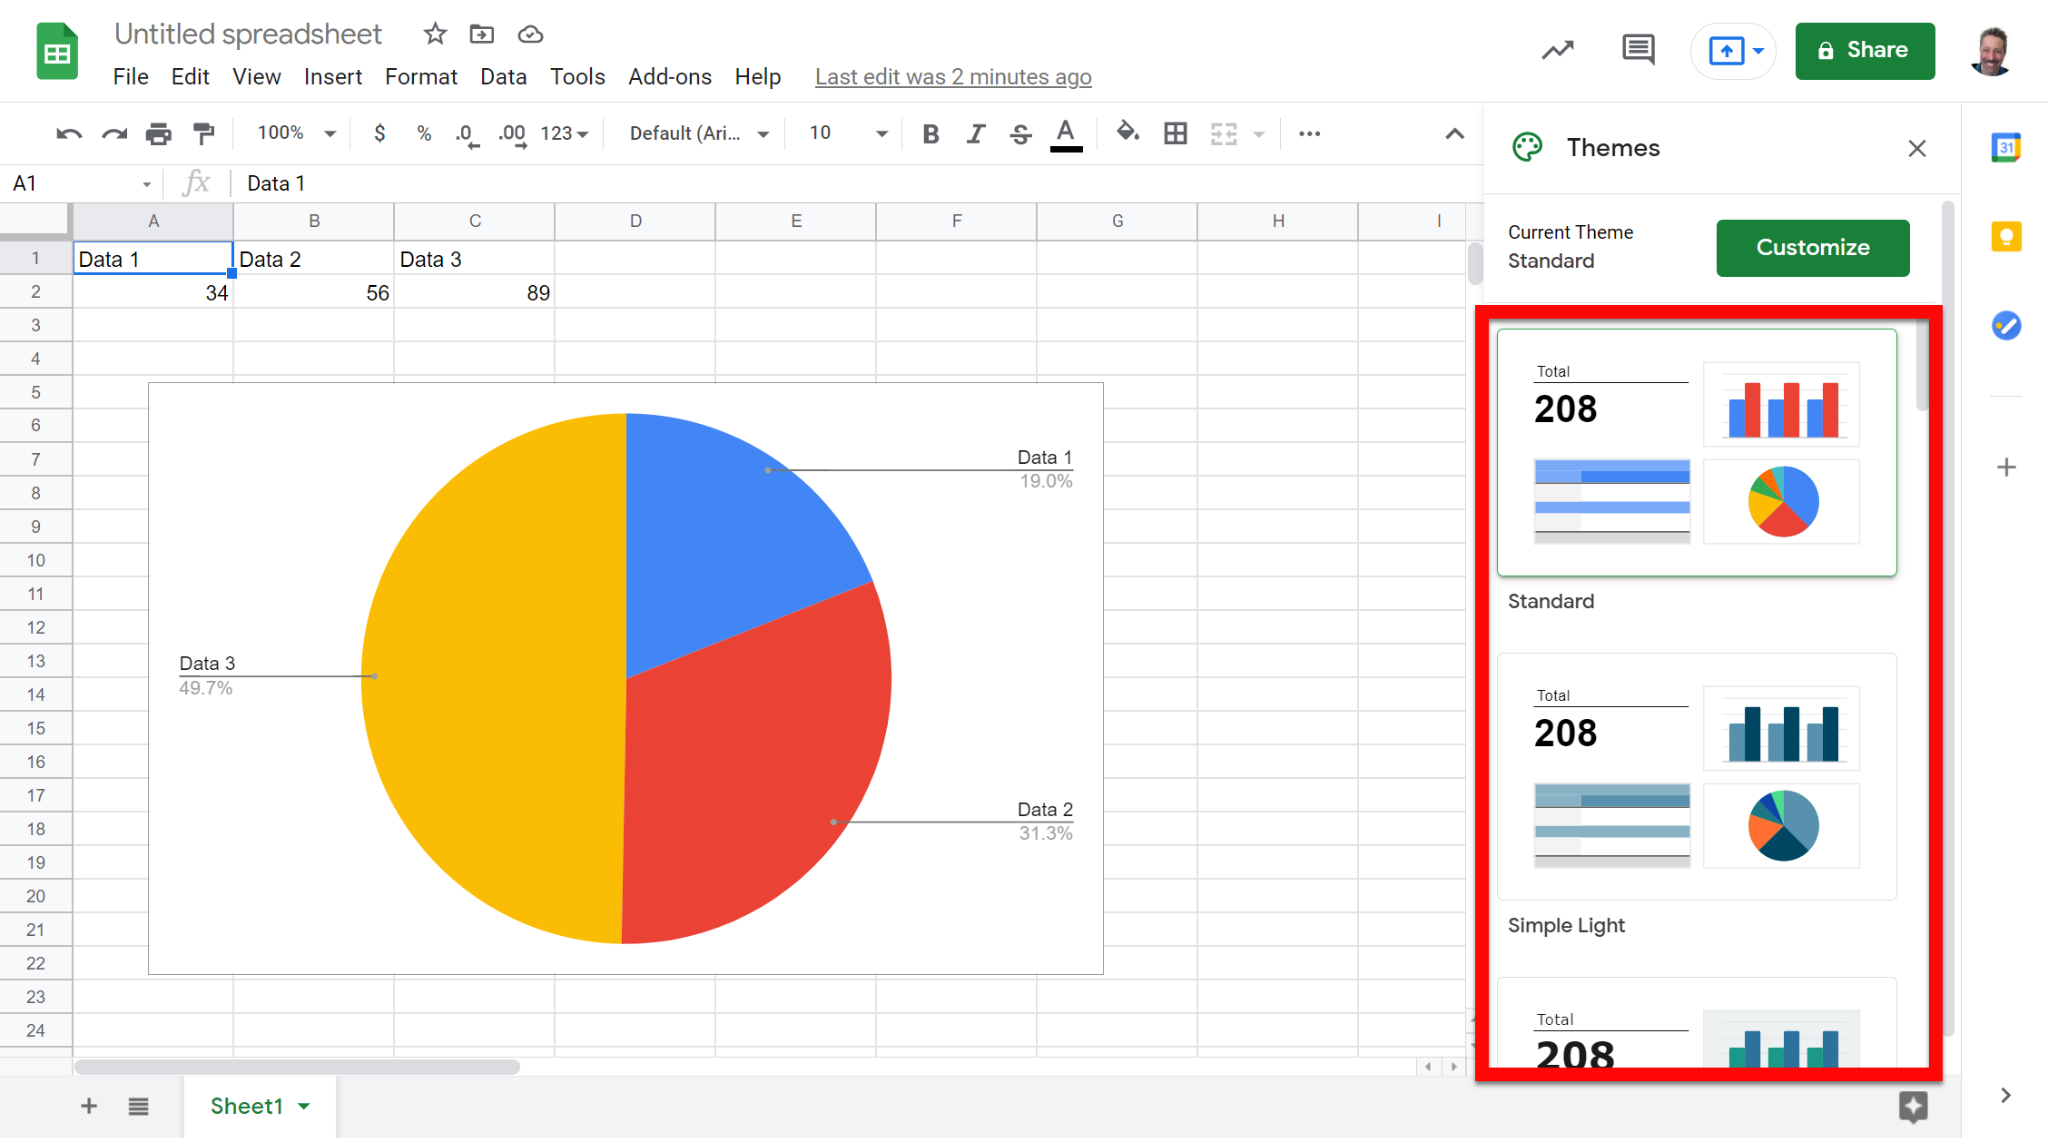
You can also click “Customize”.
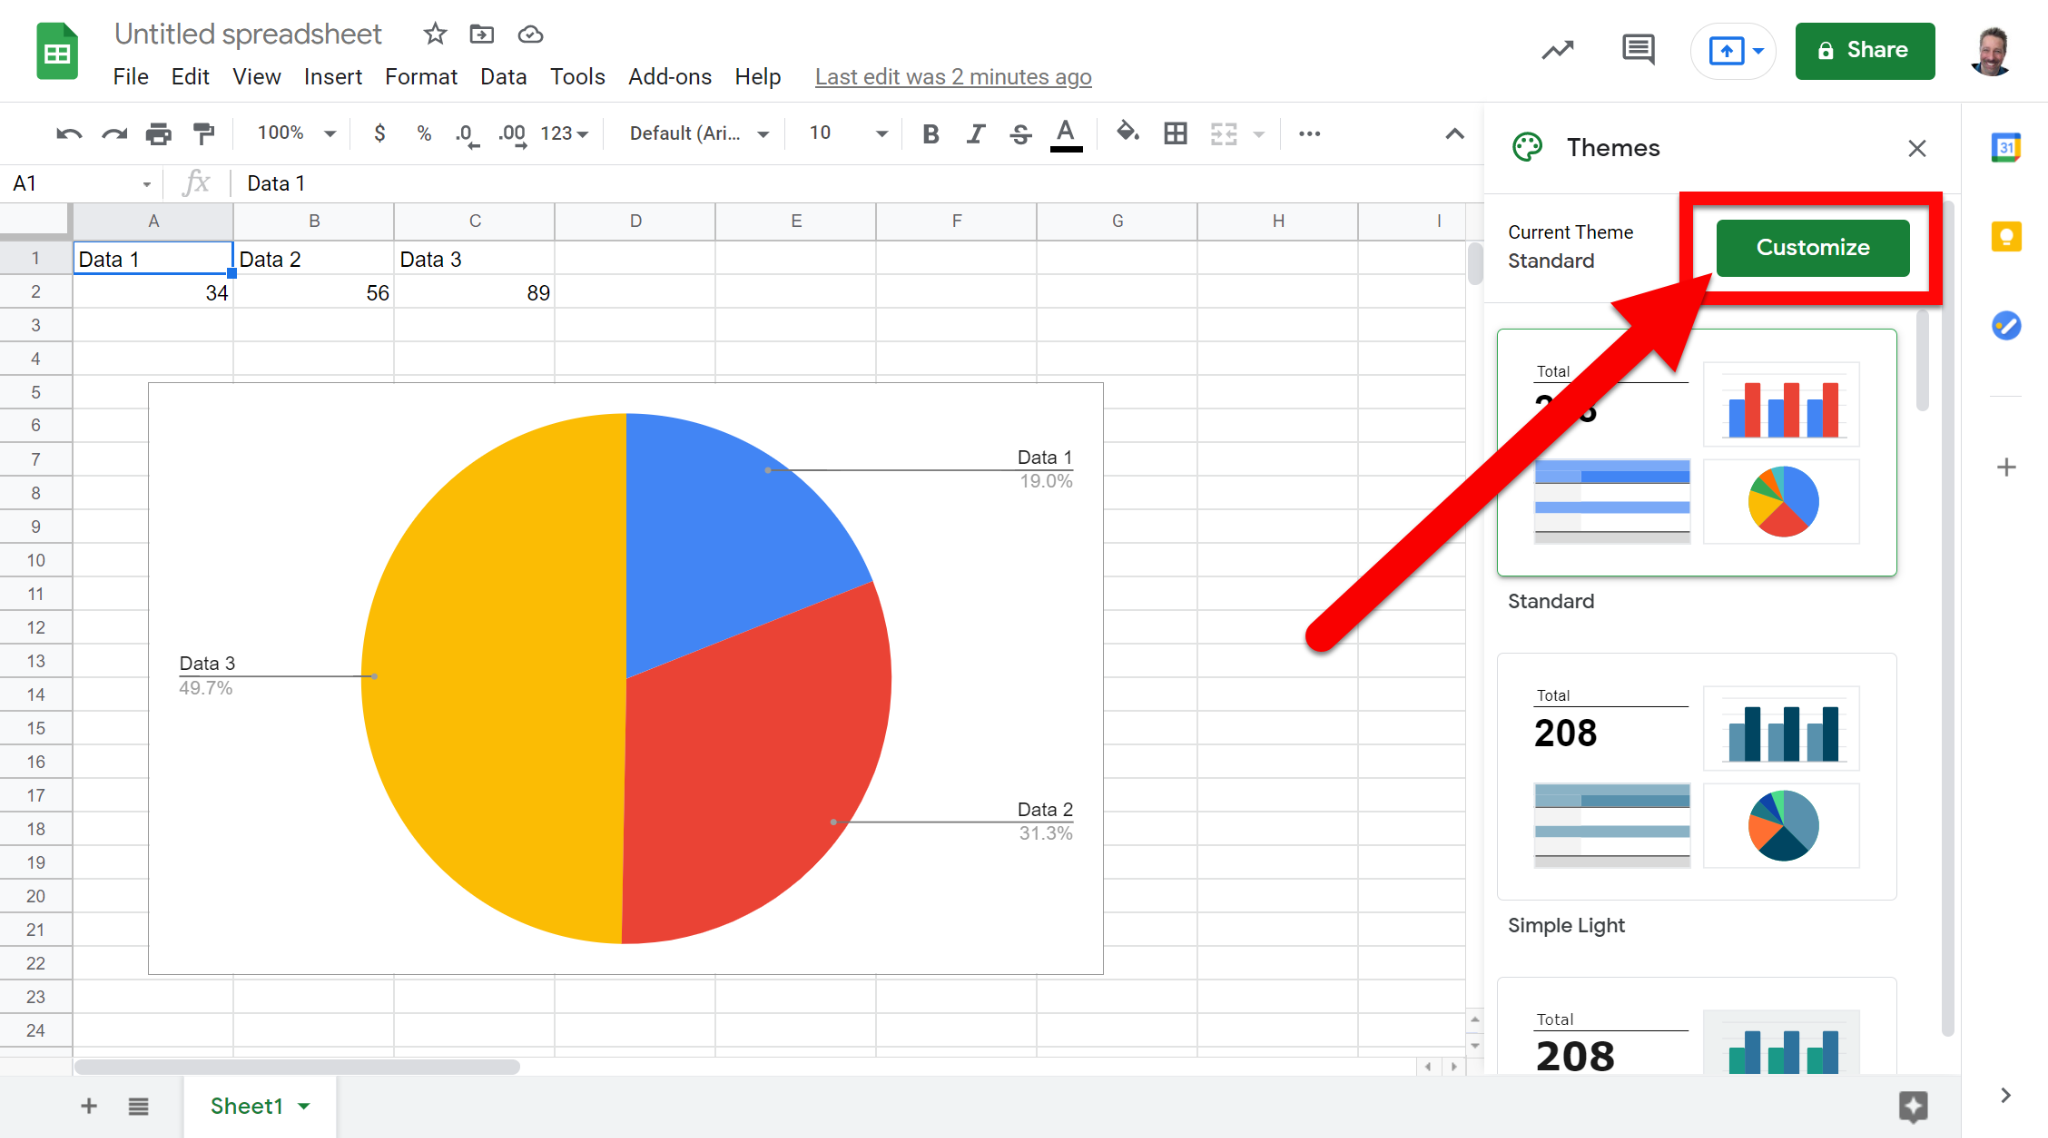
You can set font, chart background, and data range colors. Click “Done” to save this template.
If you want these directions in a Document, Click HERE!

Monday, September 4, 2017
Alternating Row Colors in Sheets

One of my favorite Google tools is Sheets. I use it for much more than just data spreadsheets. There are many tweaks that make Sheets extra cool. Conditional formatting, charts, cell formatting, and more. One of the things that is easy to do but can be labor intensive is alternating row colors for a whole sheet. The good news is that there is a quick and easy way to do this with just a couple of click! Follow the steps below to alternate colors for rows in an entire spreadsheet.
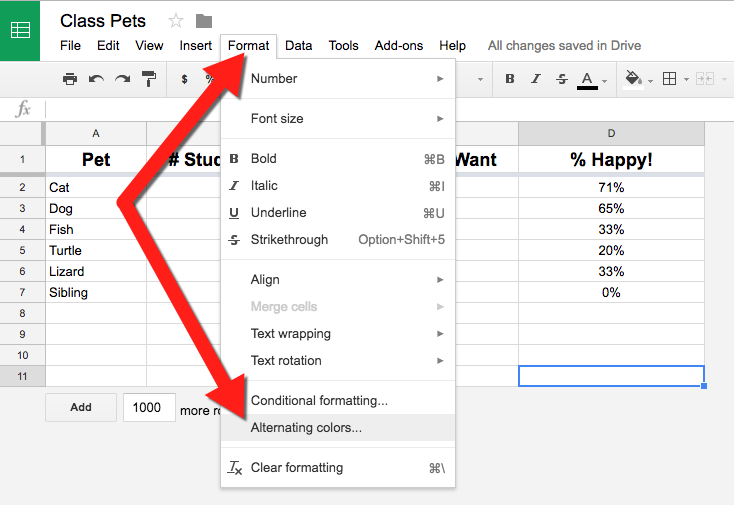
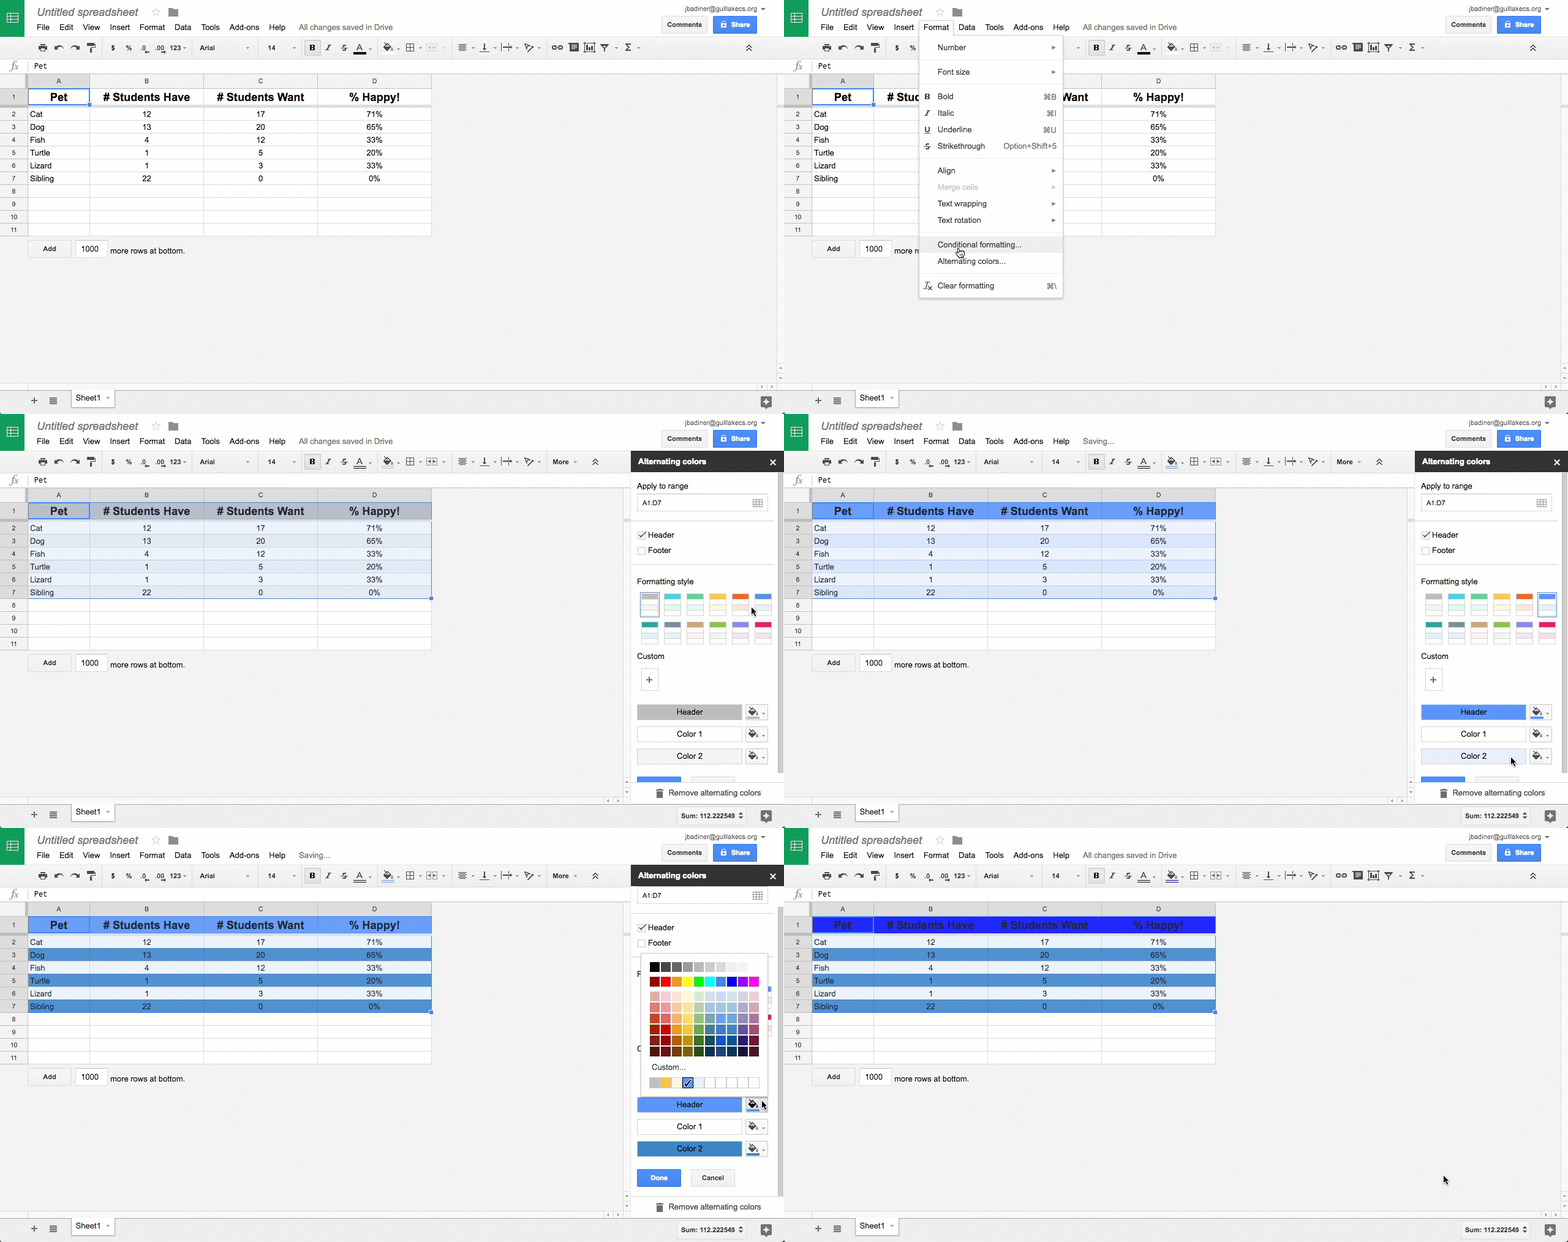
- In Google Sheets, click on “Format” and then click on “Alternating Colors”.
- You can select a range in the “Apply to range” field if you only want part of the sheet to have this formatting or leave it as the whole spreadsheet.
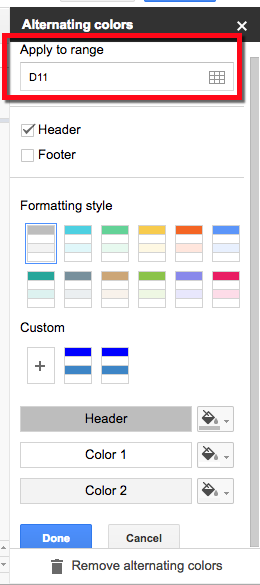
- If your sheet has a header or footer select them in the options to make them bolder by default.
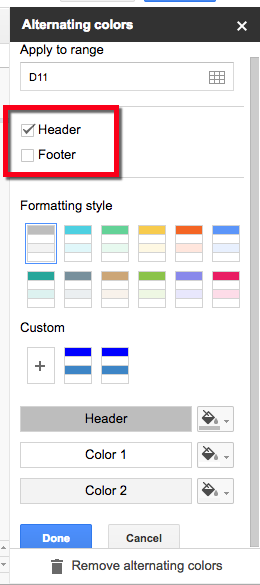
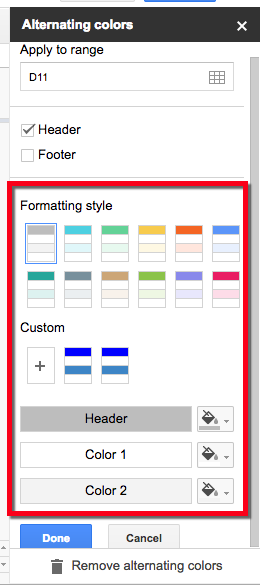
- You can use the default color options if they work for you, or you can make custom color options below.
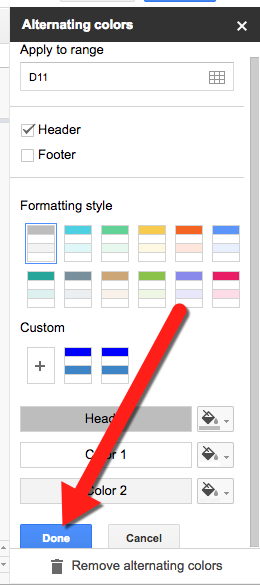
- Click “Done” when finished!
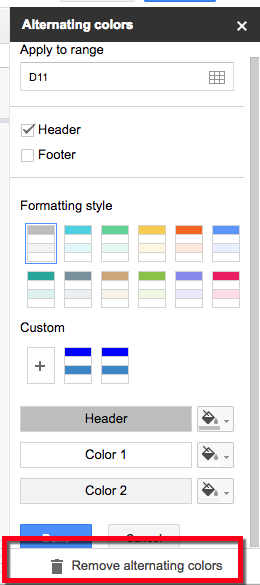
- If you change your mind you can click “Remove alternating colors”.
Open up a Google Sheets and give it a try!
Wednesday, February 22, 2017
Rotate Text in Google Sheets

Whoa!
It is FINALLY here!
The elusive Rotating Text in Google Sheets cells! Many of us have been waiting a long time for this. It is finally here! Follow the steps below to see how to rotate text in Google Sheets cells!
Rotate Text in Google Sheets
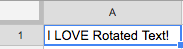
- Type text in a cell.
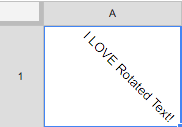
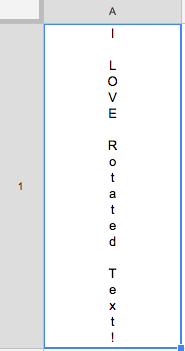
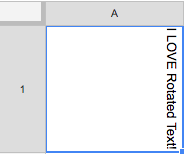
- Click on Format, then “Text rotation” and choose how you want to rotate.
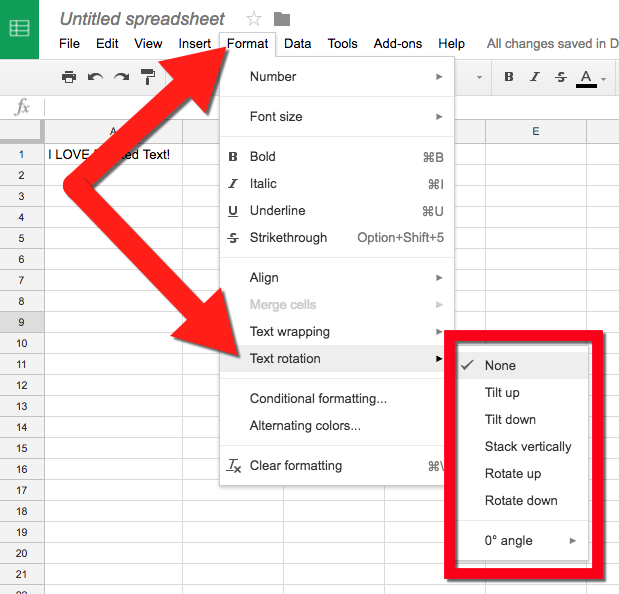
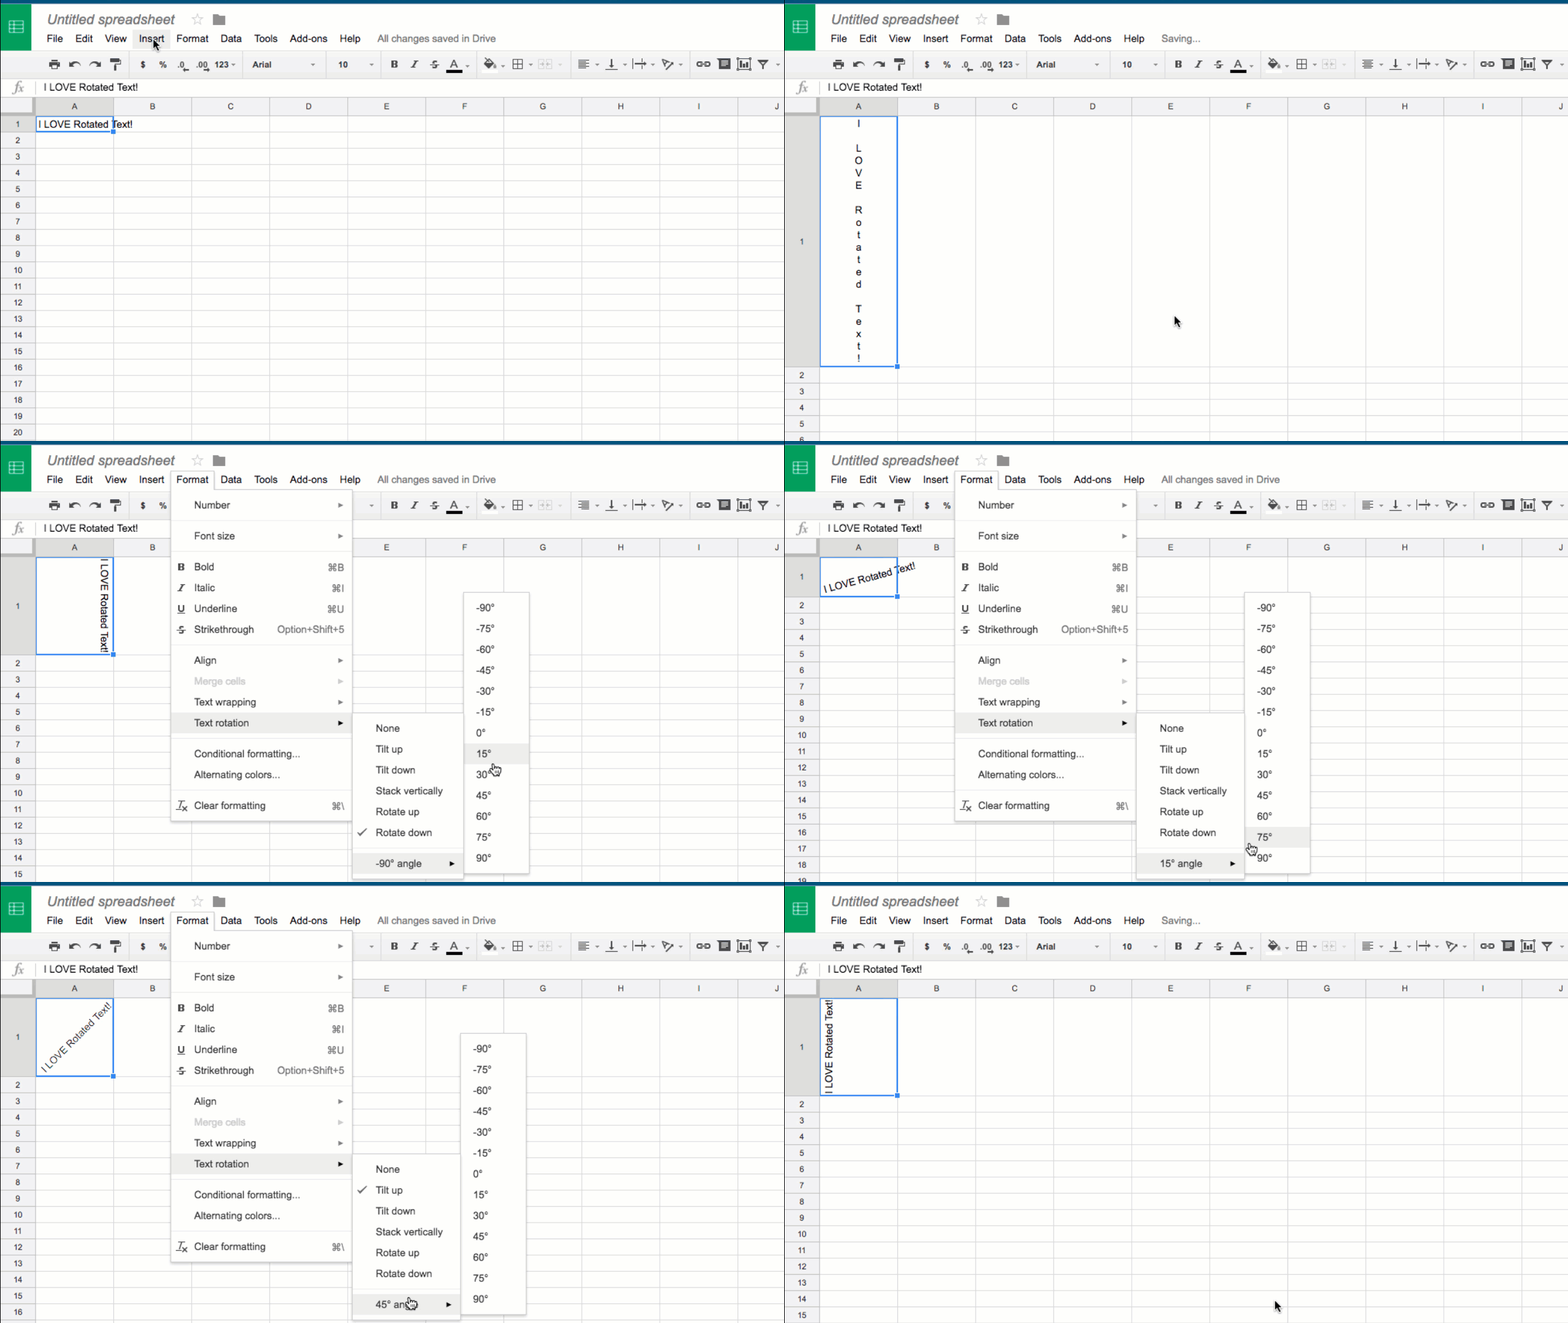
Here are the Text Rotation options:
|  |
|  |
|  |
|  |
|  |
|  |
|  |
Now start editing all that text you have been begging to rotate!
If you want these steps in a Document click HERE!
Sunday, May 15, 2016
Remove Unused Rows and Columns

I will admit it, Google Sheets is one of my favorite Google tools. I use it for many things: data sheets, creating charts, making organized tables, reordering text lists by name, math assessments, and many other things many use Documents to do. One of the things that is most over looked is that the overall size of a Sheet is editable. Many users leave all those pesky unused cells lingering and this makes it far too easy to get lost in a sheet by accidently scrolling through empty rows and columns. By removing those unused cells, Sheets can be managed and used in ways not thought of before (almost like a standard document) with defined edges. Check out the easy steps below to get rid of all those unwanted empty cells.
Remove Unused Rows and Columns
- Open or create a Google Sheet.
- Locate the cells you no longer want (the unused rows and columns after all your work).
- Remove these unused cells with the following steps:
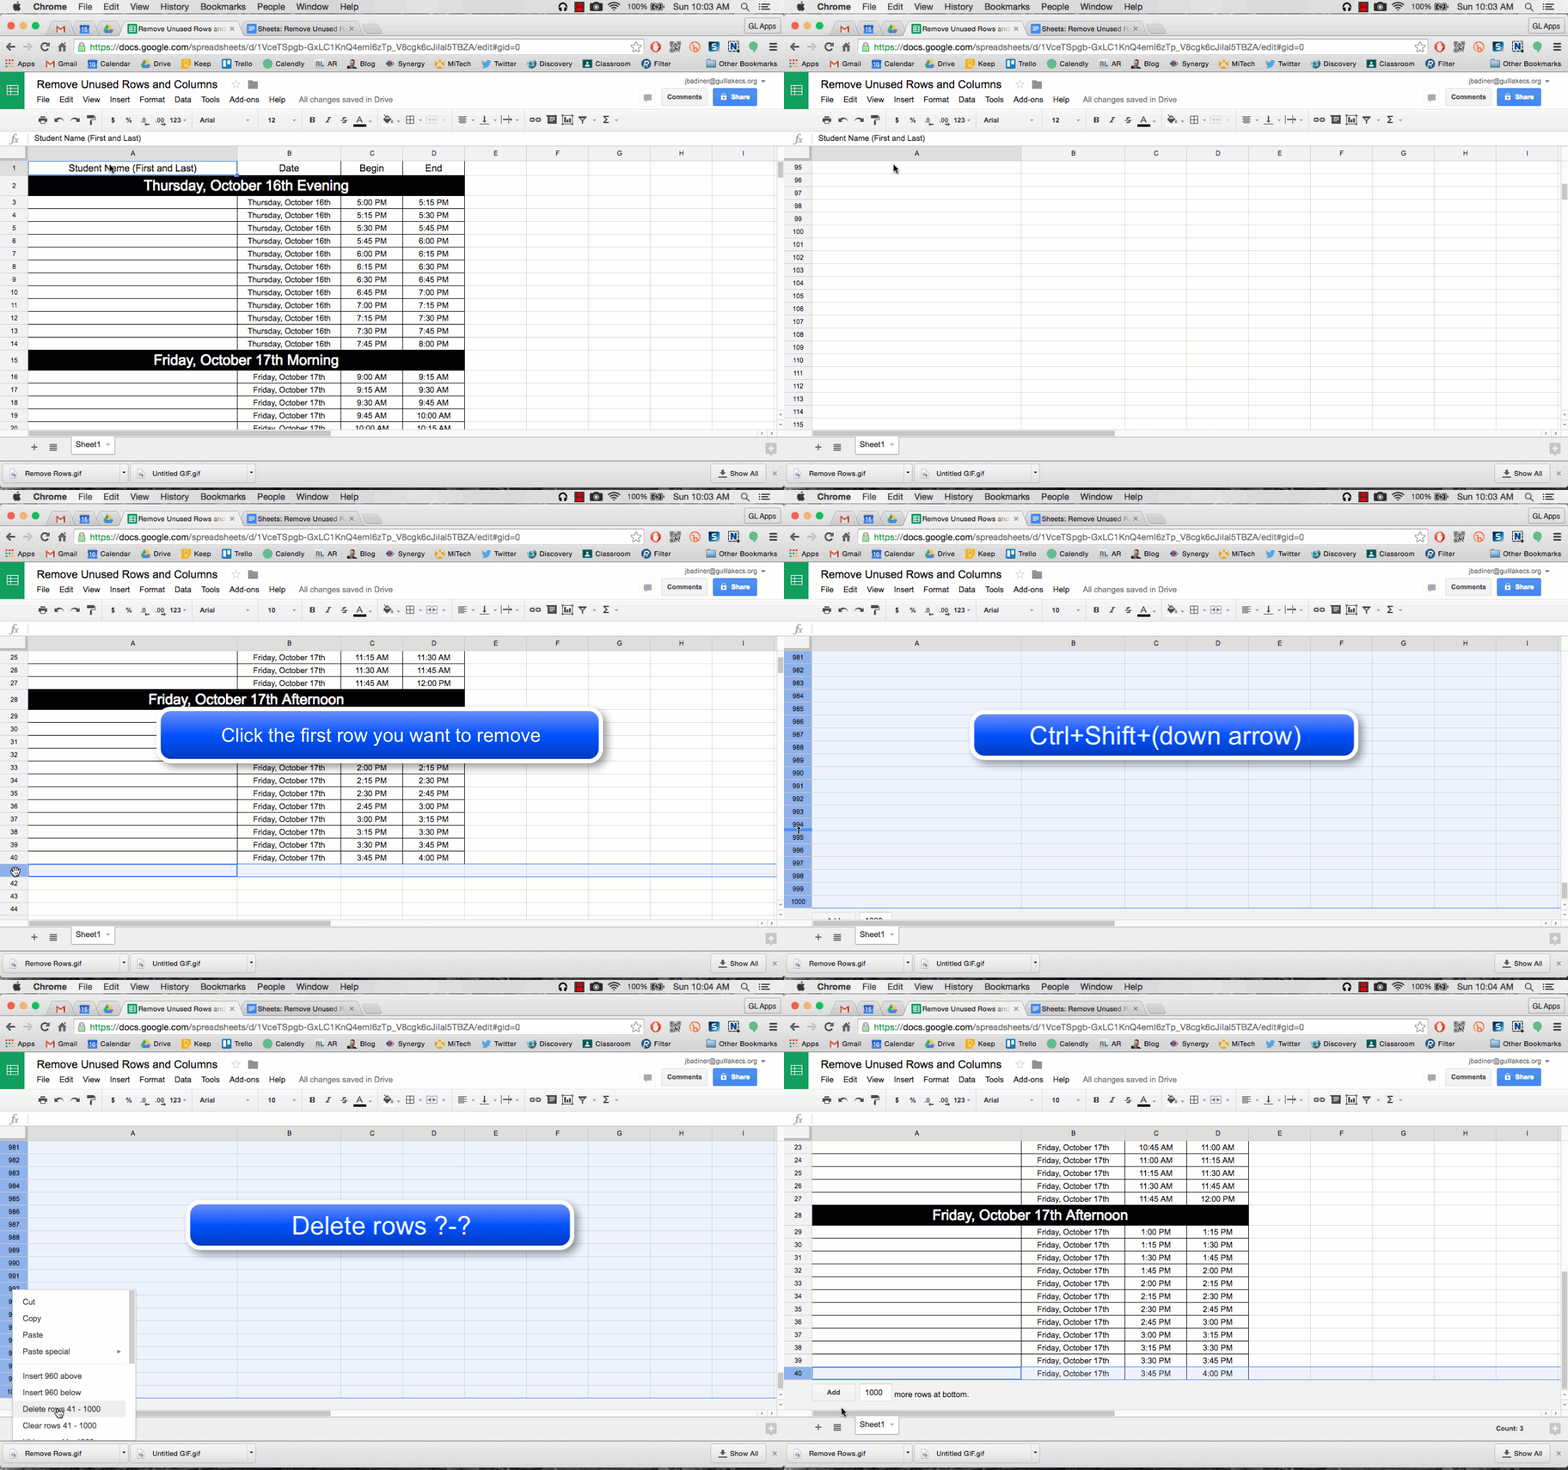
Removing Unused Rows:
- Click to the first row you want to remove.
- Hold Command+Shift+(down arrow) on Mac or Ctrl+Shift+(down arrow) on PC.
- Right Click on one of the row header numbers that is selected.
- Choose Delete Rows (numbers).
Removing Unused Columns:
- Click to the first column you want to remove.
- Hold Command+Shift+(right arrow) on Mac or Ctrl+Shift+(right arrow) on PC.
- Right Click on one of the column header letters that is selected.
- Choose Delete Columns (letters).
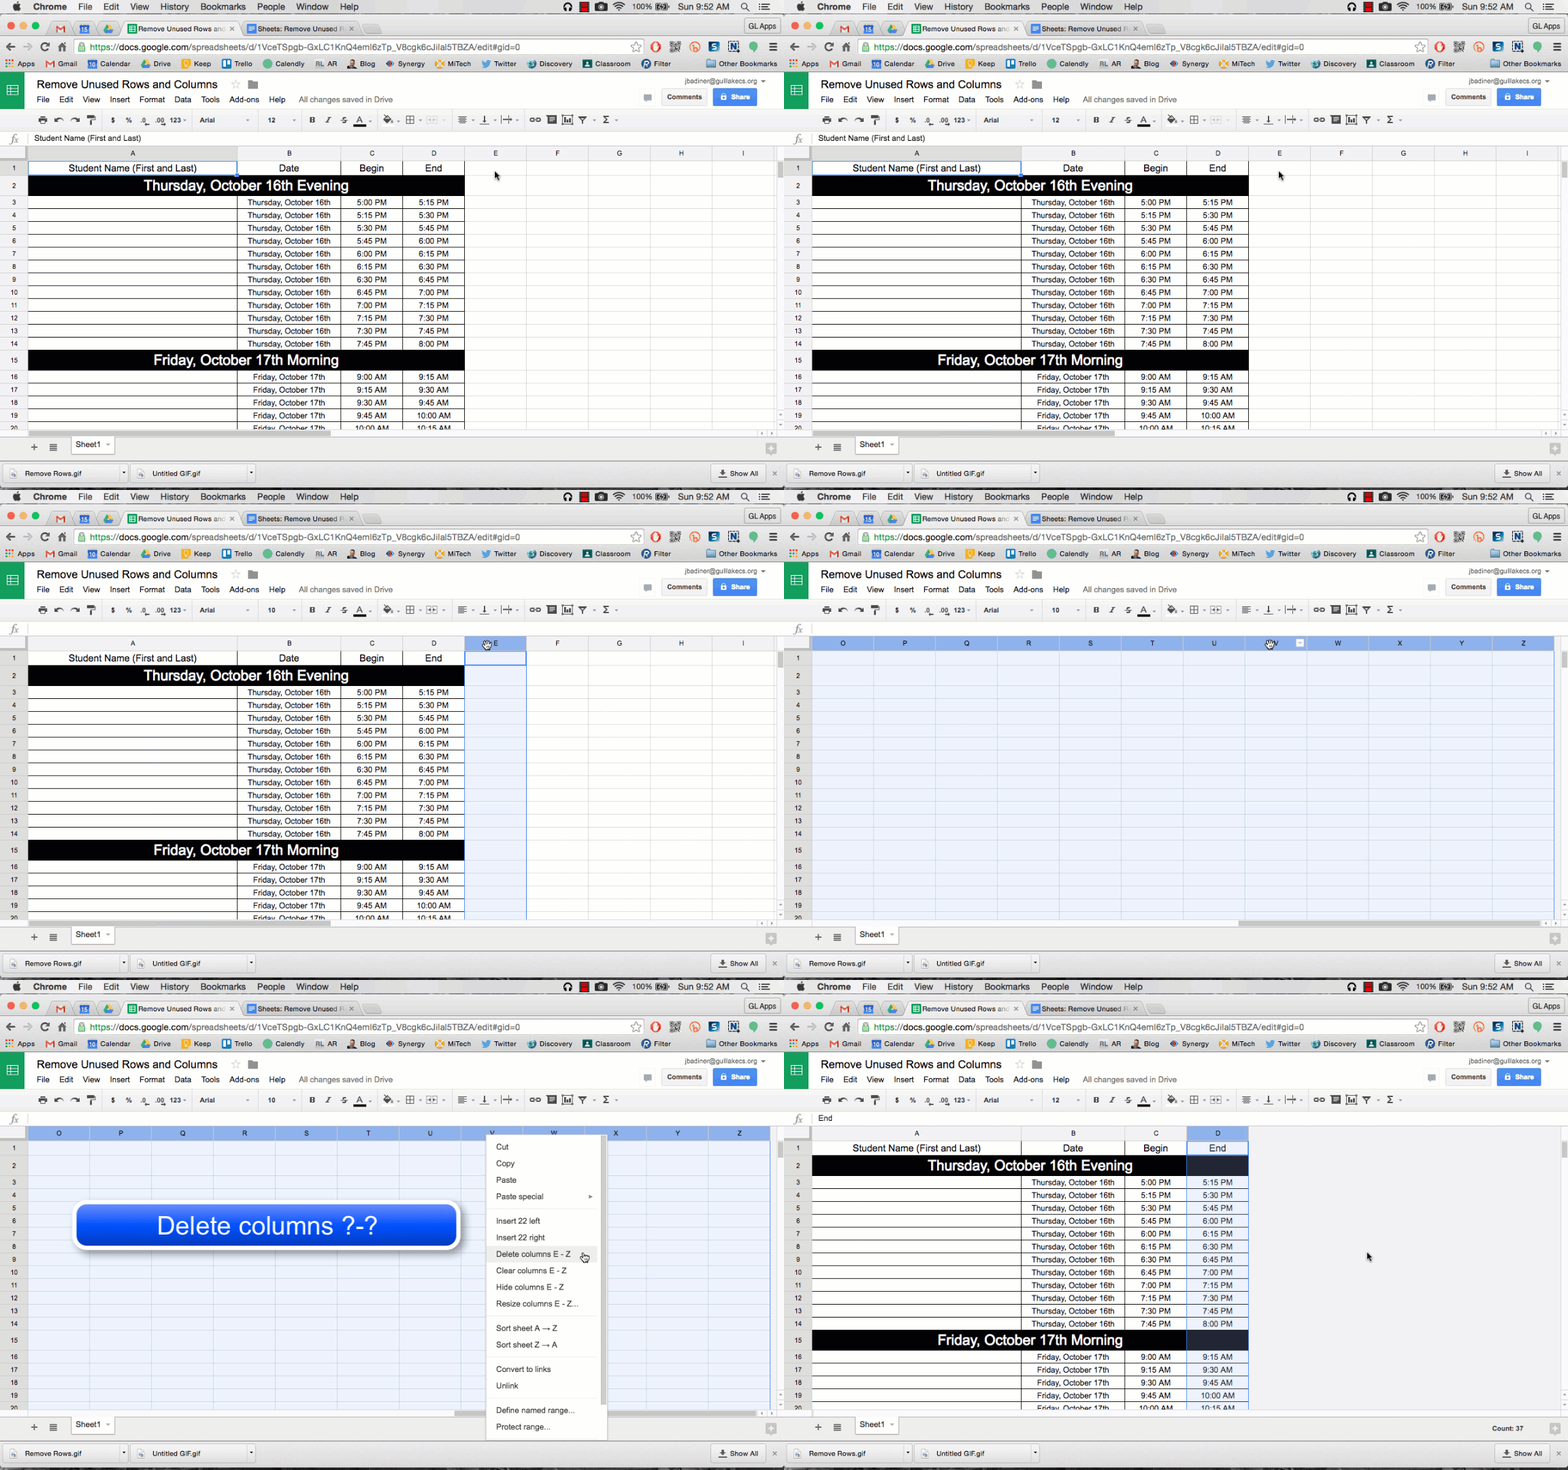
Now your Google Sheet is the exact size you want and there is no getting lost in the unused columns and rows. I do this on every Google Sheet I use as it makes navigating the document much easier.
Want these steps in a Document? Click Here!
Subscribe to:
Posts (Atom)