Google Drive has become my “go-to” tool for more than just document creation. I also use it to store files such as audio, video, PDF, and images. Over the past 3 years I have gone completely “Google” and I really no longer use MS Office. This type of change-over can be tough, especially if one lived in MS Office before. The first question asked is, “Do I have to recreate all those files from Office?” The answer…”No!” You can upload any file into Drive for storage, but you can also have all those MS Office files converted to Google Documents in the same step! Below are the steps to follow to do both!
Transfer (Convert) Files into Google Drive
Upload Files to Drive (See last step to also convert).
- Log into your Google Drive.
- Open the folder that you want the uploaded files to be stored.
- Open up your location of the files that you want to upload.
- Drag the file/folder you want to upload to the center of the screen. As you drag the file over, the center will turn blue like below.
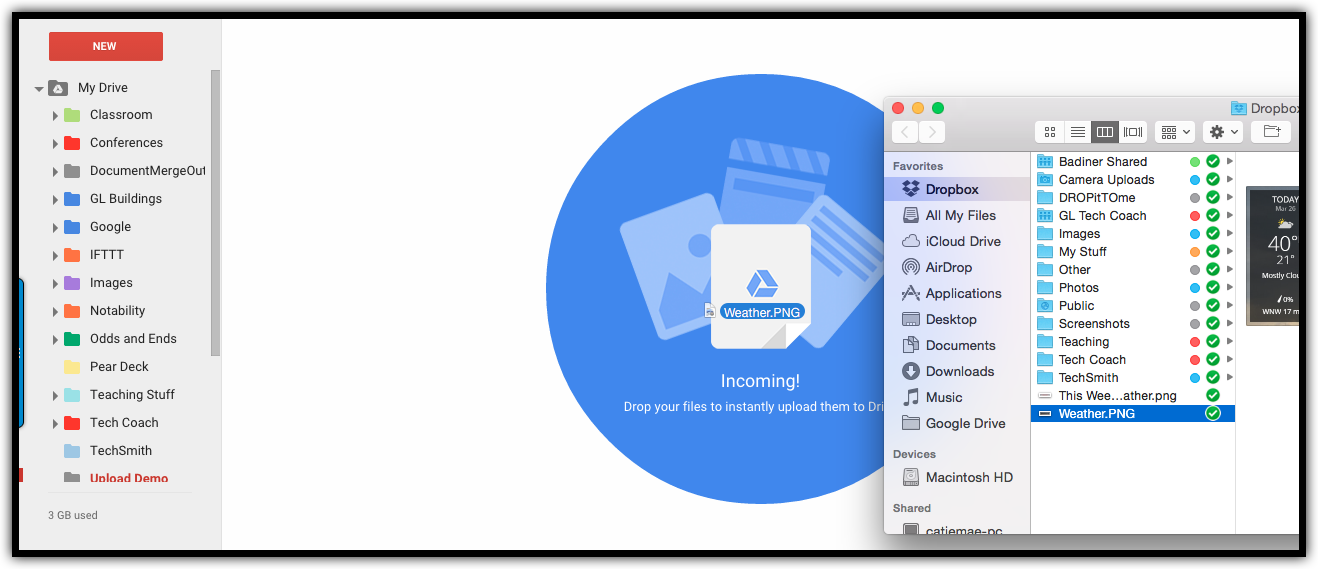
- Drop the file/folder into the center of the blue circle and the upload process will begin.
- You will see the progress on the bottom right as files are uploaded.

- You can do this with individual files or whole folders (with many folders and files within them). A bonus with this process is that all file organization will be retained. Folders in folders will keep the same system. However you have your files organized, this set up will transfer over.
If you are transferring files over to use as Google Document files, there is one step you must do before uploading. (1 time only)
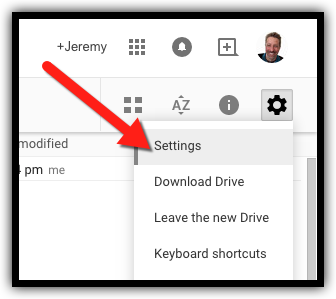
- Click on the Gear icon.
- Click “Settings”.
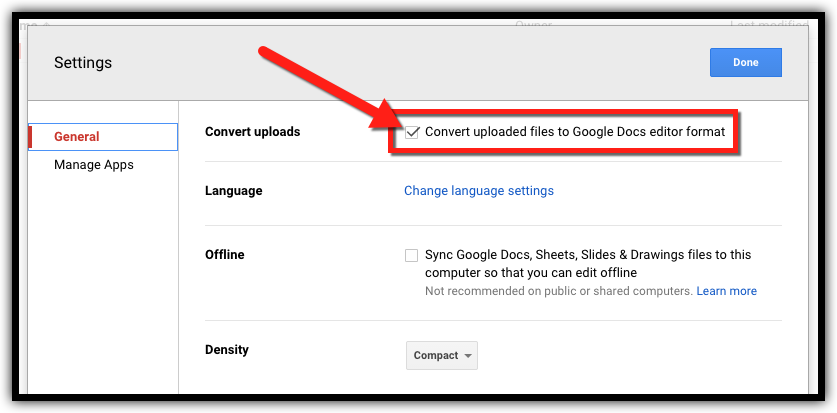
- Make sure the box next to “Convert uploaded files to Google Docs editor format” is checked. This will convert these files to the Google format.
Things to consider:
- Google Docs does not support columns.
- Google Docs does not support Text Boxes.
- Some formatting (borders, fonts, spacing) may change.
- Google Slides might not support all PowerPoint animations/actions.
If you want these directions in a document, Click Here!