Showing posts with label Slides. Show all posts

Monday, November 11, 2024

Add/Delete Slides to Assigned Classroom Slide Decks

Many of us have created and posted an assignment only to want to add some Slides to the end of a presentation AFTER students already have a copy. In the past, that would involve manually going into each student’s file and adding these slides. What a pain! Now it is quick and easy! Check out the extension below to make this process a snap!


Add Slides:

  1. Head over to Magic Exercise Book and install this extension. 

  2. Open the Slide Deck you want to edit (the one you shared with your students). 

  3. Edit this by adding the desired slides.

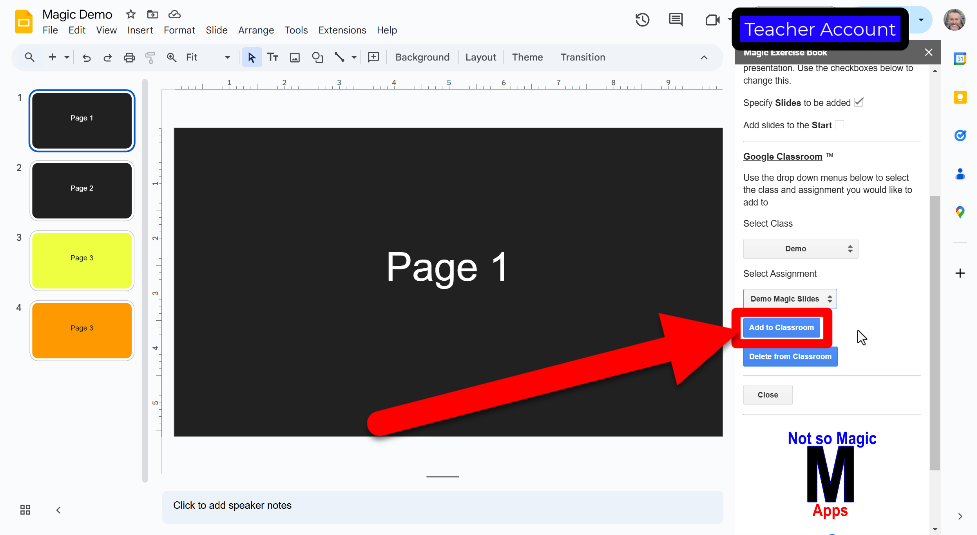
  4. Click on “Extensions” and then “Magic Exercise Book”.
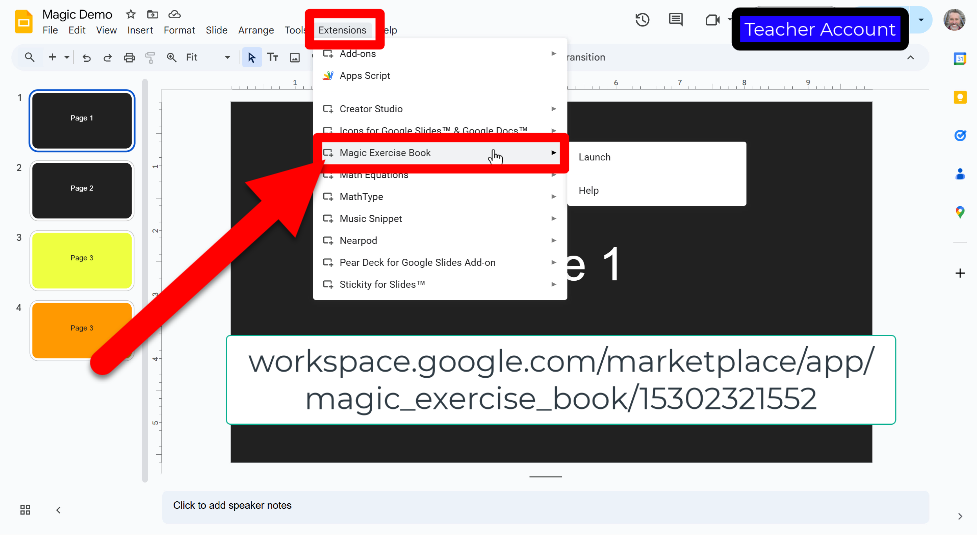

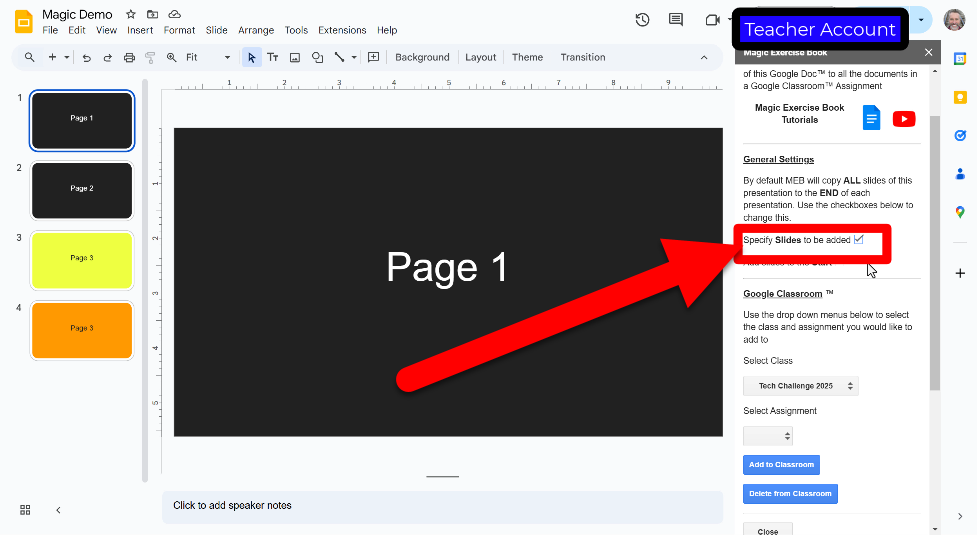
  1. Click the box to “Specify Slides to be Added”.

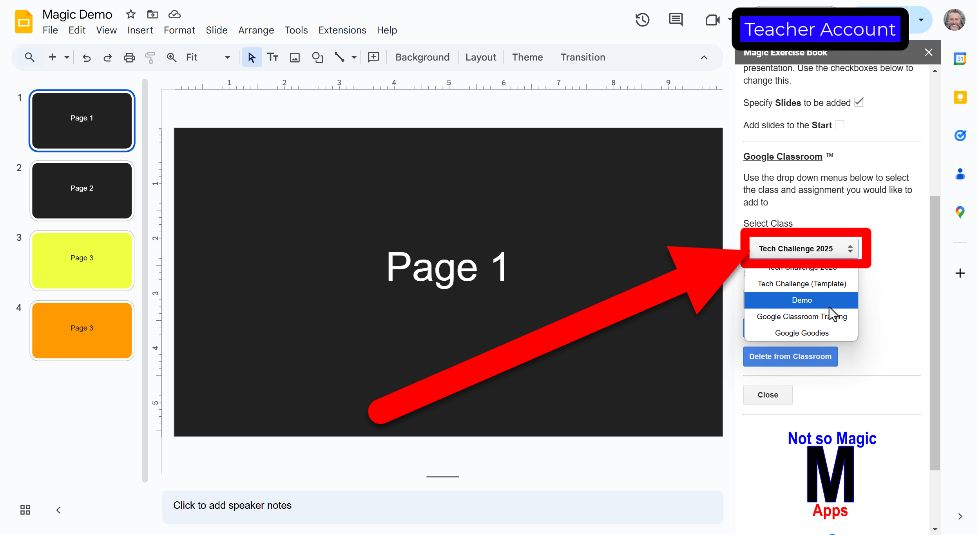
  1. Select the class to edit the student copy in.

  1. Choose the assignment the Slide Deck is in.
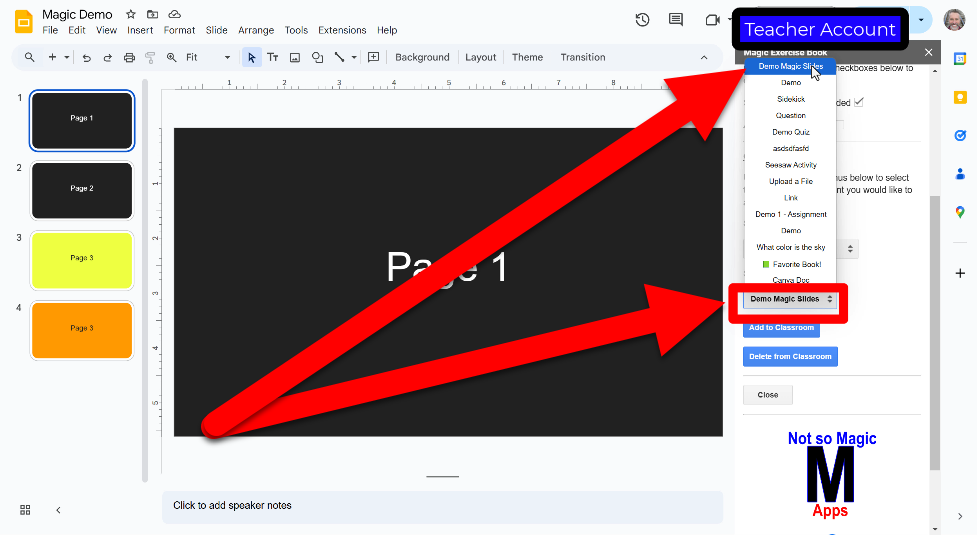

  1. Click “Add to Classroom”.


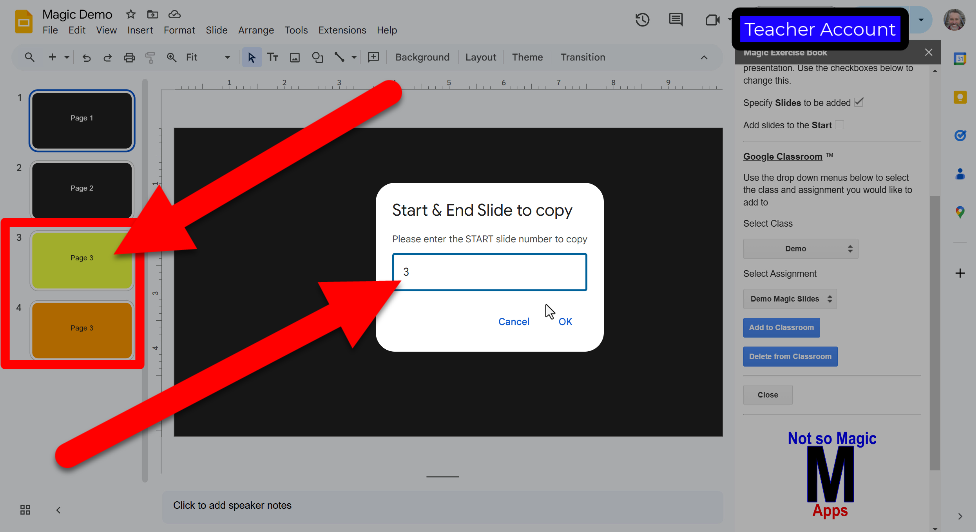
  1. Choose which slide to START to add.


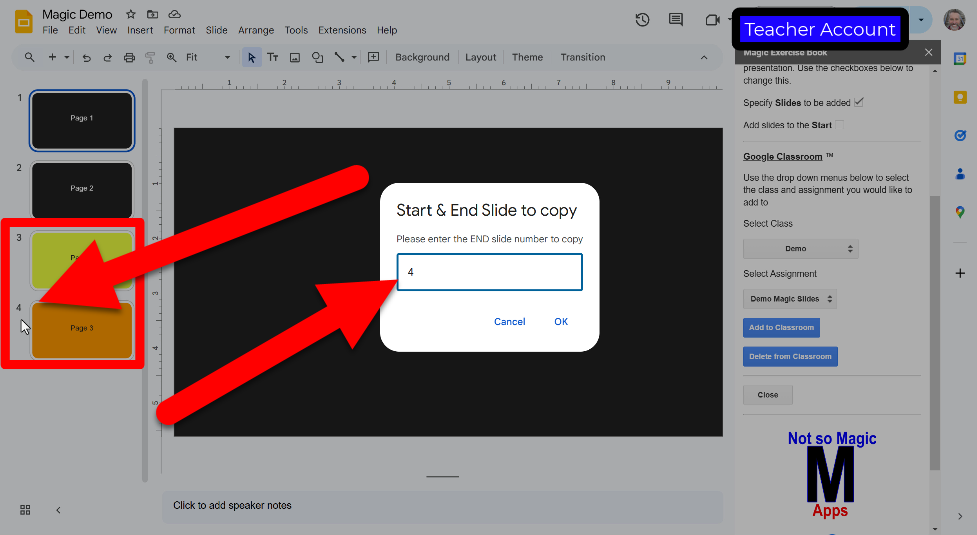
  1. Choose the LAST slide to add.


  1. Click “OK”.


These slides are now added to all your students’ decks!


Delete Slides:

  1. Open the Slide Deck you want to edit (the one you shared with your students). 

  2. Edit this by adding the desired slides.

  3. Click on “Extensions” and then “Magic Exercise Book”.


  1. Click the box to “Specify Slides to be Added”.


  1. Select the class to edit the student copy in.


  1. Choose the assignment the Slide Deck is in.


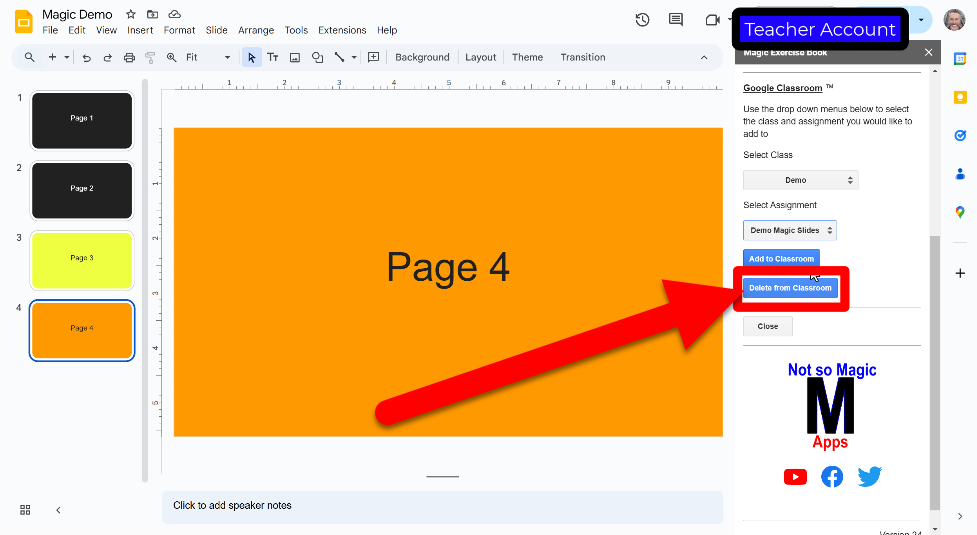
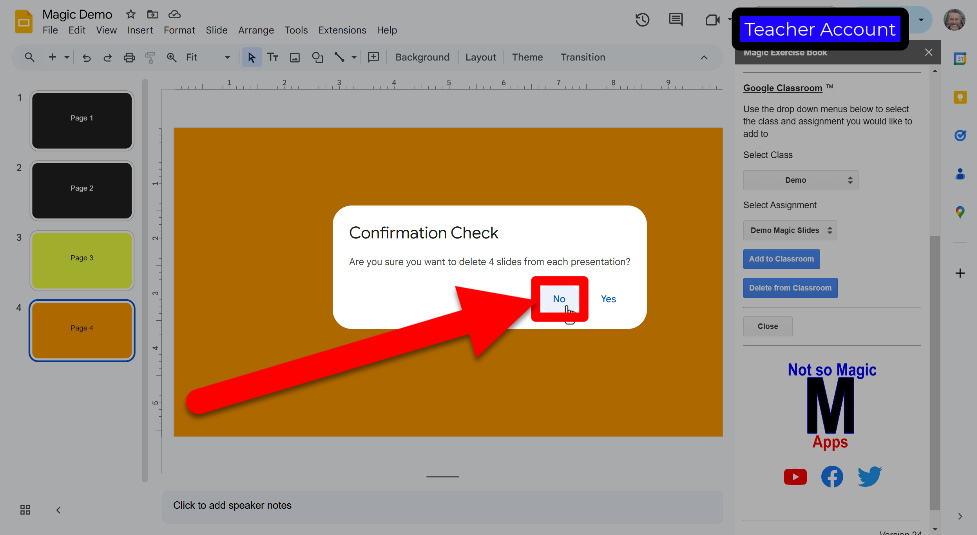
  1. Click “Delete from Classroom”.


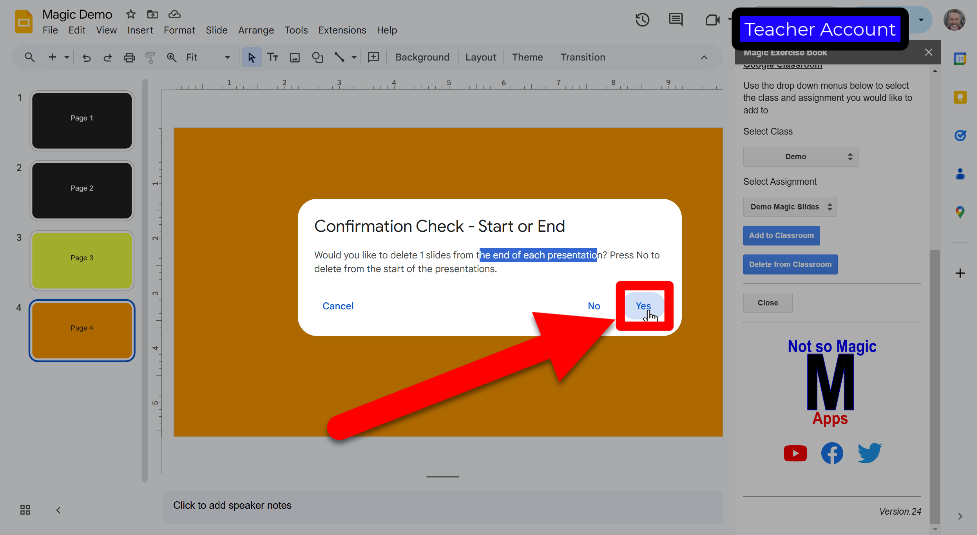
  1. Click “No” if you do NOT want to delete ALL slides.

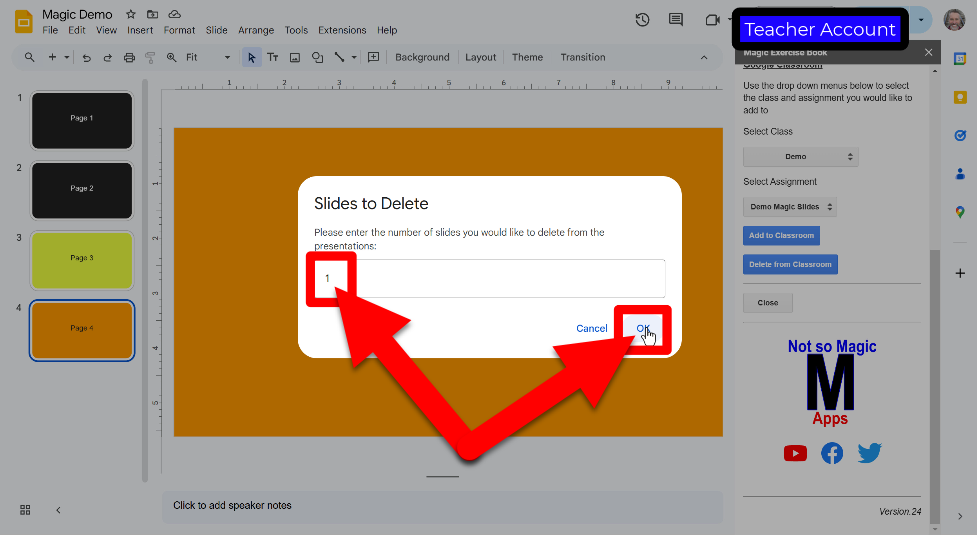
  1. Enter the number of slides you want to DELETE and click “OK”.

  1. Choose the LAST slide to add.


  1. Click “OK”.

  2. Confirm “Start or End”.


The selected slides are now DELETED from the students’ decks!


Here is a VIDEO WALKTHROUGH of all these steps!


If you want these directions in a Document click HERE!


Tuesday, June 7, 2016

Adding Charts to Slides and Docs

In a world of data we are all using charts to show classroom data. Data charts have become as common as images in our documents and presentations. The issue has been when we made these charts (using spreadsheets or other tools) we inserted them into our document or presentation and they were treated much like an image. If the data changed in the spreadsheet we had to recopy and re-insert the chart into our document or presentation. Those days are now gone! You can now insert live charts that sync to a spreadsheet and will always be up to date! Follow the steps below to learn how.


Adding Charts to Google Documents and Slides

  1. The first step (and the one you probably already have done) is to create a spreadsheet and create your chart. The chart can be anywhere within the sheet (new tab, on existing tab, multiple charts, etc).
  2. Open either a Google Document or a Google Slide.
  3. Choose where you would like the chart inserted and put your cursor there.
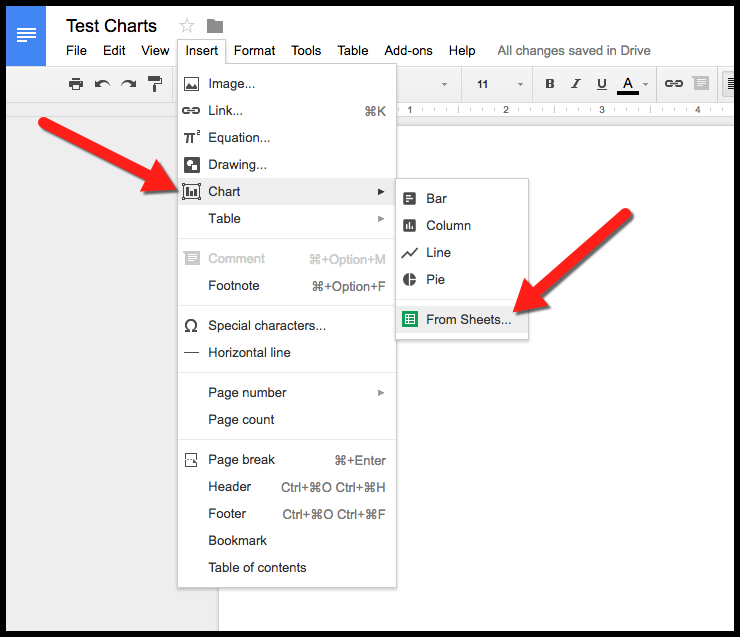
  4. Click “Insert”, choose “Chart”, and click “From Sheets”.


  1. A Drive search box will come up. Locate the Sheet that contains the chart you want and select it.
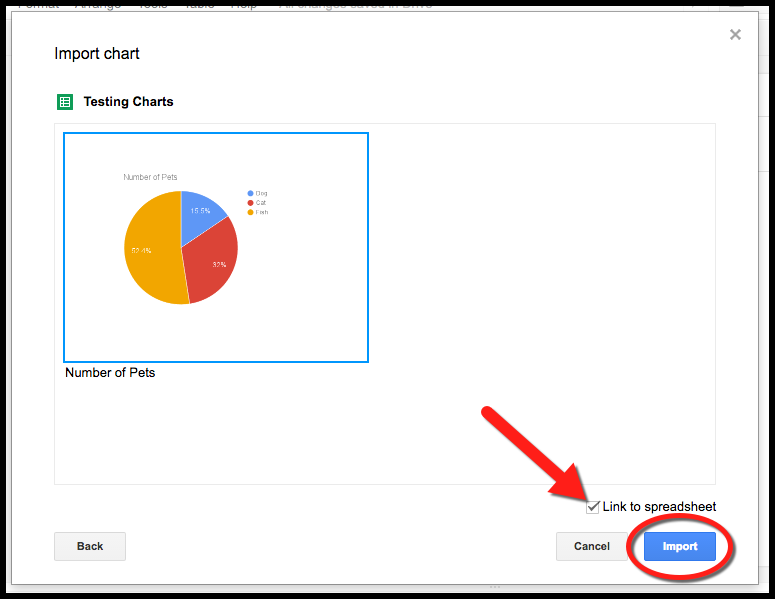
  2. The next box will show any charts that are contained within that selected Sheet. Choose the chart you want inserted into your Document or Slide.
  1. Make sure the “Link to Spreadsheet” box is selected (this will allow it to sync) and click “Import”.


  1. Resize or relocate the chart as needed in your Document or Slide.
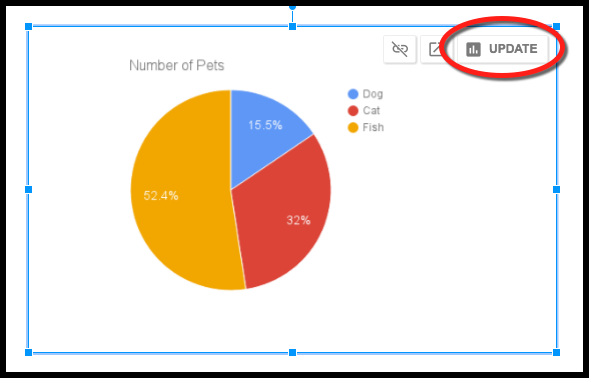
  2. If you edit the data in the spreadsheet and the chart changes, you will need to refresh your Document/Slide and click the “Update” button to make the chart update the new data.


You are all set!
Now you can keep up to date data charts working in Google Documents and Google Slides!


To see these steps in a Document, Click Here!


Friday, January 23, 2015

Edit Images in Google Slides and Documents

Google Slides and Documents are awesome. With all the updates Google is always doing with these products they just keep getting better. One of these improvements is the ability to edit images. There are many options now that were not available before. Below are some easy steps to help you start editing your images in both Documents and Slides.


Edit Images in Google Slides & Documents


Insert an Image:
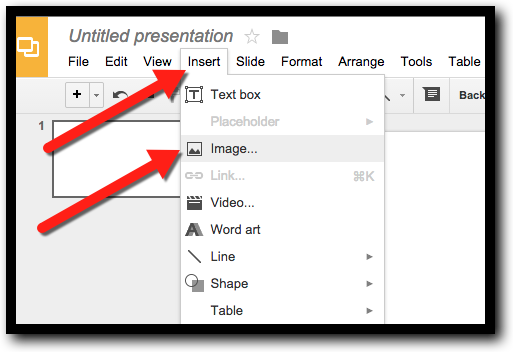
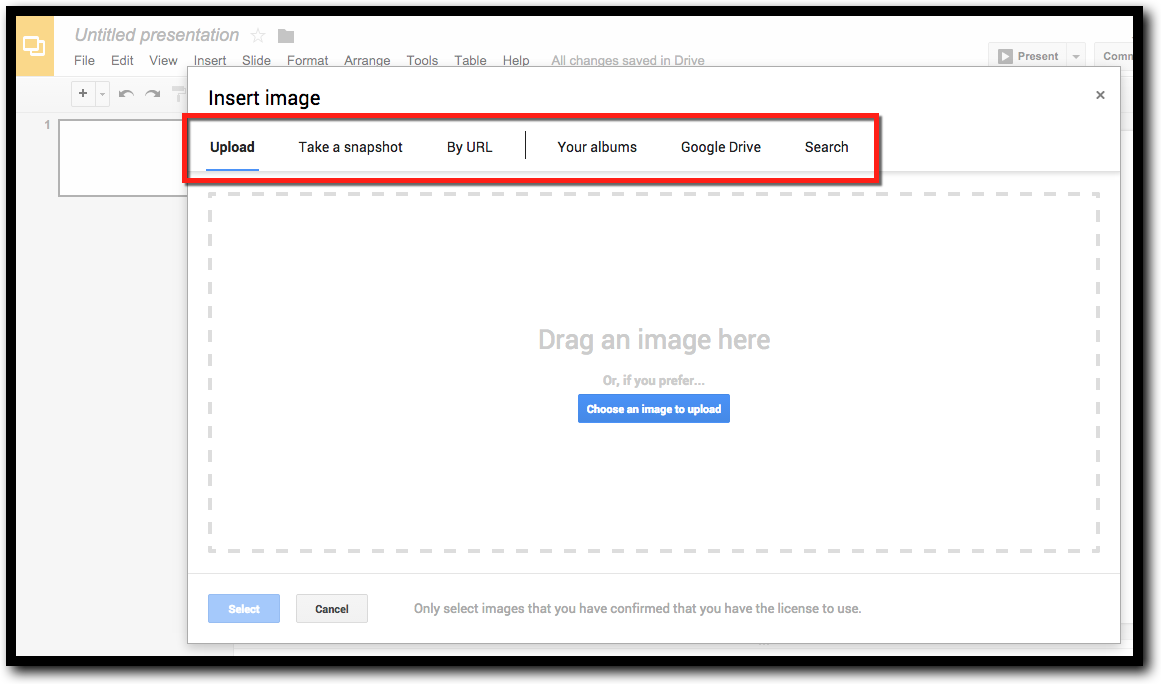
  1. Click “Insert”.


  1. Find where the image is located.


Edit an Image: (Make sure to click on the image first to bring up these tools.)
   
Crop:
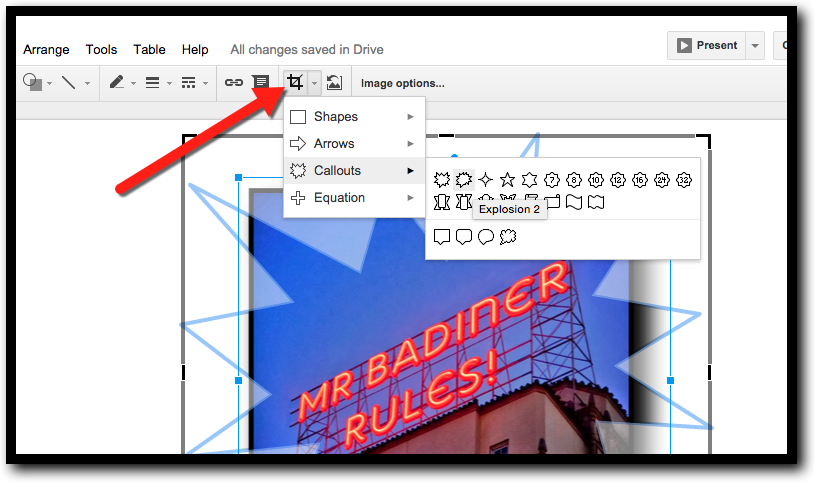
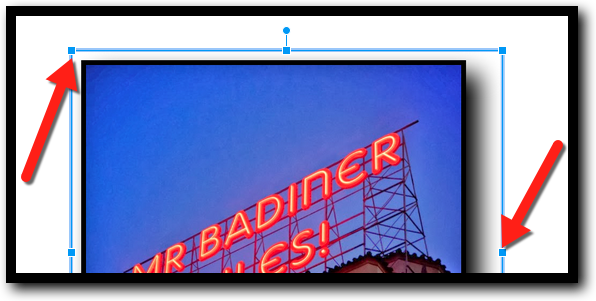
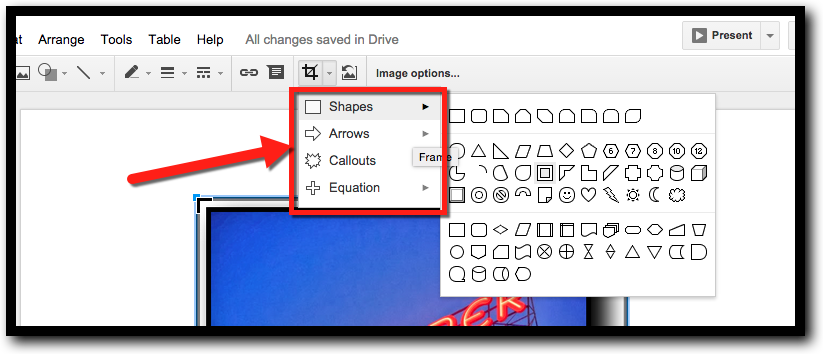
  1. Click the “Crop tool”.


  1. You can crop the image using the corners or sides to keep it a rectangle...or…


  1. Choose the shape you want to use. There are lots to pick from. Make sure the image fits in the outlines of the shape.


Border:
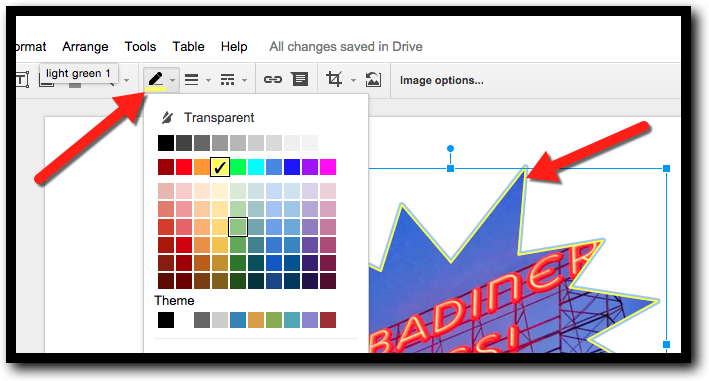
  1. Line Color: Click to add a border to you image.


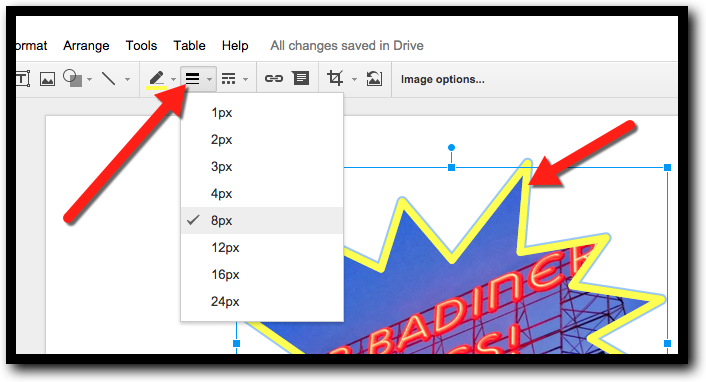
  1. Line Weight: Click this tool and choose how thick you want the border.


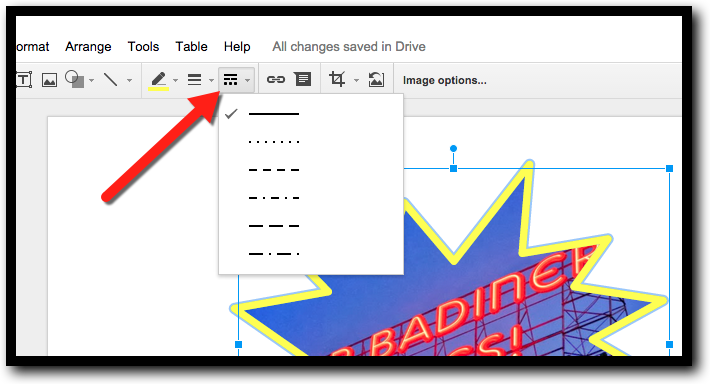
  1. Line Style (style): Click this tool and choose style of line used in the border.


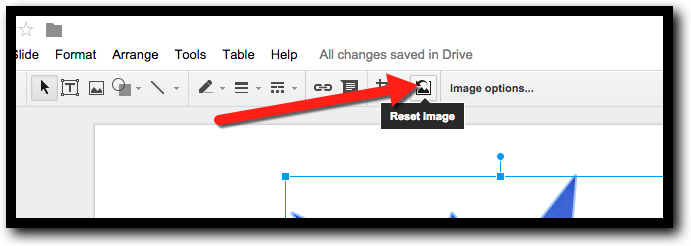
Reset Image:
  1. We all makes mistakes. If you click the Reset button your image will go back to it’s original format and you can start over. The ultimate in “undo”. Little 1 step errors can still be undone with the “Undo” arrow


Inserting and editing images in Documents and Sheets will add more appeal and effectiveness to your documents. Open a document or Slide and give these steps a try!


If you want these directions in a Document Click Here!