Showing posts with label Google Forms. Show all posts

Monday, February 13, 2017

Google Forms Animated Header


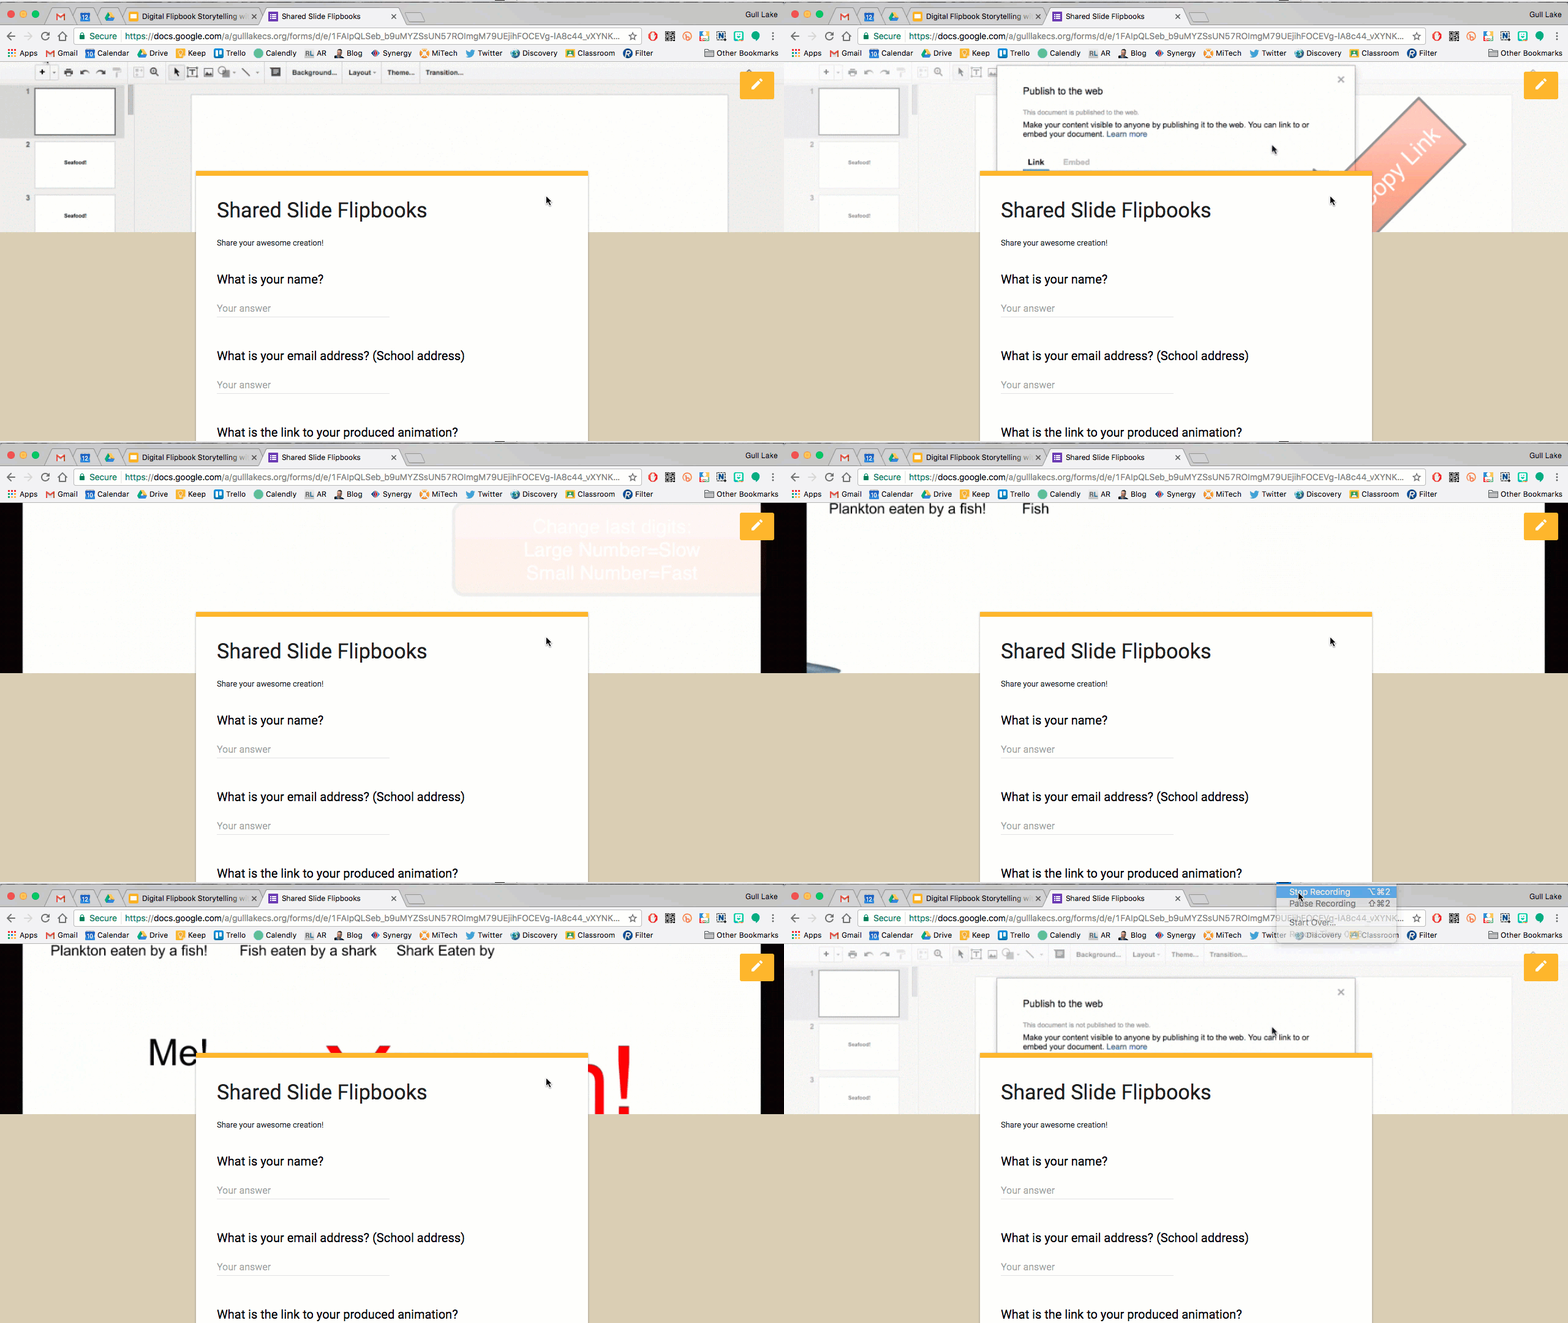
We all love Google Forms. It is such a great tool to collect data, give quizzes, and many other uses. As with any tool, we want to make the most of its features. Here is a way to add a little pizazz to your Google Forms and make them a little more “animated”! Follow the steps below to make your landing spot a little more interesting.


Google Forms Animated Header

  1. Decide what GIF you want to represent your Form. Here is a great way to find a premade GIF. If you have an editing program (I use Snagit or Camtasia) you can make your own. Also keep in mind that you can use Google Photos to create animated GIFS from any of your photos!
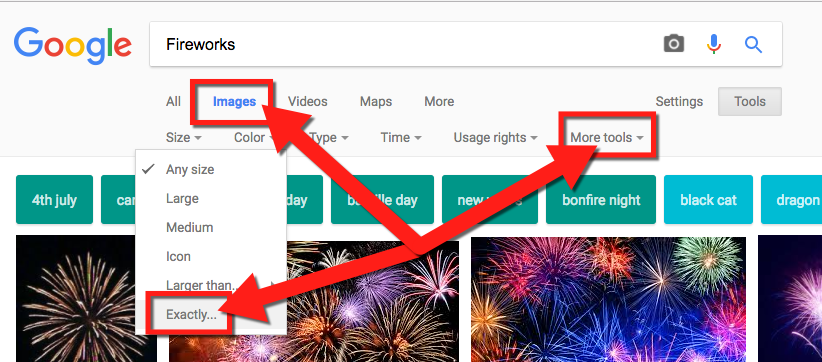
    1. Google search for the topic of your GIF.
    2. Go to “Images”.
    3. Go to “Tools”.


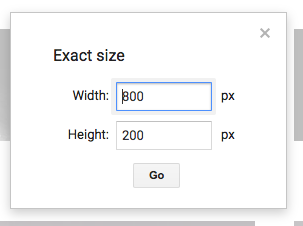
  1. Go to “Size”.
    1. The size that you are looking for is 800x200 as a minimum (2000x400 works as well).

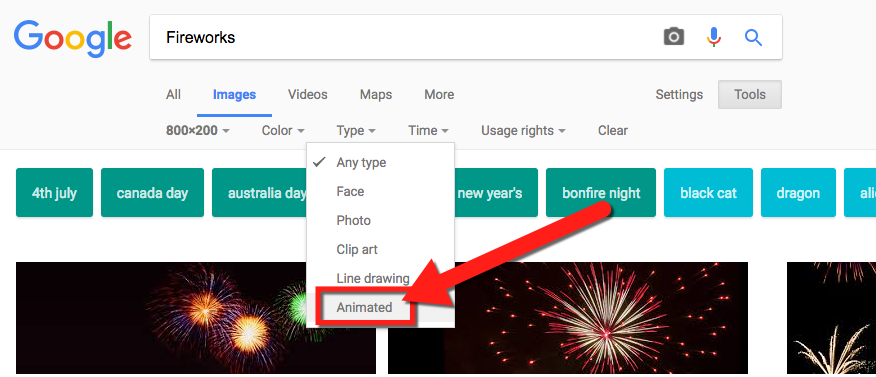
  1. Then select “Type” and choose “Animated”.

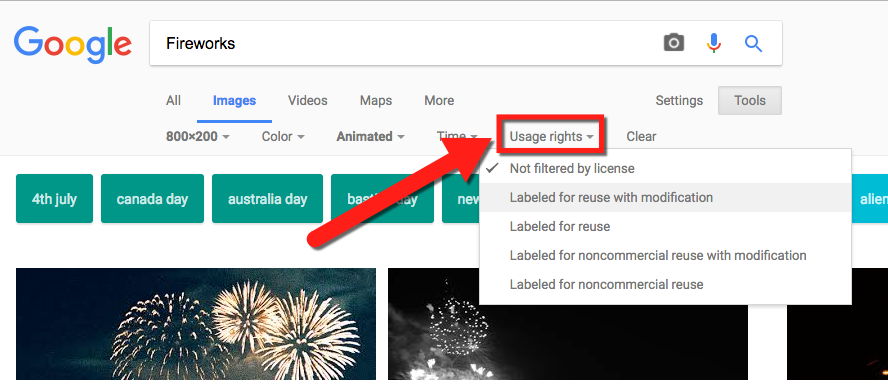
  1. For Copyright guidelines, remember to choose the correct “Usage Rights”.

  1. Download the GIF you want to use to your computer.
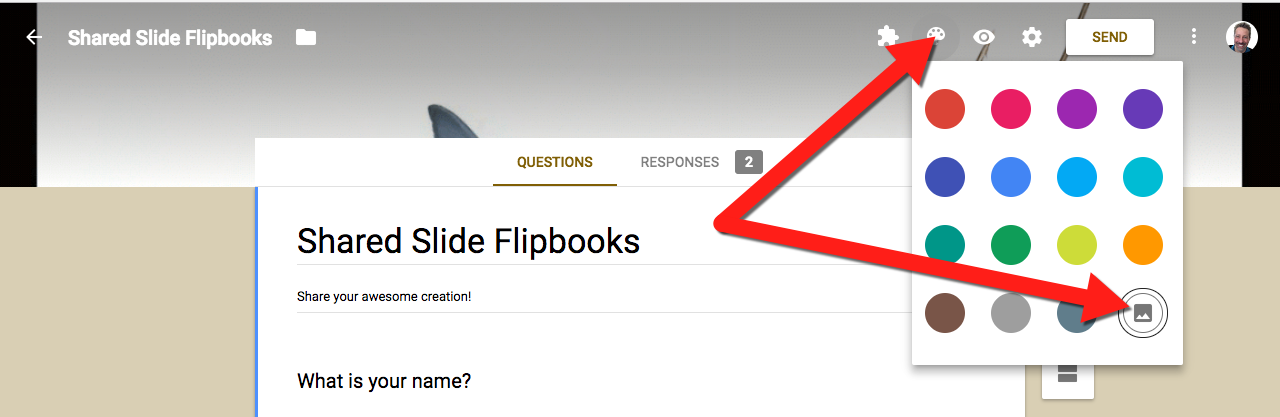
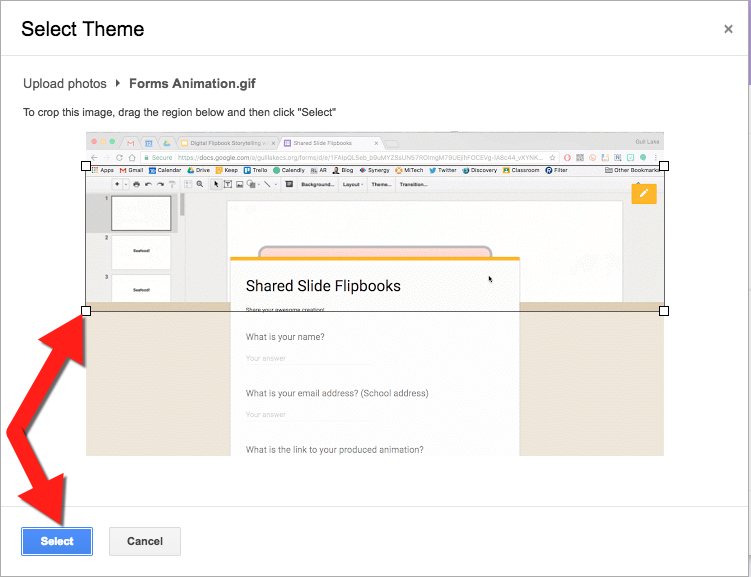
  2. Click the “Palette” icon, then the “Upload” icon. Upload the GIF you downloaded.


  1. Crop to best fit then click “Select” to apply.

  1. Enjoy your new header!


Try to find a GIF that reflects your Form. Colors of the image/GIF change the theme of your Form. Play around to find one that creates the theme you want.

If you want these steps in a document, click Here!


Wednesday, January 25, 2017

Password Protect Google Forms


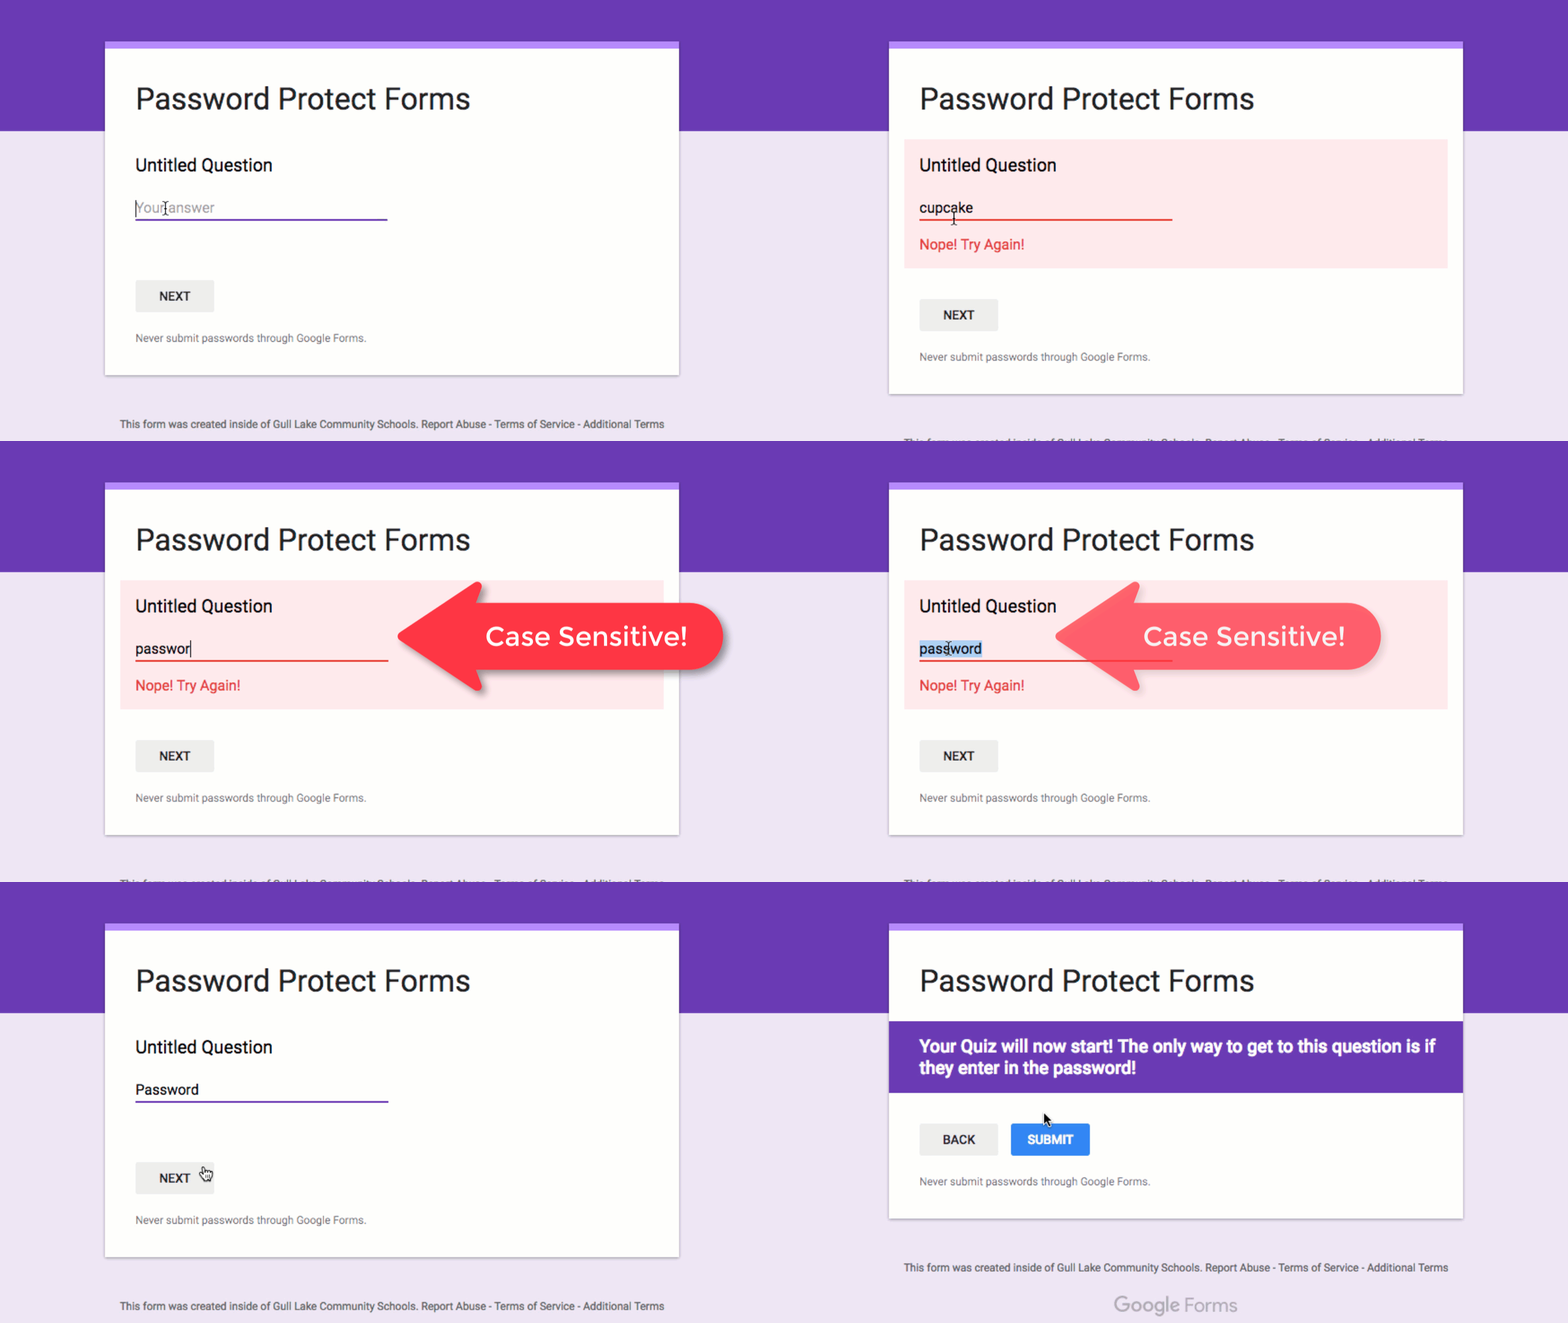
Google Forms can be used for so much: collecting data, surveys, self grading quizzes, and Breakout Games. One of the coolest features is the ability to set a password to block progress in any Form. All you need to do is create sections and add a question that requires a specific text, set of digits, or other combination to progress. Follow the steps below to start creating Password Protected Google Forms!


Password Protect Google Forms!


  1. Open a Google Form.
  2. Create questions/images/etc until you want there to be a “roadblock” or spot where the person completing the Form is required to enter in a password or specific combination.
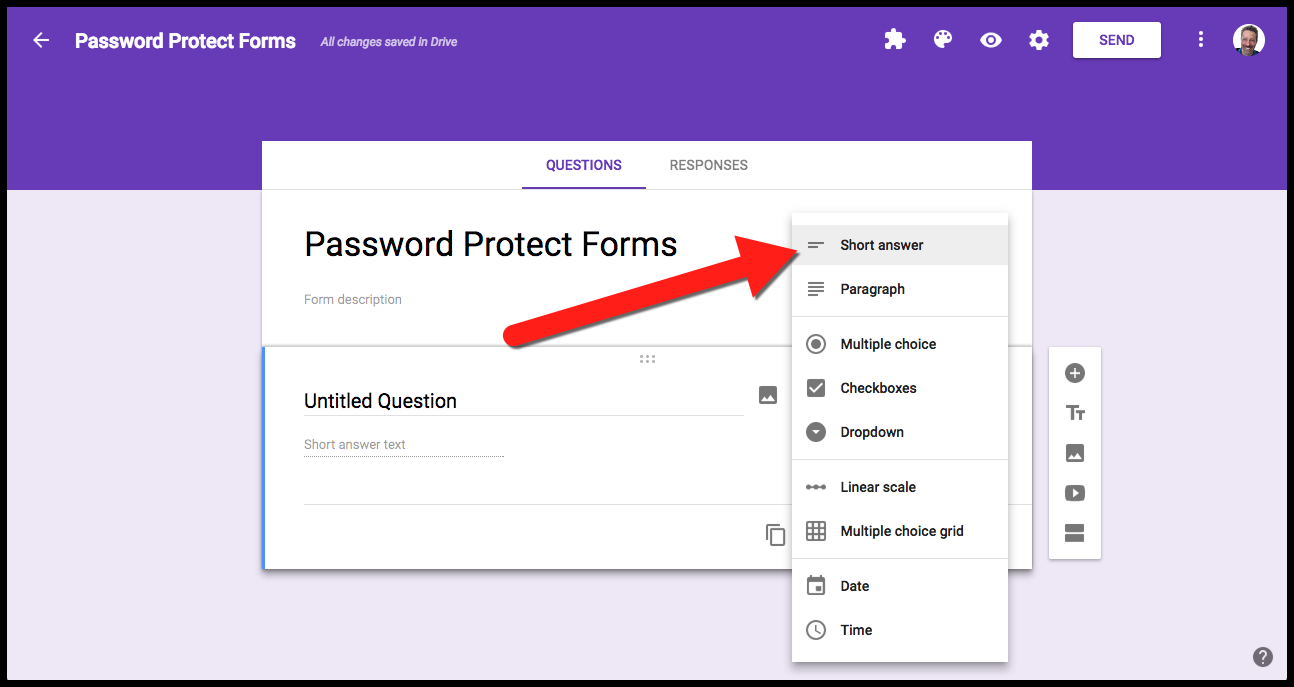
  3. Make a short answer question.


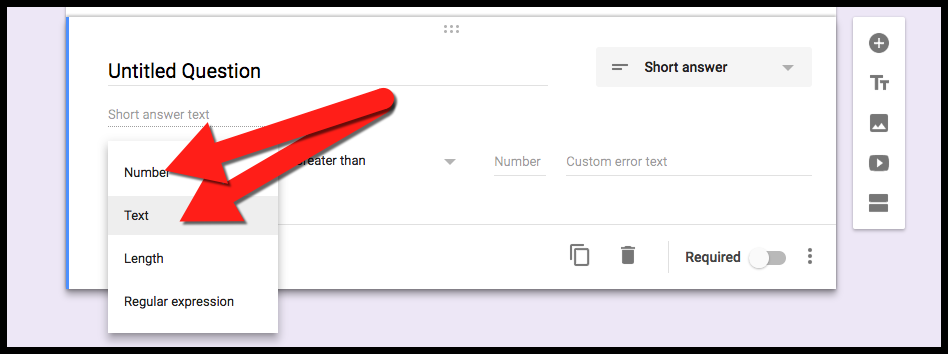
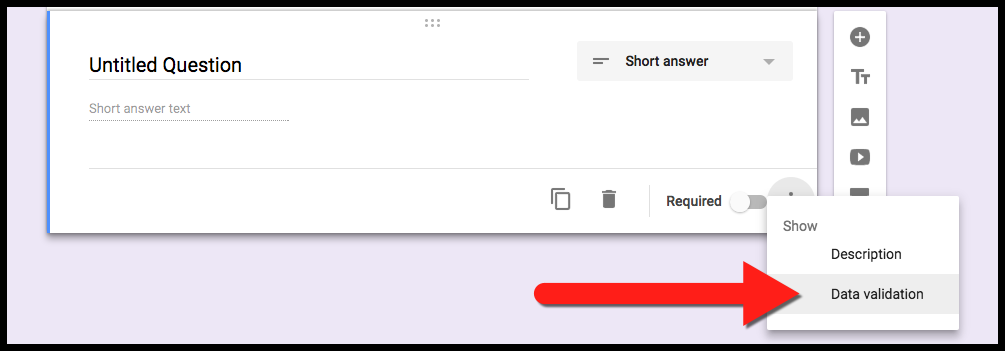
  1. Click the 3 dots on the bottom right corner of the question and click “Data validation”.


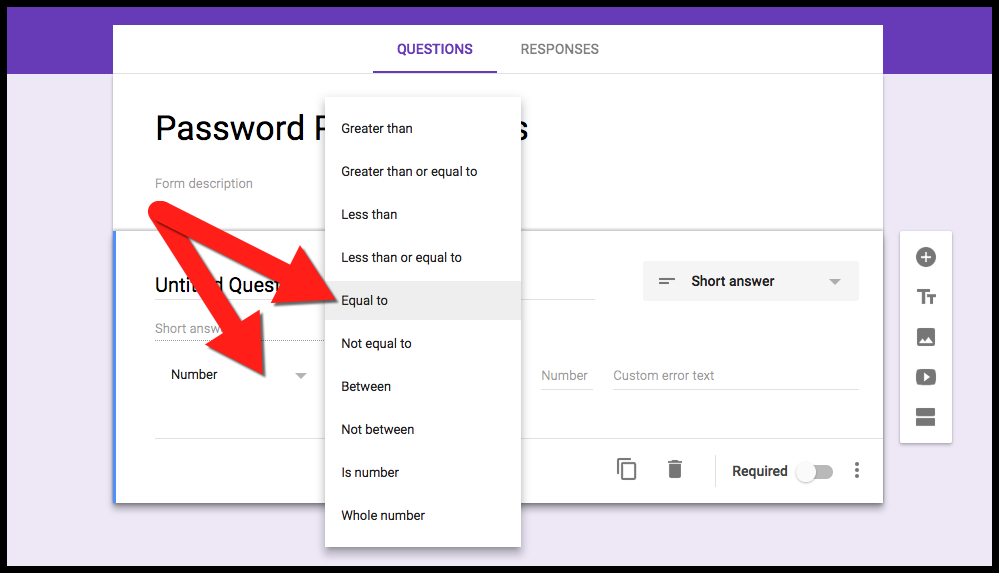
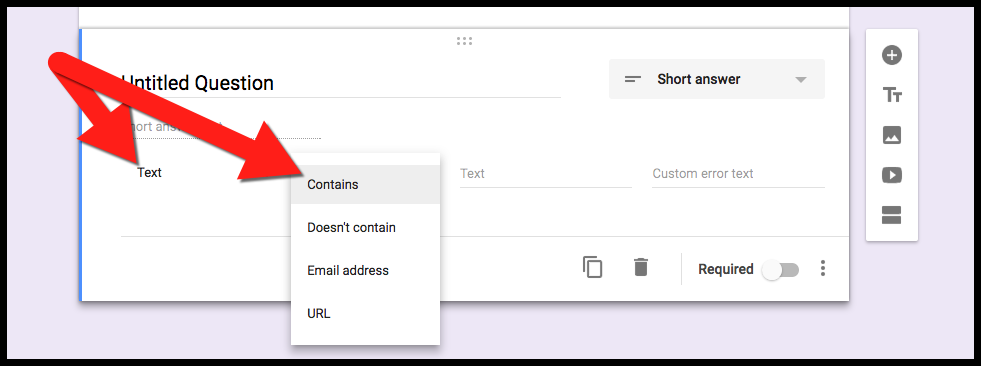
  1. Choose “number” or “text” as your password format and click on one of them.


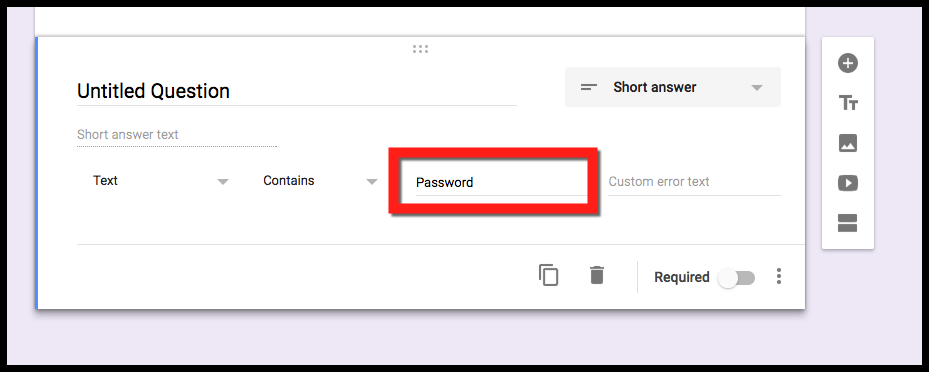
  1. Choose “Is equal to” in the next dropdown for number or “Contains” for text.


  1. Type in the required password in the next line. This is Case Sensitive!


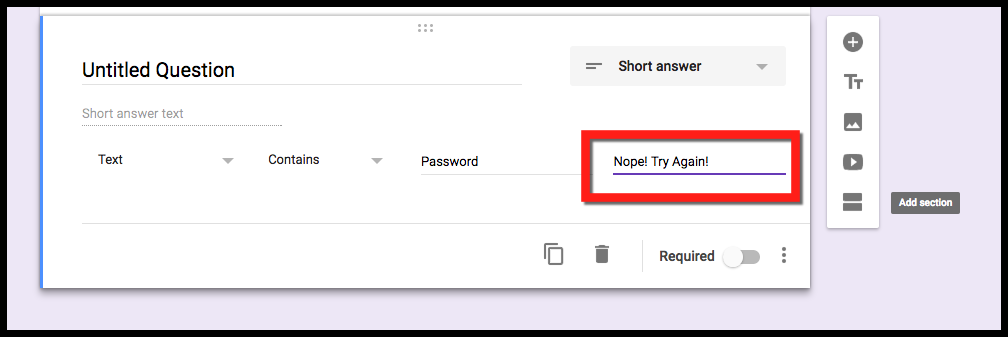
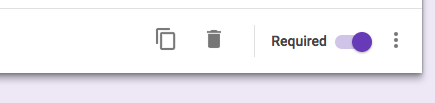
  1. Type an error message in the last line. This is required! If there is no error message, it will show the password to anyone filling in the Form and make the question "Required".


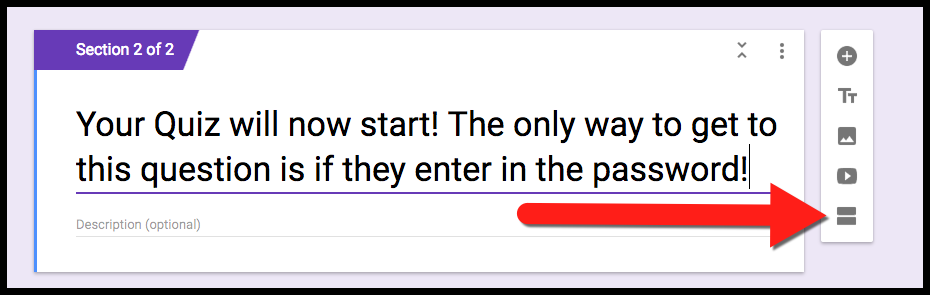
  1. Insert a Section Break. This will require the person filling in the Form to get the password correct before seeing any more of the Form.


  1. Now you can continue to create regular question. The only way anyone can get to the question is if they submit the correct password.


Now your Form is password protected so students can not get into it or progress any more without the password. This also works great for creating digital Breakout style games!

If you want these directions in a Document click Here!


Wednesday, January 18, 2017

Share a Google Form

Google Forms might be one of my favorite Google Tools in G Suite. There is so much you can do with them: collect data, survey others, create self-grading assessments, create lesson plans, etc… One of the drawbacks was trying to share them. In the past I always invited collaborators, allowed them to open the Form (in editing mode) and watched over their shoulder as they clicked “Make a Copy” before quickly removing their editing rights before they could mess anything up. I always wanted a better way to do it, and I finally found it. Follow the steps below to start sharing your Forms with others!

Share a Google Form

  1. Open Drive.
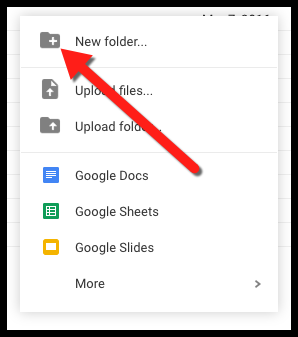
  2. Create a folder.


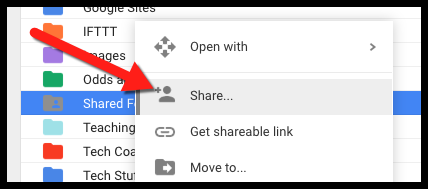
  1. Right click on the folder and click the “Share” icon.


  1. Edit the share options of this folder to “Anyone with the link can view”. This will force any file within the folder will have the folder’s sharing settings. There is no way to put these settings on a Google Form, but the folder will force viewing to the Form (super-cool hack!). Put any Forms you want to share in this folder.


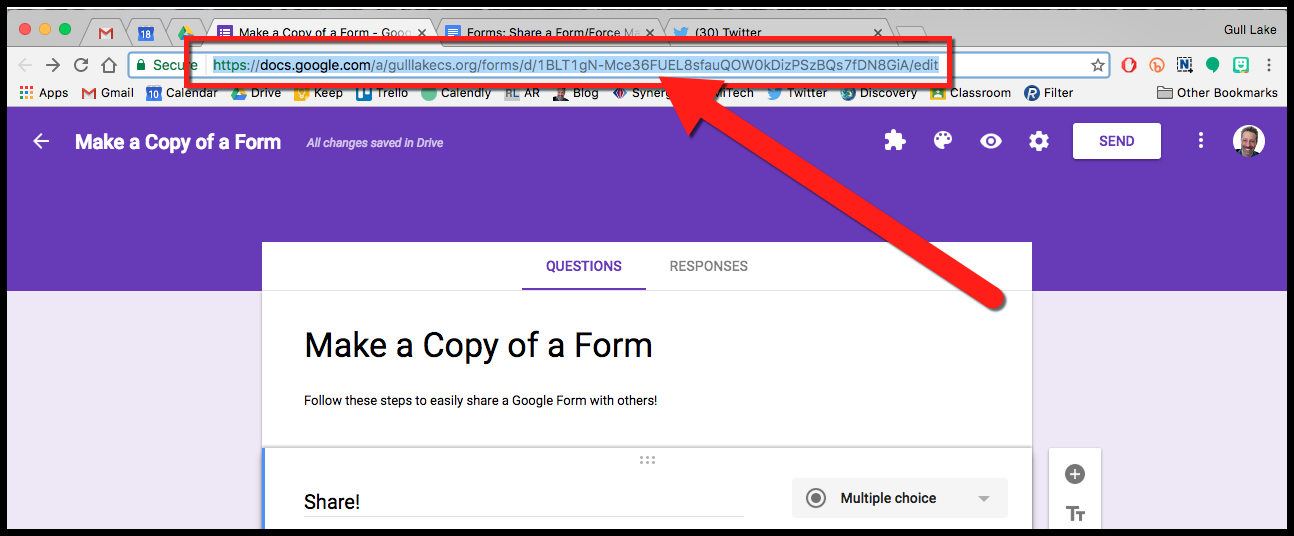
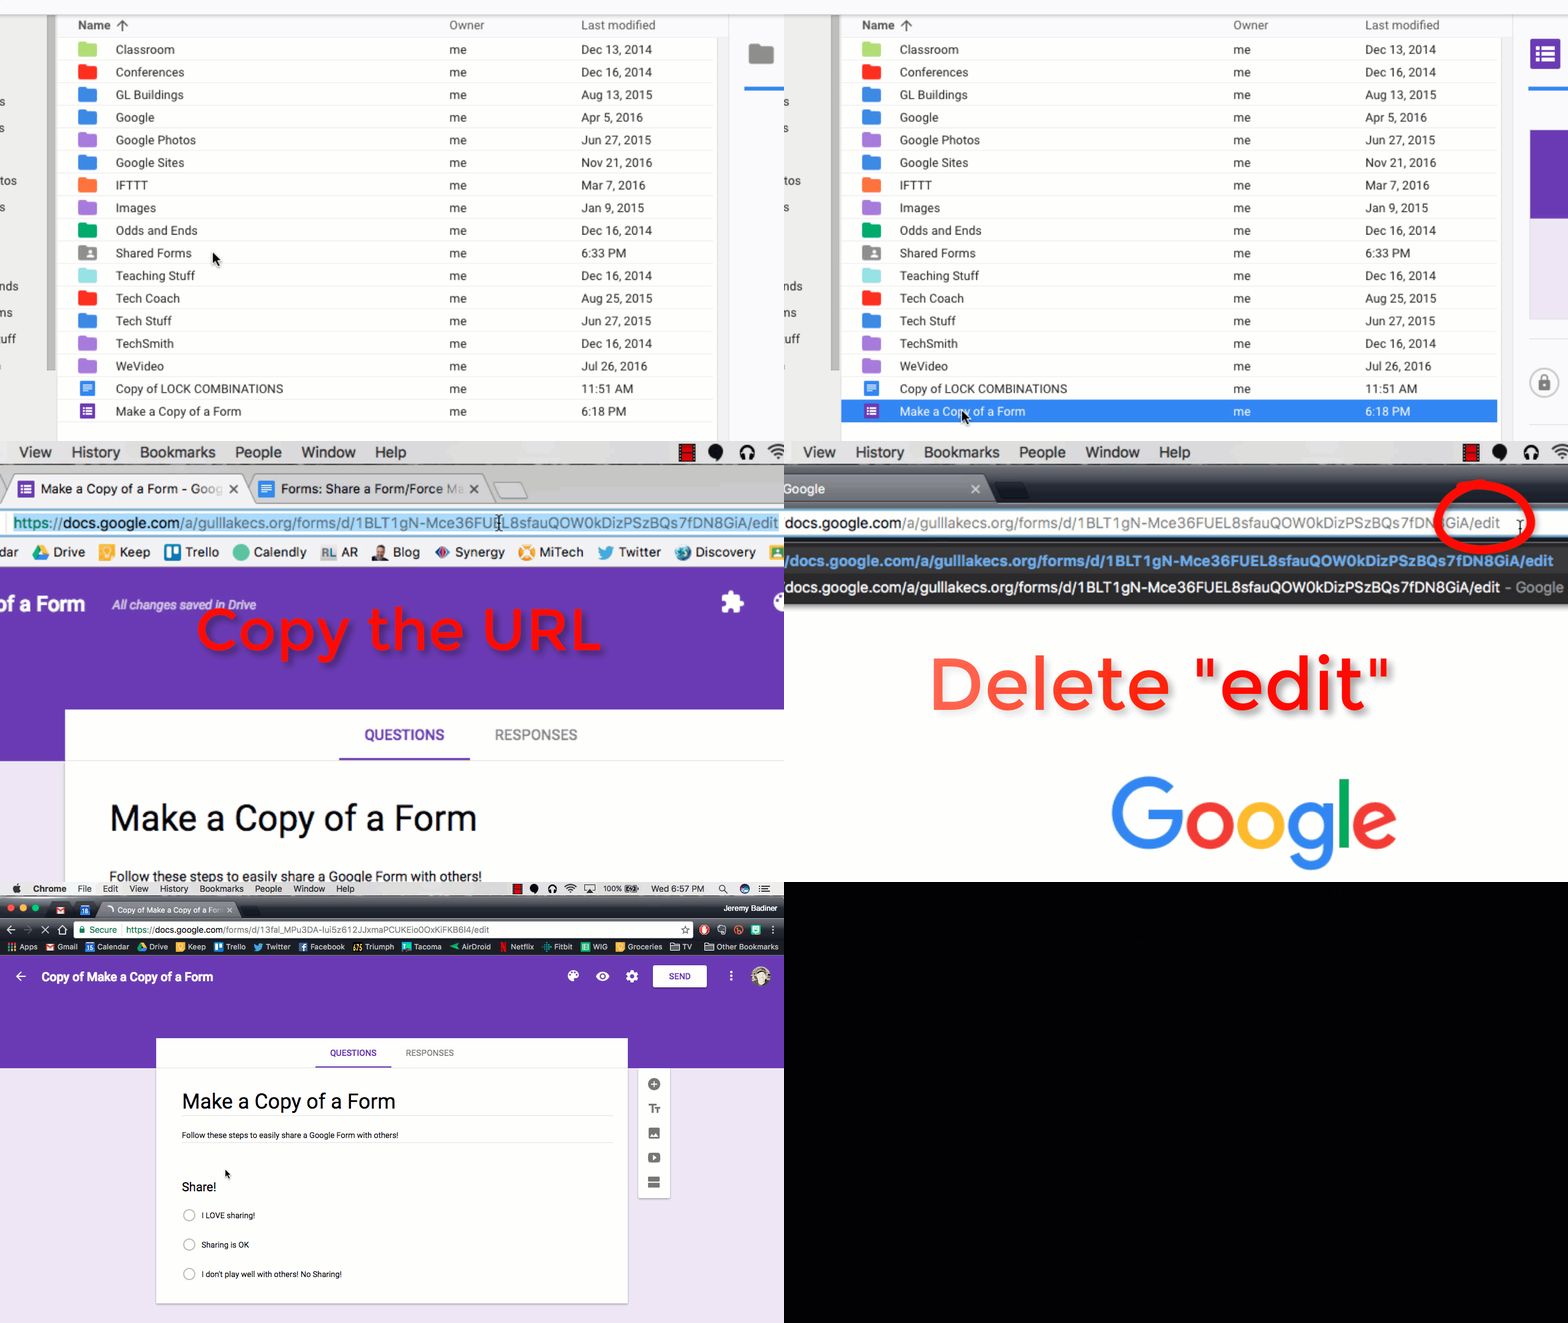
  1. Open a Google Form you want to share and copy the address at in the address bar.


  1. Paste this somewhere in an email or document that you are sharing with those you want to be able to make a copy.
  2. Now comes the magic! Look at the URL you pasted. At the very end is the word “edit”.


  1. All you need to do is delete the word “edit” and replace oit with the word “copy”.


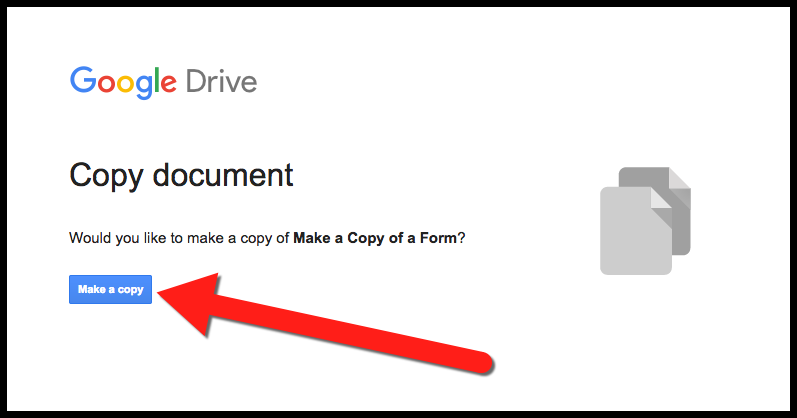
  1. When someone uses this newly created link (with “copy”) they will be prompted to Make a Copy!


  1. Sit back and relax...no one will ruin your awesomely make Google Forms!


Give it a try and start sharing all your awesome Google Forms!


If you want these directions in a document click Here!


Friday, November 11, 2016

Uploading Files with Google Forms

It is finally here! The long awaited “Upload File” in Google Forms has arrived! You can now have students upload files from their desktop or Drive directly to you through an easy process in Google Forms. Below are the steps to see how it works. One thing to keep in mind...This is only available for GAFE accounts and can only be used in the same domain.


Uploading Files with Google Forms

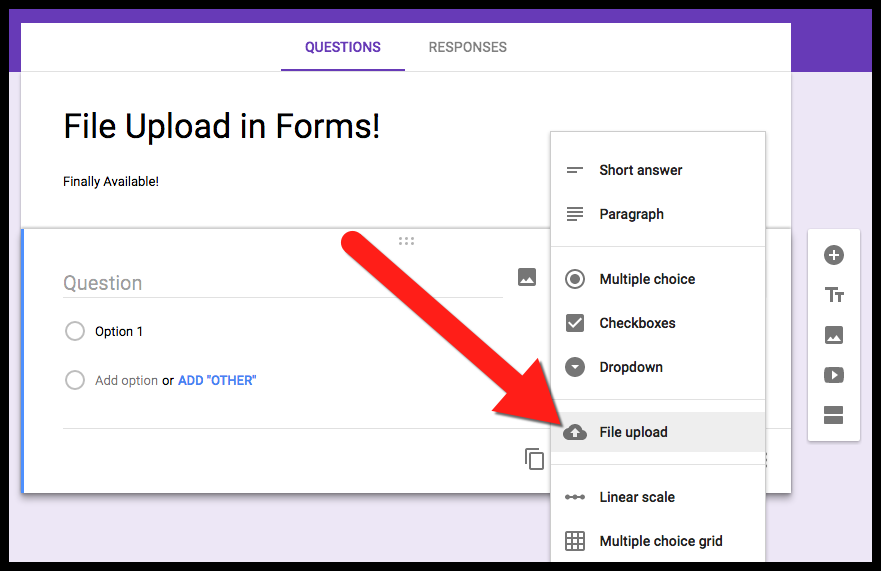
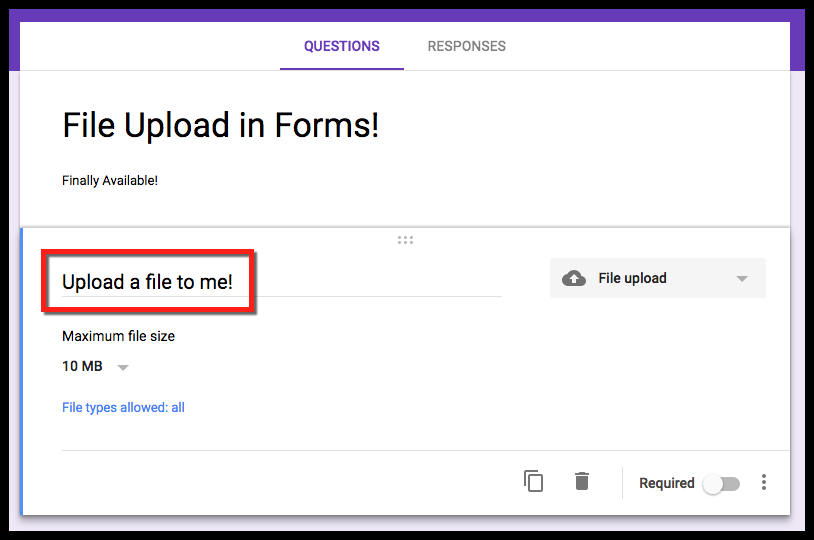
  1. Create a Form. Then choose the question option of “File Upload”.


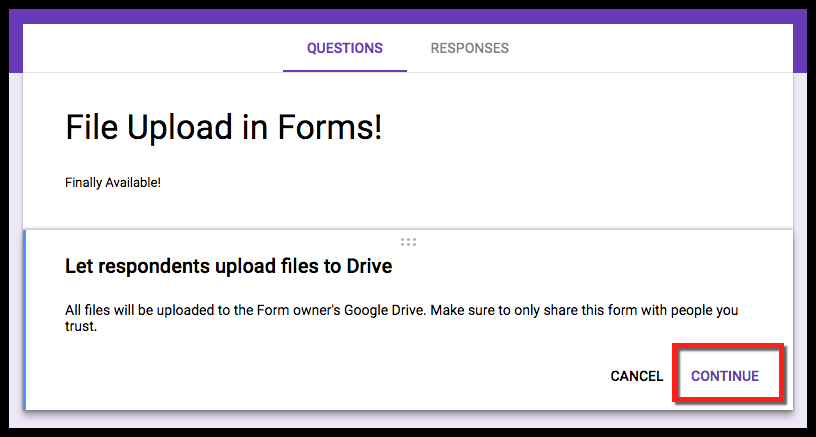
  1. Forms will run you through a Step-by-Step setup for that question.


  1. You will title the question (this will name all submissions this name to easily find later).


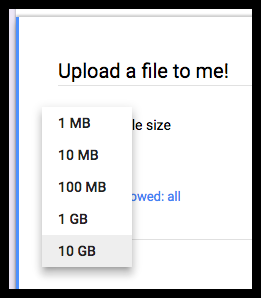
  1. You can set the maximum file size.


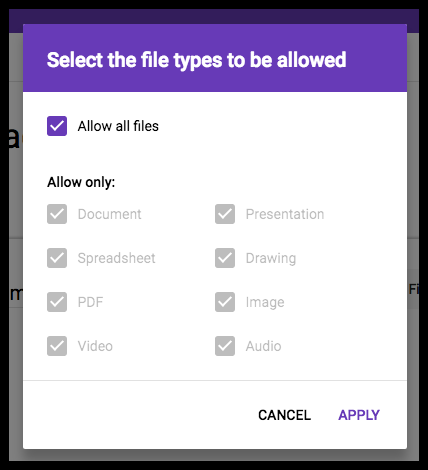
  1. You can choose/limit the uploaded file type.


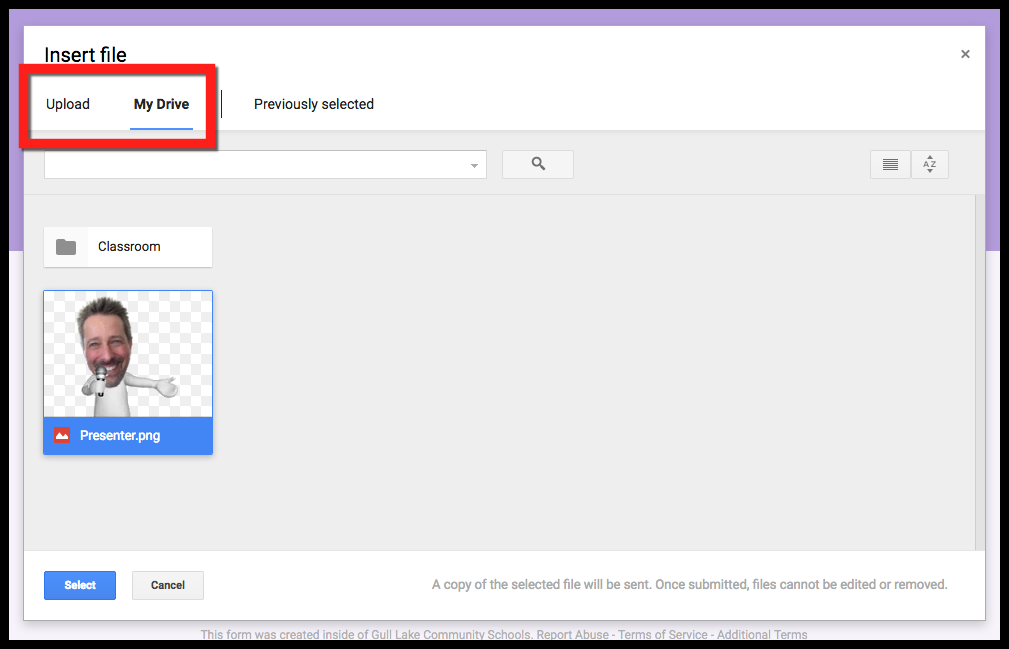
  1. Then you can send the Form to your students. When they submit they will be able to choose where the file is located to upload (on their device or in their Drive).


  1. If the file is on their device it will make a copy in their Drive (they will need to be signed in to their GAFE domain). If they are sharing a Google Drive file (or once the Form creates the uploaded file in their Drive) it will share to the Form creator. Form will then also make the Form creator the owner of this file.
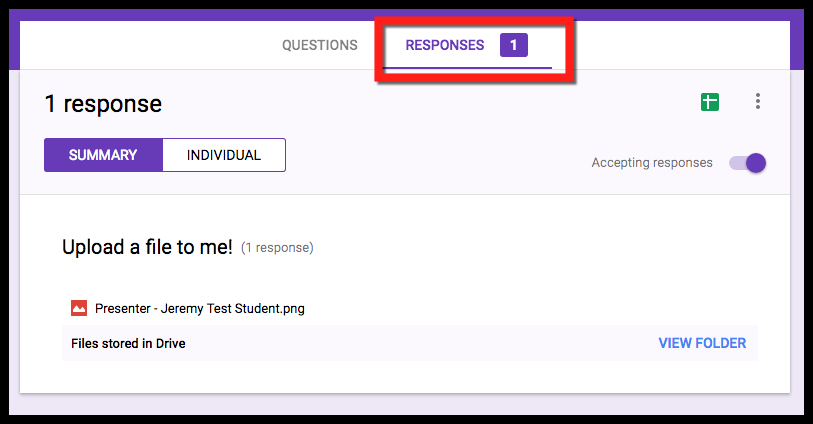
  2. You now just need to go to “Responses” to see the submitted files. You can see them by individual or question here.


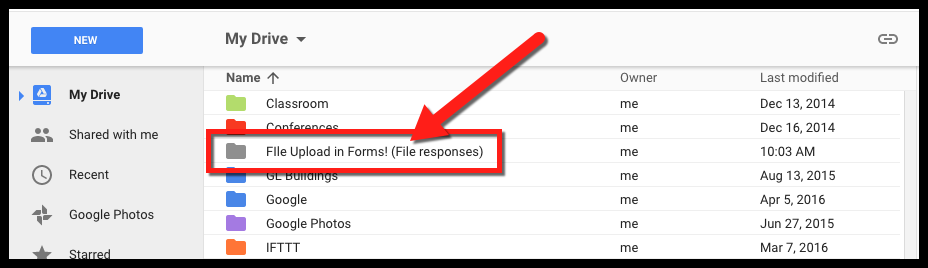
  1. The Form also makes a folder within your Drive with all the uploaded files.


  1. Forms also puts a folder for each question within this folder. You will notice that you (Form creator) is the owner of these files.


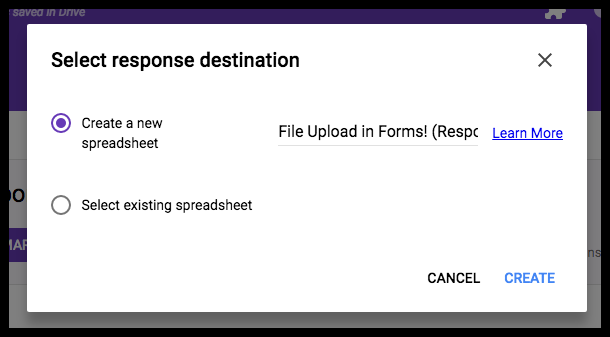
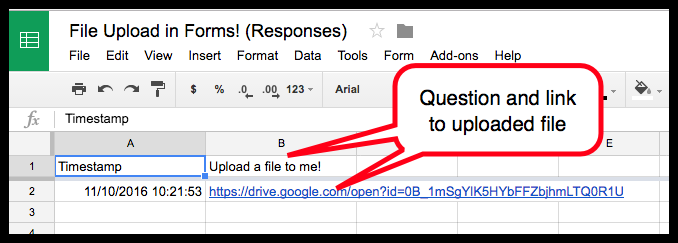
  1. If you prefer to work in the Spreadsheet, you can create a spreadsheet with all the submitted files.


  1. Links to each file will be listed under the question.


This is a great way for students to get files to you through Forms. Keep in mind, your students will need to be signed into their Google Accounts on the device they are using. Below is a video link to the process as well:


If you want these steps in a document click Here


Sunday, September 20, 2015

Re-Using Previously Used Google Forms


I just love them...Google Forms. They work so well and all my data is saved right into my Drive. That is a Win-Win for me! The best part is that I always have the ability to edit and tweak the Form as I need. So, I have spent hours creating all these Forms to give (Pre/Post Tests, Surveys, Data Collection, etc…) and it is a new school year. What do I do? The good news is, “Not much!” All you need to do is “reset” the Form to spill the newly collected data into a new spreadsheet. How do you do that? I am so glad you asked. Follow these steps to get all your previous Forms to be ready for a new year!


Re-Using Previously Used Google Forms


  1. Open a previously created Form that you want to use again this year.
  2. Click on the “Responses” tab at the top.


  1. Click “Delete all responses”. I  know this sounds scary. Do not panic. It really isn’t “deleting” anything.


  1. Click “Ok” on the warning box that comes up to tell you that in fact no data will be deleted. (I told you not to worry!)


  1. Click on the “Response” tab again. You will see that there are “0” responses now.


  1. Click on “Change response destination..”.


  1. In the box that comes up, leave the button for “New spreadsheet” checked. In the name of the sheet add the current school year. This is making another spreadsheet in your Drive with the current year as a name. Click “Create”.


  1. Now when you go back into your Drive, you will see your Form, the old spreadsheet (with all the data still there), and a new one for the current year!


You are all set!

Now you can use these Forms from Year to Year or Trimester to Trimester!

If you want these steps in a Document click Here!