

See Enabled Accessibility Features:
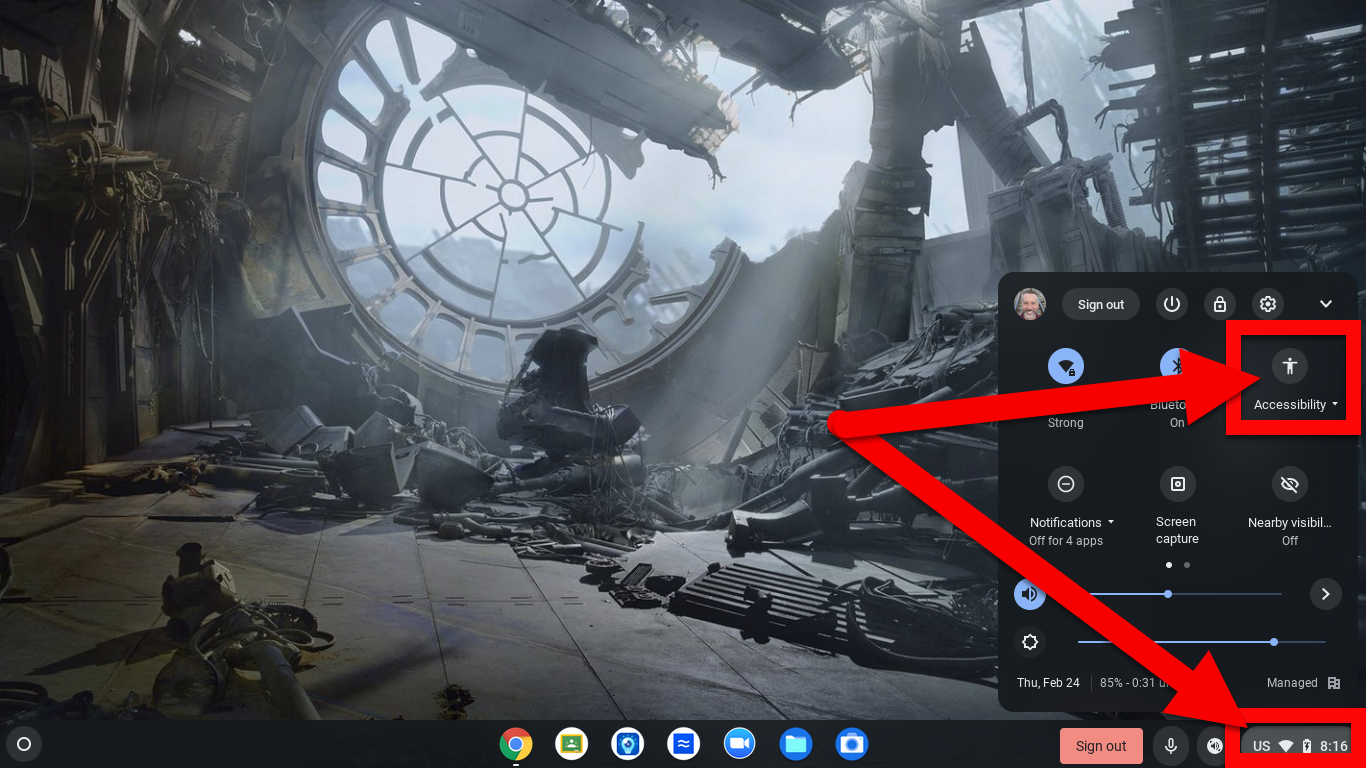
There are two ways to do this. The first is the easiest but depends if the student/admin has turned on the Accessibility quick access feature. Start with clicking on the clock.
If you see the Accessibility option you are in luck and this is very easy.
Click on “Accessibility”.
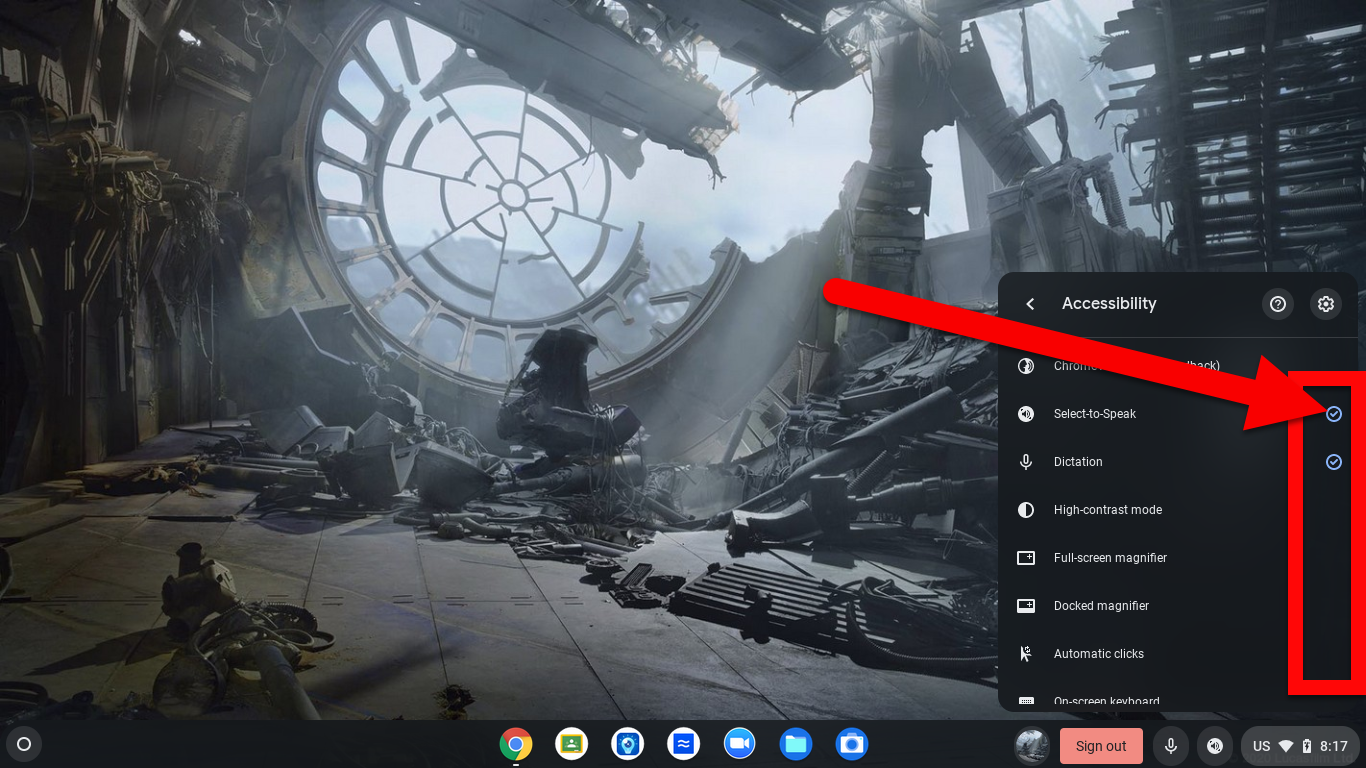
Scroll through the list. Anything with the checkmark is enabled. Click on the check to disable this feature. Disable all features that are not needed by that student.
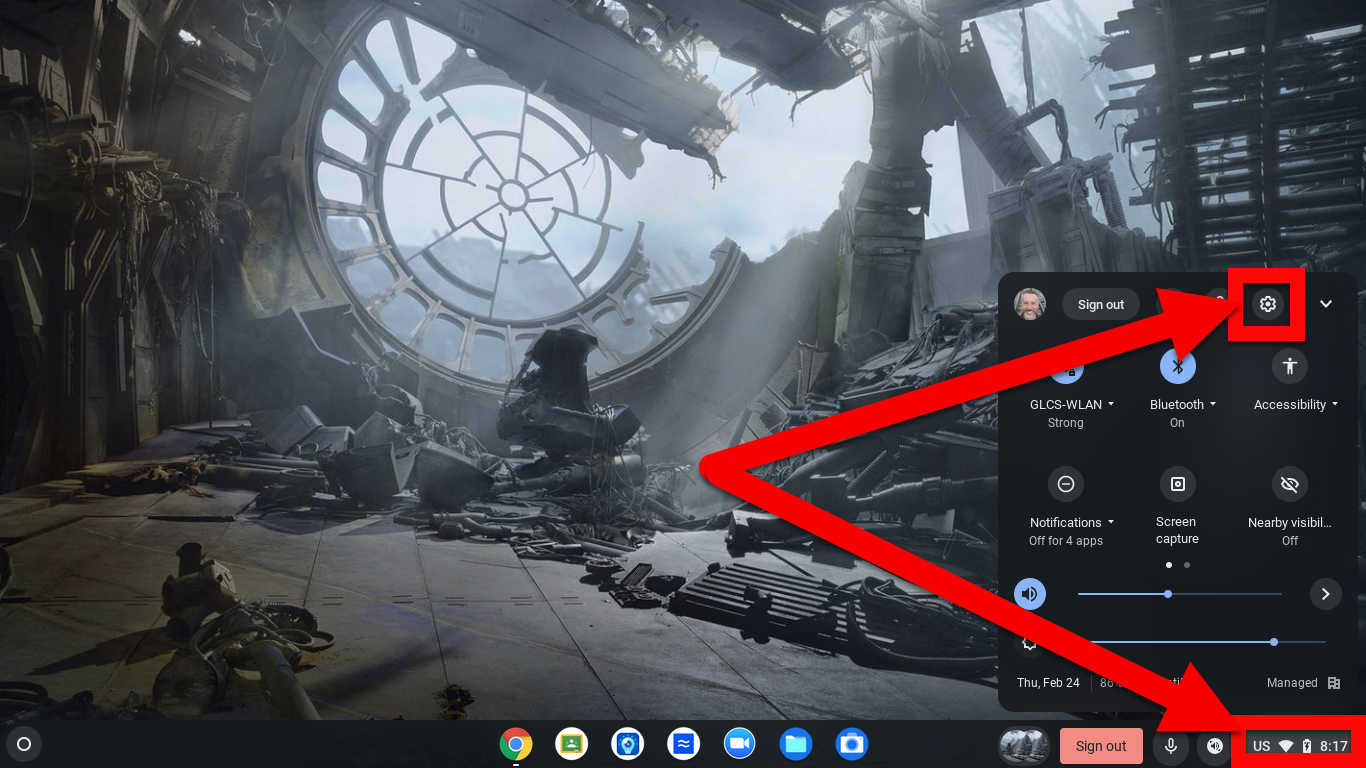
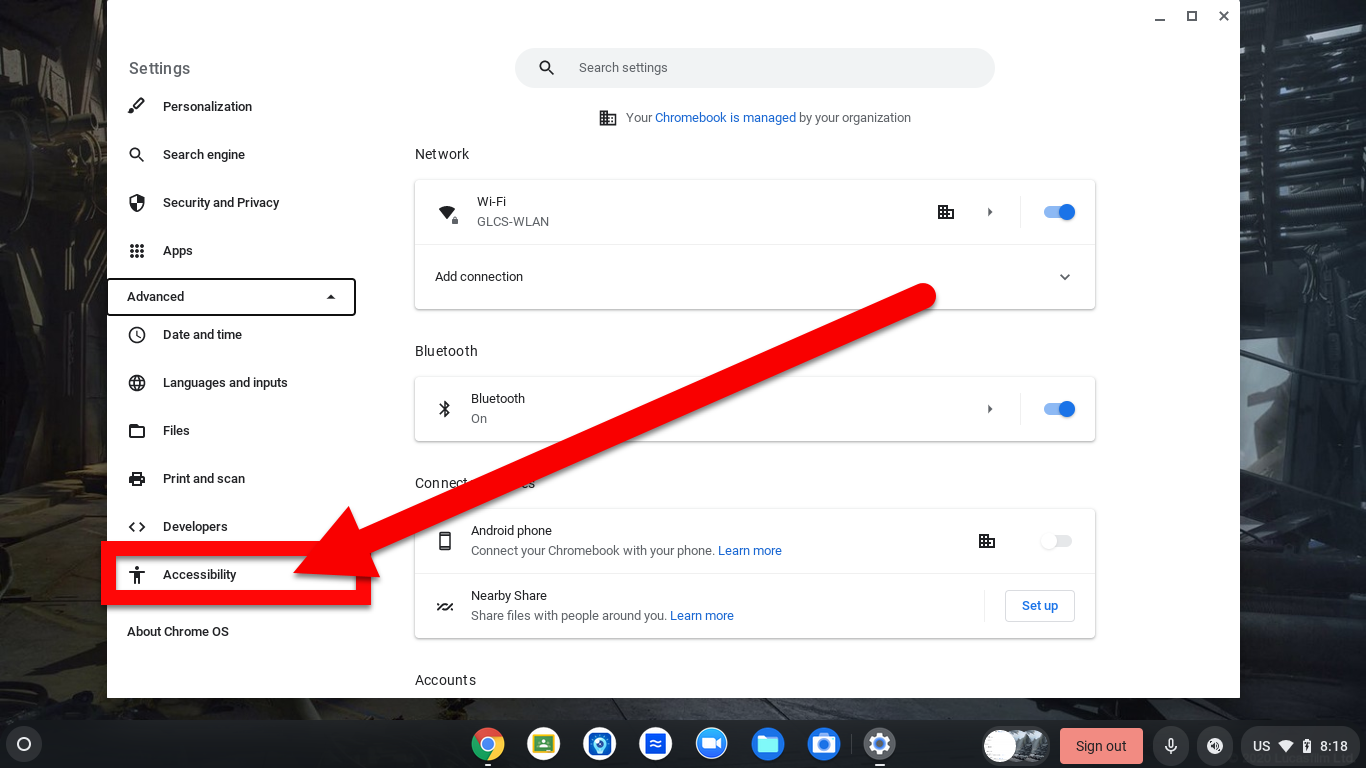
If the Accessibility option is not shown, follow these steps.
Click on the settings gear.
Click on “Advanced” on the left.
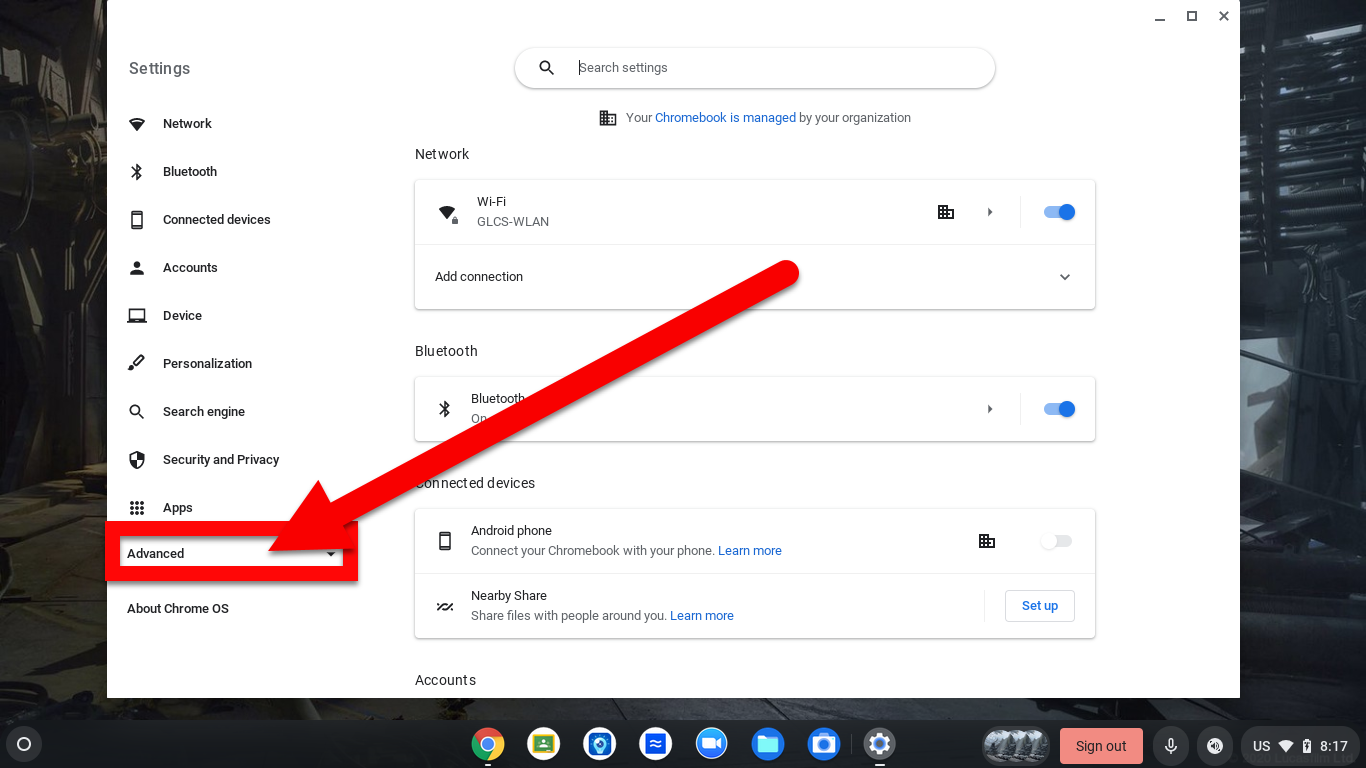
Click on “Accessibility”.
If you want the Accessibility option to show up after clicking on the clock (even if no features are enabled), toggle it on here. Keep in mind that this will also make it easier for students to turn features on.
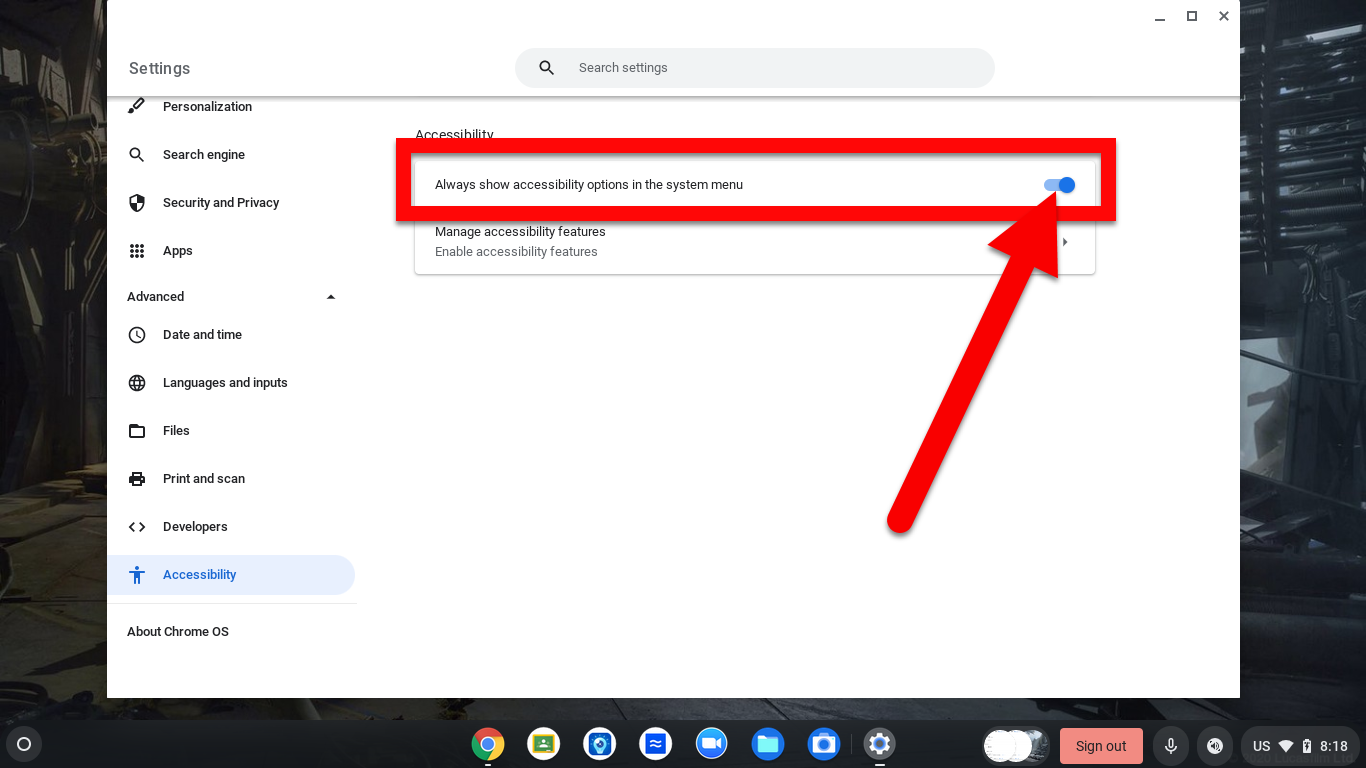
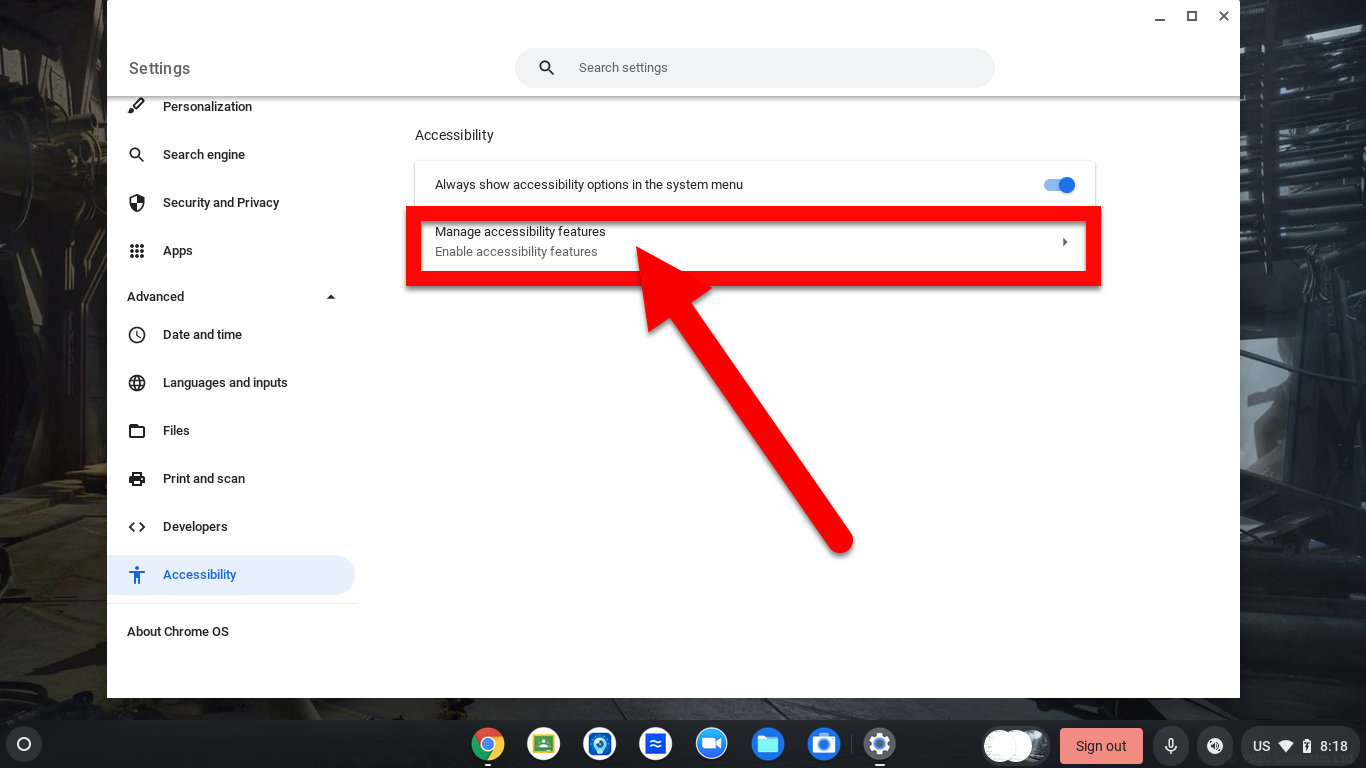
Click on “Manage accessibility features”.
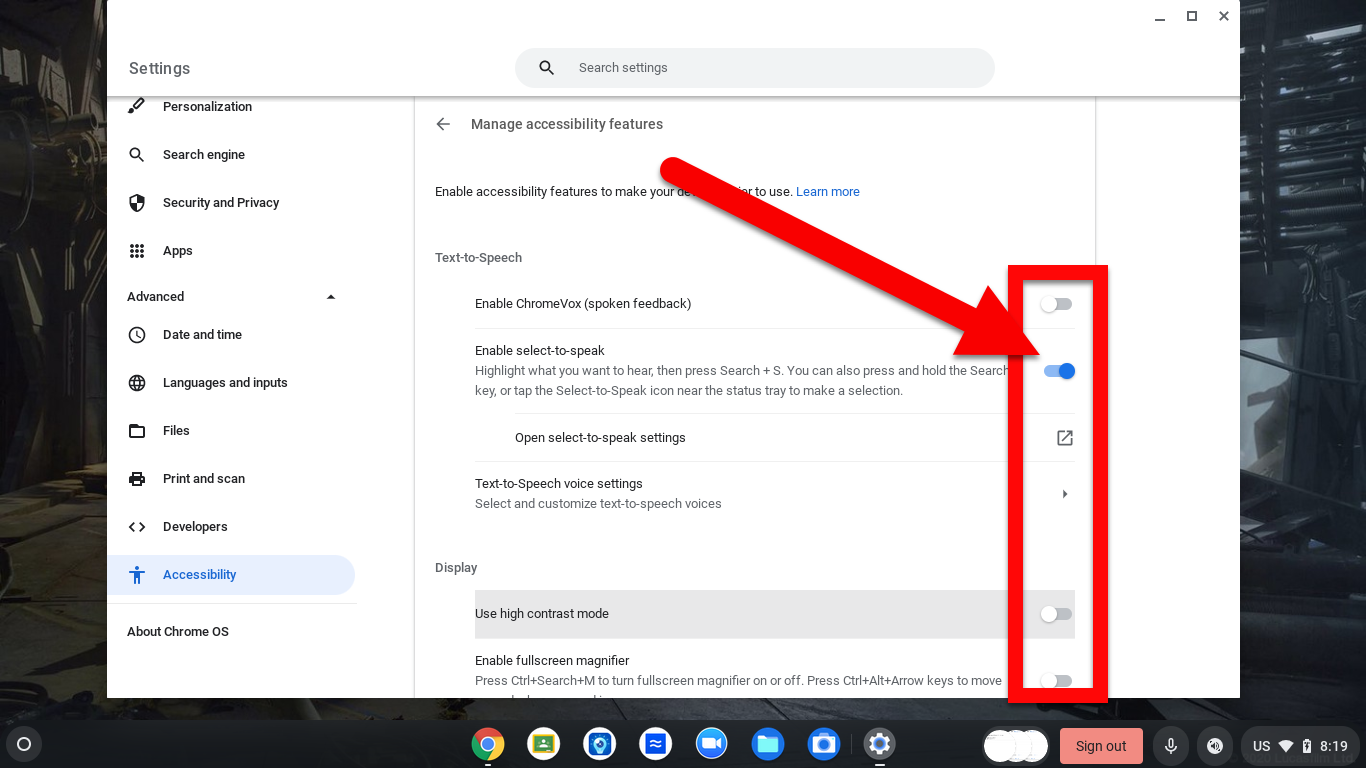
Scroll down and disable any feature you do not need for that student.
Here is a video walkthrough of all these steps.
Click HERE.
Although these features are needed for some and are very helpful, sometimes they cause issues with the device when too many are on at the same time. I would recommend only having these features enabled for students who need them.
If you want these steps in a Document click HERE!