Many of us have created and posted an assignment only to want to add some Slides to the end of a presentation AFTER students already have a copy. In the past, that would involve manually going into each student’s file and adding these slides. What a pain! Now it is quick and easy! Check out the extension below to make this process a snap!
Add Slides:
Head over to Magic Exercise Book and install this extension.
Open the Slide Deck you want to edit (the one you shared with your students).
Edit this by adding the desired slides.
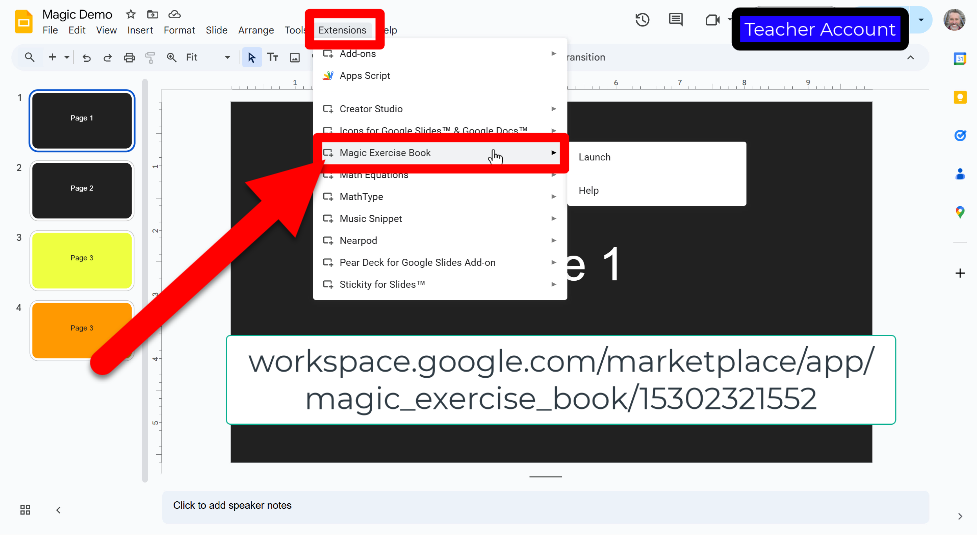
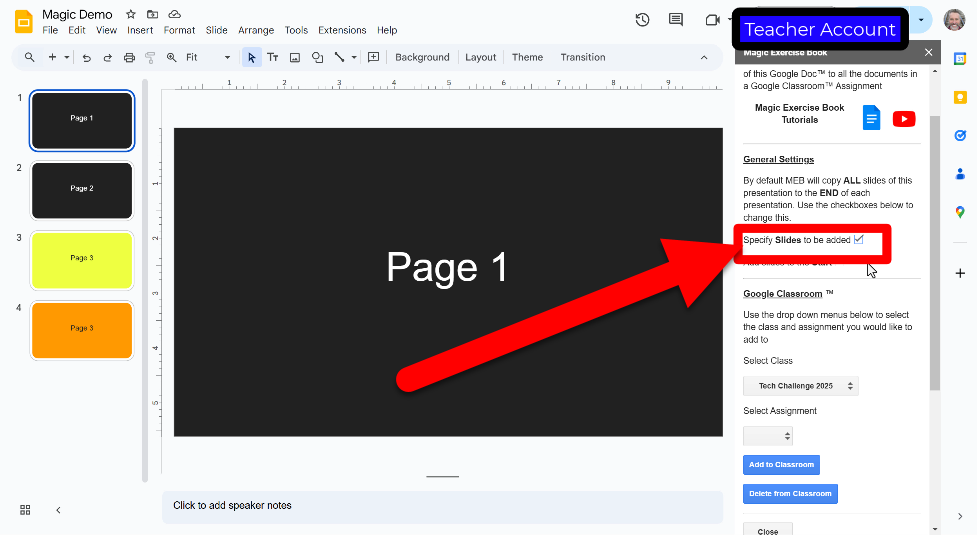
Click on “Extensions” and then “Magic Exercise Book”.
Click the box to “Specify Slides to be Added”.
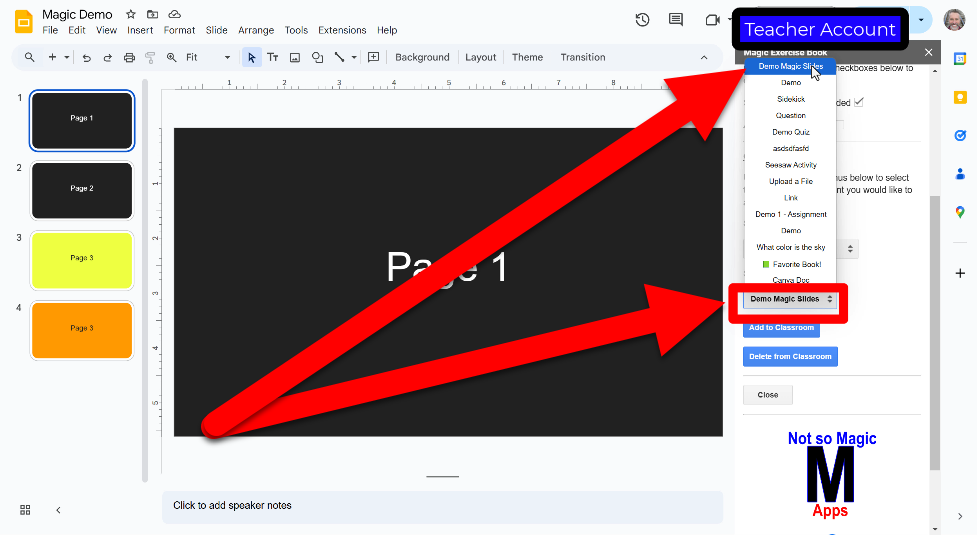
Select the class to edit the student copy in.

Choose the assignment the Slide Deck is in.
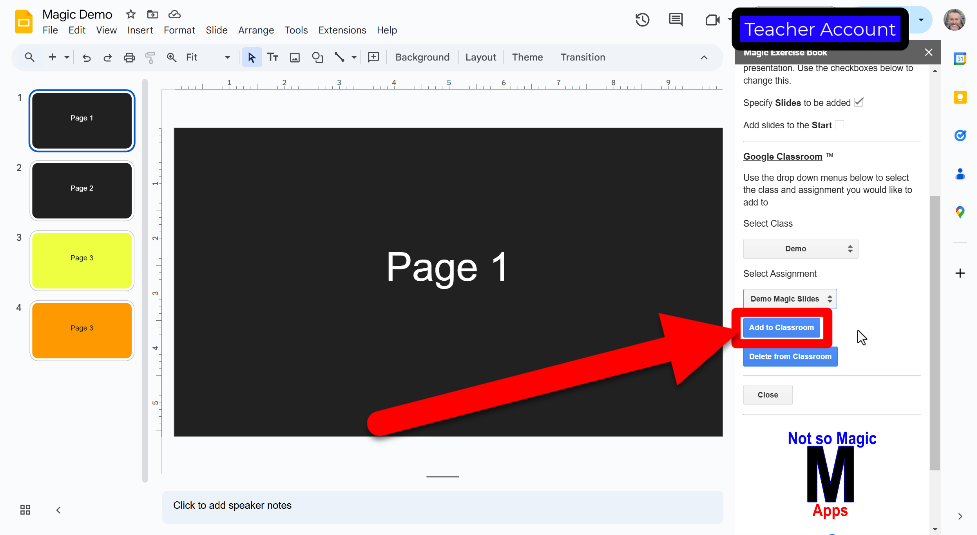
Click “Add to Classroom”.
Choose which slide to START to add.
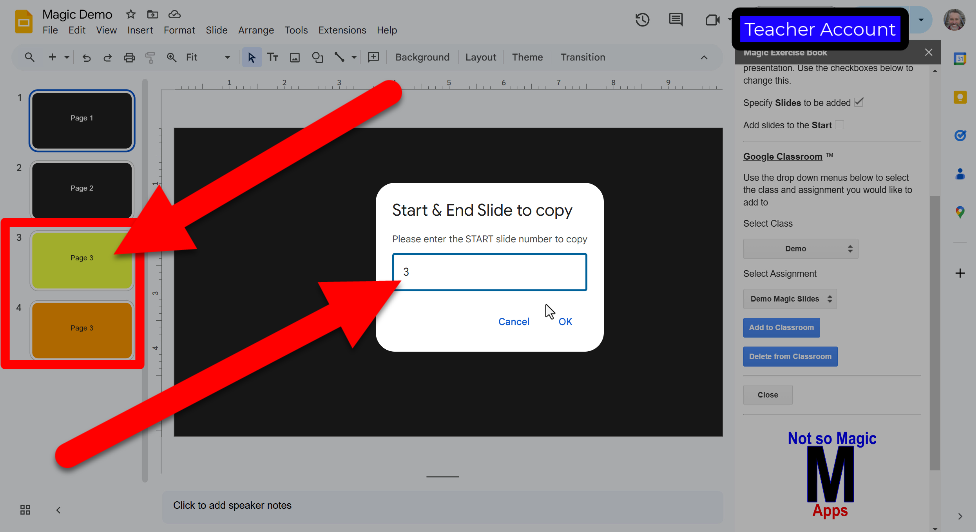
Choose the LAST slide to add.
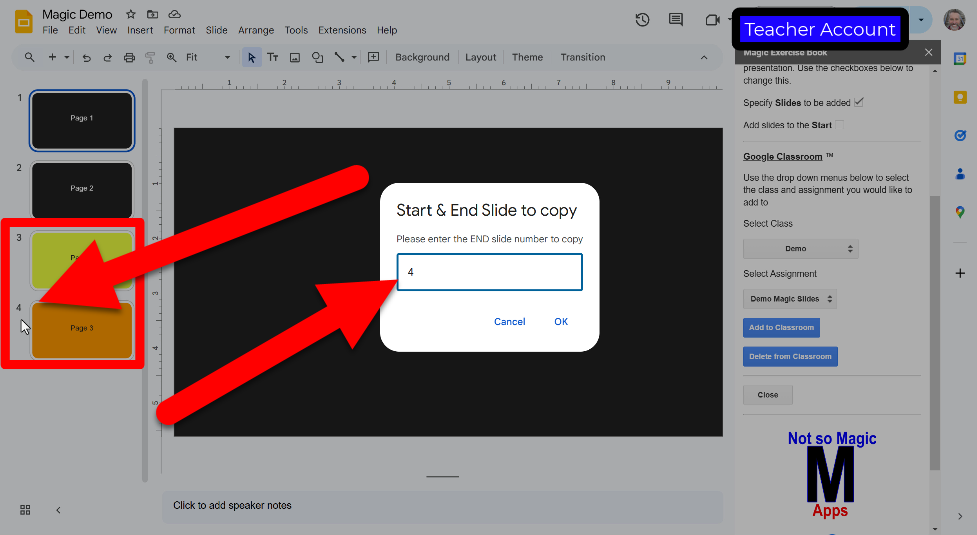
Click “OK”.
These slides are now added to all your students’ decks!
Delete Slides:
Open the Slide Deck you want to edit (the one you shared with your students).
Edit this by adding the desired slides.
Click on “Extensions” and then “Magic Exercise Book”.
Click the box to “Specify Slides to be Added”.
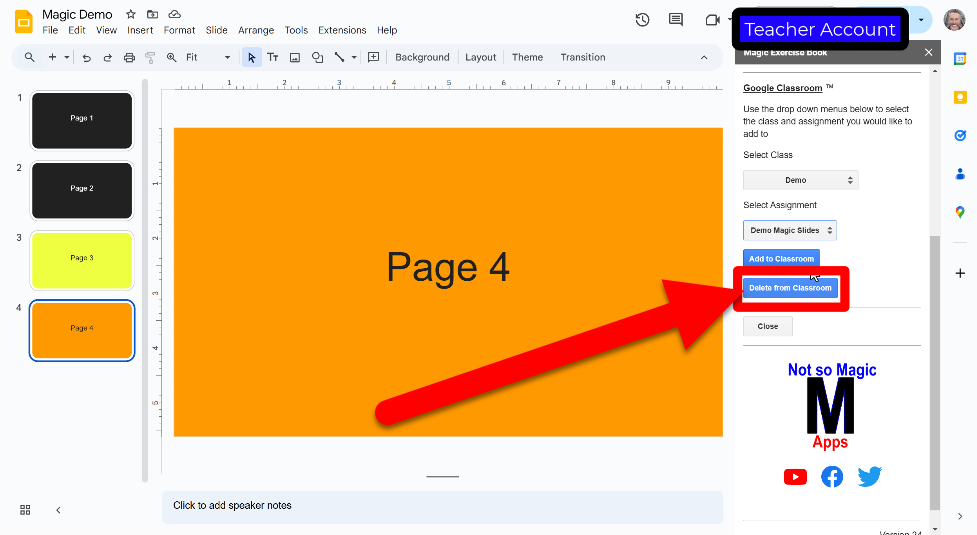
Select the class to edit the student copy in.
Choose the assignment the Slide Deck is in.
Click “Delete from Classroom”.
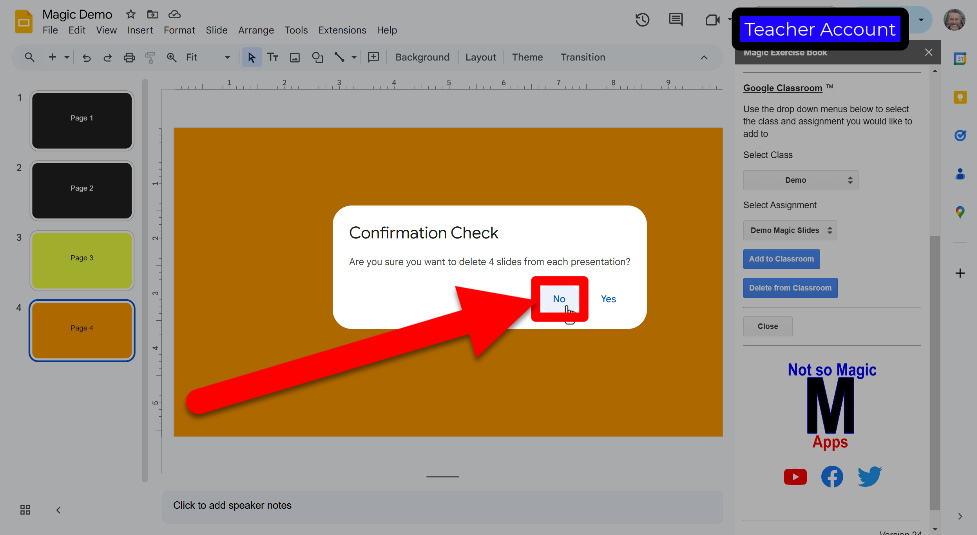
Click “No” if you do NOT want to delete ALL slides.
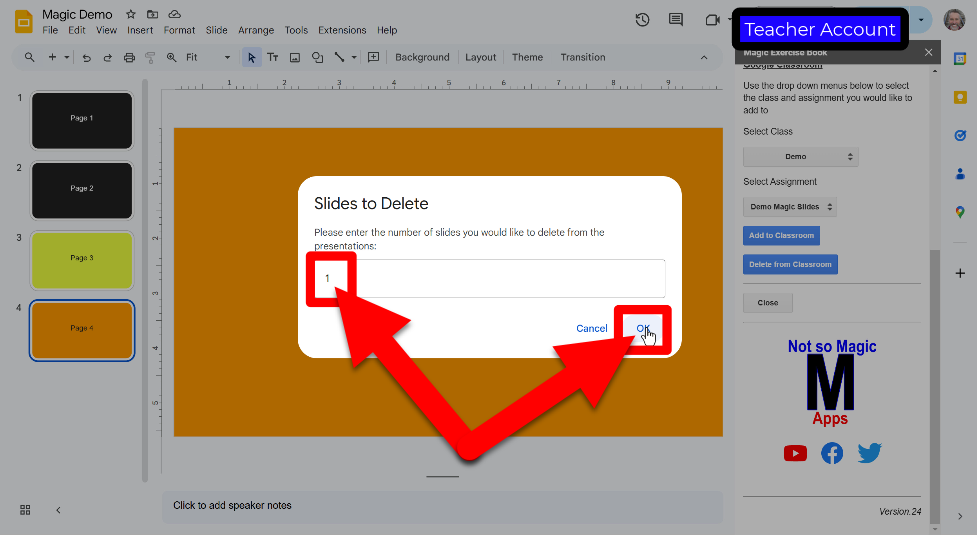
Enter the number of slides you want to DELETE and click “OK”.
Choose the LAST slide to add.
Click “OK”.
Confirm “Start or End”.
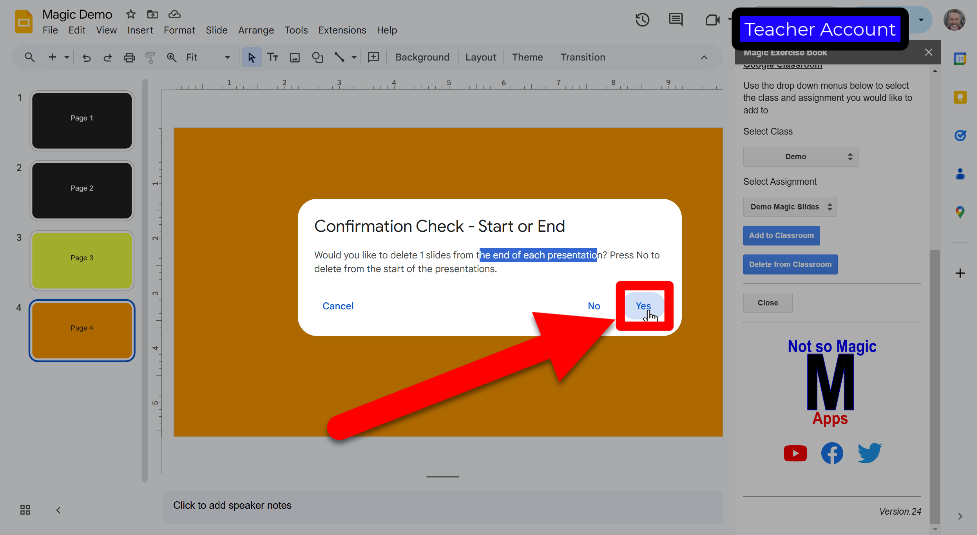
The selected slides are now DELETED from the students’ decks!
Here is a VIDEO WALKTHROUGH of all these steps!