

*Just a note: these cool tools are ONLY available on a Chromebook and some features can only be shared and viewed by others on a Chromebook. For basic Chromebook screencasting, use the basic Chromebook screen recording tool found HERE.
Start a Screencast:
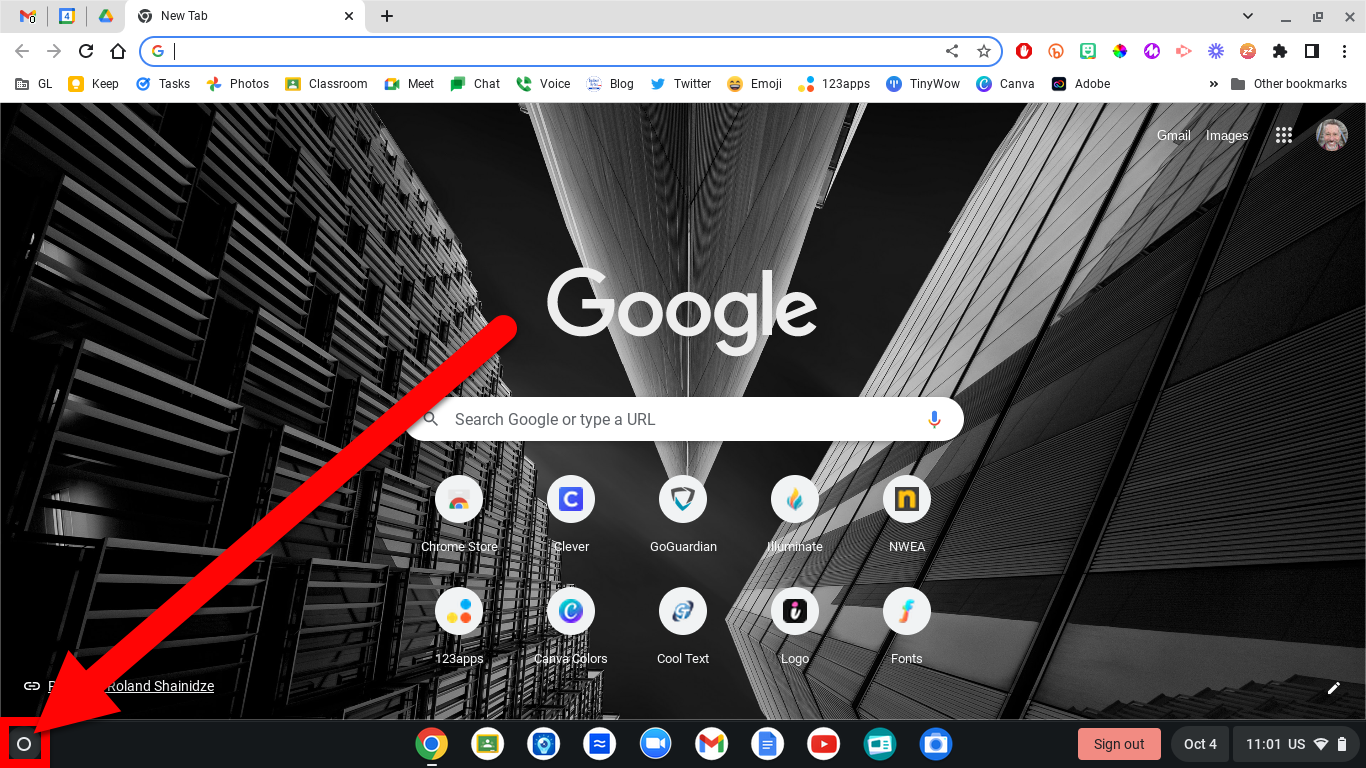
Click on the circle icon on the bottom left of your Chromebook Screen (Launcher).
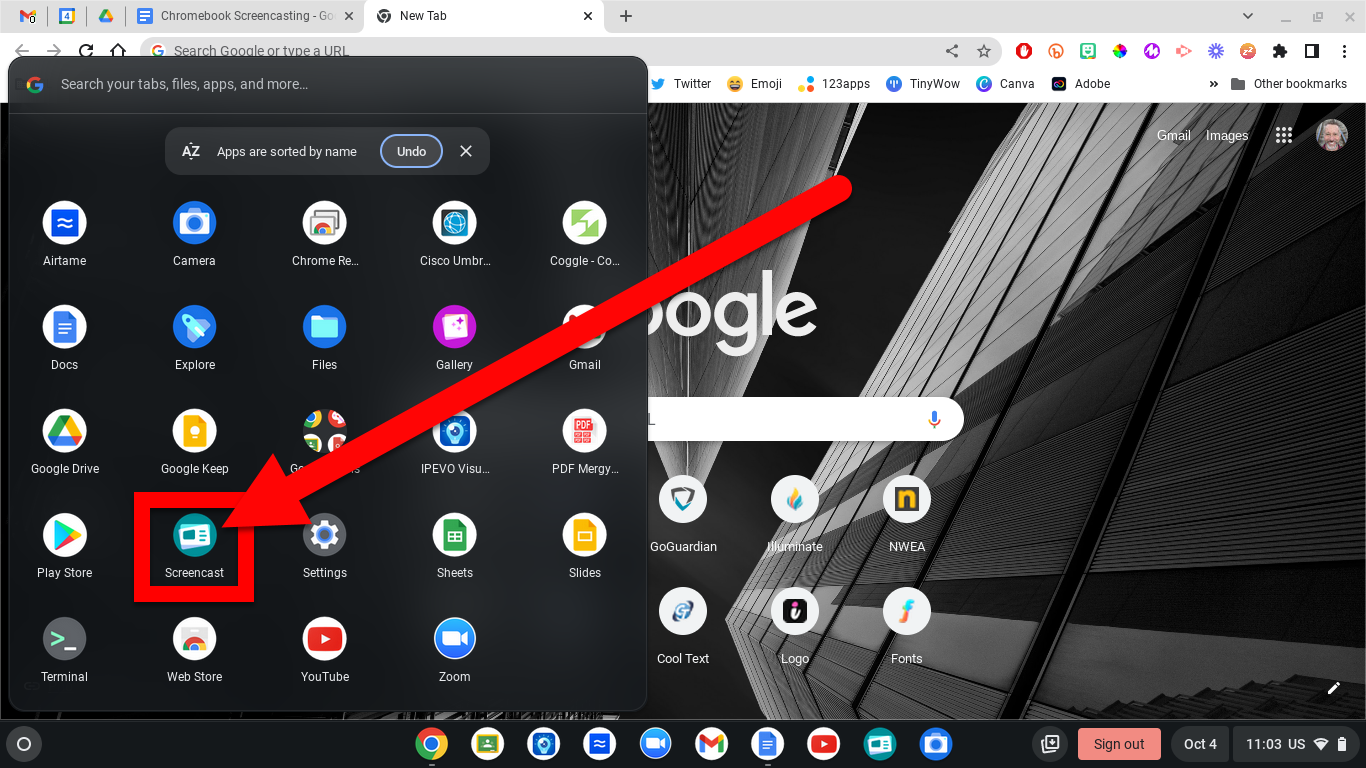
Locate and select the “Screencast” app.
Click on “+ New Screencast” in the top left.

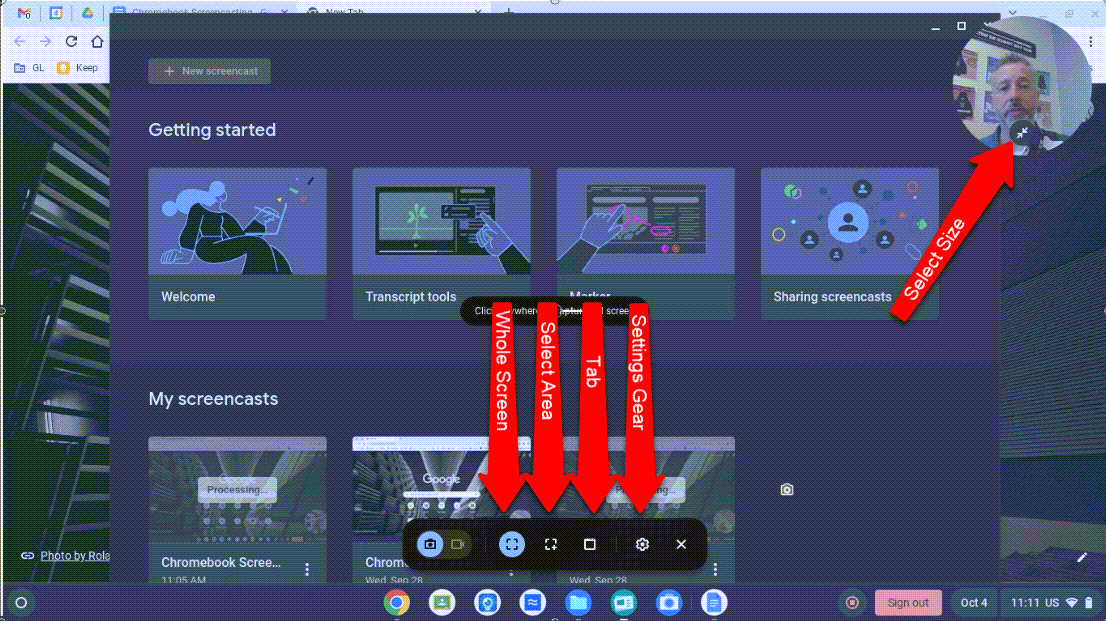
Choose the settings you want for your recording.
Choose the Whole Screen, Select Area, or Tab to record.
Click the Gear icon to choose Audio and Webcam.
Click on the video of yourself in the corner to choose small or large if you have it enabled. You can also drag this to a different location on the screen.
Click anywhere on the screen to start recording.
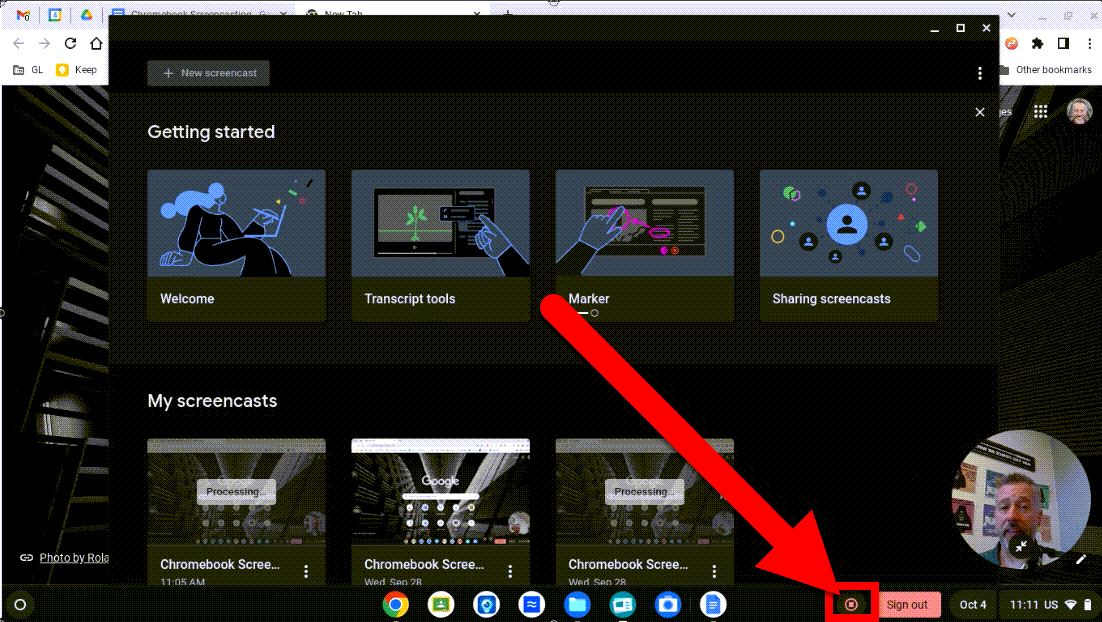
Click on the “Recording” red icon on the bottom right side of the dock to end the recording.
You will find this recording in the “Screencast” app.
Additional Features:
While recording you can annotate your screen by clicking the Pencil Icon on the right side of the dock.

You can also drag around your webcam feed (if you had it turned on).
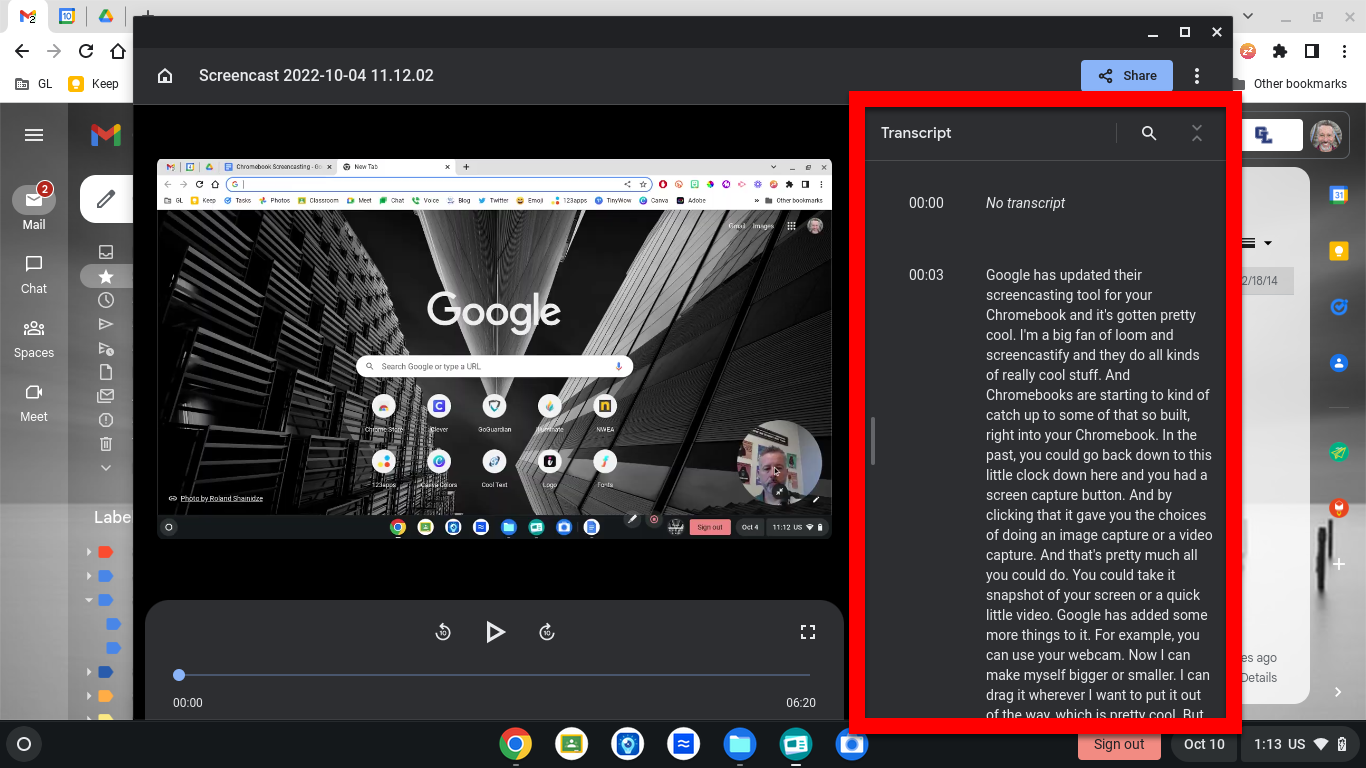
In the “Screencast” app you can see the video transcripts. This feature is ONLY available on Chromebooks. You can edit these to correct any issues.
Sharing Your Recordings:
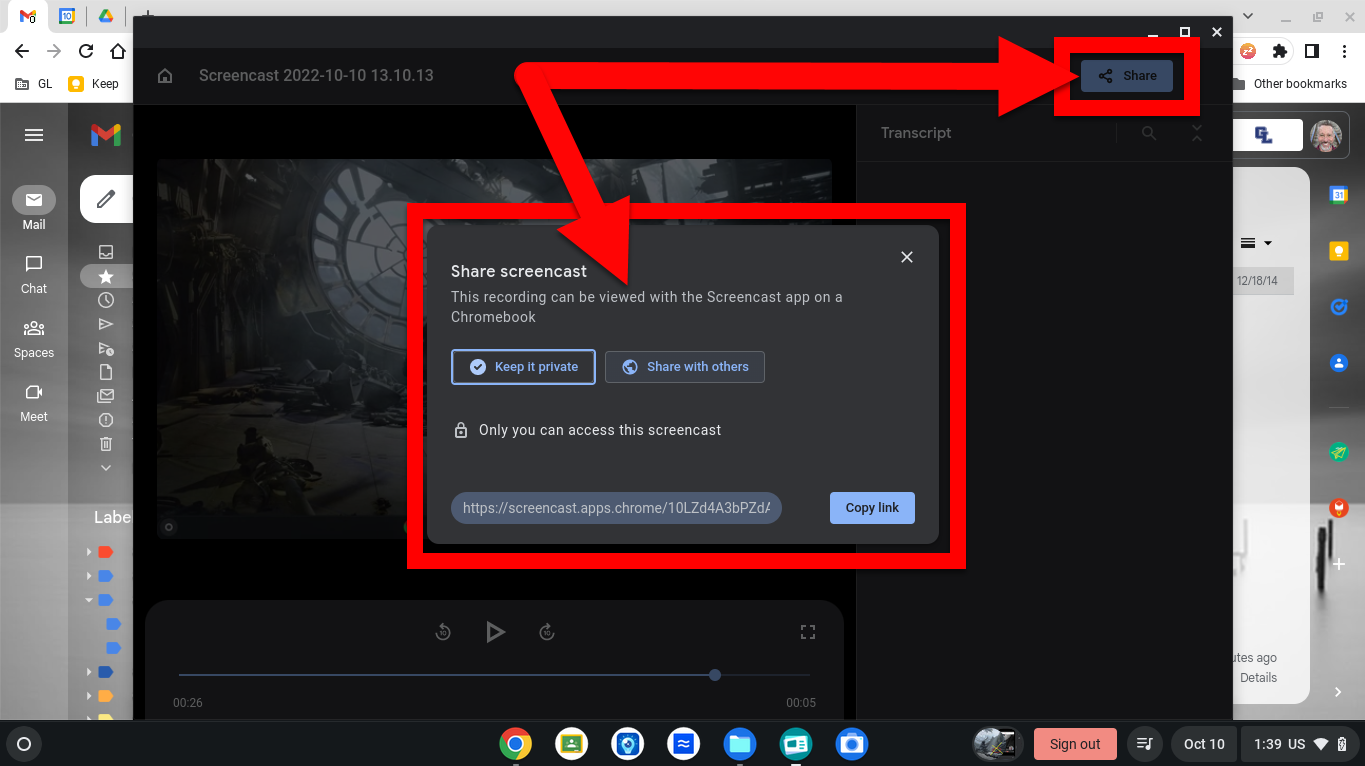
If your students are on Chromebooks, you can share any of your recordings directly from the “Screencast” app. Open the recording you want to share and click “Share” in the top right. You will then be given options to choose how you wish to share. (Remember, if you want others to see the transcripts, they MUST be on Chromebooks.).
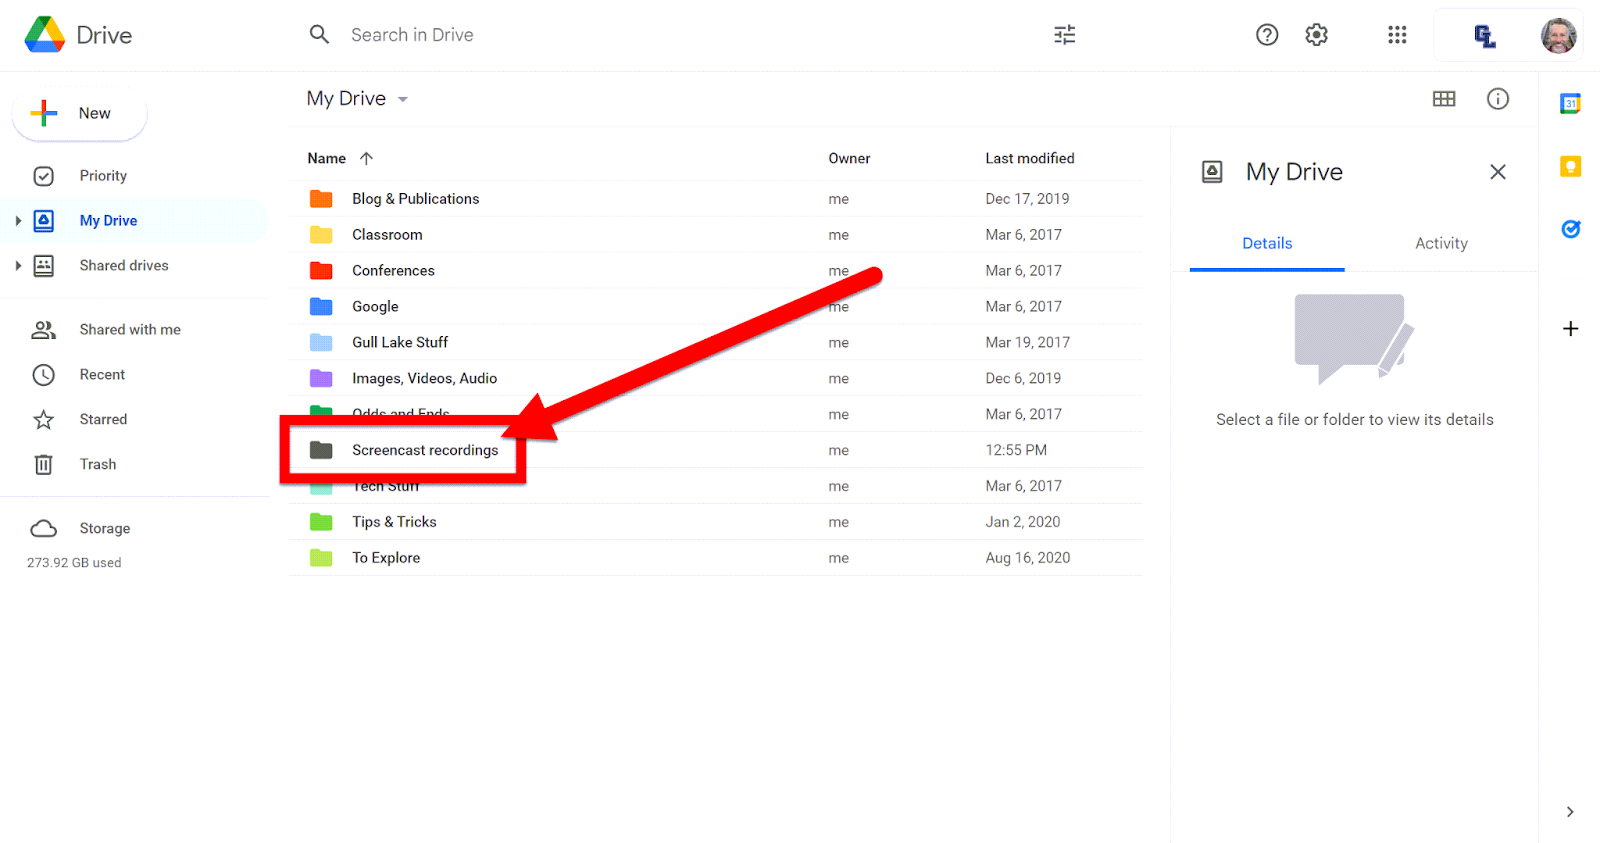
You can head to Google Drive and locate the folder your Chromebook created named “Screencast recordings”. In this folder will be every screencast you created.
Just a note, if you move this folder a new one will be created in Drive every time you create a Screencast.
For an AWESOME walkthrough, check out John Sowash’s detailed video HERE!
If you want these directions in a document click HERE!