

Create a Video:
You can create your entire video within the website using your camera, but I suggest you get your actual video recordings done first. You can use your laptop, phone, tablet, or any means to record the footage you want and upload all the videos to your Google Drive (or save to the device you will be working with). This site can access them if you sign in with Google.
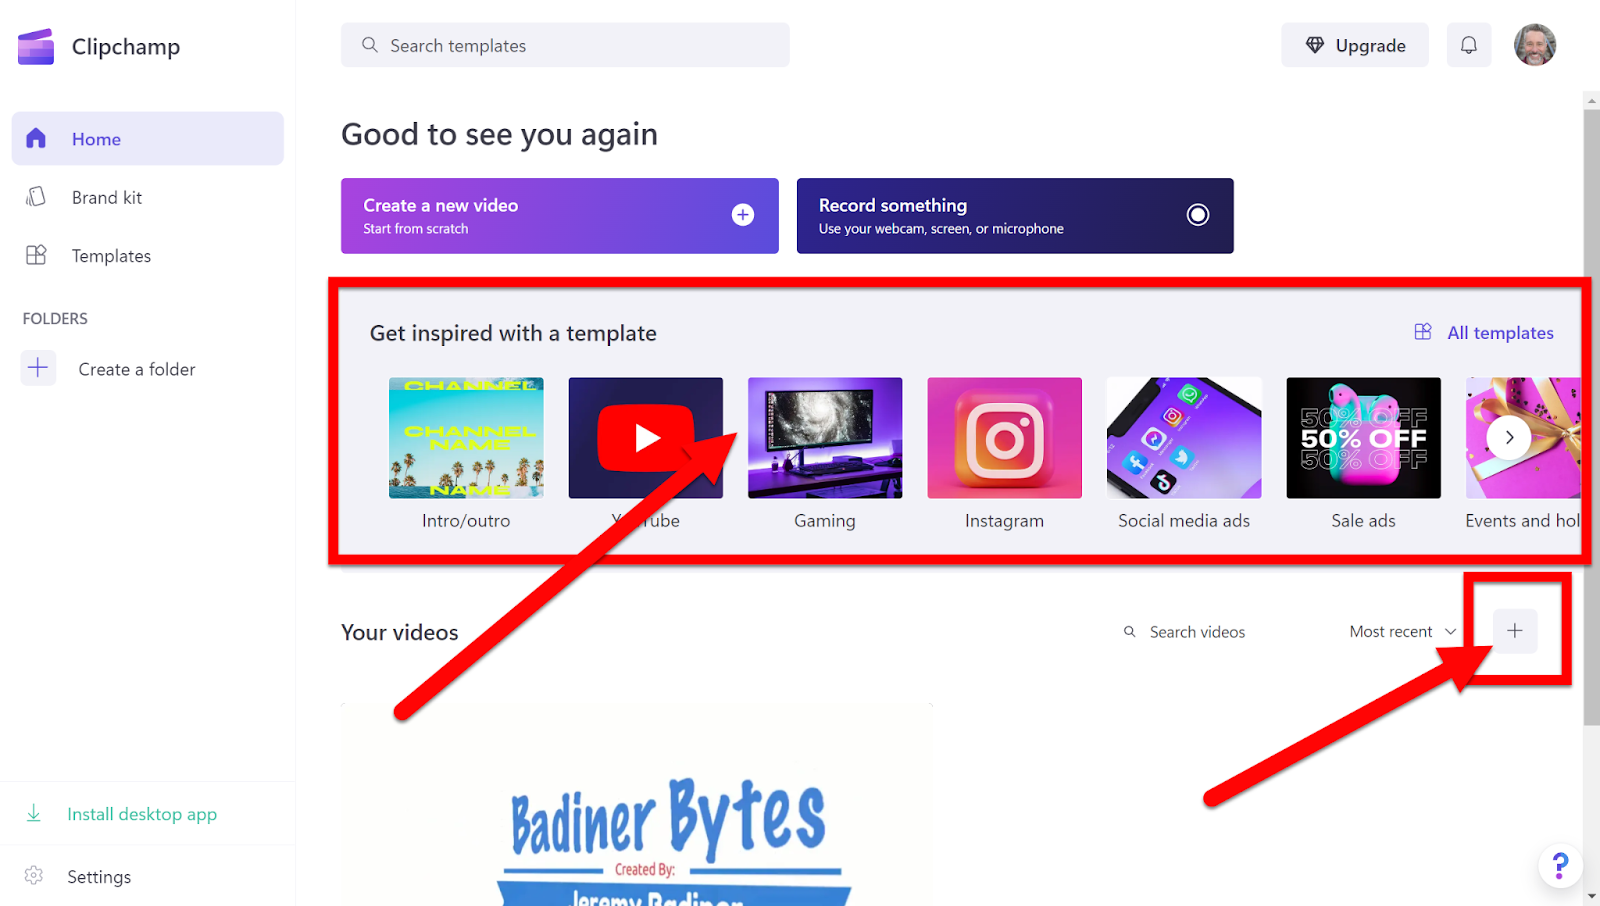
Head over to app.clipchamp.com and create your account. If you sign in with Google you will have access to your Google Drive for your already recorded and uploaded content.
Browse the Templates to see if there is something you would like to start with or click the “+” icon to create from scratch.
I clicked on a template and the editor is filled with preselected material. I will be replacing these clips with images and videos of my own.

You will now want to import your already recorded images and videos. They can be on your device or in a cloud storage location. Mine is in Google Drive so it is easy. Just click “Import Media” and choose where it is stored and what to add.


You will see your imported videos/images in the left side pane. You can now drag them into any one of the placeholders at the bottom (if you choose a template) or to the empty timeline if you choose to create from a blank video.

You can reorder these if you like as well. Just click and drag the clip to a new location. Also, if you have a video and need to trim it, just grab the end and slide it over.

Use the space bar to play your creation. You can also drag the player head (vertical white line) to any location you want to start playing from.
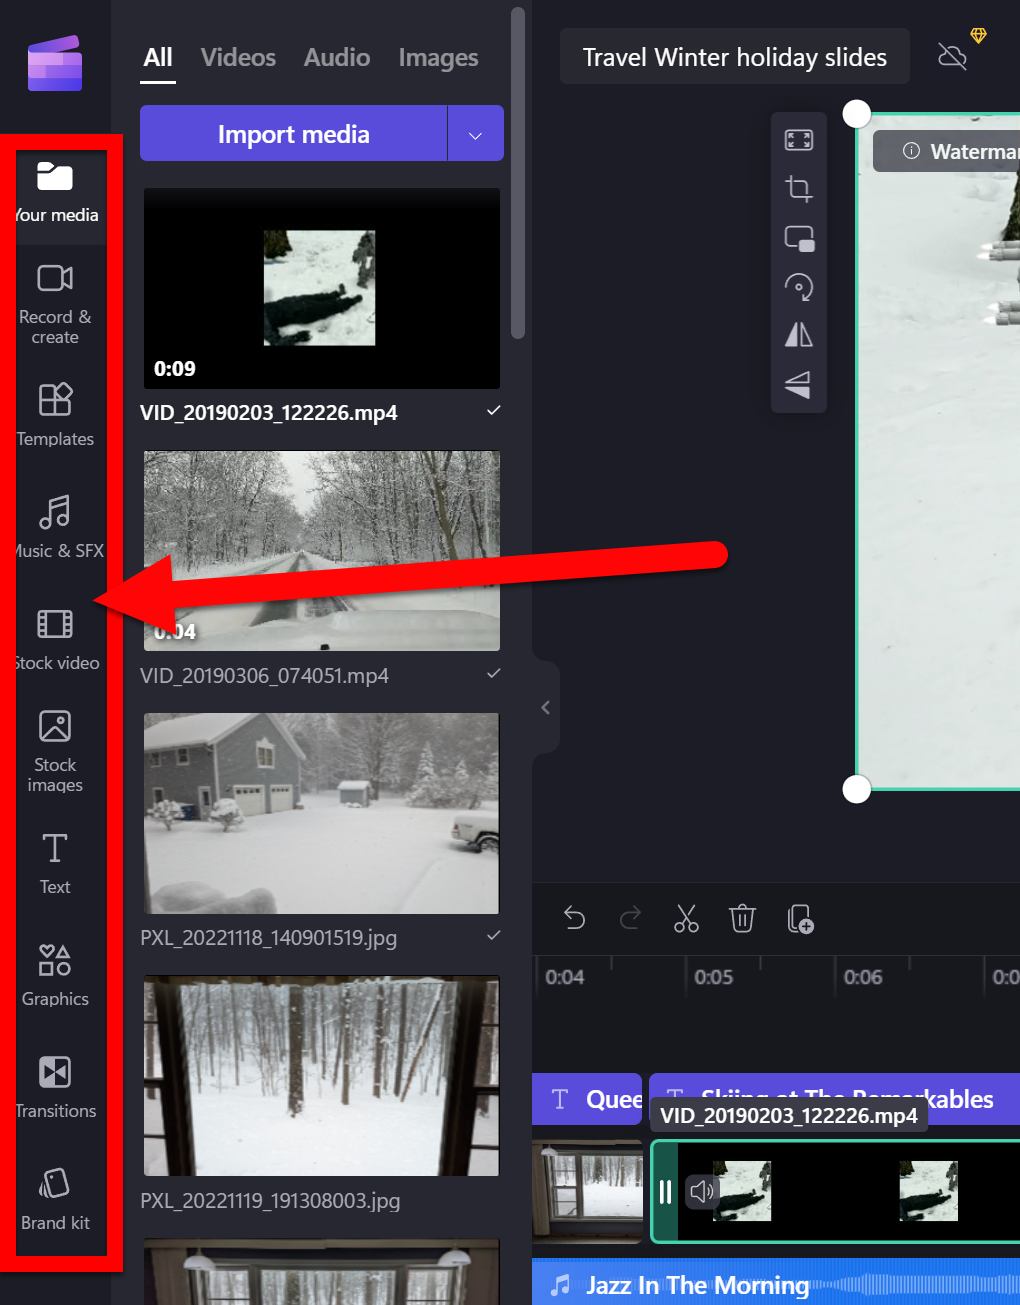
All the cool add-ons are on the left side. Just find an add-on and drag it onto your timeline where you want it (above your video for text or between 2 clips for transitions). Check them out!
*Note: some are paid features. You can use them but your video will have a watermark if you use paid features.
Record & Create: enables your camera to record new content
Templates: allows you to add or change the template you are using
Music & SFX: audio clips you can add to your video
Stock Video: free video clips you can add
Stock Images: free images you can add
Text: add text to your video
Graphics: add graphic images to liven up your video
Transitions: add transitions between your images or video clips
Brand Kit: for power users who want to keep styles constant with all their videos
To edit any of these add-ons, click the add-on in your timeline and look at the top right corner for options.

Make sure to explore all the cool transitions you can use to make your images and videos flow together.

Make sure to watch your video once you have added your clips, text, transitions, effects, or anything else to make sure it is as you want. Then, you are ready to export. Click the “Export” button in the top right and choose the resolution. If you see the only option without the yellow diamonds is “1080 with a watermark” then you have an add-on that is a paid feature.
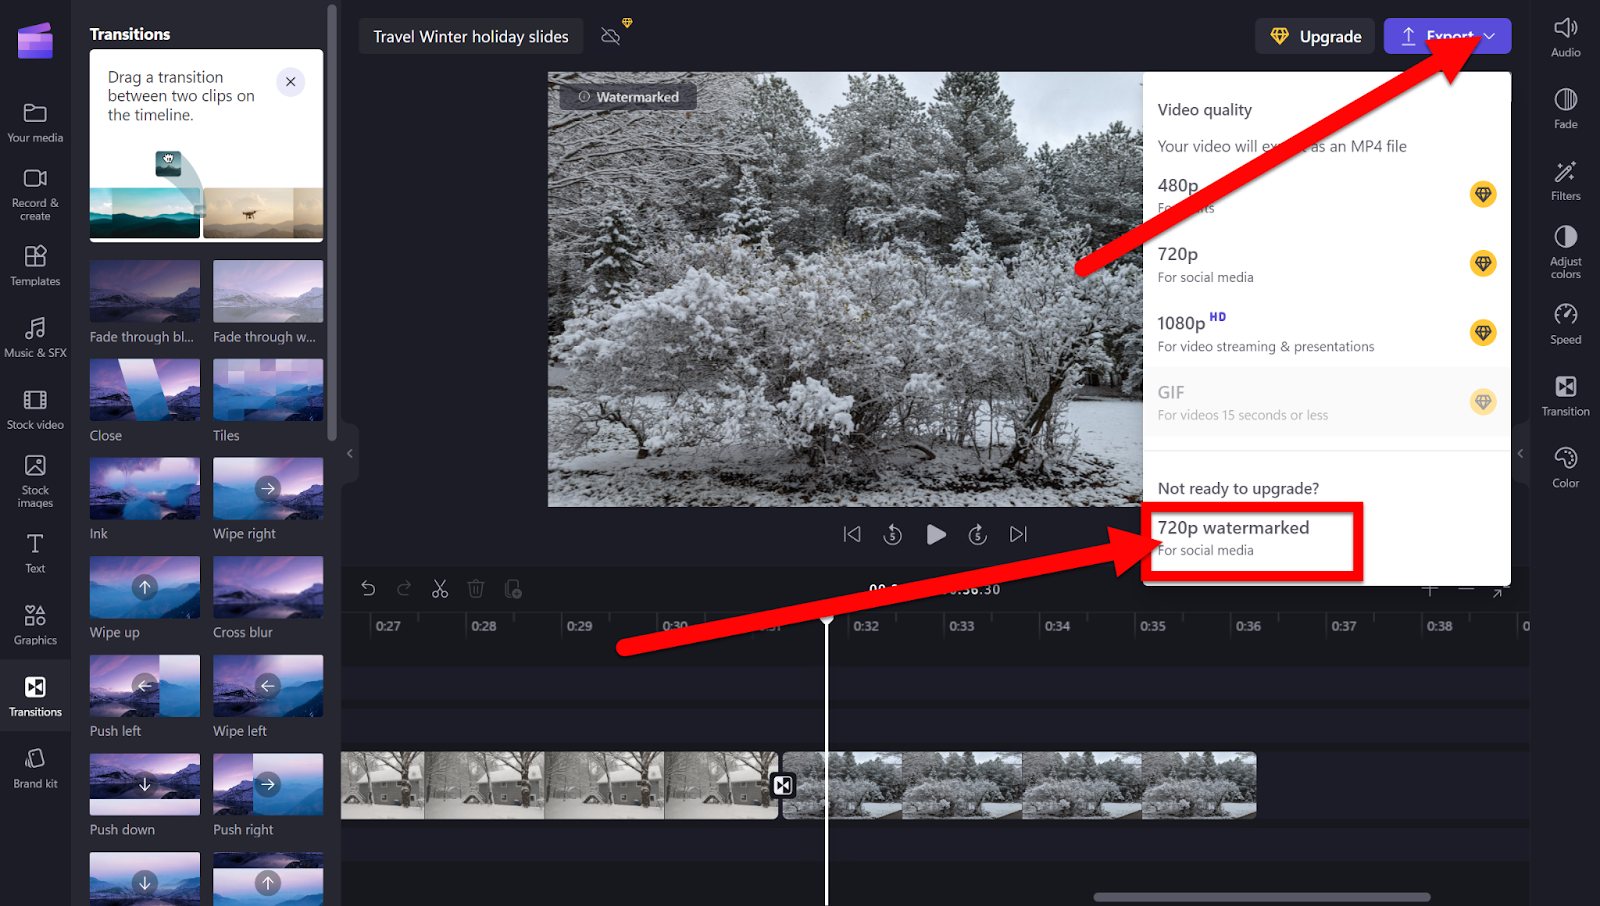
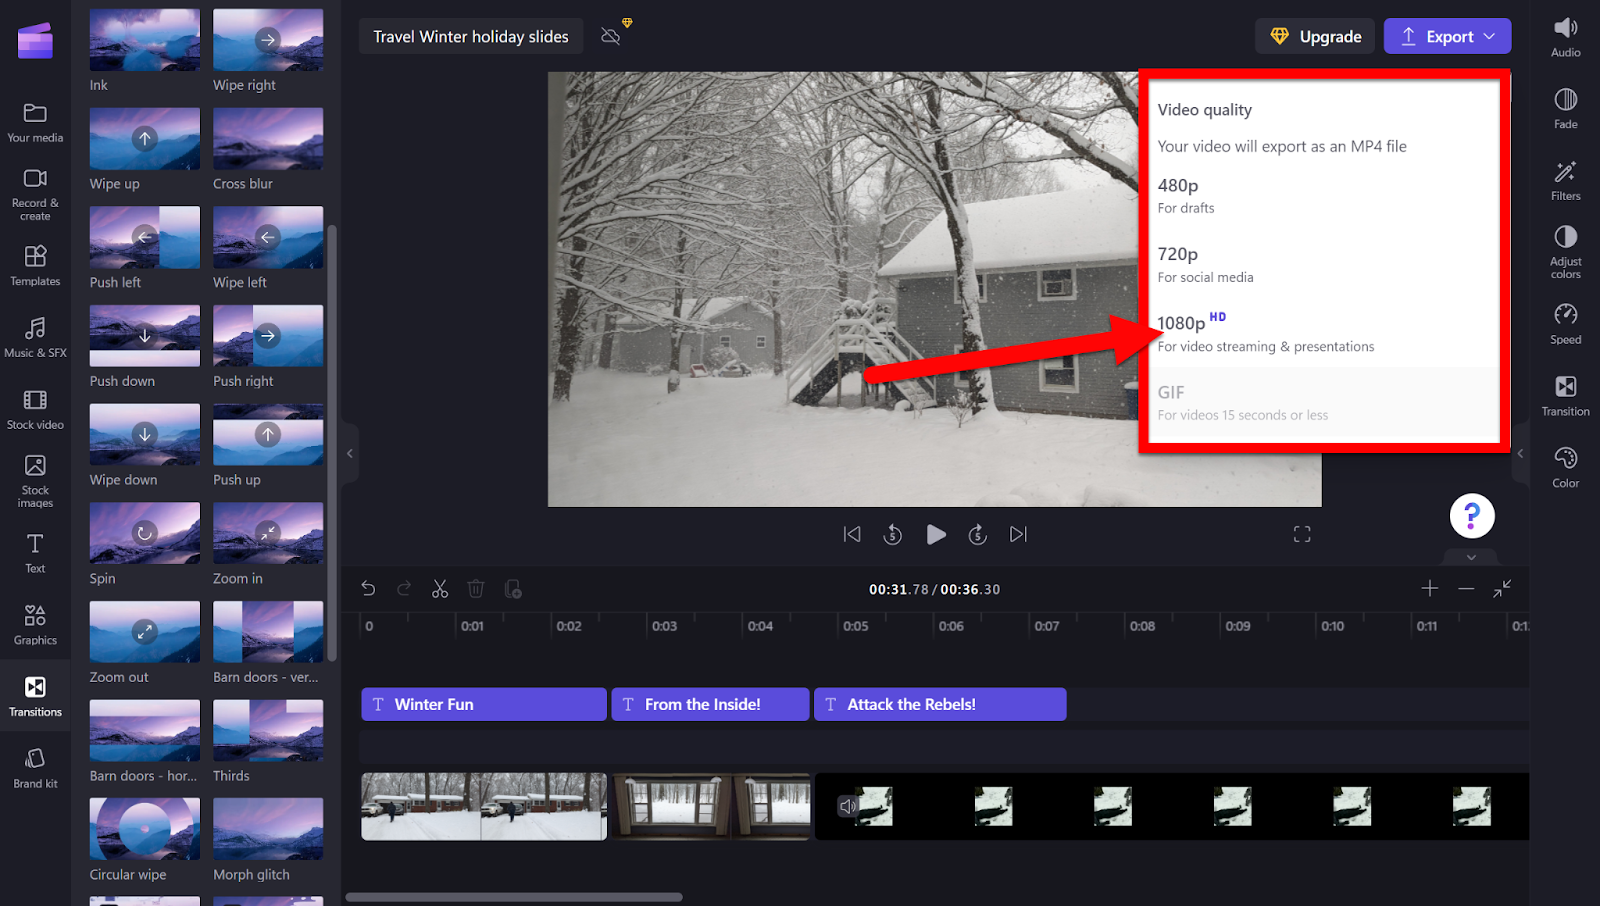
You can still download it as 1080, but there will be a watermark. To get rid of the watermark remove (or replace it with a free feature) the paid option. Mine was the music. I can remove the paid music option and then upload my own music from a free site like THIS. If you remove any paid features your download options will look like this:
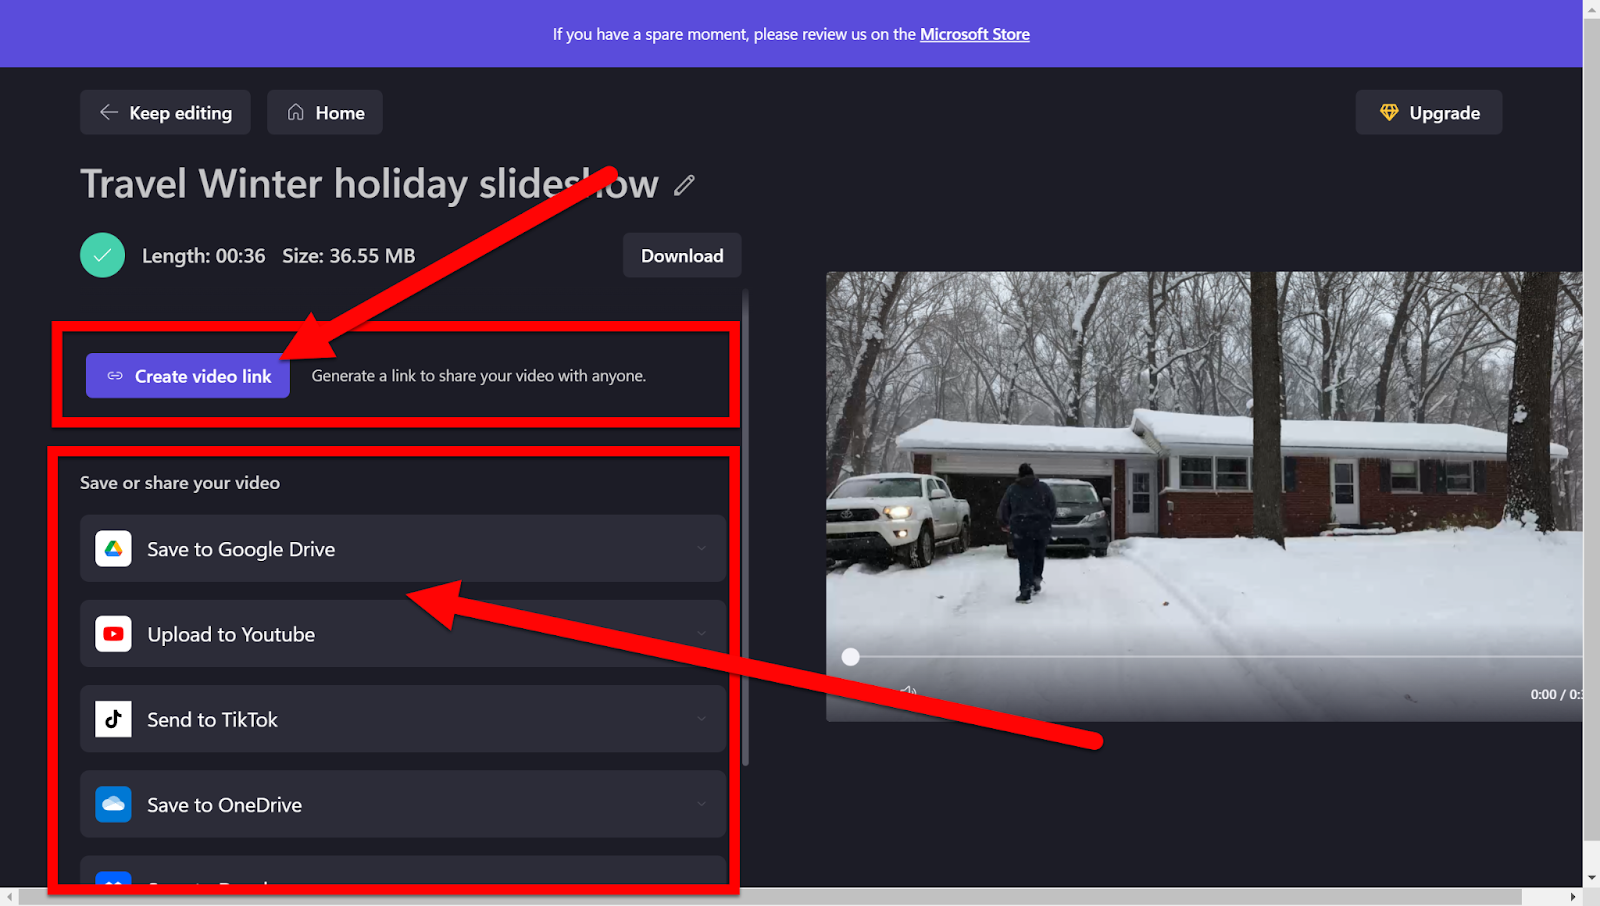
You will be asked how you want to share. You can do anything you want with your downloaded file, but you can also have it sent directly to your cloud services or even share it with a link.
Explore ClipChamp and start creating awesome videos!
If you want these directions in a document click HERE!