

With all the emails we get there are days we can all get overwhelmed. Fear not...there is an easy way to help organize, sort, and prioritize your incoming email! By setting Gmail filters you can have those “not so important” emails never hit your inbox, send incoming emails to pre-set labels, or even mark emails as read when they hit your inbox without opening them. There are other options as well. Check out what you can do with filters in Gmail to keep your inbox under control!
Create Filters:
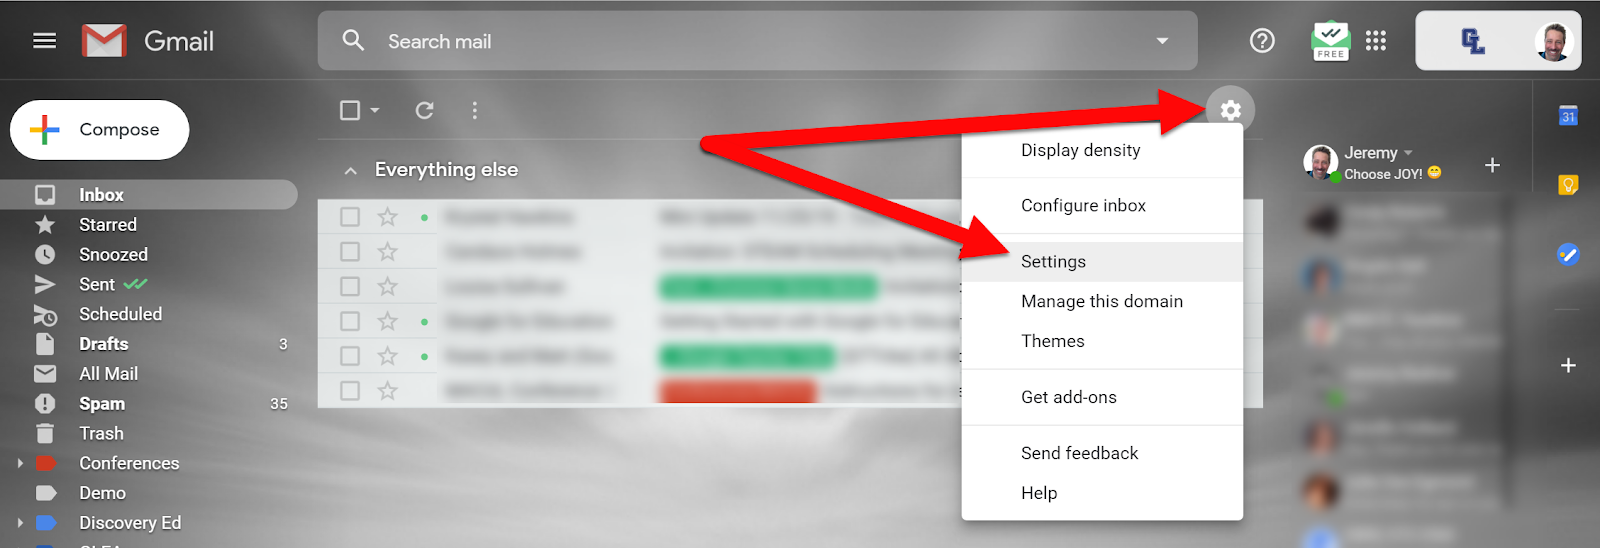
- In your Gmail inbox, click on the gear and click “Settings”.
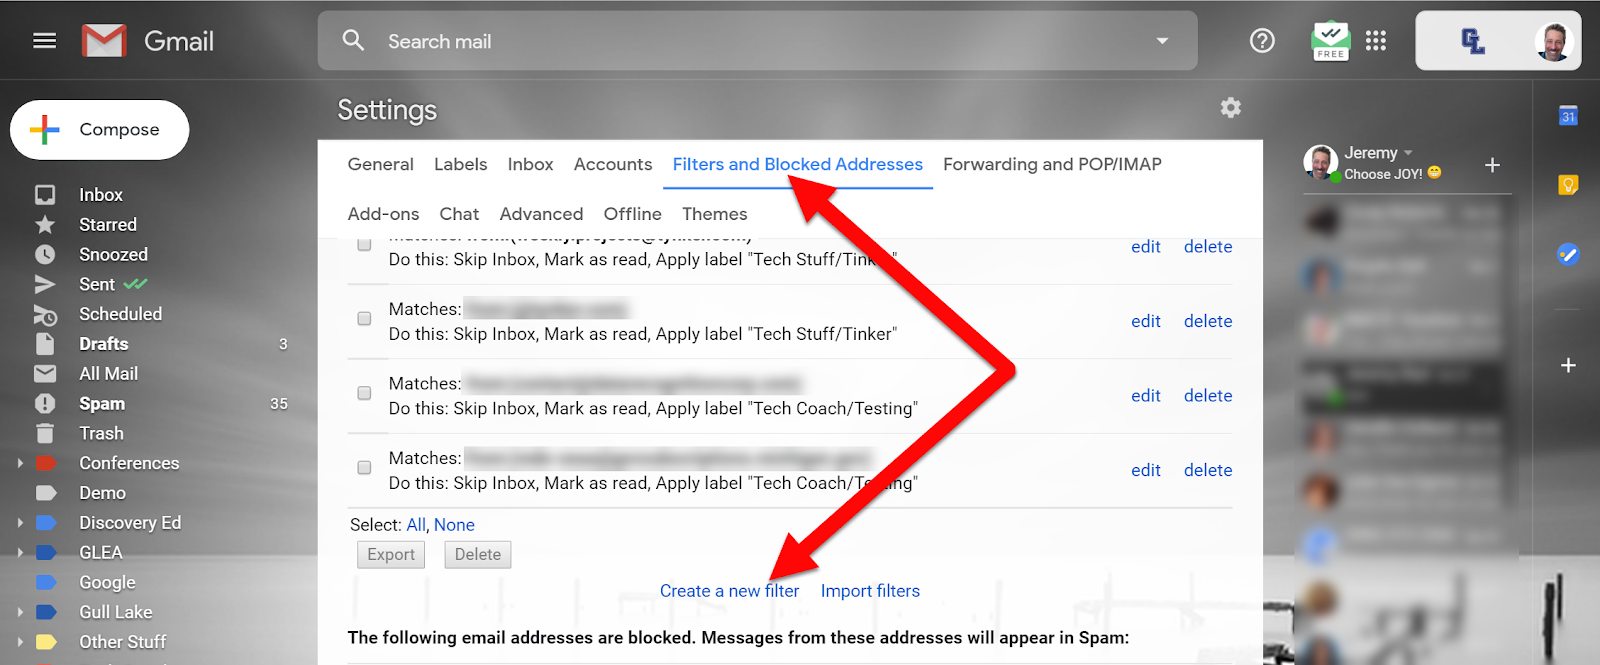
- At the top, click on “Filters and Blocked Addresses”. Then click on “Create a new filter”.
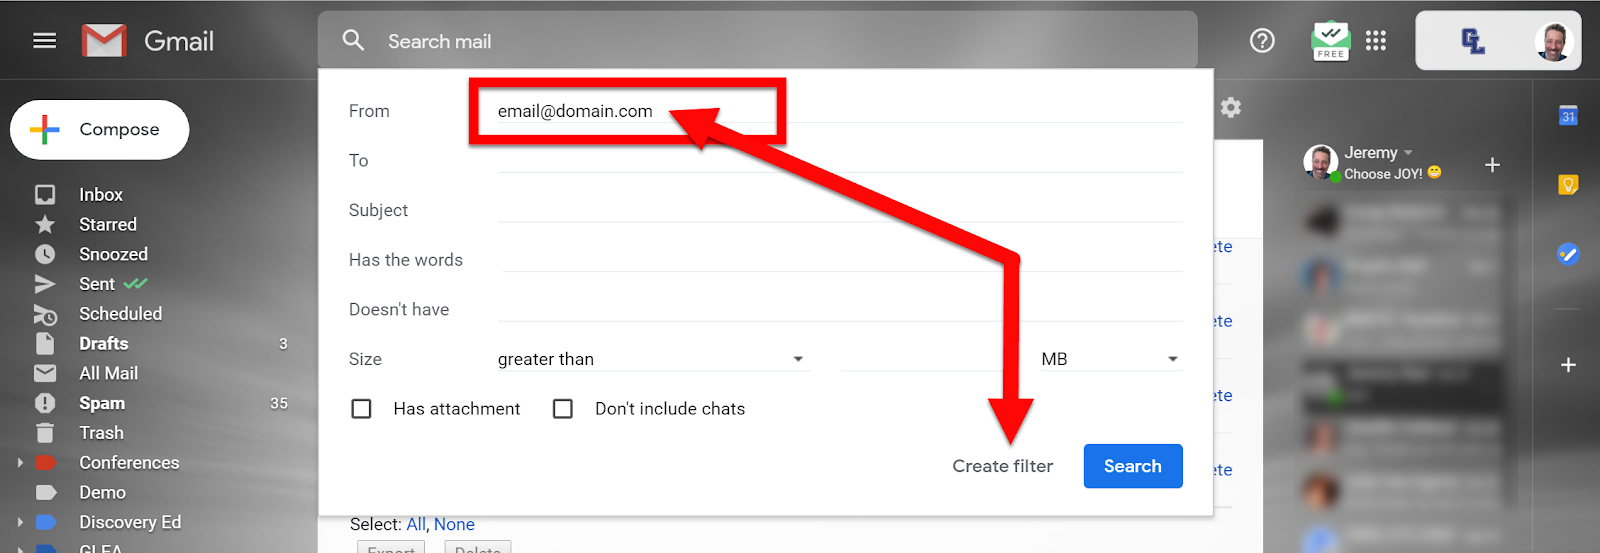
- Type in the email address you wish to create a filter in the top line. There are other options to include, but I always stick with just the email section. You can use any of the others to set filters as well.
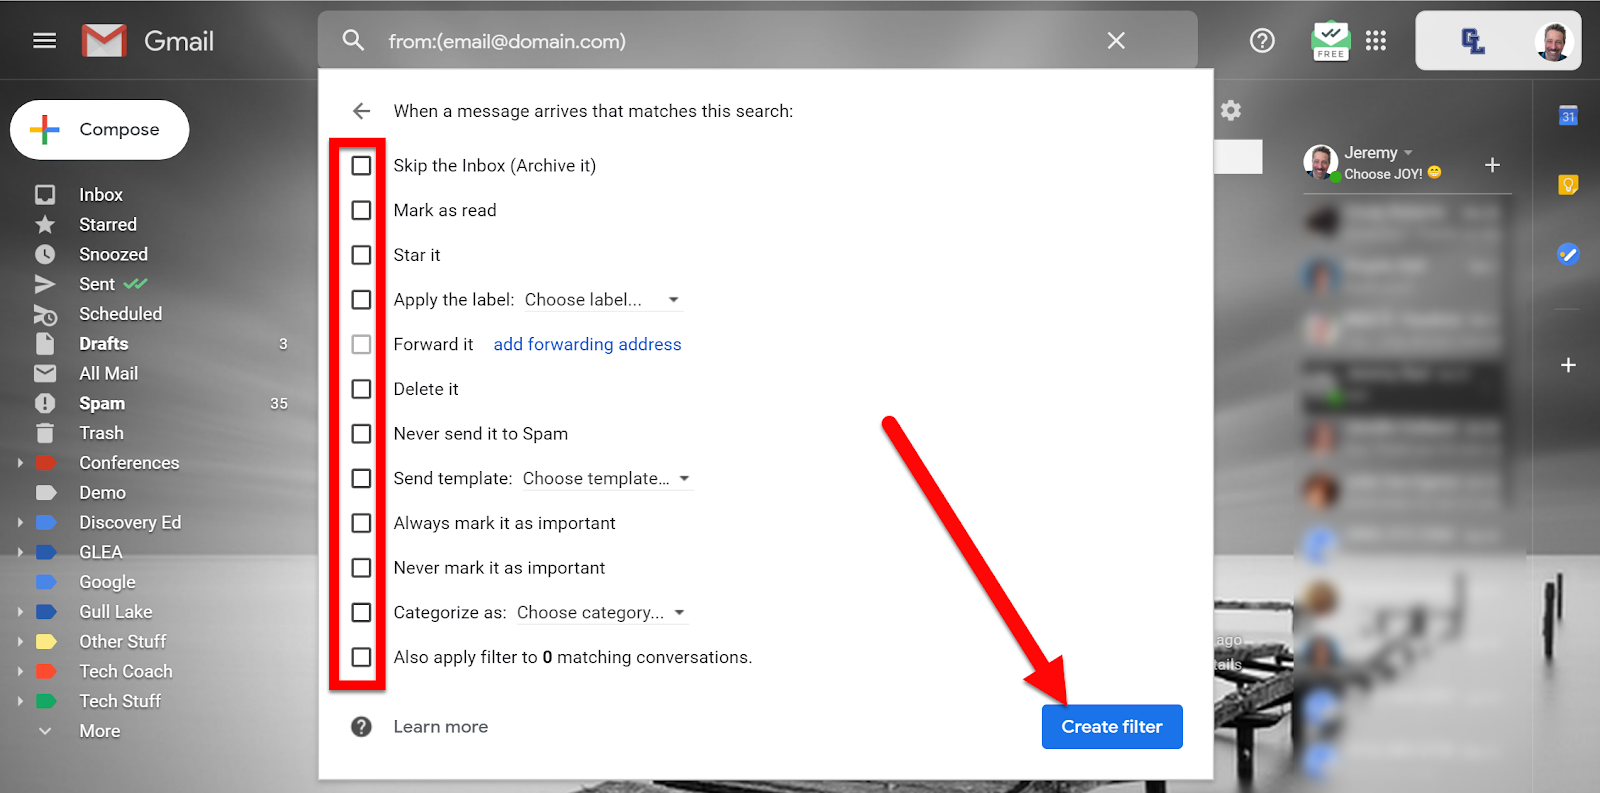
- You are given options for what you want to happen when the email hits your inbox. For example, if you want it to be marked as read and added to a specific label you have created you would check those two boxes. Then click “Create filter”.
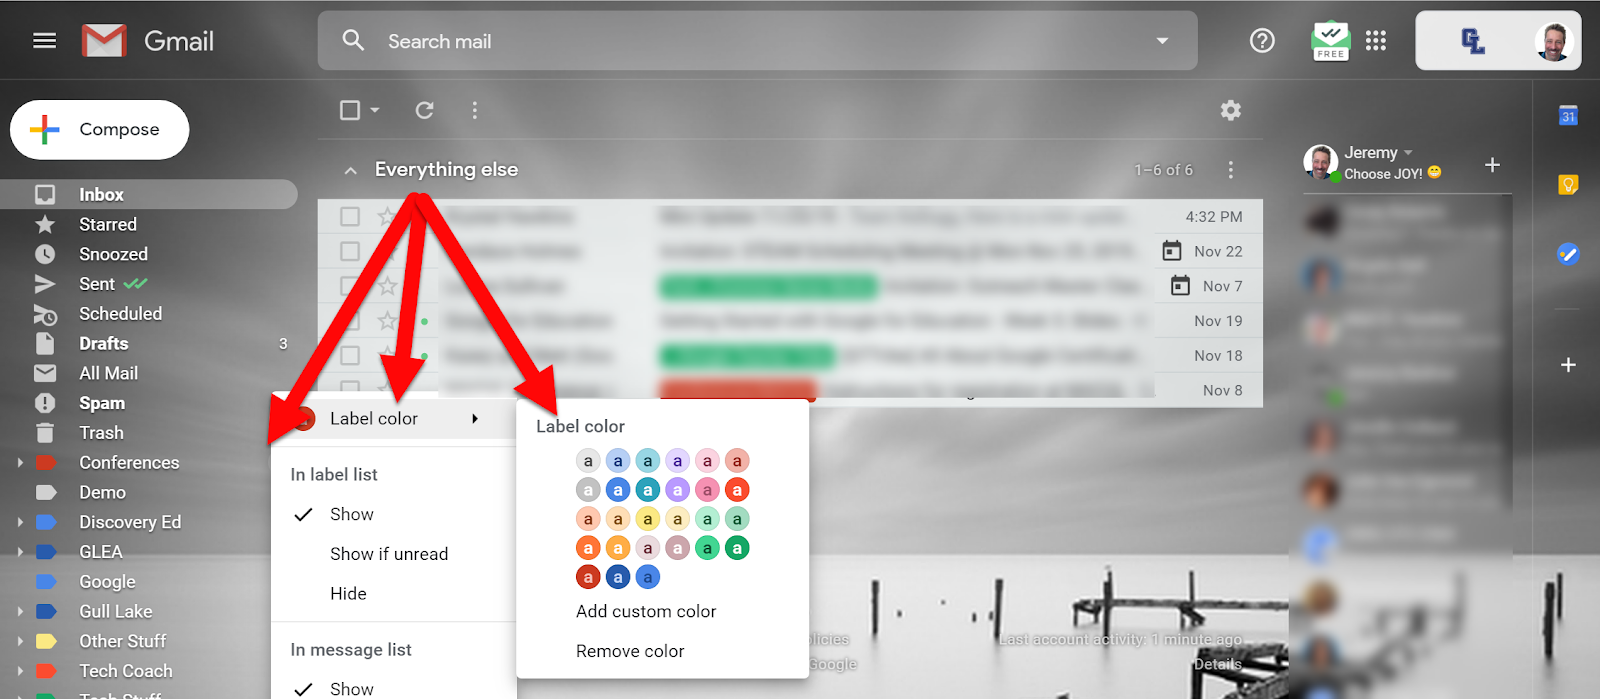
- You will end up back at your inbox. Something to keep in mind, you can set colors for your labels. Click the 3 dots to the right of your label name, then the little arrow to the right, and choose the color you want the label to be set.
Head to your inbox and start setting those filters to get your inbox under control!
If you want these directions in a document click HERE!