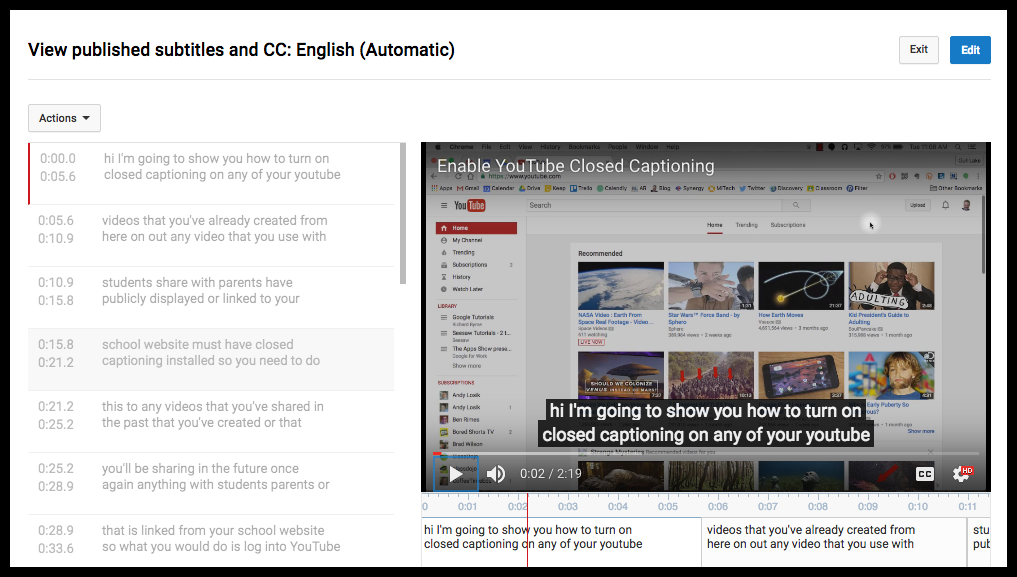
With all the new laws on the books there are some considerations you need to keep in mind if you create or share YouTube videos. If you post links to YouTube clips on your website, share videos with parents, or make a YouTube link public in any way through your website you are required to have Closed Captioning enabled. You will need to do this to any video you share with the public that you make. The link below will help you enable Closed Captioning on any YouTube videos you have made so you are in compliance with this law.
Add Closed Captioning to YouTube Videos
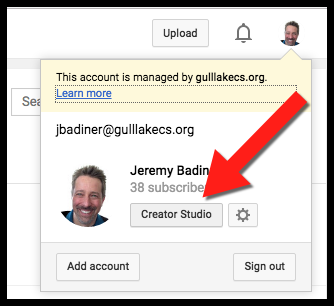
- Go to YouTube.com.
- Click on your Profile picture in the top right and click “Creator Studio”.
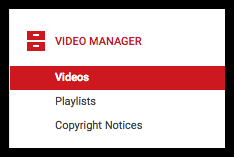
- Click on “Video Manager” and then “Videos”.
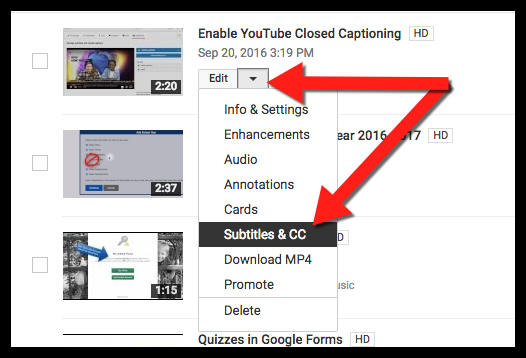
- Click the drop arrow next to “Edit” on one of your videos. Click on “Subtitles & CC”.
- It will ask for language. Choose which you want.
- Click on “Add New Subtitles or CC”.
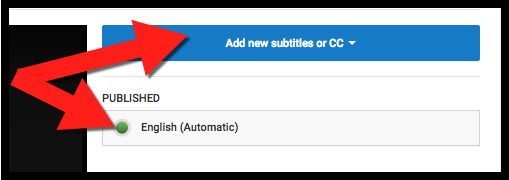
- The left side will now have the auto transcribed text. You can edit in here if needed then exit.
You are all set!
(Video How-To Here: https://youtu.be/B_YYYo2t9ss)
If you want these directions in a Document click Here!