

Create an Account:
Head over to bookcreator.com.
Click “Sign In” at the top and then choose “Switch to Teacher”.
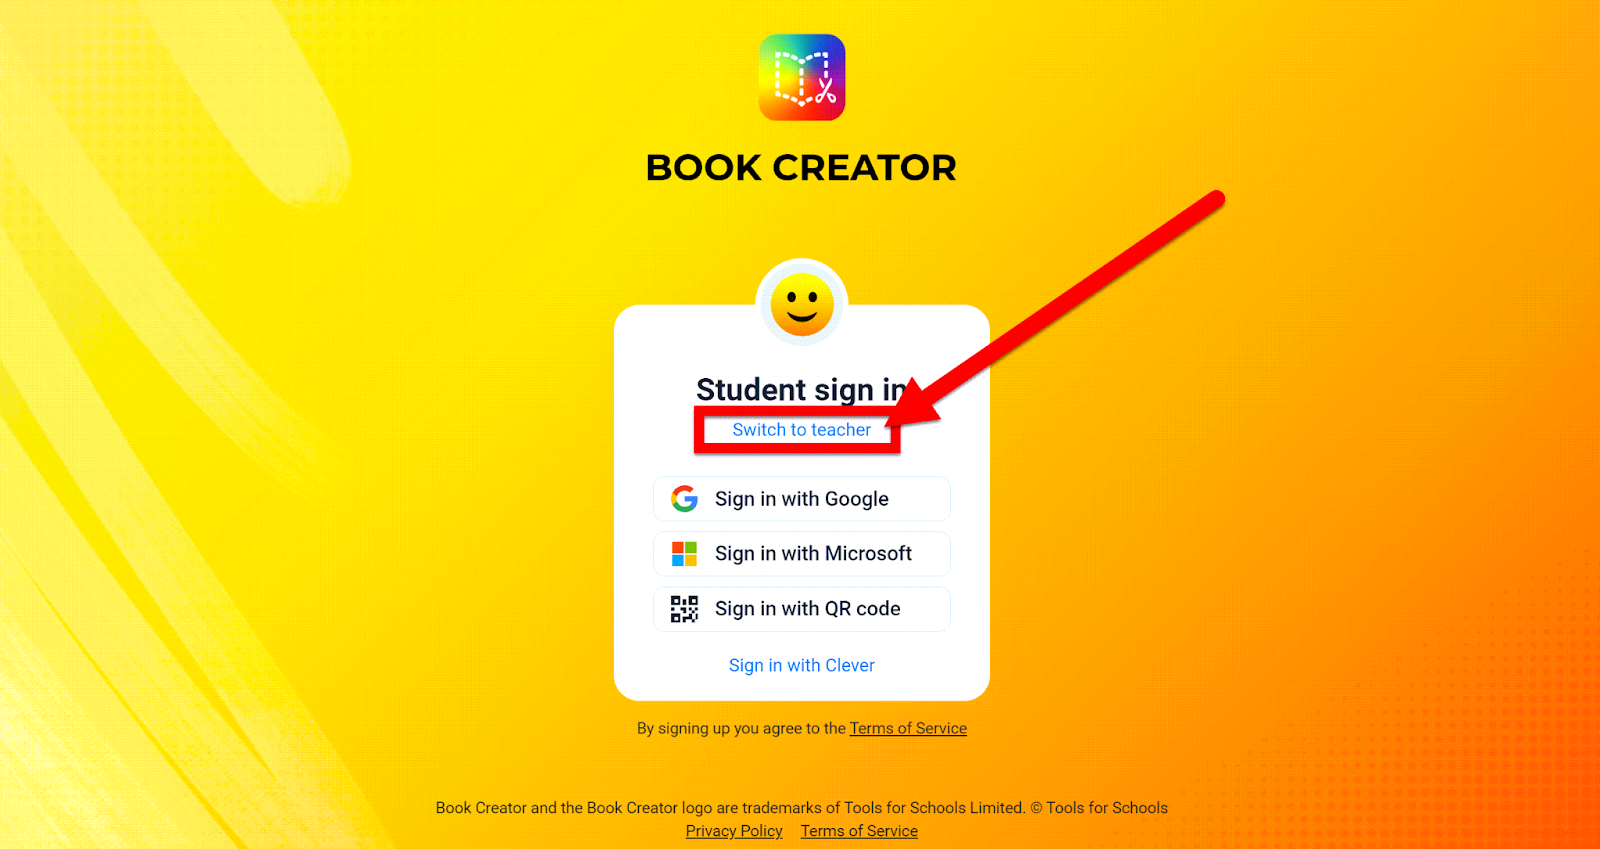
Choose “Sign in with Google”.

You will have to complete the steps to set up your library (the free version only allows 1 Library and 40 books).

Create a Book:
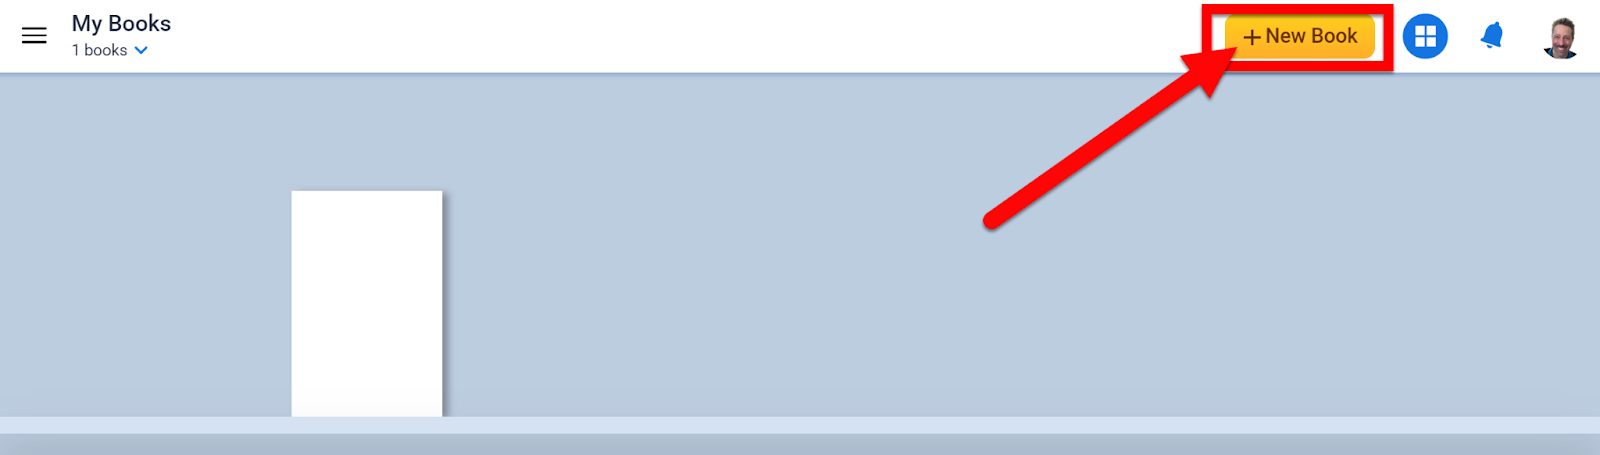
Click on the “+ New Book” button.
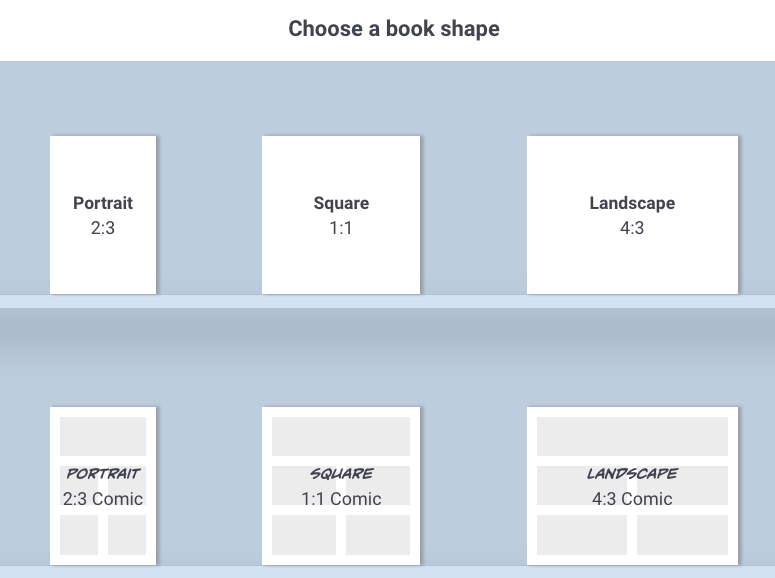
Choose your layout/shape.
Choose your Background by clicking the “i” icon.

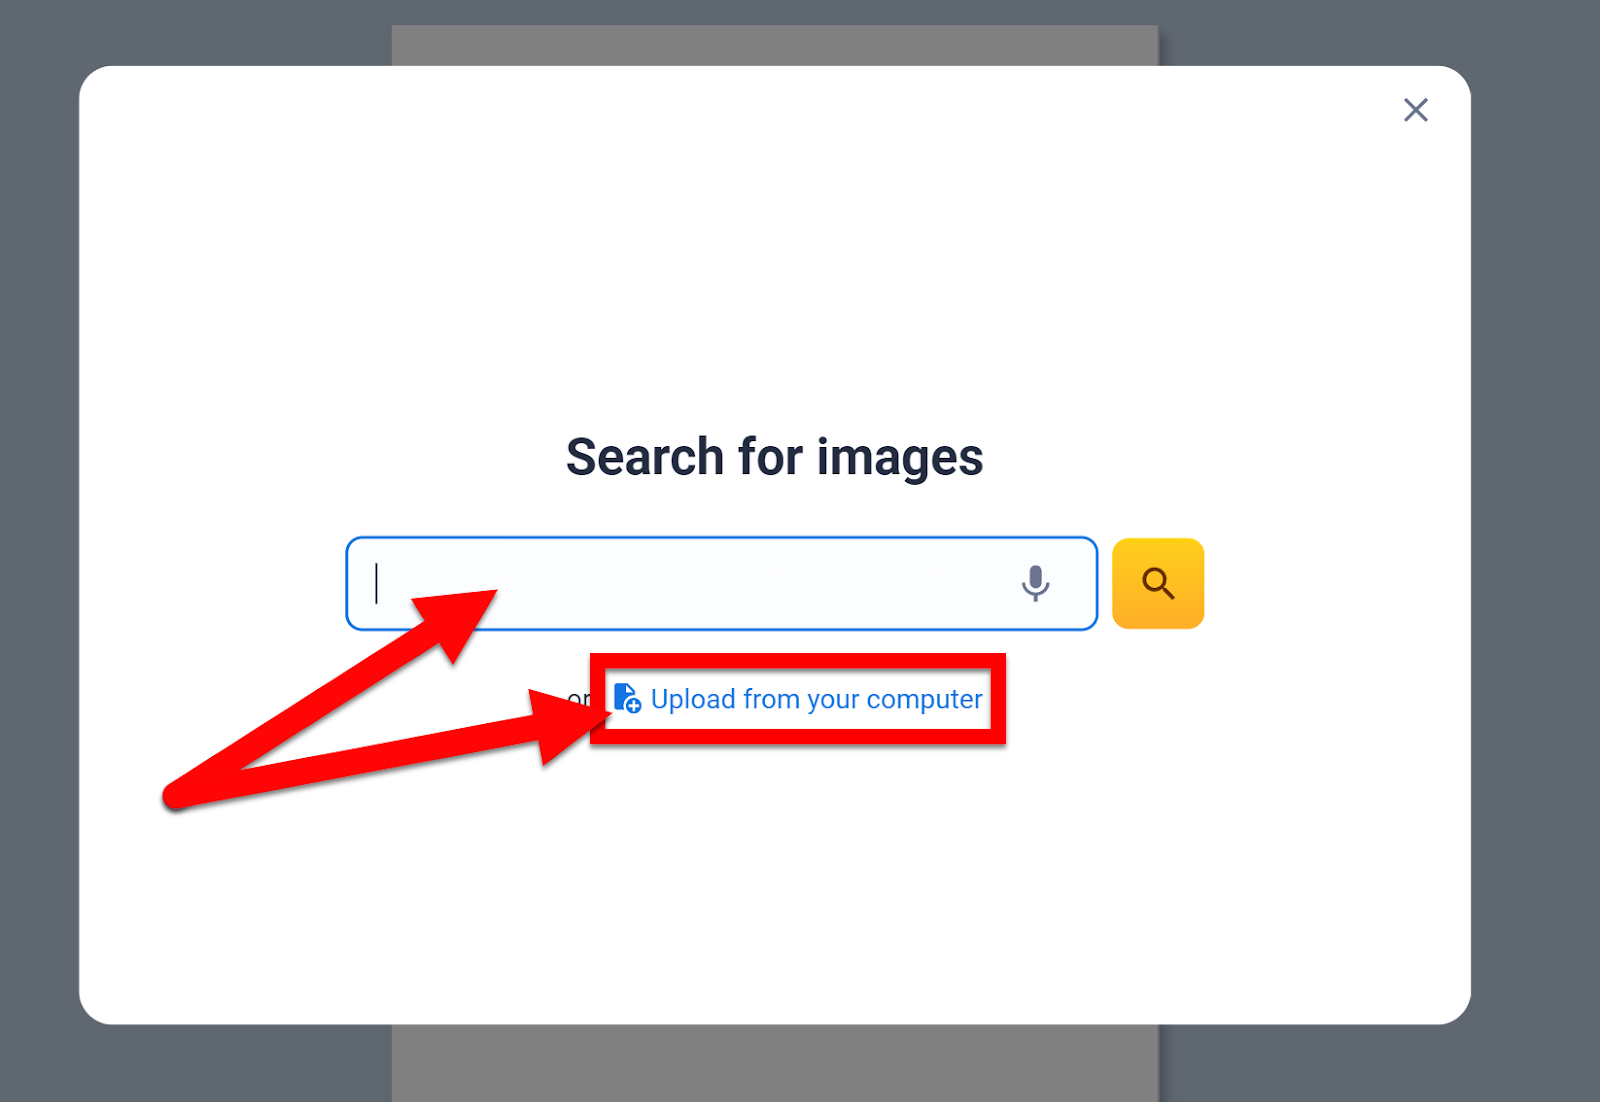
Add content by clicking the “+” icon:
Media
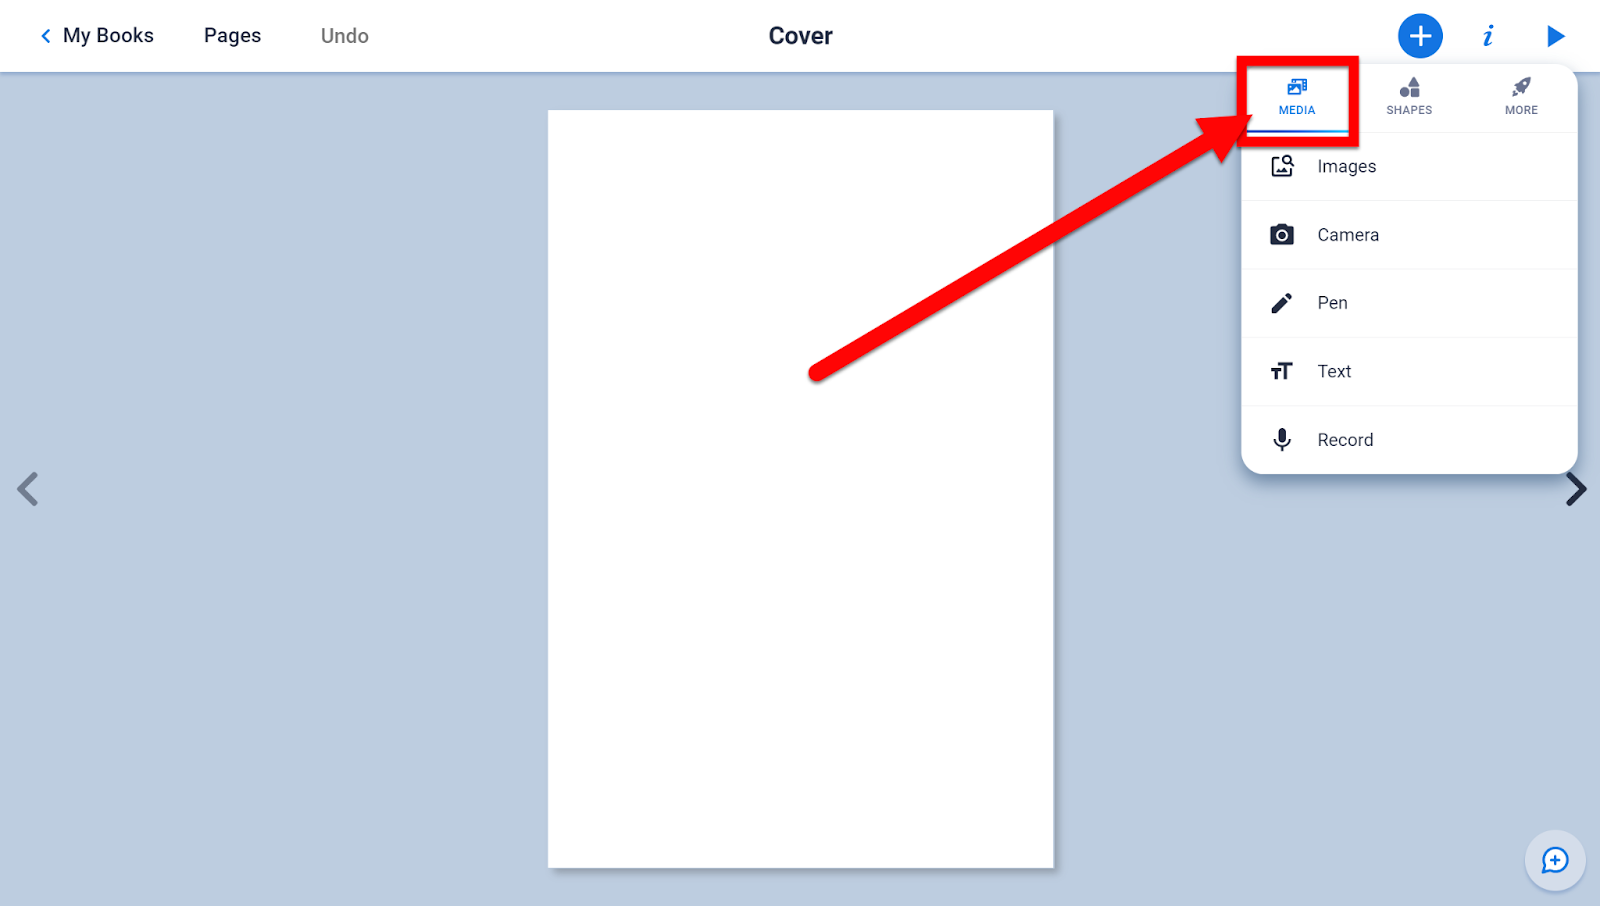
Images: add images from the web or from your device.
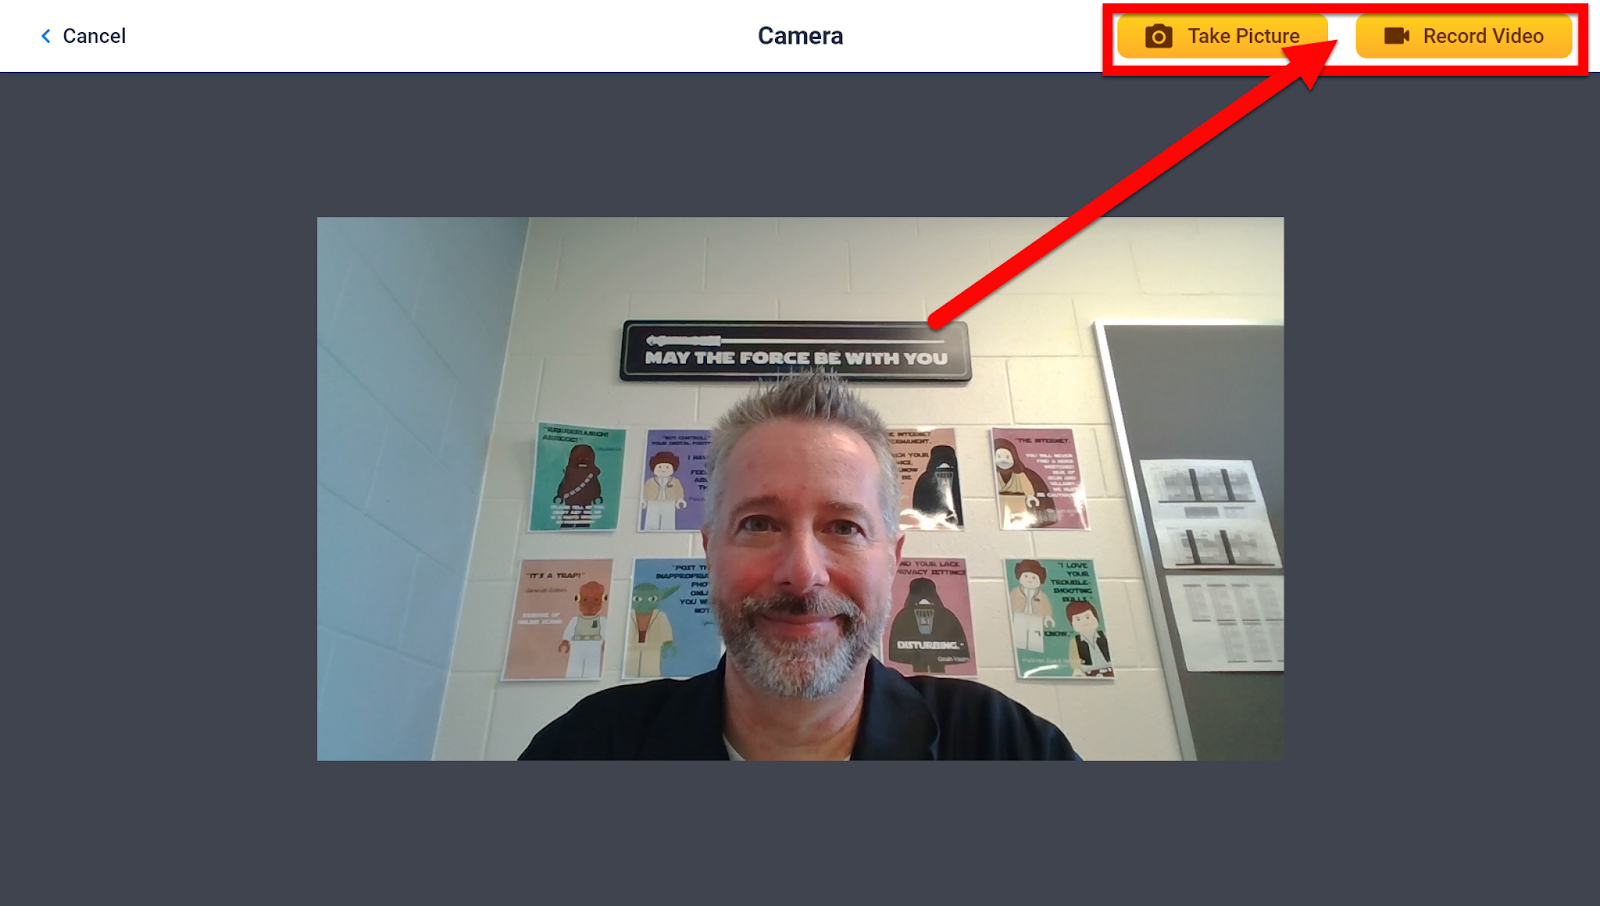
Camera: Use your webcam to add a video/image
Pen: Draw anything you wish

The “Auto Draw” at the bottom uses AI to auto-create a picture so ANYONE can be an artist!

Text: Create a text box

Voice to Text: Add text by typing or DICTATION!

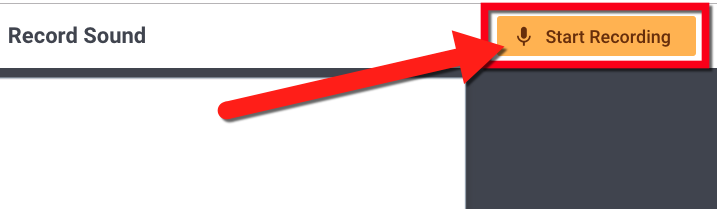
Record: record audio to add to your book
Shapes
Insert shapes and callout bubbles (can have text added)

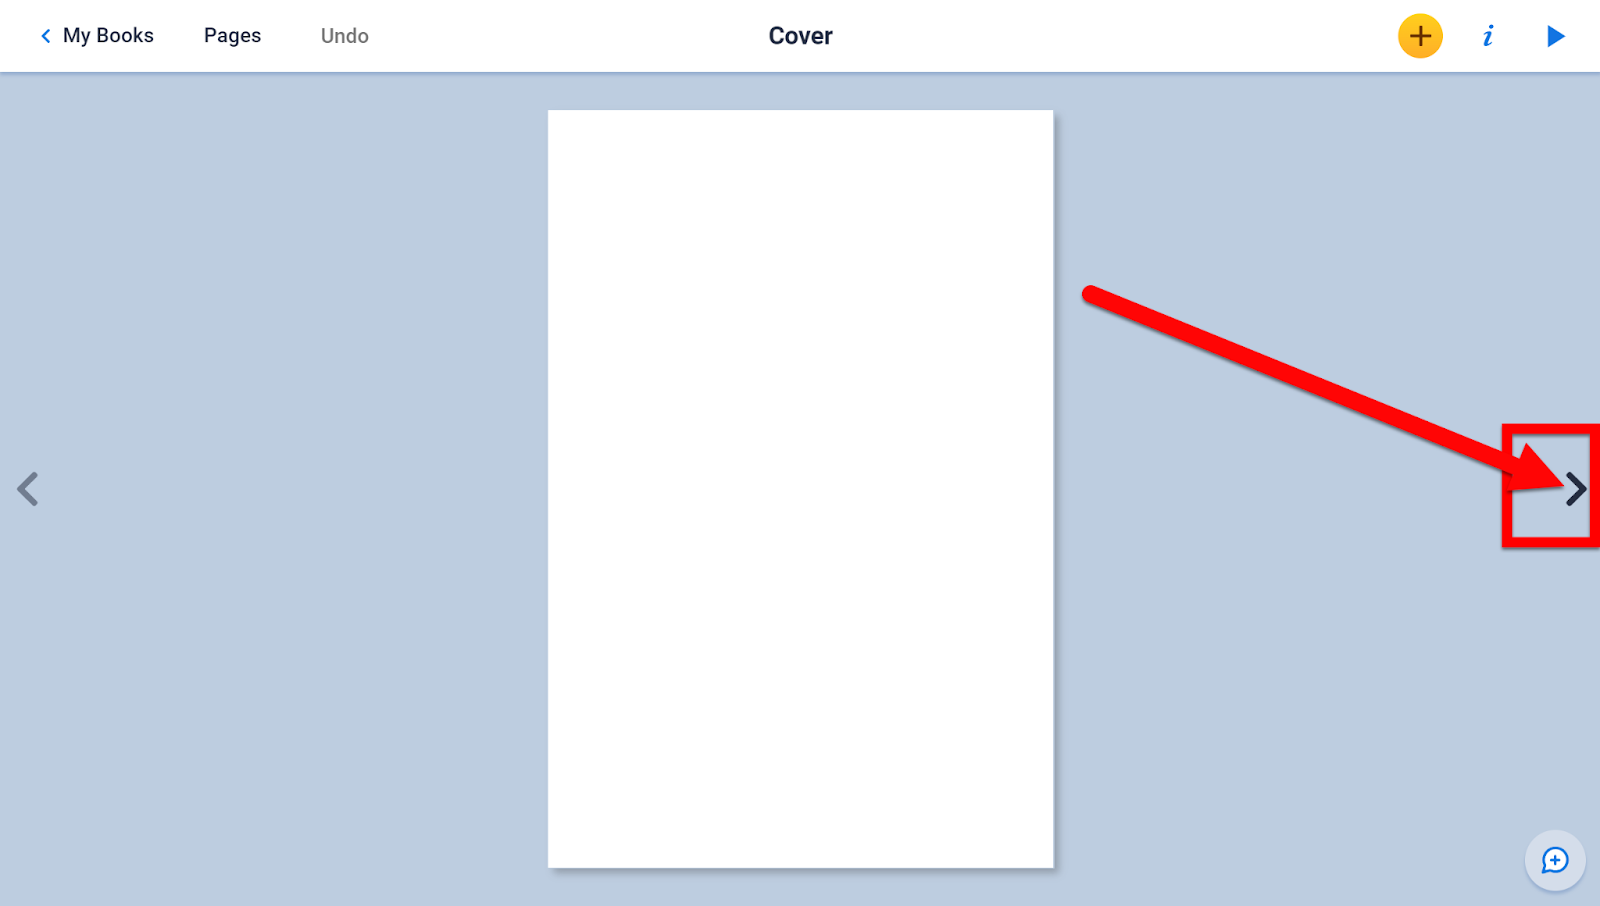
Add pages
Click the arrow to the right to add a page
Manage/reorder pages

Play the book
Just click the arrow in the top right to play the book. You can even have it read to you by clicking “Read to me”.

Share with Students:
First, there are 2 ways to display your books. The grid icon in the top right controls this.

There are 2 ways to share your books.
Add to a Library:
Click the 3 dots and choose “Move to Library” if in compact view.
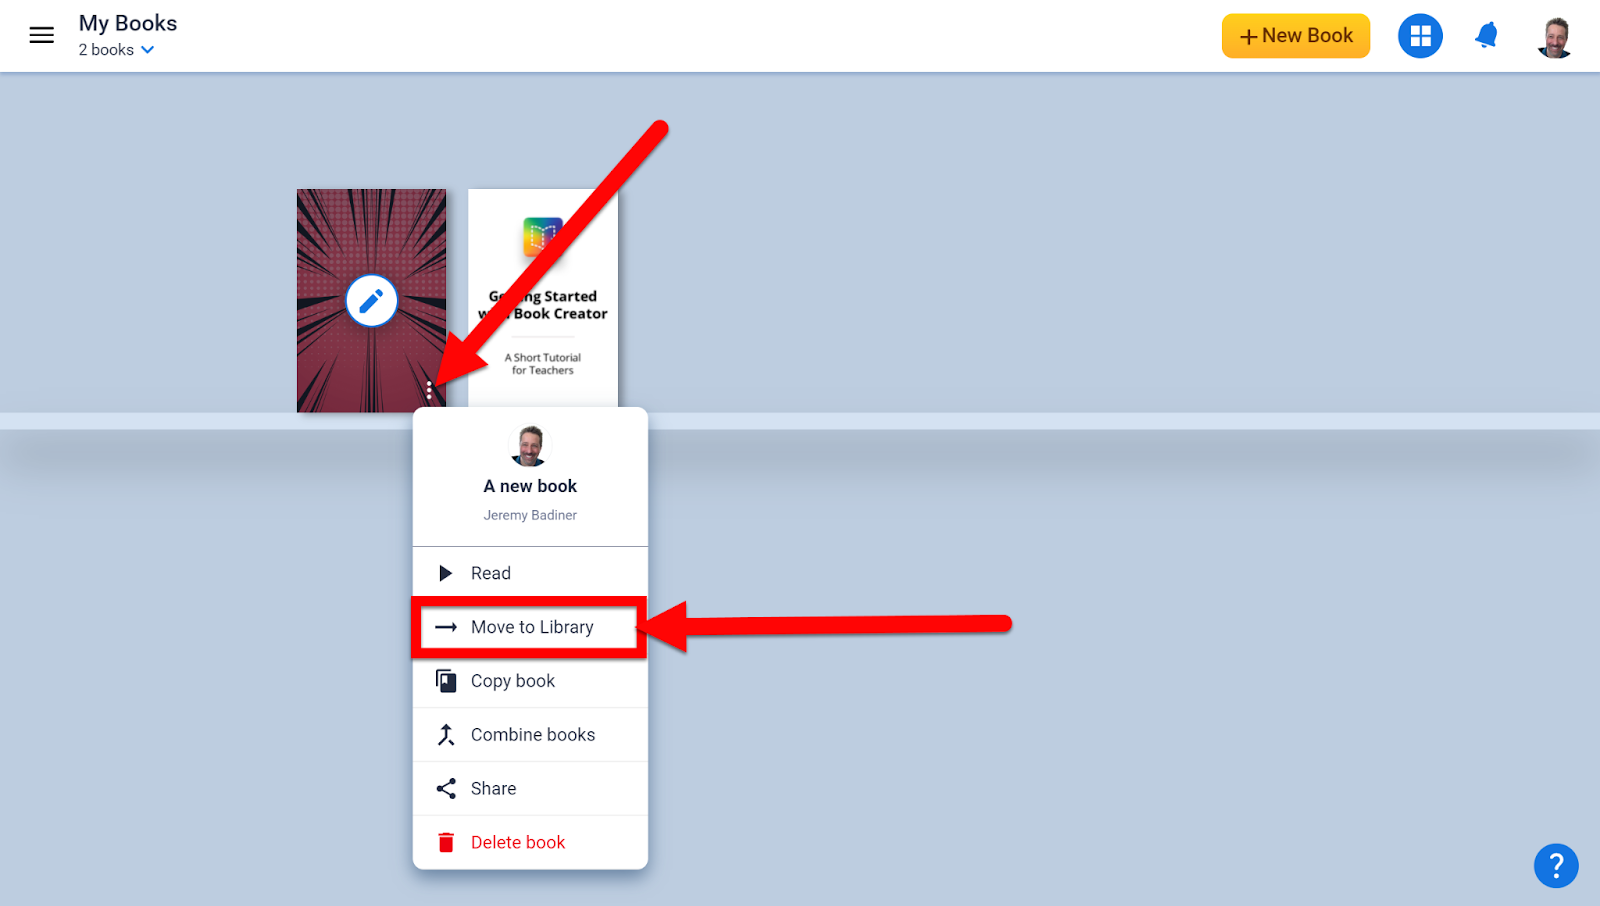
Go to the “Library” icon and click “Move to Library” if in the zoomed-in view.

Open the Library you added the book into by clicking the 3 horizontal lines in the top left, choosing the Library, and clicking on the “Invite Code” link at the top. This is what you will share with your students once they have signed into Book Creator.

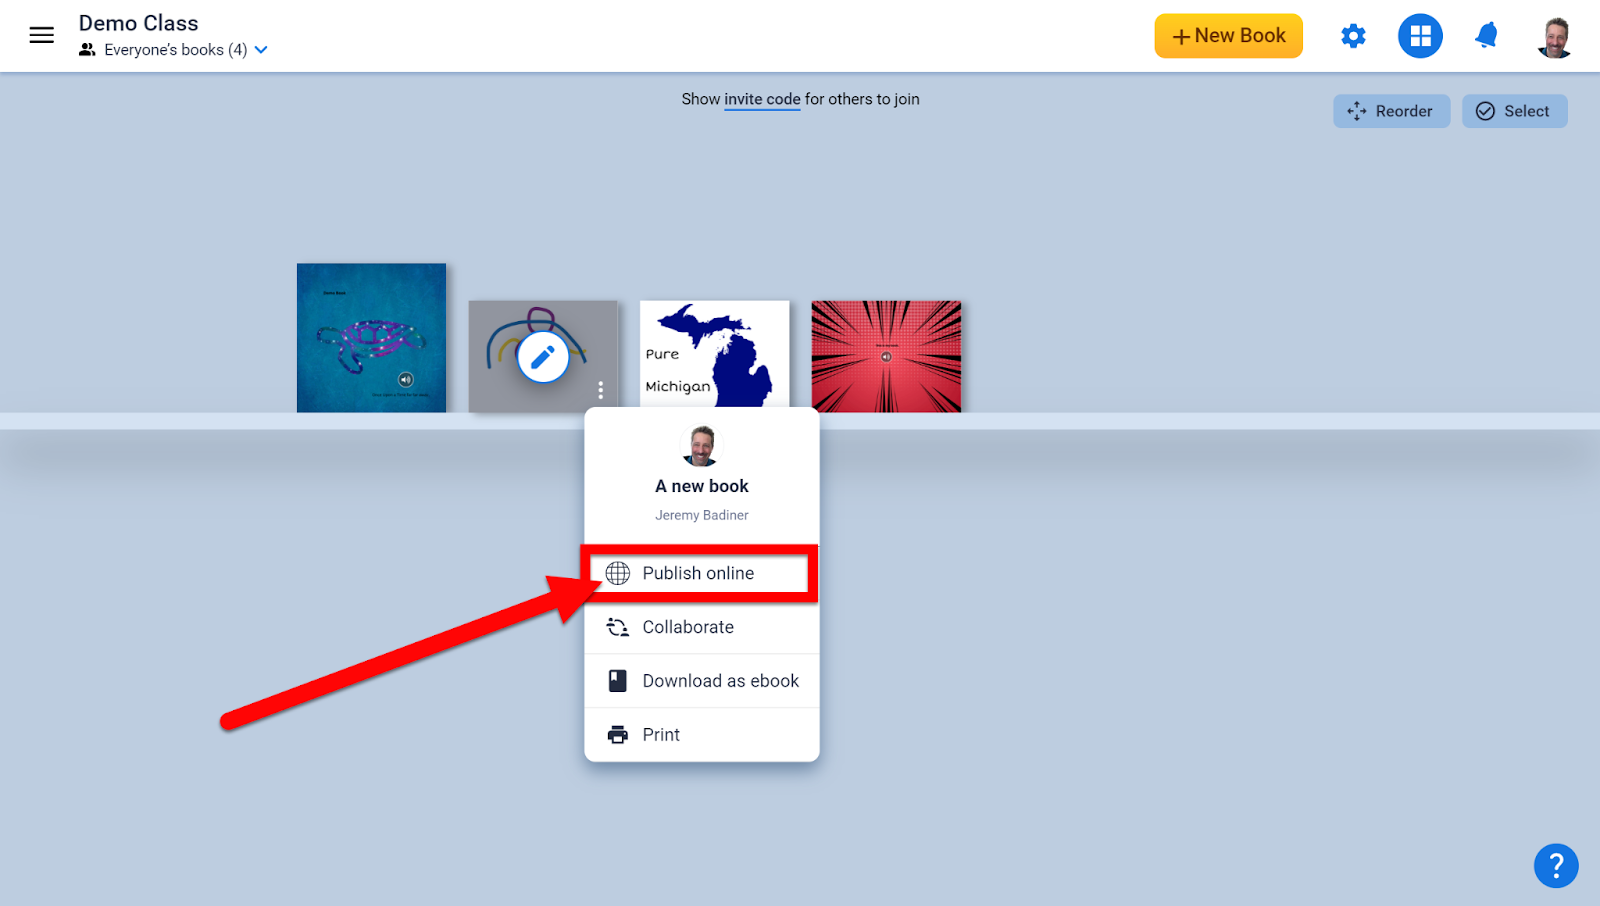
Share the Link:
After your books are finished you can share them with the world by clicking the “Share icon”. You can then choose to “Publish online”, “Download as ebook”, or “Print”. The ebook download will require an ebook reader, and printing can be paper or a shared PDF but will lose the video/audio features.
Once published, your book can be read on bookcreator.com with a private link. You choose who to share this book with, and you can unpublish the book at any time.
Add Students to Library:
There are 2 ways to add students. The easiest is by using their Google Accounts.
Use your students’ Google Sign-in:
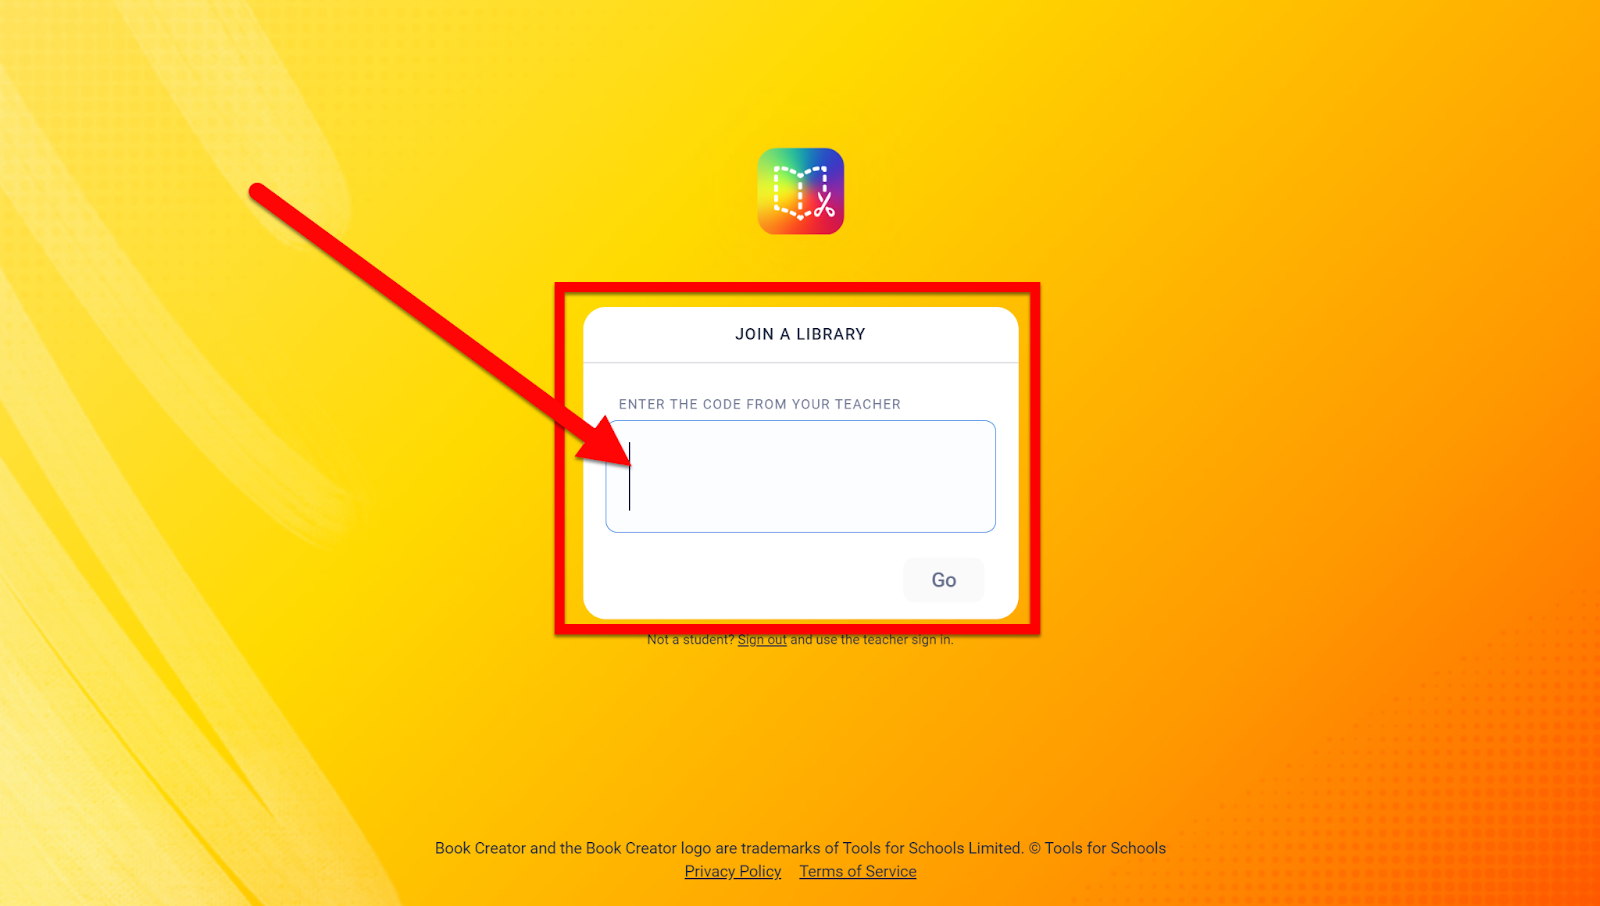
Have your class go to bookcreator.com.
They will click the “Student” option.
They will sign in with their Google Account.
Students will be asked for the teacher's code. This is found by opening the Library you added the book into by clicking the 3 horizontal lines in the top left, choosing the Library, and clicking on the “Invite Code” link at the top. This is what you will share with your students once they have signed into Book Creator.
QR Code: (If not signing in with Google)
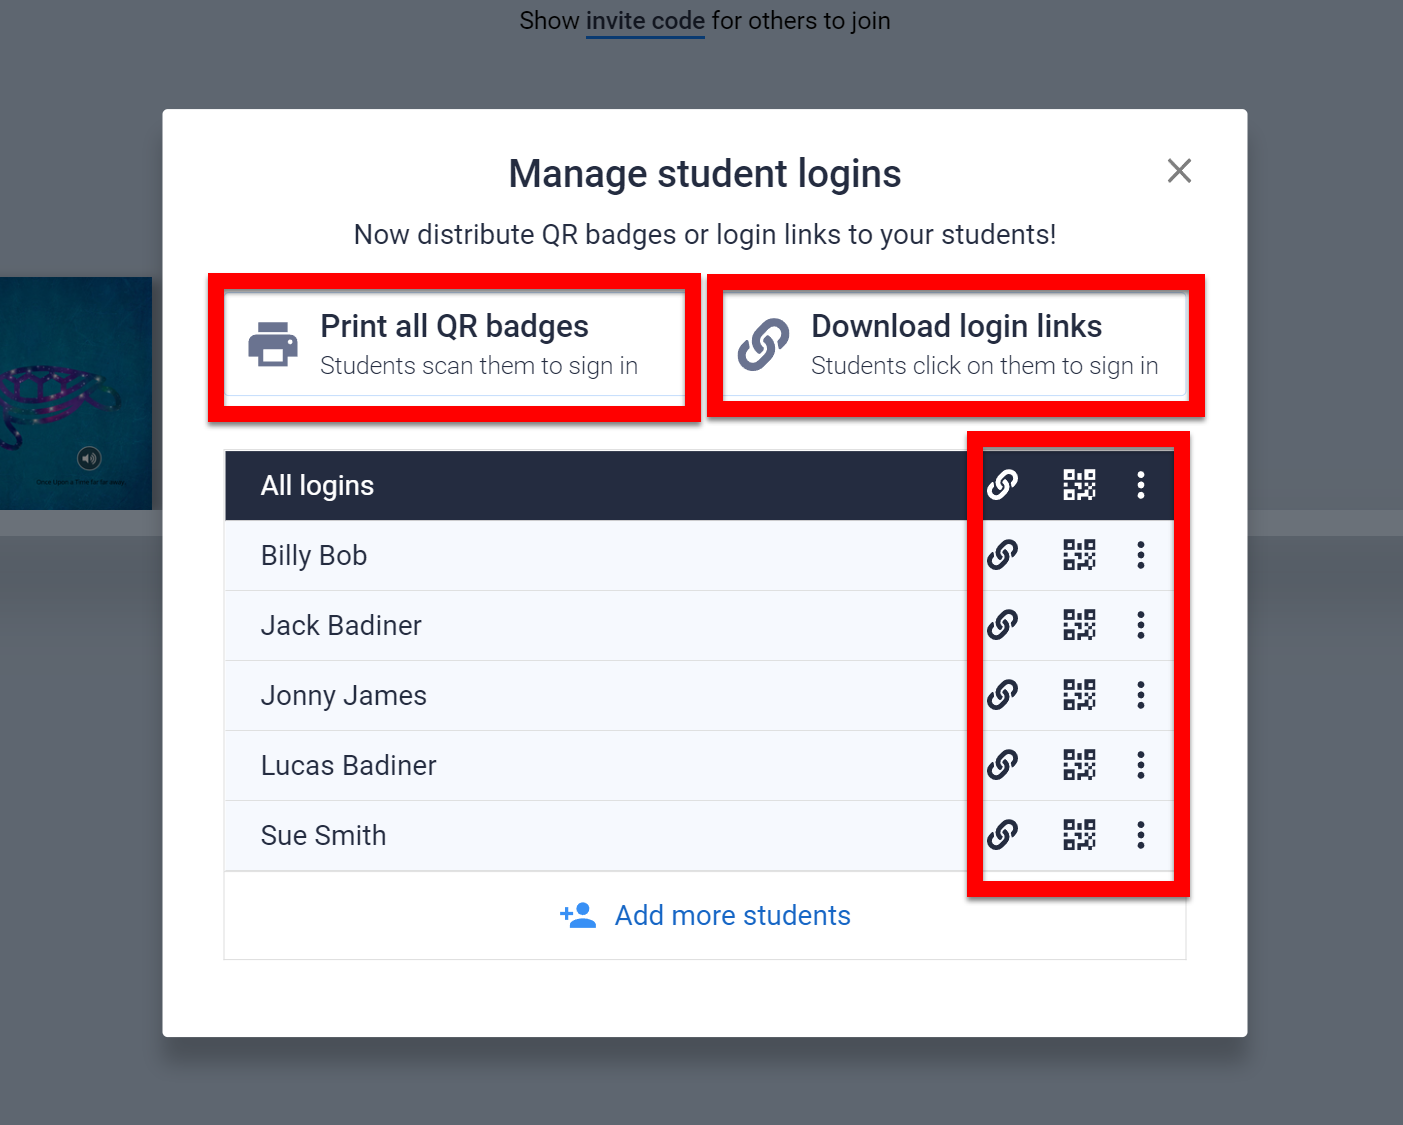
Create your class list by clicking on your profile pic and choosing “Student Logins”.
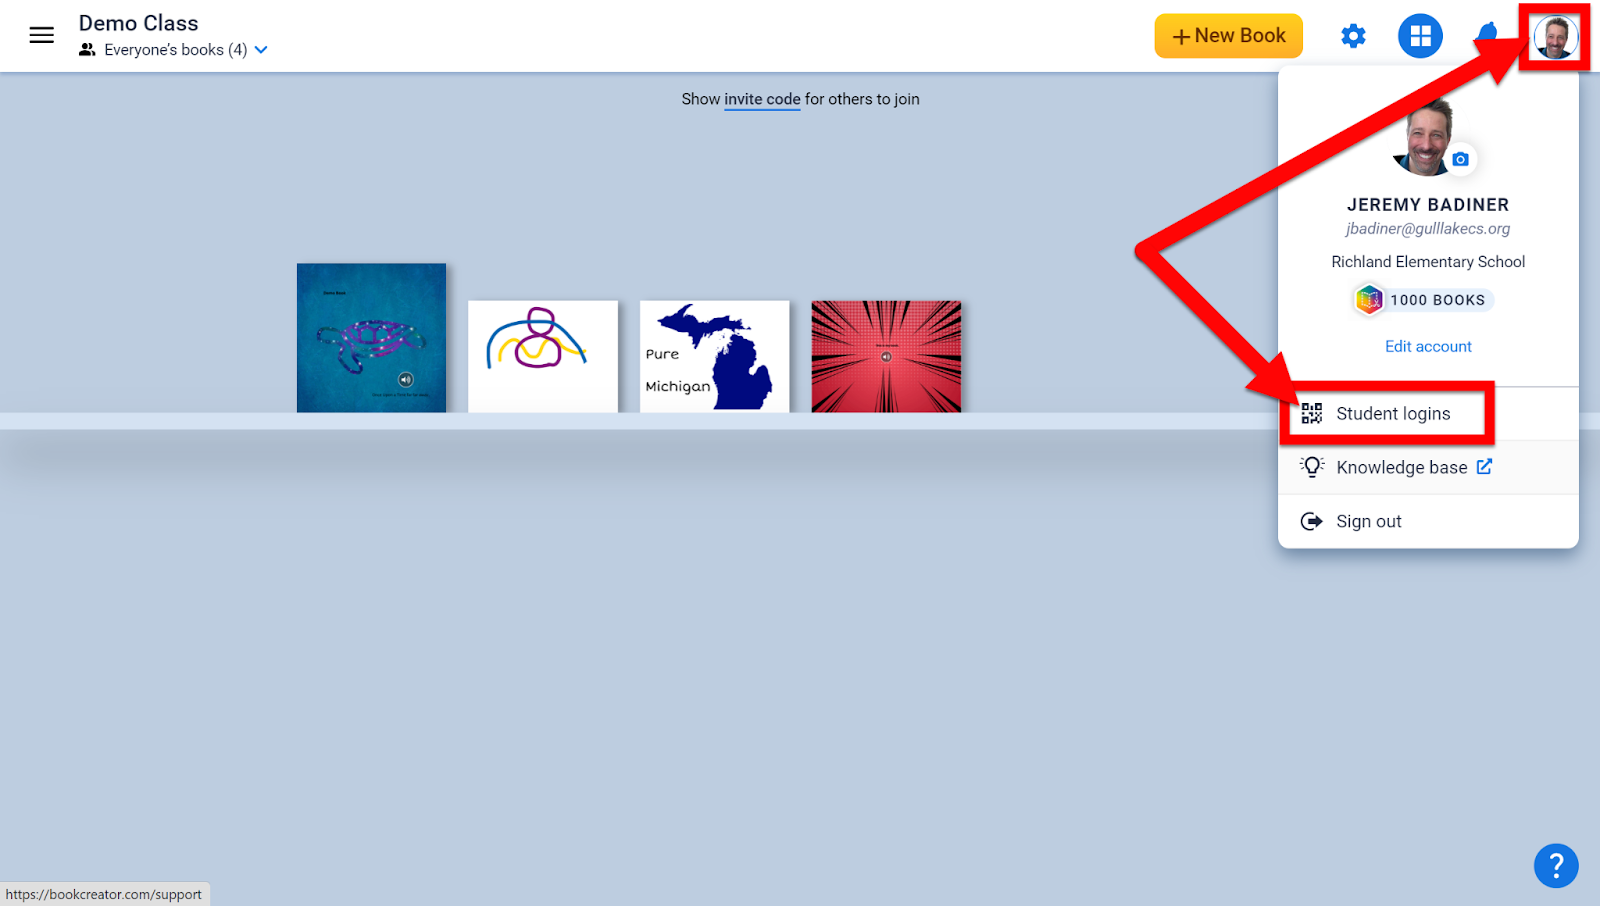
Click “Add more students” and enter their names.
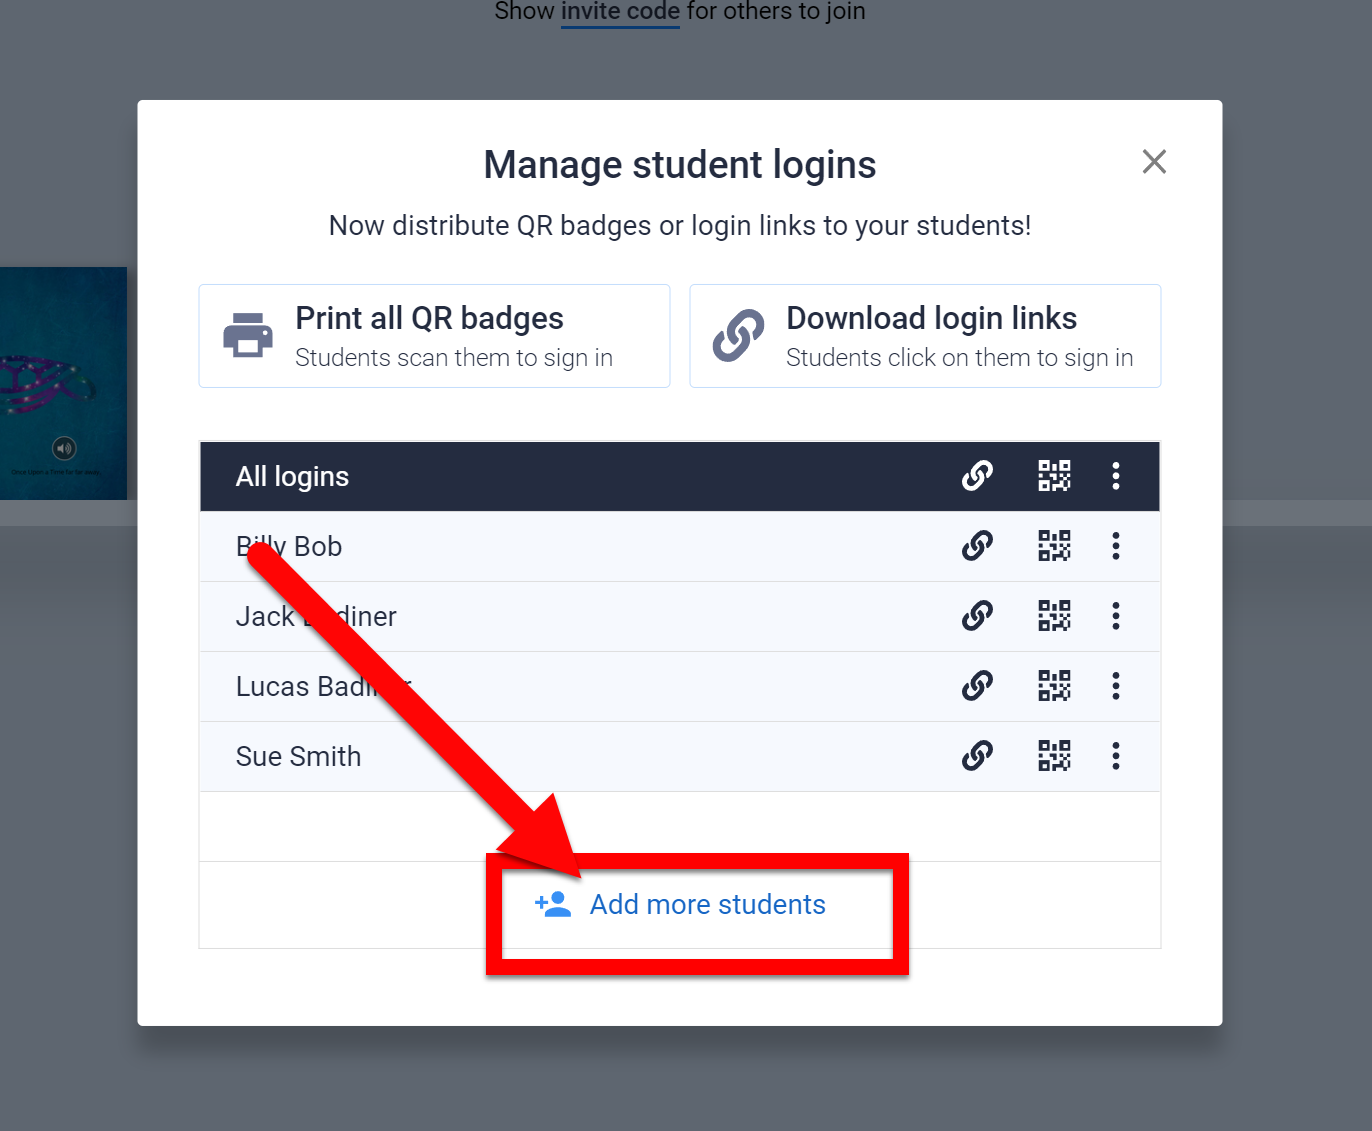
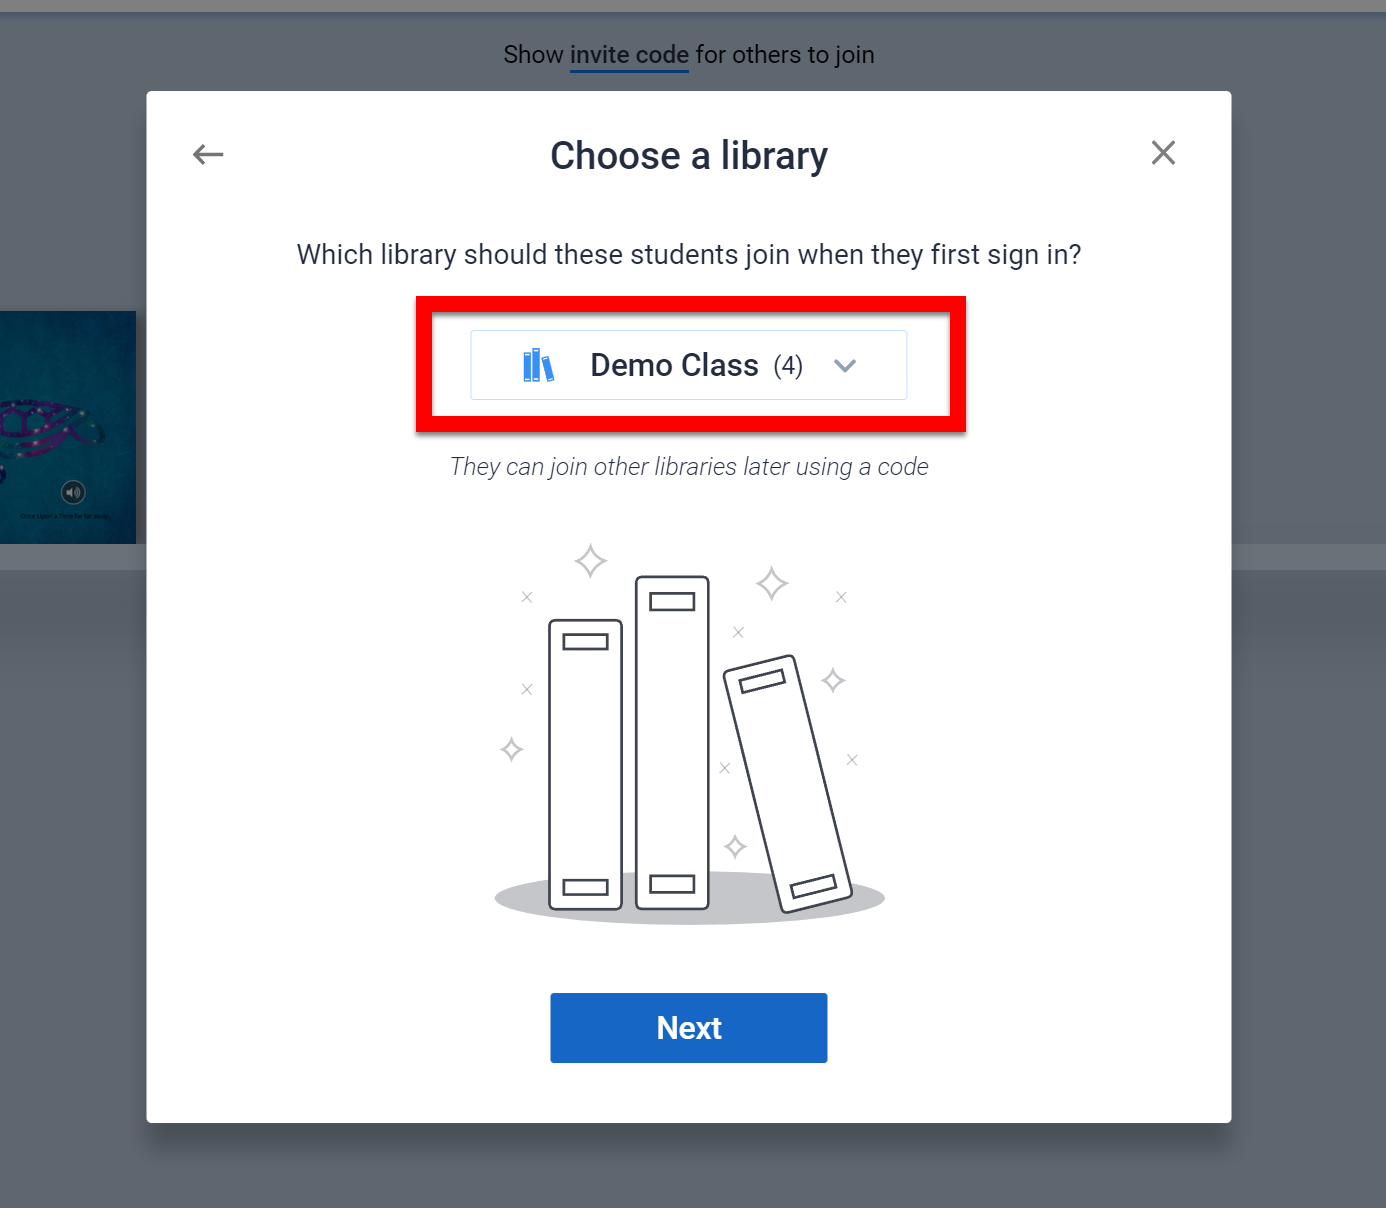
You will then be asked to add them to a Library. Choose the correct one.
You can now download badges or links for them to use to sign in.
Students can now view any book in the library and add books of their own. Keep in mind...you are limited to 40 books with the free account.
You now have Library and student access. Have them create and publish their work for the world to see!