Thursday, May 6, 2021

Multiple Gmail Signatures

Email is still the most widely used tool for communication. I use it all day long for both in-district and out-of-district communication. When I communicate with others in my district, I want them to see a signature that reflects what I want them to see (links to my blog, Twitter account, and a “Book Me” link. When I communicate with educators outside my district, I don’t want them to have access to my “Book Me” link. In the past, I had to delete this portion of my signature. Gmail allows you to have multiple signatures saved. Before sending an email I can select the correct one for the recipient. Set up multiple signatures in your account (one for staff, one for students, and one for parents) to make your signature specific to your audience! If you are looking at how to make a Creative Signature click HERE.


Set Up Multiple Signatures:

  1. Open Gmail.

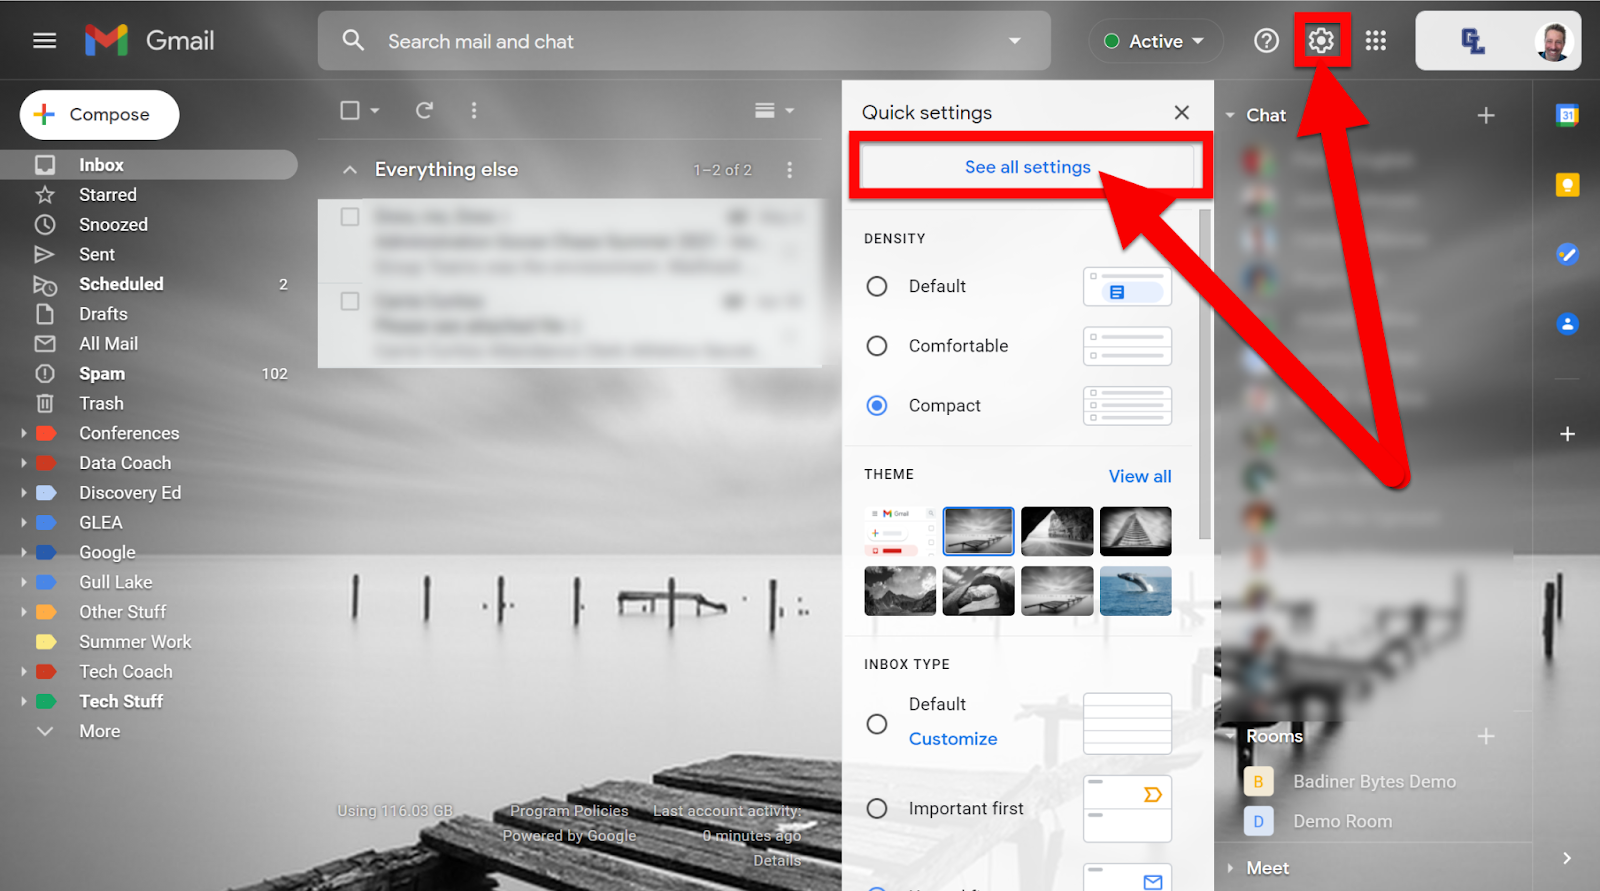
  2. Click on the gear in the top right and choose “See all settings”.


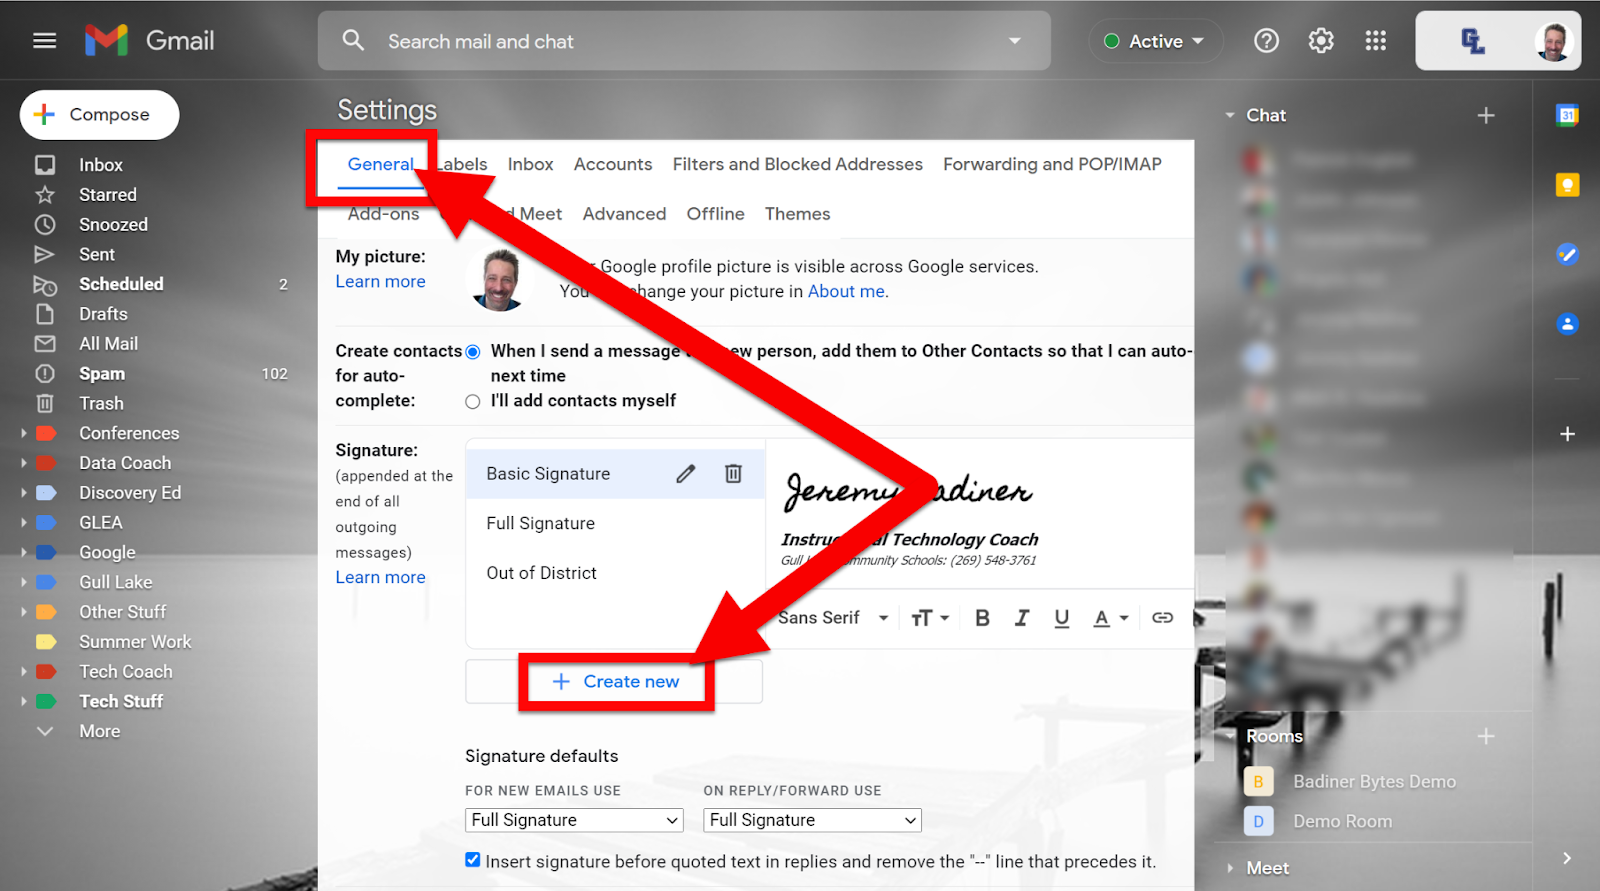
  1. Under the “General” tab scroll down to “Signature” and click “+ Create new”.


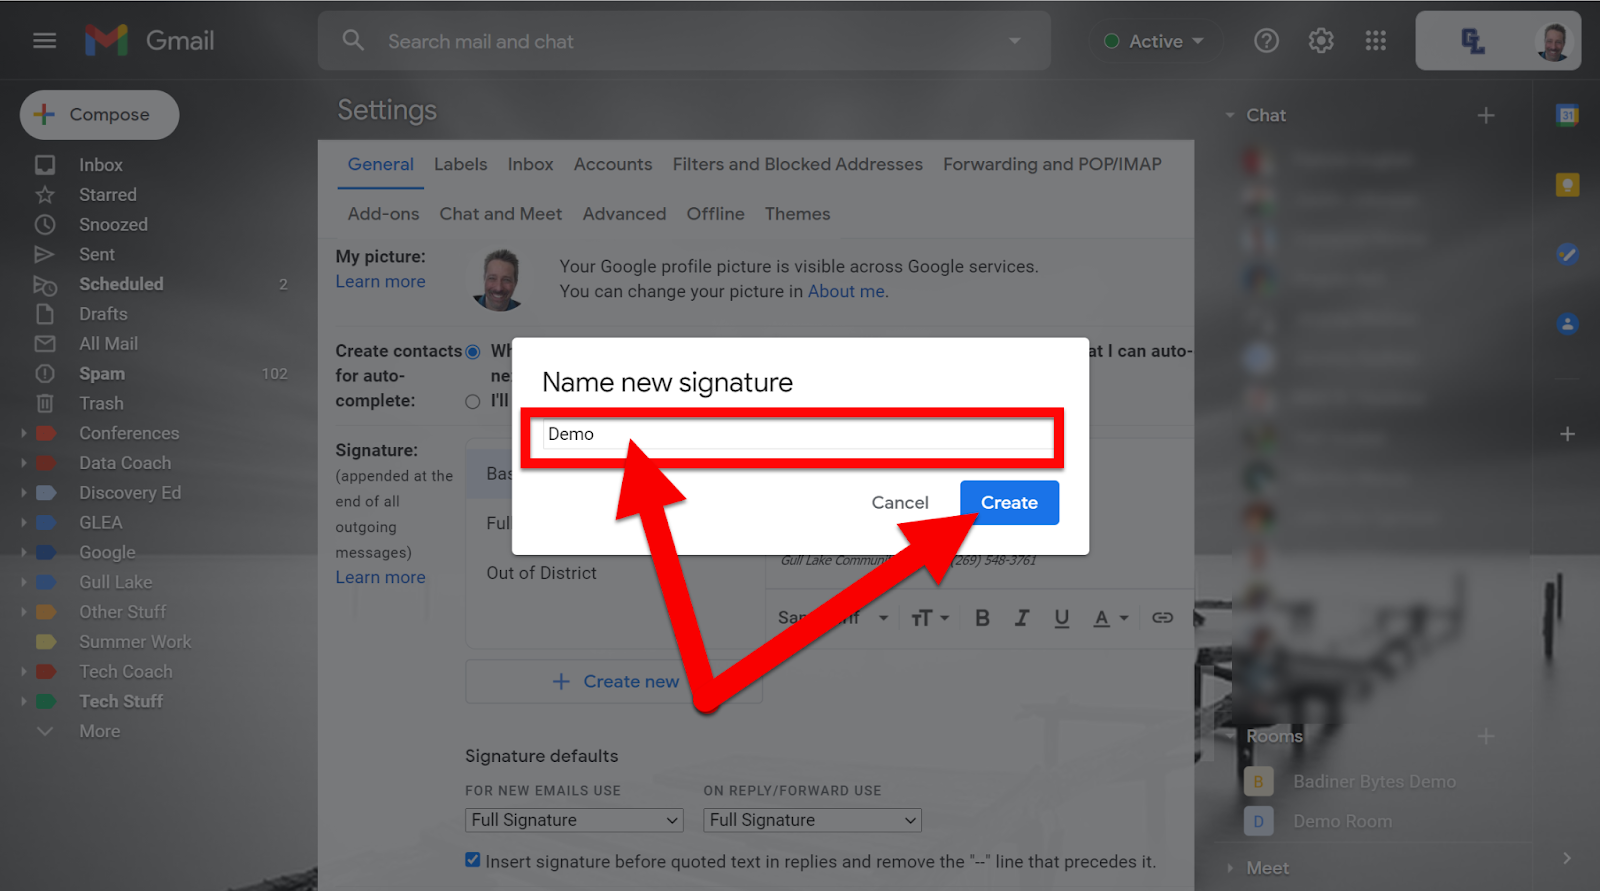
  1. Name this signature (something you remember and tied to its purpose). Click the “Create” button to save this on your list.


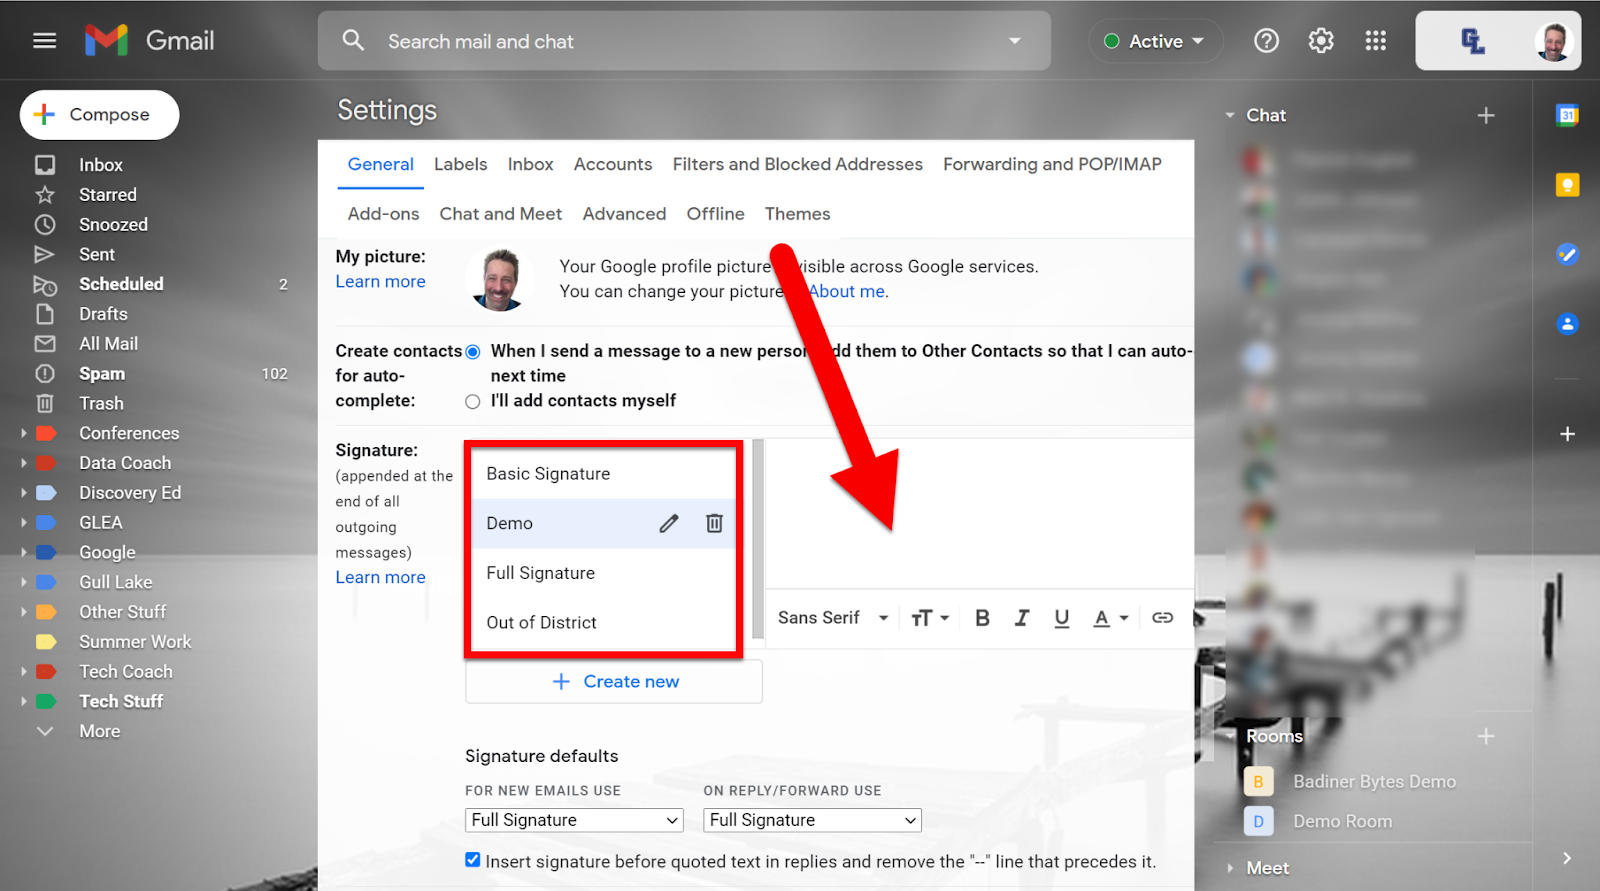
  1. You will see this newly created name on the left side. Click on it and you can now create this signature to the right. If you are looking at how to make a Creative Signature click HERE.


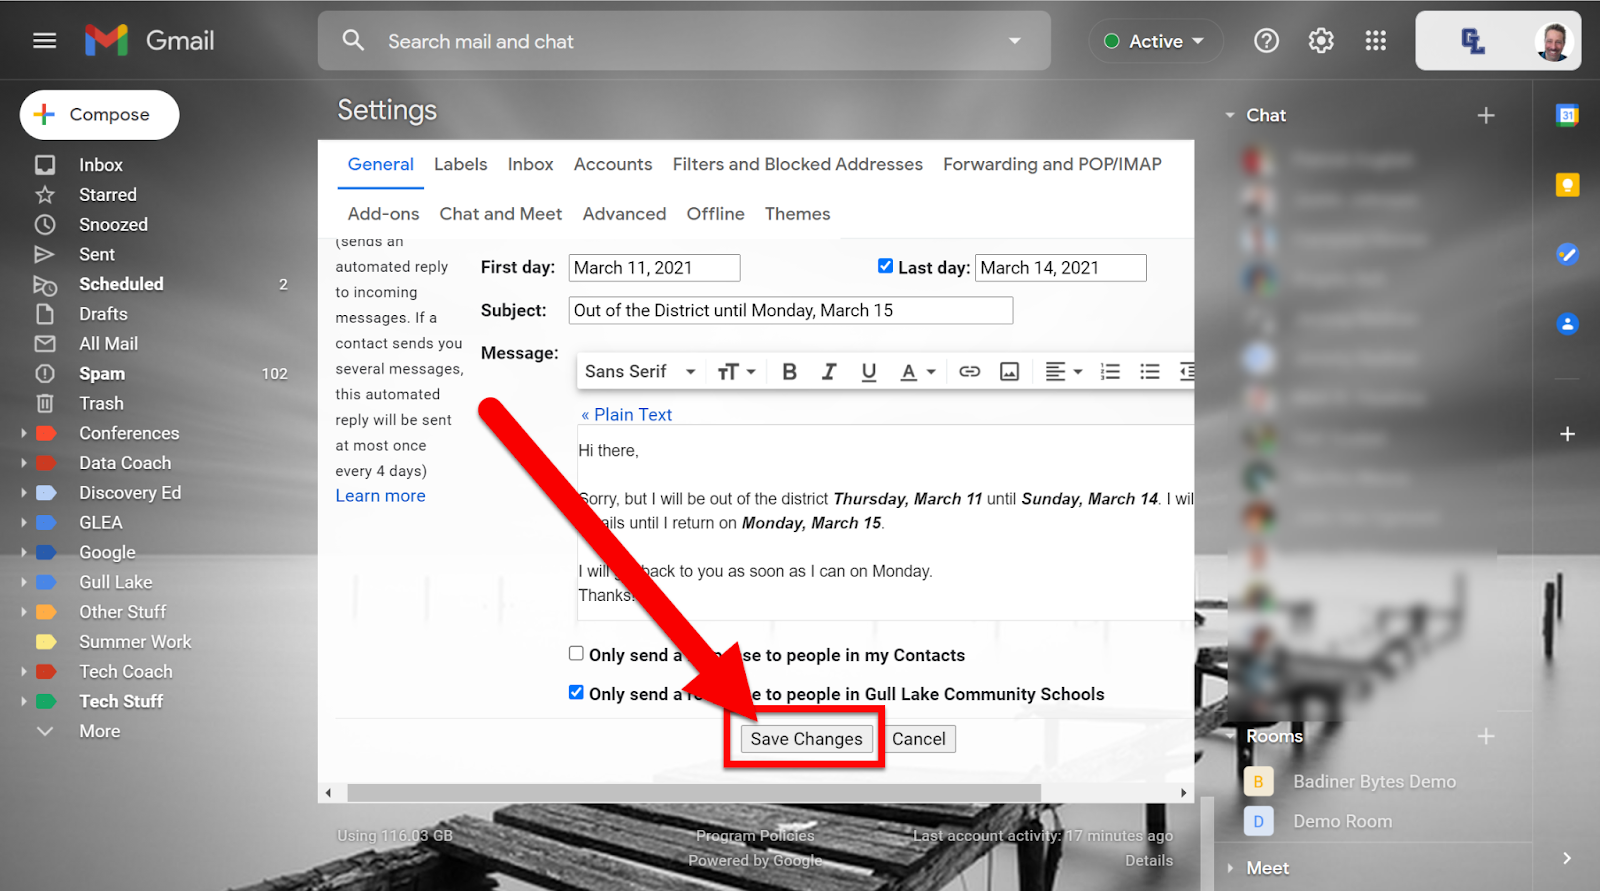
  1. Make sure to click “Save changes” at the bottom of the screen to save.


Insert Correct Signature:

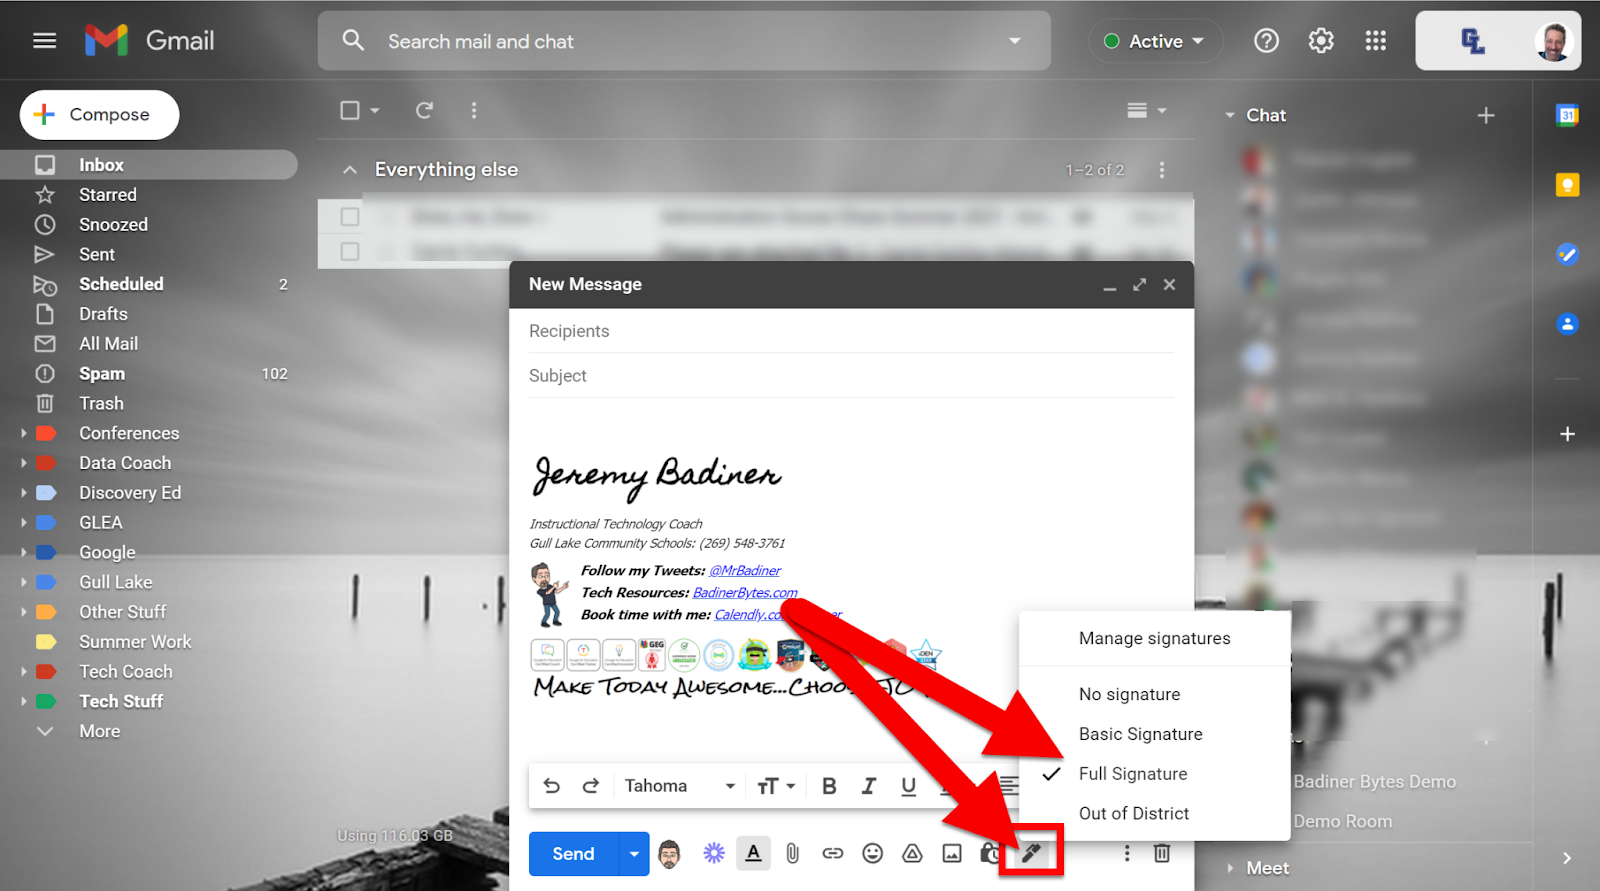
  1. After composing your email you can easily switch and use any created signature. Click the “Signature” icon and choose the one you want from the list. This is why naming them for easy identification is important.


Start creating Multiple Signatures today!


If you want these directions in a Document click HERE!