Showing posts with label Documents. Show all posts

Friday, October 3, 2025

Add Symbols and Accents to Letters

Add Symbols and Accents to Letters

If you teach reading (especially early elementary)​ or foreign languages, you often need to include phonemic symbols to show pronunciation. You can easily do that in Google Docs.


Add Symbols and Accents to Letters:

  1. Open a Google Document.

  2. Click “Insert”, then “Symbols”, then “Special Characters”.


  1. Choose “Latin” and “Phonetic (IPS)”.


  1. Type the letter where you want it in the document.

  2. Click “Control” and click the symbol.


Examples:

ǝ     ā     Ü     ü    ŏ     à     ȃ


Another tip: To get vertical lines like this  |A| use Shift+\ to insert a line


If you want these directions in a document, click HERE!


Thursday, December 22, 2022

Name Version History

I am all about sharing my Google Creations. Collaboration is the key to awesome projects. The trouble is when someone accidentally deletes or changes things. Yikes! This is when Version History comes to the rescue. You can always go back to almost any specific “moment in time” in your document’s history. This can make correcting mistakes easy, but if you have been working on a Document for a long time it may be challenging to find just the right moment to revert your file. This is when naming your Version History comes into play. Take a moment in all your projects (especially at major checkpoints) to name that moment so it is easy to return. (Example: you have a document that is all text and you are just adding images to it. Name it “Text Only” just before adding the images. Then you can always return to the Text Only version if needed.)


Name a Version History Moment:

  1. Open up your Document (Slide, Drawing, Sheet, or any Google file).

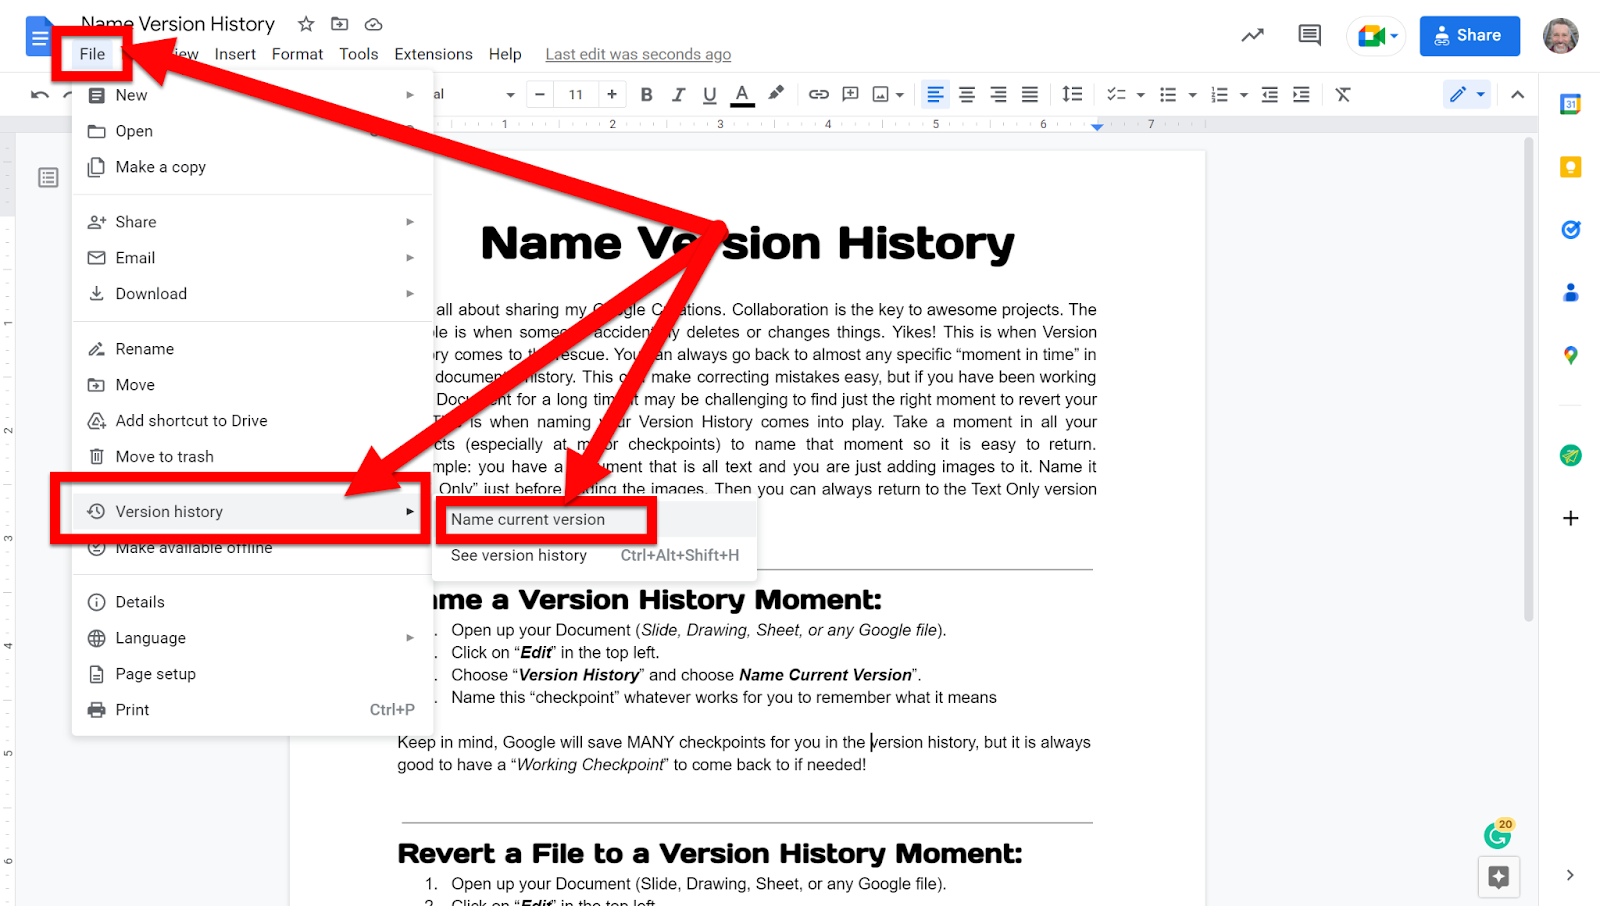
  2. Click on “Edit” in the top left. Choose “Version History” and choose Name Current Version”.


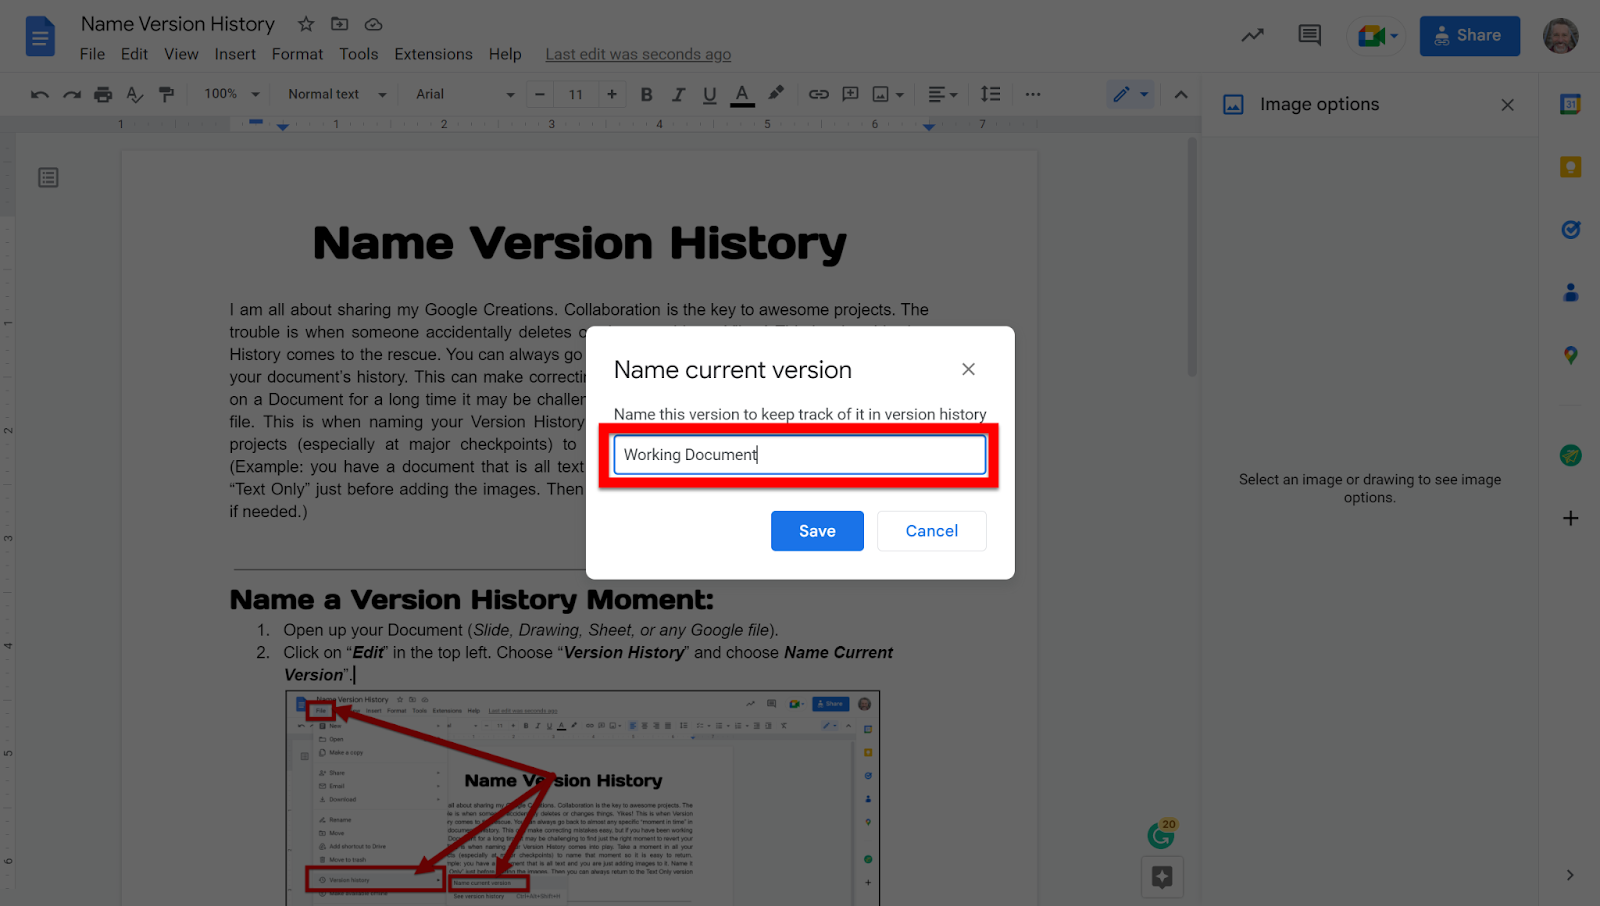
  1. Name this “checkpoint” whatever works for you to remember what it means.

Keep in mind, Google will save MANY checkpoints for you in the version history, but it is always good to have a “Working Checkpoint” to come back to if needed!


Revert a File to a Version History Moment:

  1. Open up your Document (Slide, Drawing, Sheet, or any Google file).

  2. Click on “Edit” in the top left. Choose “Version History” and choose “See Version History”.


  1. Choose the moment in time you want to go back to. The changes will be shown in colors (by change and the person who edited the document). You will see crossed-out (deleted) and color-coded (added) text/items.
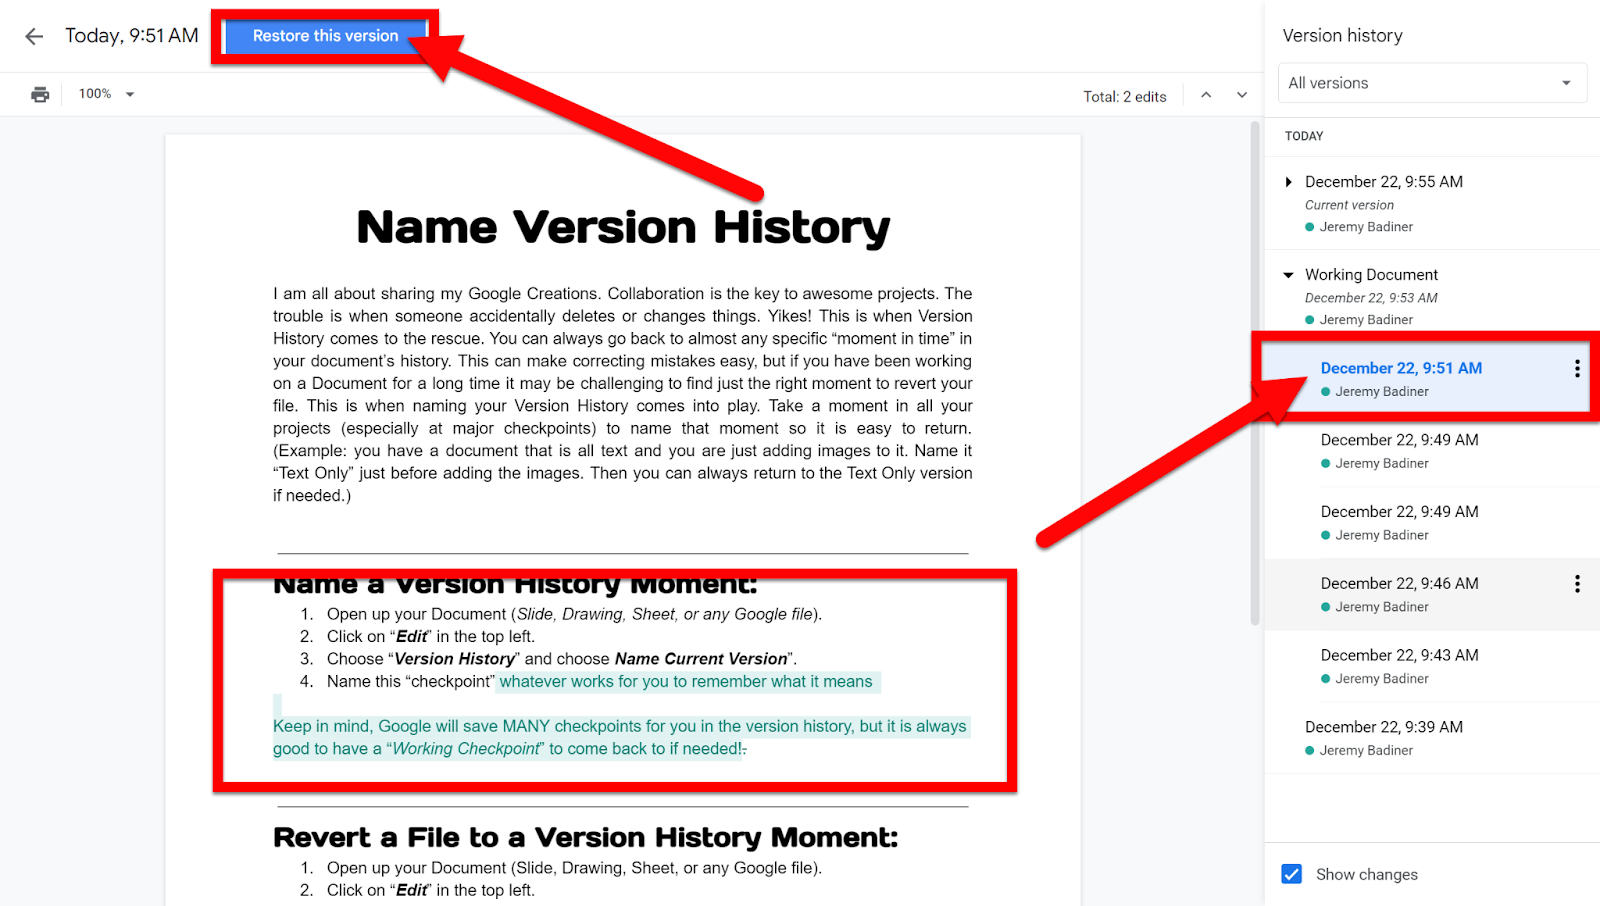
    • Note that you may see drop-down arrows. These will expand even more moments to choose from. 

    • You will also see who made the changes you can go back to.


  1. Click “Restore this Version” in the top left.
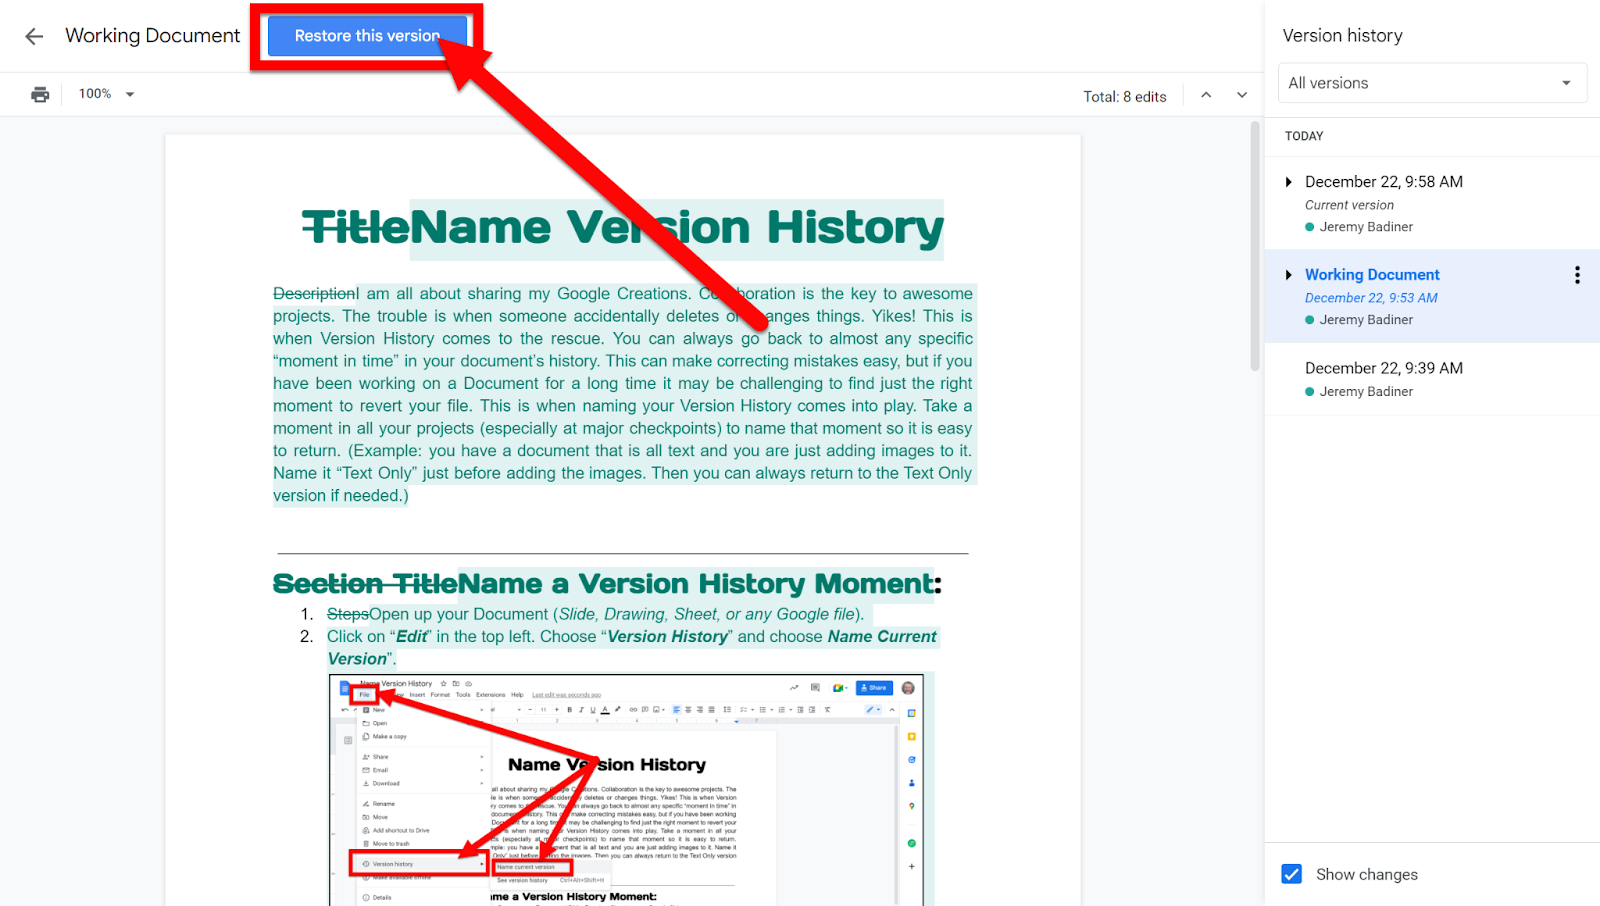


These can be undone and changed at any time. If you wish to return to the last or first change they are always available!


If you want these directions in a Document click HERE!


Thursday, May 19, 2022

Google Documents Dropdown Menu

Google updated their Smart Chips (my how-to here) to include a great new feature, Dropdown Menus. These are pretty awesome, especially because you can customize them to work best for you! Check out the steps below to see how to start creating your own Dropdown Menus.


Access Smart Dropdown Menu in Smart Chips:

  1. Open a Google Document.

  2. Place your cursor where you want the Dropdown Menu located (I use tables for this the most, but it can be done in line with text or anywhere you want).

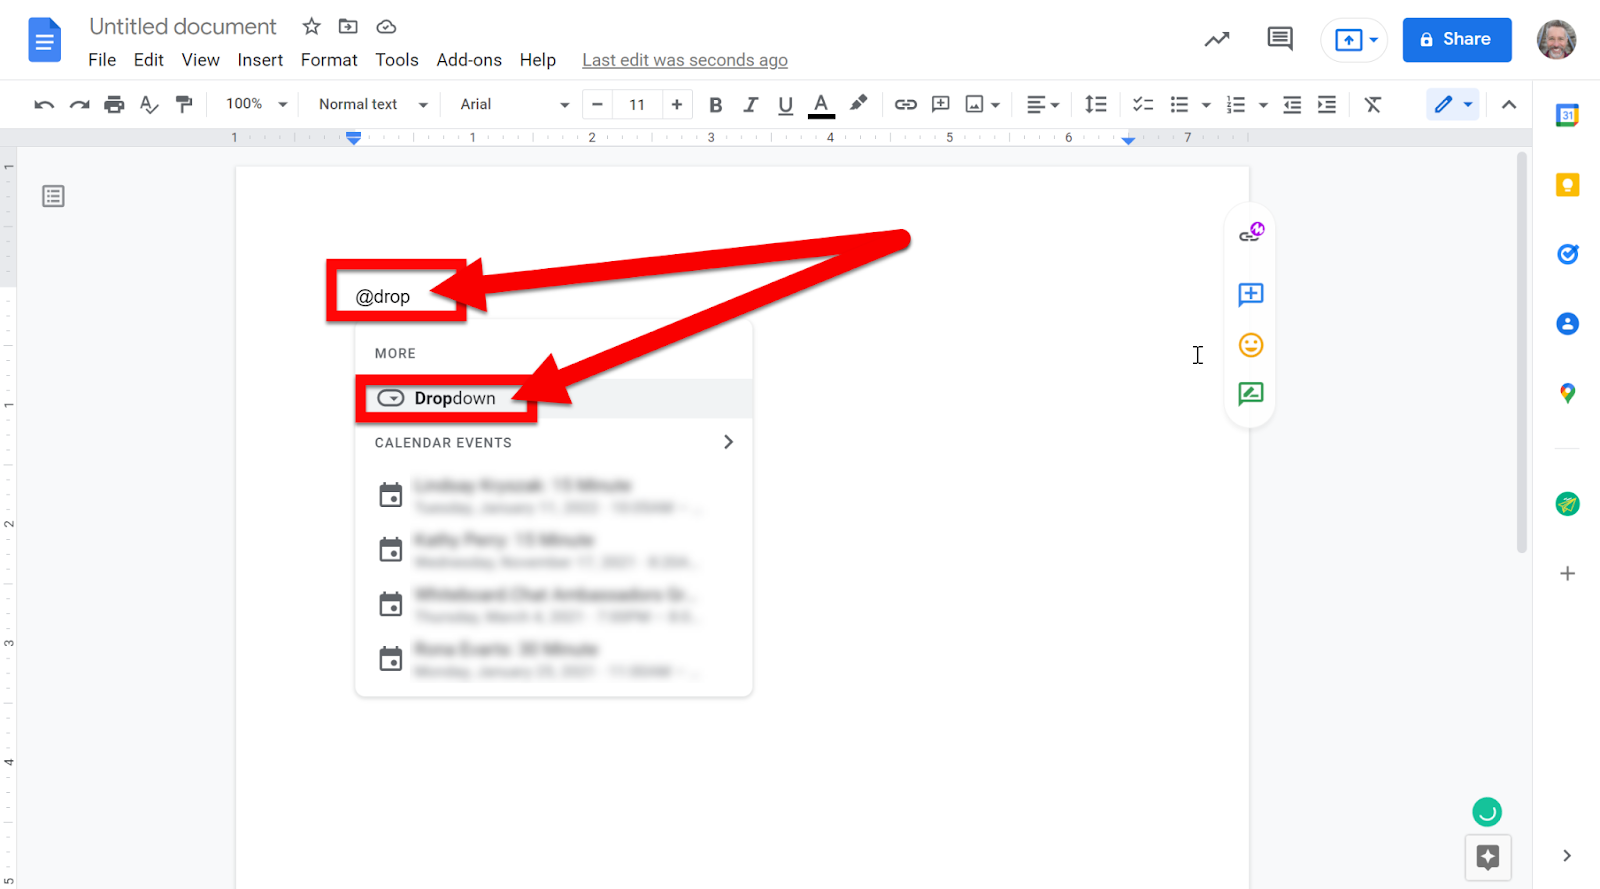
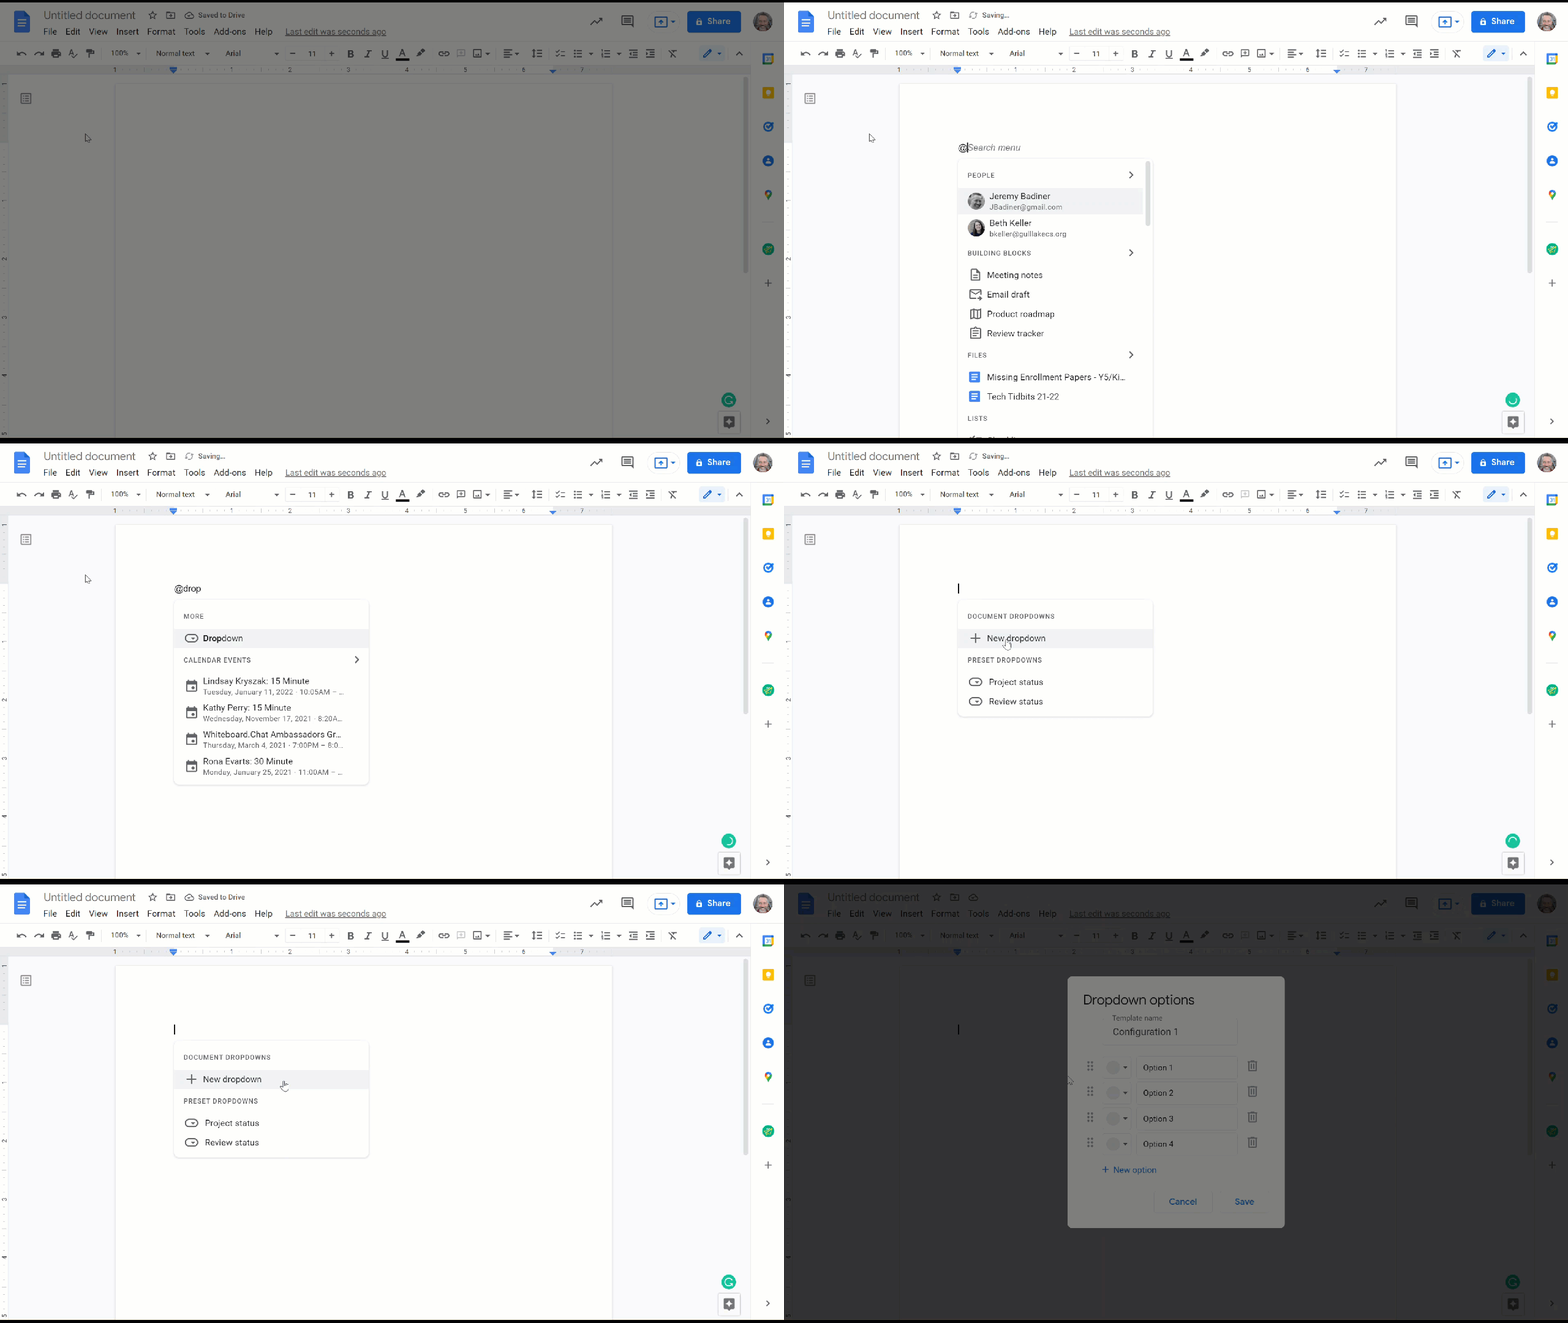
  3. Type the “@” symbol and start typing “Dropdown”. Select “Dropdown” in the popup.


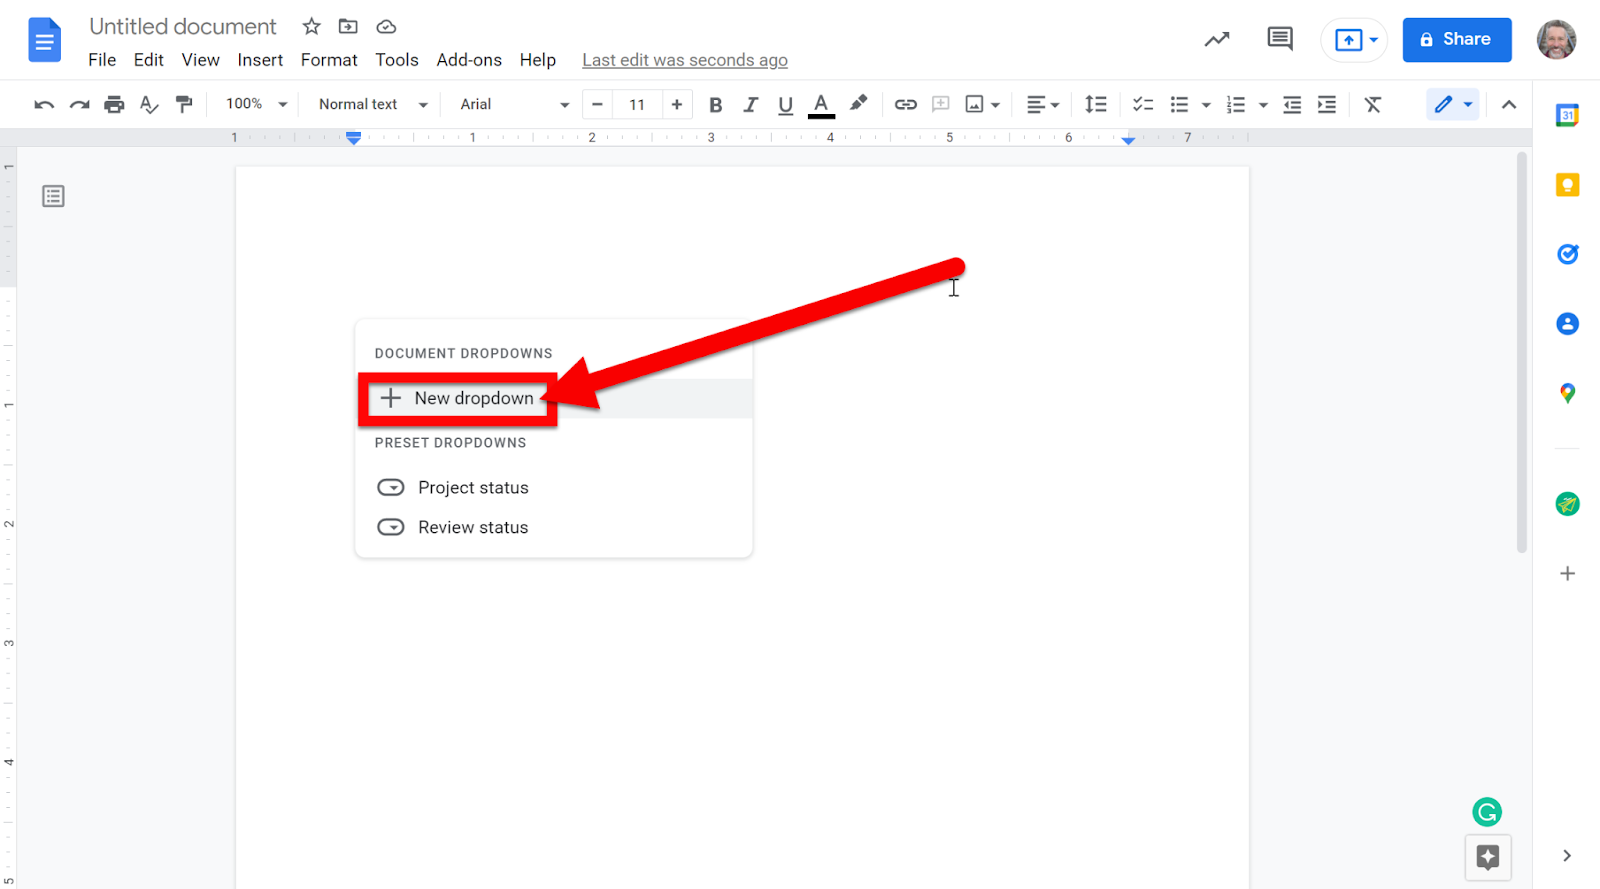
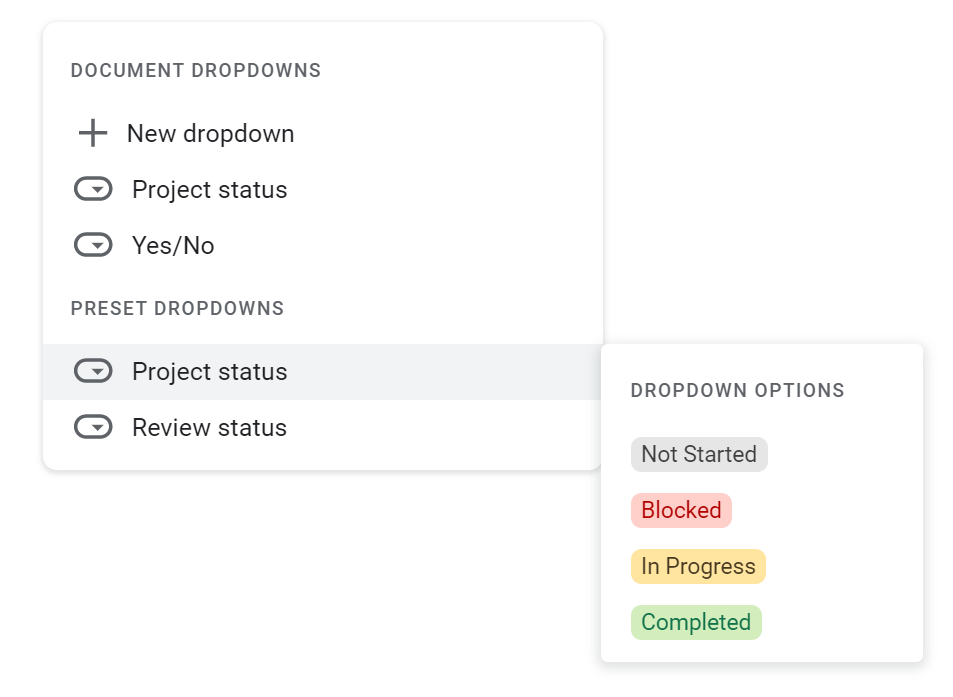
  1. Select “New Dropdown” or choose one of the Presets (or one that you made if you already created one in this Document).


  1. You can select to create a new Dropdown Menu or use a Preset.


Access Smart Dropdown Menu from “Insert”:

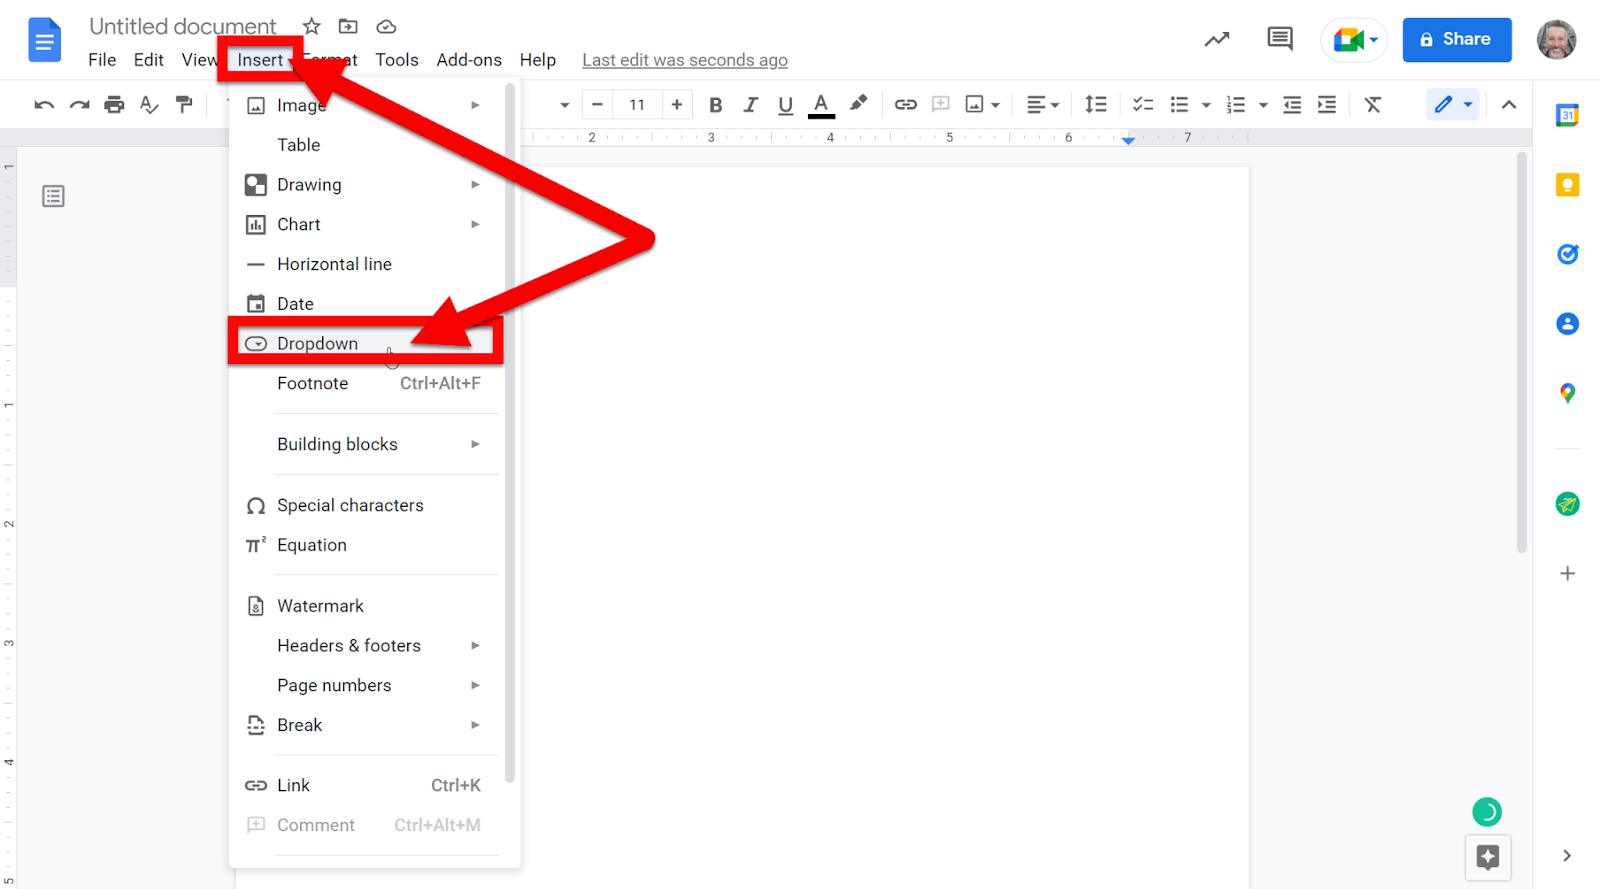
This option is also available in the “Insert” section of Docs, Slides, and Sheets. 

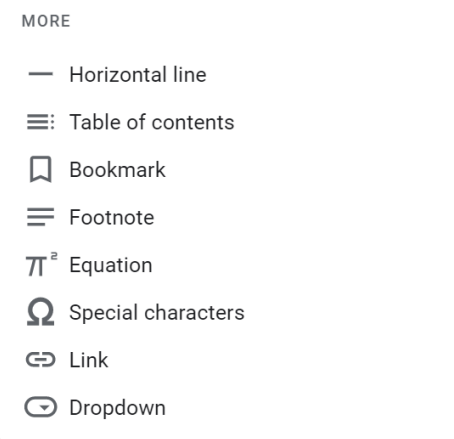
  1. Click on “Insert” and choose “Dropdown”.


Customize Dropdown Menu:

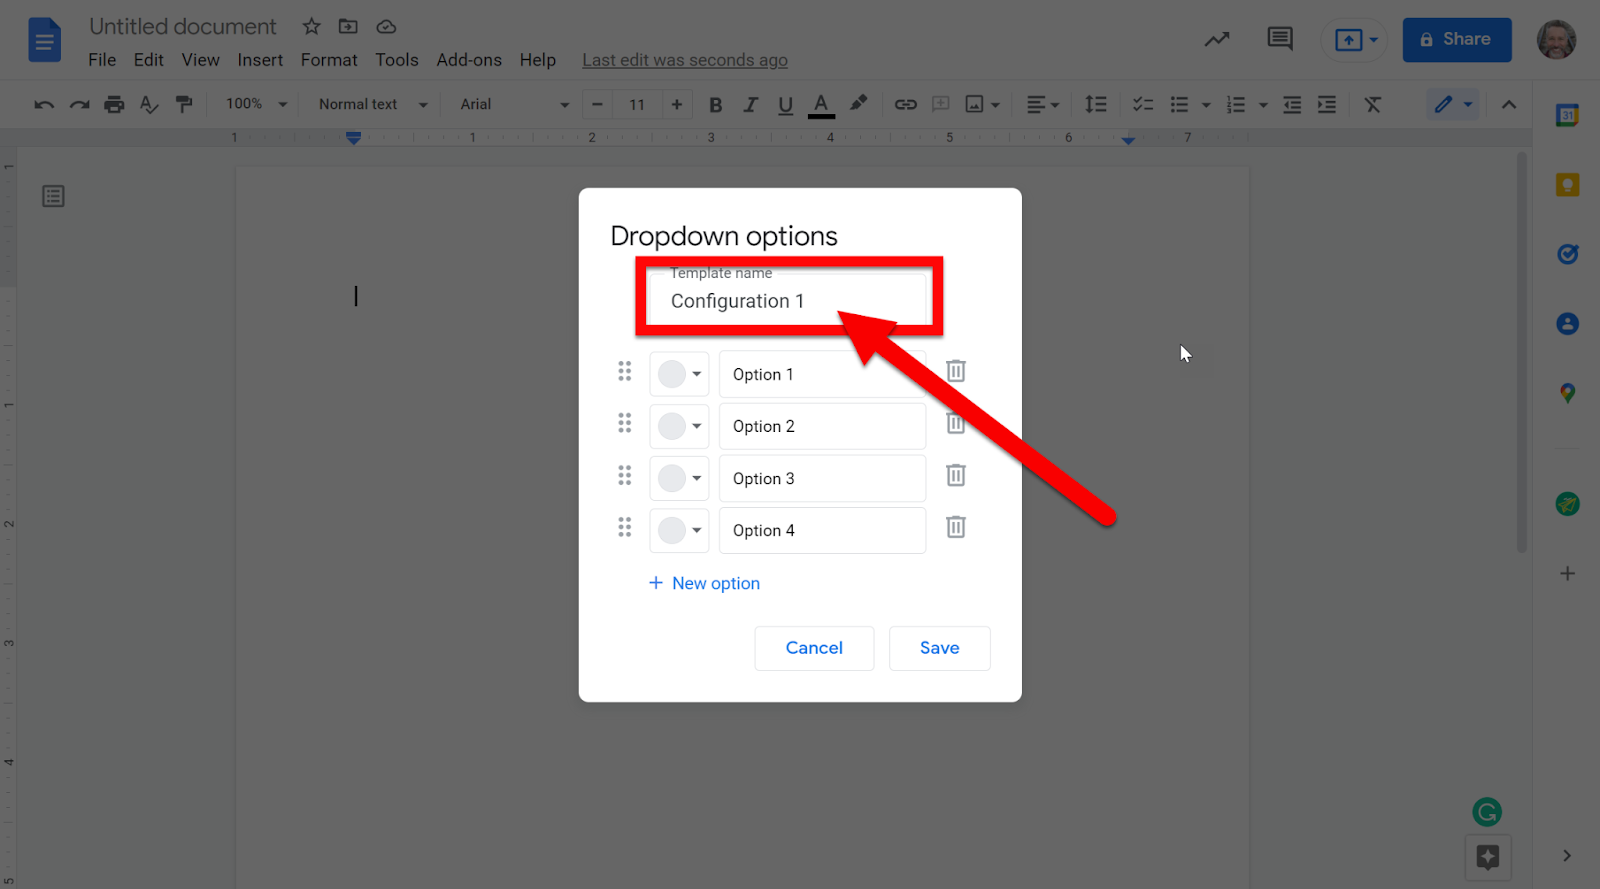
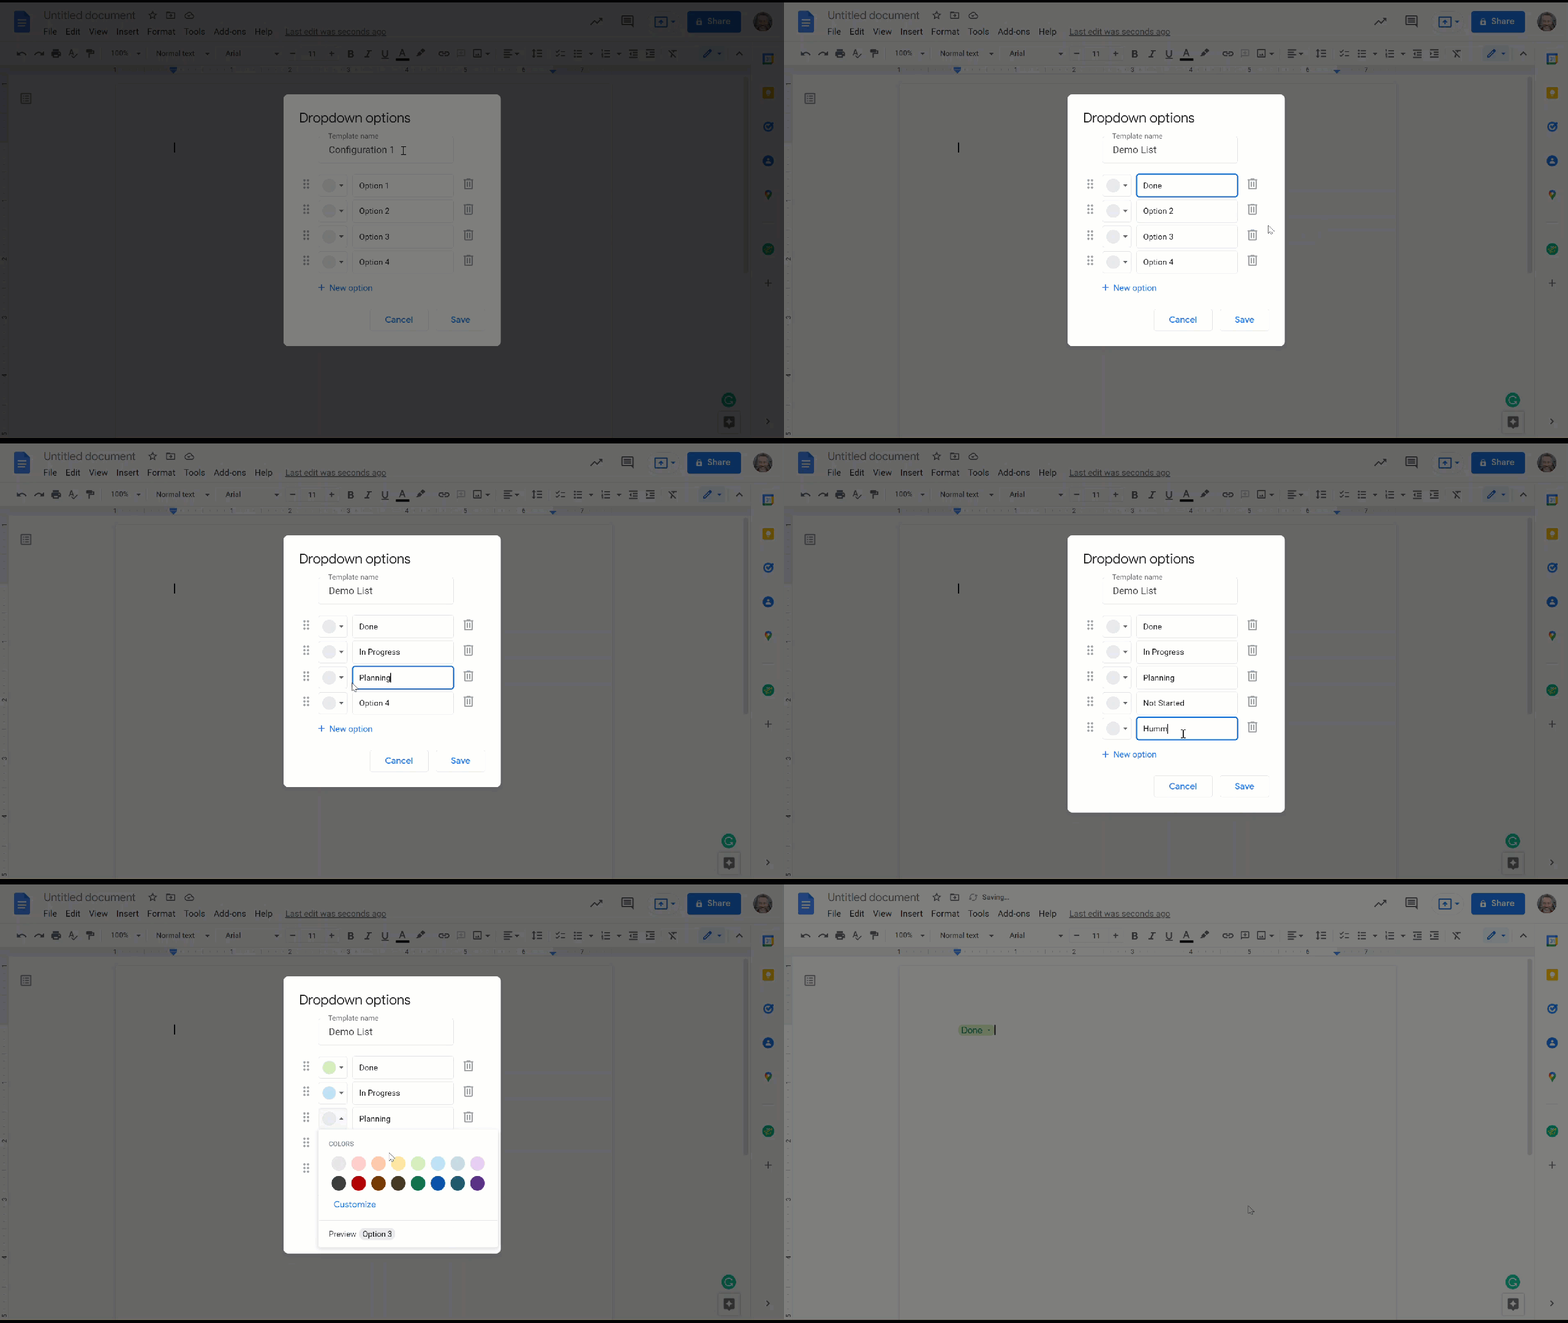
  1. After selecting “New Dropdown” name your list.


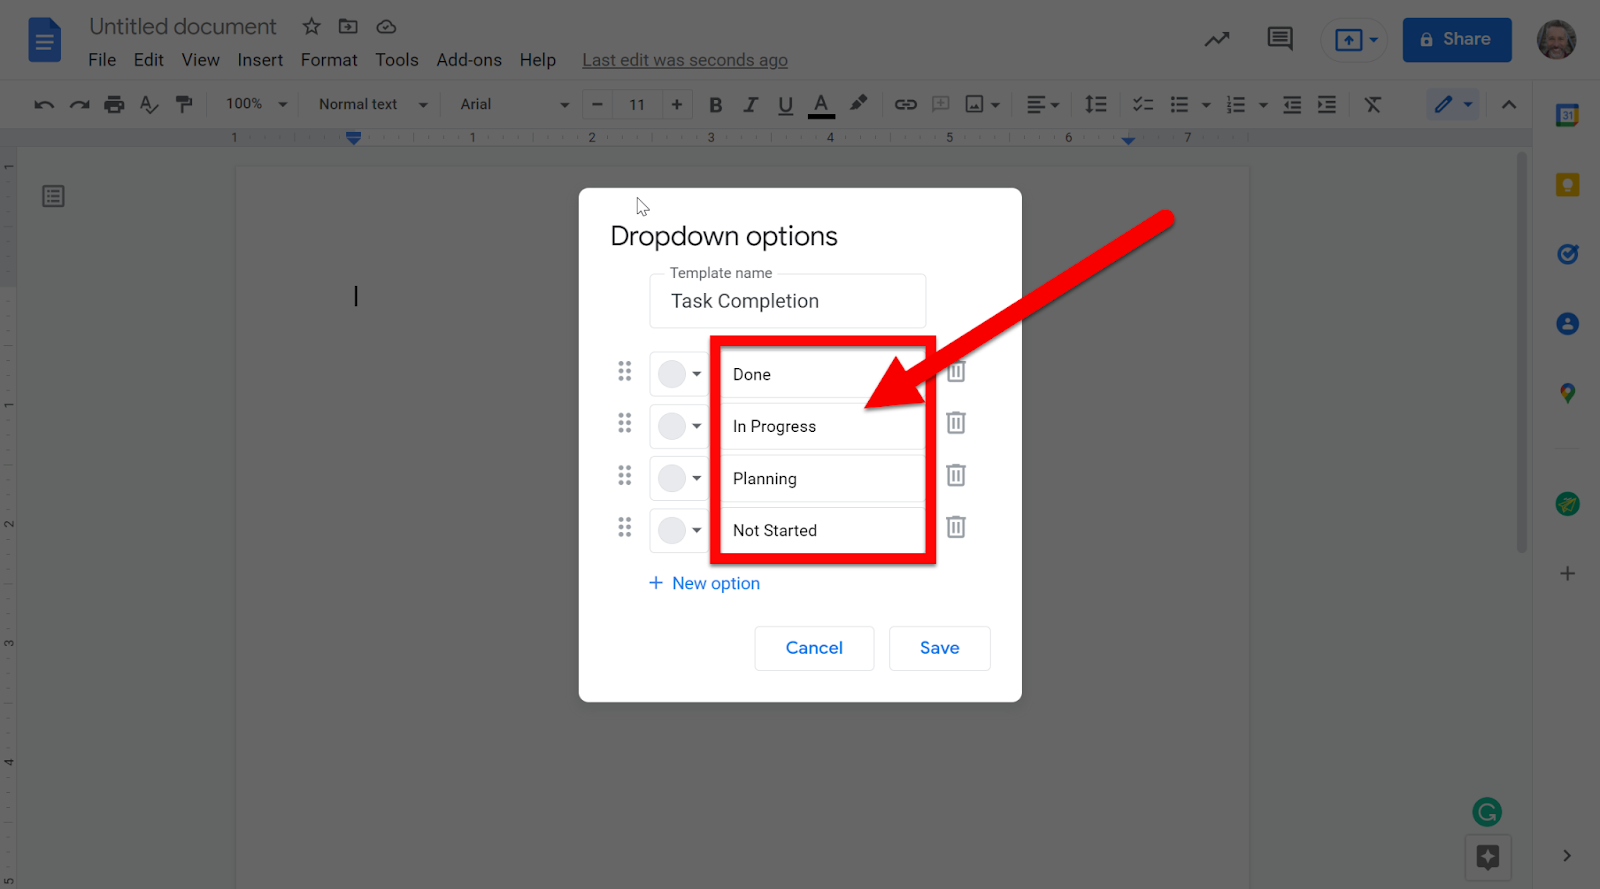
  1. Add the description for each option/category.


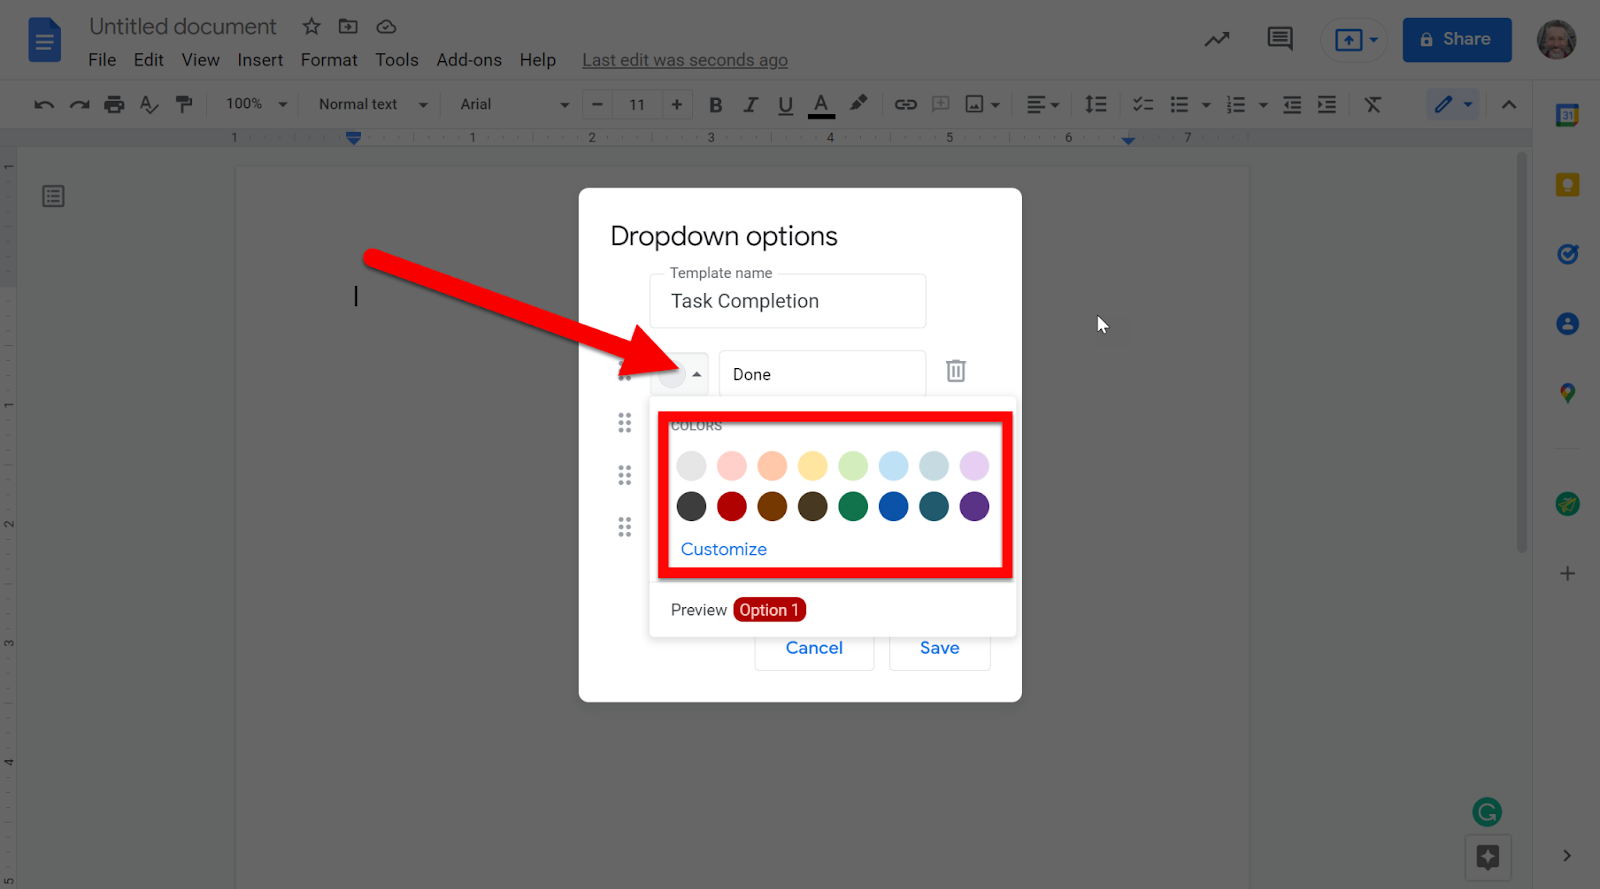
  1. Add colors if desired. This gives you the ability to quickly see progress or choices selected.


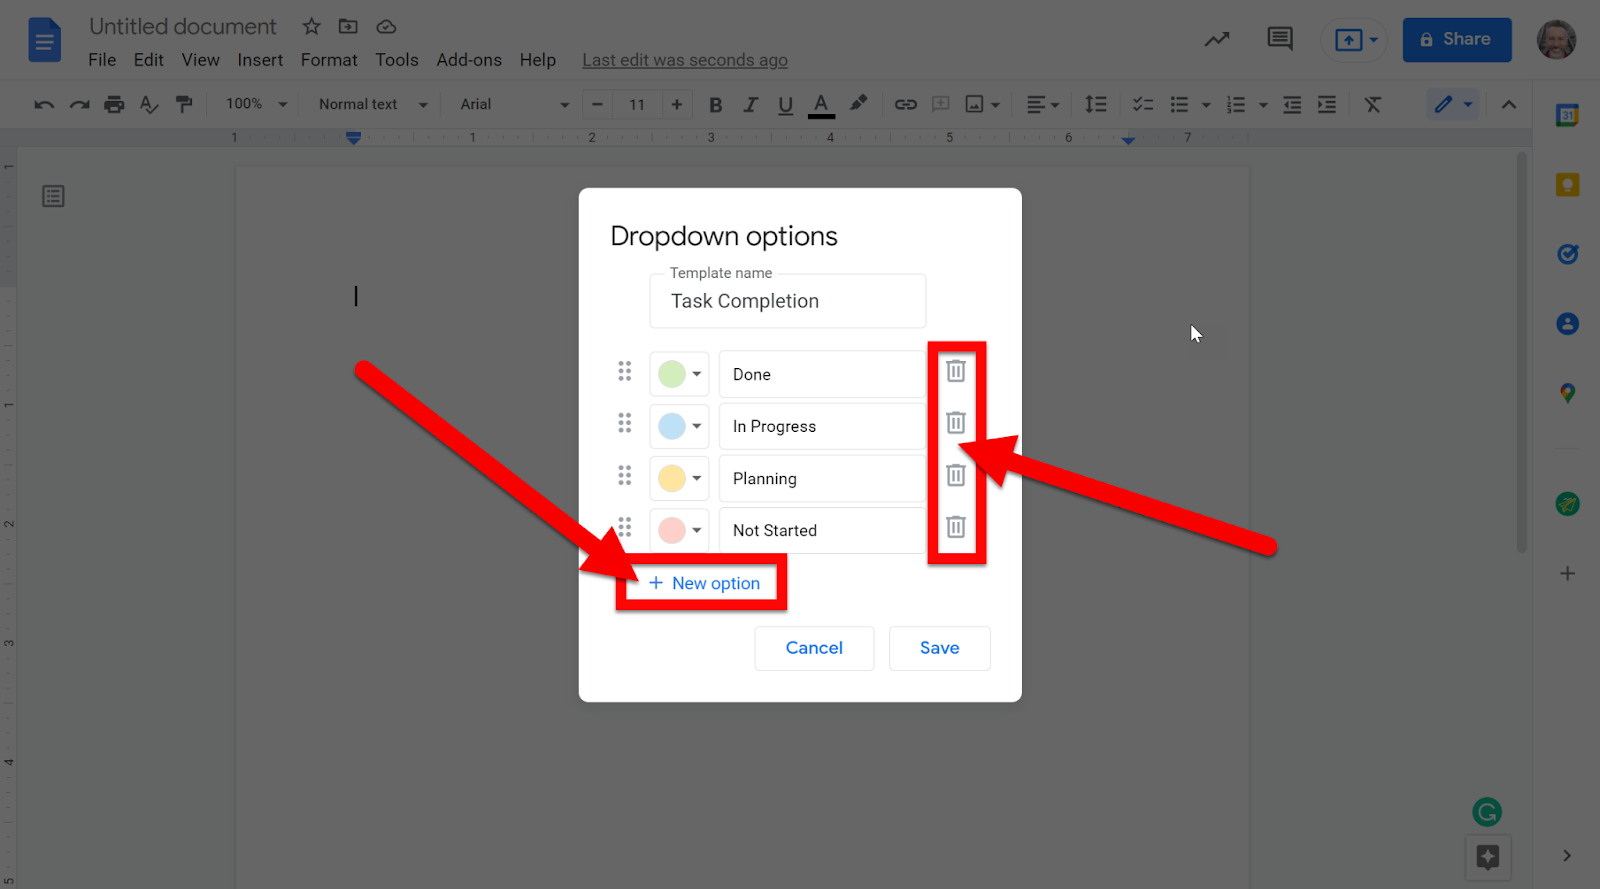
  1. Delete categories by clicking the Delete icon, or add more by clicking “New Option”.


  1. Click Save when done. 

Just a note: this Dropdown Menu will be available on this Document as a created Dropdown, but it will not be available on other Documents.


Using Dropdown Menu:

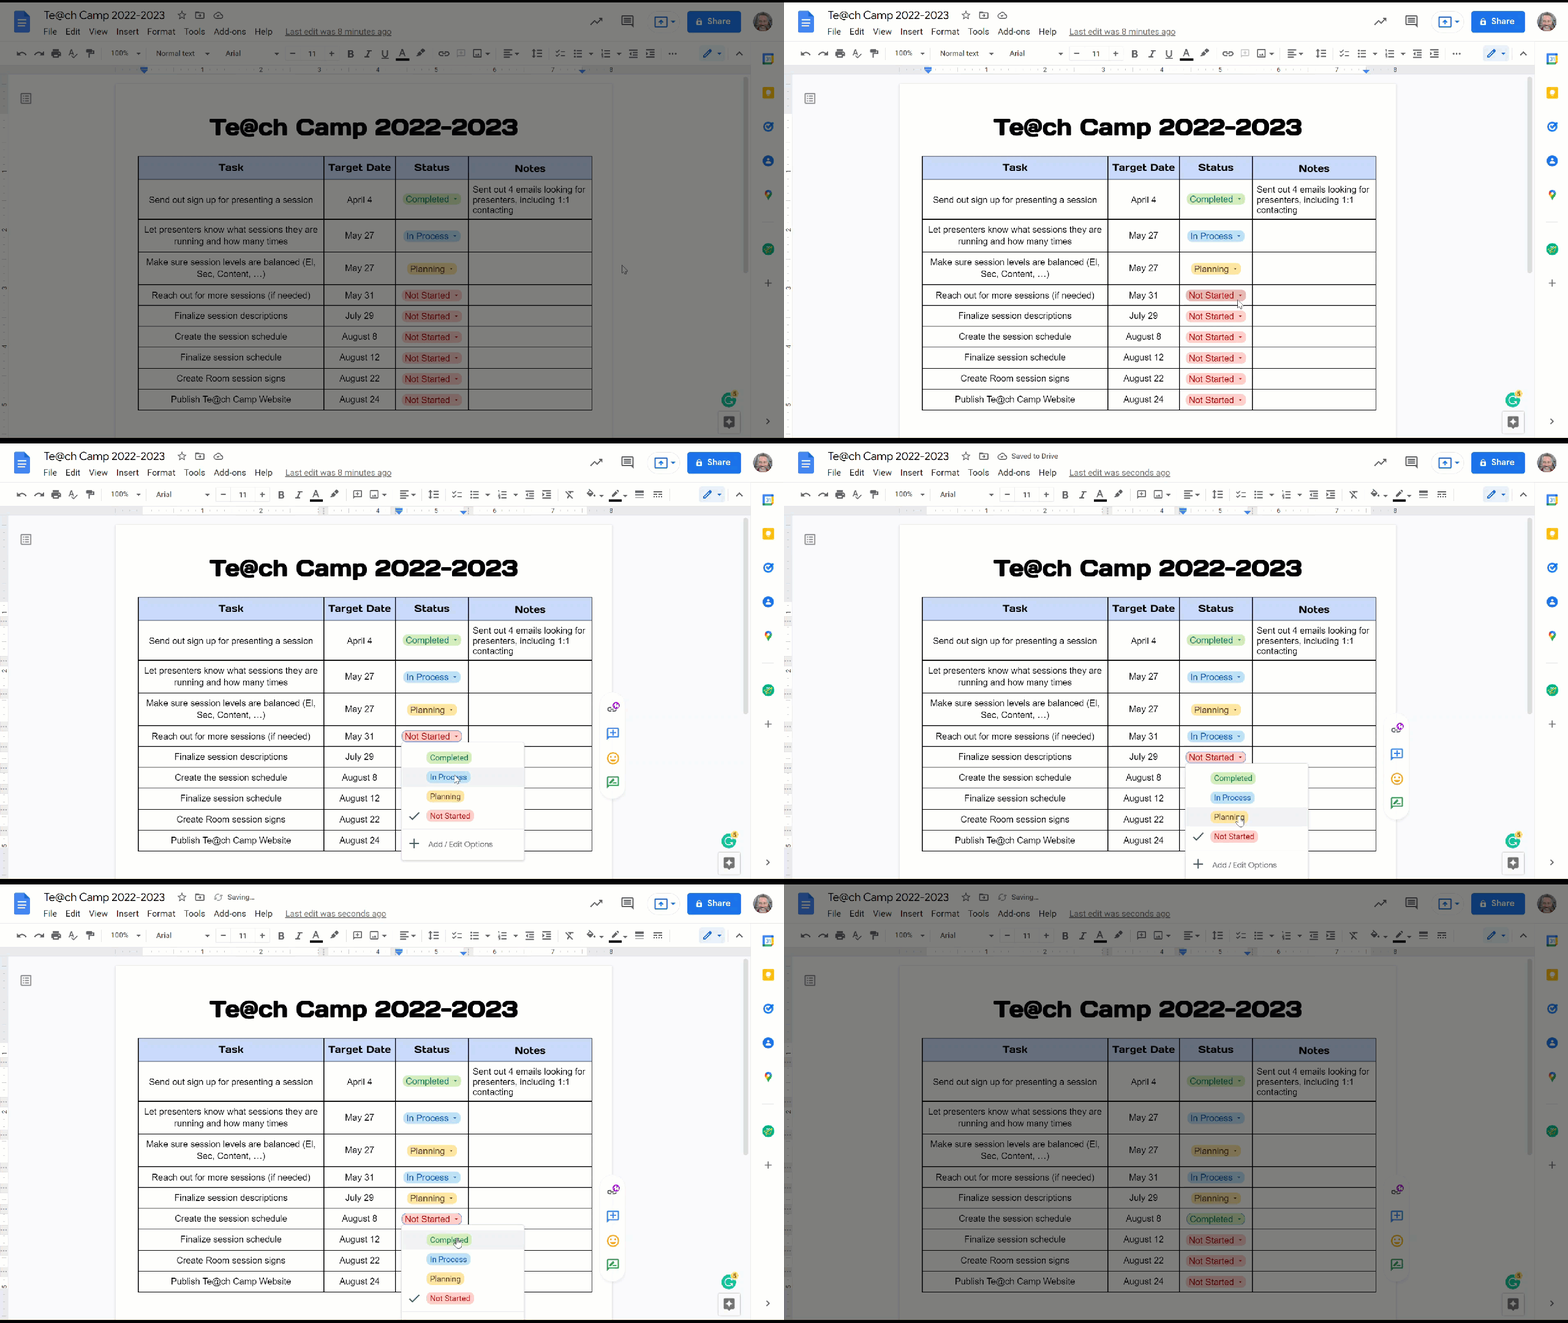
  1. Use these as clickable status icons in your document to choose the options you set.


Uses for Dropdown Menu:

  • Project Status/Review Status

  • Fill in the blank assignments

  • Form style fill-ins

  • Checklists

  • Evaluation documents

  • Anything where you want to select items from a list

  • …and many more uses!


If you want these directions in a Document click HERE!

Tuesday, May 3, 2022

Google Docs Smart Chips

Google released Smart Chips in their Documents. This feature allows you to embed content into a document with a simple click. There are some amazing shortcuts and features in Smart Chips that will take your Documents to a new level! Check out what you can do with Smart Chips below!


Access Smart Chips:

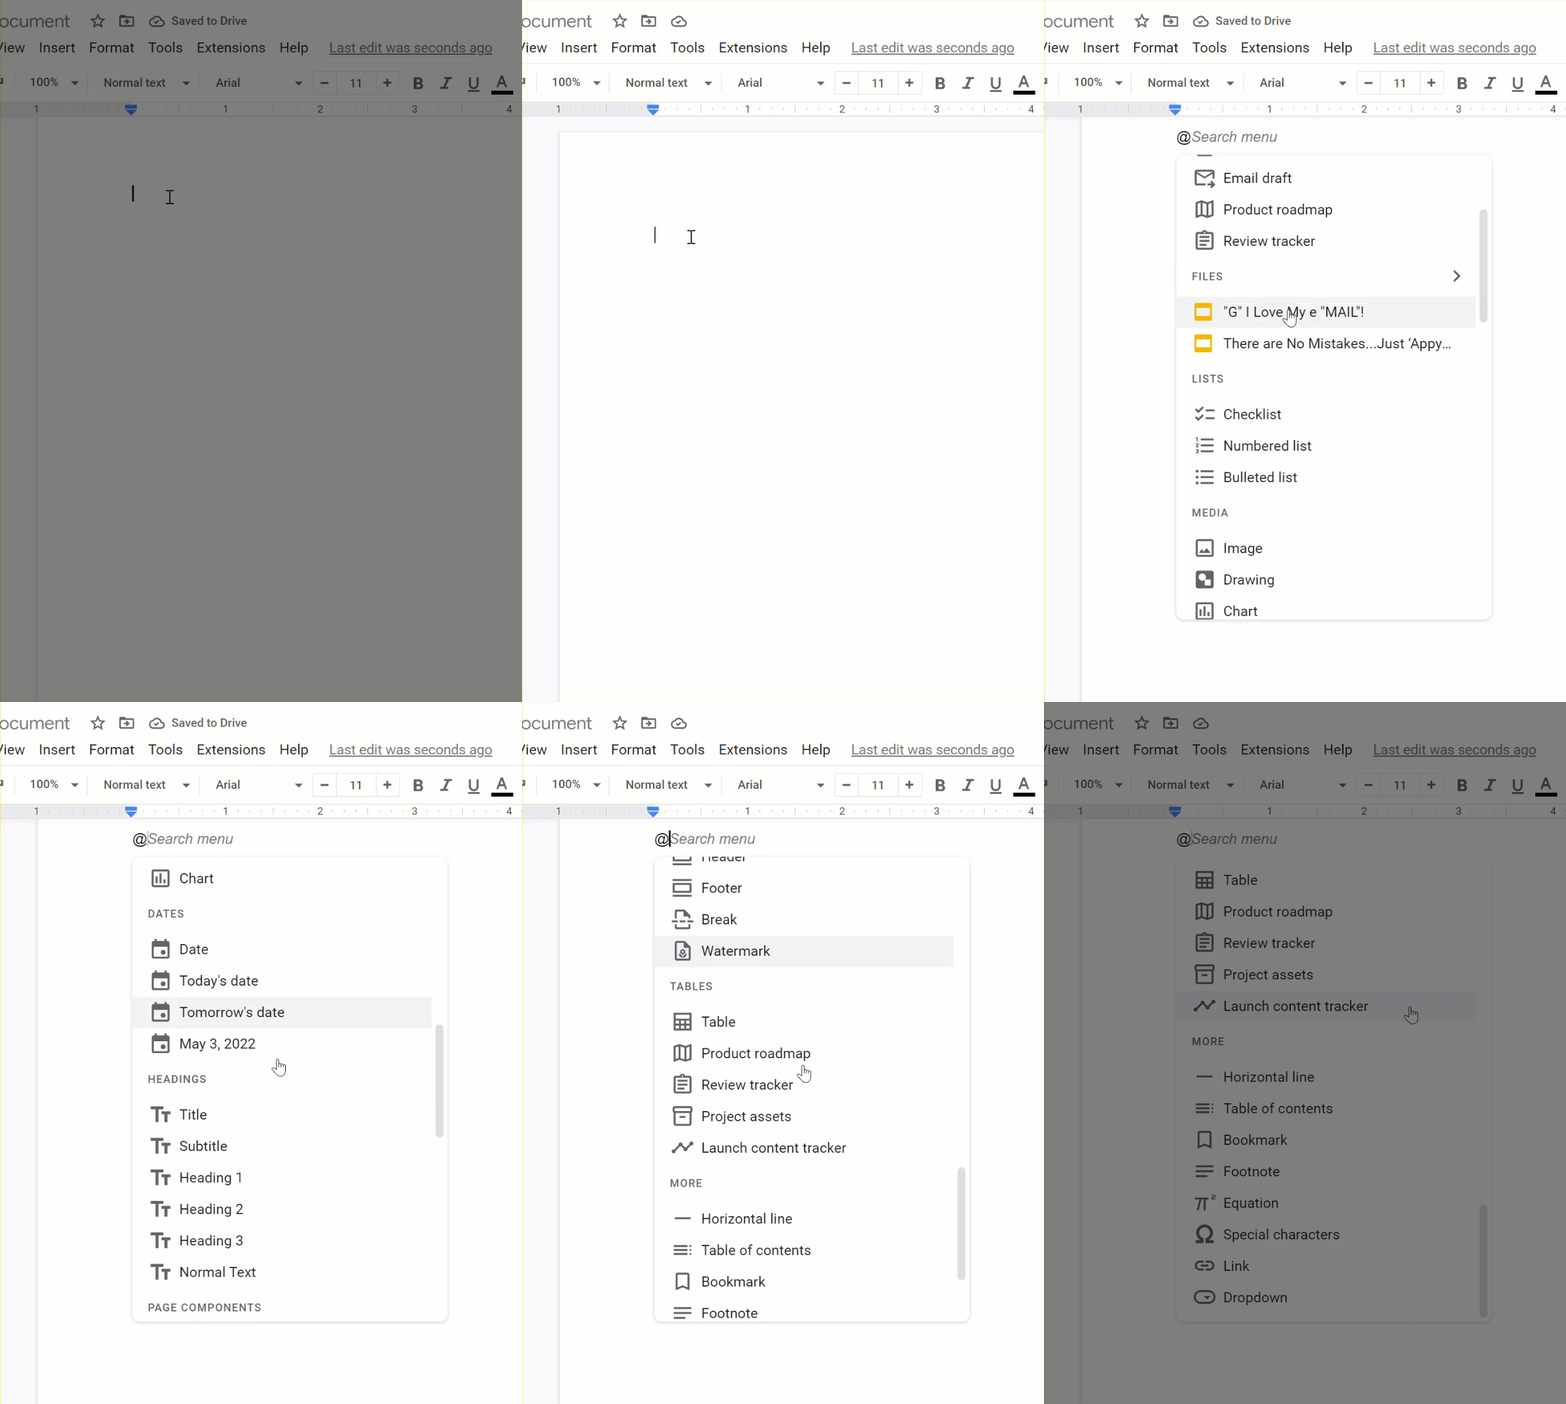
  1. Withing any document enter the “@” character. A menu will pop up.

  2. Scroll through the pop-up and choose the feature you want to use.


Smart Chips Features:

There is a lot you can do with these chips. Here are some of the features available (some will change as updates get pushed out).

  • The “People” section allows you to tag others in your Document for notifications.


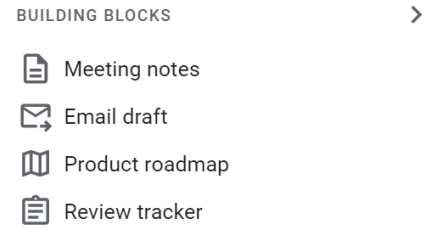
  • The “Building Blocks” section creates templates within your Document.


  • The “Files” section inserts hyperlinks to Drive Files.


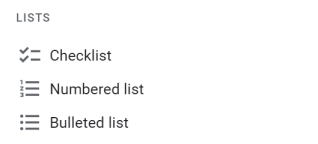
  • The “Lists” section created lists in your Document. 


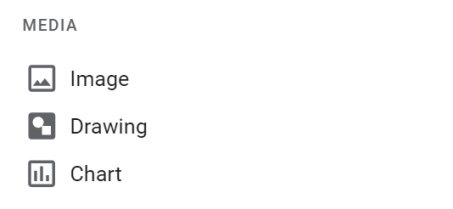
  • The “Media” section inserts Images, Drawings, and Charts.


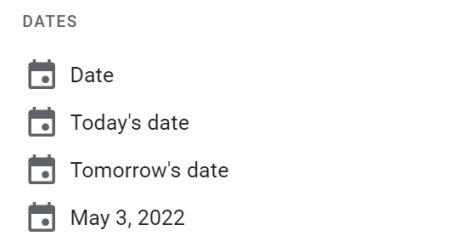
  • The “Date” section inserts linked calendar dates or events.


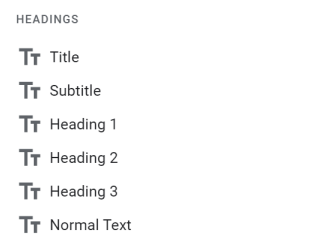
  • The “Headings” section changed your page layout.


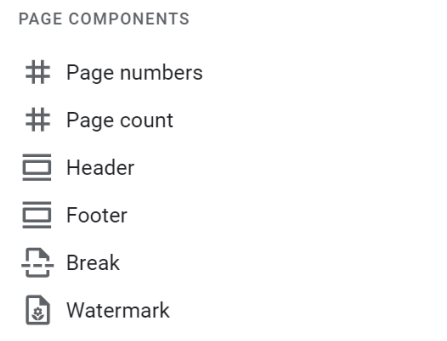
  • The “Page Components” section adds features to your Document.


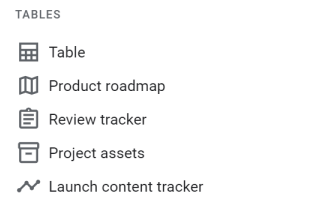
  • The “Tables” section inserts table features.


  • The “More” section has additional features.


  • Special Note: The “Dropdown” feature is customizable to do anything. It is pretty cool!


You may notice some of these features are already available in the dropdowns at the top of Documents. Smart Chips are an easier way to get to some of these often-used features. Also, these Chips are always updating and improving so they may look different in your account.


If you want these directions in a Document click HERE!


Wednesday, February 23, 2022

Pageless Documents

Documents are the most commonly used tool in education (followed closely by Slides). In the past, these were always printed and shared in that way. Now that we live in a digital world most Documents are no longer printed, they are shared and viewed on a monitor. Google has added a long-wanted feature to Documents, Pageless Documents. Because these are not printed as they were in the past, they are no longer confined to a page length. You can make a Document as long as you like without having to worry about paragraphs or sentences jumping to the next page and breaking the formatting. They flow much as websites do, a forever scroll! Check out how to change any Document into a Pageless Document with just a couple of clicks!


Set Up a Pageless Document:

  1. Open a Google Document.

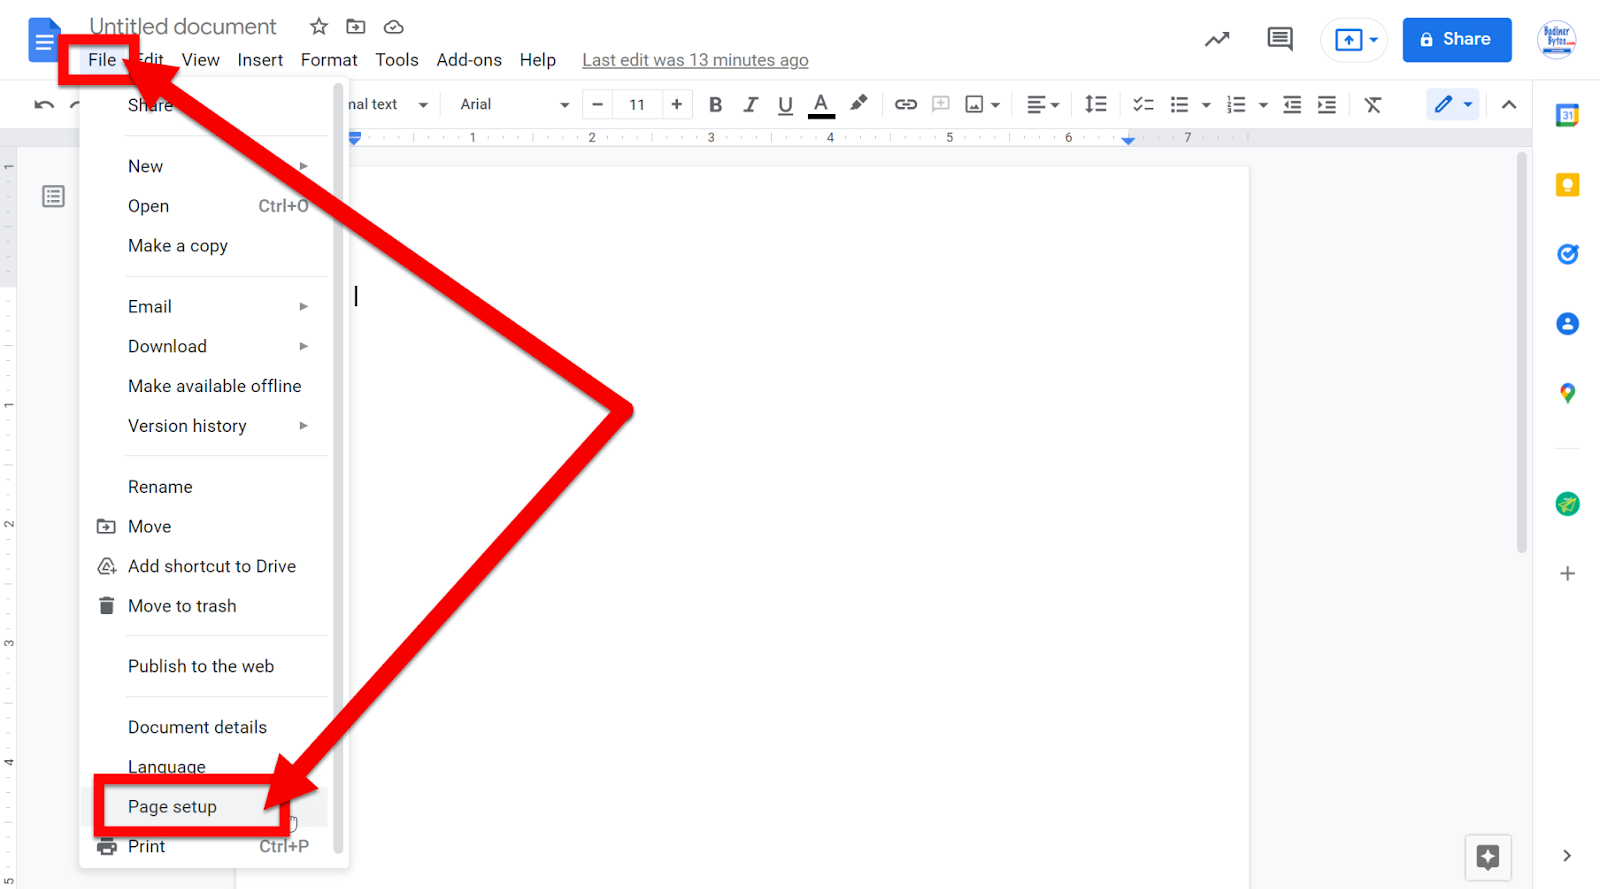
  2. Click on “File” and then “Page Setup”.


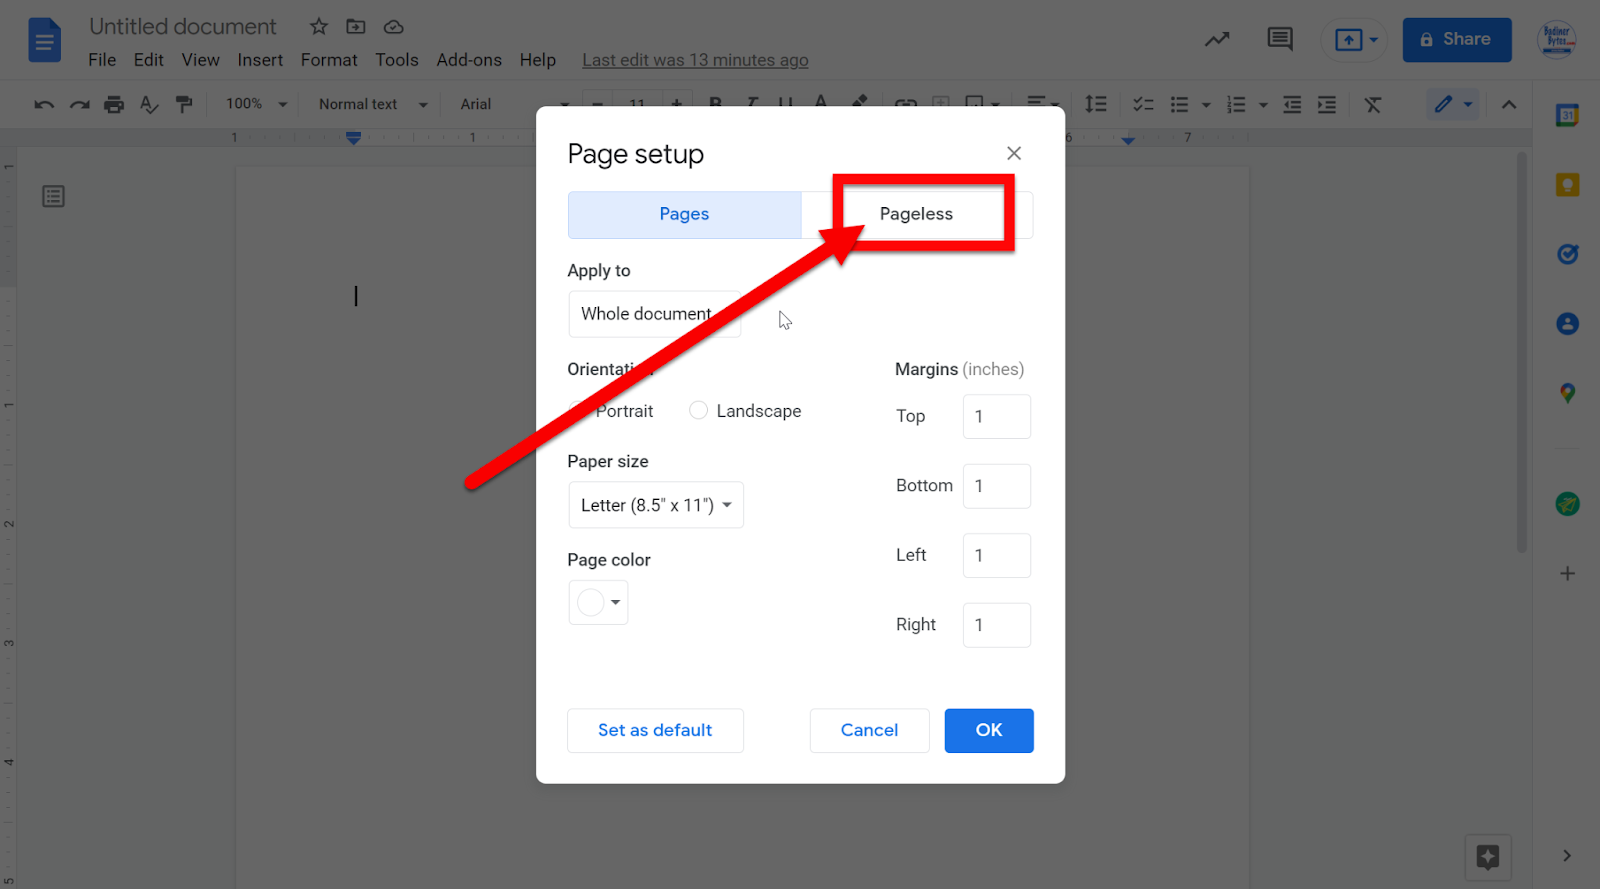
  1. Select the “Pageless” tab at the top.


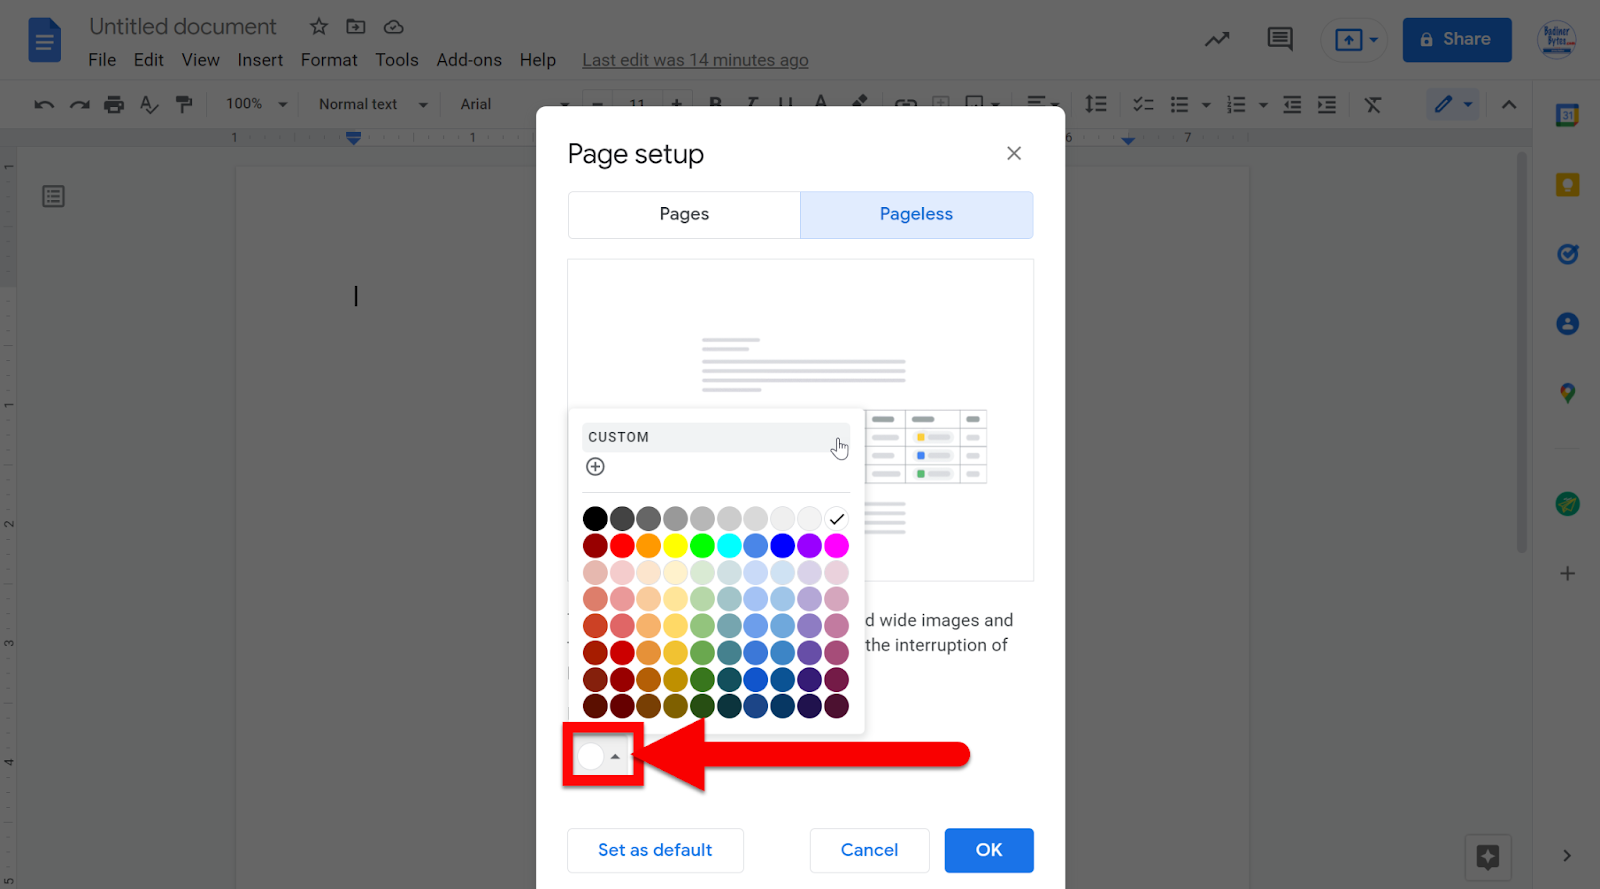
  1. If you want to set the page background color you can change that as well.


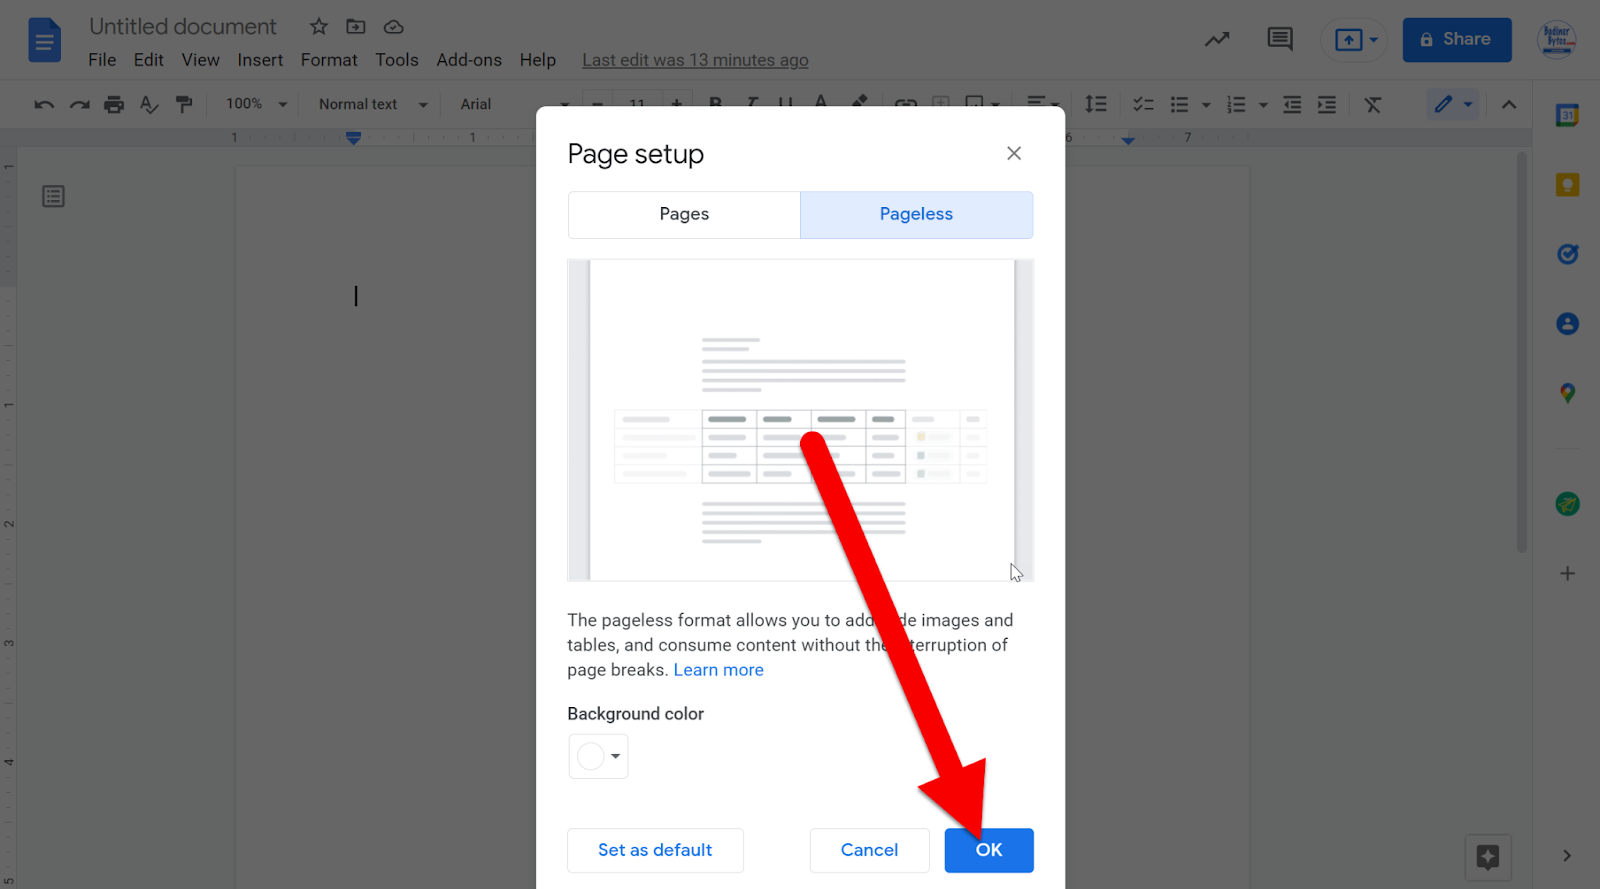
  1. Click “Ok” at the bottom to set this change.


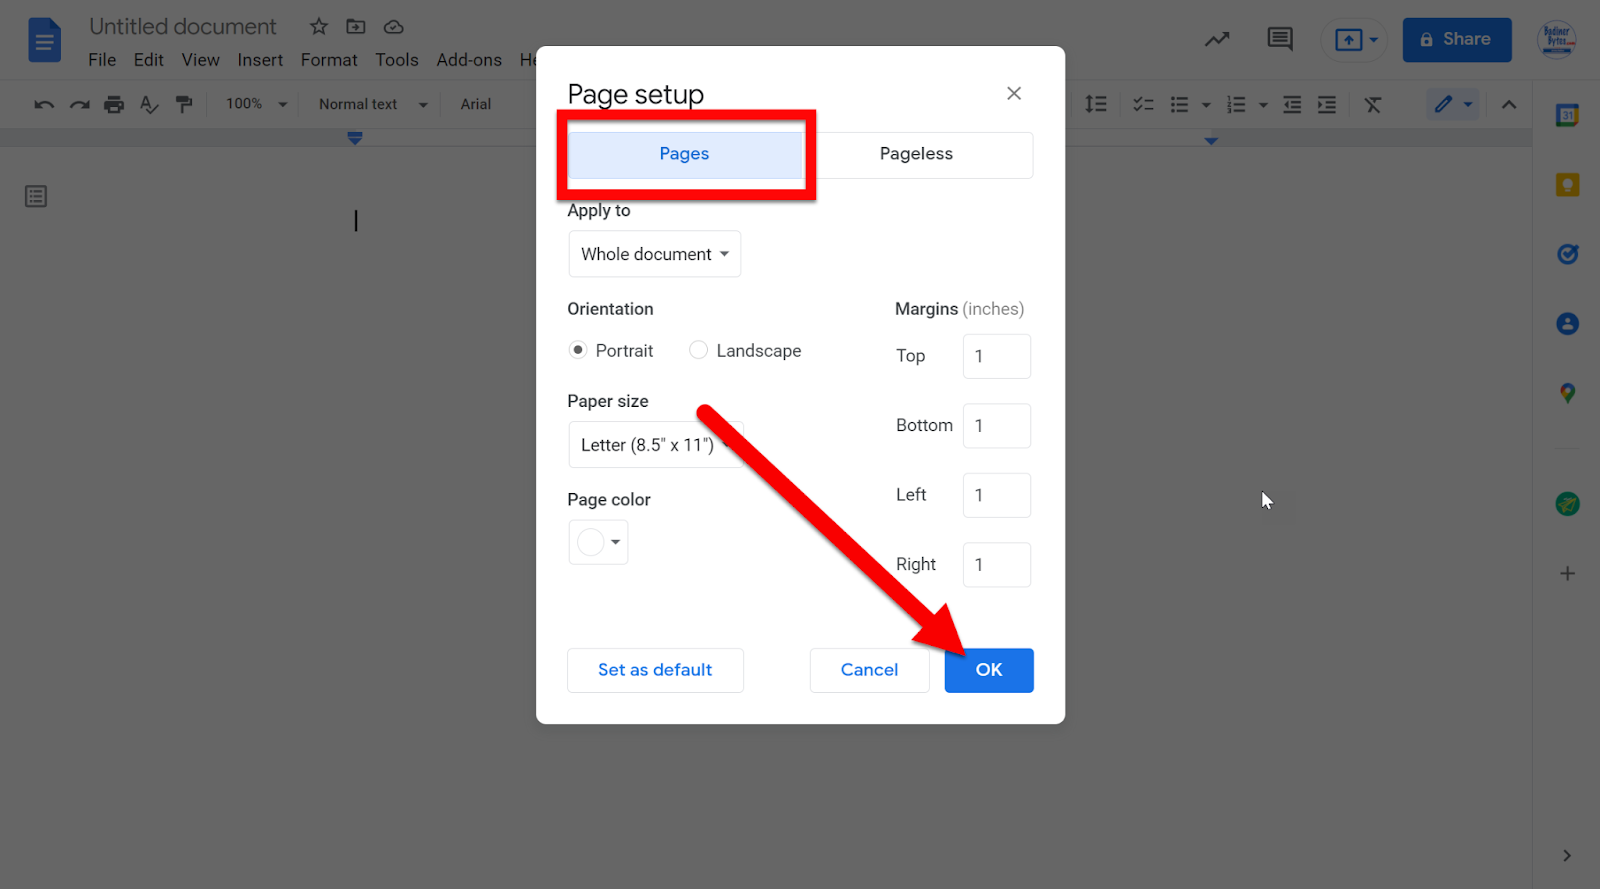
  1. This can all be undone and set back to regular pages by going back into Page Setup, choosing the “Pages” tab, and clicking “Ok”.


Jump into a Document and explore the freedom of a Pageless Document!


Video Walkthrough Here:


If you want these directions in a Document click HERE!