Tuesday, October 25, 2022

Handwriting Without Tears Digital Access

We already have hard copies of Handwriting Without Tears, and now there is access to all the digital Teacher Resources and Student Activities. You will just need to set up your account (all resources are tied to your Gull Lake email address) and look through the resources. If you choose to assign activities for your students to do you will be able to do that as well.


Set Up Your Account:

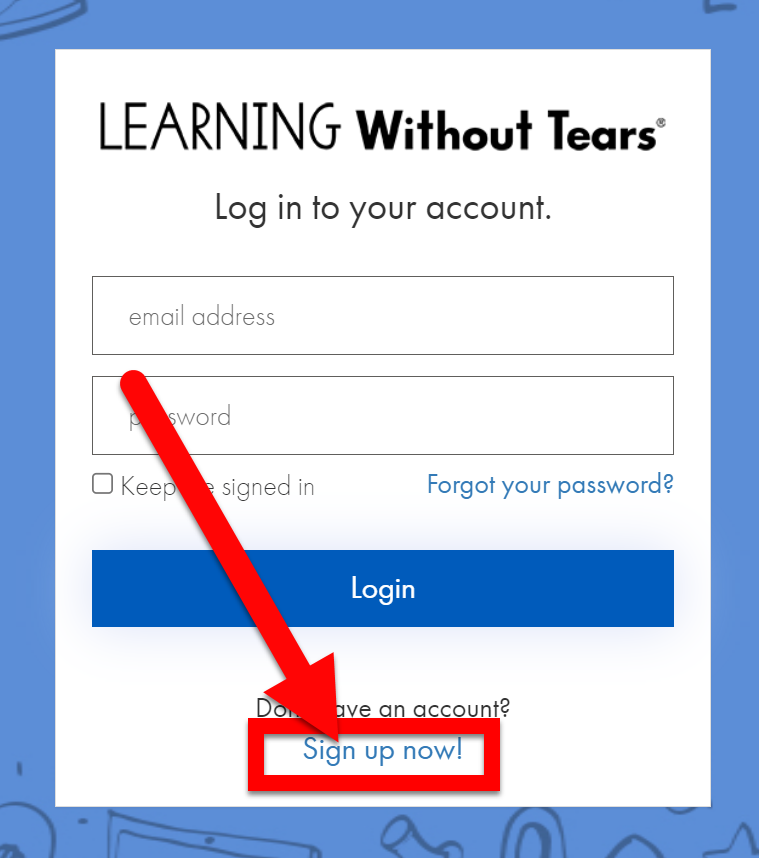
  1. Head over to pli.lwtears.com and click on “Sign up now!”.


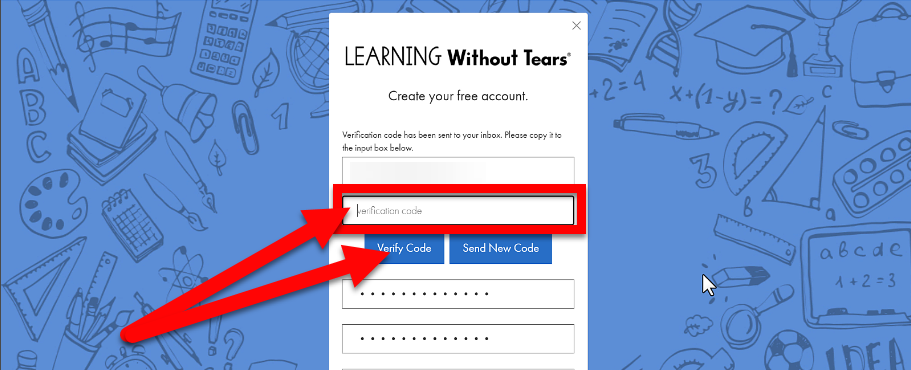
  1. Enter your Gull Lake email address and click “Send Verification Code”.


  1. Open the email (from Microsoft and Learning Without Tears) to find your access code. Enter that in the Verification Code box and click “Verify Code


  1. Fill in all the information in this form and click “Sign Up” at the bottom.


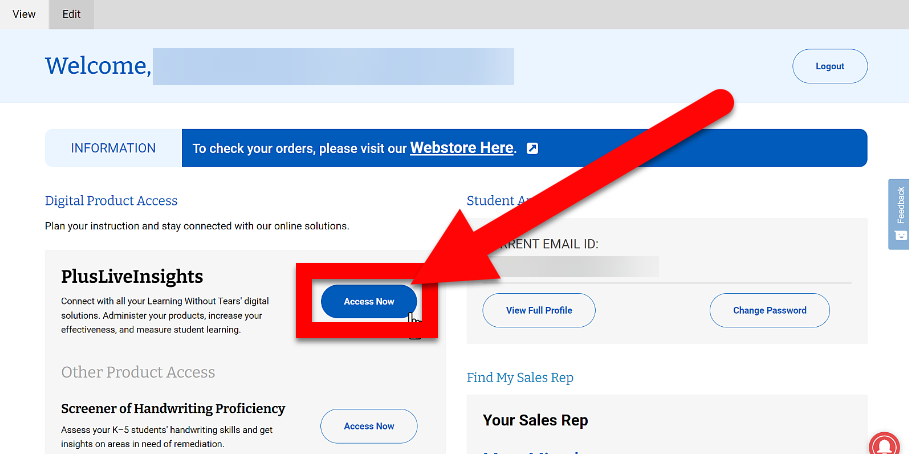
  1. Click on the “Access Now” button for PlusLiveInsights section.


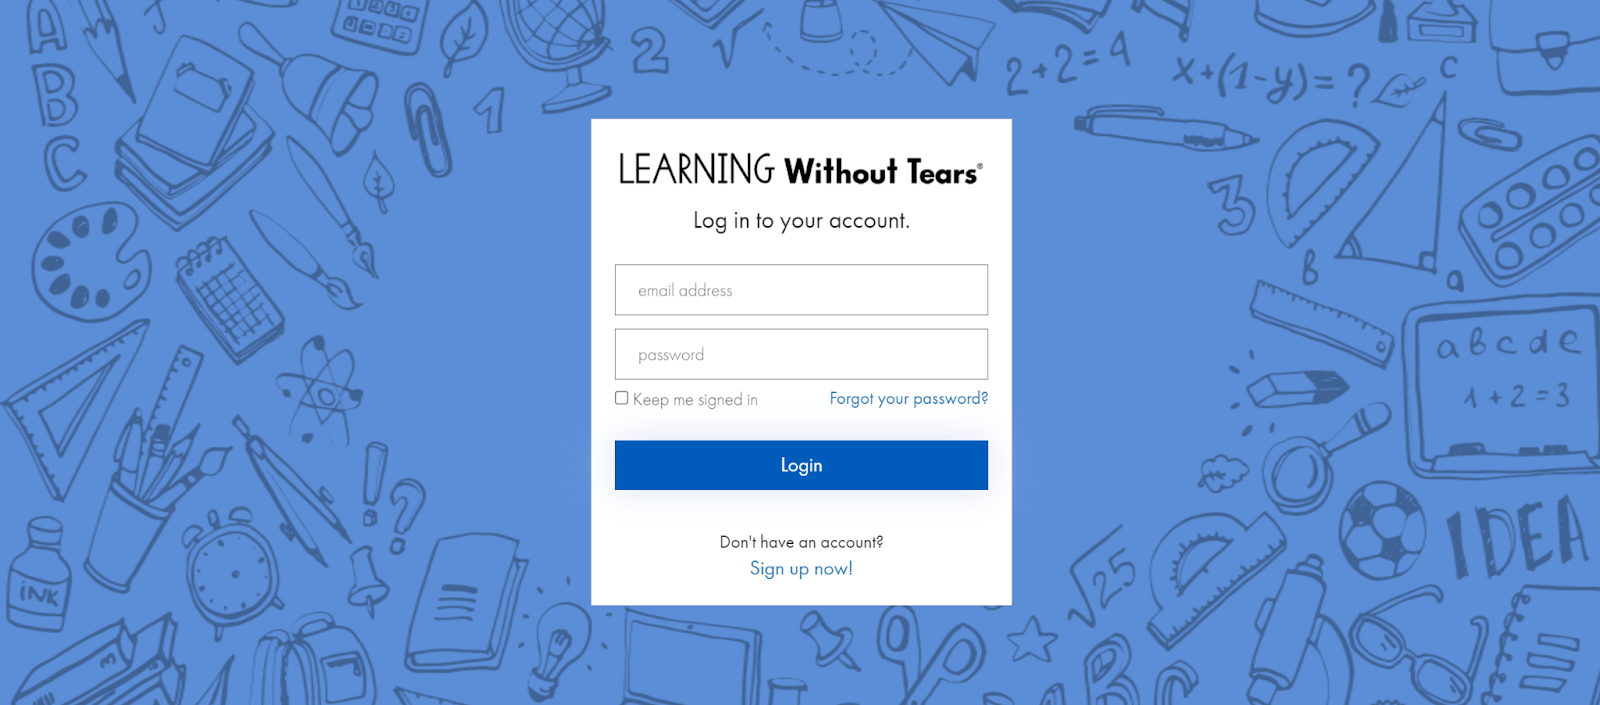
  1. From here on you can use this link to access your account: pli.lwtears.com


Access Keyboarding Resources:

  1. Once you log in you will see your Dashboard. Here you will have access to the following resources:


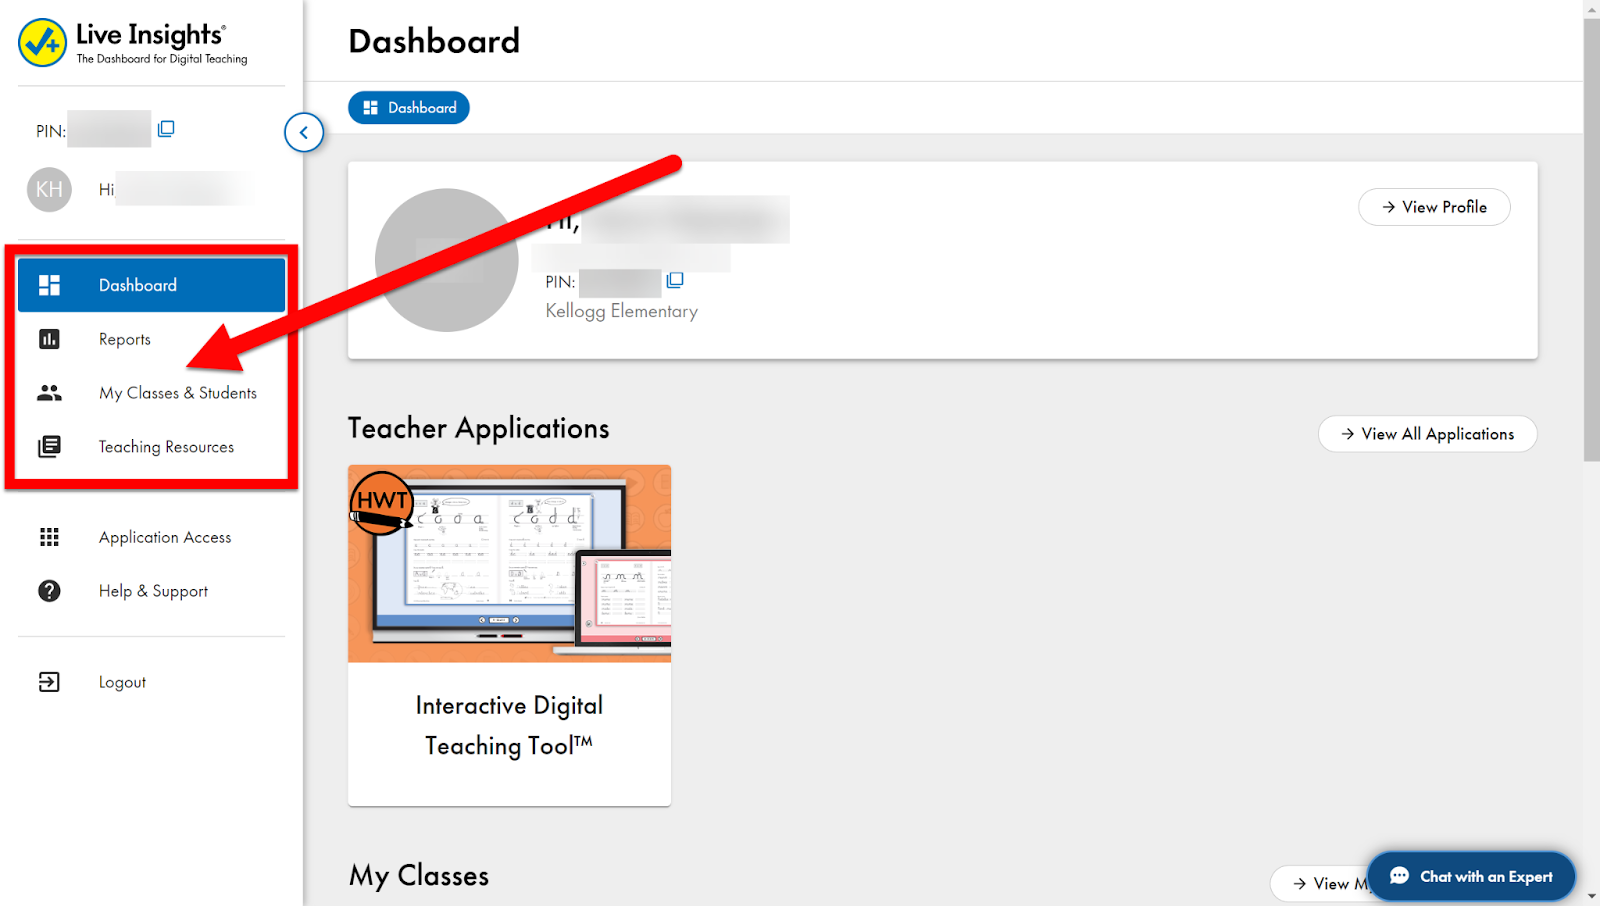
  • Dashboard: This screen

  • Reports: Student Progress

  • My Class & Students: Classes/Students pulled from Synergy

  • Teaching Resources: All activities and resources


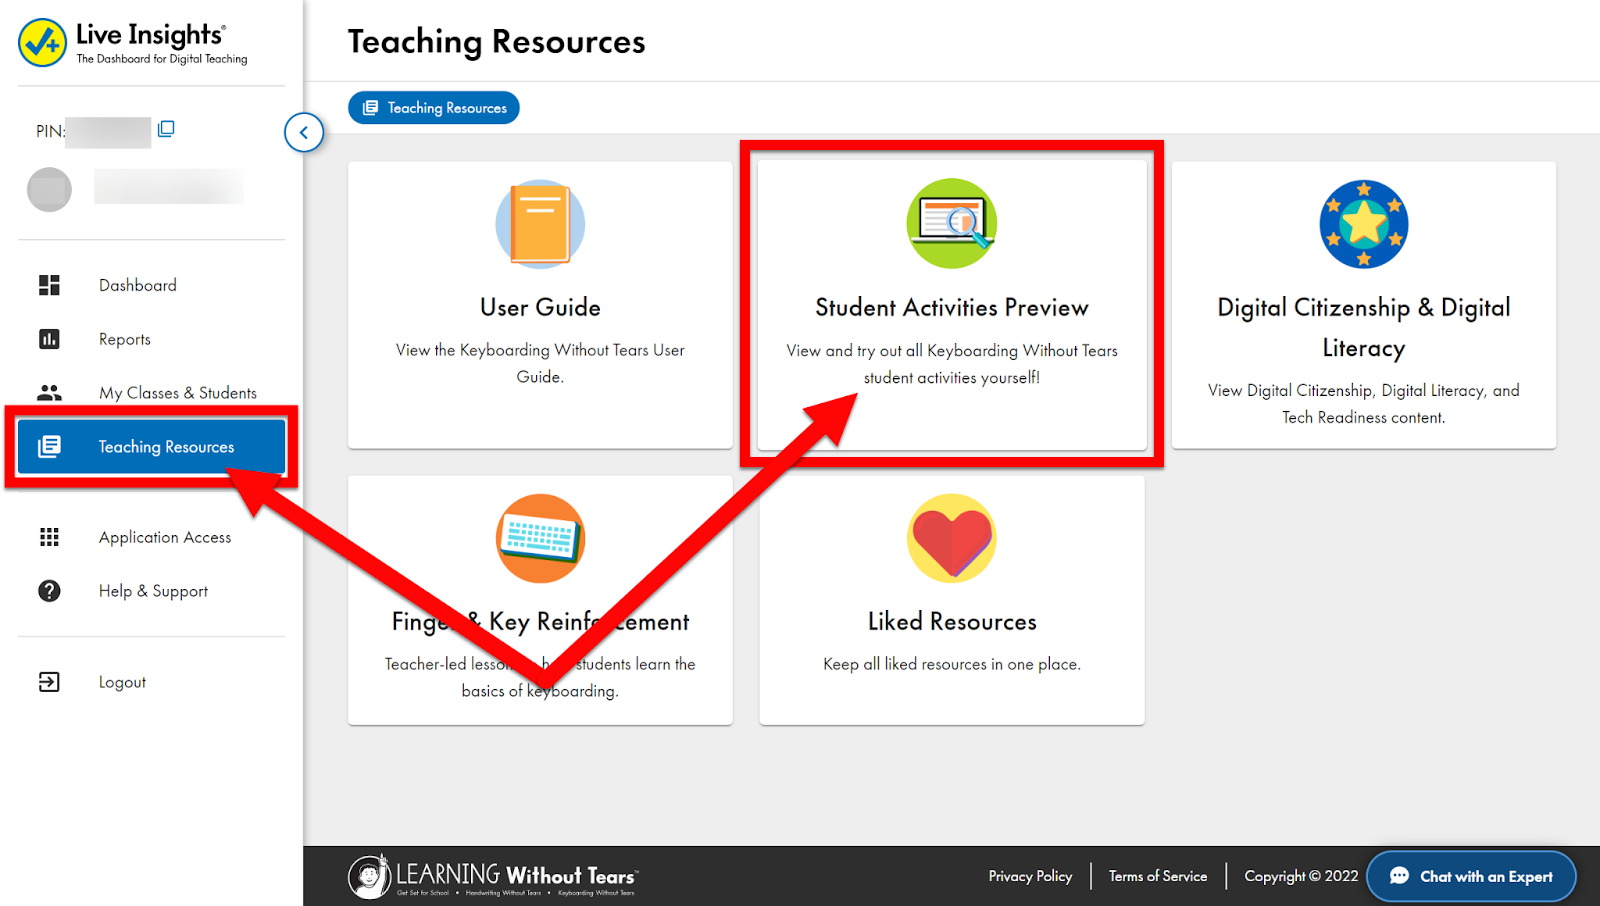
  1. To view available resources, click “Teaching Resources”. The one you want is “Student Activities Preview”. You can look at the other resources, but they are outside Learning Without Tears or PDF documents.


  1. Find your grade. You can favorite it by clicking the heart in the corner.


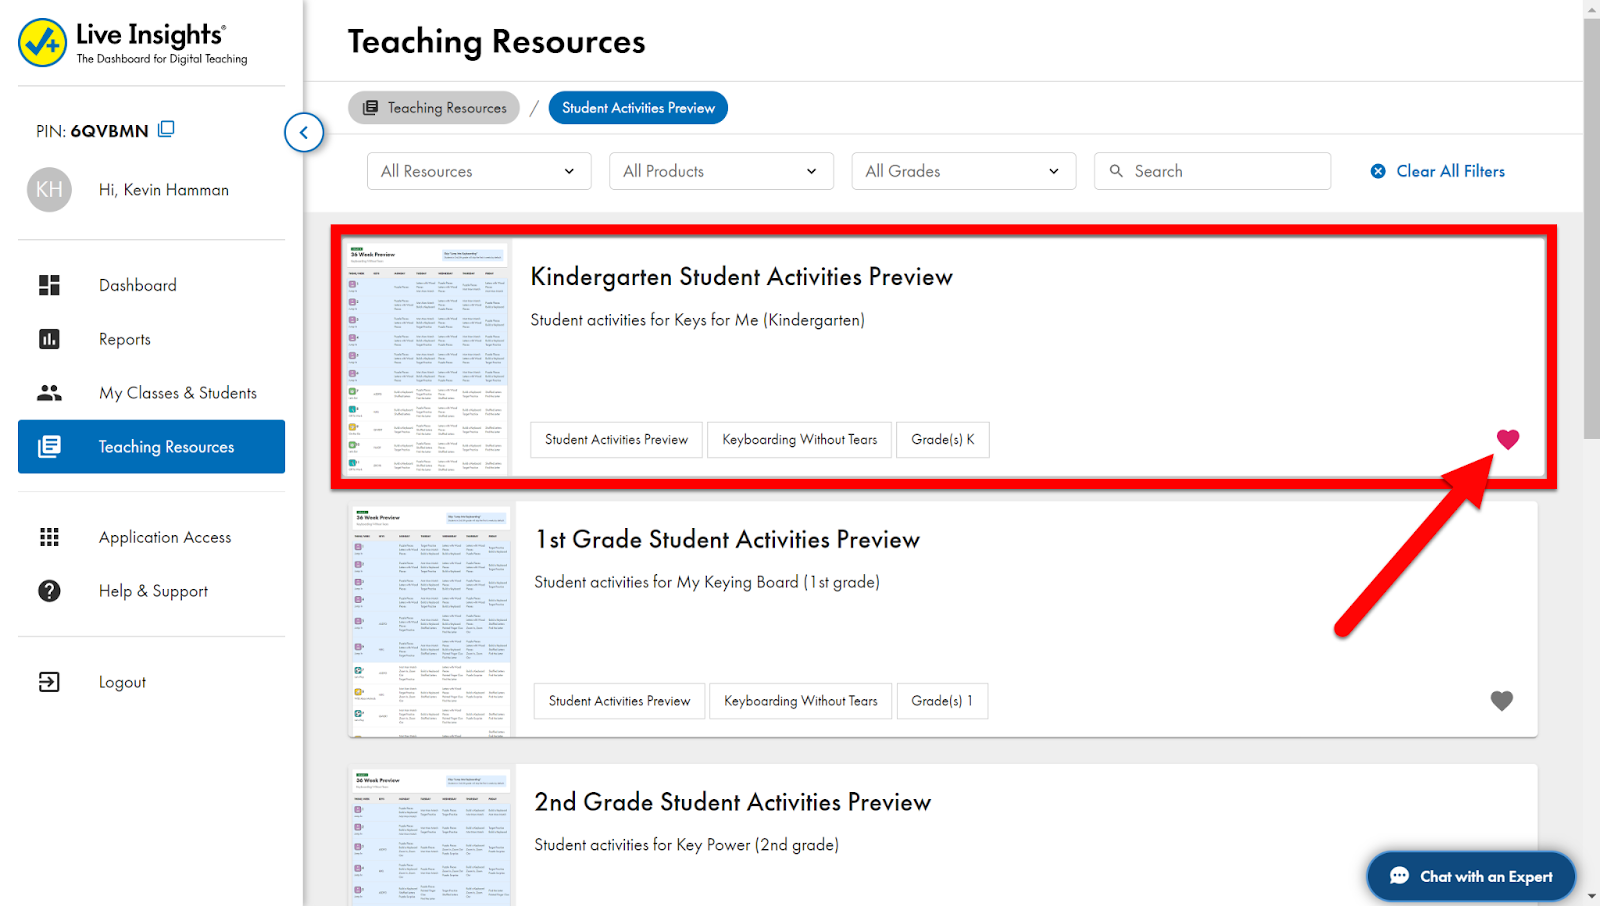
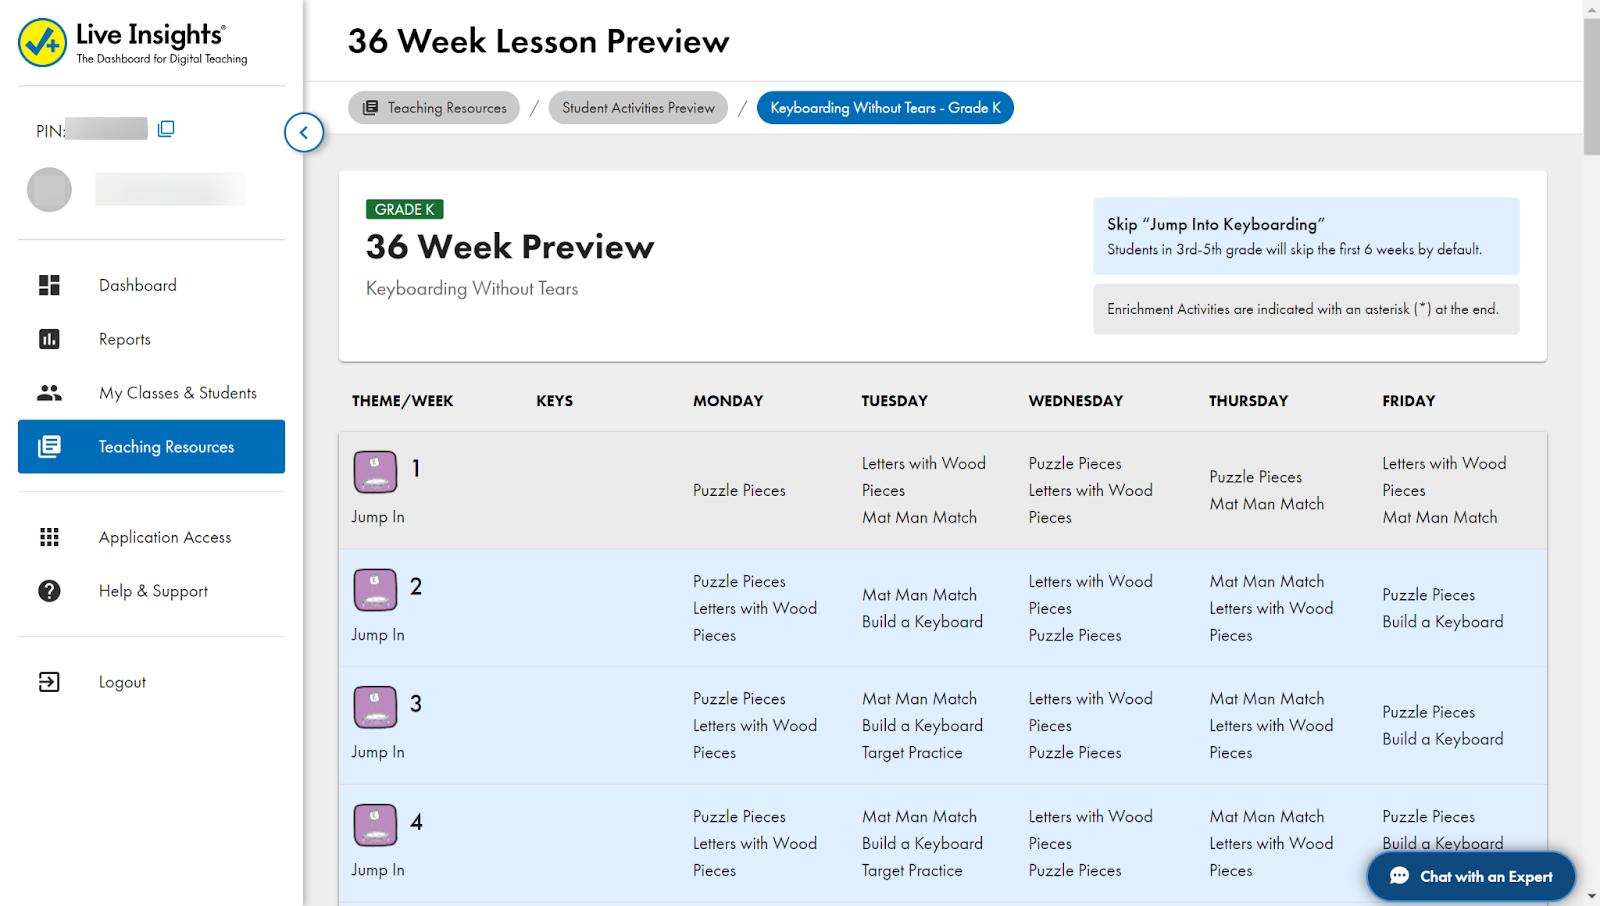
  1. You will now see all the keyboarding lessons and activities you can do. Click on them to view them. You can demo this for the students or just explore it.


View Available Interactive Activities:

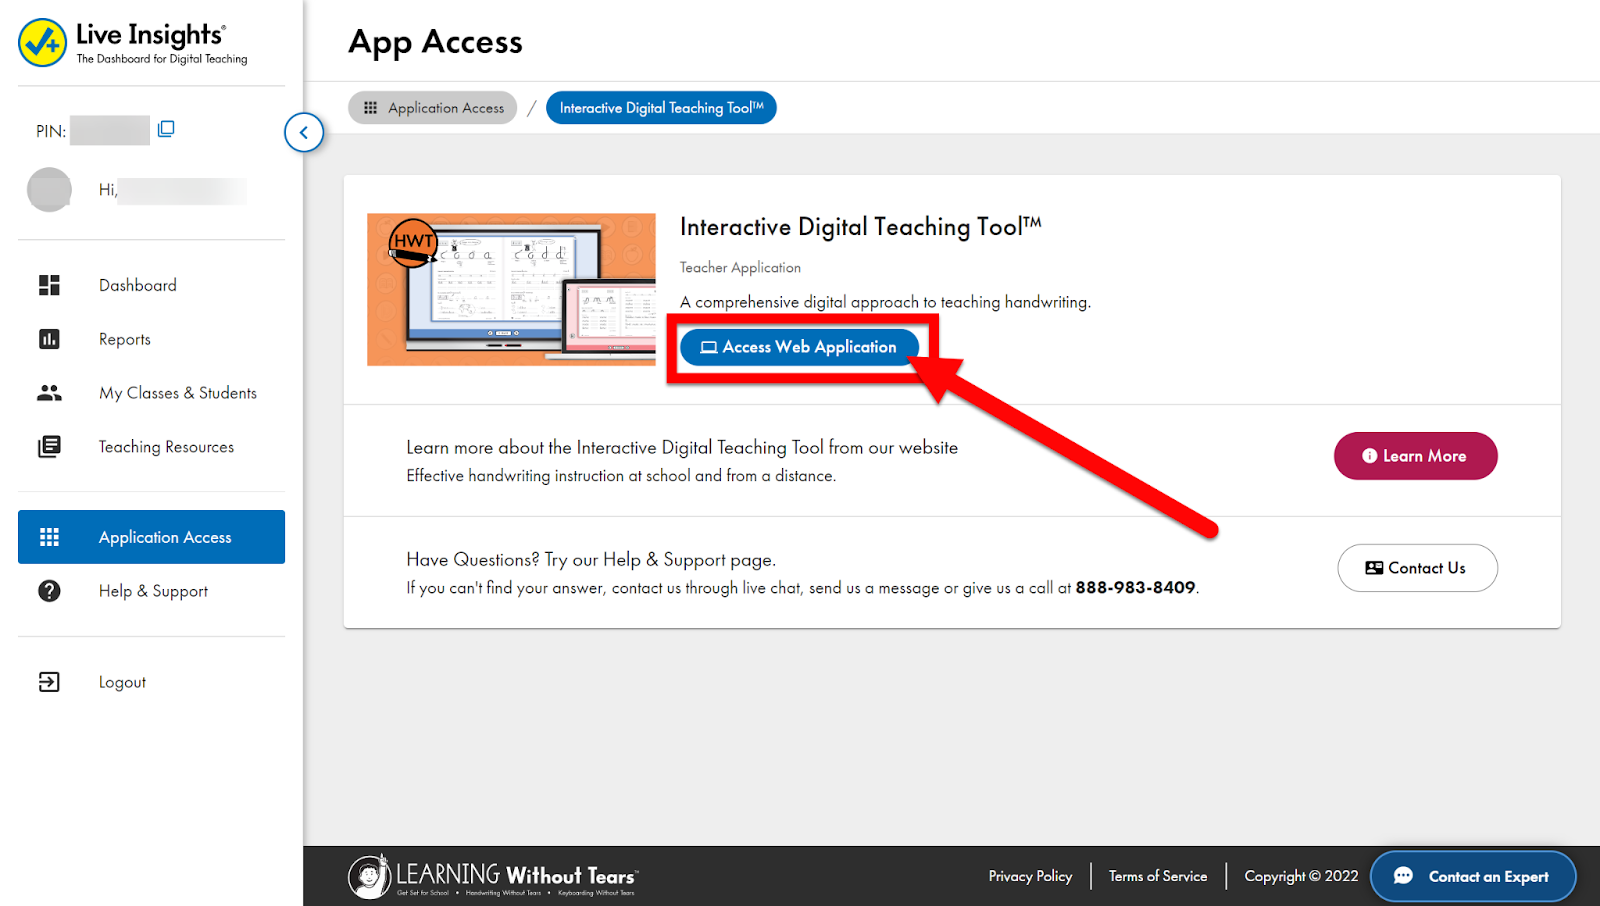
  1. On the left side click on “Application Access” to assign activities.

  2. We have access to the Interactive Digital Teaching Tool


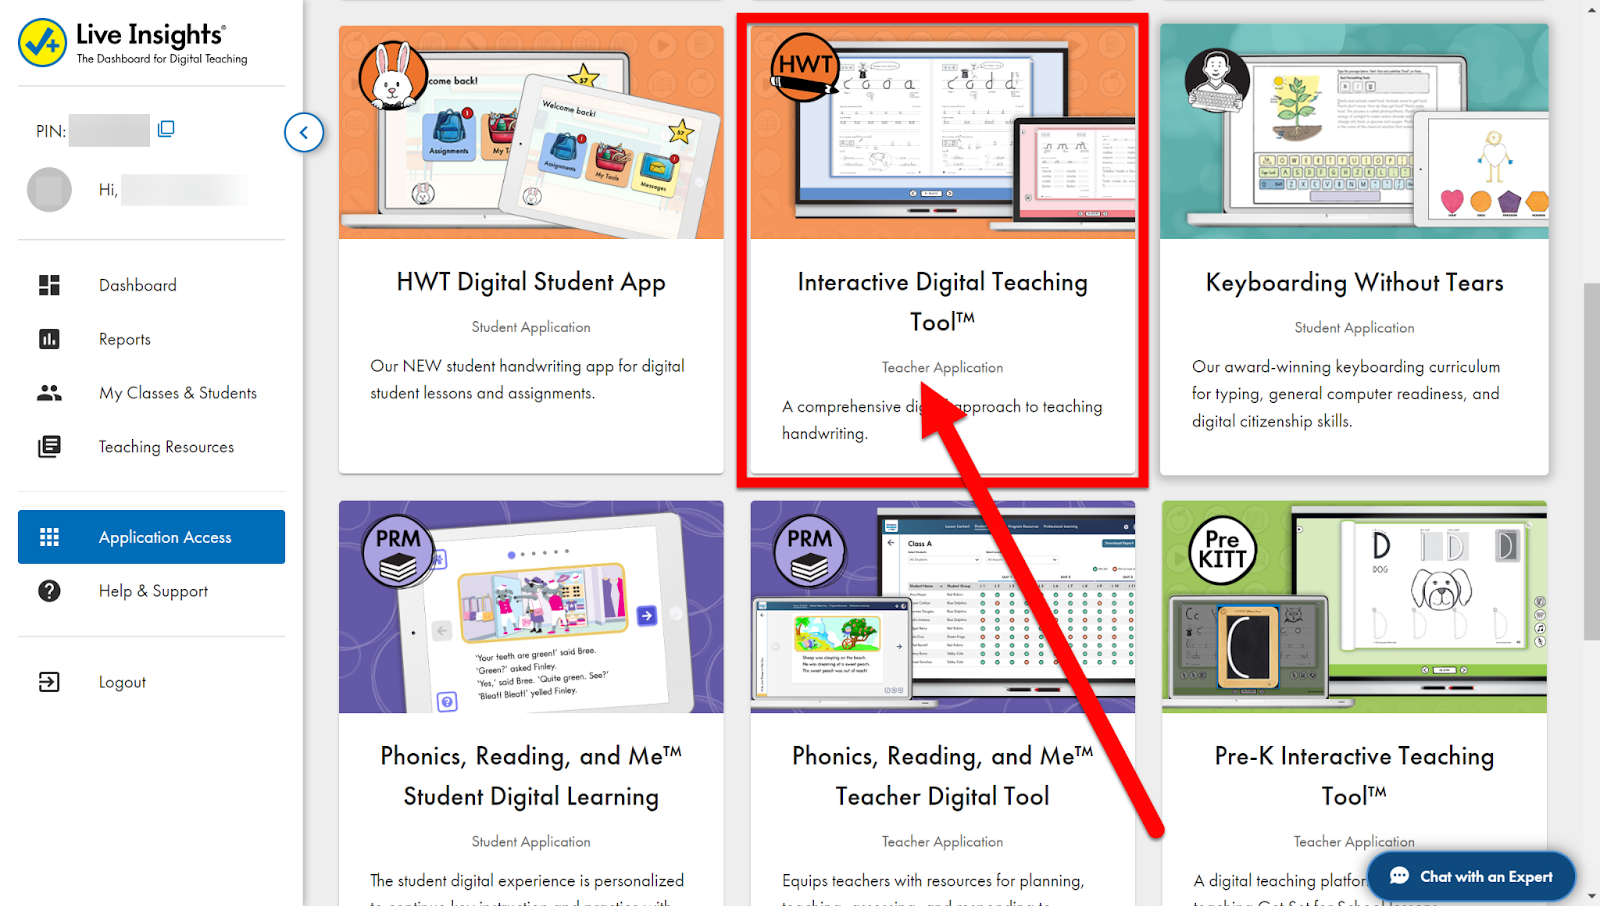
  1. Click and open the Interactive Digital Teaching Tool and click on “Access Web Application”. This will be the site to bookmark as you will do all your work from here.


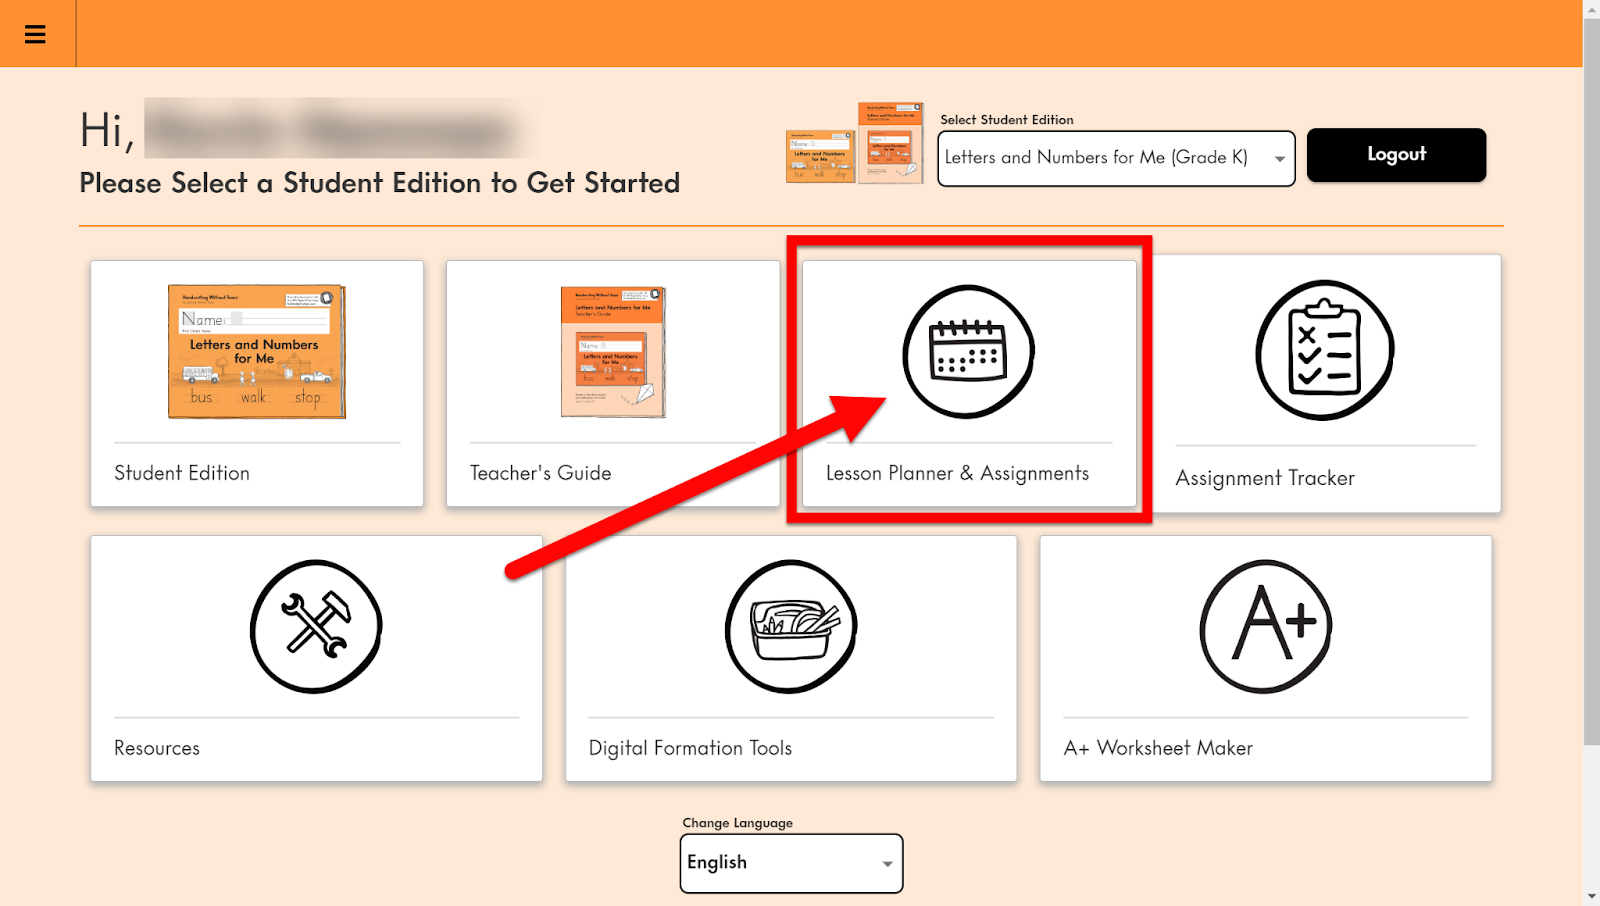
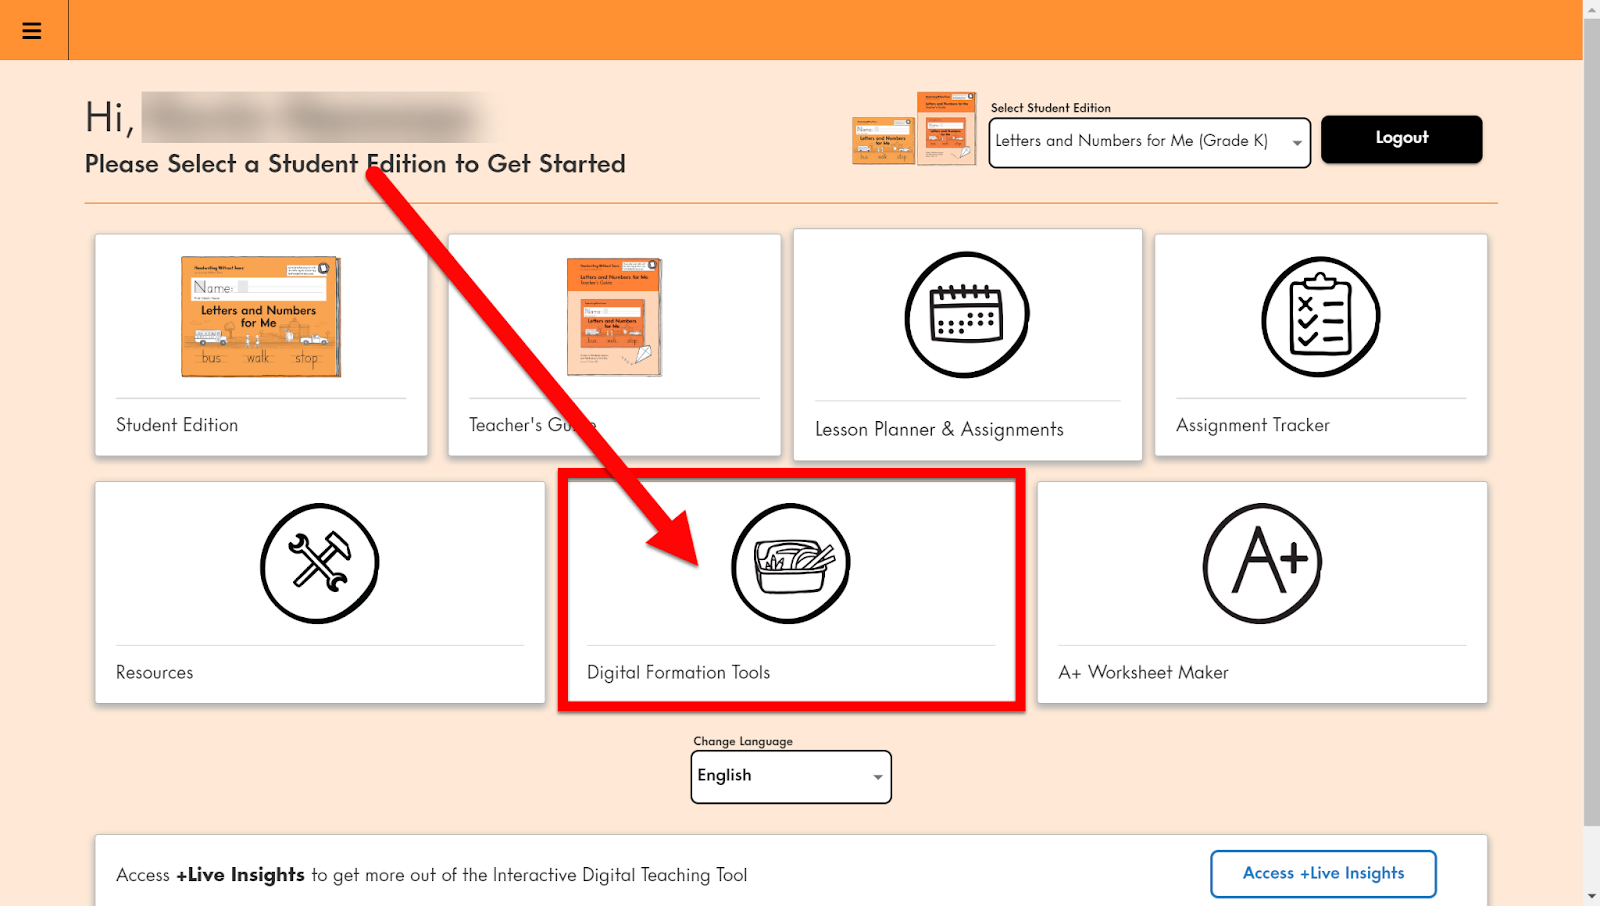
  1. You will see all the resources you have access to use.

    • Student Edition: View a digital copy of the student hardcopy

    • Teacher’s Guide: View the Teacher’s Guide

    • Lesson Planner & Assignments: Plan activities and assign lessons to students

    • Assignment Tracker: View student progress

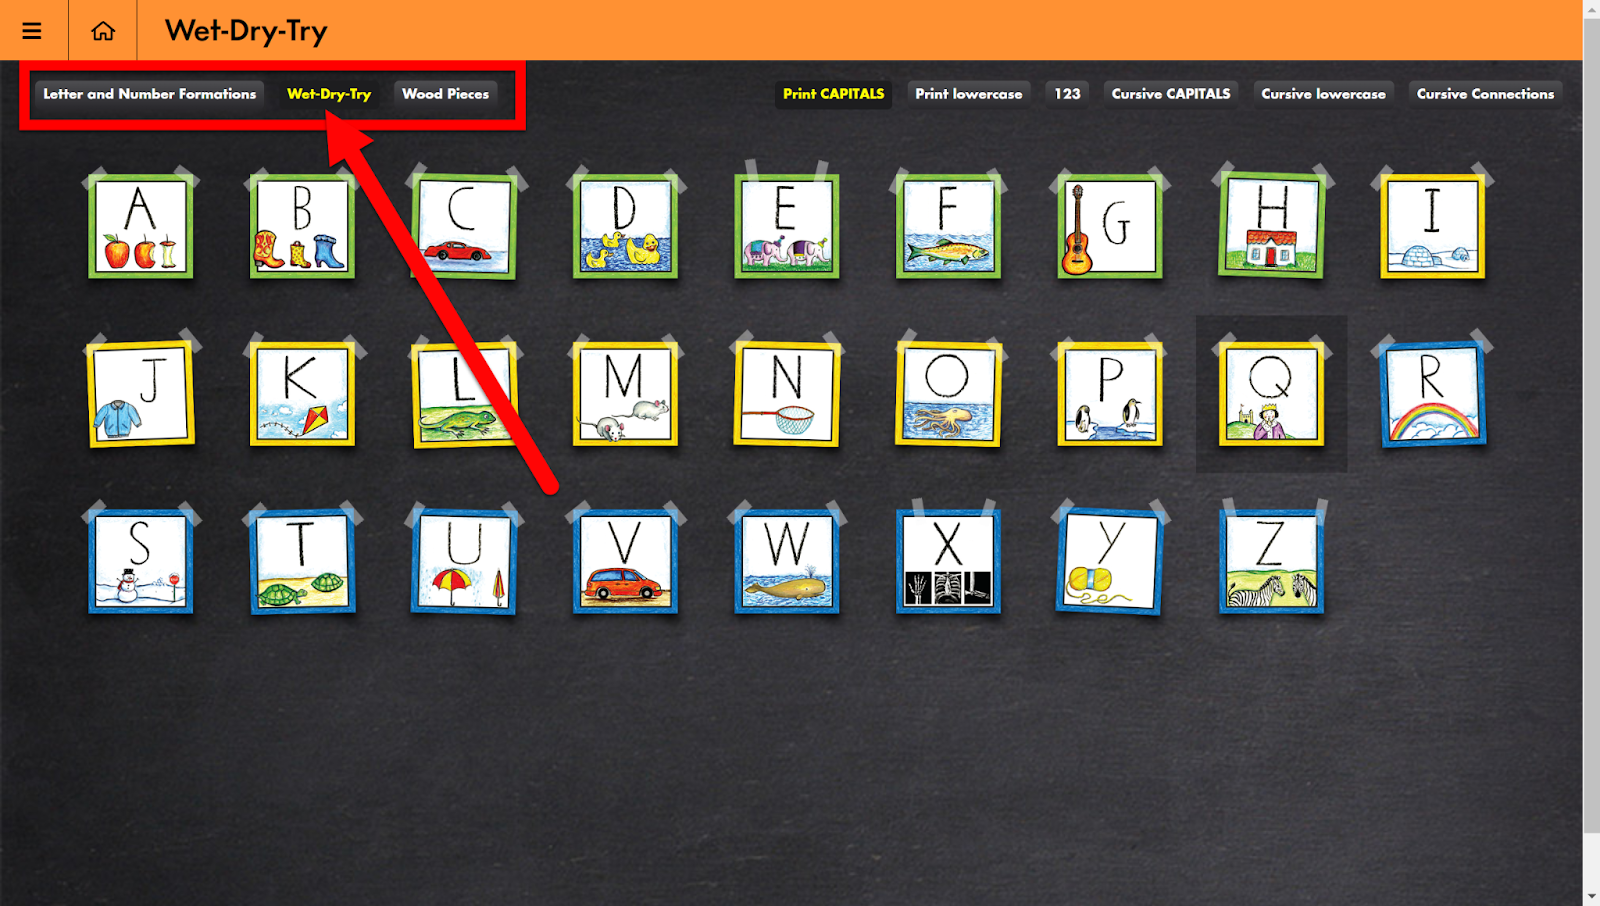
    • Digital Formation Tools: View interactive letter formation activities (Check out this section for letter practice!)

    • A+ Worksheet Maker: Create handwriting worksheets


Assign Student Activities:

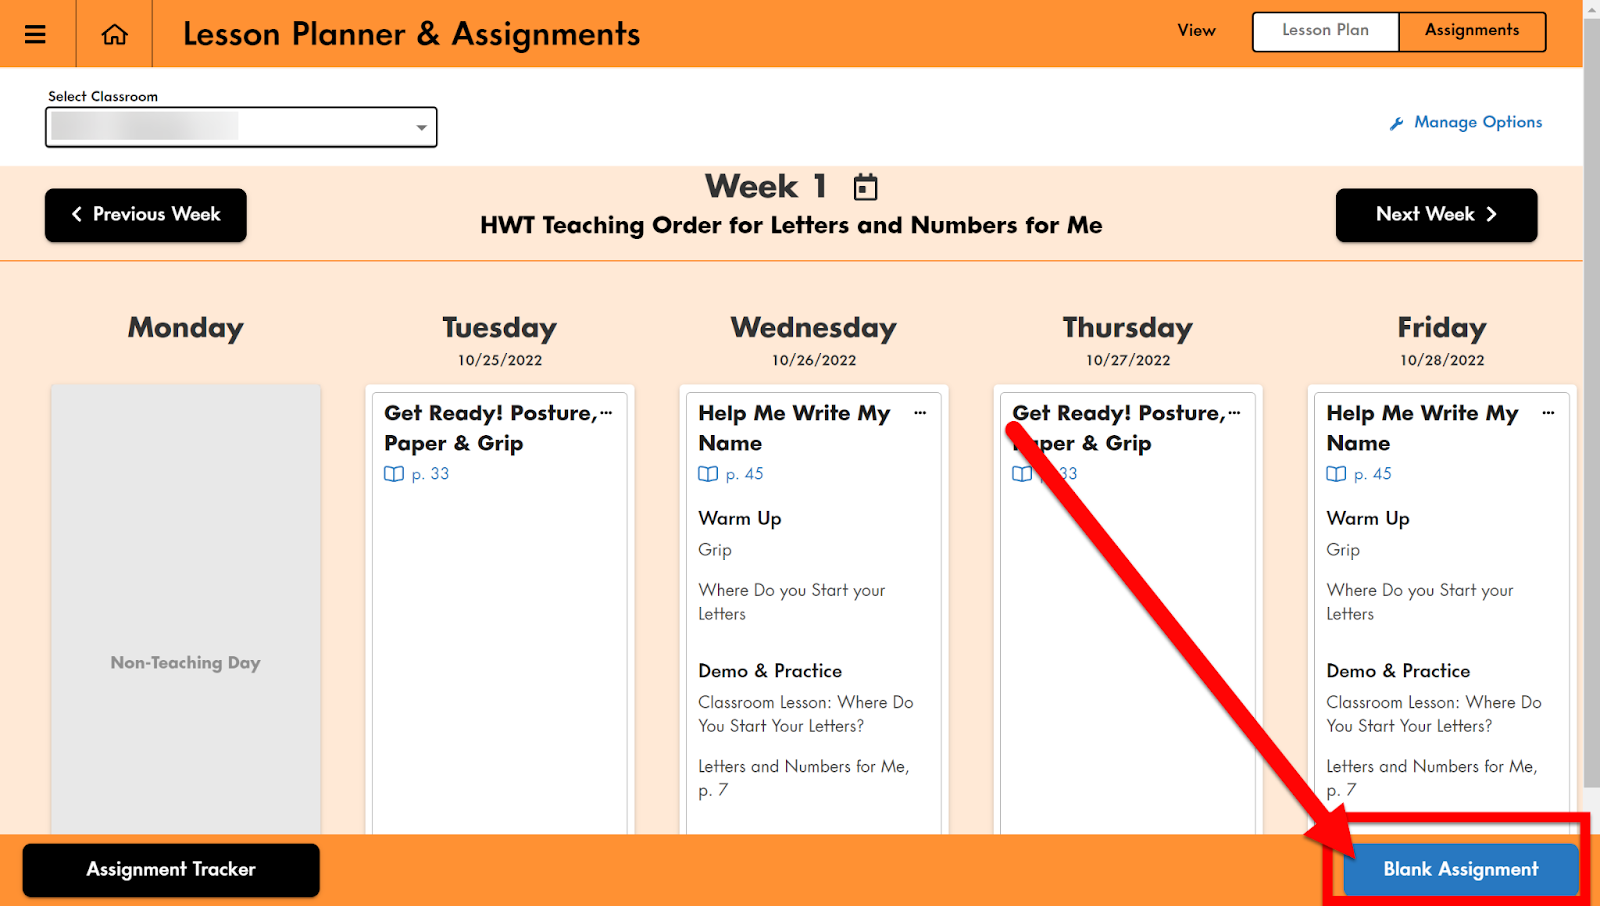
  1. Open the Interactive Digital Teaching Tool and click on “Lesson Planner & Assignments”.


  1. You will be asked to set a start school date. You can choose whatever you wish (today or at the beginning of the year). 

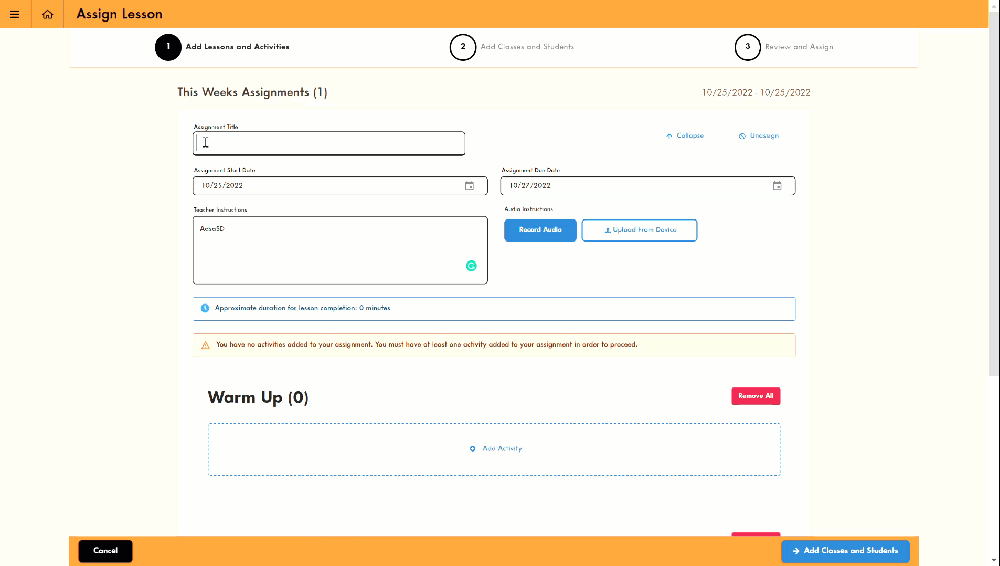
  2. If you are just looking to assign an activity for your students to try, click “Blank Assignment” at the bottom right.


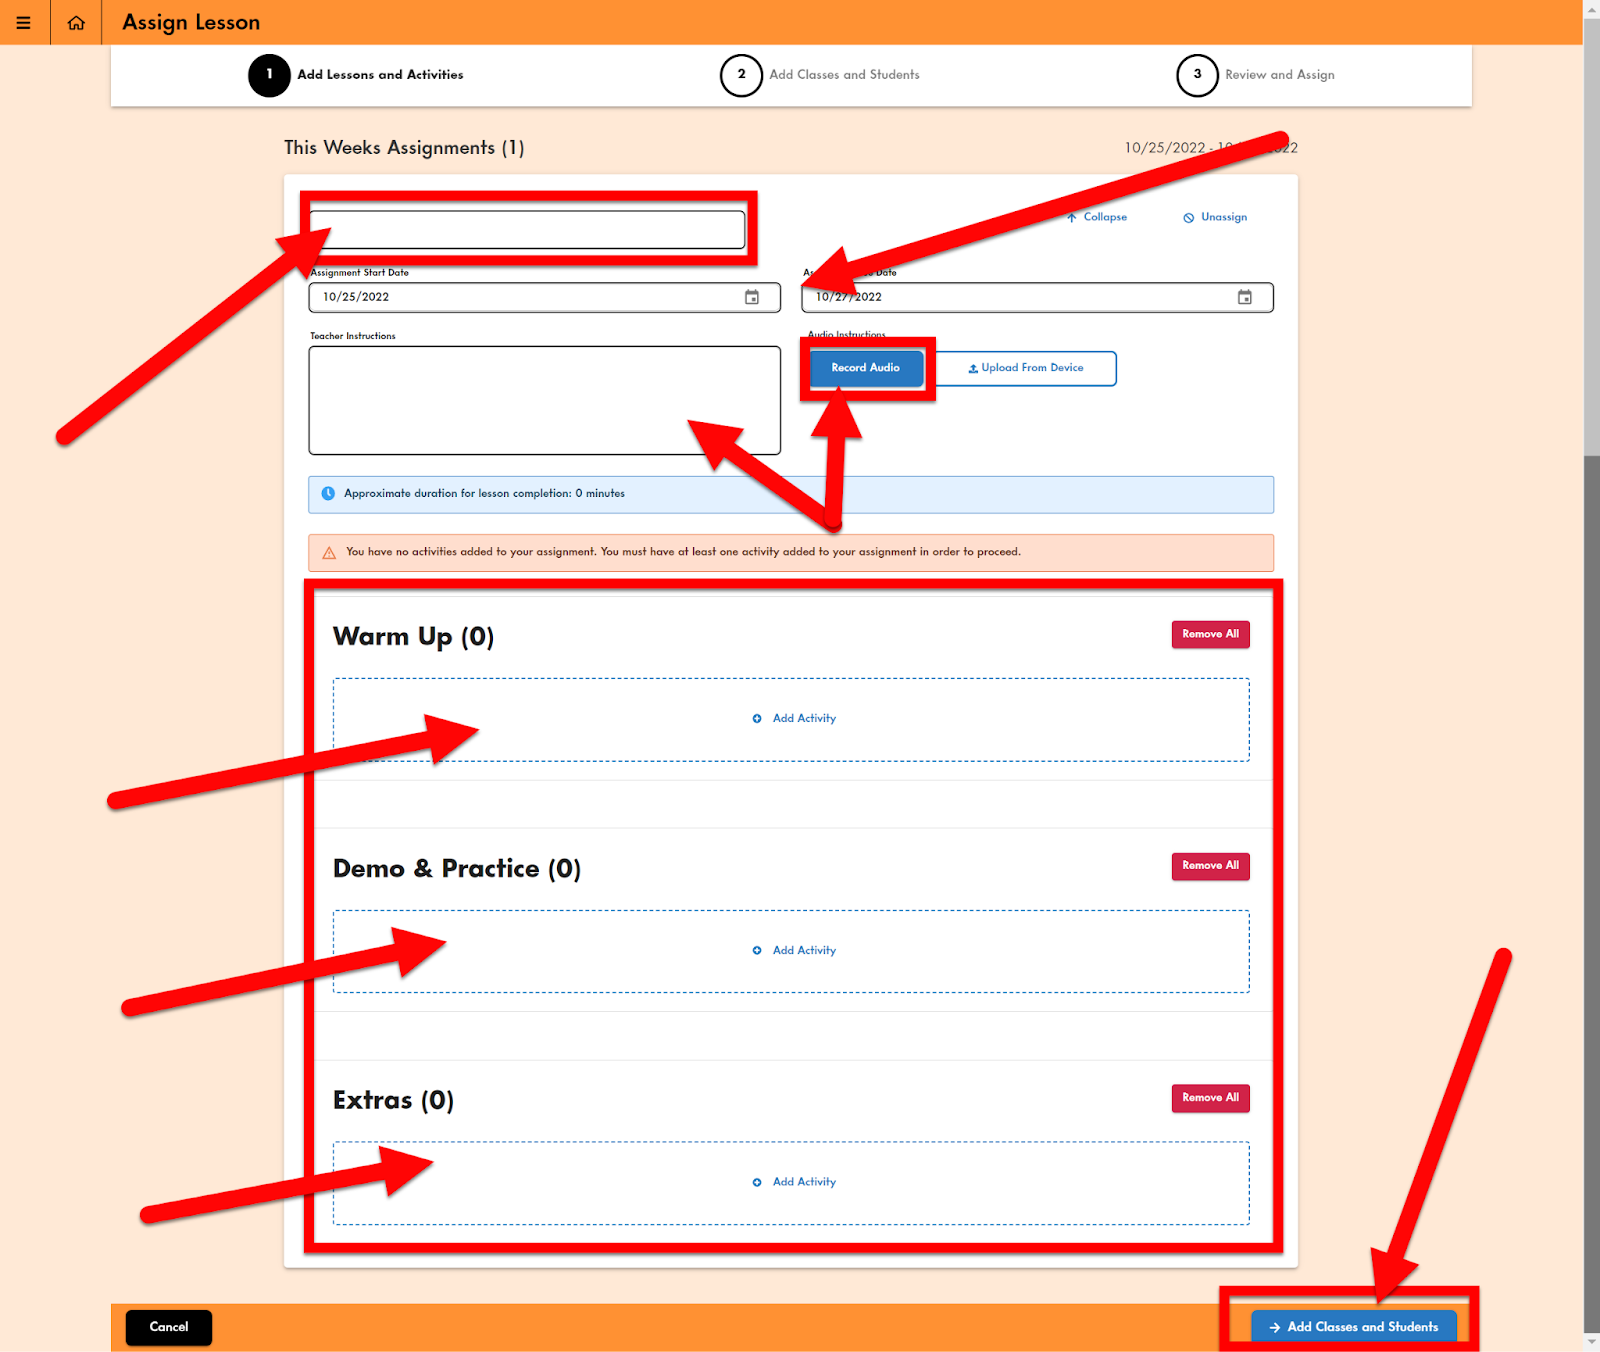
  1. Fill in the information needed. You will need to title the assignment, choose a start/due date, add directions (you can add audio directions as well!), and you can assign a Warm Up, Demo, or Extras (you do not need to do them all, you can just do one or all as you need). Then click “Add classes & Students”.


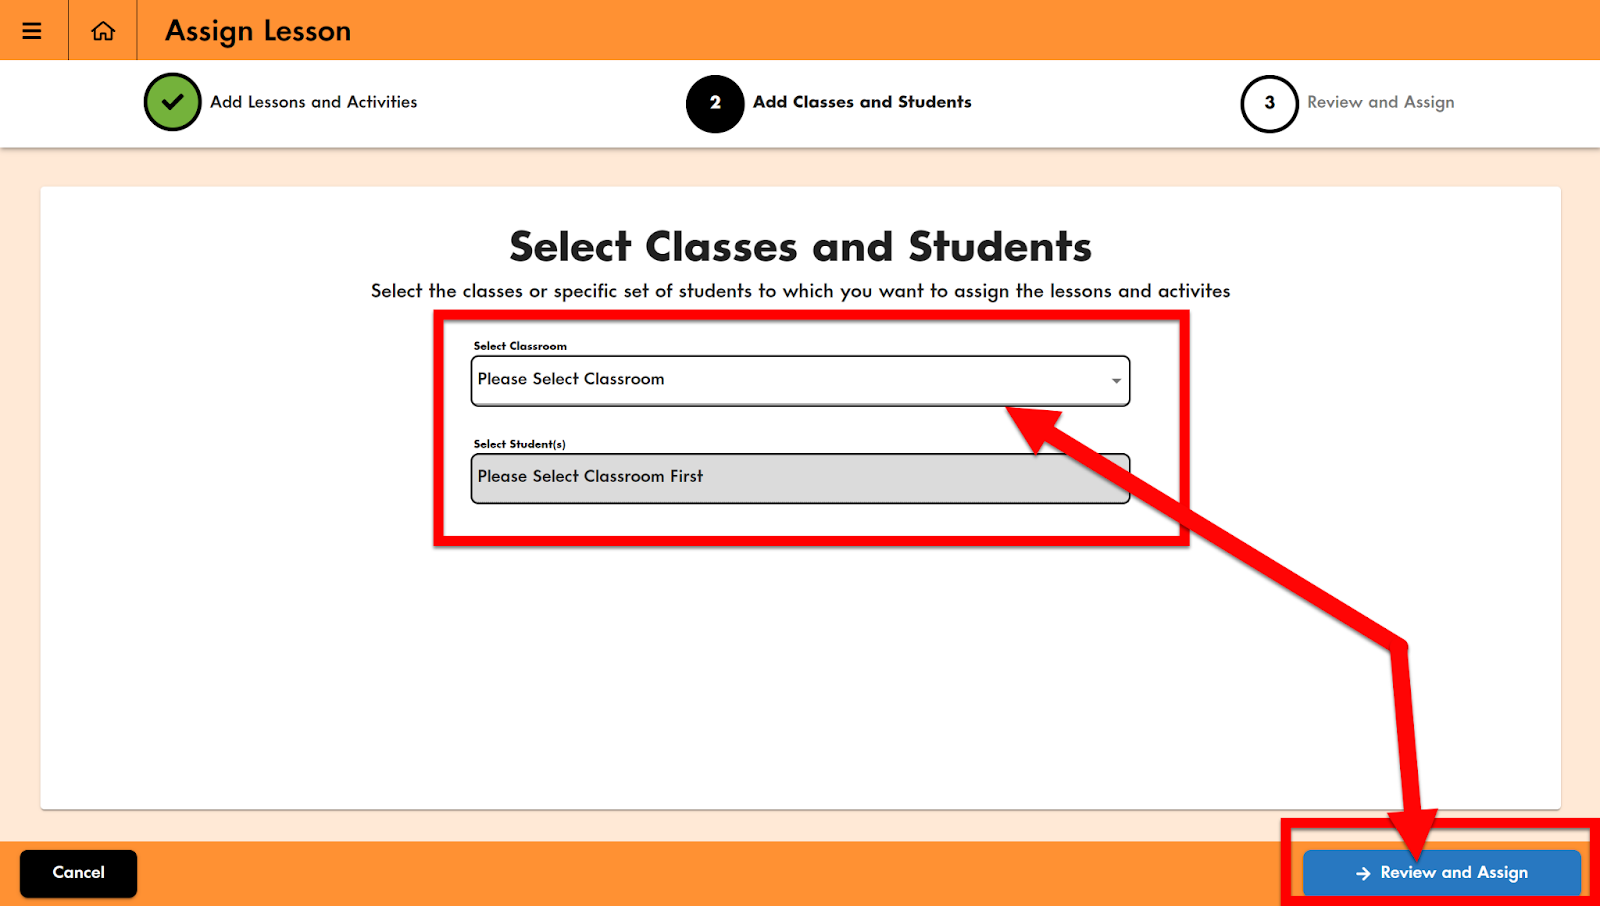
  1. Choose your class and students. On the next screen click “Review and Assign”.


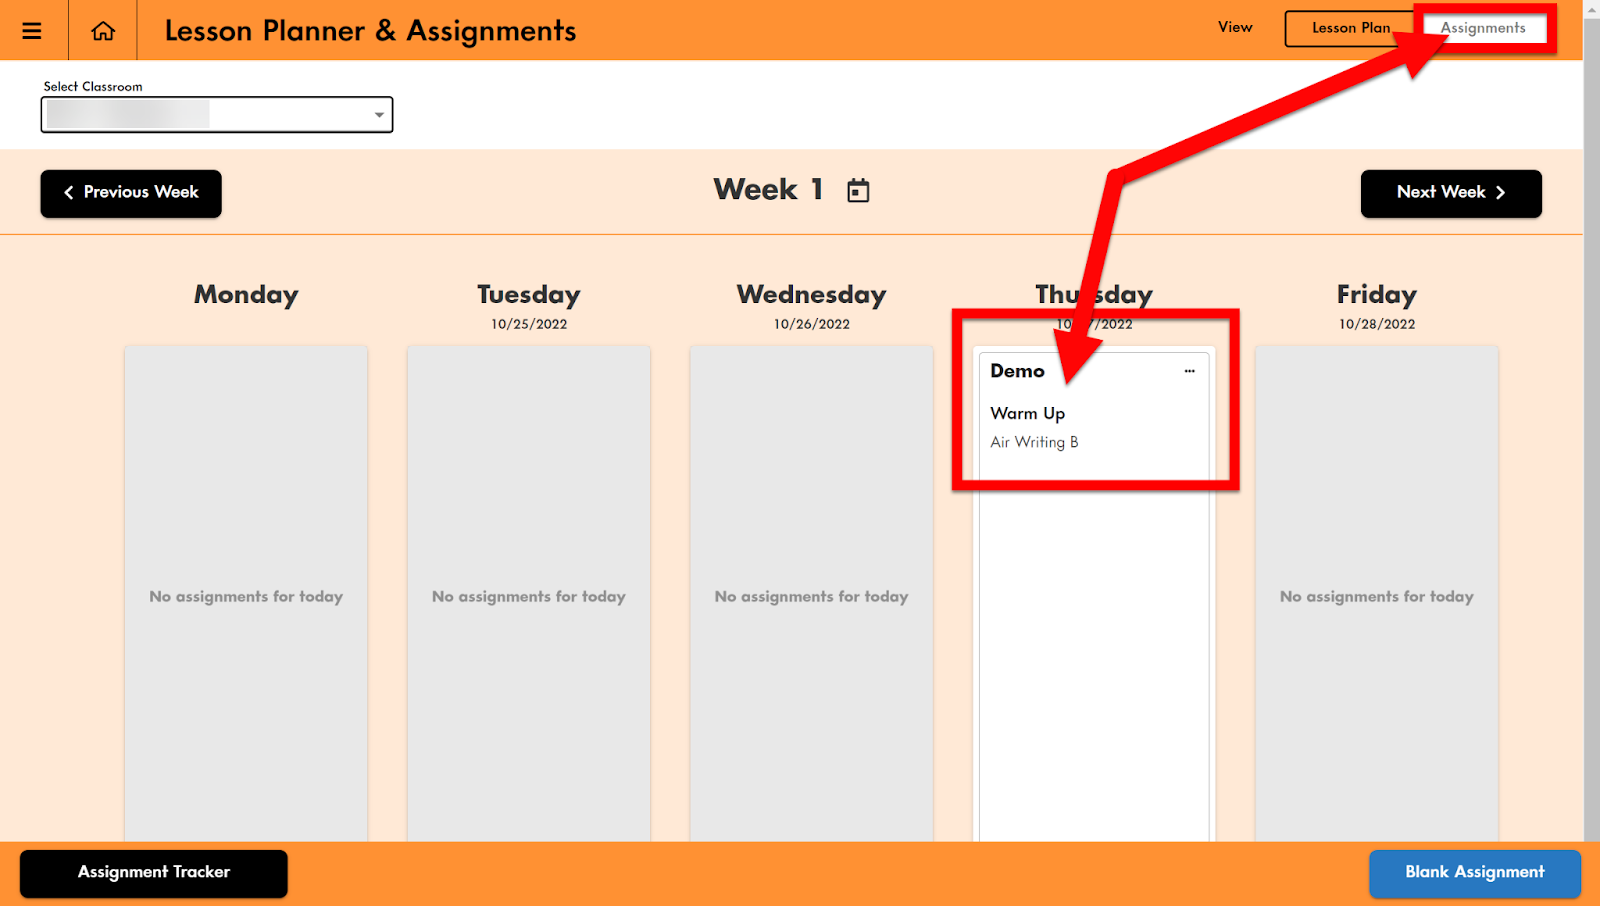
  1. On the next screen click “Assign Lesson”. You can now view assigned lessons on the “Assignments” tab at the top right.


💡 Tip: Check out the Digital Formation Tools from this screen:


The “Wet-Dry-Try” and “Letter and Number Formations” are great practice activities!
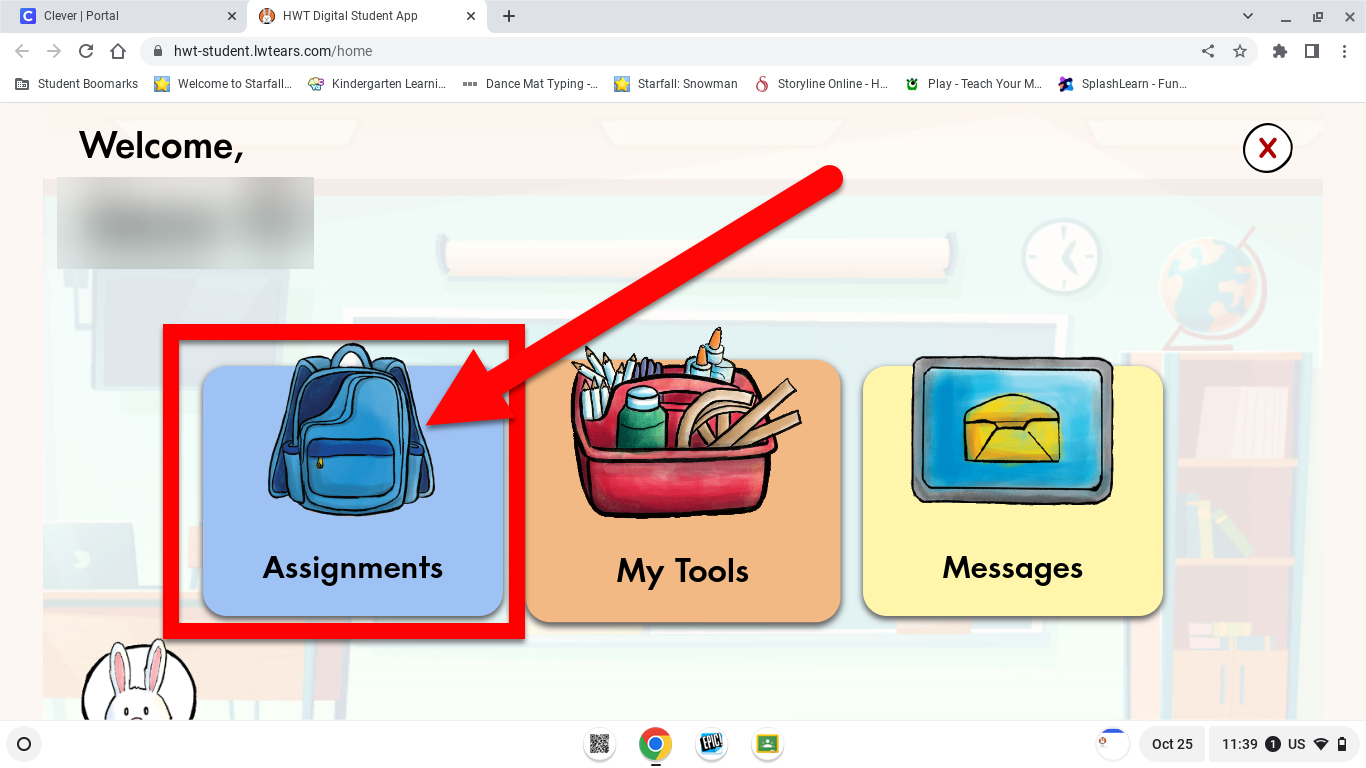


Student Access:

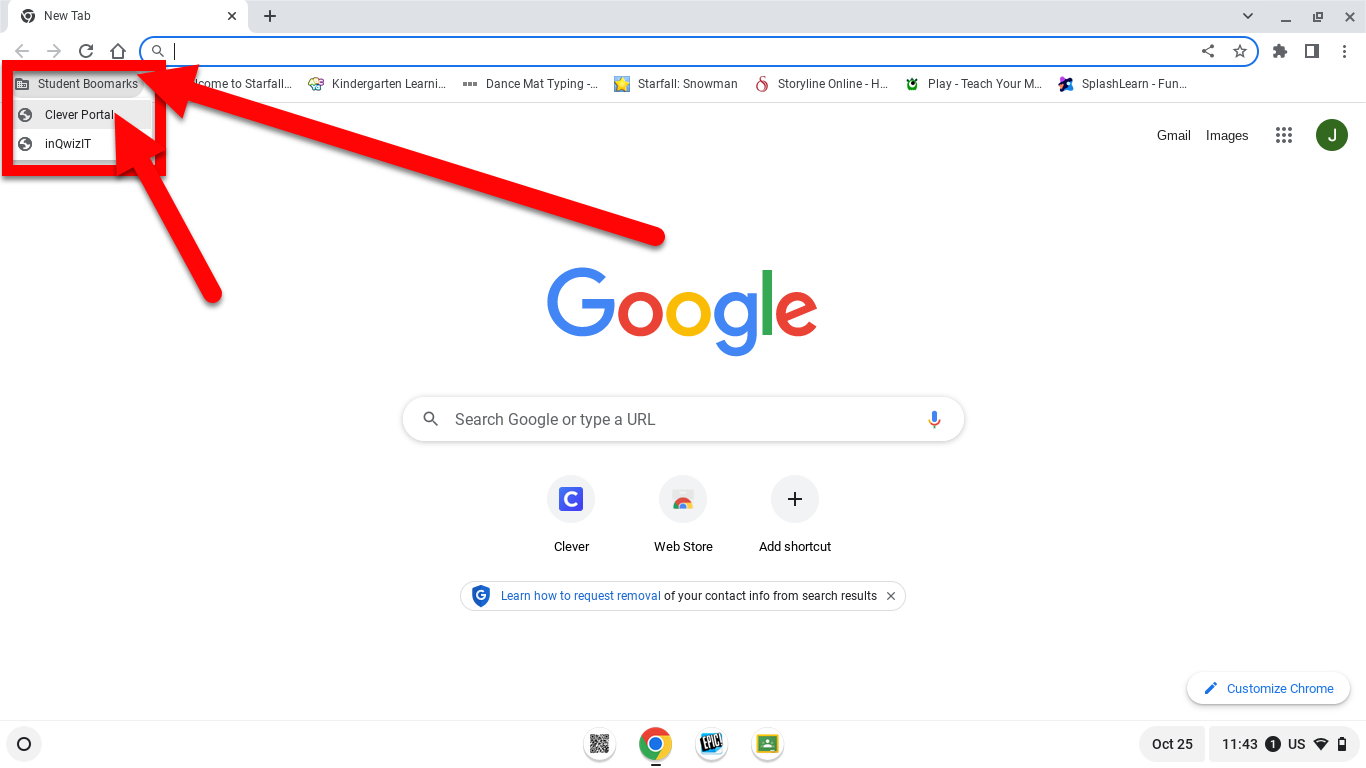
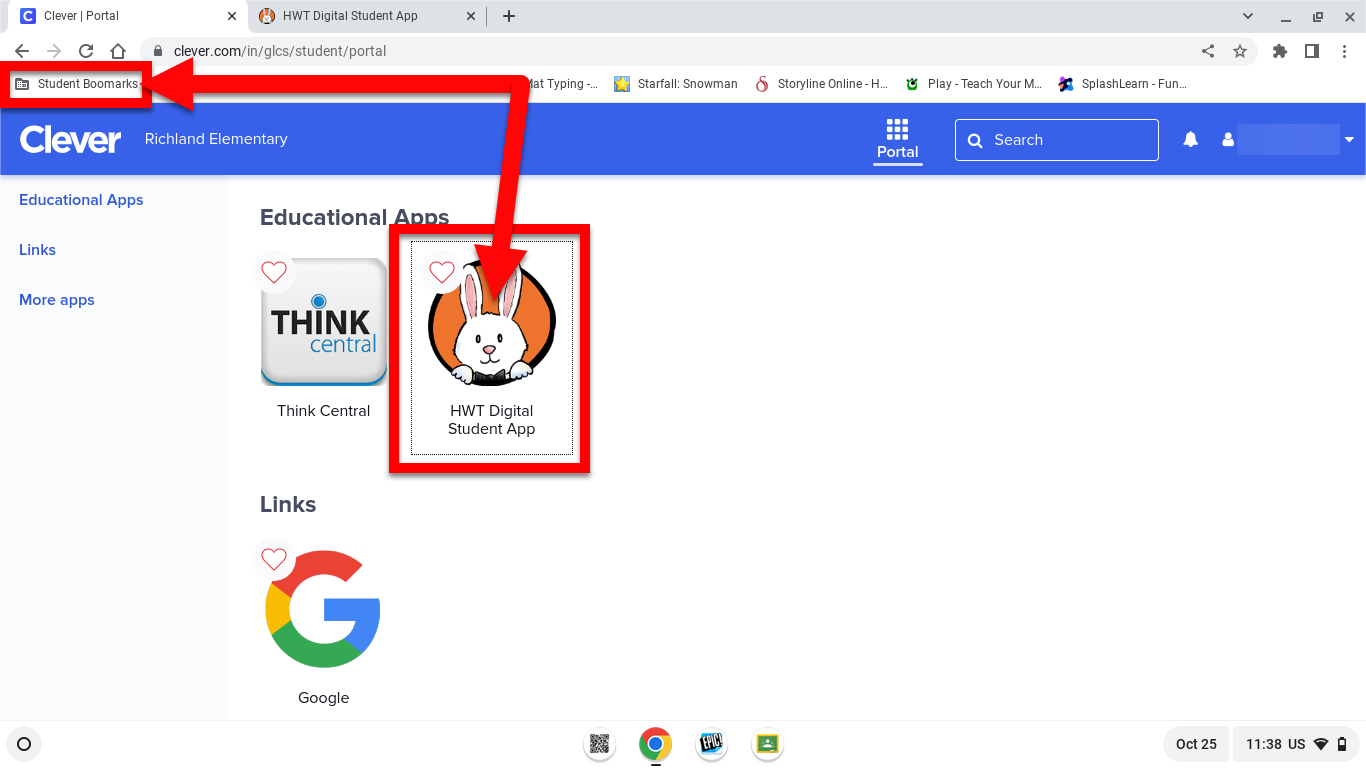
  1. On the student Chromebook click on the “Student Bookmarks” folder in the top left and choose “Clever Portal”.


  1. They may be asked to sign in. Do that if needed, then click on the “HWT Digital Student App”.


  1. The “Assignments” backpack icon will list all the activities you have sent to them. Click on that and complete the assigned activities.


If you want these directions in a Document click HERE

Friday, October 14, 2022

Curving Text with Adobe Creative Cloud Express

Adobe Creative Cloud Express is an easy tool that allows teachers and students to create awesome projects! You can easily create all sorts of visual projects like flyers, web pages, videos, images, graphics, and more. With the EDU account, we have access to all the cool tools, resources, and projects. Students can easily use Adobe Creative Cloud Express to create projects to demonstrate their learning. It has many awesome features. One of my favorites is the ability to add curved text to images. Check out how to do this below!


Start a Project:

  1. Head to https://express.adobe.com/sp/ and sign in with your Enterprise Account.

  2. On the main page, you will see a list of easy-to-create projects. You can also click on the purple “+” icon on the left to see more tools. Click on “Custom Size” or “From your photo” to make a quick project.


  1. In addition, you can search for templates with the Search Box or filter by project type.


  1. Choose one to use.


Add Curved Text

  1. Add some images or a background to your project.

  2. Click on “Text” on the left.


  1. Type “Curved” in the search box and hit enter.


  1. Choose one of the curved styles at the top.


  1. Drag the inserted text to where you want it on your image.

  2. Edit your text.


  1. Change the type of curve by clicking the Curved icon.


  1. Choose the style you want.


  1. Resize the text on your image.


Share Adobe Creative Cloud Express Projects:

  1. After you create a project you will want to share it. You can share a link to this file or download it as an image. Because you are creating an image you should choose “Download”. 


  1. Choose the image format that best fits your needs. I always choose PNG. If you want the background to be transparent, you MUST choose PNG. 


Head to Adobe Creative Cloud Express & Start CURVING Your Text!!


If you want these directions in a Document click HERE!


Wednesday, October 12, 2022

Gamify Learning with Jeopardy Labs

Jeopardy is one of the most popular game shows out there. I even had the cool scoreboard that was plugged into my computer and projector in my classroom as a teacher. I would run full-on Jeopardy games for review and fun learning activities. Students loved this. Now there are places online where you can play pre-made games or even create games for free! JeopardyLabs is one of these sites. Check it out!


Create a Game:

  1. Head over to JeopardyLabs.com.

  2. Choose “Create a Jeopardy Game”. (You can also choose “Find a Jeopardy Game” if you want to find an already-created game.)


  1. Create a password that will allow you to edit your created game. (You can sign up for a paid version, but the free one will work just fine!)


  1. Edit your game!

    • Enter the Title of your game.


  • Label your categories.


  • You can edit the point value.


  • Enter the questions and answers.


  • You can add rows or columns for more questions if needed.


  • Click “Save and Finish” to save.


  1. Bookmark this page!!! This will be the web link you use to go to the game to play or edit later!


Play a Game:

  1. Either use the  “Find a Jeopardy Game” if you want to find an already-created game or use the bookmark you created when you made a game to play. (There are MANY games to play that are already created!)

  2. Choose how many teams you want and click “Start”.


  1. Divide your class up into teams and choose however you want them to “ring in”. Before I had my cool Jeopardy game I used 3 different bells that sounded different. Then I knew who rang in first. You can also take turns or any other tool you use.


  1. When a team rings in have them tell you the answer. Use your “Space bar” to display the correct answer and give or take away the point on their team.


  1. Use the “Esc” key to go back to the playing board for the next question.

  2. You can also use your mouse and click on the top corner prompts to show the answer or escape.


Head over to JeopardyLabs and start playing!


If you want these directions in a Document click HERE!